As helpful as it is, one of many shortcuts that keep PC users’ heads scrambling after misapplying is the Ctrl + z shortcut.
Ctrl + z is a shortcut to undo the last command. It is a nice feature to have when you want to retrace your steps as you work on a document or undo an operation you performed on a file and restore it to its original state. However, it does not function for all operations and could accidentally delete some crucial files when used carefully.
In this article, we will examine how you can recover files lost by control + z both on Windows 10 and 11.
How is it possible that files can be lost with Ctrl + Z?
There are many scenarios where using ctrl + z Can lead to file loss. Let’s go over a few:
- 🛑 While running multiple operations simultaneously on your PC, accidental deletion with control + z is more common. The reason is that you may not be able to trace all your actions and the order in which they were performed. As a result, you may type Ctrl + z hoping to undo one thing, but you end up altering another or sometimes delete it.
- ⛔ When files are moved with cut-paste operations in this manner, it no longer appears in the original folder. When Ctrl + z is used to reverse that operation, the files could be deleted, especially when new data overwrites the original drive due to another process performed on it. Ctrl+ z Deletion is also common during file transfer between PC and external media or from one drive partition to another.
- 🚫 Interrupted Connections between external media and PC could also lead to files getting lost by Ctrl + z. The undo last command operation may be interrupted, damaging the file or keeping it in temporary storage, making it directly inaccessible on the drive.
How to Recover Files Lost by Ctrl + Z
There are so many ways to recover accidentally deleted files. As long files have not been overwritten, the data fragments still exist on the drive, and the data can be reconstructed. Some methods require simple commands on the PC, while others can only be performed with recovery software. Let’s take a look at a few:
Option 1: Use Ctrl +Y to recover files lost by Ctrl + Z
Fast and easy, pressing Ctrl + Y after Ctrl + Z nullifies the effect of the Ctrl + Z operation. If it doesn’t work, use the steps below to undo the deletion and recover the lost files.
Option 2: Undo Delete to recover files lost files
Instead of you can manually recover your files from the File Explorer using the Undo Delete option. The Undo Delete option will immediately send your files back from the Recycle Bin to their original location.
Here’s a quick step-by-step guide on how to recover files lost by Ctrl + Z:
- To get started, open File Explorer or navigate to the folder where your deleted files were.
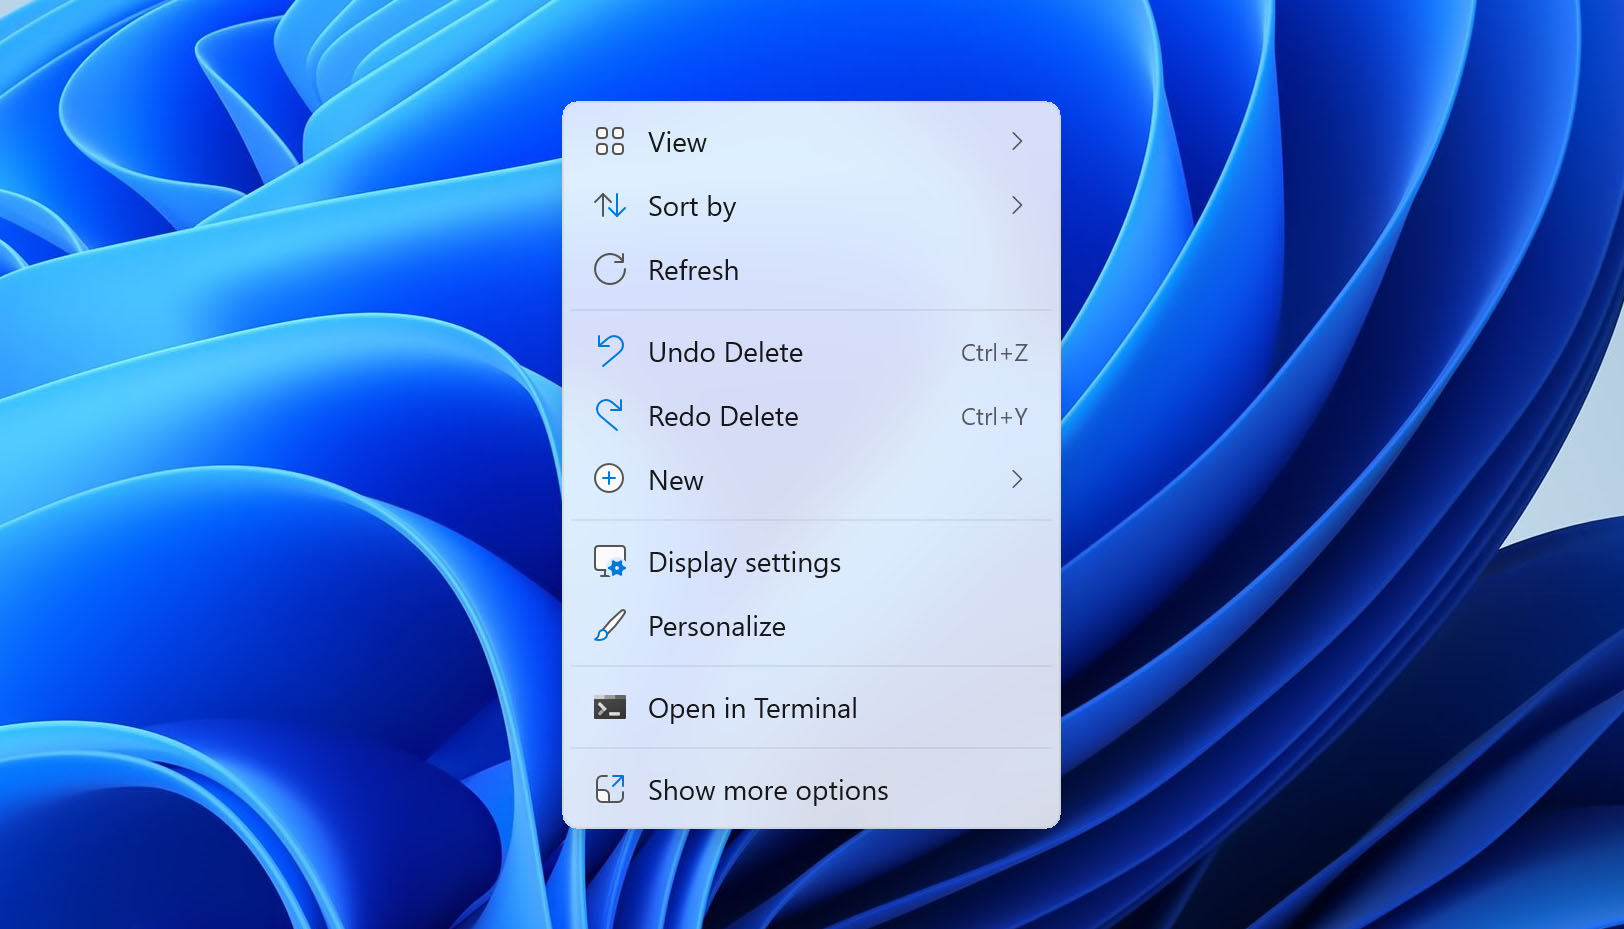
- Next, right-click inside the folder and select the “Undo Delete” option. Alternatively, you can press Ctrl + Z to perform the same action. You should now see your deleted file restored to the folder.

Note that this Ctrl + Z method to restore deleted files will only work if your files are recently deleted, if you have not performed other actions on your computer after the deletion, or if you did not press Shift + Delete (permanent deletion) to delete your file.
If this solution doesn’t work, consider other options we will explain in the following sections.
Option 3: Restore From Recycle Bin
- Sometimes, files can be found in the Recycle Bin of your PC after accidental deletion. Restoring such files is an easy task for any level of a computer user. Just follow the steps below.
- Open the “Recycle Bin” from your Desktop.
- Look for the accidentally deleted files or folders you wish to recover.
- Select and right-click on the file.
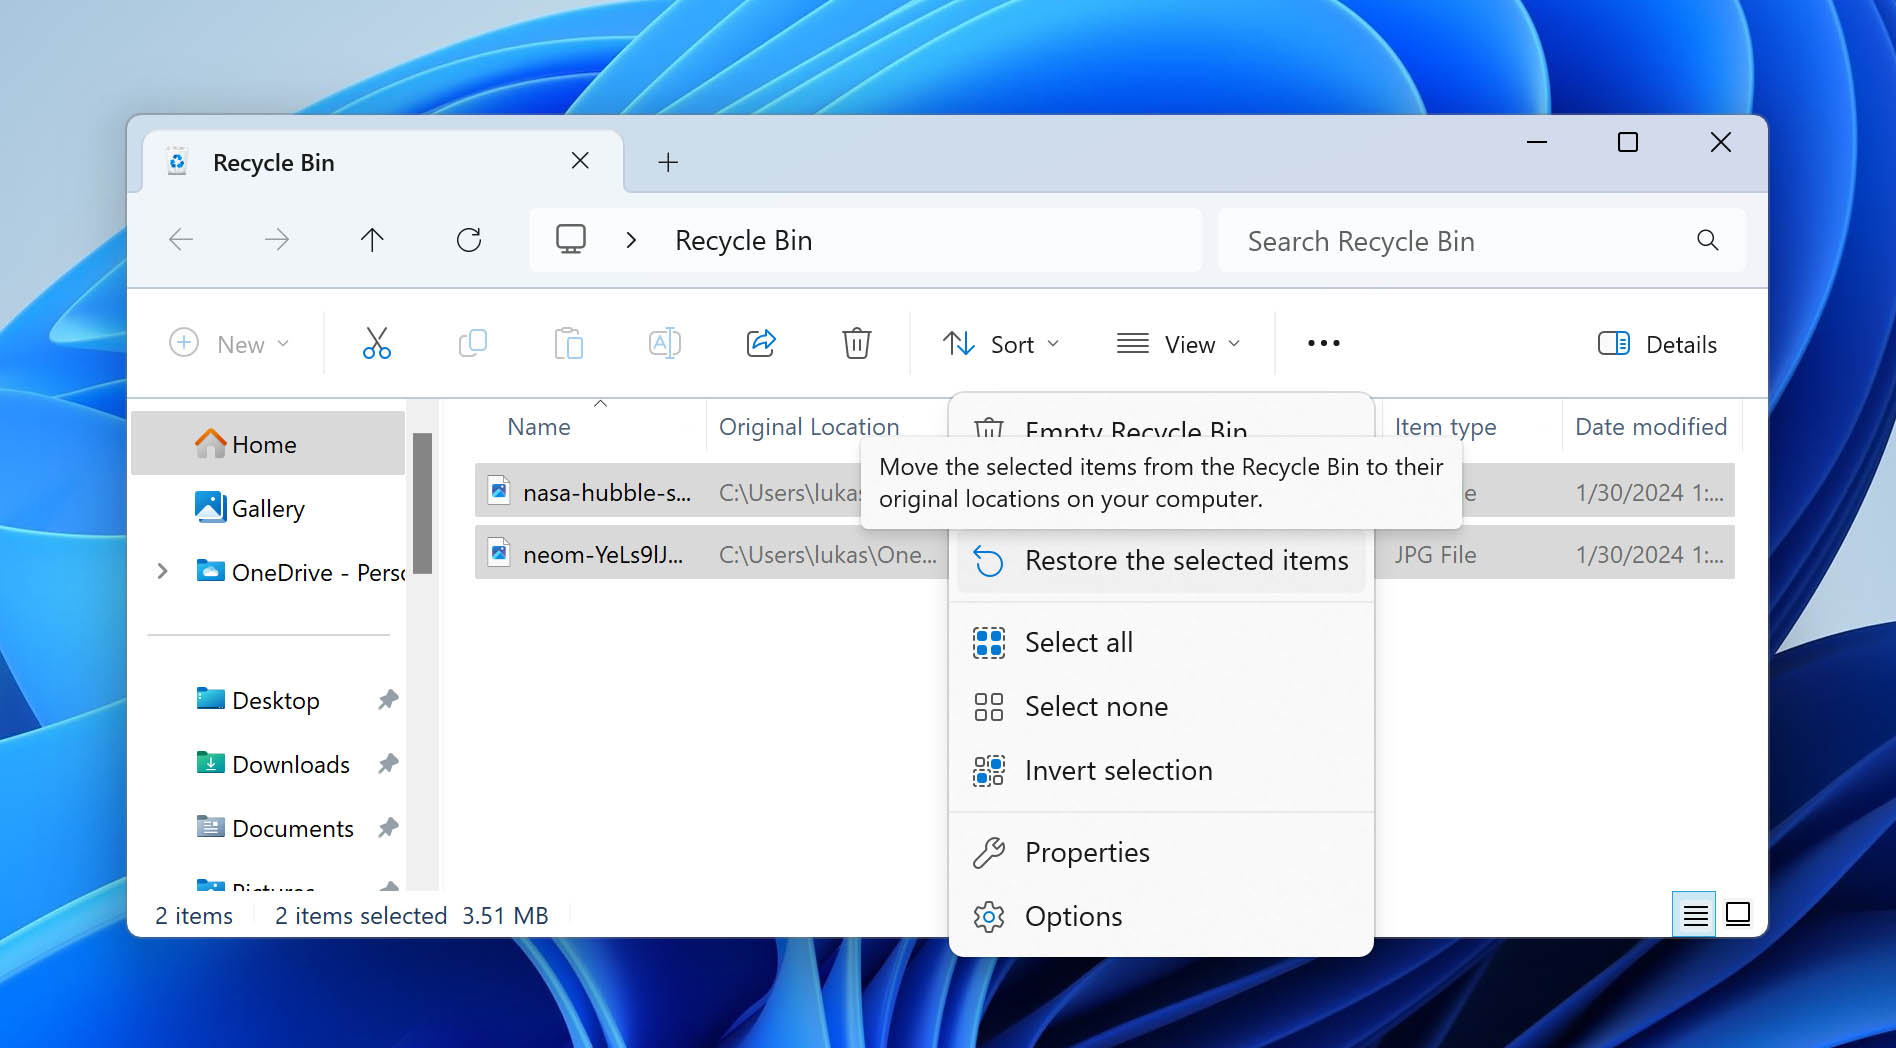
- Click on the “Restore” option to recover the lost files from the drop-down menu.
- Alternatively, after selecting the desired files and folders, click on the “Restore selected items” option in the navigation tab.
All the files and folders restored from the Recycle bin Return to their original location.
So far, we’ve covered scenarios where files are deleted but can easily be found in the Recycle Bin. There are instances where that is not the case. Before you fall into despair at the prospect that your files are lost forever, consider this final option:
Option 4: Use Manual Search
In some cases, you might have accidentally deleted or misplaced your files from one folder to another. In this case, you can manually search for your files in the File Explorer. You can also revisit your recent/adjacent folders. Follow these steps to proceed:
- First, open File Explorer by searching for “File Explorer” from the Start menu.
- Then, navigate to the folder where you last saw your file. Otherwise, you can go to “This PC” or the disk drive you want to search.
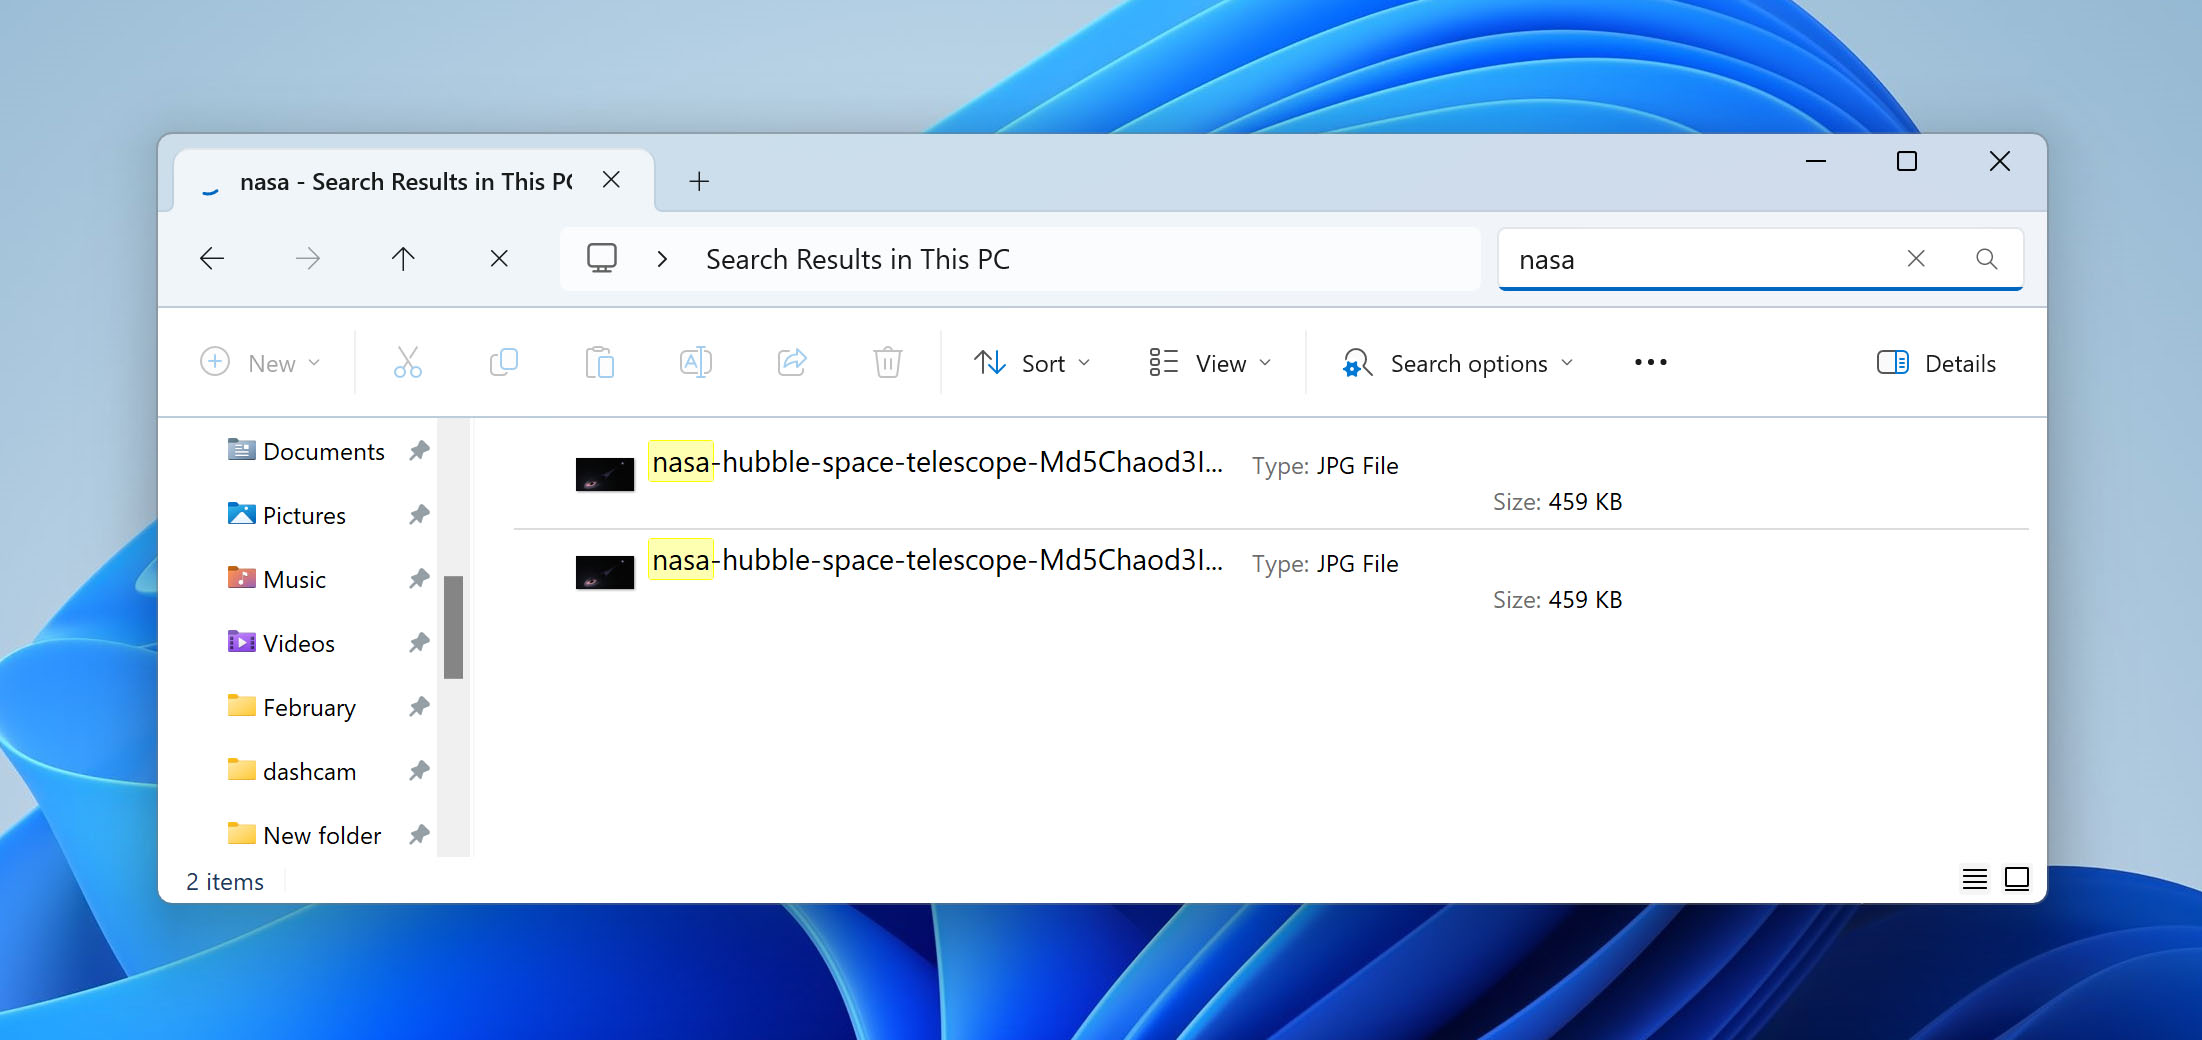
- After that, you should see a search box on the right side of the window. Type the file name or the file type on the search bar and hit Enter. You can also customize your search with advanced options by clicking the Search tab on the main menu of your File Explorer window.
If you do not know where to find your files, we recommend starting with common folders like Downloads, Documents, Pictures, or Downloads. You can also check for your files in the folders you recently visited. You can see these folders on the left sidebar below the quick-access/pinned folders.
If you’re manually browsing folders for your files, it can be helpful to sort your files by date modified or file type for easier checking.
Using Data Recovery Software to Recover Files lost by Ctrl + Z
The market is full of many custom and enterprise solutions that perform data recovery to a high degree – some better than others. This article will share 3 of the best-rated software used to recover accidentally deleted files on windows. All three have unique capabilities (combinations of features, functionality, and price) that make them appealing to their users.
Option A: Disk Drill
With its signature one-click recovery process and intuitive UI, Disk Drill is an industry leader in terms of User-friendliness. The Software comes with proper data backup and data protection tools, allowing users to protect all essential files against accidental deletion, corruption, and hardware malfunction.
Disk Drill addresses all types of data loss scenarios, including accidentally formatted disks, recovering files from an emptied Recycle Bin, and corrupted SD cards. Beyond the protection it offers, it has top-notch ability to recover files that have been accidentally deleted, including files lost by Ctrl + Z. Its deep scan algorithms scan your drive for recoverable data and even piece together damaged or fragmented files. Scans can be paused, saved, and restarted, giving the user flexibility in recovering their data. The following steps will guide you on downloading, installing, and running Disk Drill on your PC.
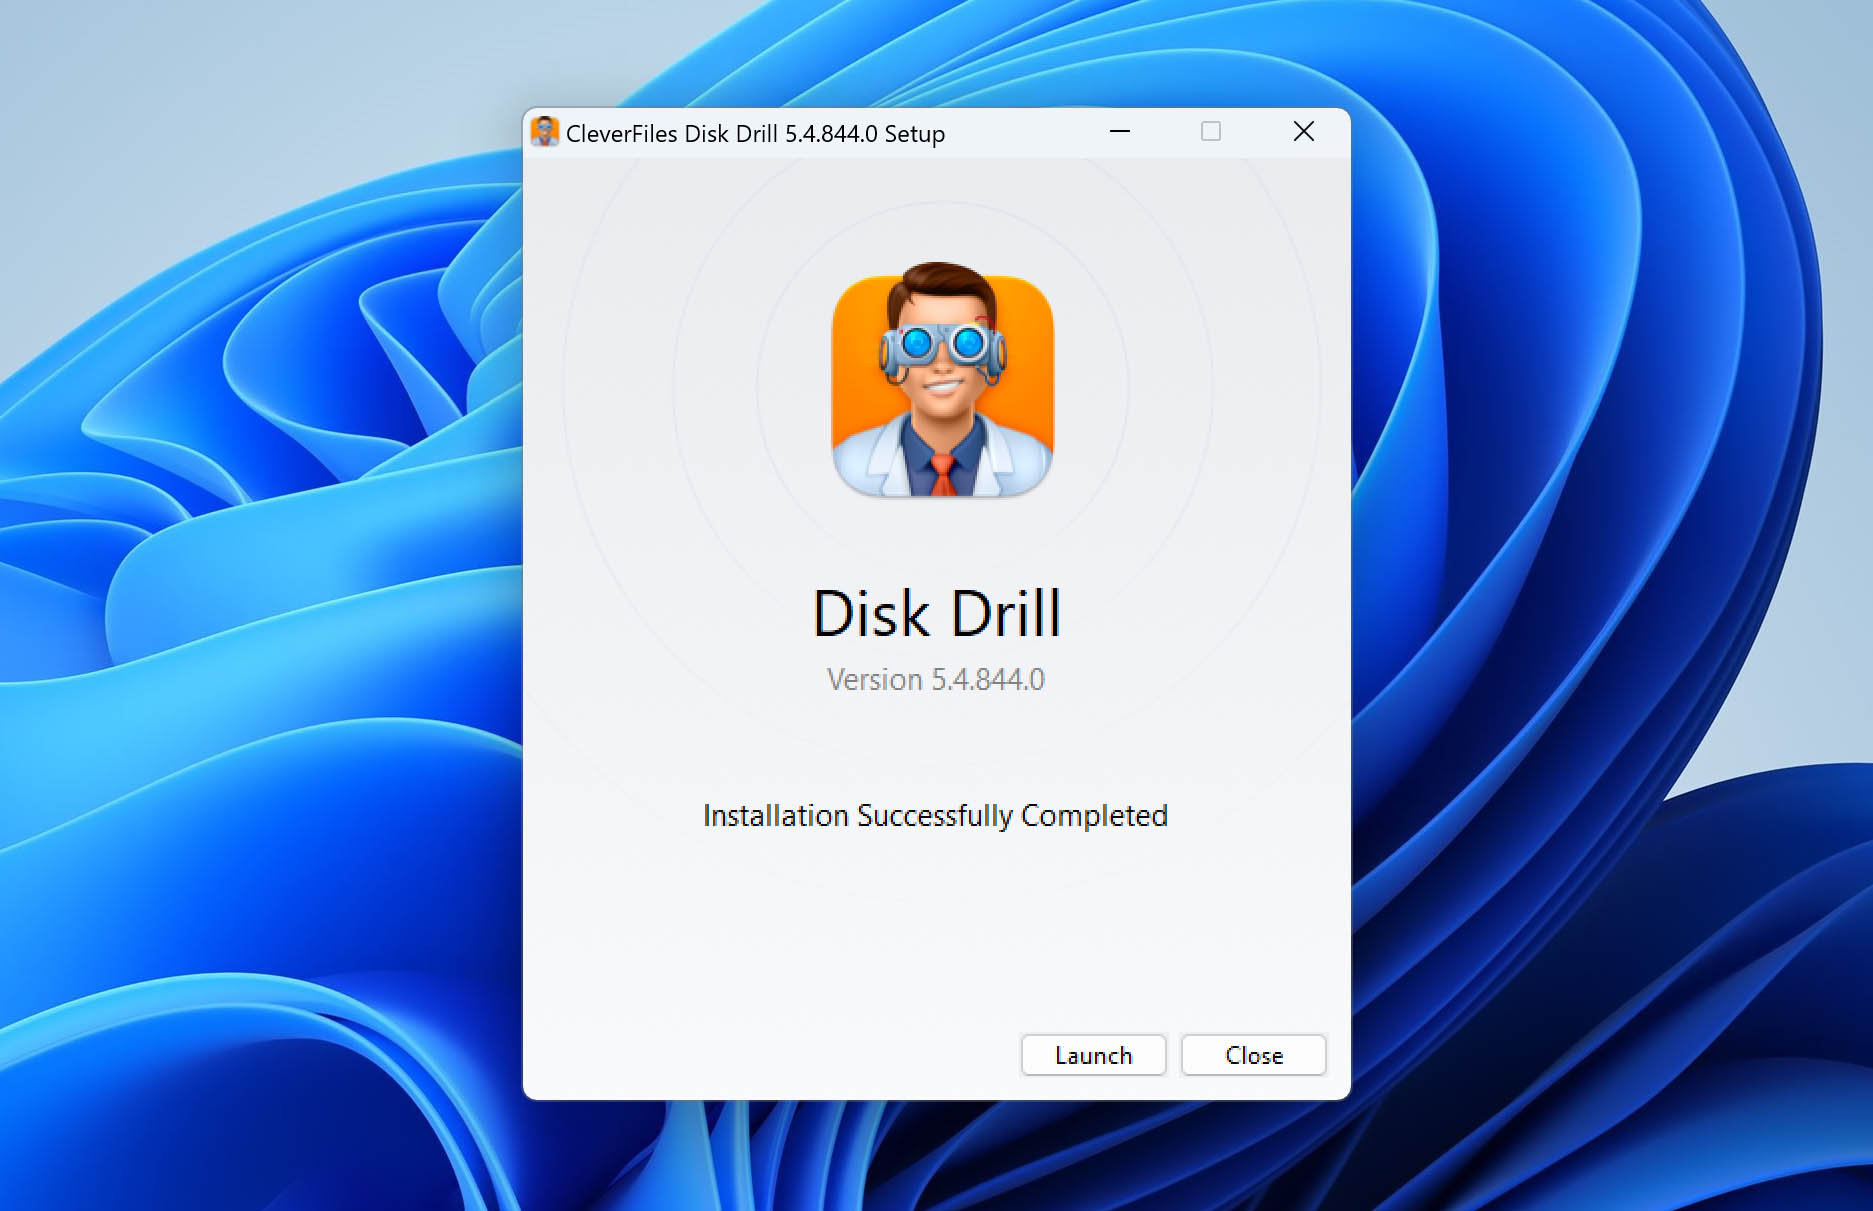
- To get started, download and install Disk Drill.
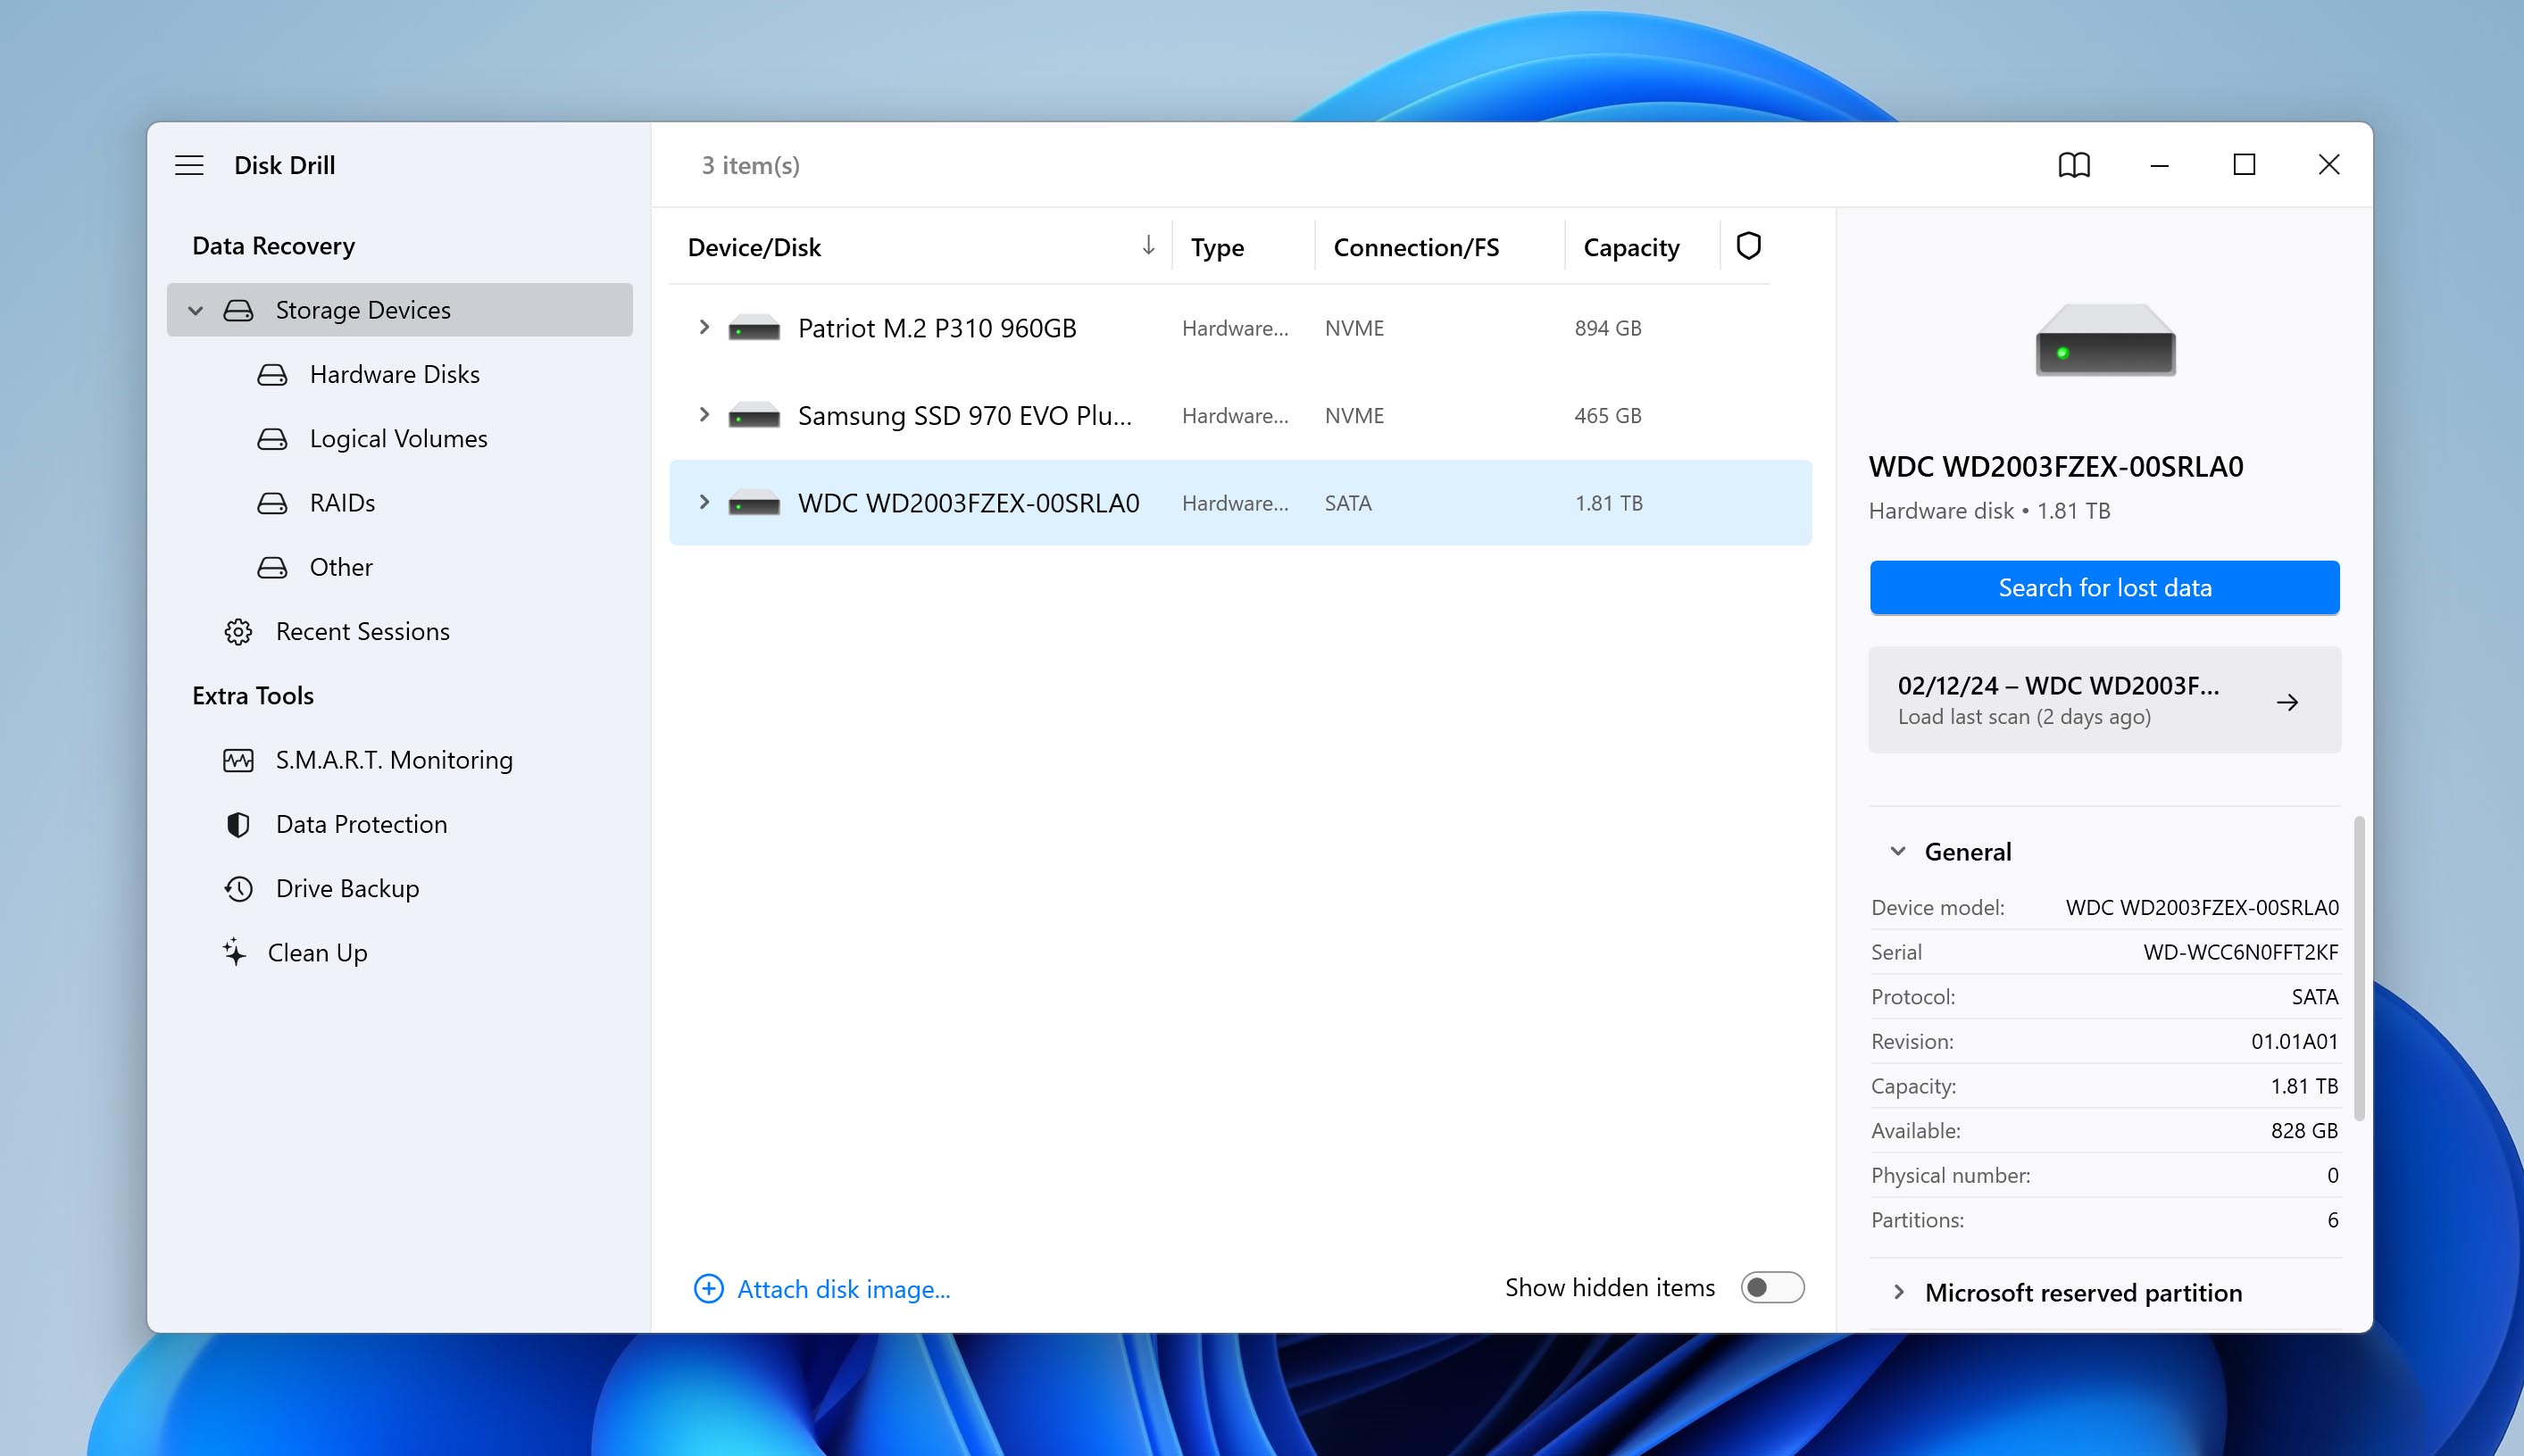
- Once successfully installed, launch Disk Drill. Then, select the drive you want to scan on the list of drives available and click the “Search for lost data” button.
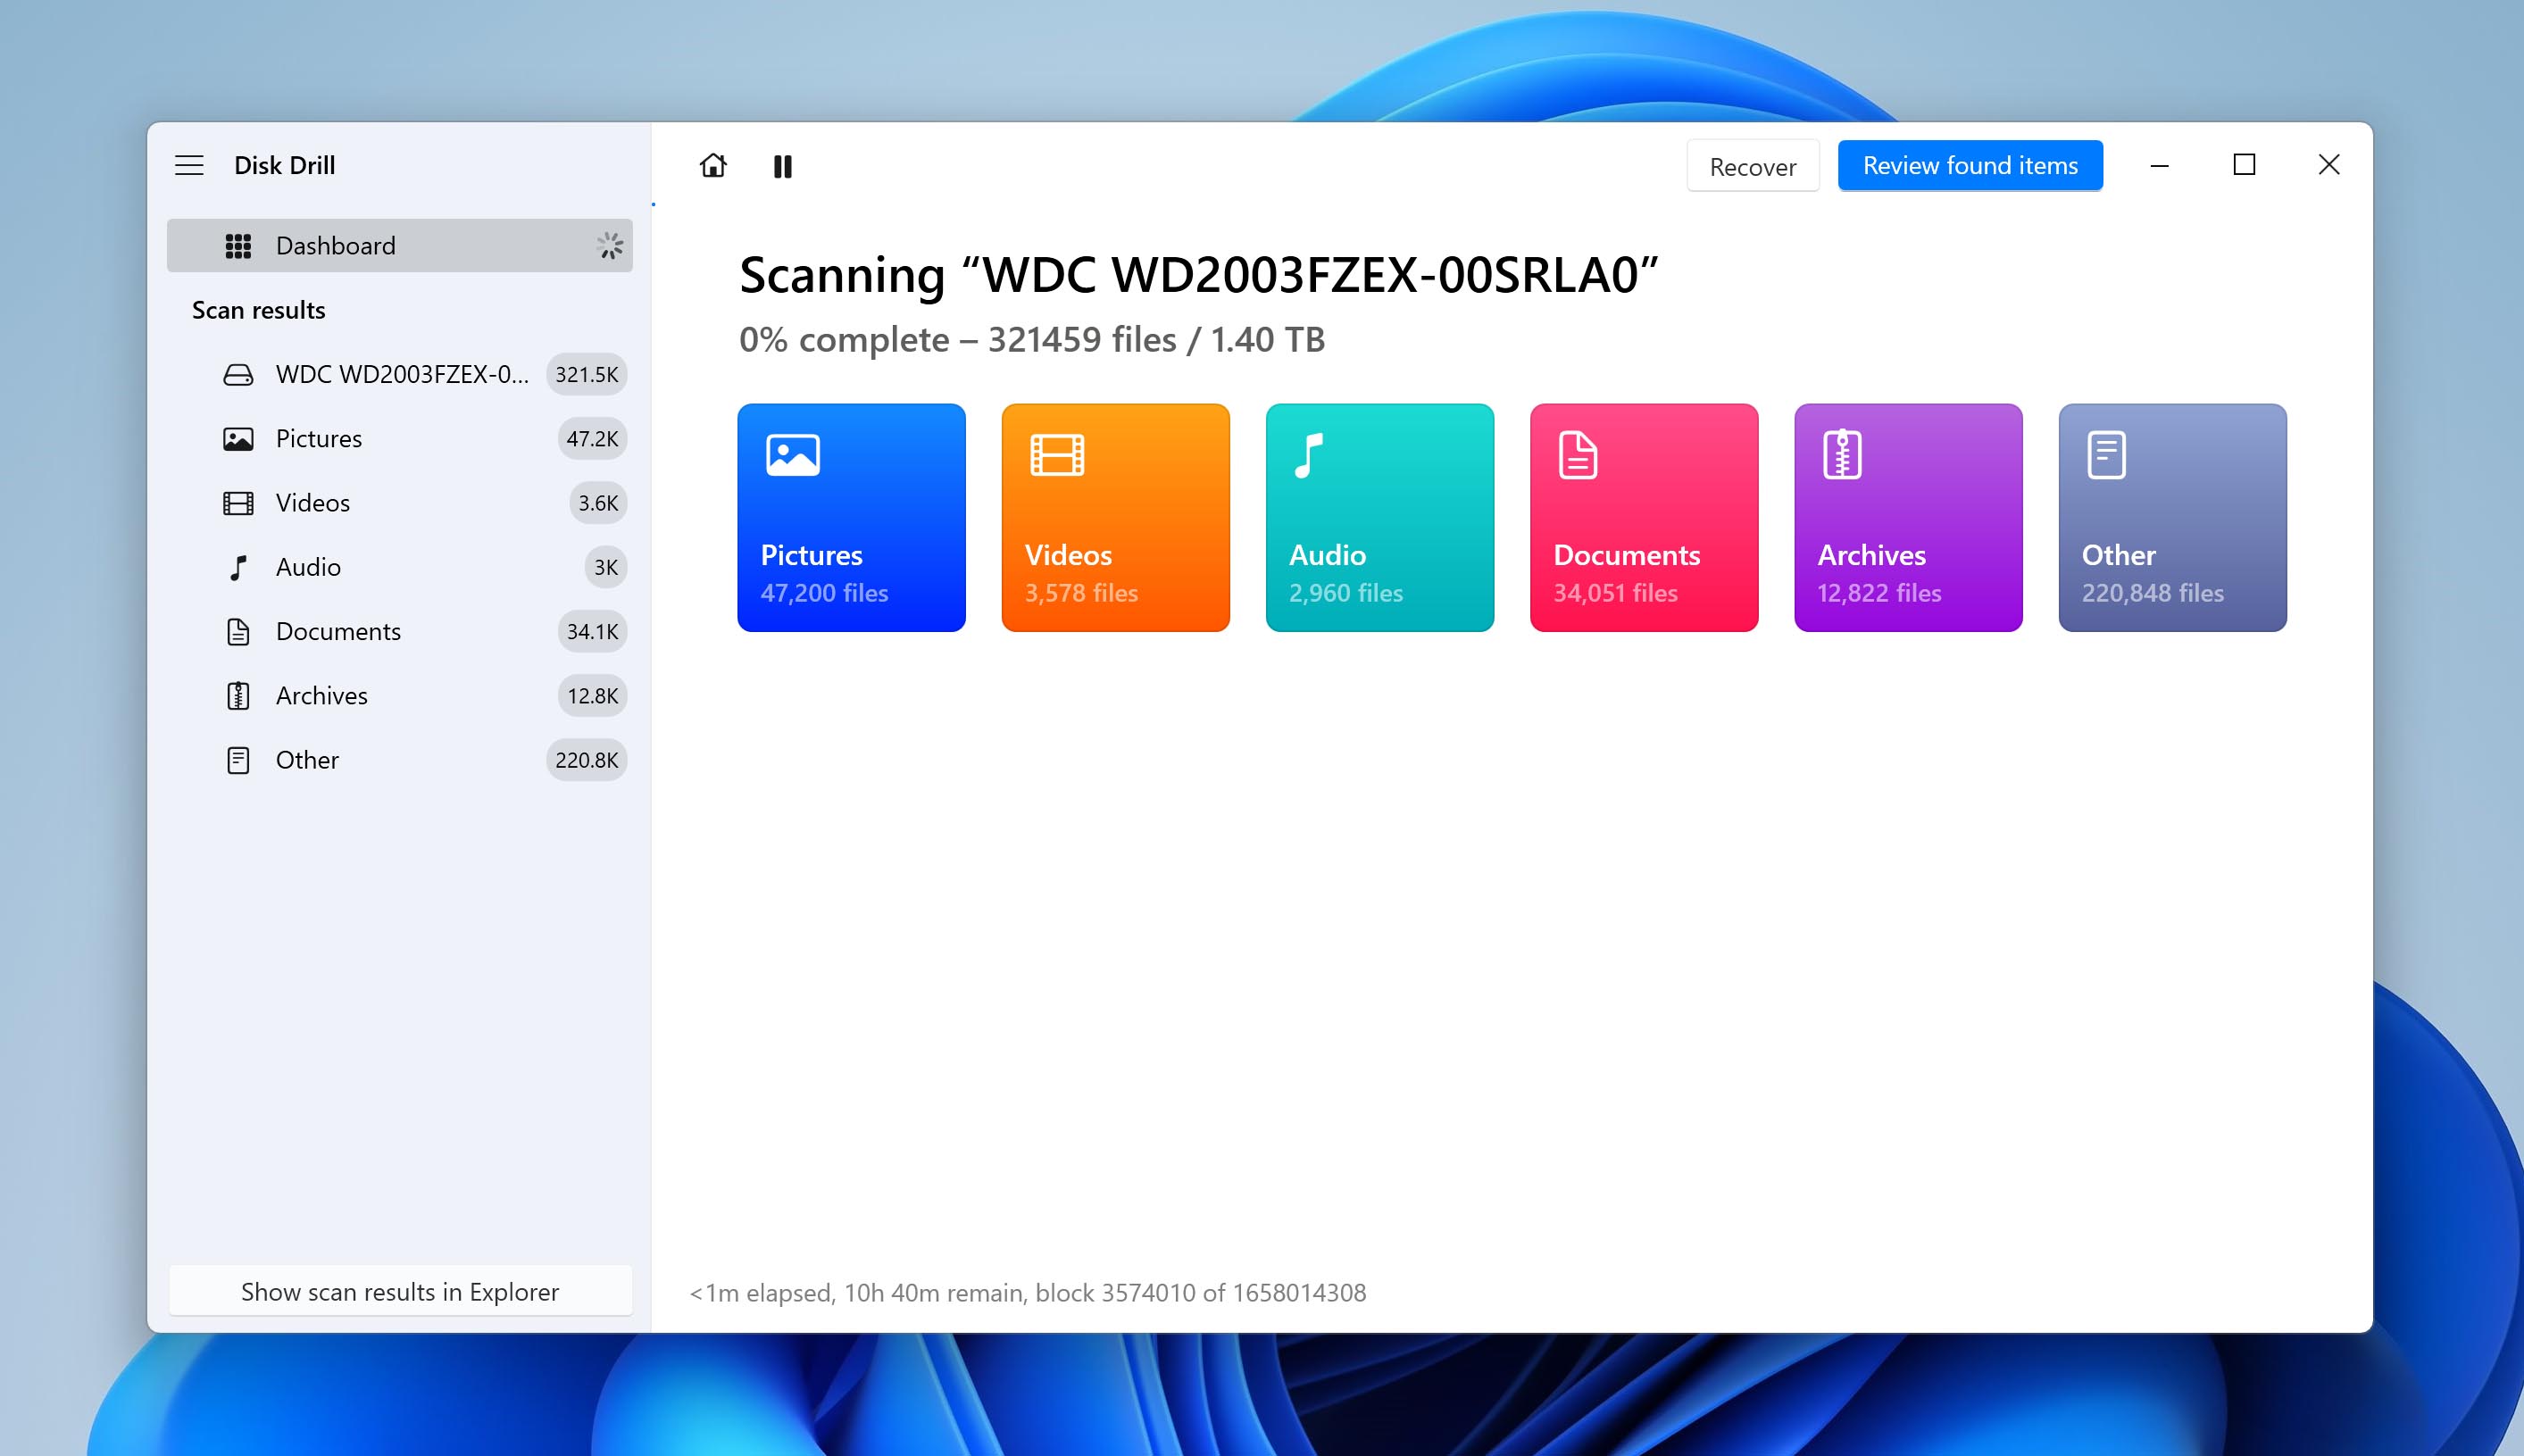
- You can click the “Review found items” button on the top-right corner while the search is in progress or once it finishes. This button redirects you to the files Disk Drill has found.
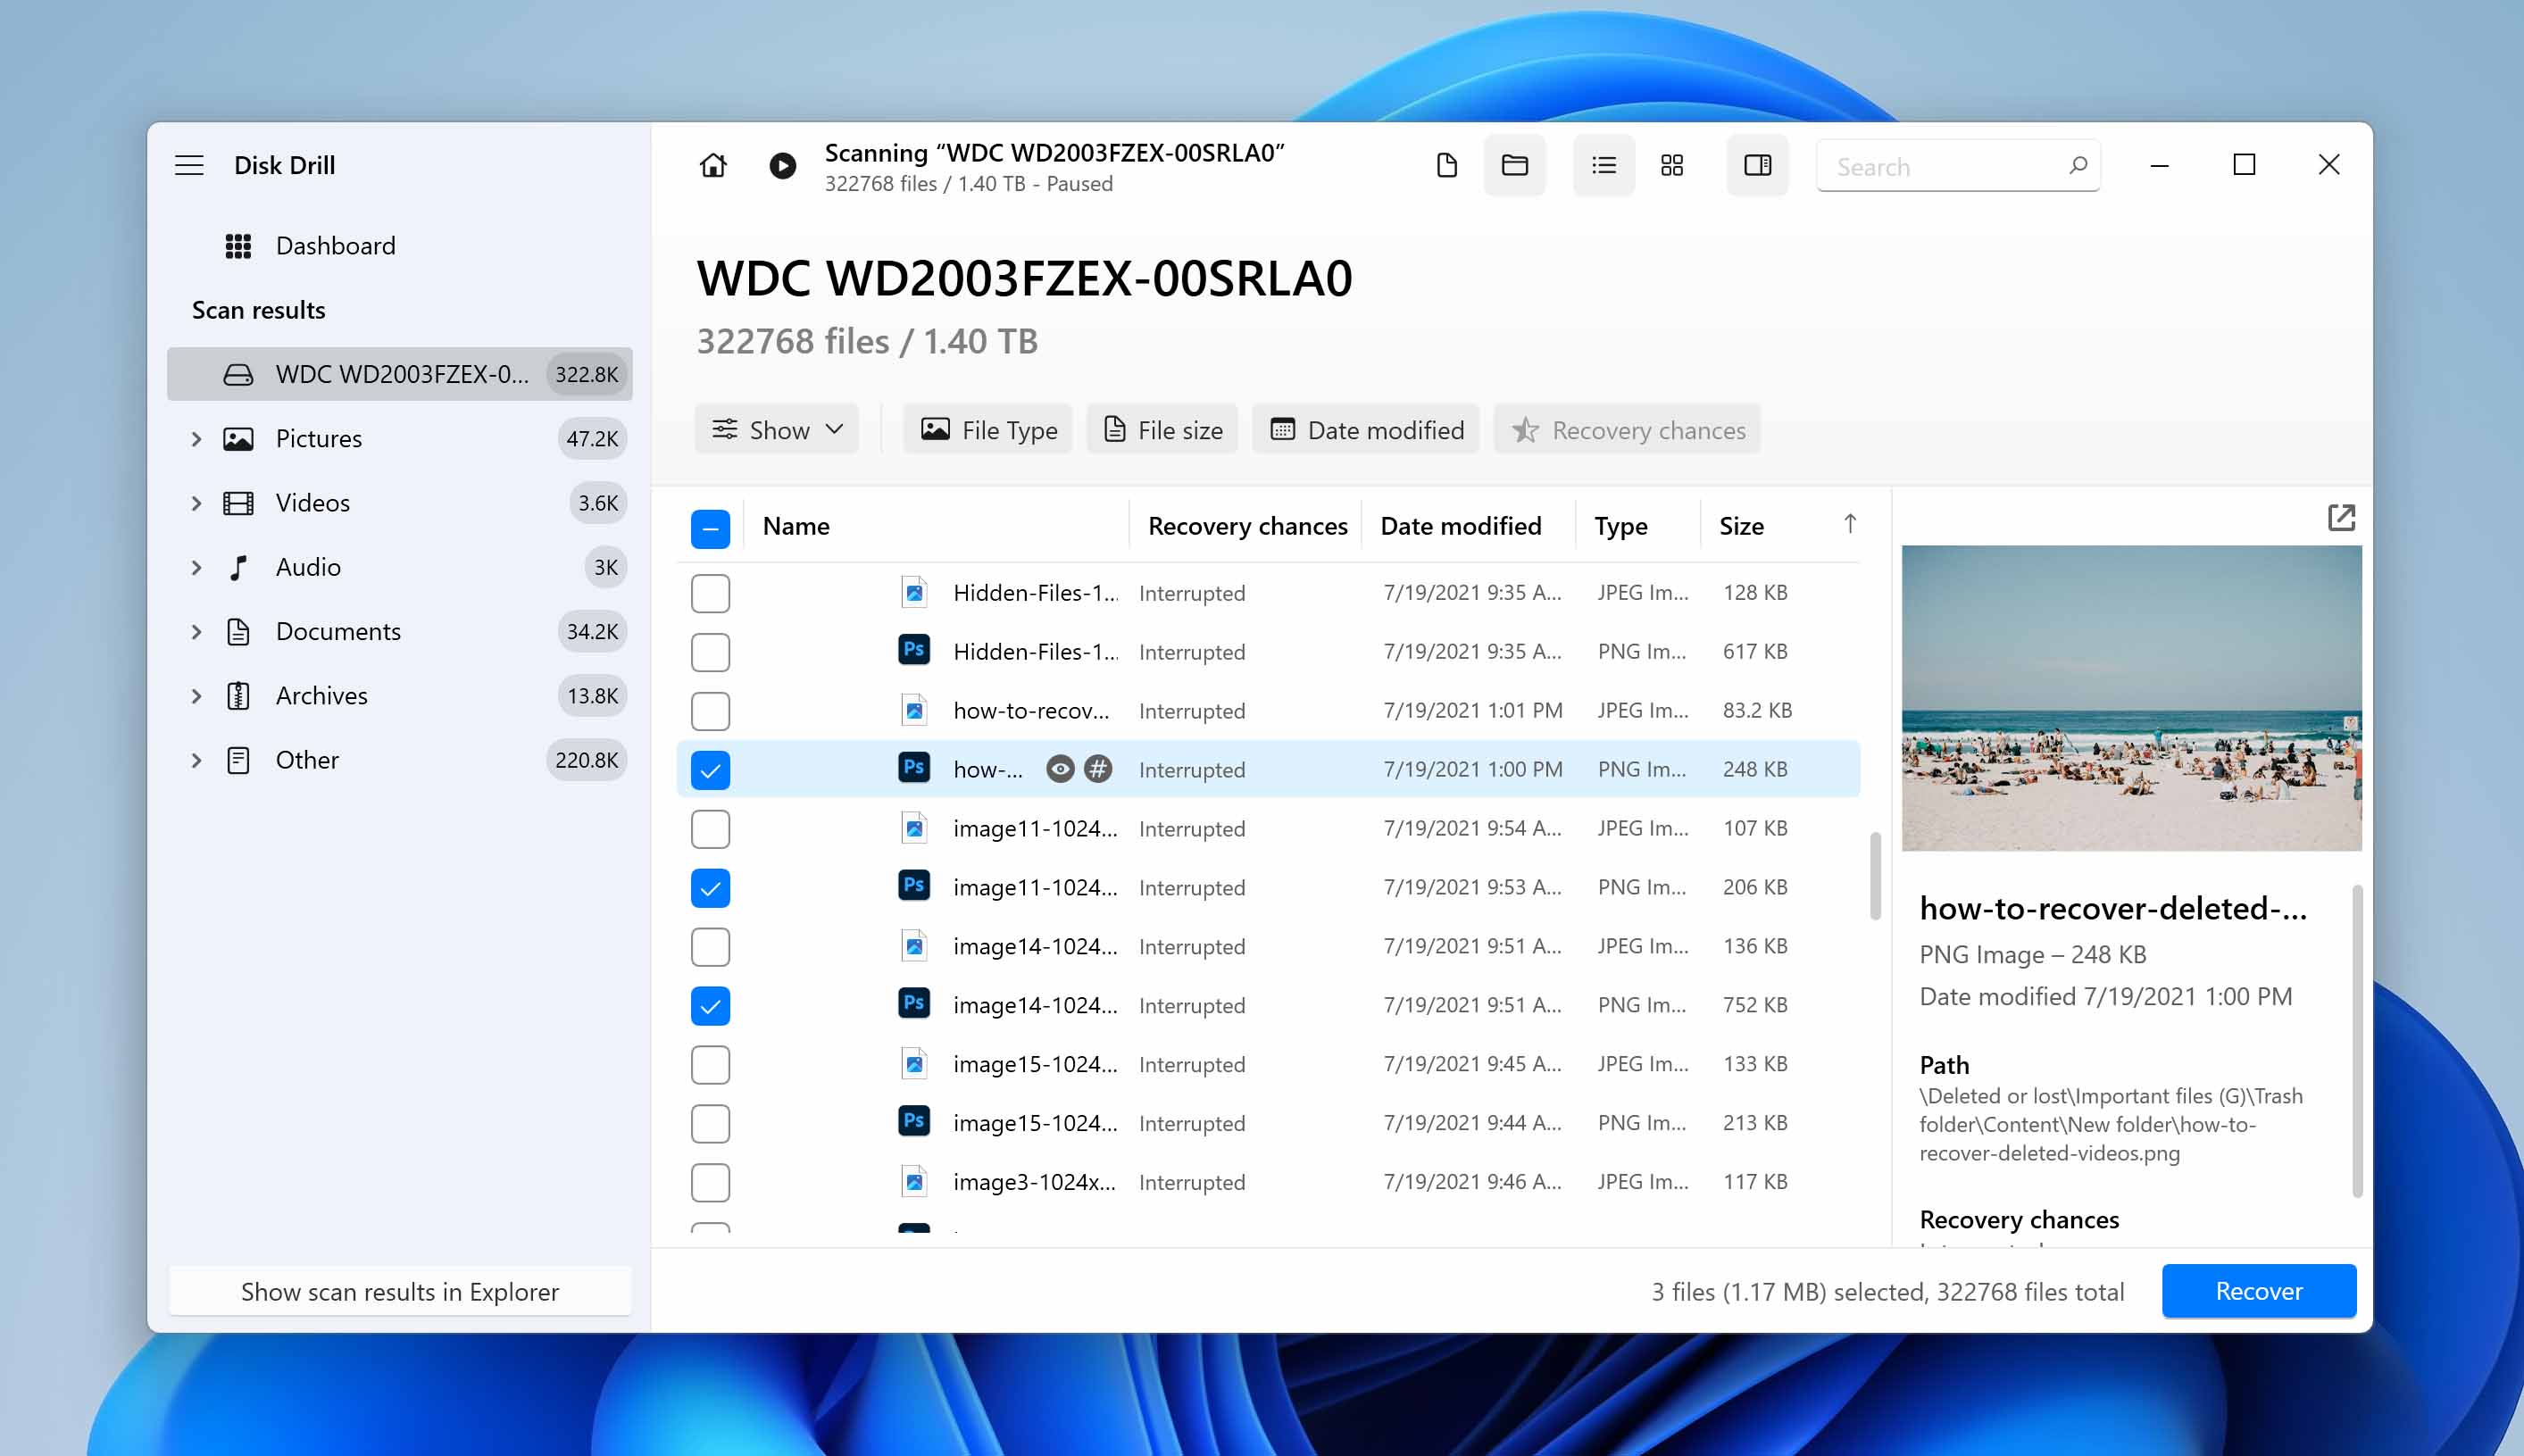
- On the list of files, tick the checkbox beside the files you want to recover. Then, click the “Recover” button.
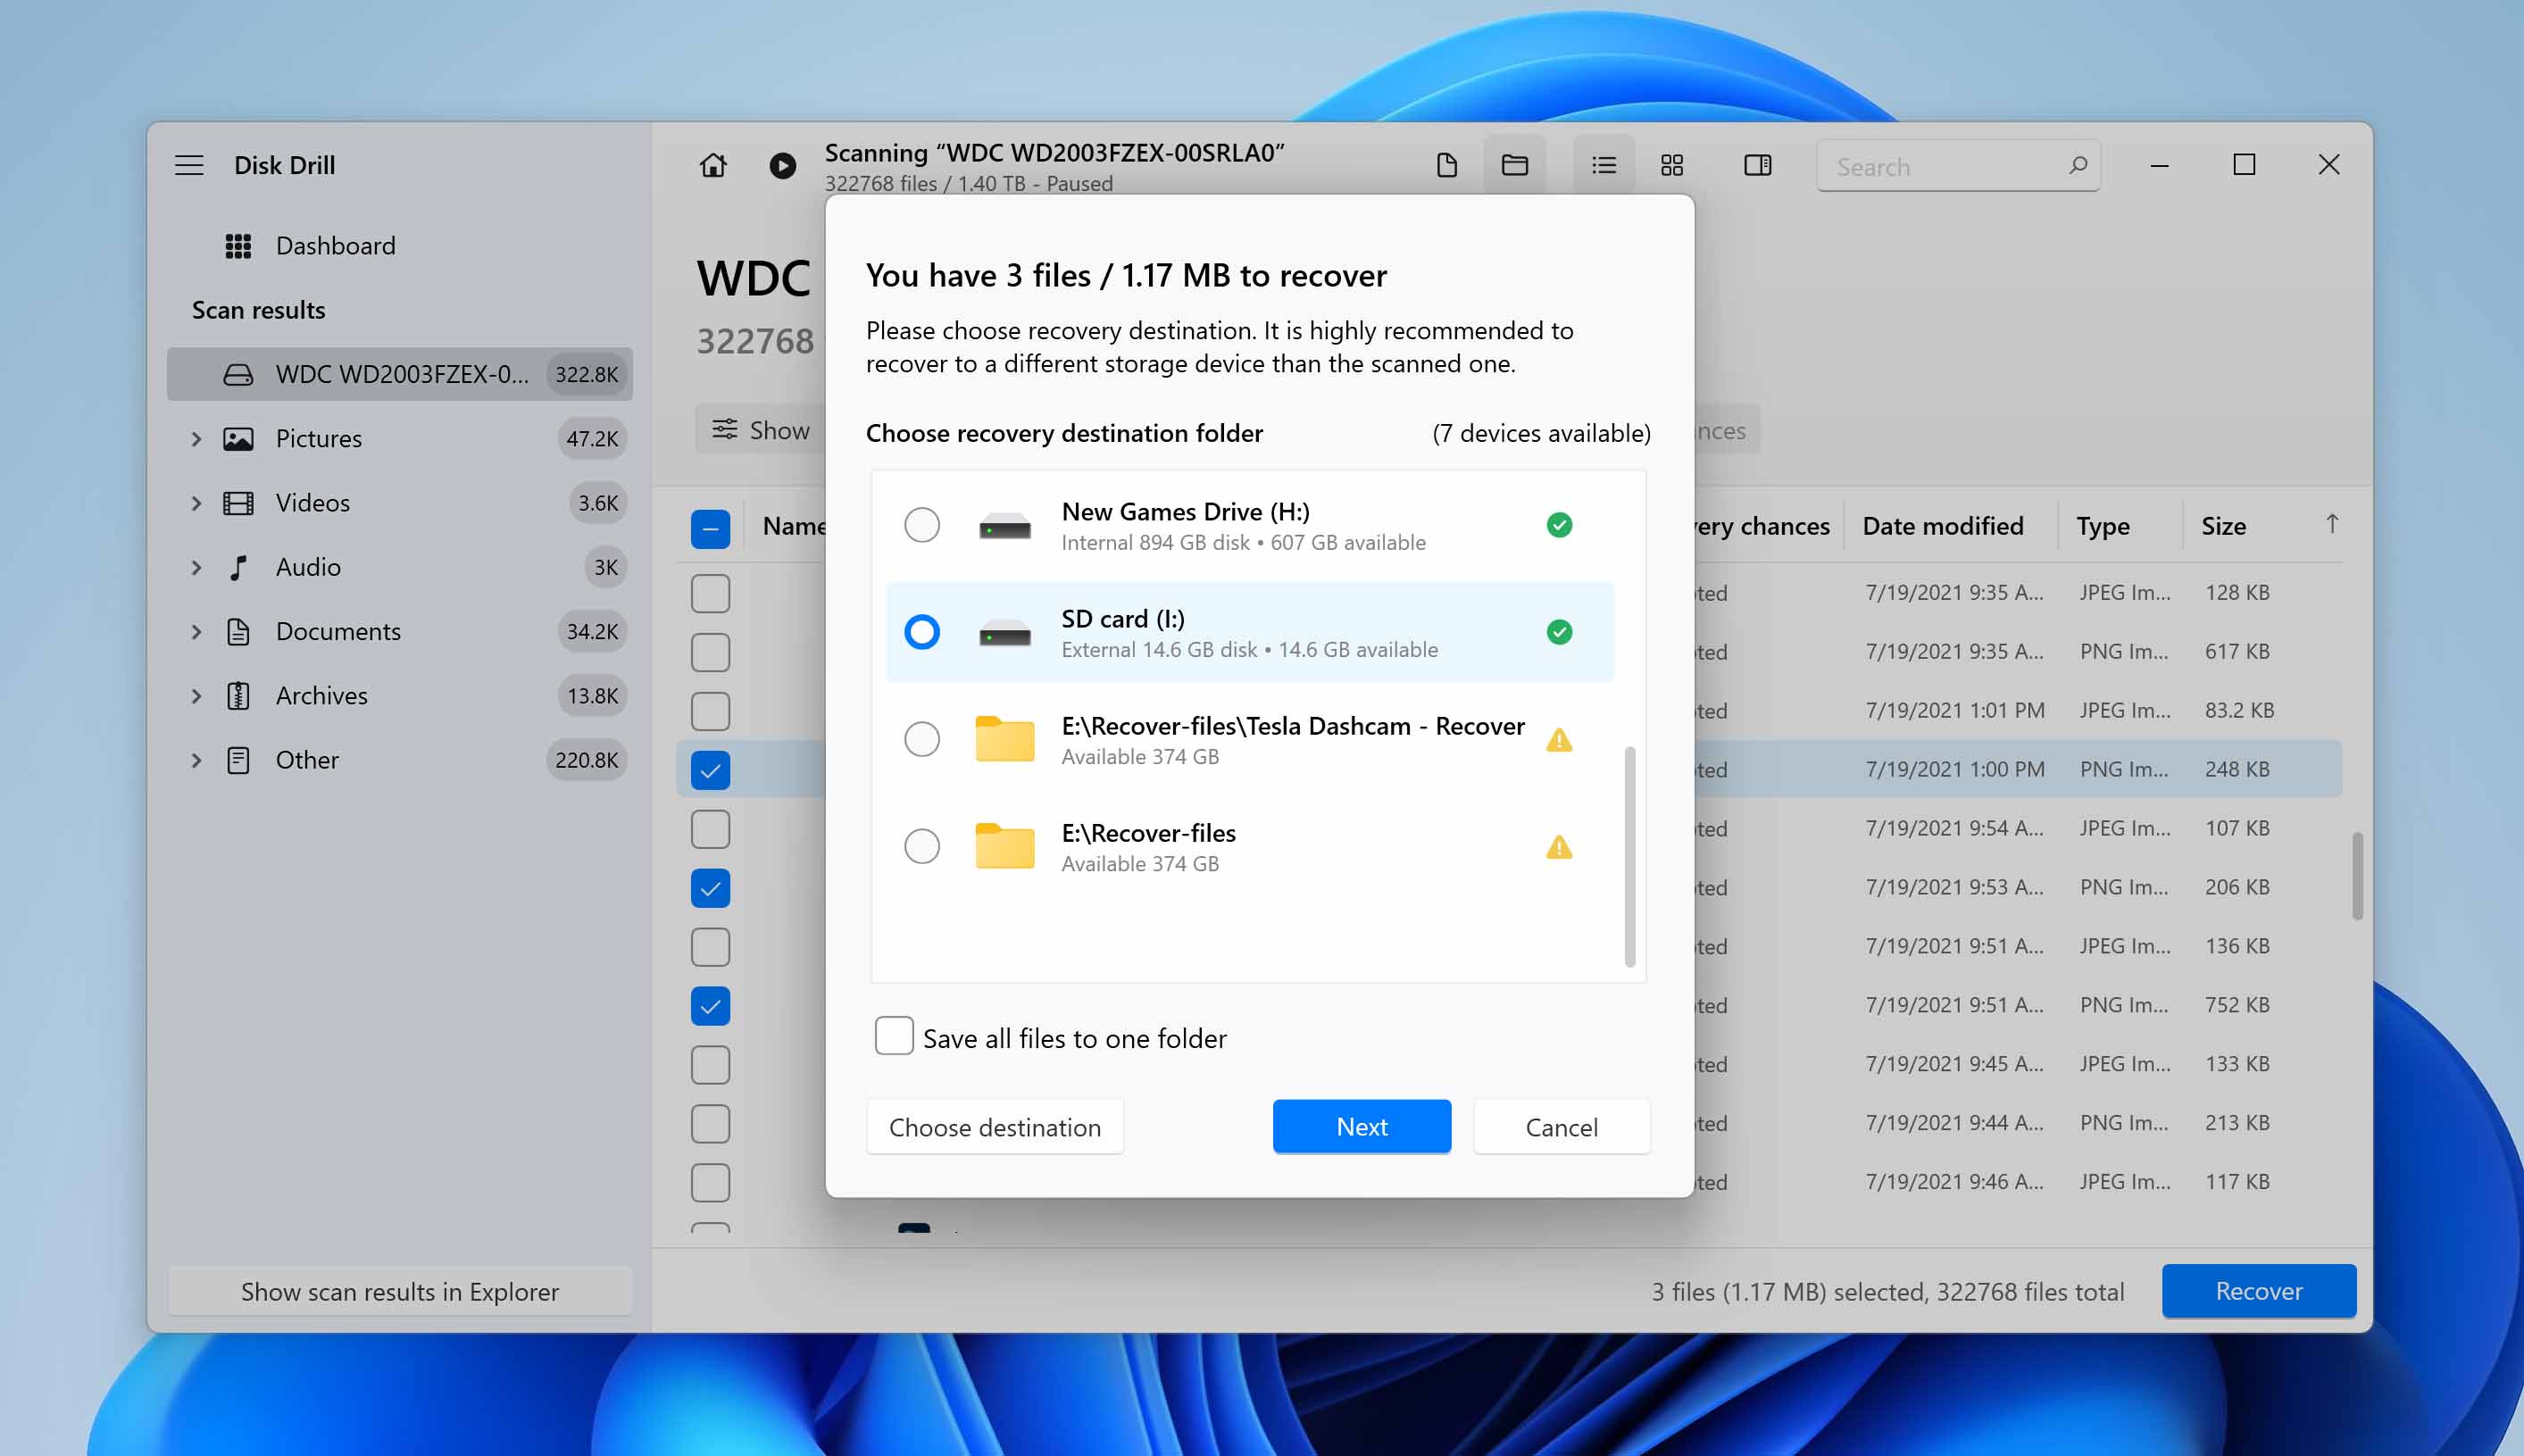
- Choose where you want to put your recovered files. To avoid overwriting your files, choose a location different from the drive you scanned. After that, click the “Next” button to start recovering your files.
- Once recovery is finished, Disk Drill will redirect you to the results page. To browse your files in the File Explorer, click the “Show recovered data in Explorer” button.
Data Recovery with Disk Drill is straightforward. For detailed information on how to use Disk Drill, here is our comprehensive Disk Drill review showing you exactly how to use it. It is complete with details about the features and functionality of the software.
Option B: PhotoRec
Whether you are looking to retrieve files from a digital camera, a USB drive, a memory card, or a hard disk drive, PhotoRec has the chops to grant you a successful data recovery operation. Maybe due to its product description, most of PhotoRec’s customer base consists of DSLR camera owners and operators. This notion does not take away that this recovery tool allows for the recovery of many different file formats and data loss scenarios.
Here’s how to recover files using PhotoRec.
- Download and install PhotoRec. Once done, launch the application.
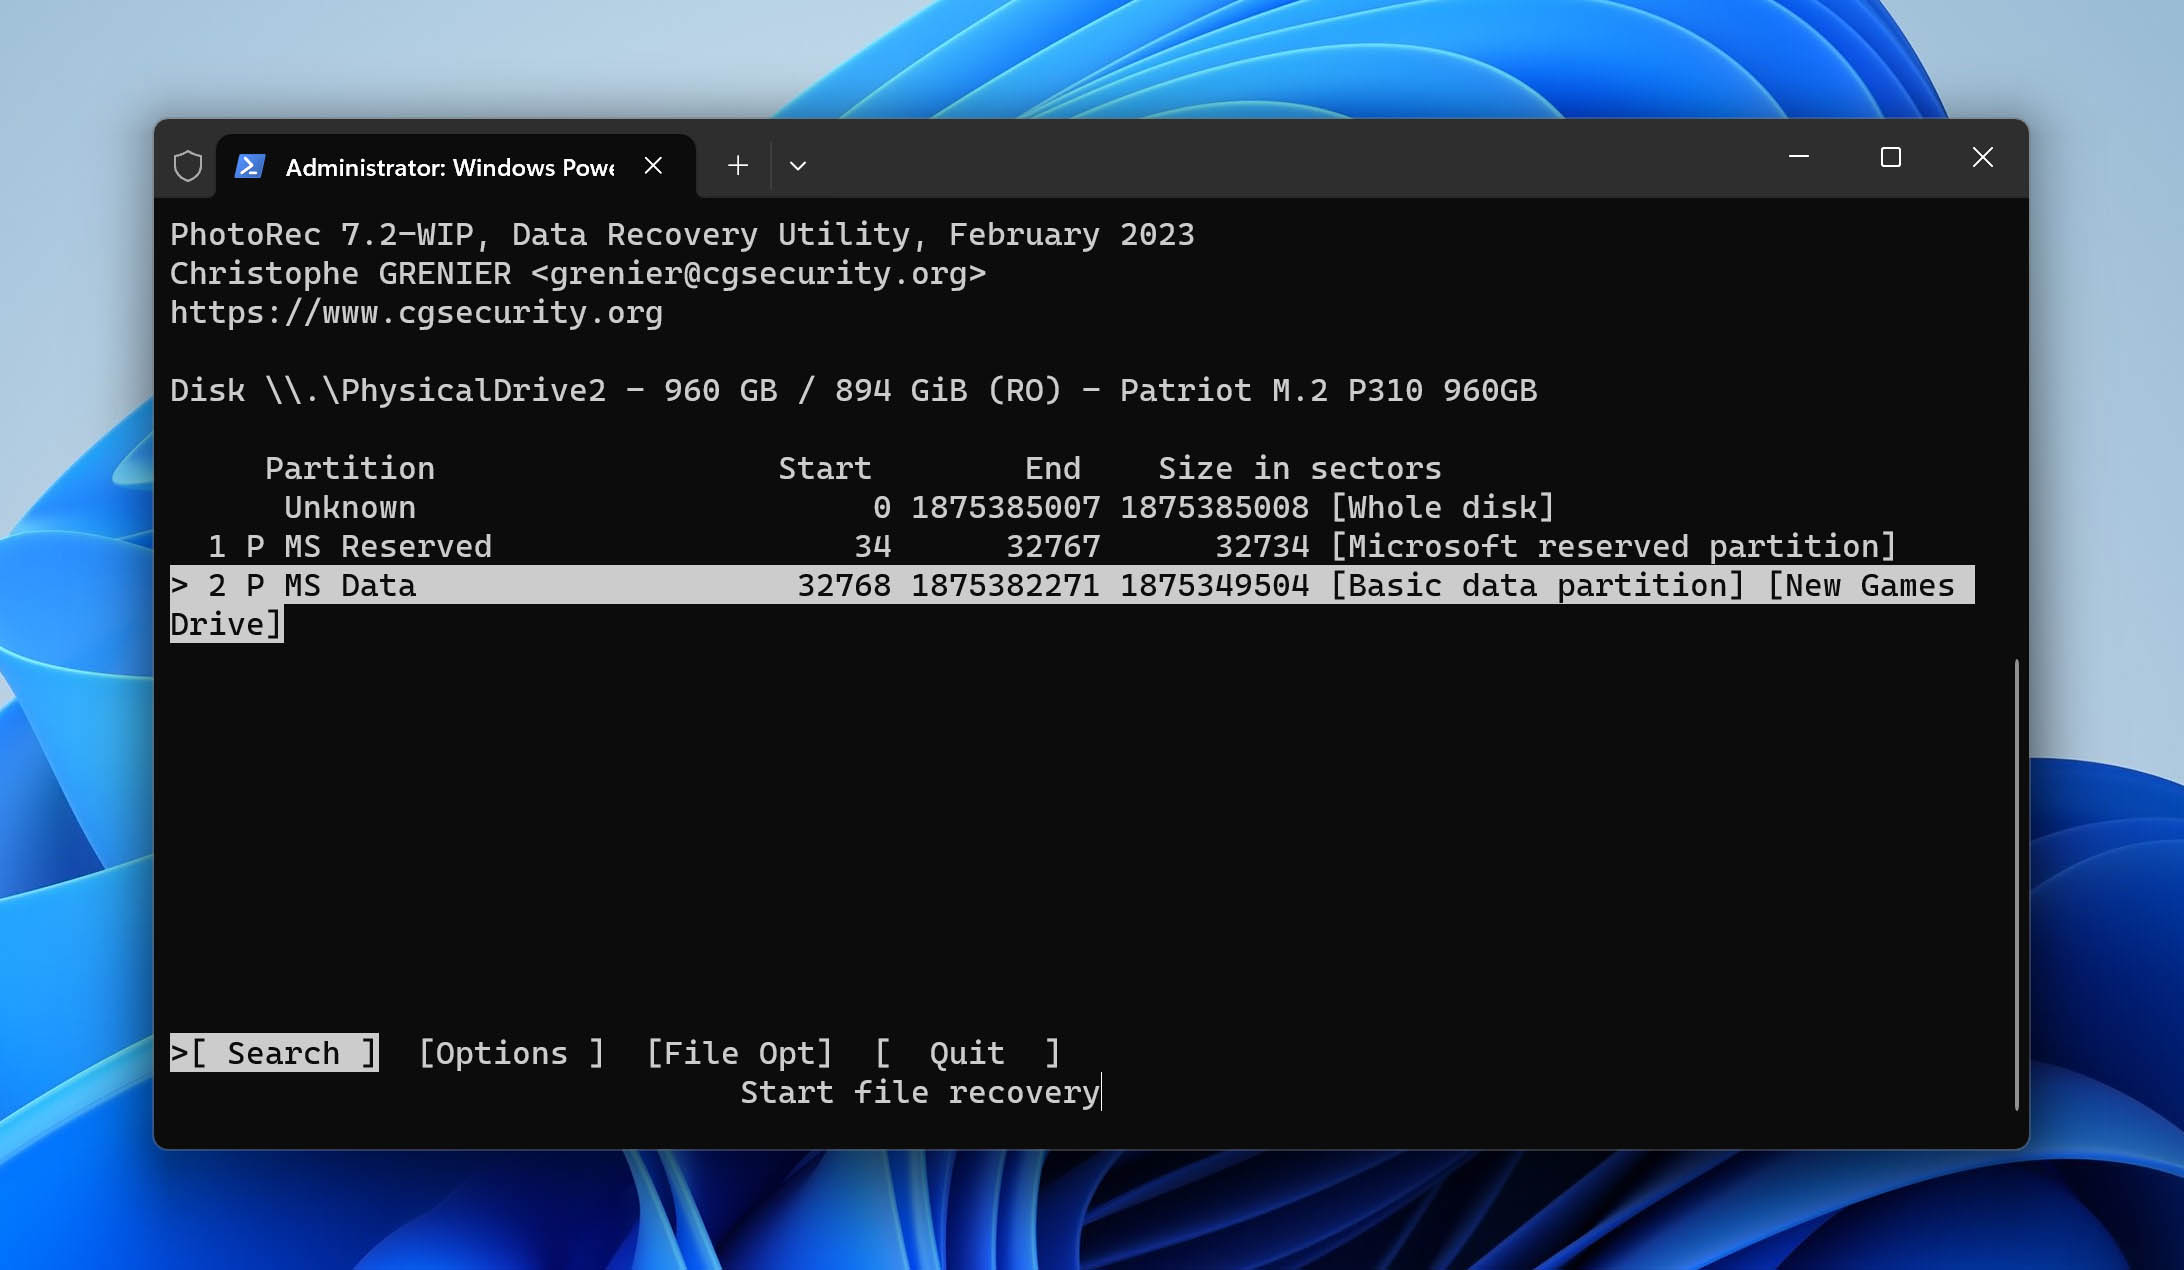
- Select the appropriate disk, navigate to Proceed, and hit Enter.

- Select the source partition.
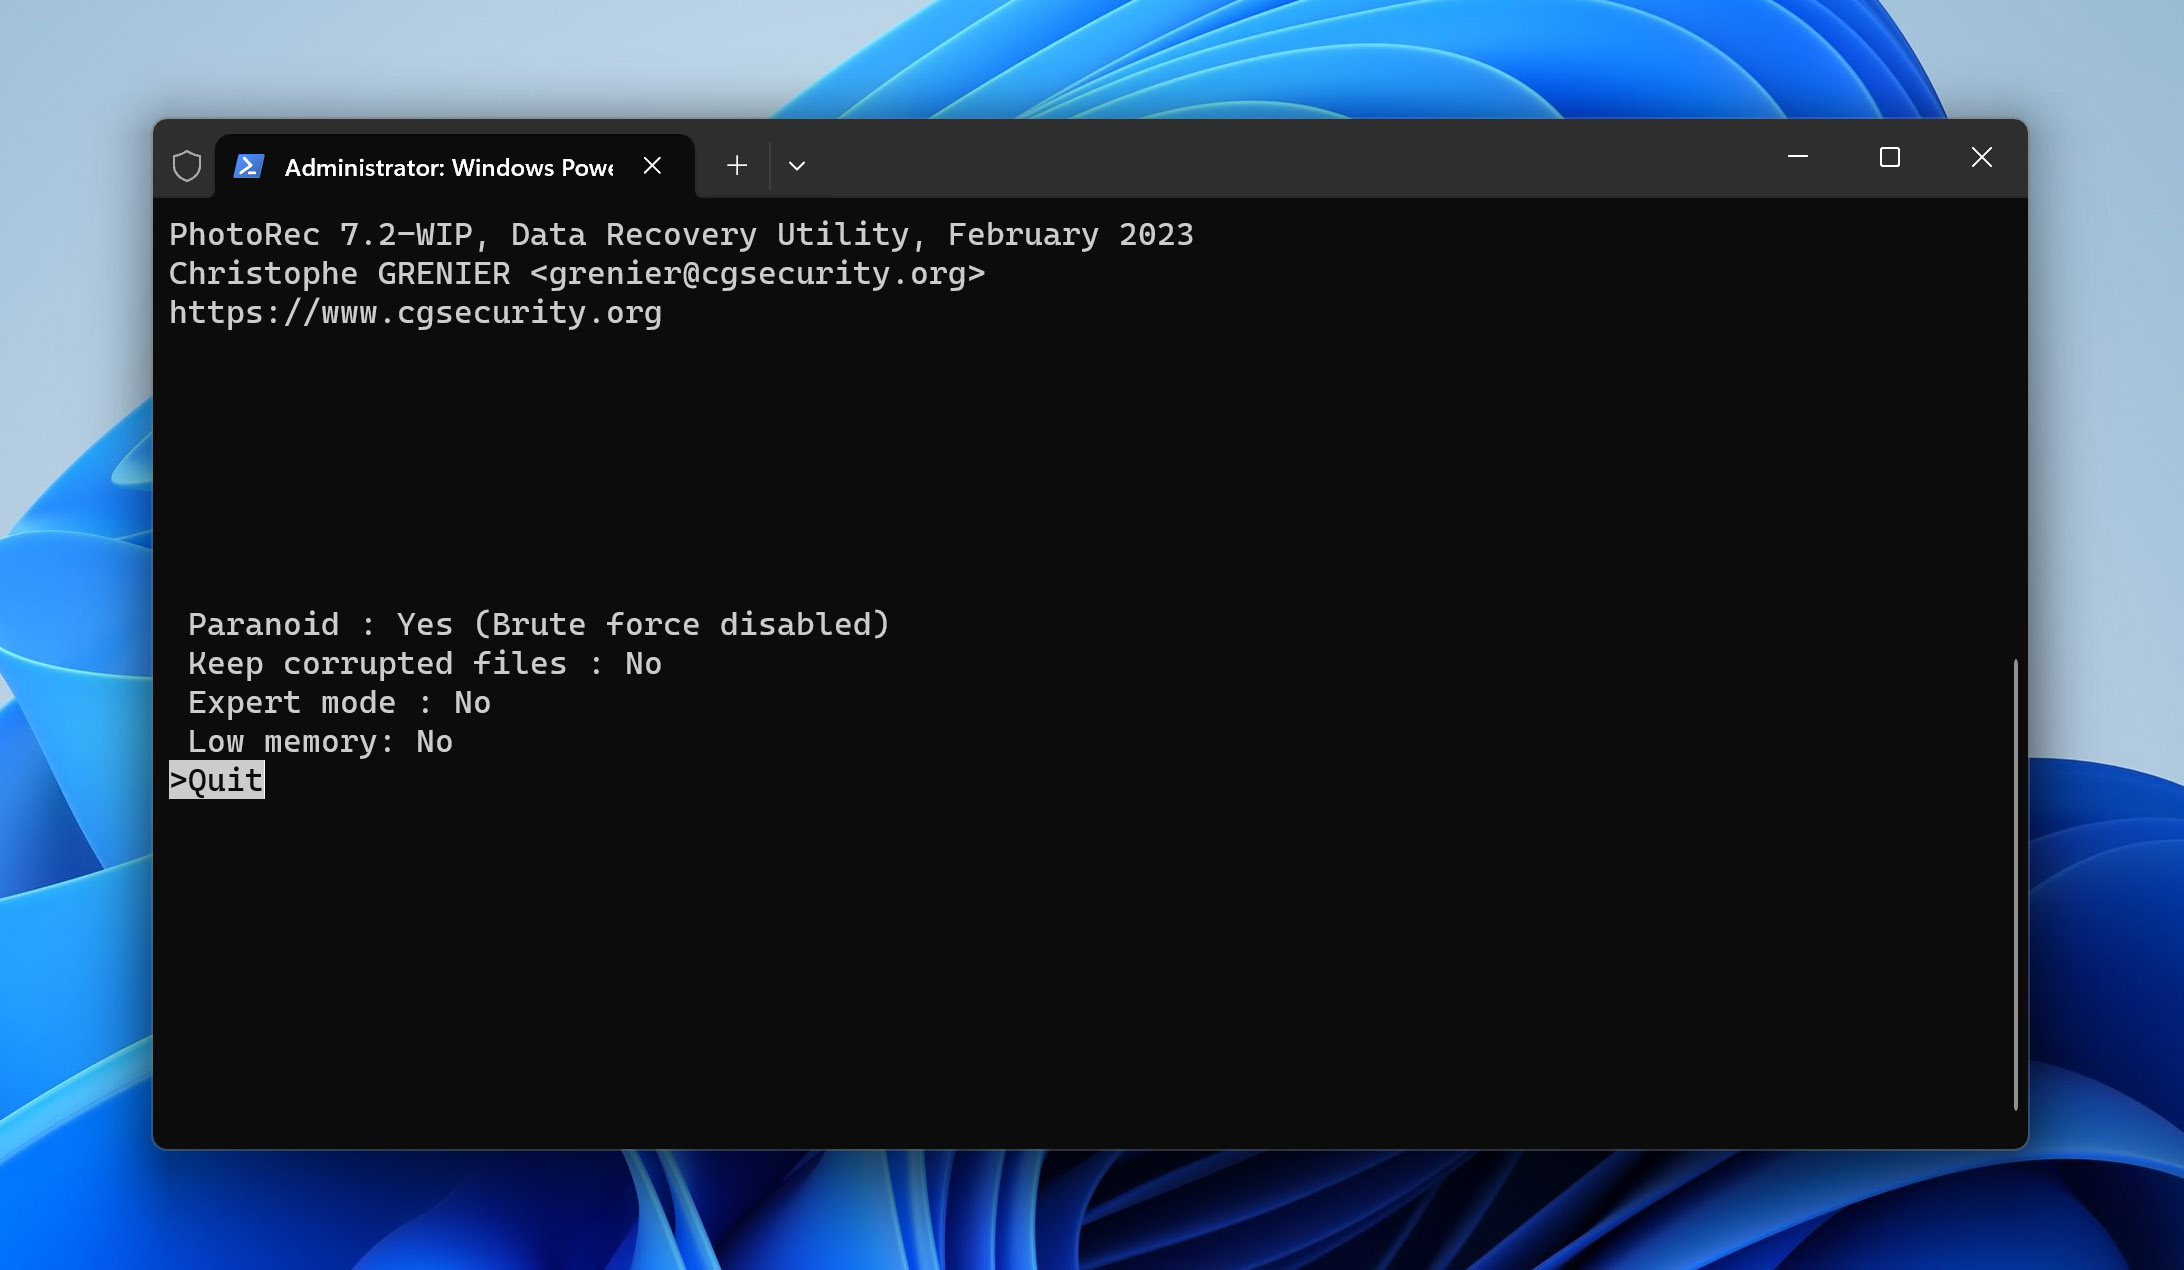
- Make changes to the list of options as applicable.
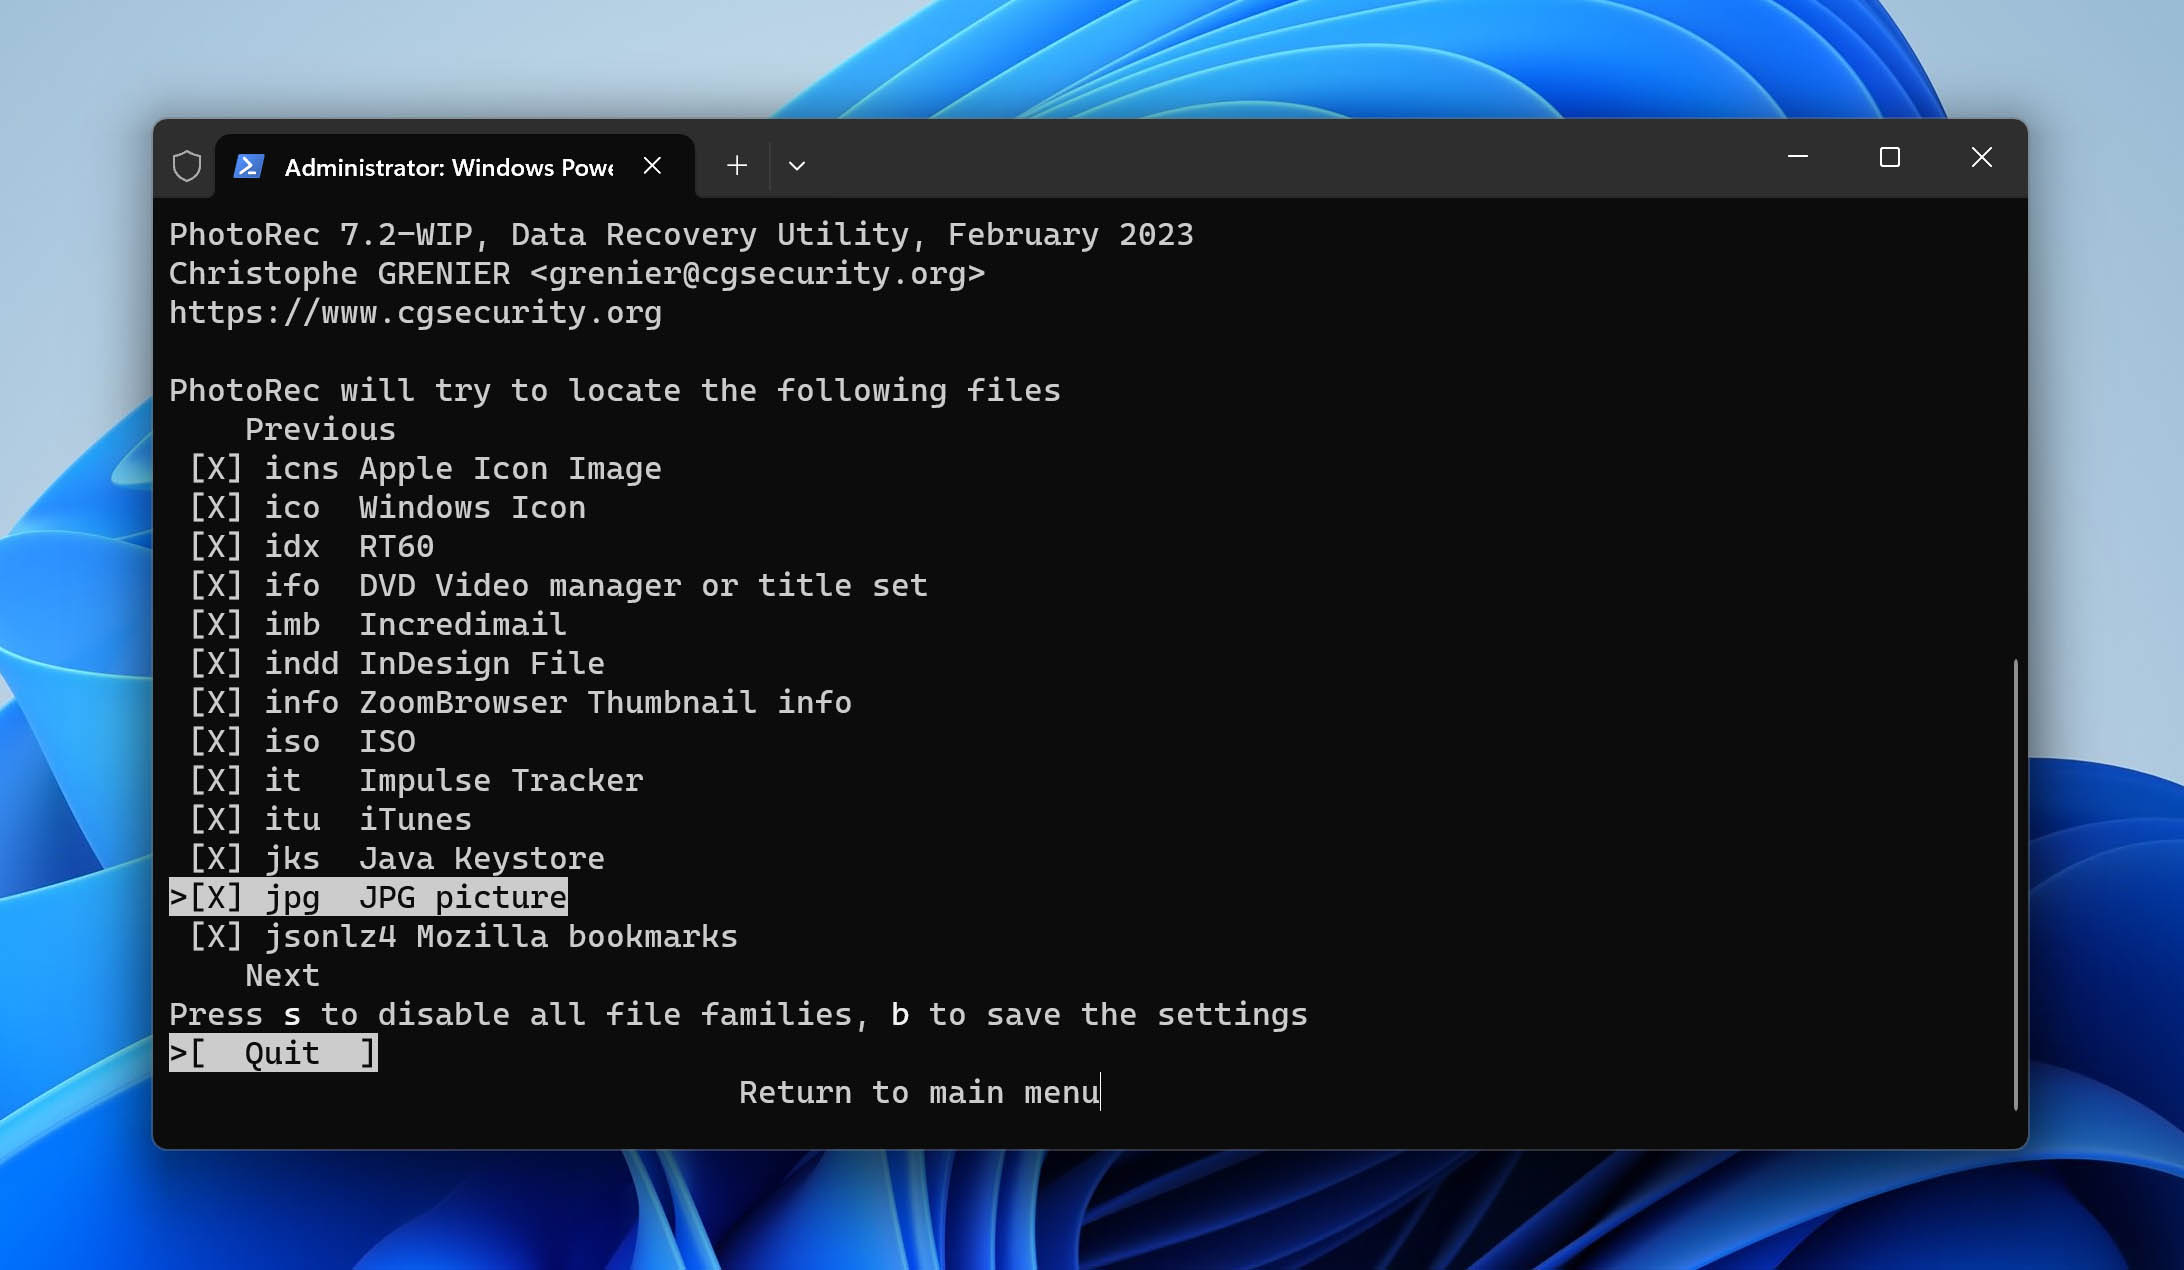
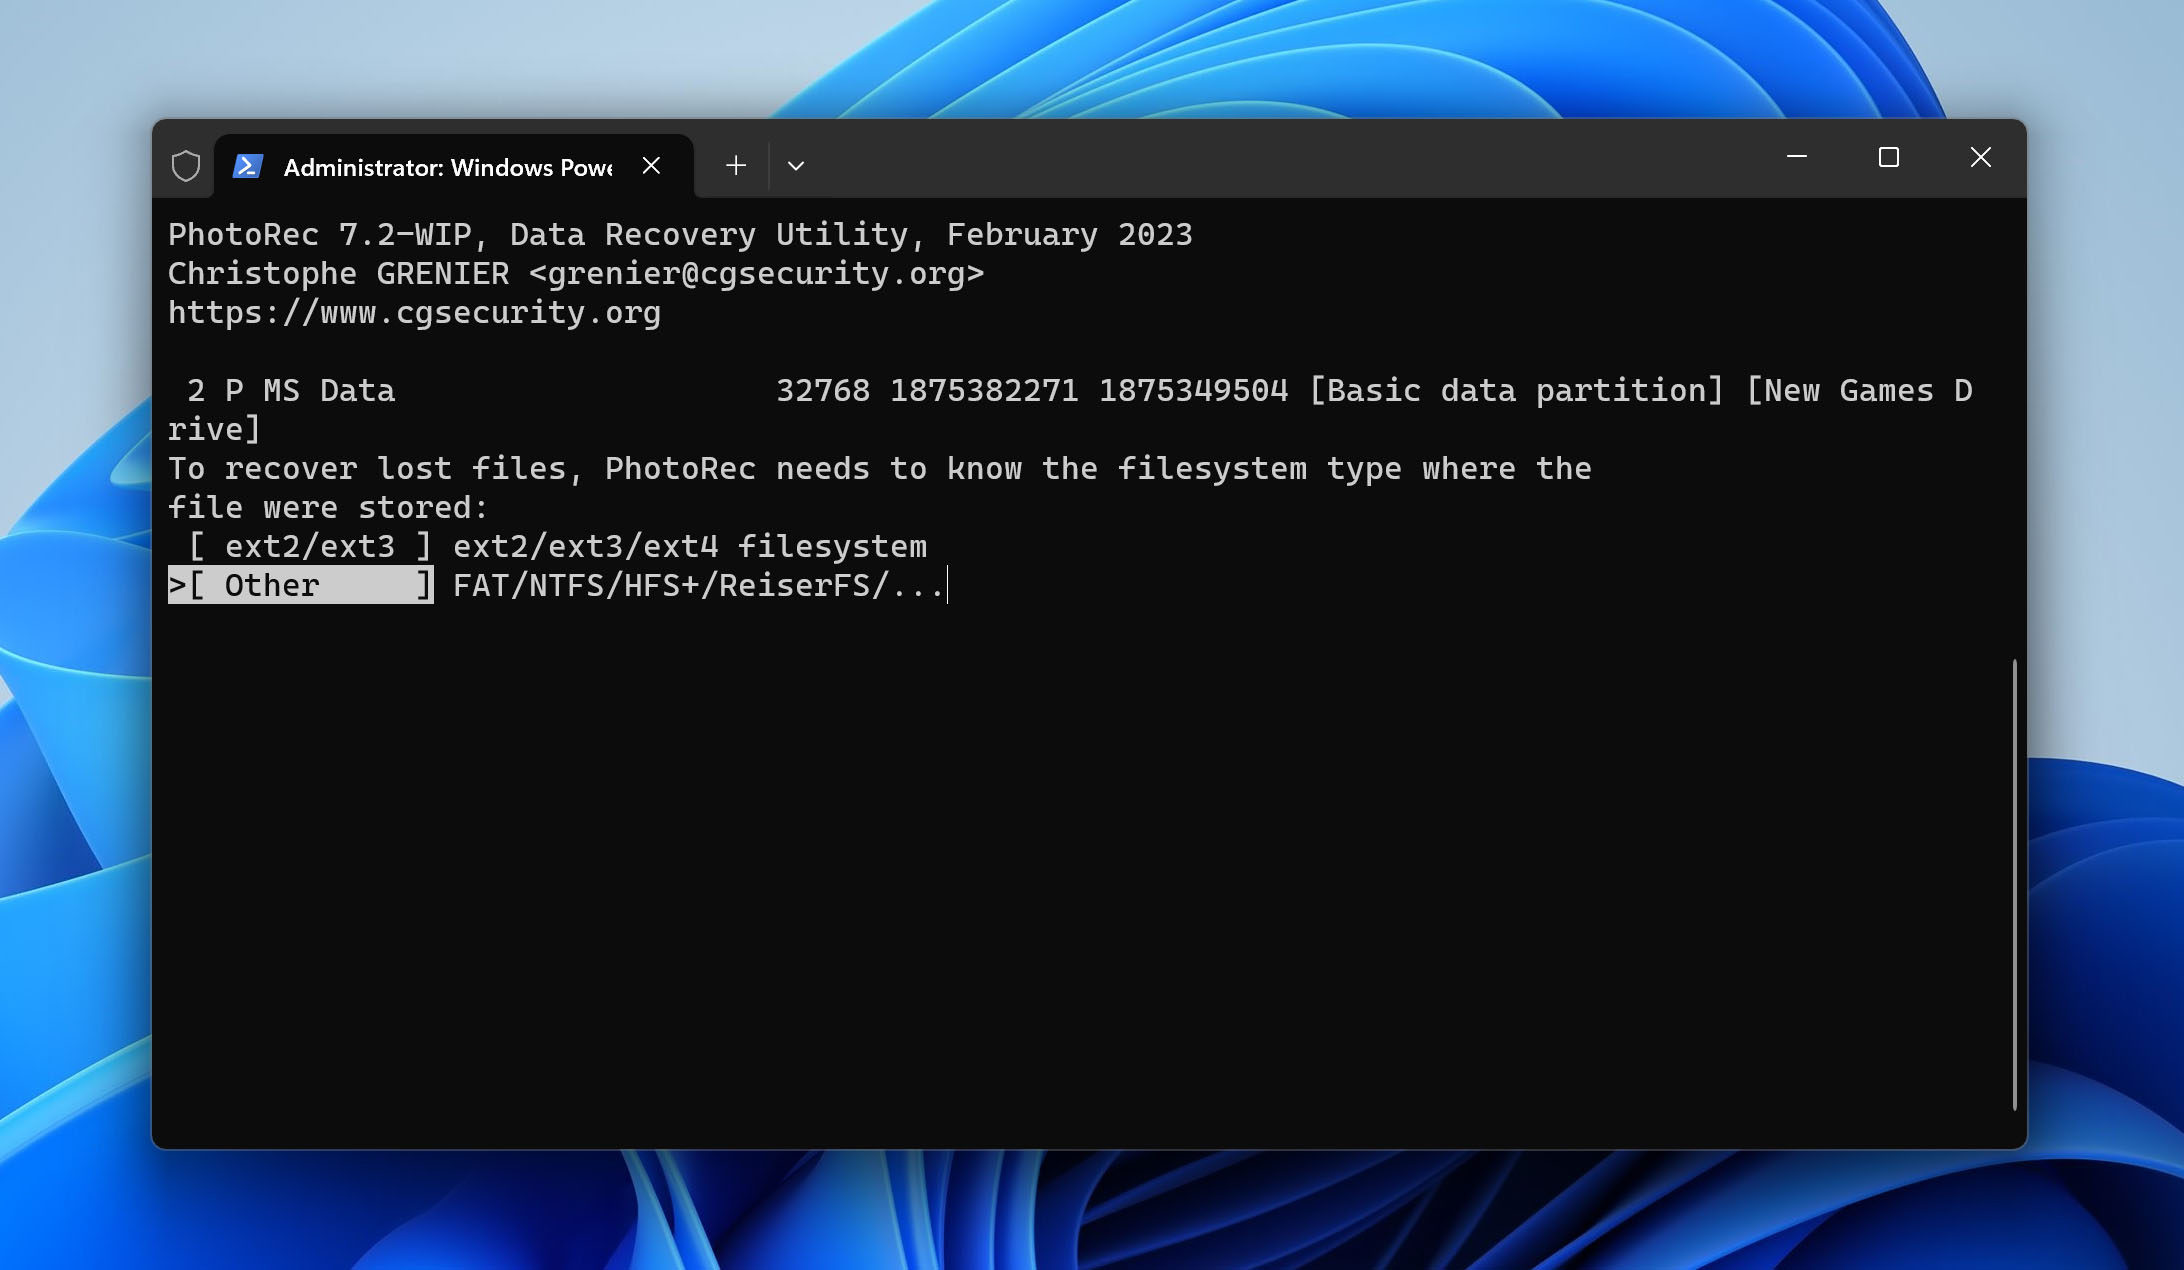
- Select file types to recover and choose the file system type.
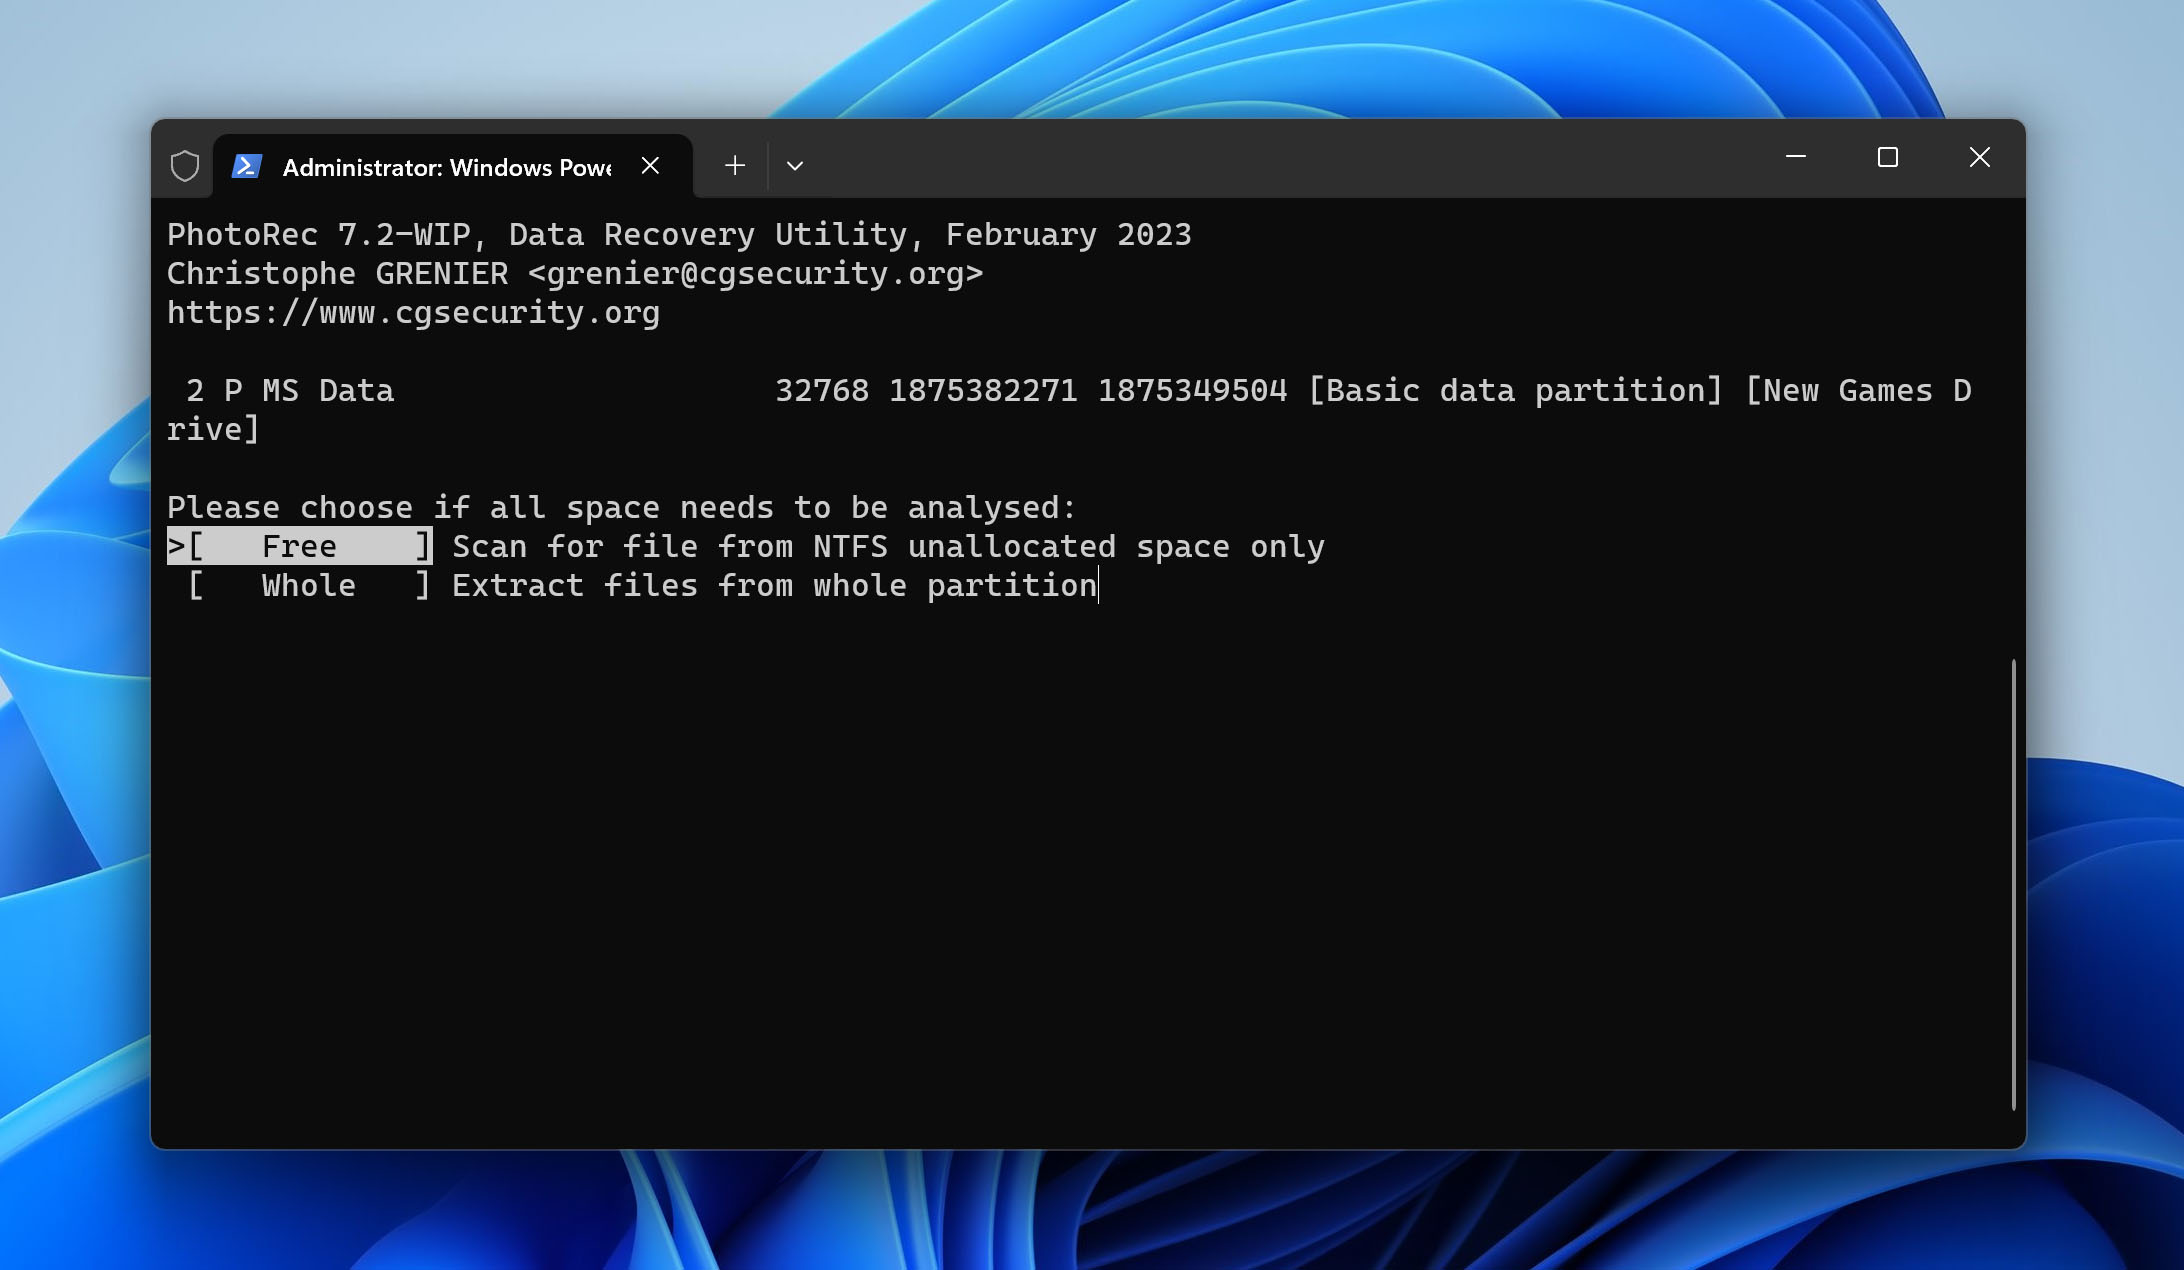
- After that, form the partition or unallocated space only and select where recovered files should be written.
Data Recovery with PhotoRec is effortless. If you want a complete overview of the app, including details about the perks and functionality, see our comprehensive PhotoRec review.
PhotoRec is entirely free to use and open-source. The Graphic User interface with a basic command-line aesthetic is a bit of a let-down for the average PC user. But for Tech-Savvy operators, it offers a behind-the-scenes perspective on how the software performs data recovery.
For a more robust, equally-effective software package, consider our next option.
Option C: R-Studio
R-Studio offers versatile solutions to help you undelete and restore lost data.
It supports many different file formats and can recover data from damaged RAID setups. It features a file viewer to preview recoverable data. There is also S.M.A.R.T. monitoring to help you spot an imminent HDD failure and recover data as quickly as possible.
R-Studio covers many scenarios of Ctrl + Z data loss. The advanced data recovery algorithm can recover files not found in a standard scan, uncover lost partitions, and retrieve missing files from devices with non-standard or unknown file systems.
Data Recovery with R-Studio is straightforward, but it’s also pricey compared to similar apps such as Disk Drill. The user interface isn’t what many users would prefer in a data recovery app as it lacks simplicity.
The app offers a collection of support tools should customers run into trouble with recovery. A technical support team can respond to queries 24/7, with an average response time of 4 hours. You’ll also find help on the R-Tools Technology forum, which features active boards for file recovery, undelete, and repair topics.
To recover files using R-Studio, follow these steps:
- Download and install R-Studio.
- Launch the app and select the storage device you want to recover from. Then, click “Scan”.
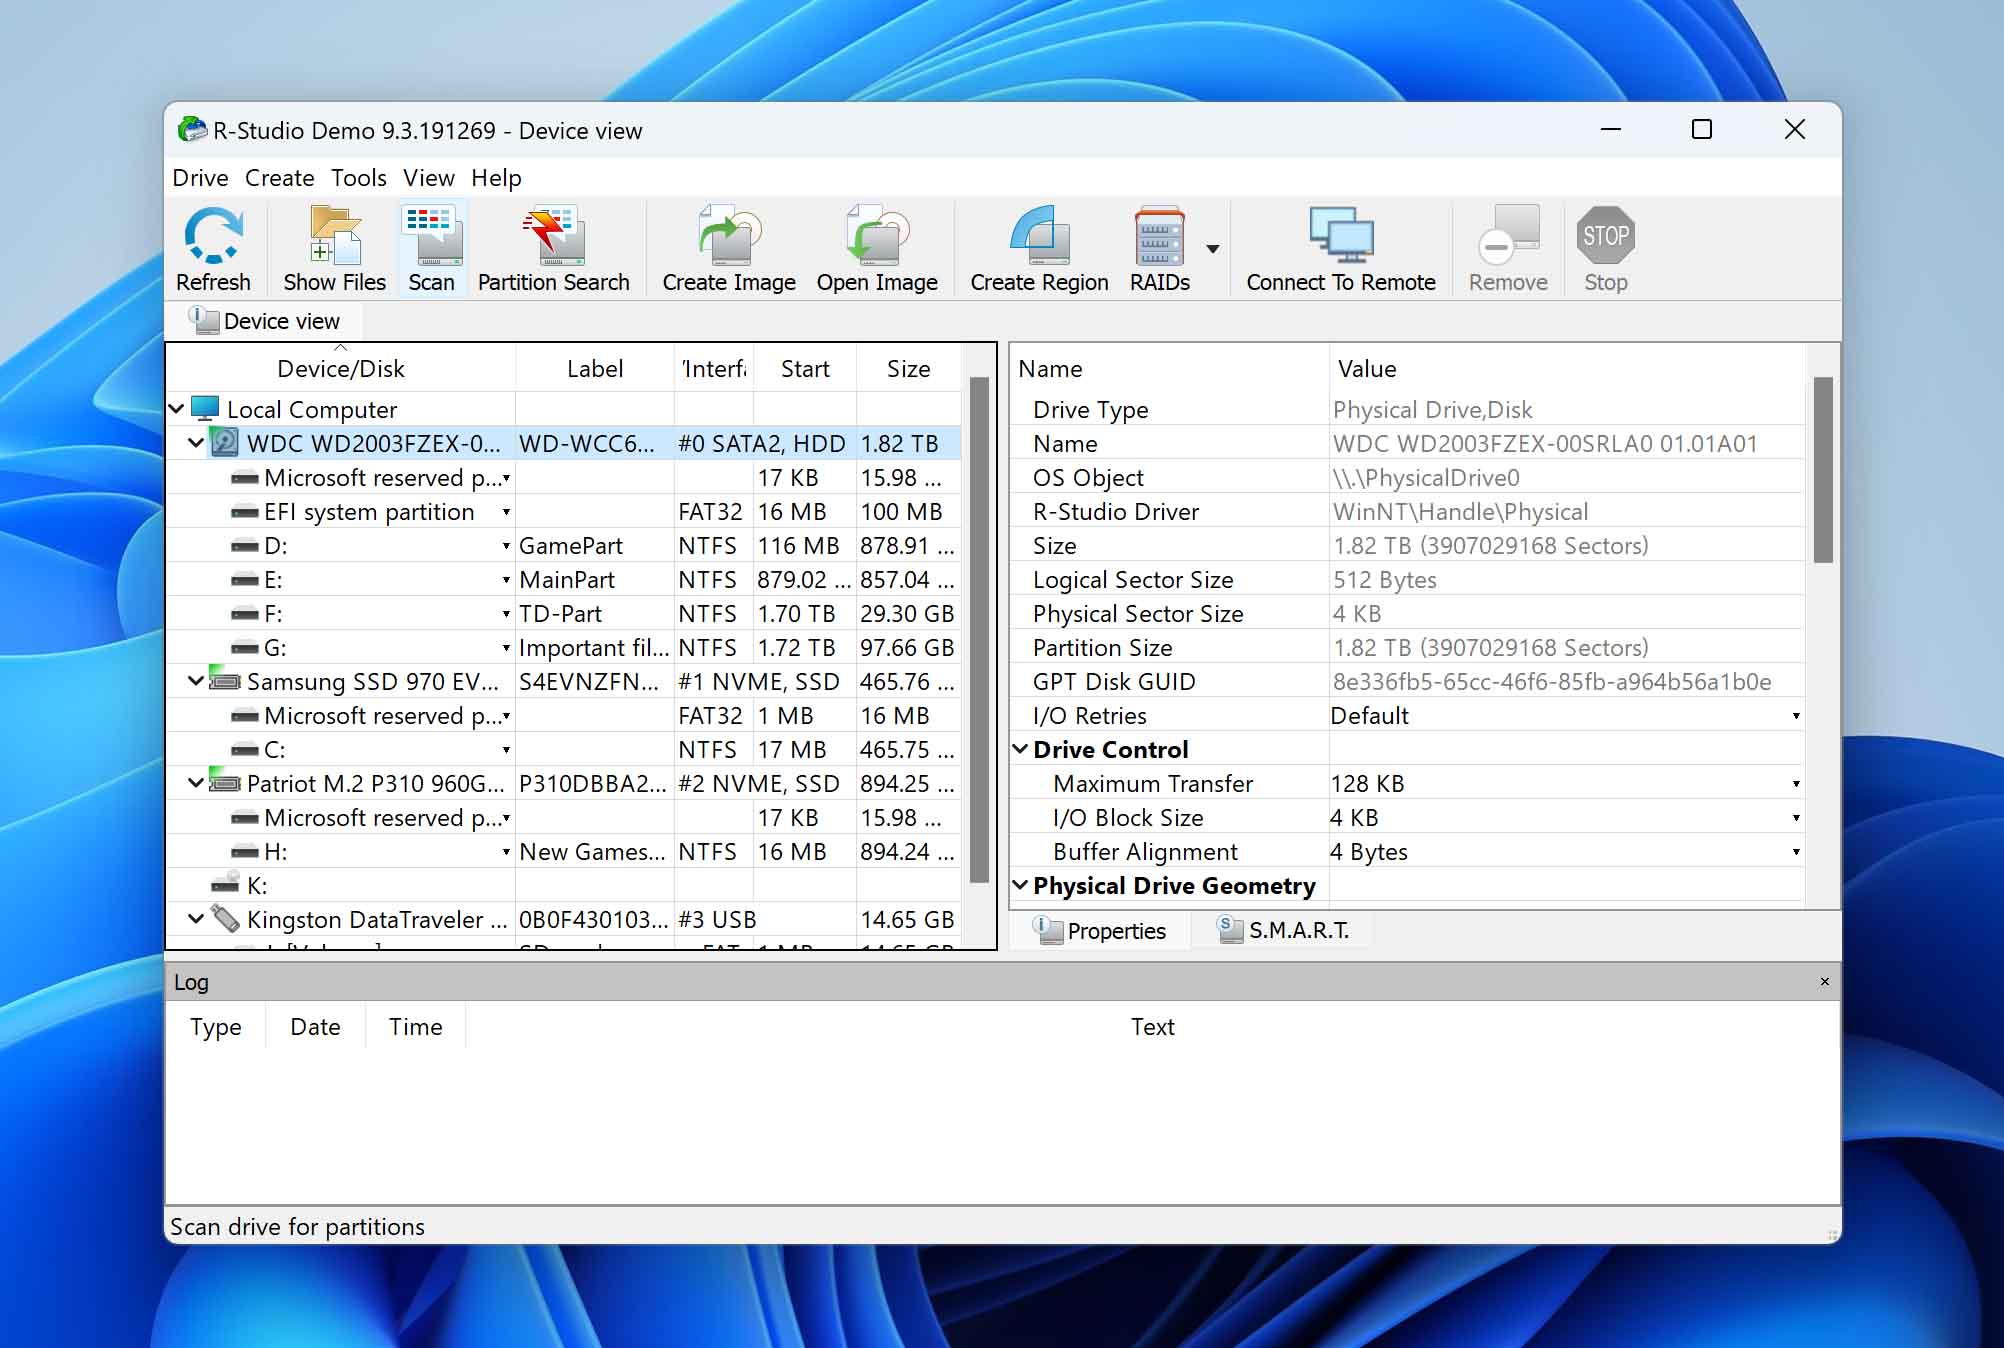
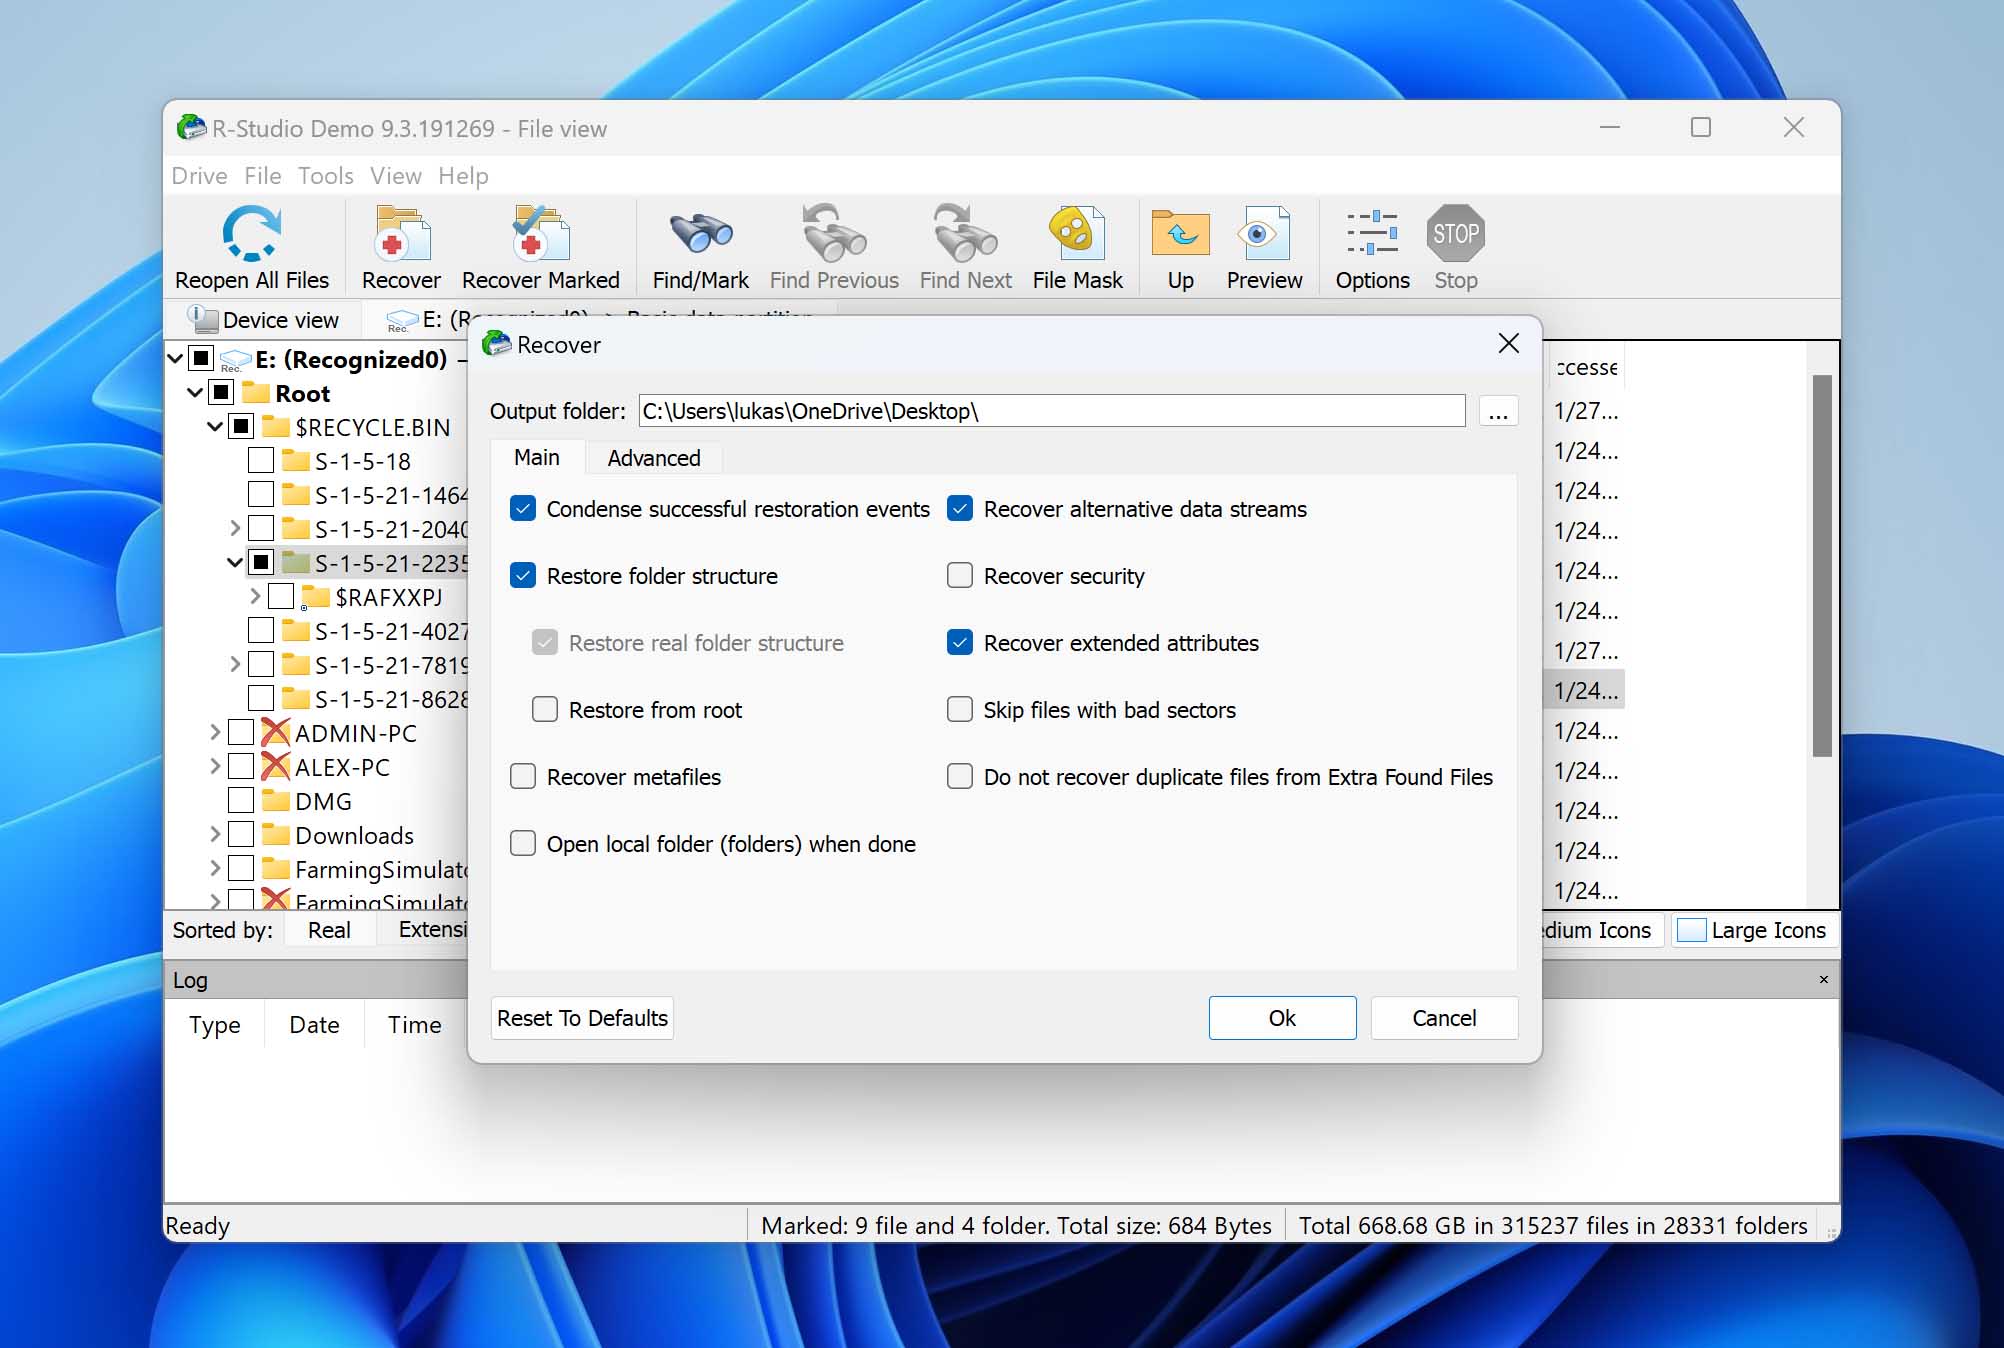
- After that, configure the scan settings on the window that appears. Then, click the “Scan” button to begin the search for lost files.

- Once the scan is completed, a subfolder containing your recovered files is created. Click “Show Files” to review the scanned files. After that, select all the files and folders you want to recover.
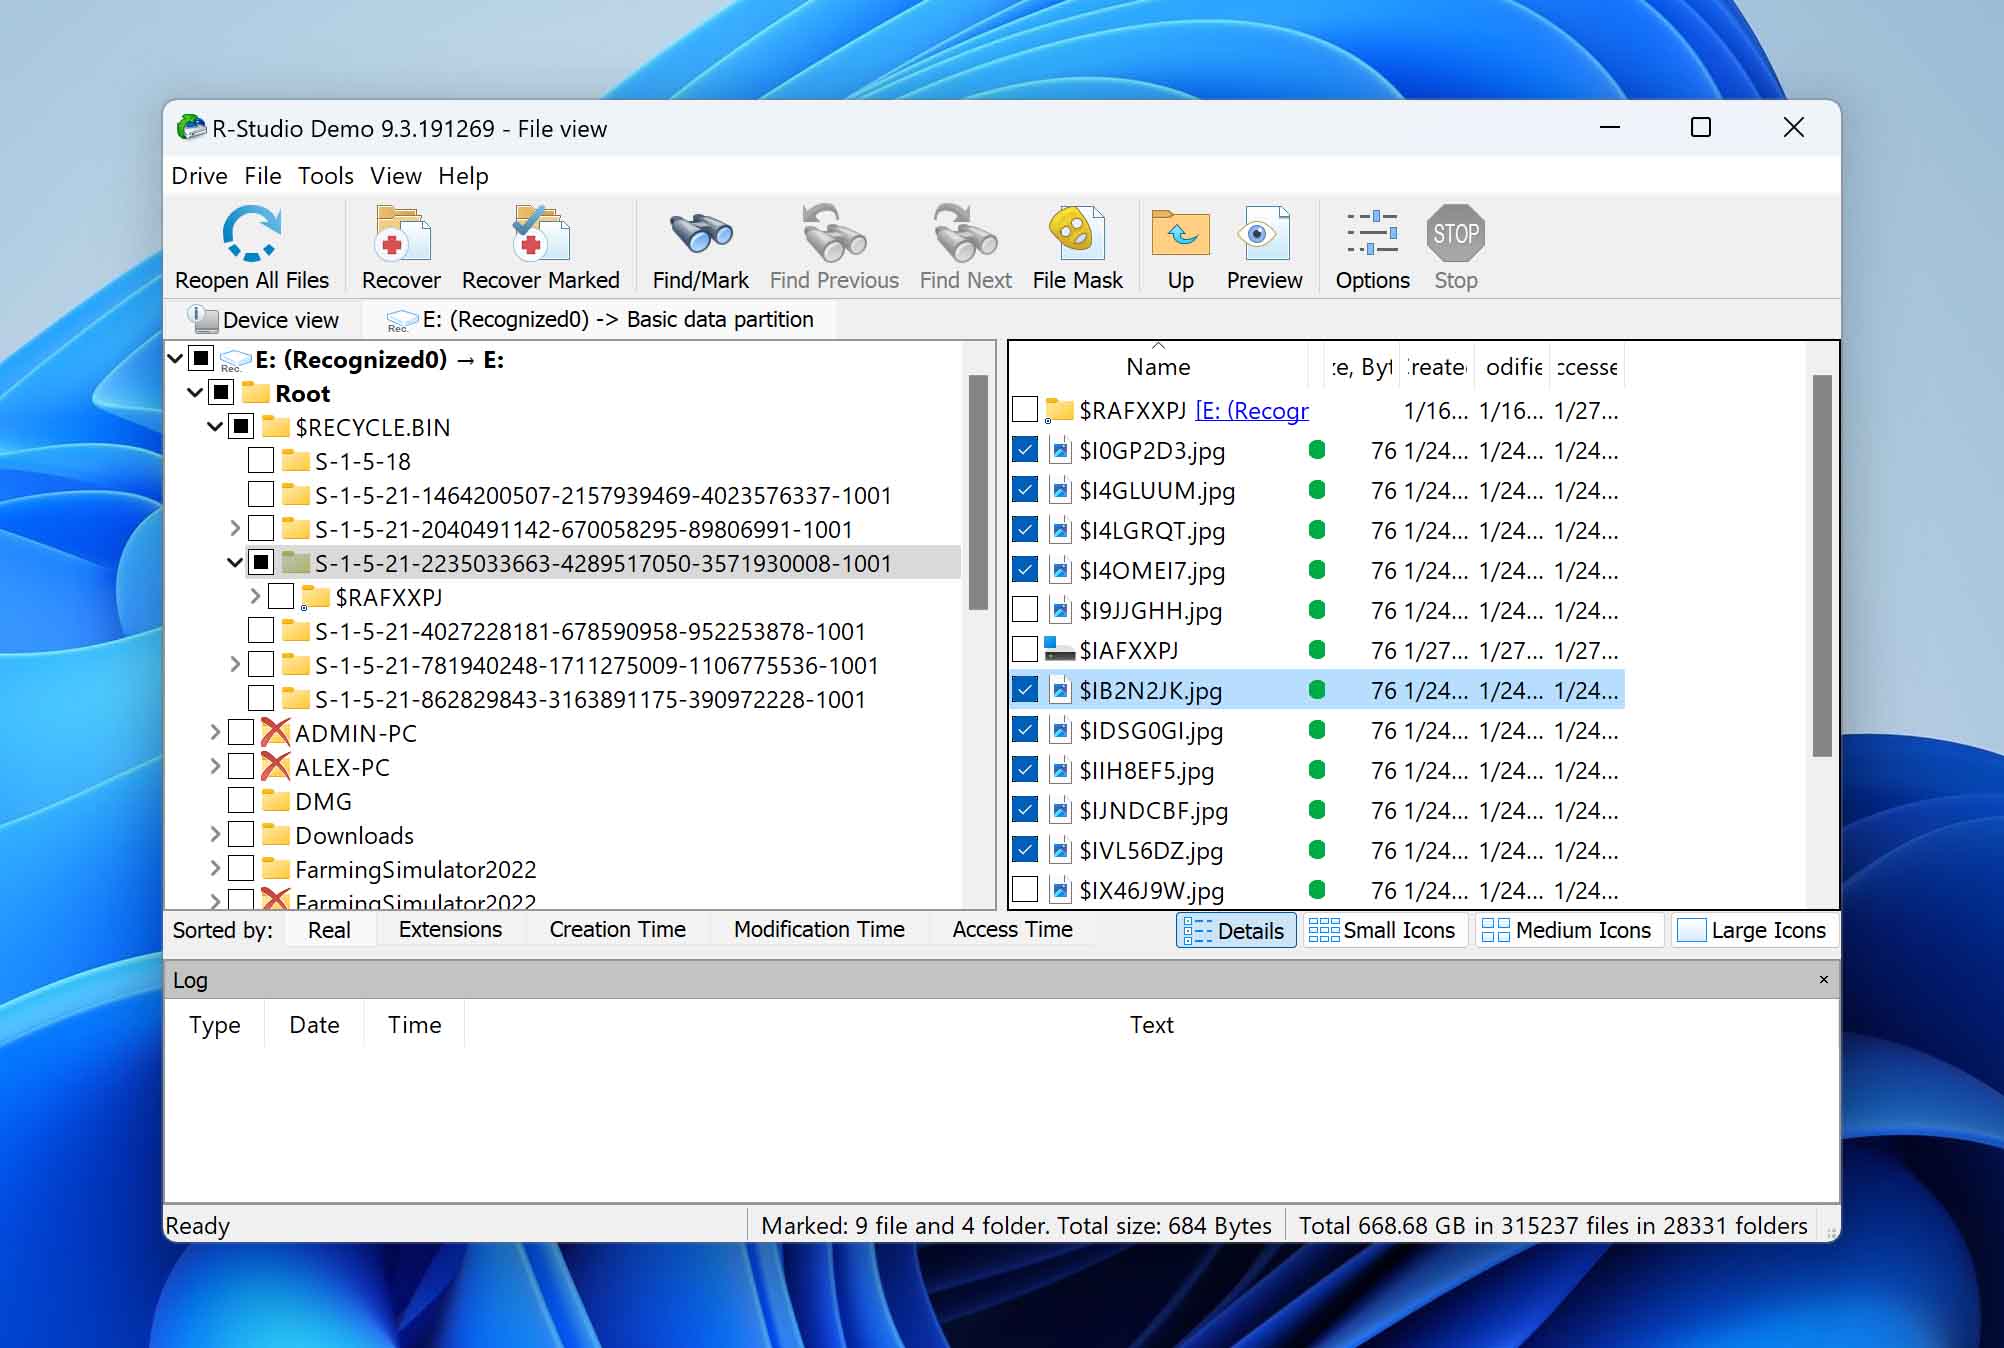
- Browse the location where you want to put your recovered files. Then, click “Ok”.
This comprehensive R- Studio review provides additional information on R-Studio.
So there you have it! 3 Solid ways to recover lost files in Windows 10. In our comprehensive guide to Windows 10 and Windows 11 data recovery, we cover more and in much greater detail.
FAQ
How do I get back something I accidentally deleted?
When you accidentally delete a file, it may be in the recycle bin of your computer. Check to find and restore the file from there. If it is not there, you may need recovery software to retrieve the file.
Is it possible to recover files lost by Cmd + Z on a mac?
Cmd + Z or Cmd + Y for mac works just like Ctrl + z for Windows. If you lose files while using this shortcut, you can use recovery software compatible with macOS to recover lost files.
How do I find lost files on my computer?
There are many ways to find lost files in Windows 10 and Windows 11. Open start, search and open “File Explorer Options” to ensure it isn’t hidden. Under the View menu, select “Show hidden files, folders, and drives.” If the file you want still does not appear in the search or in the recycle bin, you would have to use recovery software such as Disk Drill, PhotoRec, or R- Studio to retrieve it.
Conclusion
Losing your files when performing simple operations like Ctrl + Z is a common problem. It can also be frustrating. Thankfully, there are many ways to recover these types of files. The recovery process is smoother when you are vigilant and keep track of your files. The operations you have running on them because, sometimes, the problem with losing files by Ctrl + Z is that you are not sure which files have been lost, primarily when multiple files were being worked on. Whether you prefer to do everything yourself or you have the budget to pay for software or a professional service, knowing the options available to you will save you time in your bid to recover lost files.
This article was written by Michael Alimo, a Contributing Writer at Handy Recovery Advisor. It was recently updated by Princess Lescan. It was also verified for technical accuracy by Andrey Vasilyev, our editorial advisor.
Curious about our content creation process? Take a look at our Editor Guidelines.