
If you’re looking for a solution that will help you restore a file deleted by Norton, look no further! We will show you what to do if this antivirus deleted some of your data and explain how to get the lost files back in a snap using the correct tools.
Why Norton Can Delete Important Files
Norton can delete files if it thinks they’re malicious. In such cases, Norton automatically quarantines them by placing them in a hidden folder that’s not accessible to anyone. After a certain period, the antivirus will delete the content of the hidden folder, making it impossible for you to access your files—but not impossible to recover them.
In this article, we will demonstrate two basic methods to recover files affected by Norton. However, although the antivirus may occasionally produce false positives, it’s important to note that it typically identifies files for a reason (or quarantines them). Therefore, you should double-check the security of the files you intend to restore.
Undelete Norton Deleted Files With Data Recovery Software
You have two main options on how to restore files that were deleted by Norton and are not present in the quarantine folder: You can retrieve them from a backup, or, if you don’t have a backup, you can use data recovery apps like Disk Drill or Recuva. Data recovery apps can recover all deleted files that are still physically present on your hard drive (meaning they haven’t been overwritten yet), so it’s best to use them as soon as possible.
Option A: Disk Drill for Windows
Disk Drill is one of the most beloved names in the data recovery world. It lets you recover up to 500 MB of files for free, and the software has a clean and simple interface that allows anyone to get a hold of the program in no time. The latest version of Disk Drill supports hundreds of file formats, and it comes packed with useful features that can help you protect your files against data loss. Disk Drill is fully compatible with all recent versions of Windows and macOS, and a single license unlocks both Windows and macOS versions.
To recover deleted files with Disk Drill, follow these steps:
- Download Disk Drill from the company’s website and install it on a different drive than the one you want to recover to avoid overwriting (e.g., you can use a USB or an external drive).
- Launch Disk Drill and select the drive you want to scan for lost files.
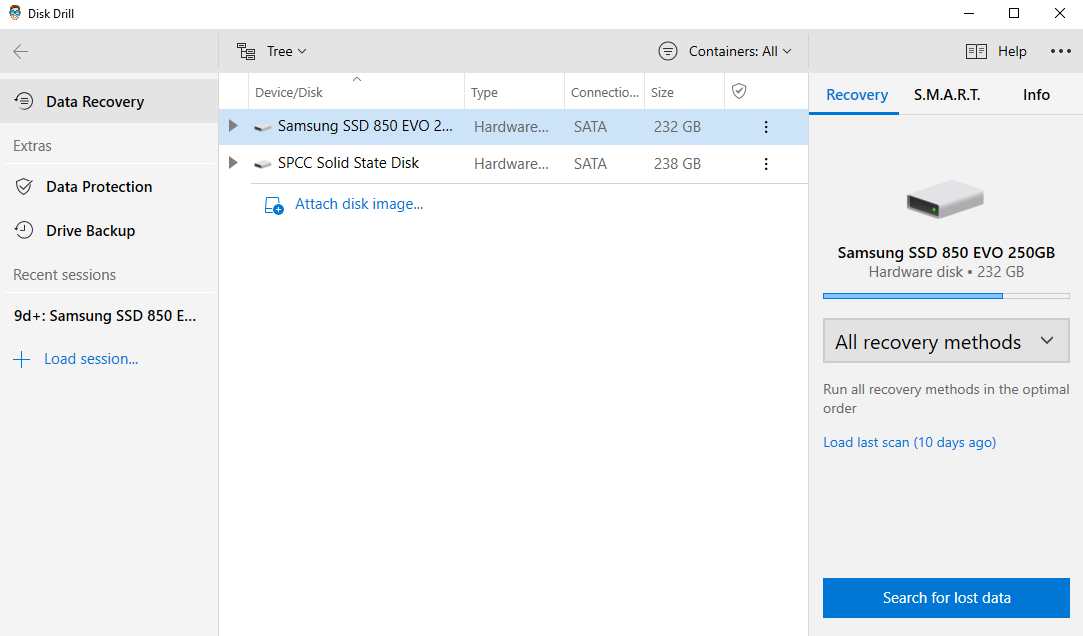
- Click on the ‘Search for lost data’ button.
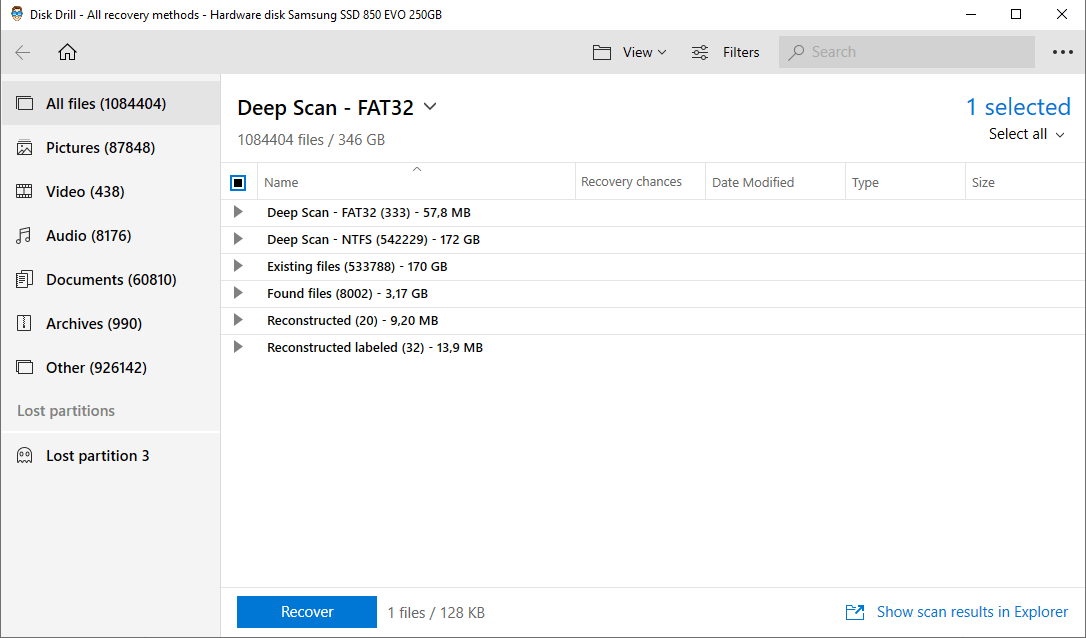
- Check out which files you want to save (Pro tip: the ones you can preview are usually recoverable).
- Hit the ‘Recover’ button and select where you want the lost files to be stored (you should save the files on a different volume to avoid overwriting).
And that’s it! You’re good to go! The program is as you can see easy to work with and doesn’t require much tinkering. I’ve been using it for quite some time now and I have nothing but words of praise (bear in mind that we’ve reviewed countless data recovery programs over the past few years).
Want to know more about Disk Drill? Read our full review, as well as our security analysis.
Keep in mind that you have to buy the full version of the program if you want to restore more than 500 MB of files. On the other hand, the purchase is worth every penny as the program does its job perfectly. There are often numerous discounts on the company’s official website, so be sure to catch them to save a buck or two and get Disk Drill at a lower price!
Option B: Recuva
Recuva is another well-known name in the data recovery world that can help you recover Norton-deleted files. The program can recover an unlimited amount of data for free, and its straightforward user interface makes it suitable even for less experienced users. Keep in mind that Recuva hasn’t received major updates in a long time, so it may not provide the same reliable results as Disk Drill. To restore lost files with Recuva, you need to:
- Download Recuva from the company’s official website and install it on any other storage device except the one you want to scan.
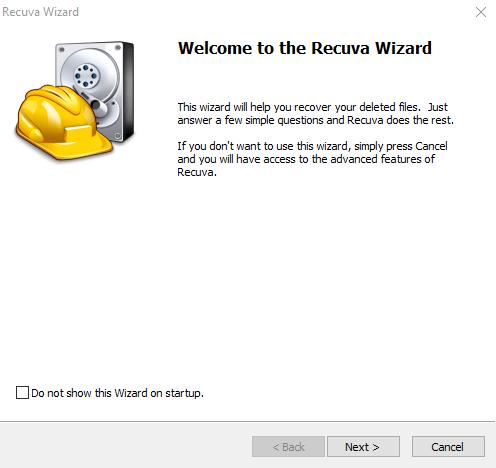
- Open the program and click on ‘Next’ to begin the wizard.
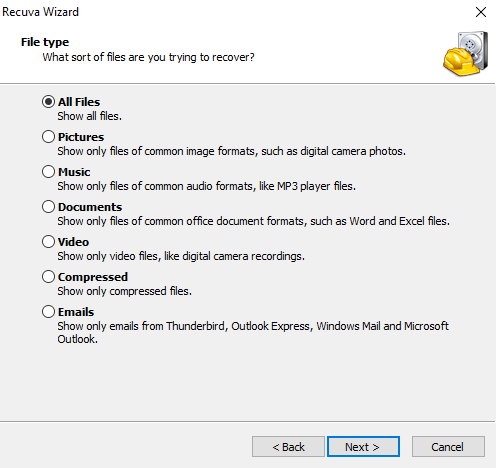
- Choose which type of files you want to recover.
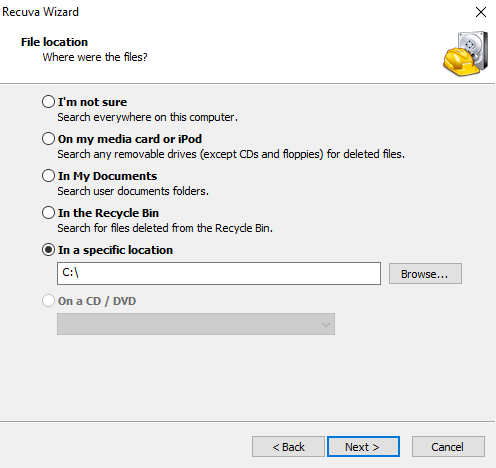
- Select where you want Recuva to perform the research.
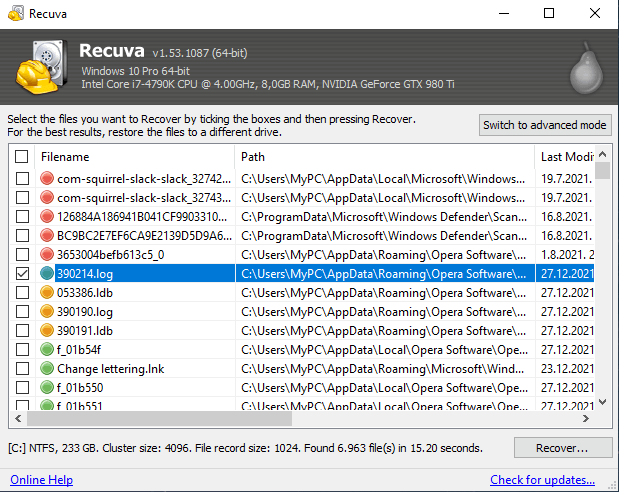
- Choose which files you want to recover and select the location where you want Recuva to save them.
- Hit the ‘OK’ button and follow the rest of the prompts that will ask you to click ‘OK’ (Pro tip: check the ‘Enable Deep Scan’ option if you want more detailed results).
Interested in Recuva? Read our full review, as well as a detailed guide on how to recover data from a memory card using Recuva.
Restore Files From Norton Quarantine
Files that are in Norton quarantine are isolated from the rest of your computer, meaning that they can’t contaminate other files or infect your system. After a certain time, the antivirus deletes them automatically. If you want to restore them and save them from deletion, you will have to:
- Open the Norton antivirus.
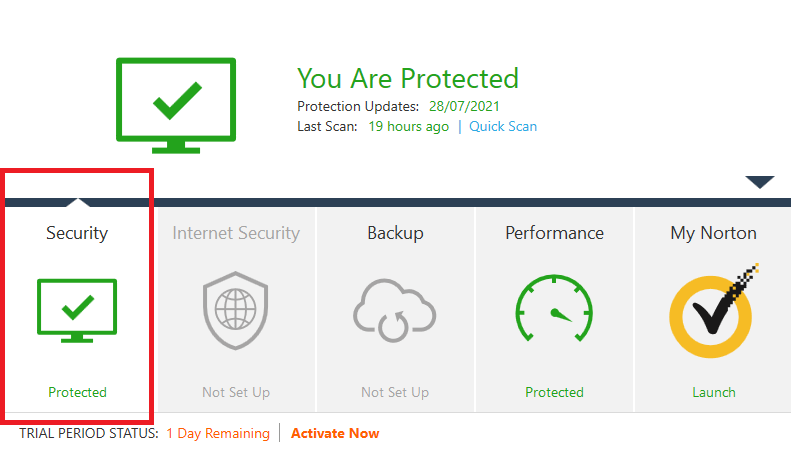
- Double-click the ‘Security’ button from the product’s main window.
- Click on ‘History’.
- Select the files you want to restore in the drop-down list from the ‘Security History’ window.
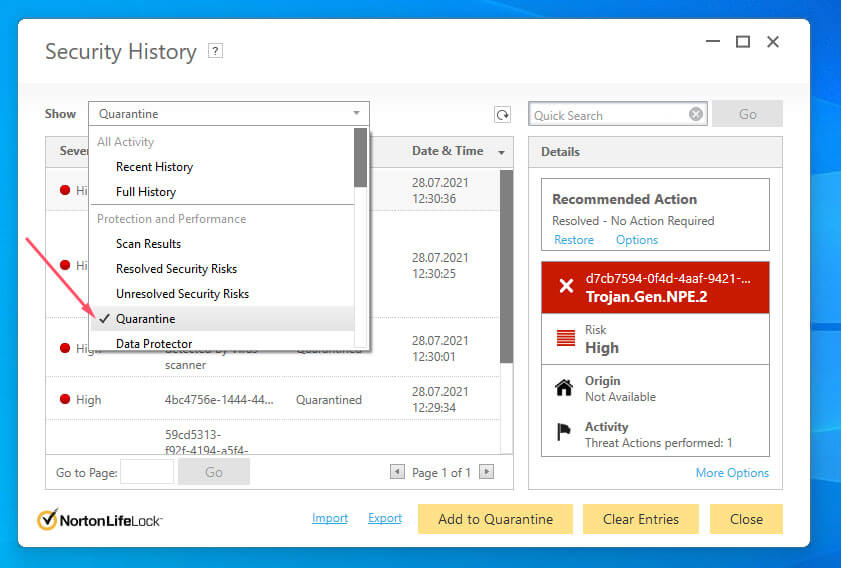
- Choose what you want to do with the files in quarantine–you can either:
- Restore the files–This option will transfer the quarantined files to their original location on your computer, but it’s only available if you’ve manually sent the items to the quarantine.
- Restore & exclude the files–This option allows you to restore the quarantined files to their original location on your computer without repairing them. The files will also be excluded from being detected in the future Norton scans.
- Remove the file from history–If you just want to remove your items from the ‘Security History’ log, this option is for you.
FAQ
Can Norton recover deleted files?
The short answer would be that yes, Norton can recover deleted files. It offers a feature called Norton File Recovery that can help you recover deleted files. Norton File Recovery is a part of the Norton 360 suite, which is a comprehensive security solution provided by Norton. Although the program can complete this action for you, we have to say that this data recovery solution isn’t advisable as it’s costly (Norton Utilities Premium yearly subscription costs $69.99) and not as reliable as other data recovery programs, such as Disk Drill for example.
How do I restore files from Norton Security?
Restoring files from Norton Security is a tedious and long-drawn process as it requires you to follow a lot of complicated steps. You need to:
- Open your Norton Security product.
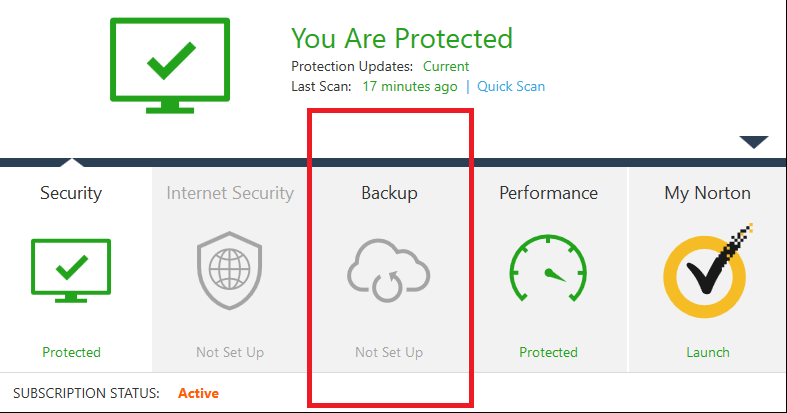
- Click on the ‘Backup’ button in the main window.
- Find the ‘Restore Files’ button and click on ‘View All’ under ‘Restore From’.
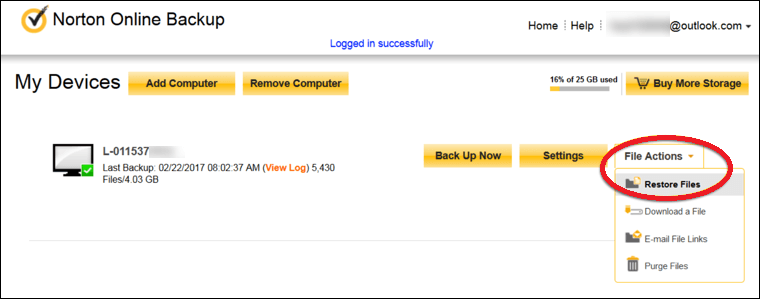
- Select the files you want to restore and click the ‘OK’ button.
- Choose whether you want to restore the files to their original location or a new one.
How do I stop Norton from deleting files?
If you want to stop Norton from deleting files you need to turn off the download intelligence feature of the program and exclude files or folders from being scanned. You can do this by Going to settings and following the prompts in the Firewall and Antivirus sections of Norton.
How do I whitelist files in Norton?
To whitelist files in Norton, you need to configure your program so it excludes files from Auto-Protect scans and SONAR scans. To do this, you need to:
- Open Norton.
- Go to the ‘Settings’ section.
- Click on the ‘Antivirus’ button and then on the ‘Scans and Risks’ tab.
- Configure which files you want to be excluded in the following sections of the program:
- Items to Exclude from Scans.
- Items to Exclude from Auto-Protect, Script Control, SONAR, and Download Intelligence Detection.
Conclusion
If you’ve lost your files because Norton has deleted them, you shouldn’t worry too much because there are tools like Disk Drill that can help you deal with this situation, and we’ve described how to use them in this article.
This article was written by Logan Tooker, a Contributing Writer at Handy Recovery Advisor. It was also verified for technical accuracy by Andrey Vasilyev, our editorial advisor.
Curious about our content creation process? Take a look at our Editor Guidelines.