If you accidentally lost important files on your SD card, the first thing you’d want to know is if you can still retrieve them. You scour the internet for information or guides to get your files back as soon as possible. The good thing is, it’s actually easy and quick to recover files from SD card using Recuva.
In this article, we will explain and demonstrate how you can recover your lost files using the third-party data recovery software called Recuva.
Can SD Card Files Be Recovered?
The simple answer: Yes, there are methods you can use to retrieve lost files from an SD card.
There are also free SD card recovery software to choose from if you want to DIY file recovery. The complicated answer is that it’s possible to recover your files, but it depends on the condition of your storage device.
Accidental file deletions and card reformat are relatively easier to work on, even by yourself. But if your SD card is physically damaged, it is best to consult data recovery experts, so you don’t risk further damage.
It is also essential to practice these measures immediately after your file goes missing to increase the chances of successful retrieval:
- ⛔ Stop using your storage device. Don’t add files. Don’t do anything that can cause data to be altered in the drive or device you want to scan.
- ⌛ Perform file recovery as soon as you can.
- 🔍 Check if your SD card has physical damage or if the SD card is dead.
However, if you weren’t able to follow the measures above, you can still try to run a data recovery software like Recuva and hope that your files are still in the storage device’s space and not yet overwritten.
How to Recover SD Card With Recuva?
![]() The key thing to remember about files you delete manually or through reformatting is that those files are not erased into oblivion. “Deletion” just means that files become inaccessible and are marked to be overwritten by new files.
The key thing to remember about files you delete manually or through reformatting is that those files are not erased into oblivion. “Deletion” just means that files become inaccessible and are marked to be overwritten by new files.
Recuva does an efficient job of extracting and retrieving your data. It can also scan different storage drives all within a few minutes.
You can read more about it in our full review of the software.
Use Recuva to recover your SD card by following these steps:
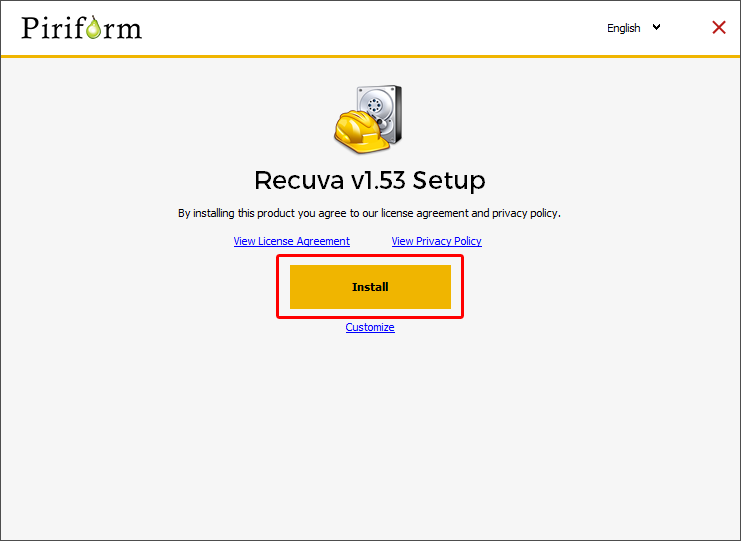
- First, download the Recuva software for Windows.

- Run the setup and proceed until the installation is properly finished.
- Next, connect your SD card to your computer by using a memory card reader or your PC’s built-in reader, if it has one. Once your card is read, open Recuva.
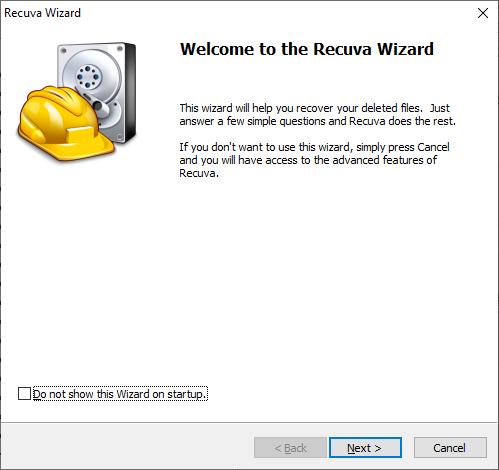
Recuva will launch in Wizard mode by default. This is the simplified version of the program. However, you can run it in Advanced mode, which offers more scanning options. To skip the Wizard mode, click the Cancel button on the first screen. You can also tick the “Do not show this Wizard on startup” checkbox If you don’t want to open the Wizard mode every time you boot the app.
Method 1: Recuva SD card recovery using Wizard Mode:
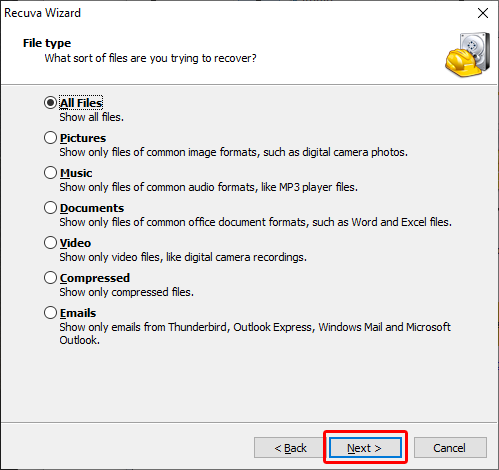
- Choose what file type you want the software to scan for. Click Next.
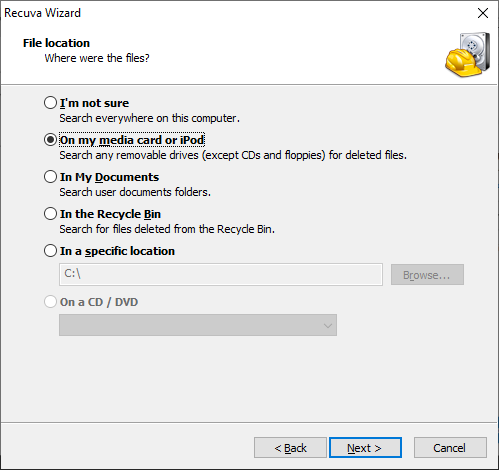
- Select the On my media card or iPod option for the file location of recovery. Then, click Next. This will scan all connected external devices, so make sure to leave only your SD card connected to your computer if possible.
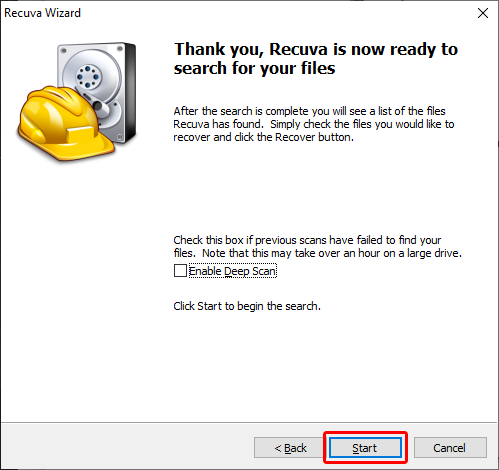
- Click the Start button to begin scanning your card. Recuva also gives you the option to perform a deeper scan by ticking the “Enable Deep Scan” checkbox.
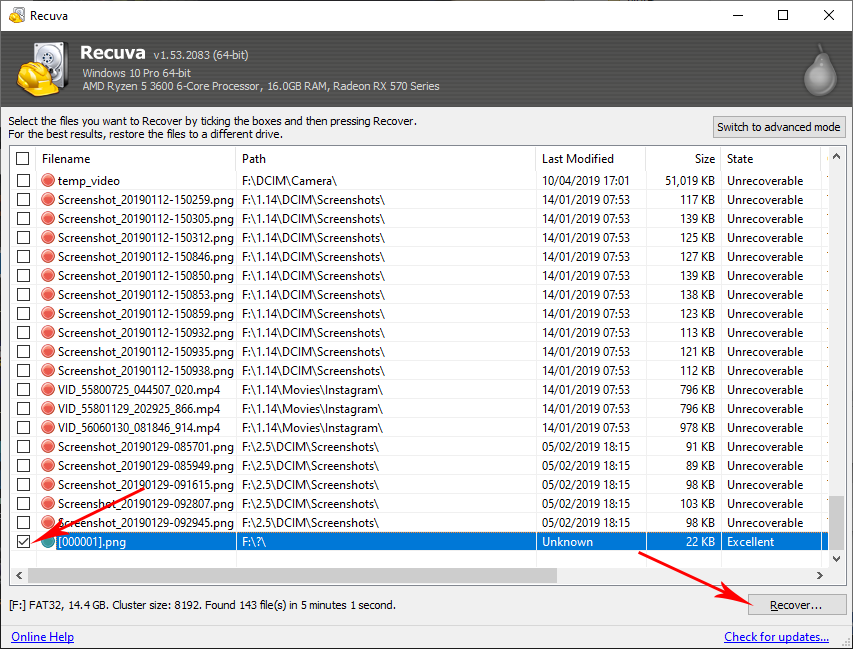
- Select the files you want to recover in the scan results by ticking the boxes on the left side of the file name. Then, click the Recover button.
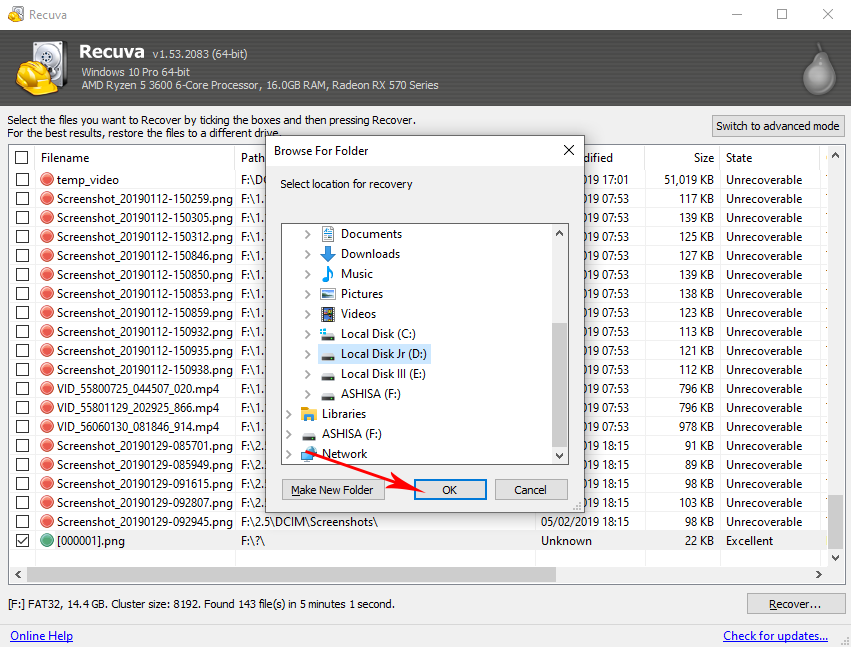
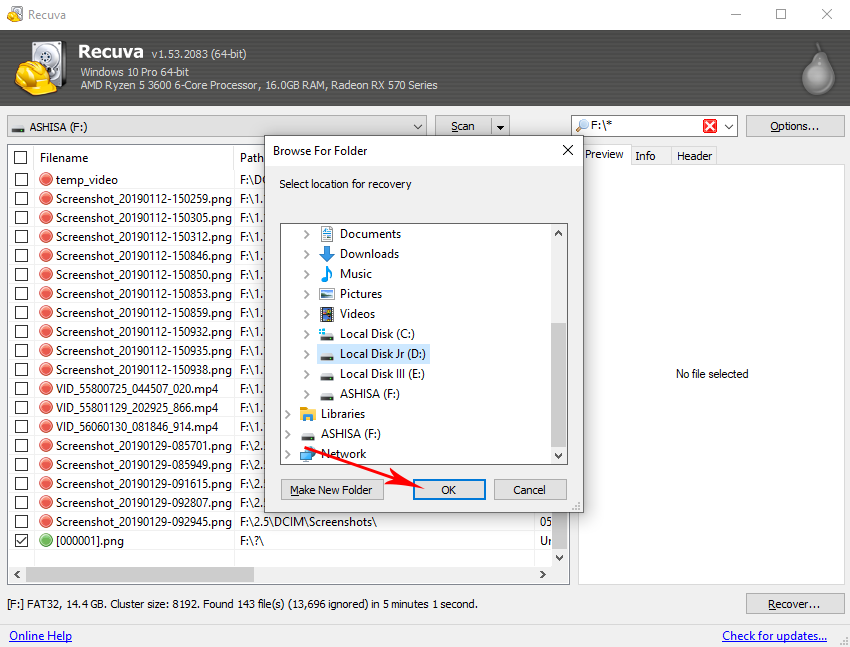
- Select a location for your files for recovery. Make sure to place them in a different drive than the one you scanned to prevent overwriting data.
Method 2: Recuva SD card recovery using Advanced Mode:
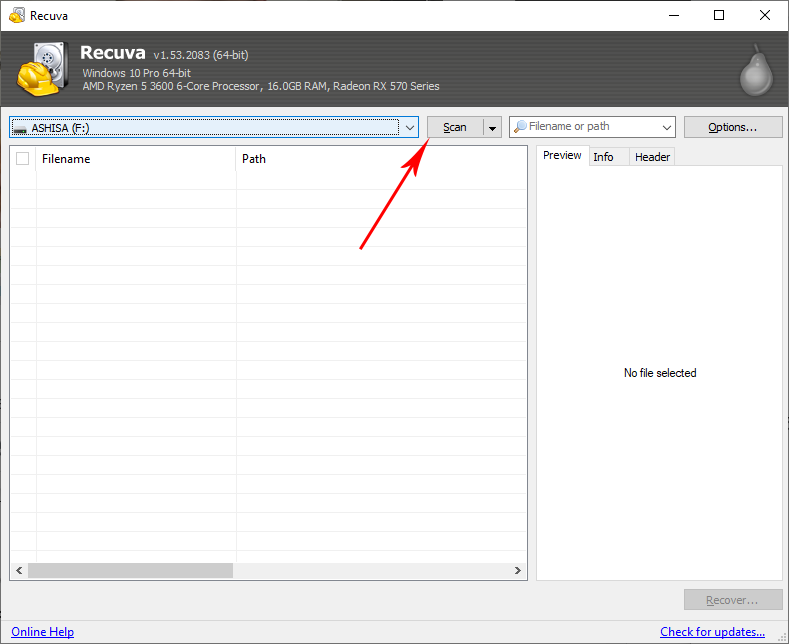
- Select your SD card in the dropdown on the top-left side of the program. Then, click the Scan button. You can also scan your storage device using the Deep Scan feature in the advanced mode. Head to Steps B-C if you wish to proceed with the said feature. If not, skip to step D.
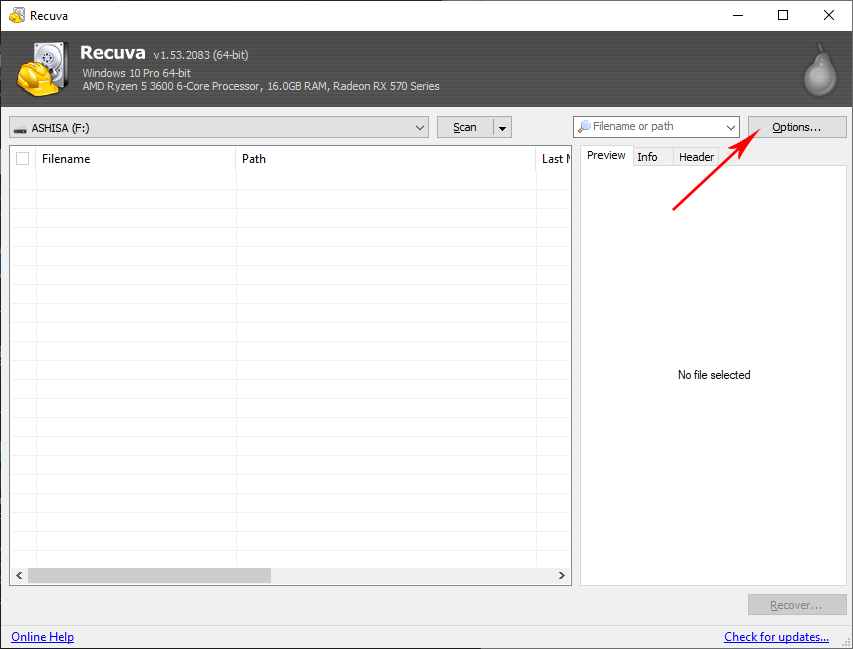
- To enable the Deep Scan feature, click the Options button on the top-right corner, at the right side of the search bar.
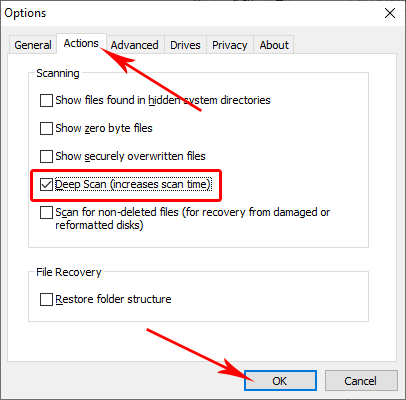
- Select the Actions tab and tick the “Deep Scan (increases scan time)” checkbox. Click OK. The program will apply your changes, and the Options window will close. You can then proceed to scanning your device by clicking the Scan button on the main window.
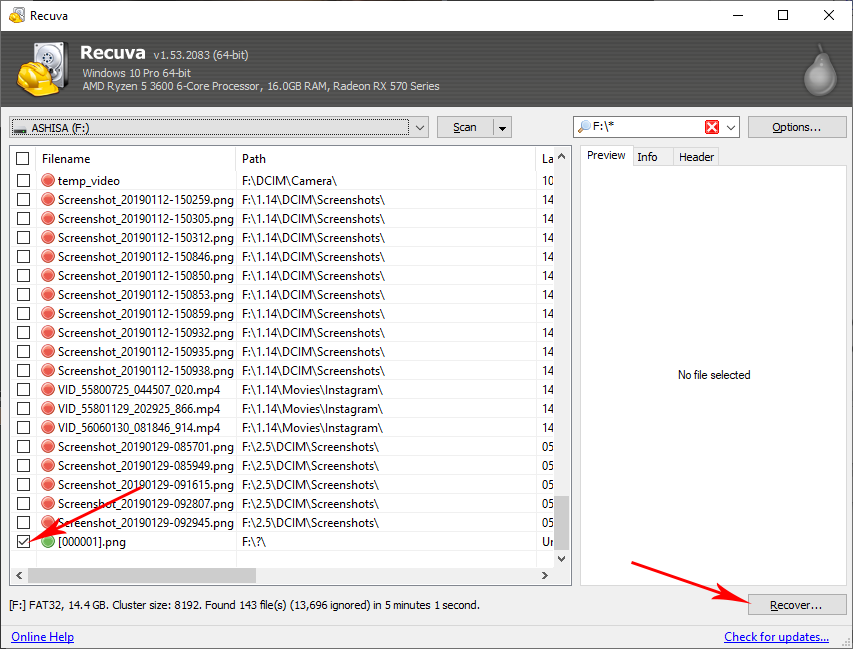
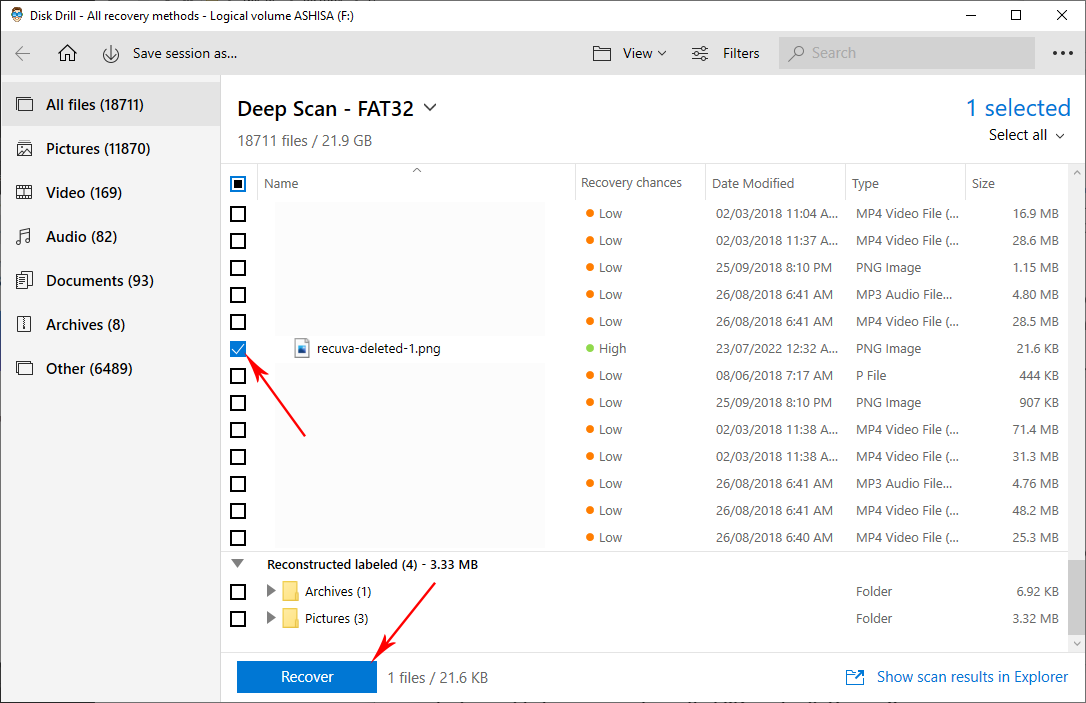
- Browse the results window to check for your missing files. Next, select the files you want to recover by ticking the boxes on the left side of the file name. Once your files are selected, click the Recover button.
- Select a location for your files for recovery. Make sure to place them in a different drive than the one you scanned to prevent overwriting data.
Once the Recuva memory card recovery is done, a window will pop up with a notification about the recovery status and information about the files you retrieved.
Important reminder: According to Recuva’s FAQ, Recuva may have a harder time to successfully recover a file from a FAT-formatted drive (which is usually the format of SD cards and microSD cards).
Is There Any Other Reliable Option for SD Card Recovery Besides Recuva?
![]() Sometimes, the Recuva SD card recovery may fail for any reason, even after many retries. Other times, the file type you want to recover isn’t supported by the app. However, we don’t recommend you give up on your files just yet. Instead, you can try another data recovery program like Disk Drill.
Sometimes, the Recuva SD card recovery may fail for any reason, even after many retries. Other times, the file type you want to recover isn’t supported by the app. However, we don’t recommend you give up on your files just yet. Instead, you can try another data recovery program like Disk Drill.
Disk Drill is a more versatile but still reliable data recovery software. It can scan almost all file types, unlike Recuva. Its user interface is modern, easy to follow, and filled with tips to guide you through the data recovery process.
The scan results are also much easier to read since the files are organized and filtered. Unfortunately, it doesn’t prioritize displaying extra files such as .lnk files that are unlikely to be what you’re looking for anyway.
Read more about Disk Drill in our comprehensive review here.
Below is a table on how Disk Drill fares against Recuva:
Data Recovery Features |
Recuva |
Disk Drill |
Recover SD card files |
✅ |
✅ |
Deep scan |
✅ |
✅ |
Preview files after scan |
✅ |
✅ |
Multiple scan modes |
❌ |
✅ |
Supports Windows |
✅ |
✅ |
Supports Mac OS |
❌ |
✅ |
More complex file types |
❌ |
✅ |
Constant updates |
✅ |
✅ |
How to Recover SD Card with Disk Drill?
To recover data from a memory card using Disk Drill, simply follow these steps below:
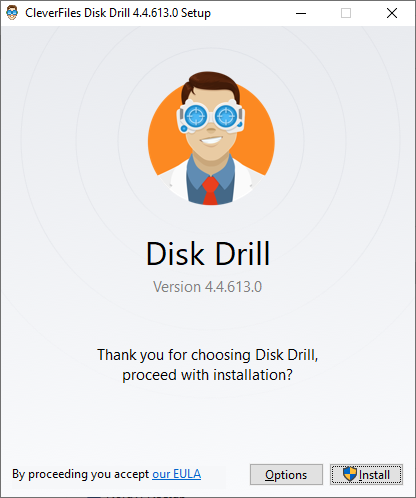
- First, download and install Disk Drill from its official website.
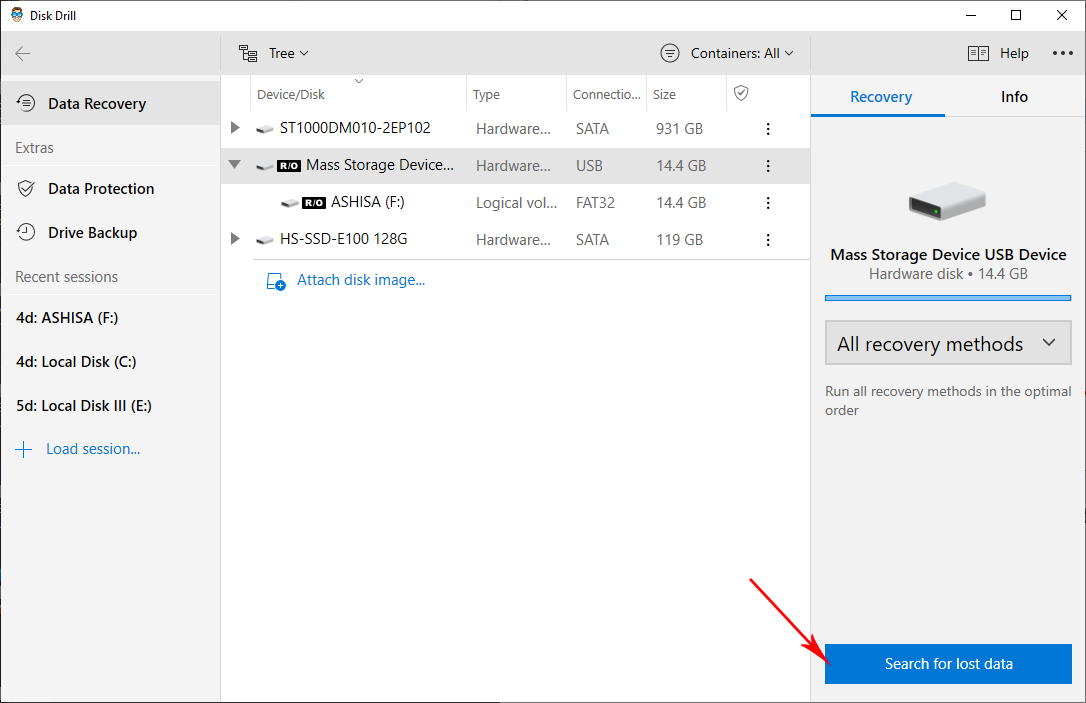
- Next, select your SD card and start the scan by clicking the Search for lost data button.
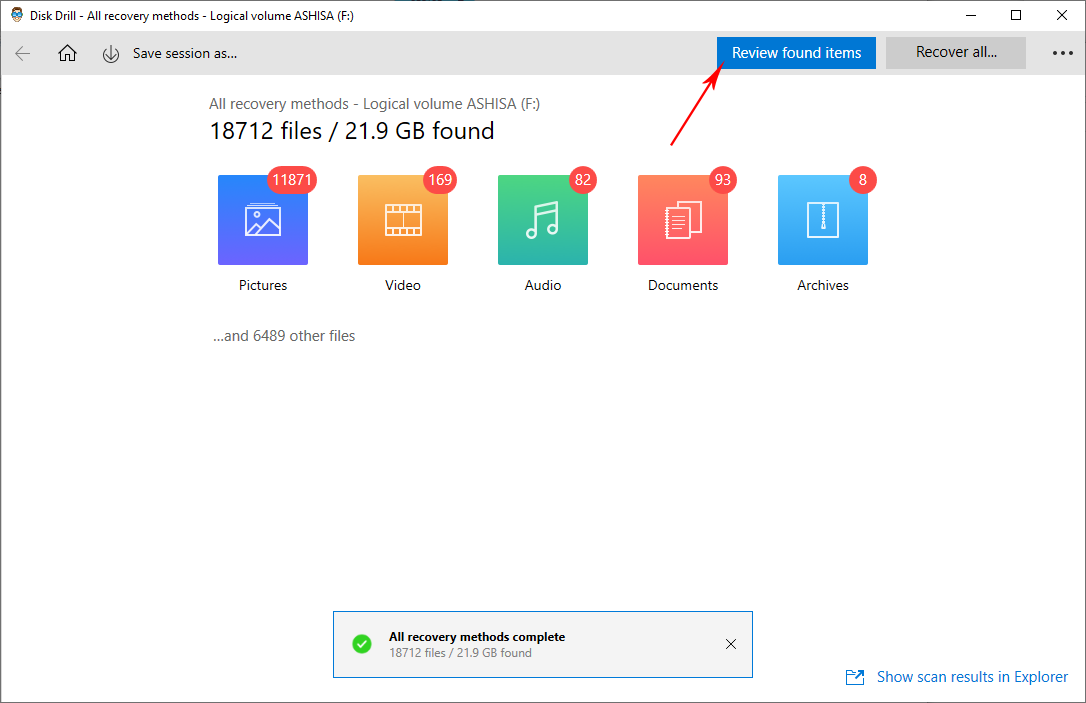
- Wait for the scan to finish. You can click the Review found items button to view the scan results. You can view your files during or after the scan.
- Next, select the files you want to retrieve by ticking the checkbox on the left side of the file name. After selecting the files, click Recover. Note that you will see an “eye” icon as you hover over the files. You can either click on the said icon or just double-click on a file to preview them and make sure you will recover the correct files.
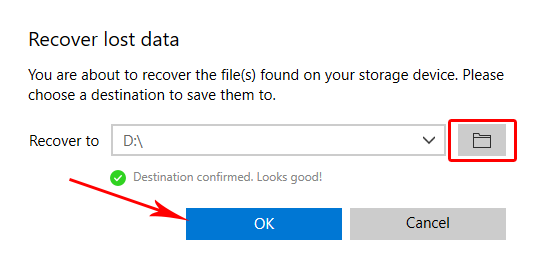
- Choose the location where you want your recovered files to be placed. We recommend that you choose a different drive or partition than the one you scanned to avoid overwriting. After selecting the location, click OK.
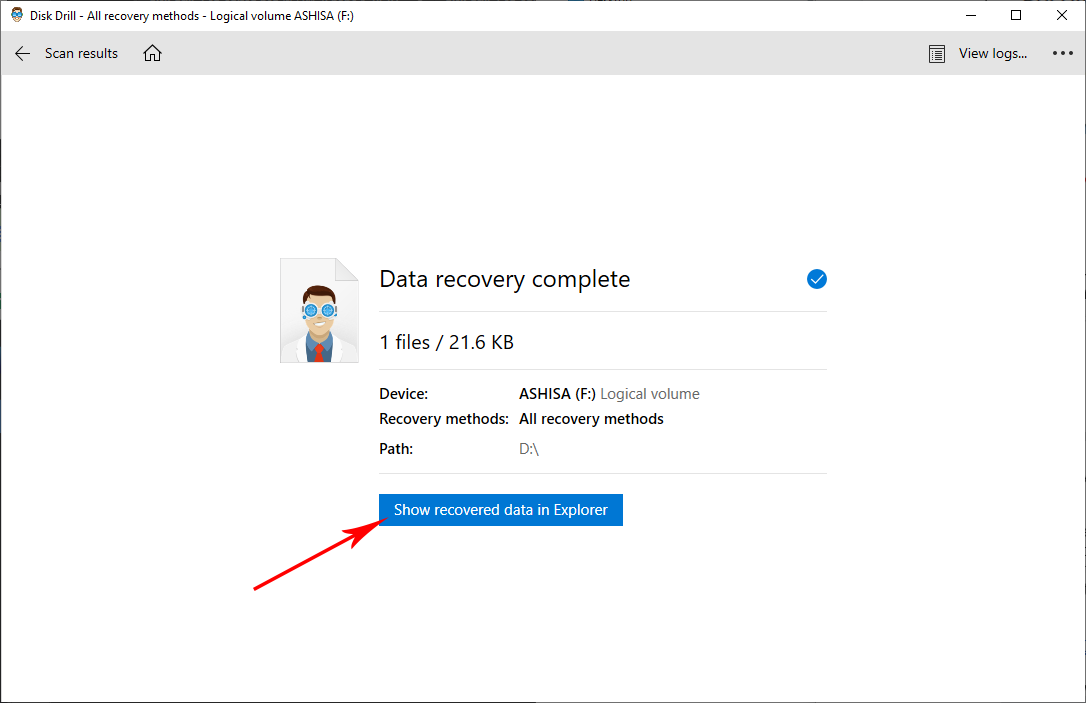
- After that, a window will pop up showing the successful retrieval. You can view your file by selecting the Show in Explorer button.
FAQ
How to perform an SD card recovery using Recuva?
You can easily recover deleted files from an SD card using the data recovery software Recuva:
- Download and install Recuva for Windows.
- Connect the SD card to your computer.
- Launch Recuva and start the scan.
- Select the files to be retrieved.
- Click the Recover button and choose the appropriate location where your files will be located.
Is it possible to recover a formatted SD card with Recuva?
According to CCleaner, Recuva is flexible enough to recover data from damaged or reformatted drives.
How to recover an Android sd card using Recuva?
To recover an Android SD card using Recuva, you need to connect your phone’s SD card to your computer and follow these steps in SD card recovery. Just note that you cannot retrieve files from your Android phone’s internal storage.
- Download and install Recuva for Windows.
- Launch Recuva and start the scan.
- Select your files for retrieval.
- Click the Recover button and choose the appropriate file location.
Does Recuva support microSD cards?
Recuva supports file recovery of different memory cards, including microSD cards.
Conclusion
Due to their portability, SD cards often contain very important data such as trip photos, videos, work documents, and other irreplaceable files. Luckily, data undeletion nowadays has become easier because of recovery software like Recuva and Disk Drill.
With Recuva and Disk Drill, you can retrieve files you accidentally delete in your SD card. It’s best to readily install a data recovery software you trust, so if you have issues with data loss in the future, you won’t risk overwriting your files due to downloading these apps.
This article was written by Princess Lescan, a Staff Writer at Handy Recovery Advisor. It was also verified for technical accuracy by Andrey Vasilyev, our editorial advisor.
Curious about our content creation process? Take a look at our Editor Guidelines.