Have you tried repairing your disk using Disk Utility in macOS to regain access to your files but failed to achieve the desired result? Don’t despair! When Disk Utility can’t repair your disk on your Mac, there are still some solutions that you can try to fix the problem. We’ll walk you through the steps you need to follow to resolve the issue and regain access to your precious data.
Why MacOS Can’t Repair the Disk?
There are several reasons why macOS might not be able to repair your disk. Here’s a quick overview of the most common culprits:
- 🔨 Physical damage: If your disk has suffered any physical harm, like a fall or a sudden voltage spike, then its ability to function properly might be compromised to such an extent that software-based repair techniques won’t be able to help.
- 🗂️ File system errors: A corrupted file system can cause Disk Utility to fail when attempting to repair your disk. This problem commonly occurs due to improper shutdowns, power outages, or file system management errors.
- ❌ Bad sectors: Over time, your disk may develop bad sectors that can’t be read or written to. If these bad sectors become too numerous, then Disk Utility might not be able to fix the problem without data loss.
- 🪳 Software bugs and incompatibility: Sometimes, the issue lies not with the disk itself, but with macOS or the Disk Utility application. Software bugs or file system incompatibility can prevent Disk Utility from successfully repairing your disk.
How to Retrieve Data from the Drive that MacOS Can’t Repair
If you find yourself in a situation where macOS can’t repair your disk, it’s important to focus on retrieving as much of your data from your hard drive on Mac as you possibly can.
Since any interaction with a faulty drive can bring you a step closer to the drive’s total failure, it’s a good idea to first create a byte-to-byte backup image of the entire drive and then retrieve your files from the image.
Fortunately, there are excellent data recovery tools for Mac like Disk Drill that can both back up your uncooperative drive and retrieve data from its backup image.
For more information about our data recovery tool of choice, we recommend you read our full Disk Drill review and our detailed safety analysis.
Here’s a step-by-step guide on how to create a byte-to-byte backup image using Disk Drill:
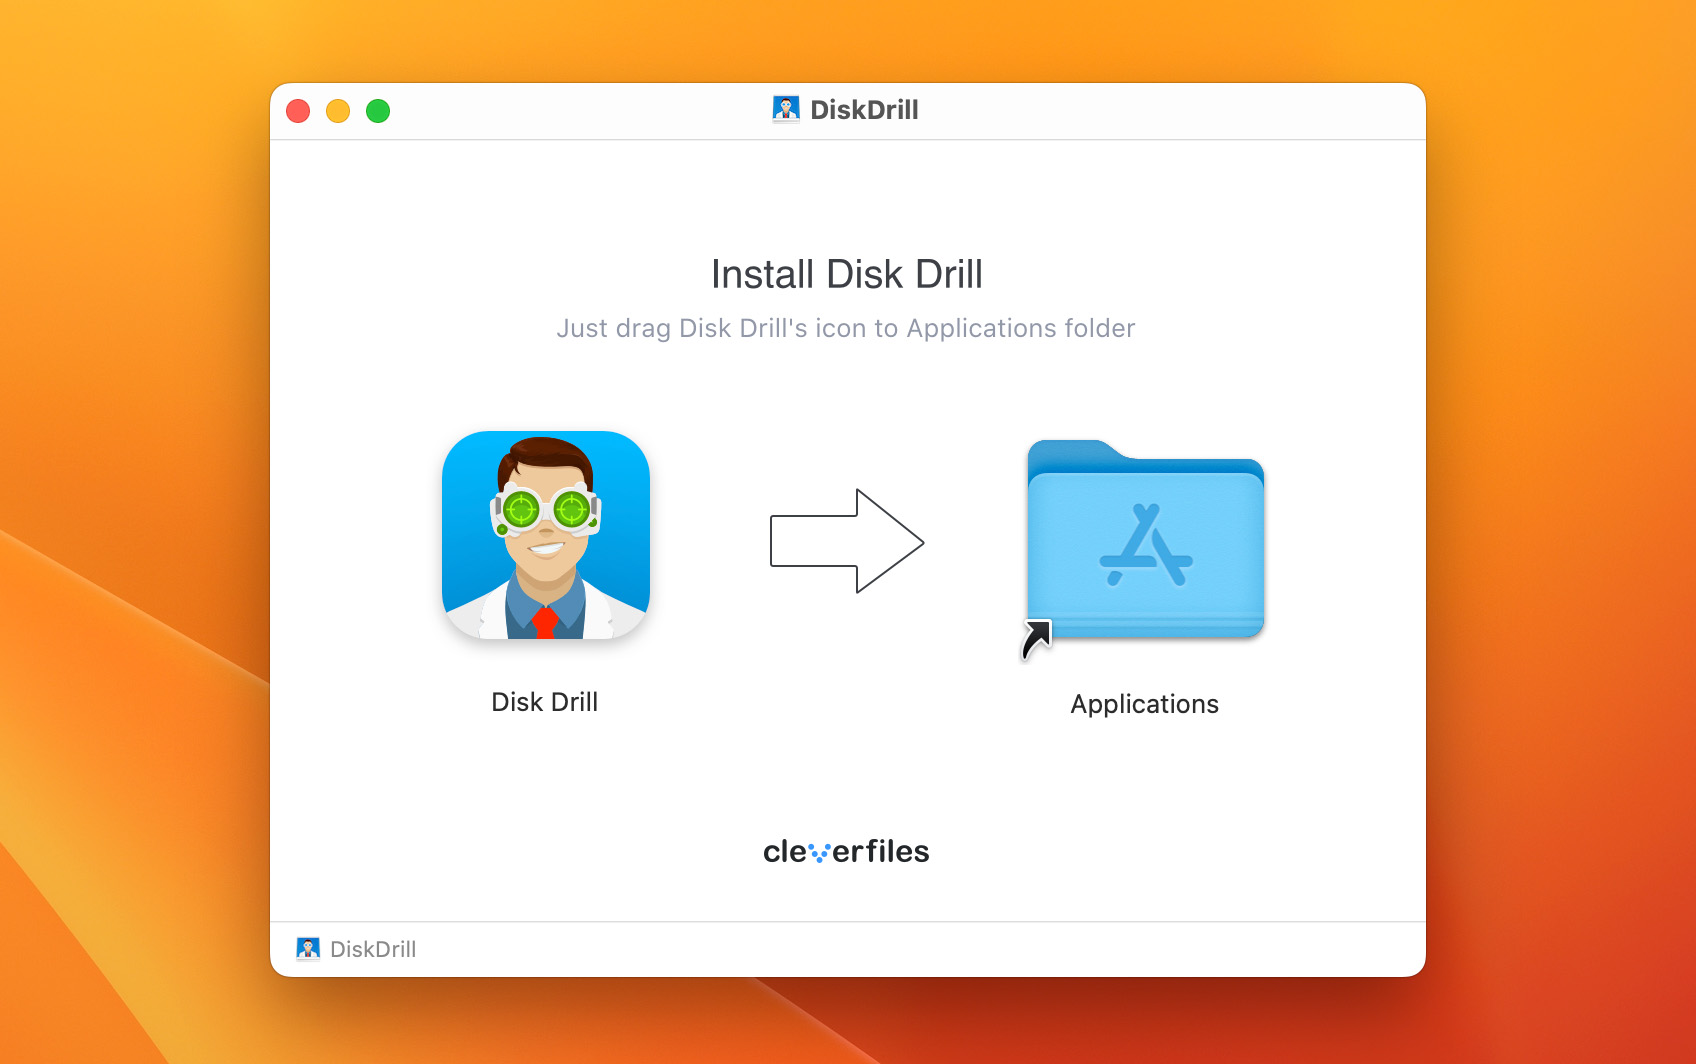
- Download and install Disk Drill. Head over to the Disk Drill website and download the software. Open the installer file and move Disk Drill to the Applications folder.
- Connect the damaged drive. If you’re recovering an external hard drive, like a Seagate Backup Plus, LaCie rugged Mini, Crucial X8, Toshiba Canvio, or WD My Passport, connect it to your Mac.
- Launch Disk Drill. Using Finder, navigate to the Applications folder and double-click the Disk Drill icon to launch the application.
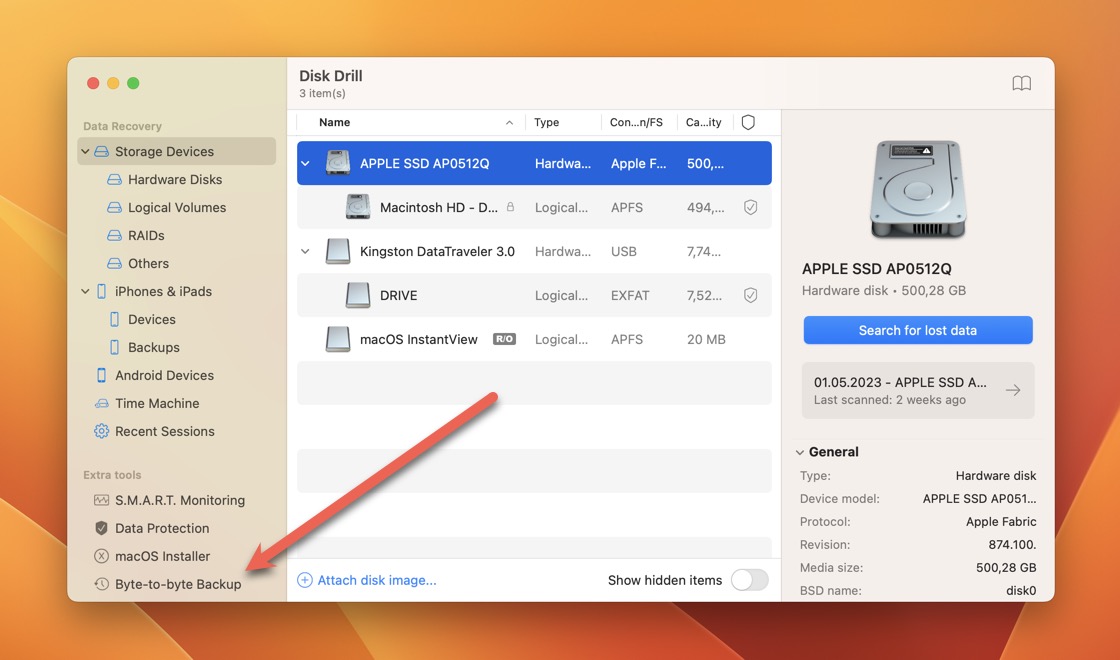
- Select the Byte-to-byte Backup tool. You can find this tool in the left pane. Click on it to select it.
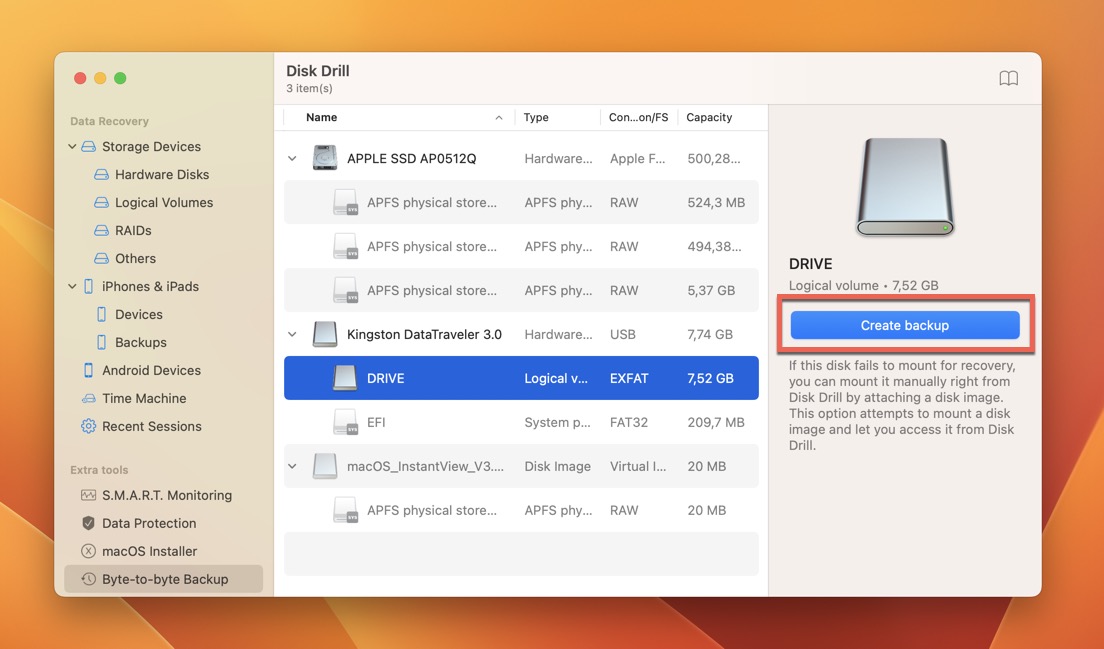
- Back up your damaged drive. Next, select the disk that cannot be repaired on Mac and click the “Create backup” button. Tell Disk Drill where you want to save the byte-to-byte backup image and click the “Save” button.
To recover important files from the byte-to-byte backup image using Disk Drill:
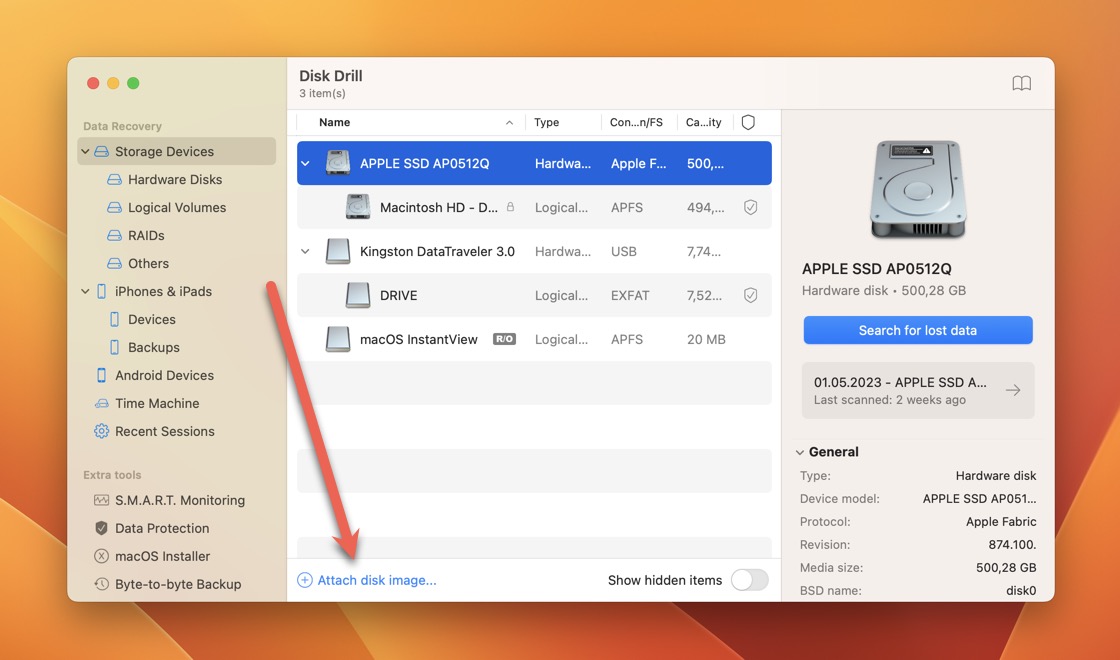
- Attach the newly created backup disk image. Once your byte-to-byte backup image is created, you can select the Storage Devices tab in the Data Recovery section. There, click the “Attach disk image…” button and mount the newly created backup disk image.
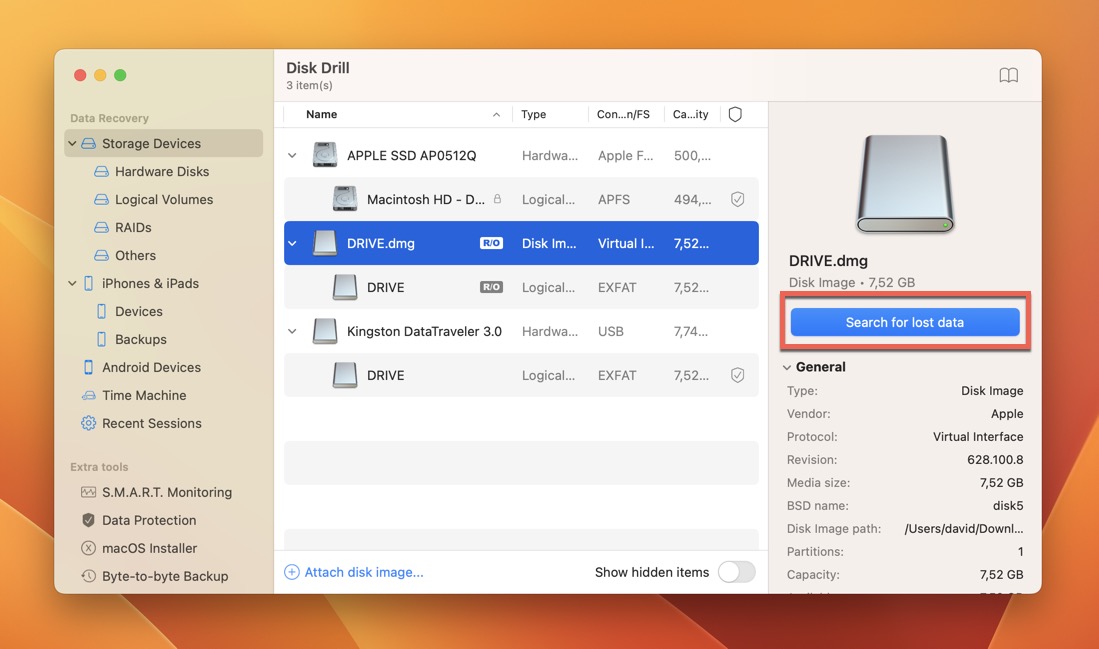
- Scan the backup disk image. The backup disk image will be listed among all available storage devices. Click on it to select it, and then use the “Search for lost data” button to initiate a scan.
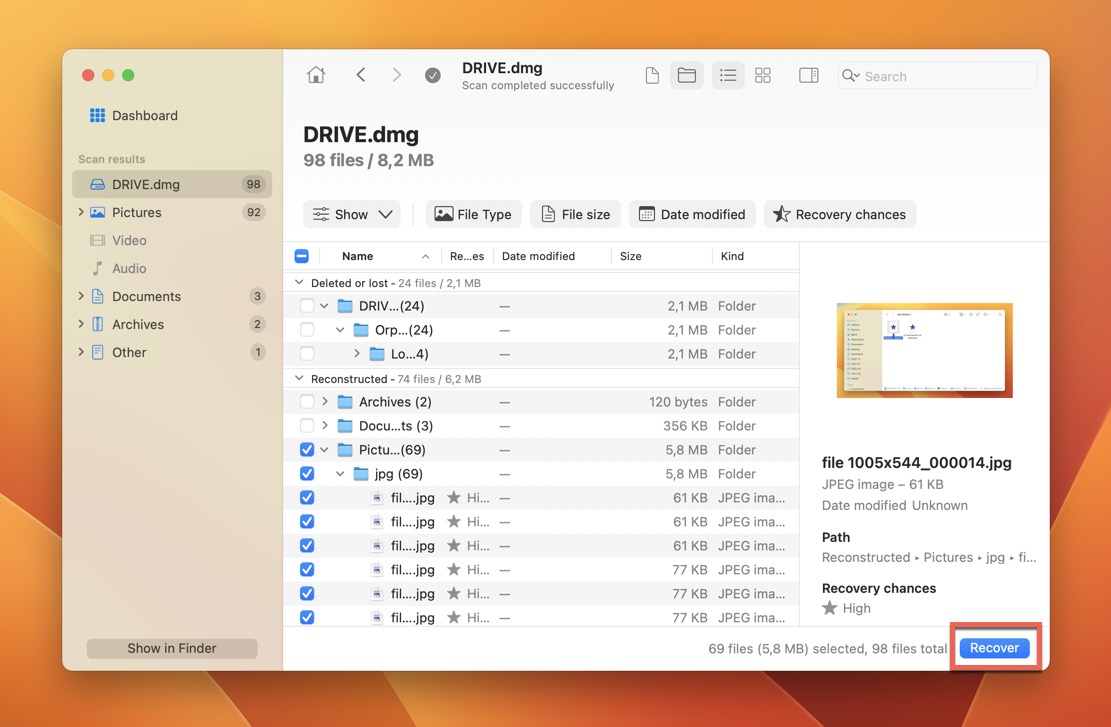
- Add important files to the recovery queue. Now you need to analyze the scan results and select all important files. You can use Disk Drill’s filters to display only recoverable files, specific file format, and so on.
- Recover selected files to a safe destination. With your files selected, you can click the “Recover” button and specify the desired recovery destination. Avoid recovering to the disk that cannot be repaired on your Mac to prevent overwriting.
- Check if your files have been recovered. Finally, we recommend you check if your files have been successfully recovered using Finder.
By following the steps outlined above, you’ll be well-equipped to tackle the problem and regain access to your precious data even when Disk Utility fails to repair your disk. Remember, the key to successful data recovery lies in acting quickly and using the right tools for the job.
6 Best Methods to Fix “MacOS Can’t Repair the Disk” Error
Now that we’ve covered data retrieval, it’s time to explore some potential solutions to fix the pesky “macOS can’t repair the disk” error. In this section, we’ll dive into six proven methods to tackle this issue from different angles.
Method 1: Check the Health of Your Drive to Identify the Problem

Modern hard disks, including small internal SSDs (the recovery of SSD drives has its own rules) and large external hard drives, evaluate their own status using a technology called S.M.A.R.T. (Self-Monitoring, Analysis, and Reporting Technology).
If you’ve encountered the disk utility can’t repair disk error, then it’s an excellent idea to check your drive’s S.M.A.R.T. data so that you know what kind of a problem you’re dealing with.
Basic S.M.A.R.T. status information can be displayed by selecting your drive in Disk Utility and clicking the Info button in the toolbar, but a third-party tool like Disk Drill, which comes with a dedicated S.M.A.R.T. monitoring feature, can provide you with much more comprehensive information, so we highly recommend you check your hard drive health with it.
Method 2: Examine Your Drive on Another Mac
If the S.M.A.R.T. diagnostics indicate that your drive is in good condition and there seem to be no problems, it’s worth connecting the drive to another Mac to rule out potential connectivity issues.
To check your drive on another Mac, simply follow these steps:
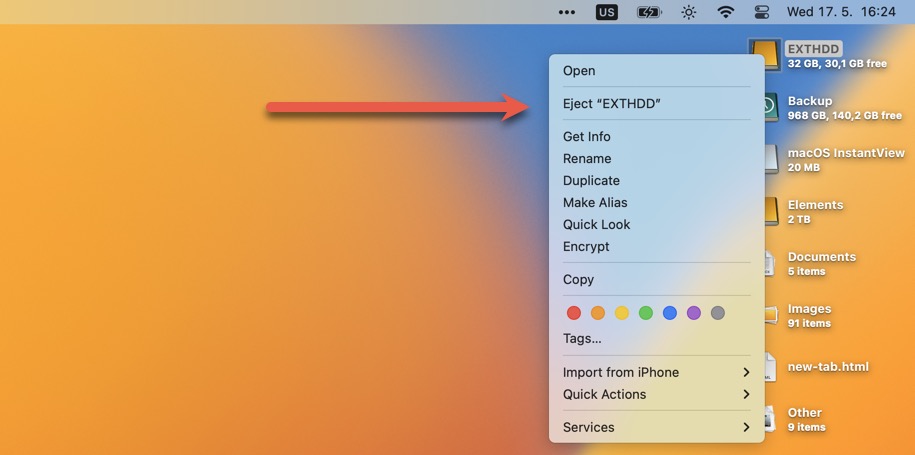
- Eject the drive from your Mac: Before disconnecting the drive from your Mac, make sure you properly eject it to prevent further damage or data loss. To do this, locate the drive icon on your desktop, right-click it, and choose “Eject.” If you need to disconnect an internal drive, then it’s best to shut down your Mac.
- Connect the drive to another Mac: Connect the drive to another Mac using an appropriate cable (when connecting an external drive) or adapter (when connecting an internal drive).
- Access the drive: Once the drive is connected to the other Mac, check if you can access it and find its contents without any issues using Finder. If you can, it’s likely that the problem lies within your original Mac’s software or hardware.
Method 3: Restart Your Mac to Fix Disk Errors
Sometimes, the simplest solutions are the most effective, and restarting your Mac is certainly one of them. This quick fix works because it clears out temporary files and forces all apps, as well as the operating system and hardware drivers, to close and start again.
To restart your Mac, you need to:
- Open the Apple menu.
- Click the “Restart” option.
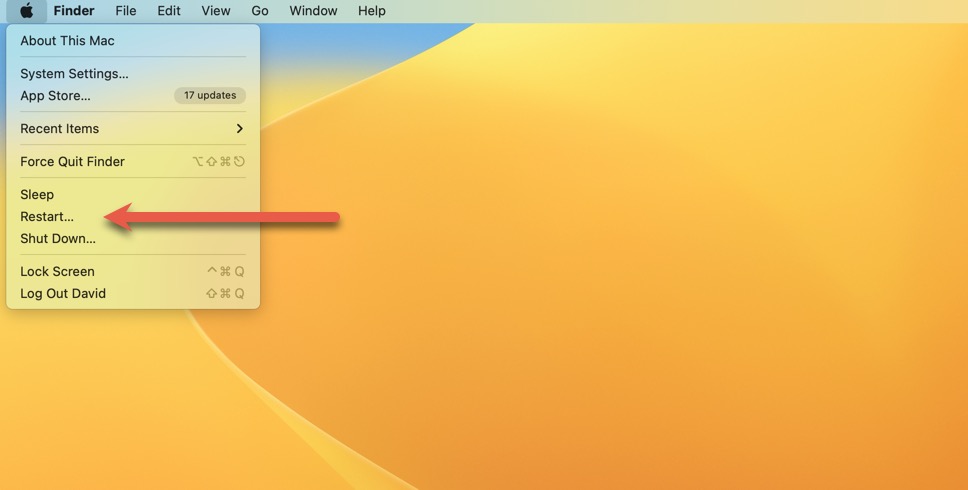
- Wait for your Mac to restart.
Method 4: Boot into Safe Mode to Diagnose Disk Issues
Safe Mode is a special startup environment that prevents your Mac from loading some applications to minimize the likelihood of software conflicts when using a tool like First Aid to repair your drive. What’s more, Safe Mode automatically performs a check of your startup disk, which is just what you need when dealing with disk-related issues.
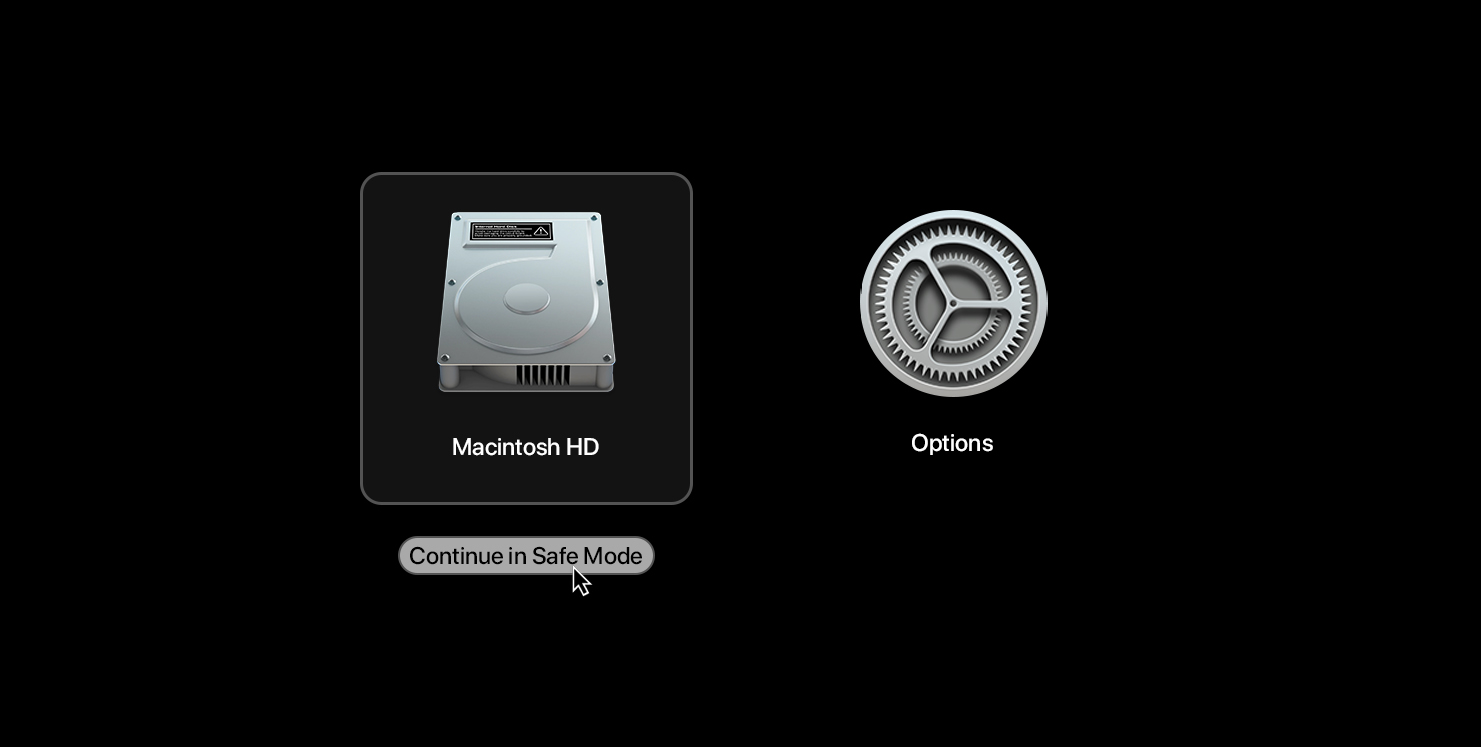
To boot an Apple Silicon Mac into Safe Mode, you need to:
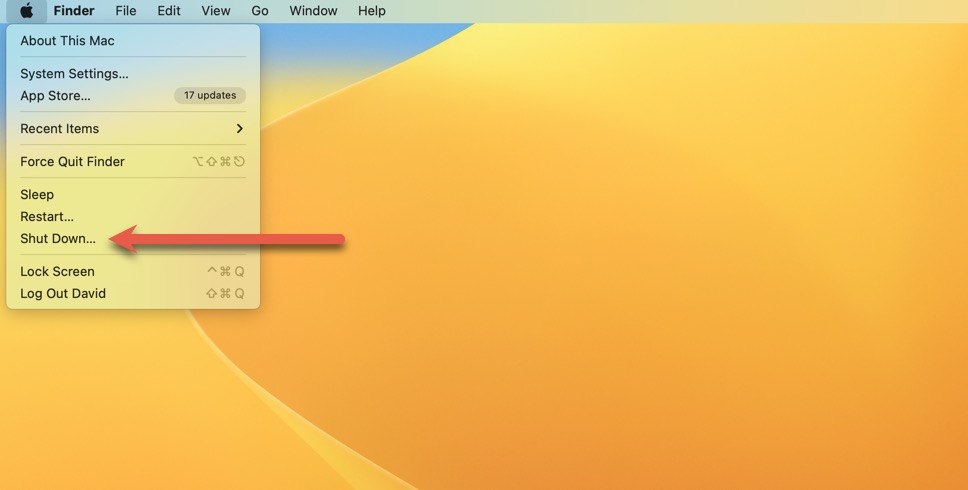
- Completely shut down your Mac.
- Press the power button and keep holding it until you see the “Loading startup options” message.
- Select your system volume.
- Hold down the Shit key and click “Continue in Safe Mode”.
- Launch Disk Utility and use the First Aid feature to fix disk errors just like you would normally.
If you have an Intel-based Mac, follow these instructions instead:
- Completely shut down your Mac.
- Press the power button and then hold the Shift key until the login window appears.
- Log in to your account. It’s possible that you will be asked to enter your login details twice. That’s completely normal.
- Launch Disk Utility and use the First Aid feature to fix disk errors just like you would normally.
Method 5: Repair Disk Errors With FSCK
FSCK (File System Consistency Check) is a UNIX-based tool that checks storage disks for errors and attempts to repair any issues. The usefulness of the tool is debatable in the day and age of journaling file systems, but it doesn’t hurt to give it a try regardless since it doesn’t take much effort to use it even though it lacks a graphical user interface.
Follow these steps to repair disk errors using FSCK:
- Launch the Terminal application.
- Type “diskutil list” and press Return to display a list of all storage devices connected to your Mac.
- Identify the device you want to check. Make sure to remember the relevant identifier (disk0, disk1, and so on).

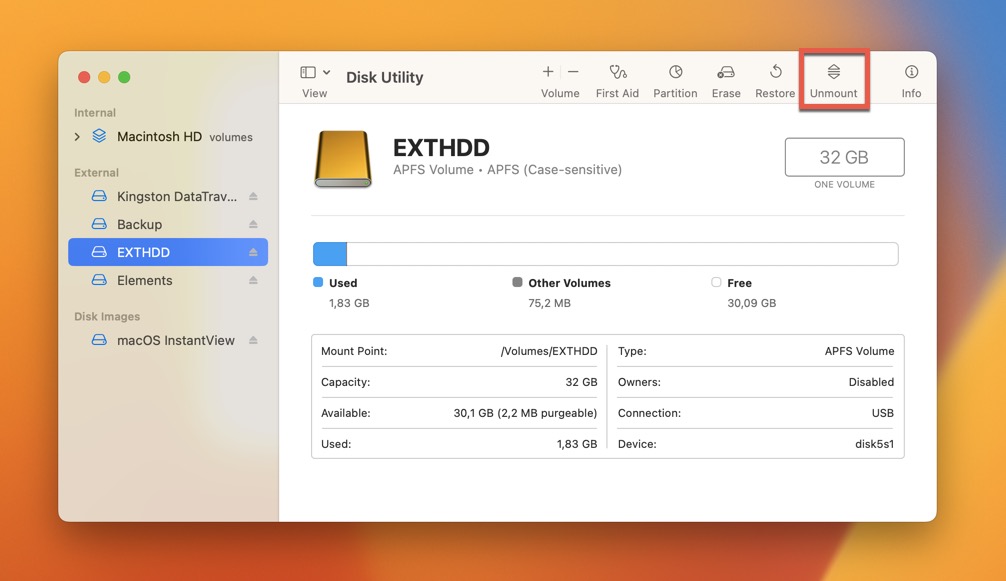
- Launch Disk Utility, select the storage device, and click the “Unmount” button to unmount it so that the FSCK tool can check it.
- Enter the following command in Terminal: sudo fsck -fy /dev/disk1 (replace “disk1” with the identifier assigned to your storage device)
Method 6: Reformat the Disk
If Disk Utility can’t repair your disk on Mac and you’ve unsuccessfully tried all previously recommended solutions, then it might be time to reformat the disk.
Important: Before you proceed with this method, ensure that you’ve backed up all important data using the best backup software for Mac, as reformatting the disk will erase everything stored on it.
To reformat a disk that can’t be repaired on Mac, you need to:
- Launch Disk Utility from the Utilities section of the Applications folder.
- Select the impossible-to-repair disk in the left pane.
- Click the “Erase” option in the top toolbar.
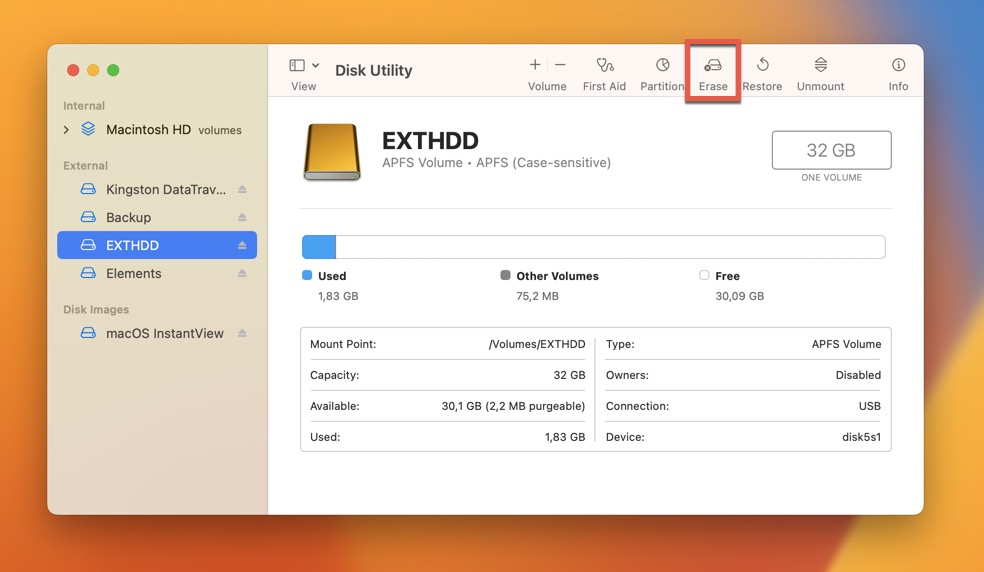
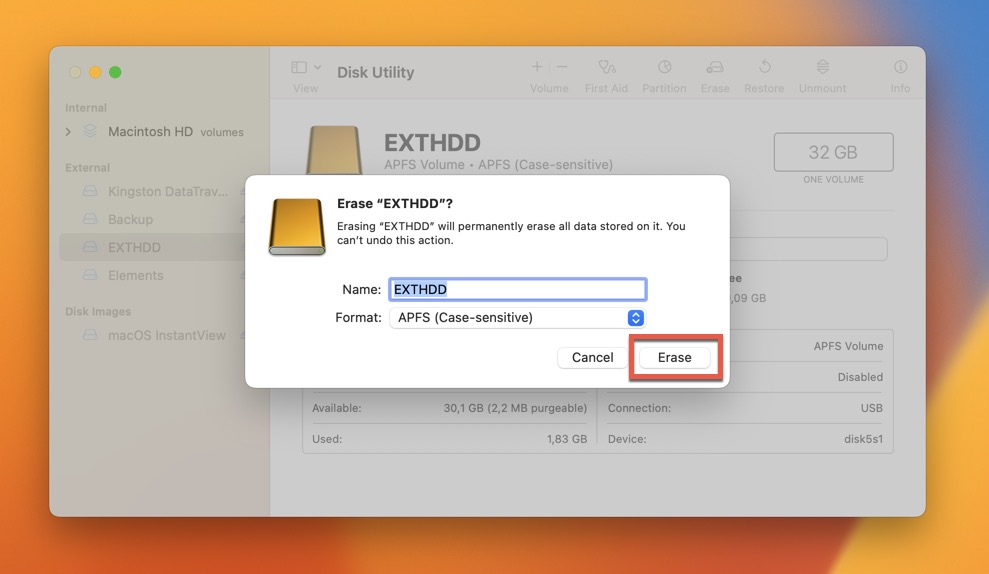
- Name the disk and specify the desired file system.
- Click the “Erase” button to begin formatting.
FAQ
How to deal with the “This disk has S.M.A.R.T. errors. This disk has a hardware problem that cannot be repaired” error?
When encountering S.M.A.R.T. errors indicating a hardware problem, the best course of action is to back up your data immediately. You can use data recovery tools like Disk Drill to create a byte-to-byte backup image of the entire drive and retrieve your files from the image. Once you’ve secured your data, consider replacing the disk.
What to do if macOS can't repair the disk but you can still open or copy files?
If macOS can’t repair the disk, but you can still access files, immediately back up your important data to another storage device. This helps to prevent data loss in case the disk fails completely. You can then try the various methods outlined in the article to fix the disk error, such as running the First Aid tool in Safe Mode.
How do I fix my Mac can't repair the disk error?
To fix the “Mac can’t repair the disk” error, try the following methods:
- Check the health of your drive using S.M.A.R.T. diagnostics.
- Examine your drive on another Mac.
- Restart your Mac.
- Boot into Safe Mode and diagnose disk issues.
- Reformat the disk (make sure to back up your data first).
How do I force a disk repair?
You can force a disk repair of any non-system storage device connected to your Mac using the FSCK console command:
- Launch Terminal.
- Enter the following command to see a list of connected storage devices: diskutil list.
- Locate the disk you want to repair and remember its device identifier.
- Unmount the disk using Disk Utility.
- Enter the following command: sudo fsck -fy /dev/disk1 (replace /dev/disk1 with the correct device identifier).
Conclusion
The “Mac can’t repair the disk” error can be frustrating, but there are various methods to address the issue. We strongly recommend you start by creating a byte-to-byte backup of the affected storage device before you attempt any repairs. With some luck, you should be able to effectively resolve the disk error by following the different approaches described in this article.
This article was written by David Morelo, a Staff Writer at Handy Recovery Advisor. It was also verified for technical accuracy by Andrey Vasilyev, our editorial advisor.
Curious about our content creation process? Take a look at our Editor Guidelines.