Changing your partition table doesn’t have to result in data loss. In the case of MBR (Master Boot Record) and GPT (GUID Partition Table), the latter offers several security and performance improvements over the former. But how do you convert an MBR disk to GPT without losing data? Well, using third-party data recovery and backup software, in combination with in-built Windows utilities.
What Is the Difference Between MBR and GPT?
MBR and GPT differ in numerous ways, and being aware of them will help you determine if you actually need to convert your MBR disk to GPT. Being the newer partition table, GPT pulls ahead in most comparison points.
Before you convert a disk from MBR to GPT, it’s important to have a basic understanding of the BIOS and UEFI:
- BIOS (Basic Input Output System): The BIOS is basically an intermediary between the operating system and the hardware. During boot, it tests the hardware of your PC, finds the OS along with the necessary drives/software, and configures the CMOS. The legacy BIOS has been around since 1981.
- UEFI (Unified Extensible Firmware Interface): UEFI is a successor to outdated BIOS. It does everything that the BIOS does, and more. It is faster, has more features, and supports secure boot on Windows. Additionally, the UEFI also supports larger storage drives because it uses the GPT partition table. While non-boot GPT disks can work with legacy BIOS, you need UEFI to take full advantage of the GPT partitioning scheme.
A comprehensive list of differences between MBR and GPT is given below:
Comparison Point |
Master Boot Record (MBR) |
GUID Partition Table(GPT) |
Maximum supported drive size |
2 TB |
18 exabytes |
Operating system support |
Works with older versions of Windows like Windows 7, XP, 98, 95, and more. |
Works with macOS and later versions of Windows, including Windows 10 and Windows 11. |
System architecture |
Works on 32-bit and 64-bit systems. |
Only works on 64-bit systems. |
Boot speed |
Slow |
Fast |
Data recovery |
MBR data recovery is more difficult. |
It’s comparatively easier to recover data from a GPT disk. |
Number of partitions |
Up to 4 partitions. |
Unlimited partitions |
Partition size |
Up to 2 TB. |
Up to 18 exabytes |
BIOS requirements |
Only works with legacy BIOS. |
Works with legacy and UEFI BIOS. To take advantage of GPT’s features, you need to use a UEFI BIOS. |
The differences above point out that GPT is a better partition table on almost all fronts. The only reason you may still want to stick to MBR is if you use a 32-bit system or an old motherboard with a legacy BIOS.
How to Convert MBR to GPT Without Losing Data
Windows doesn’t offer a non-destructive way to convert non-system disks from MBR to GPT. In this scenario, third-party backup and data recovery tools are a godsend. There are plenty of such tools available on the web, but you need to select one that can also create a disk image (or backup) of your drive and recover data from it.
That’s why I decided to go with Disk Drill. It makes the disk image creation and recovery process extremely simple. It supports all major file systems and storage drive types under the sun, saving you the headache of having to check for compatibility issues. You can create a disk image, attach it, and recover data from it, all within Disk Drill.
Here is an overview of the entire process:
- Create a disk image of the drive you want to convert to GPT.
- Convert the disk from MBR to GPT using Command Prompt or Disk Management.
- Recover your data from the disk image you created.
Here’s how you can change an MBR disk to GPT without losing data, thanks to Disk Drill:
Step 1. Create a Data Backup Using Disk Drill and Byte-to-Byte Copy Feature
- Download Disk Drill and install it.
- Make sure the drive you want to convert from MBR to GPT, is connected to your PC.
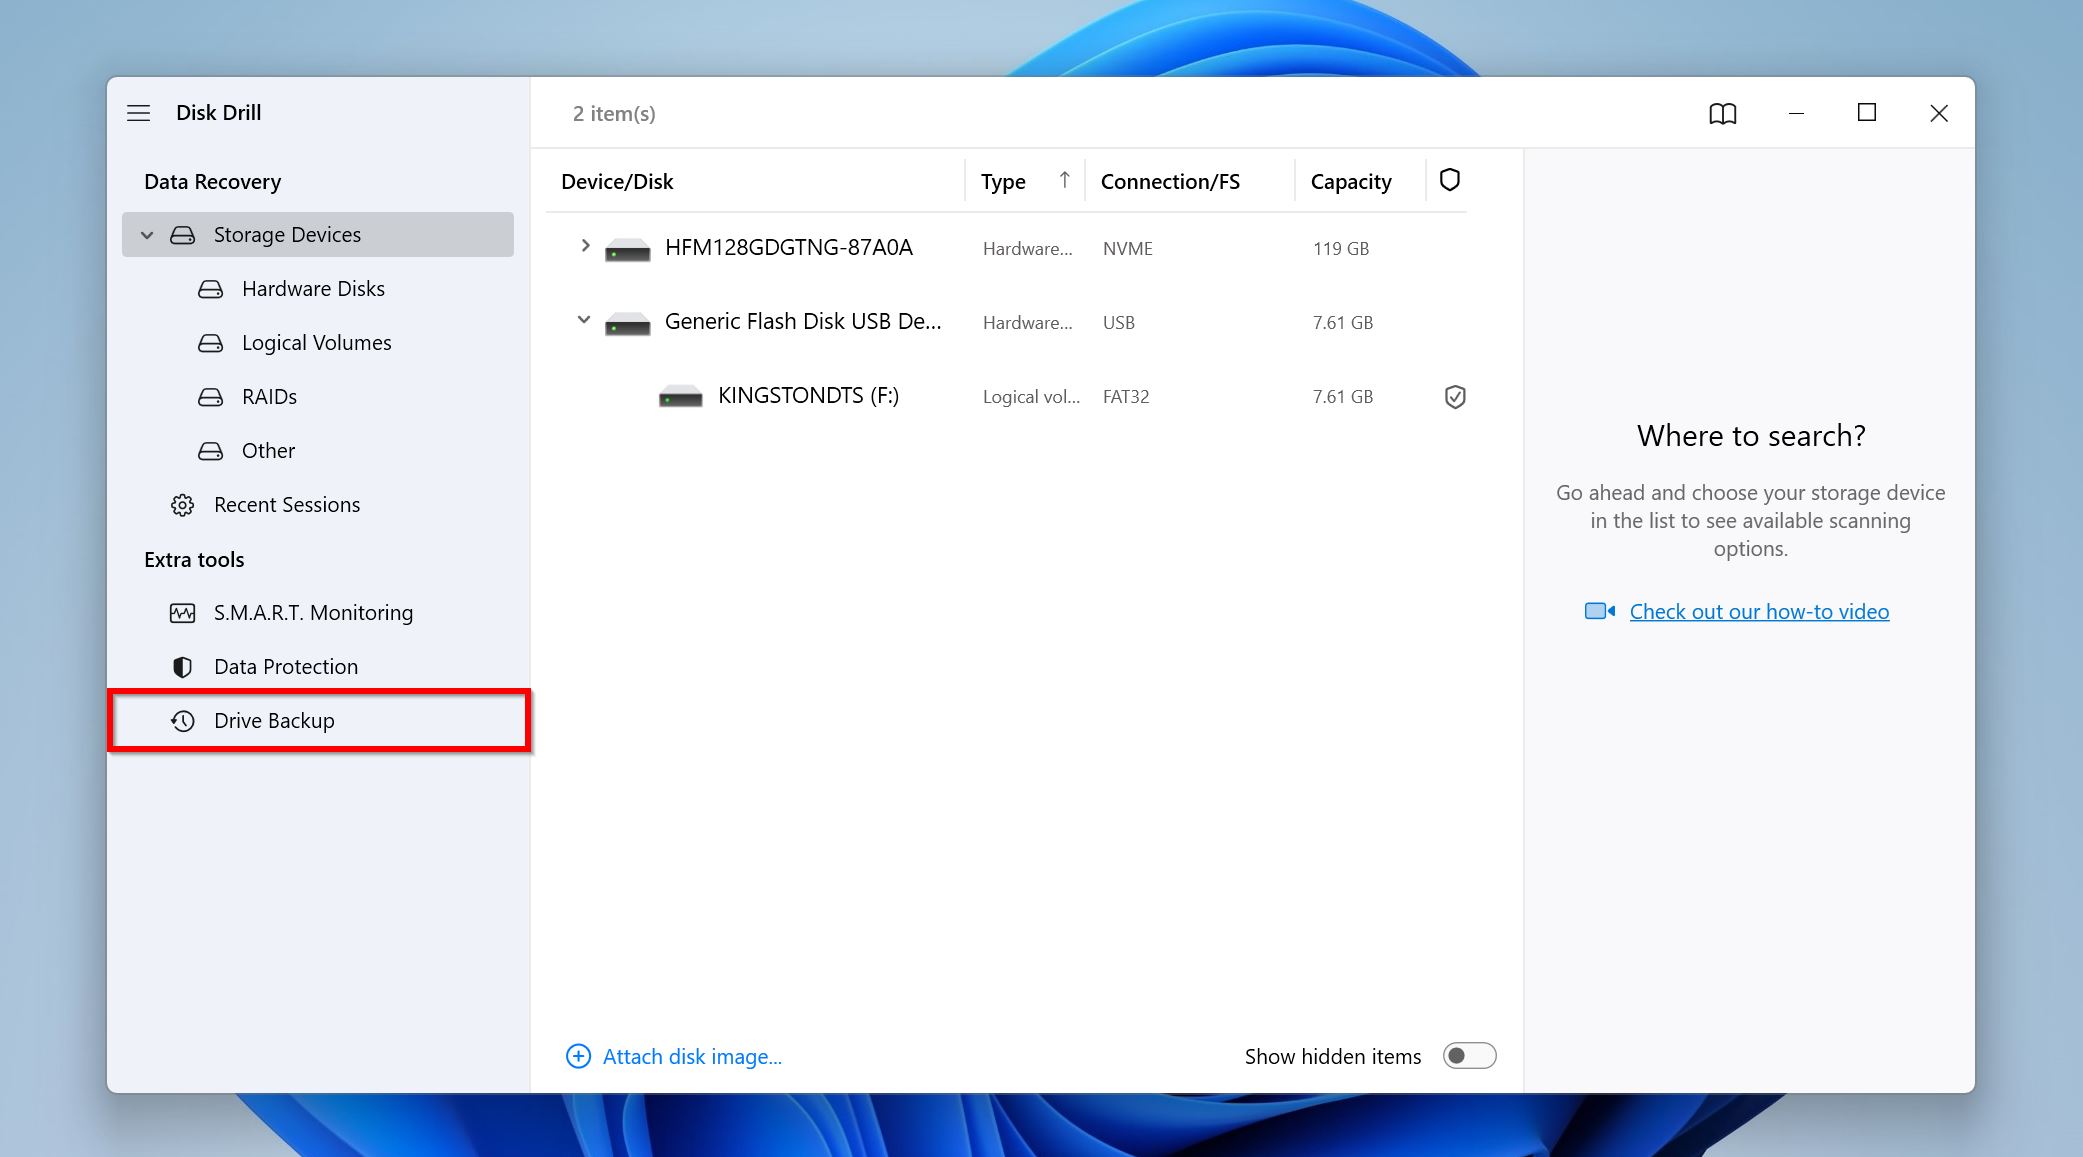
- Open Disk Drill, and click on the Drive Backup option under Extra tools in the left navigation bar.
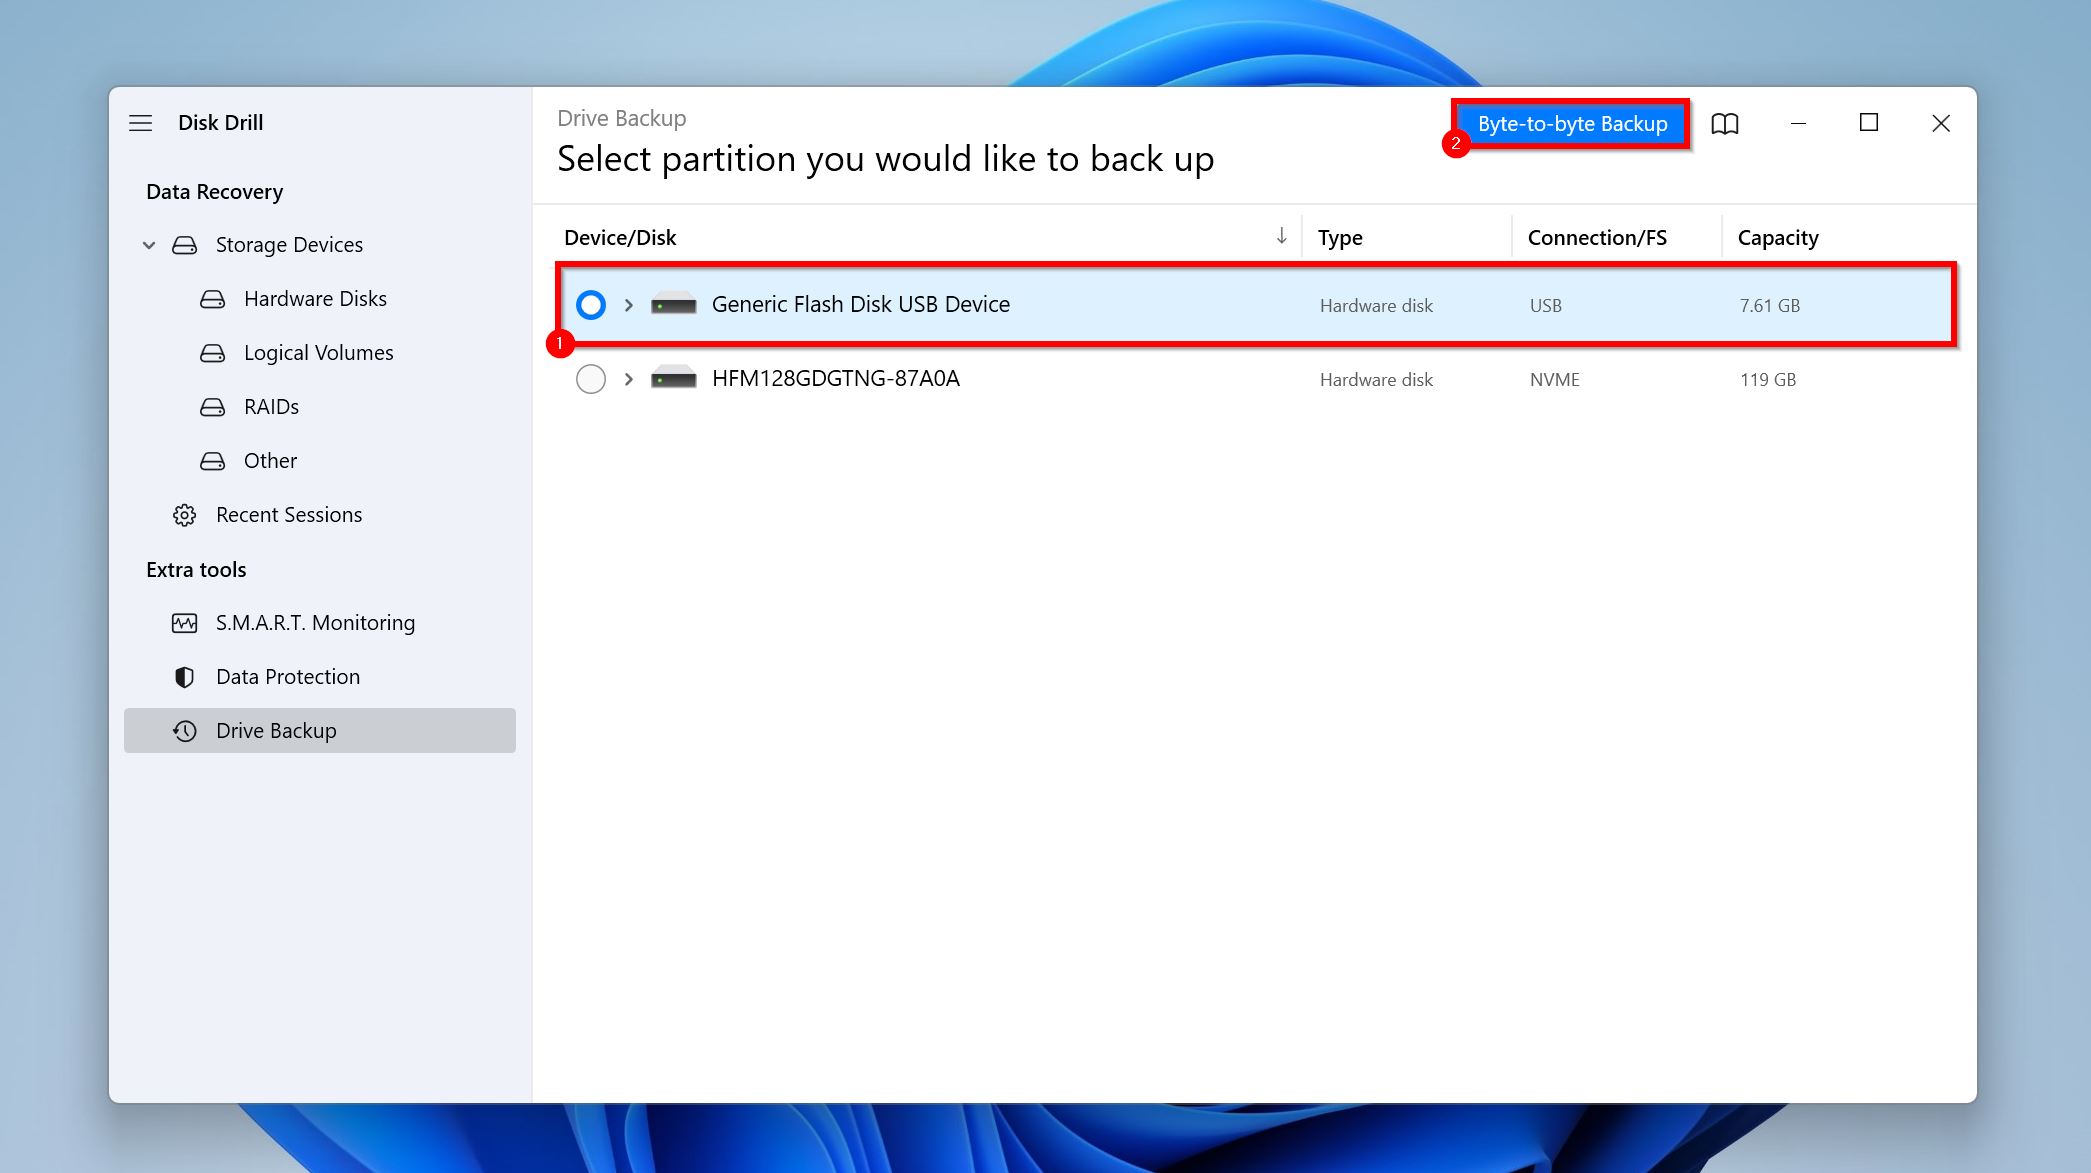
- Select the drive you wish to convert to GPT, and then click the Byte-to-byte backup button.
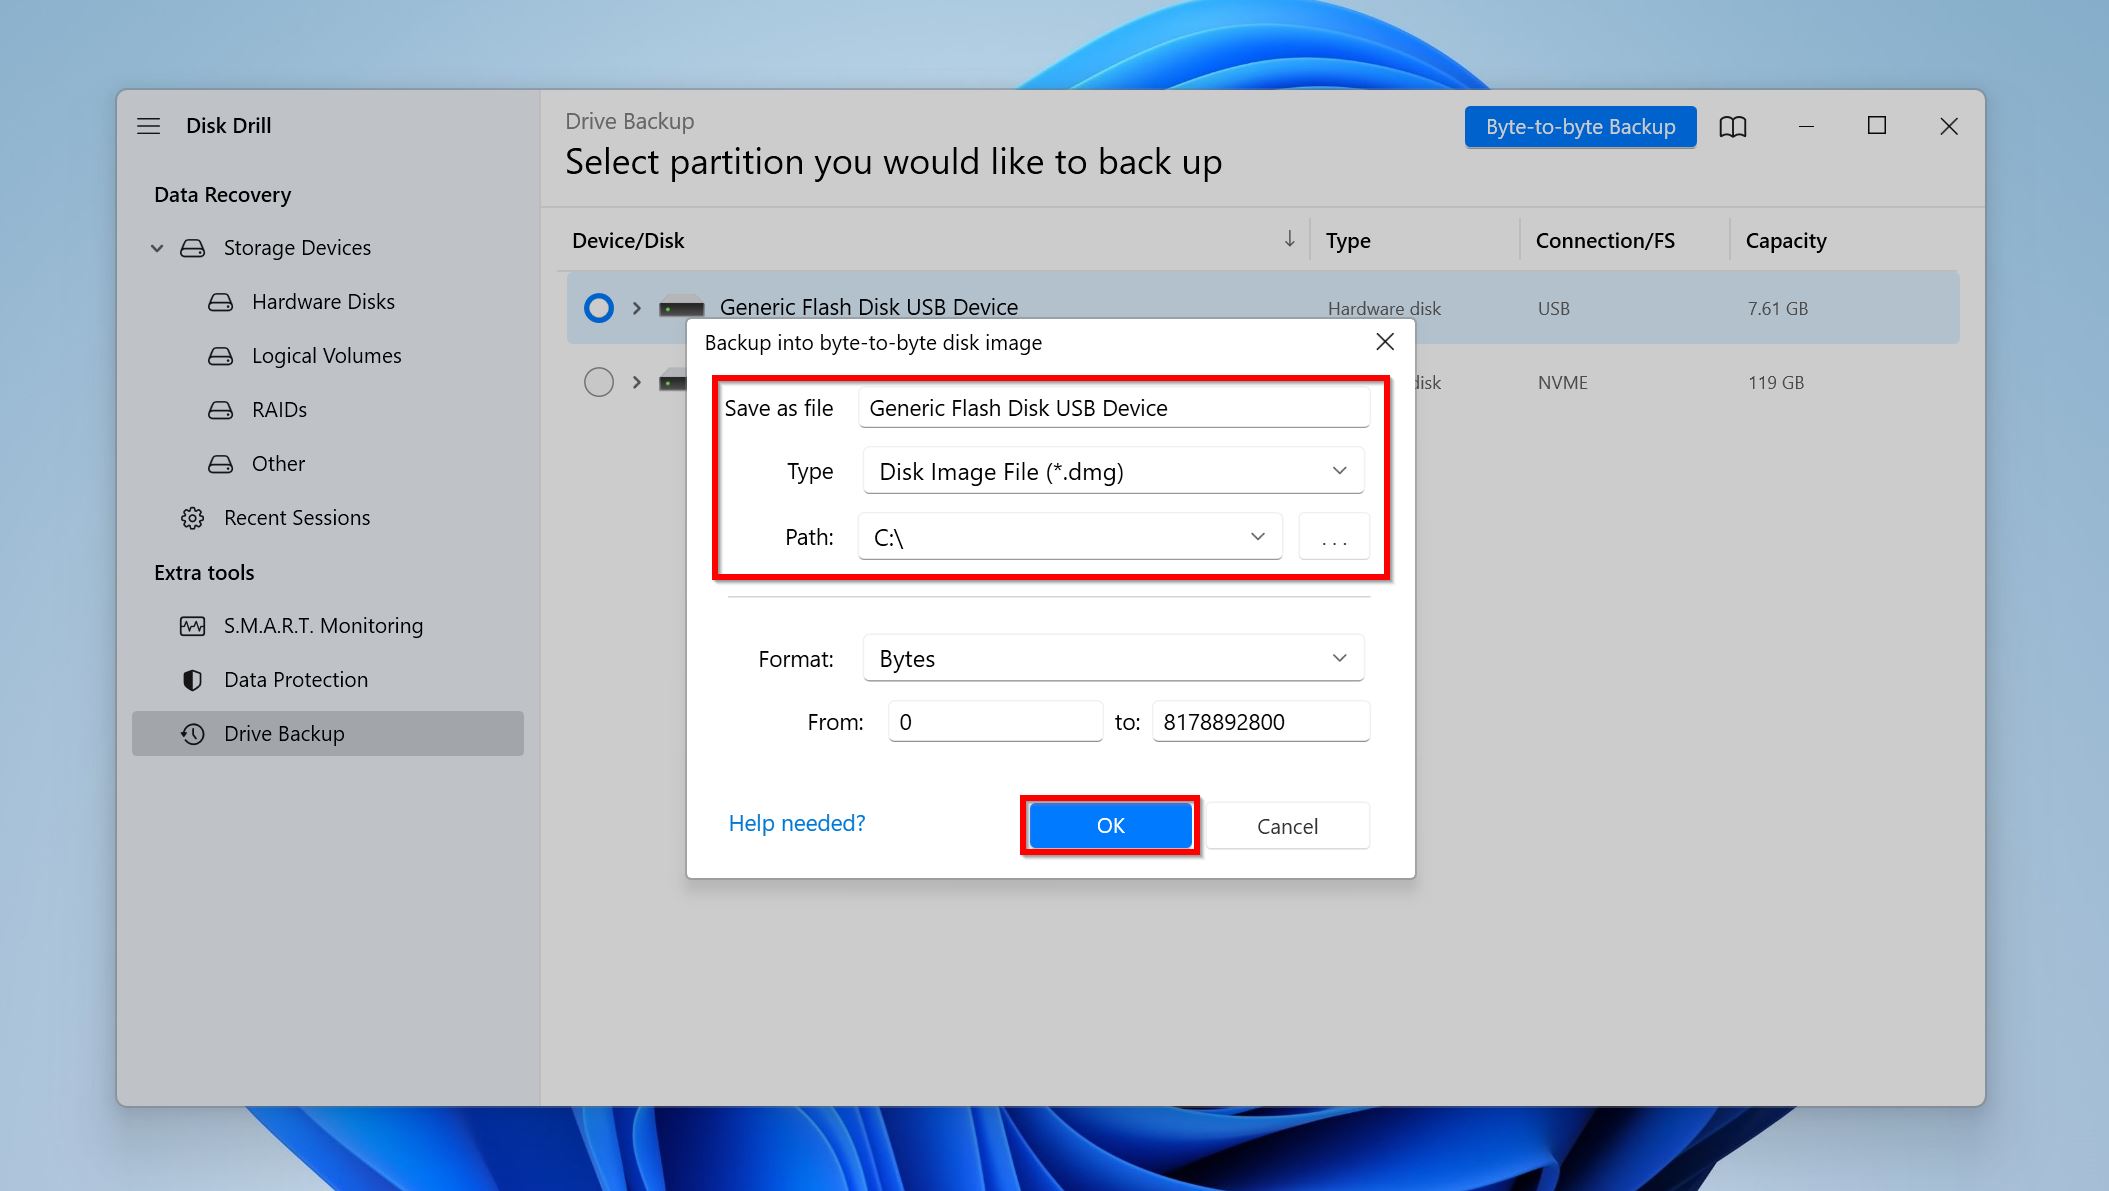
- Choose a location to save the disk image. Remember, the destination must have more free space than the storage size of the disk you’re converting. Click OK.
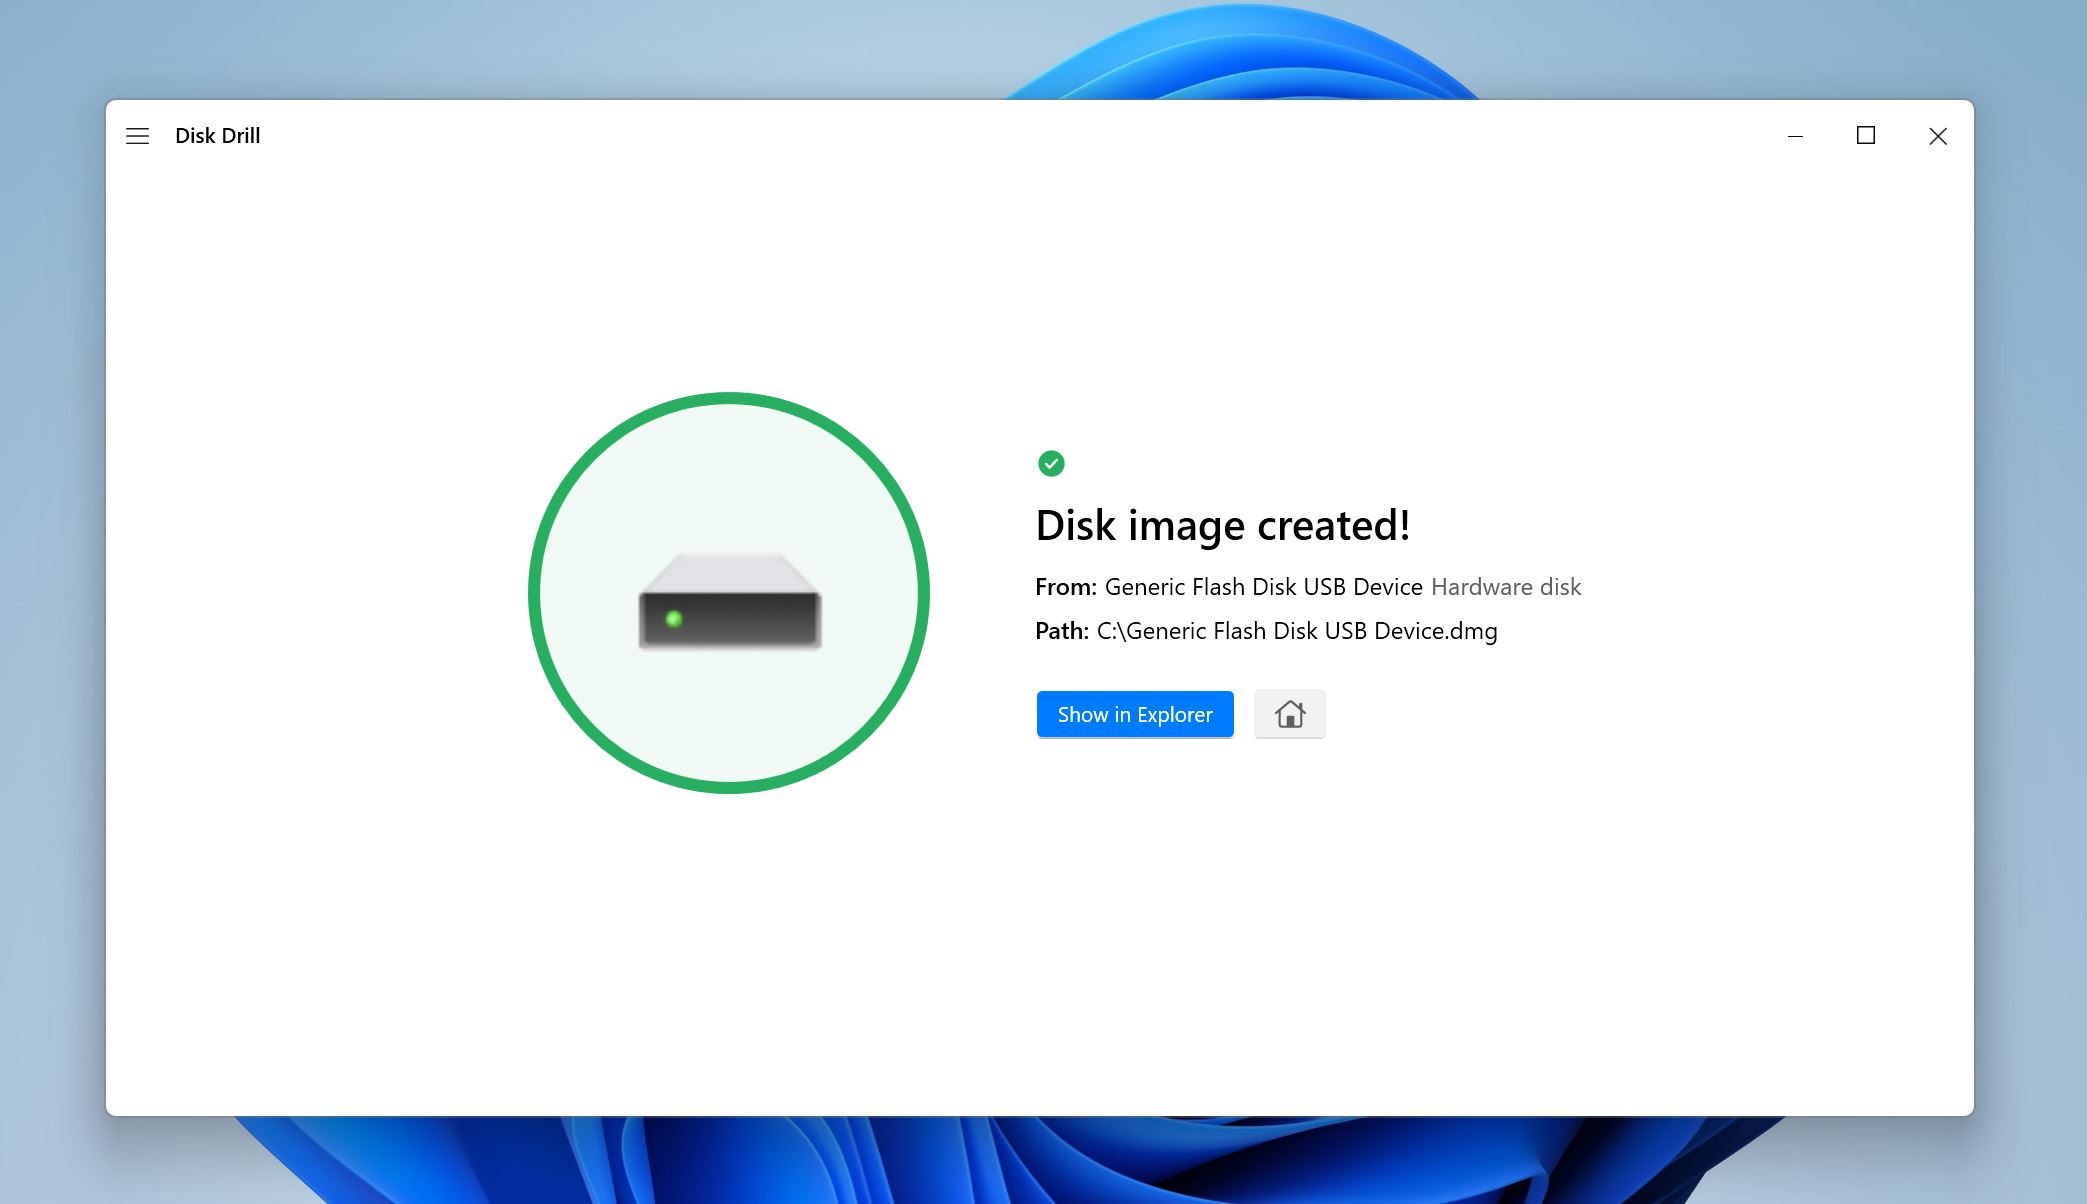
- Disk Drill will create the disk image. Depending on the size of your drive, it may take some time.
Step 2. Convert the MBR Disk to GPT Using CMD (diskpart) or Disk Management
There are two ways to convert the MBR disk to GPT in Windows. You could use the diskpart utility in Command Prompt, or use Windows Disk Management.
Using Command Prompt (Diskpart)
- Type “cmd” in Windows Search (Windows Key + S). Right-click on Command Prompt > Run as administrator.
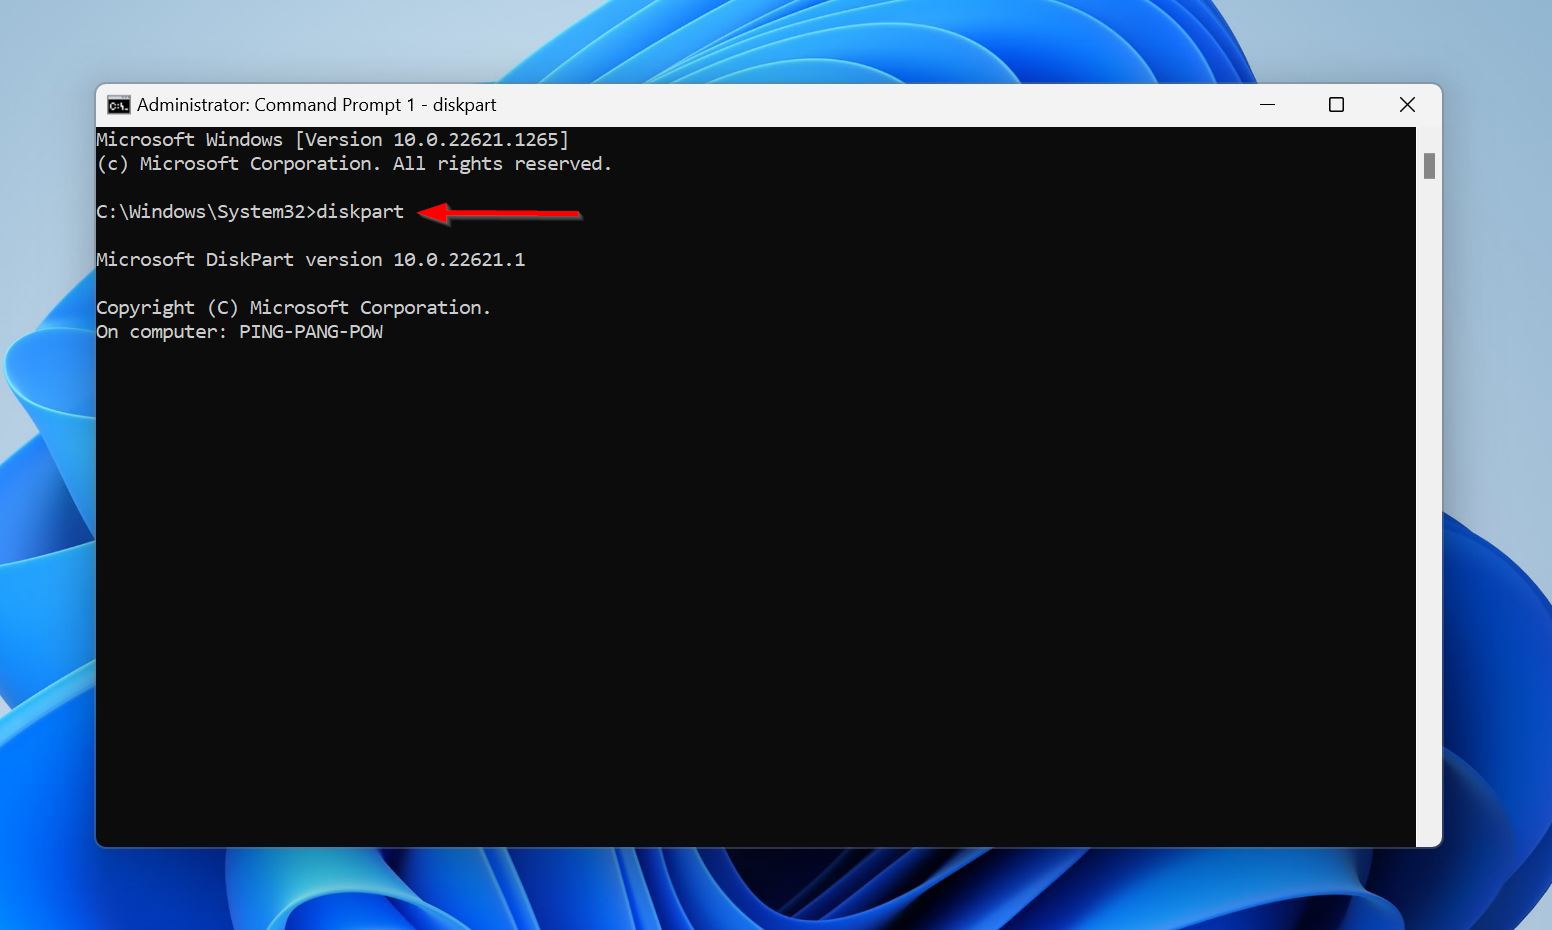
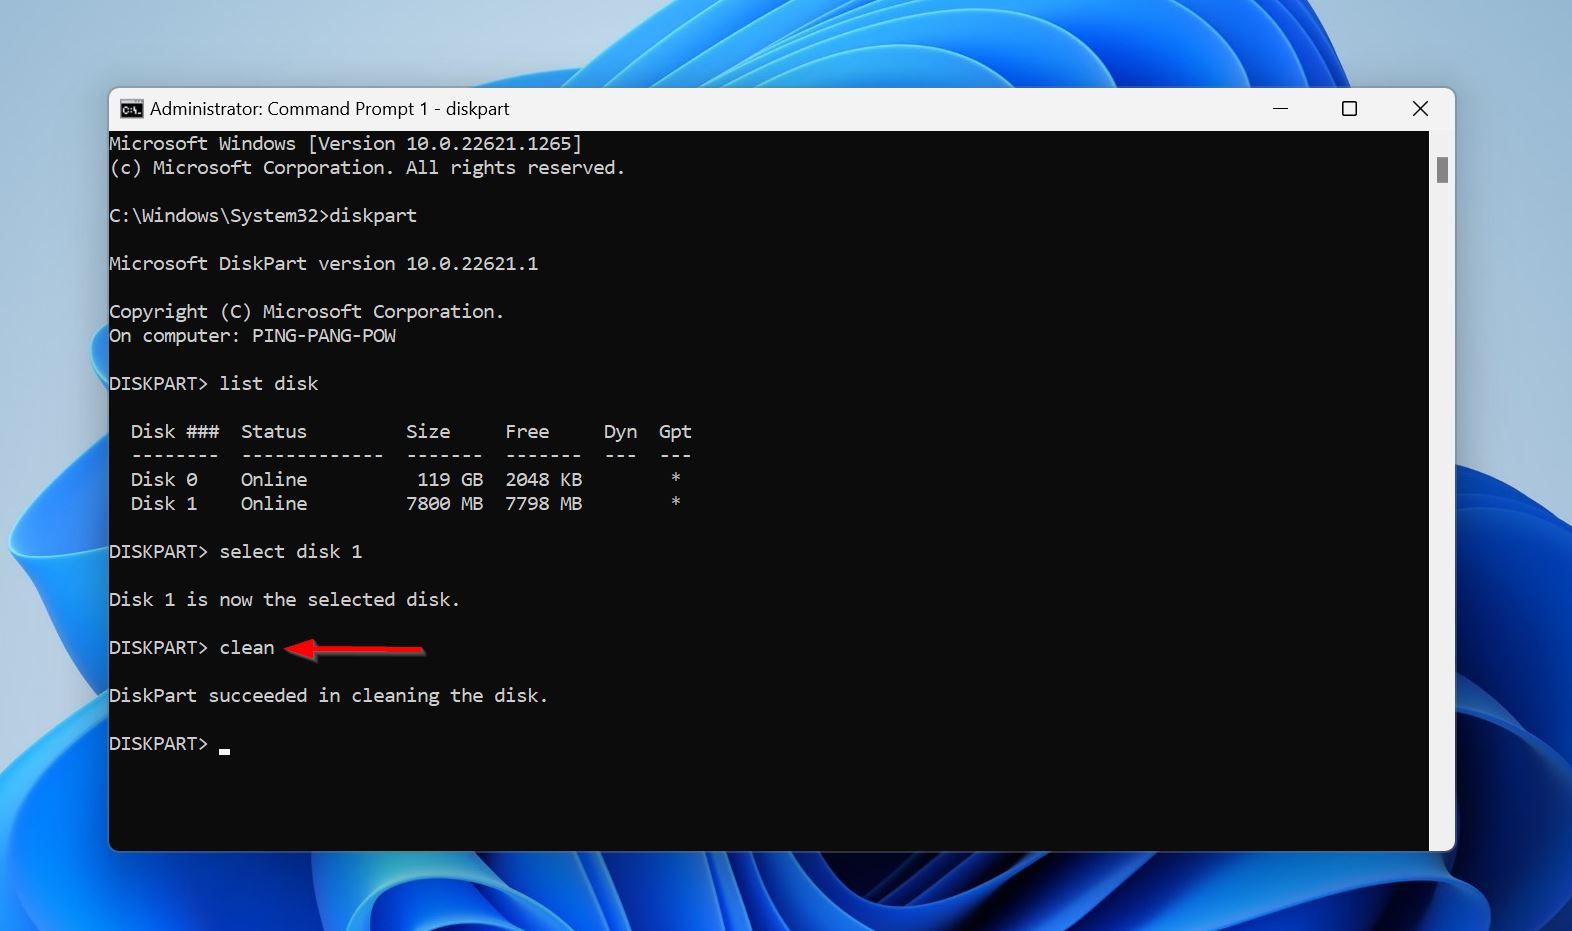
- In the console, type diskpart and press Enter.
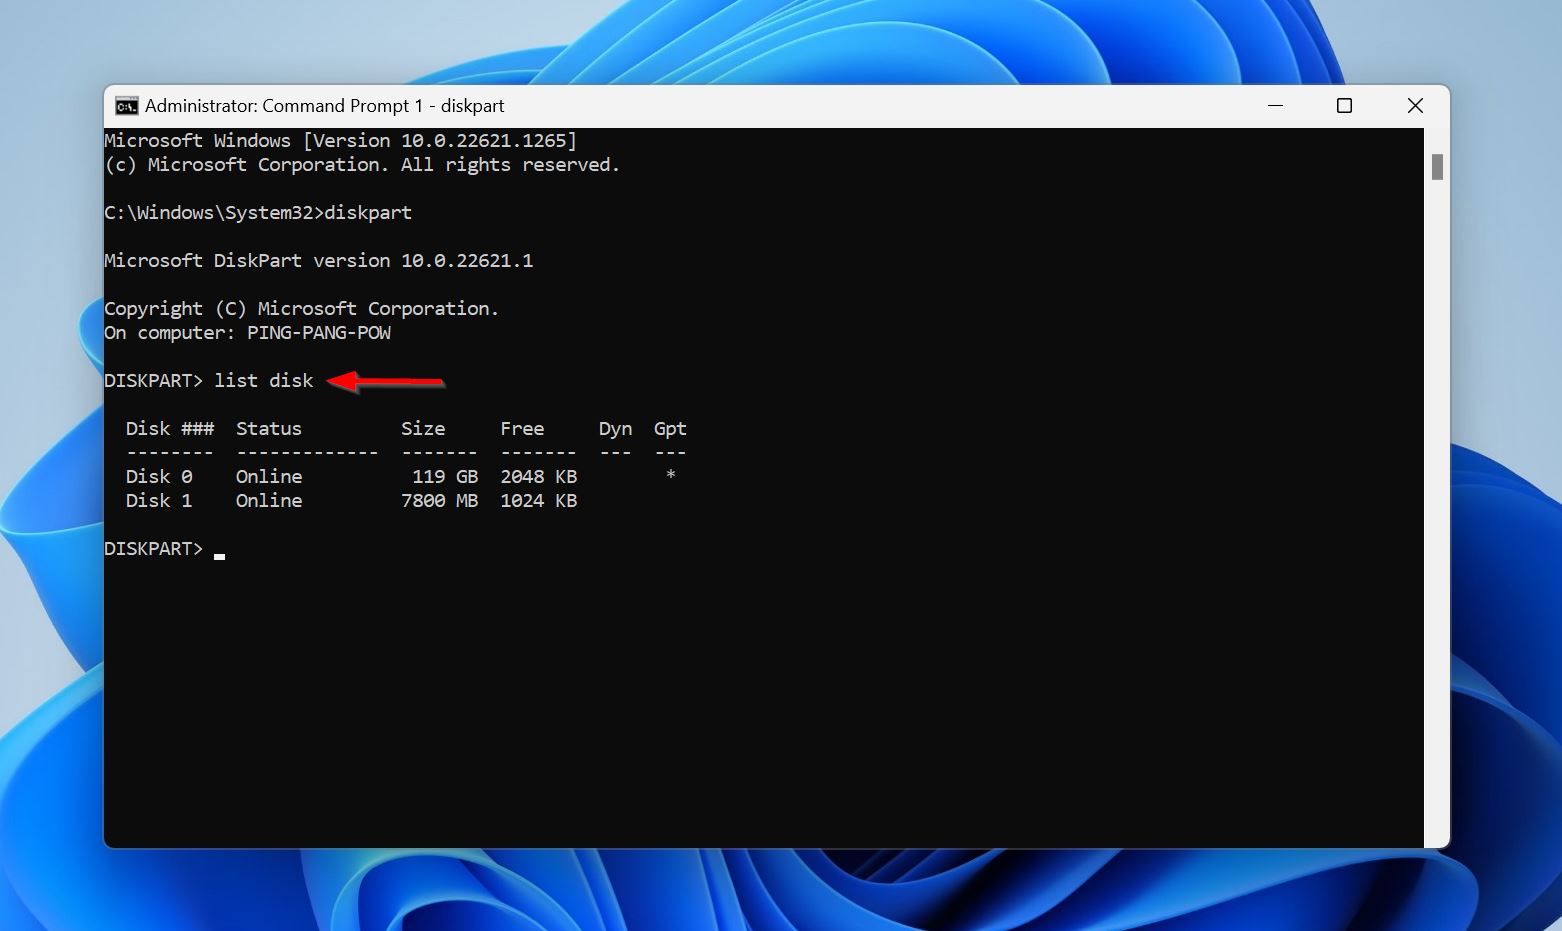
- Type list disk and press Enter to display all the storage disks attached to your PC.
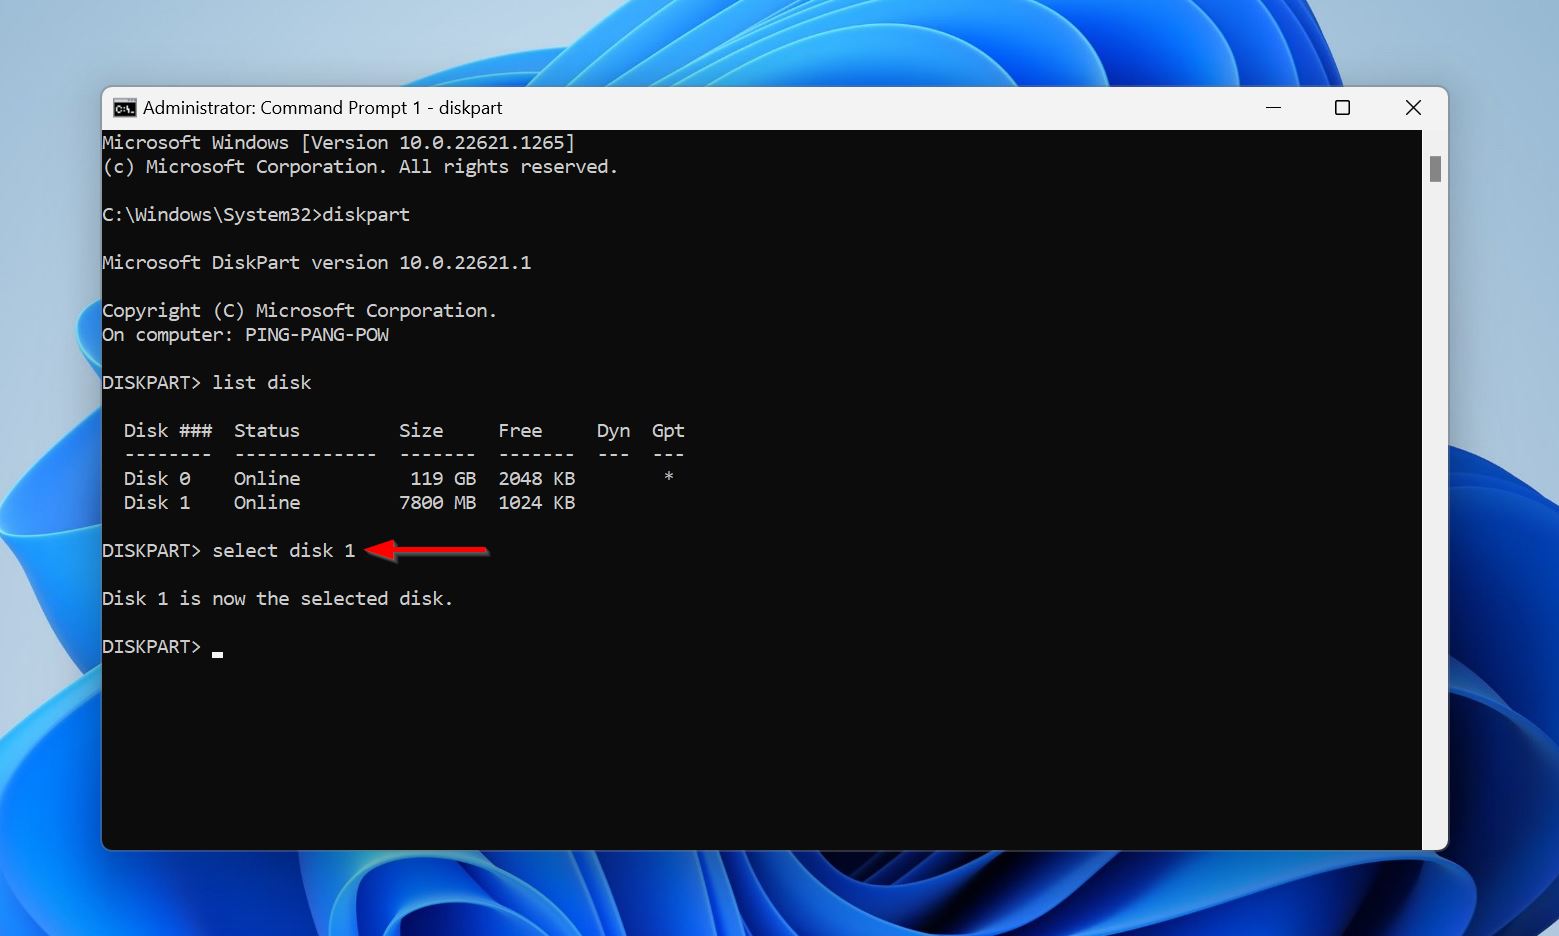
- Type select disk x and press Enter. Replace x with the number disk number of the drive you want to convert to GPT. In my case, it was disk 1.
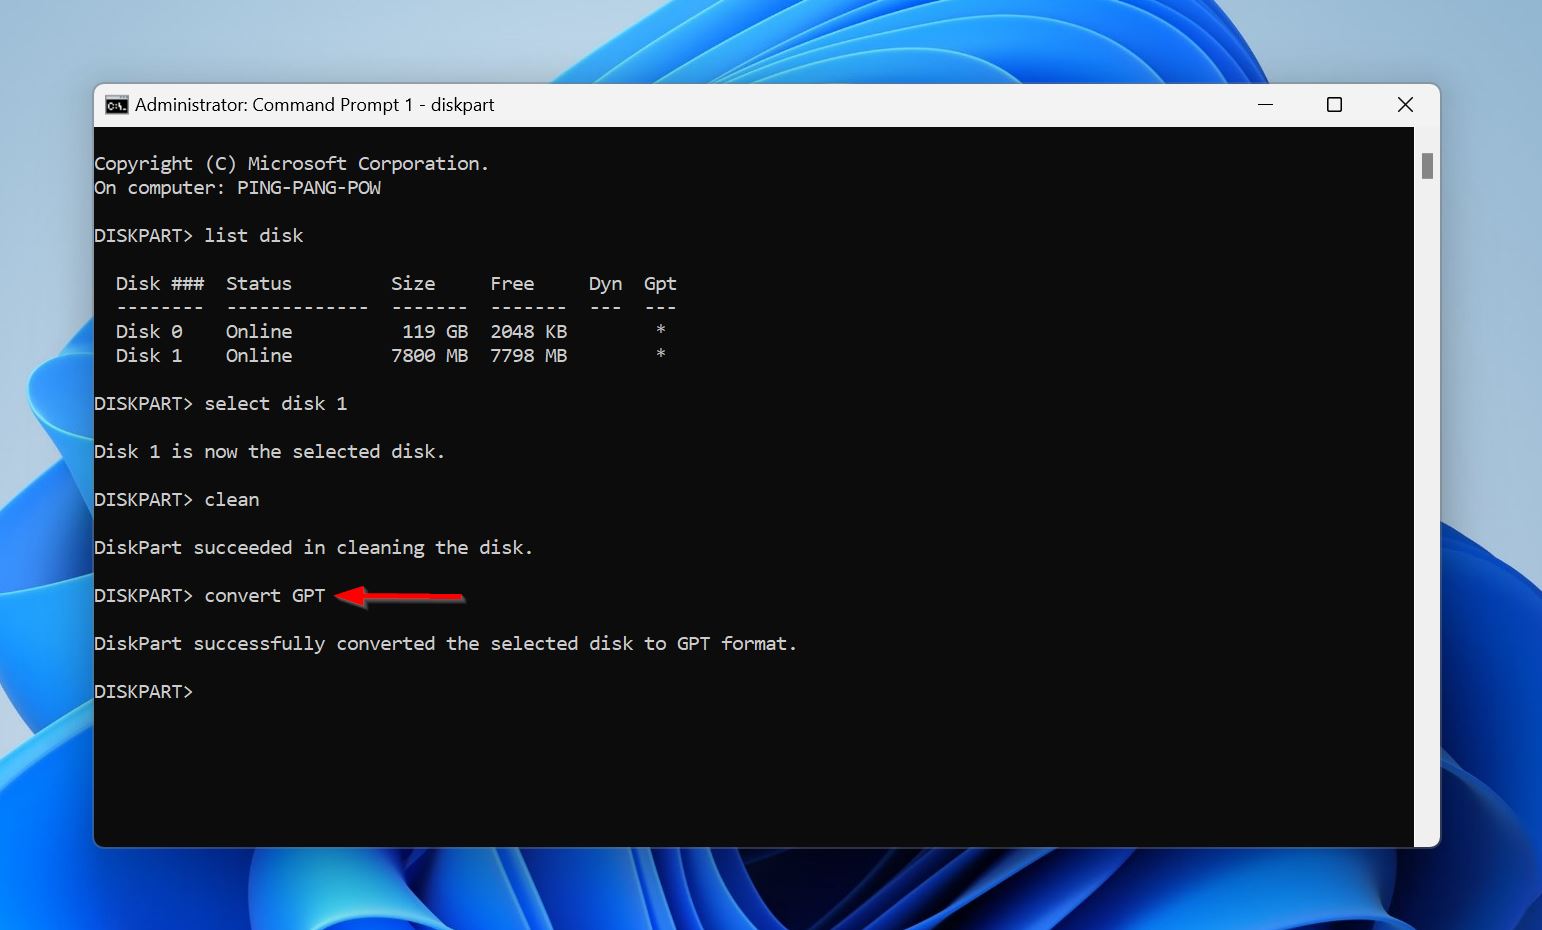
- Type clean and press Enter to clear all information from the disk.
- Finally, type convert GPT and press Enter to convert the selected disk to GPT.
Using Disk Management
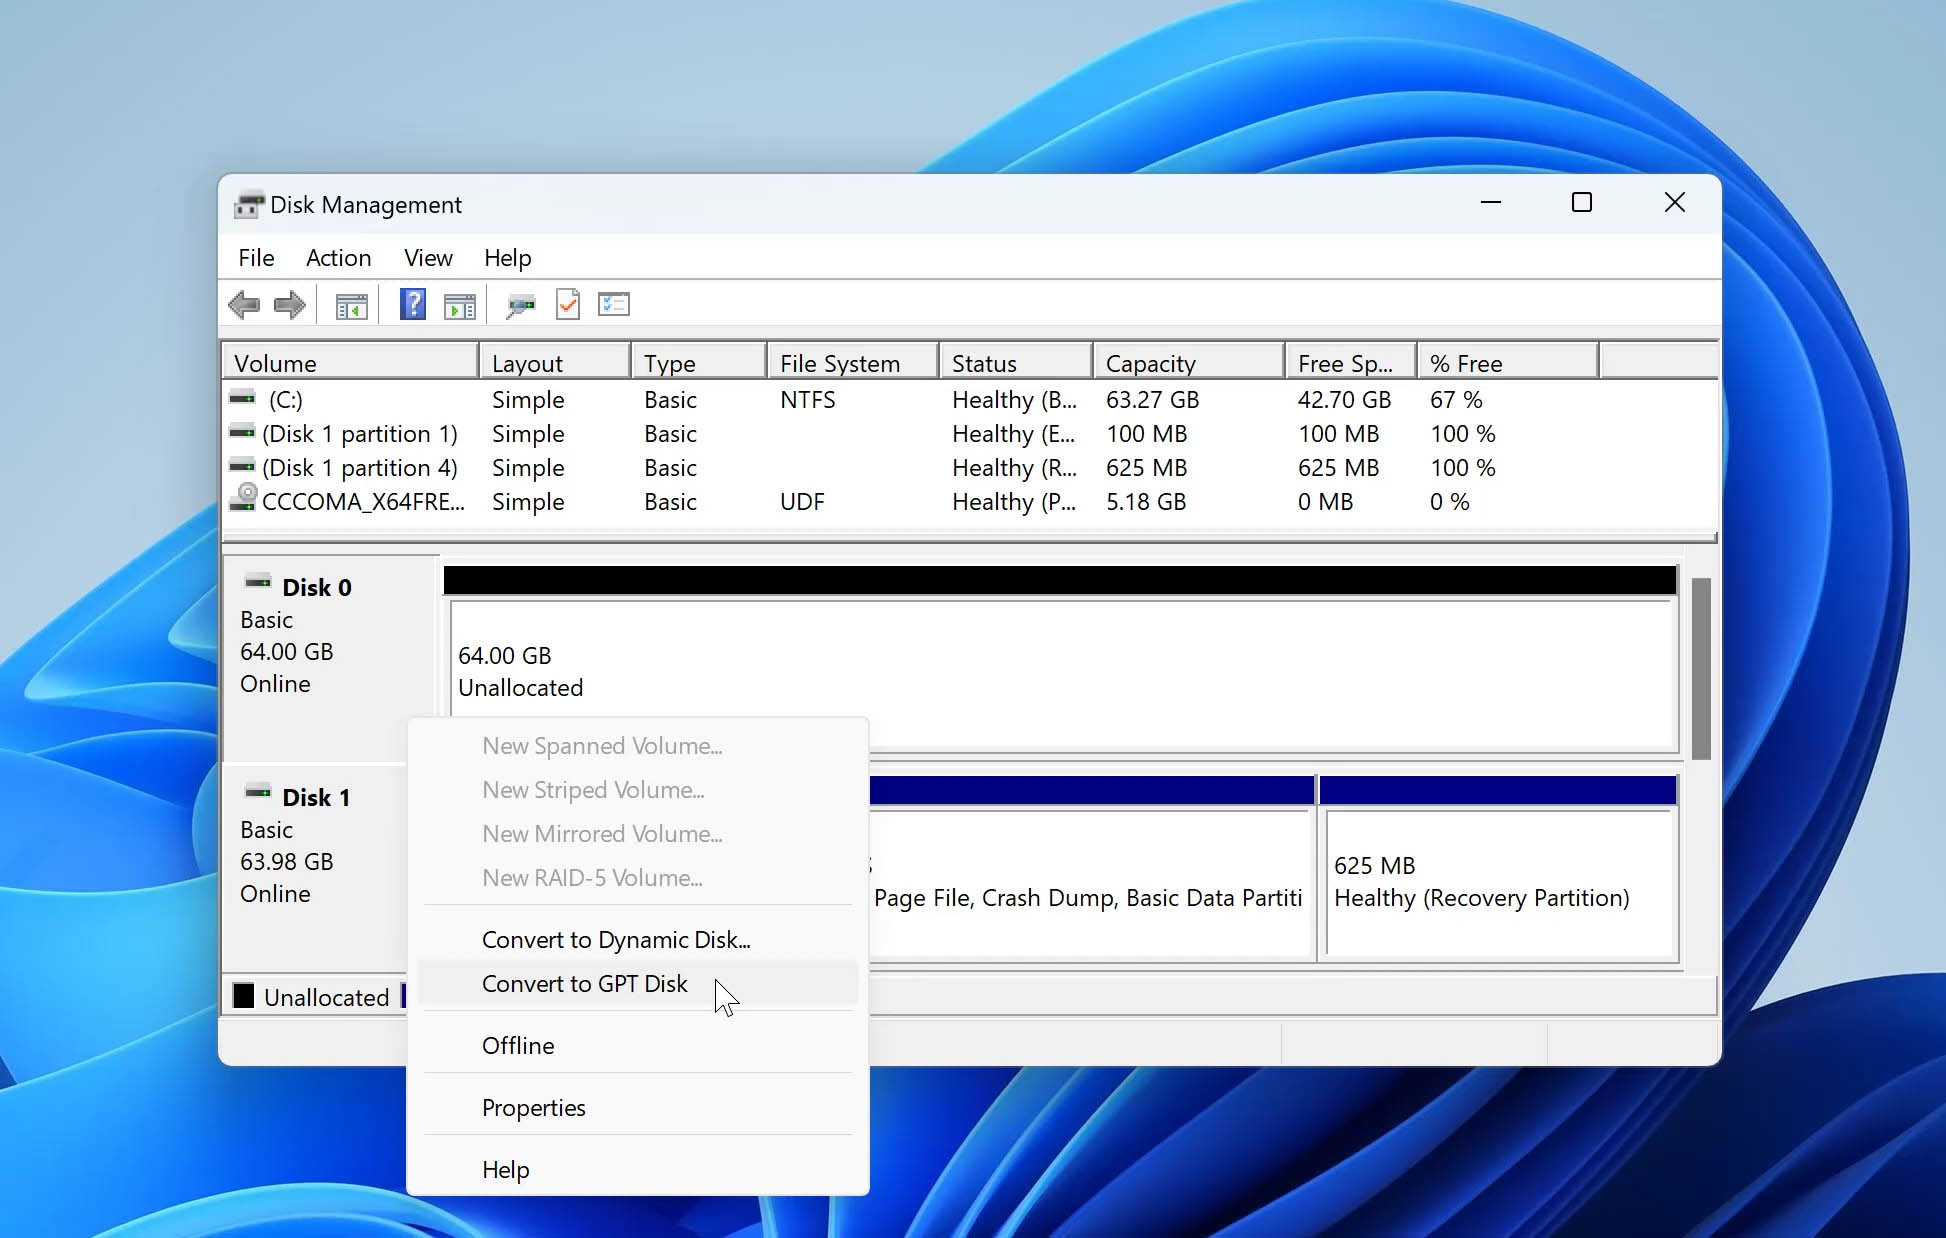
- Type “disk management” in Windows Search (Windows Key + S). Click on Create and format hard disk partitions from the search results.
- Right-click on the disk label of the drive you want to convert and click on the Convert to GPT Disk option.
Step 3. Retrieve Data From the Backup
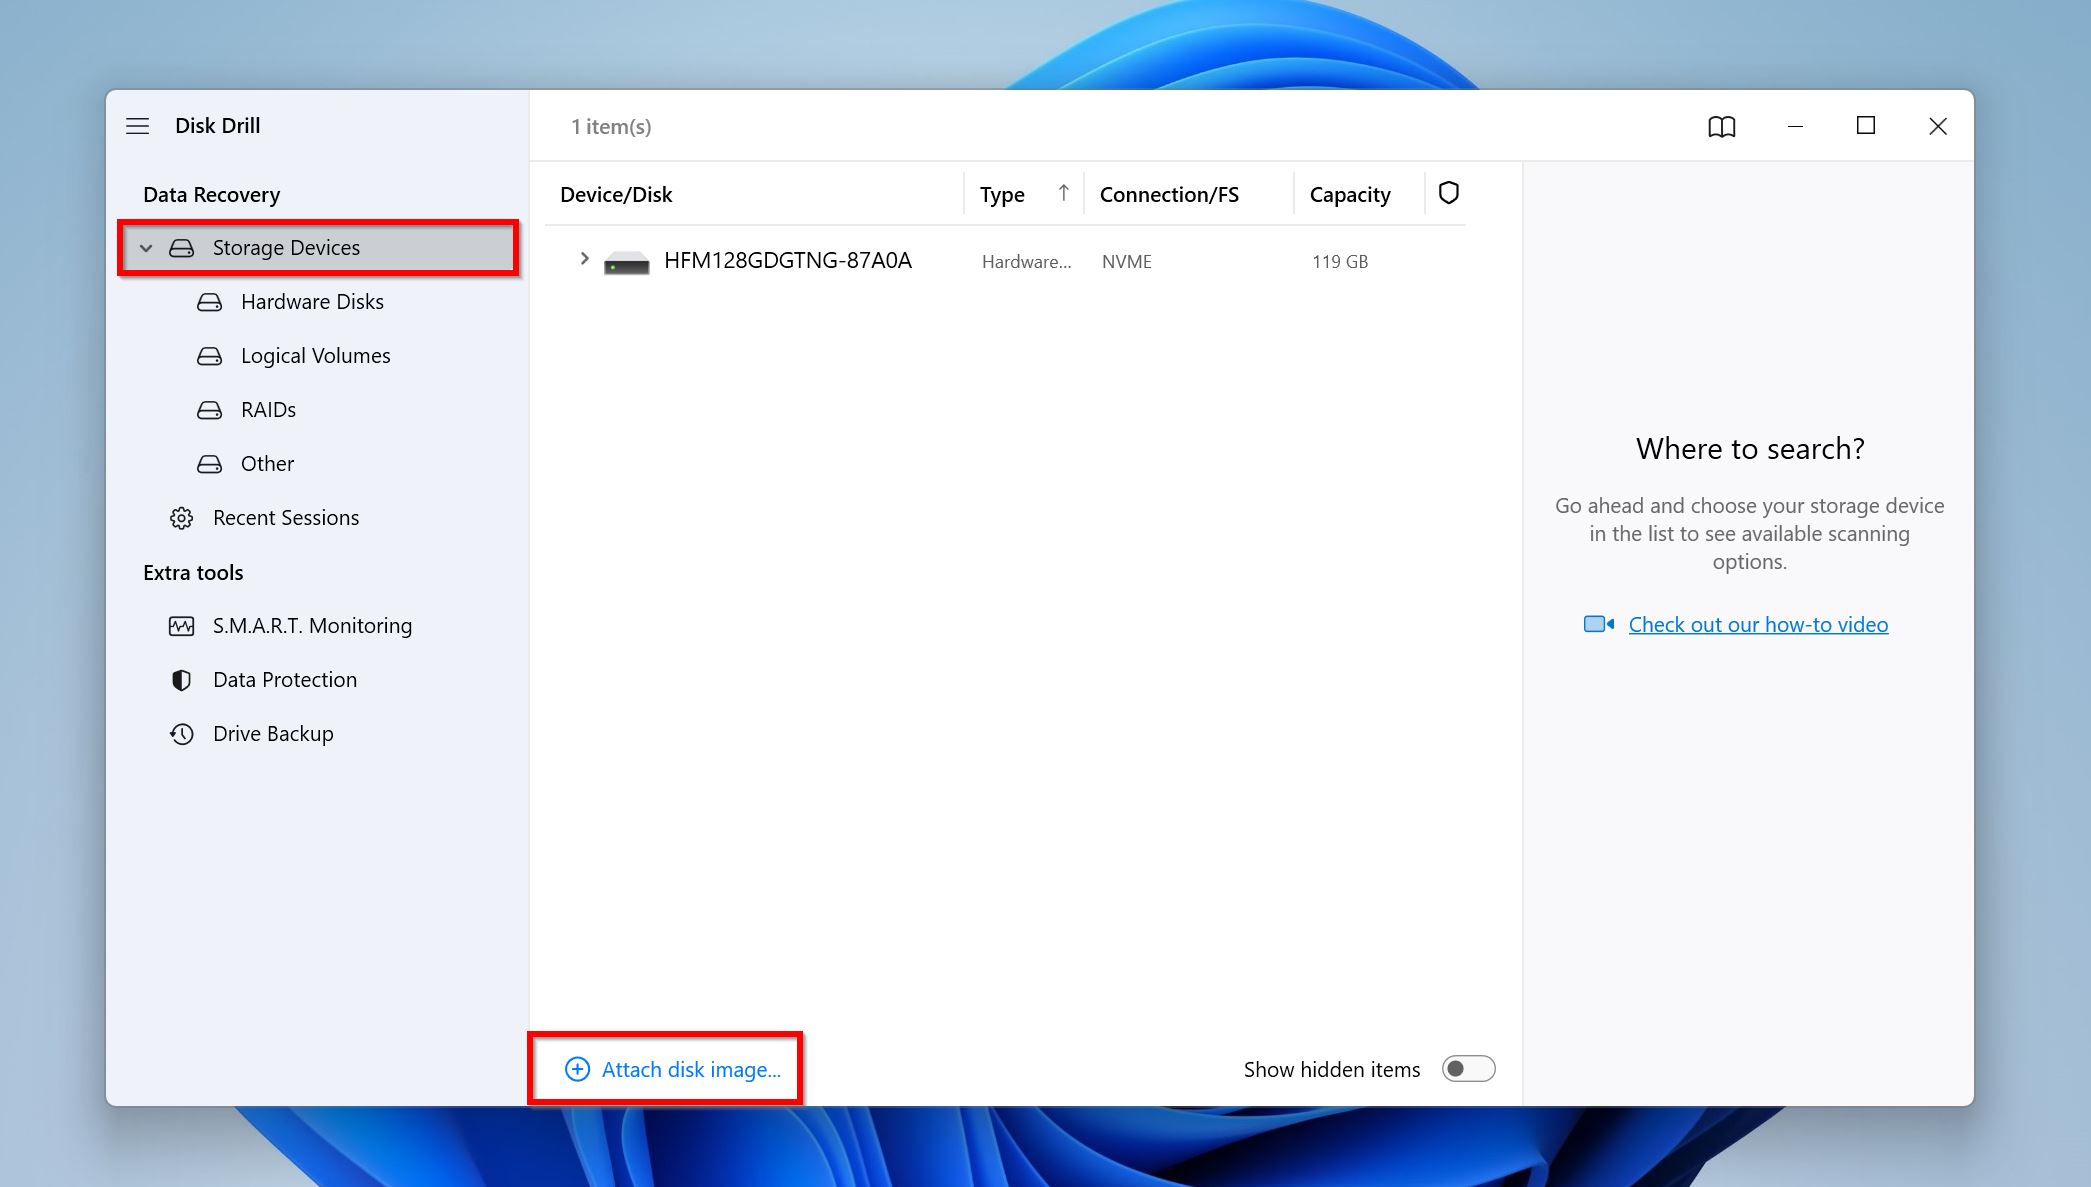
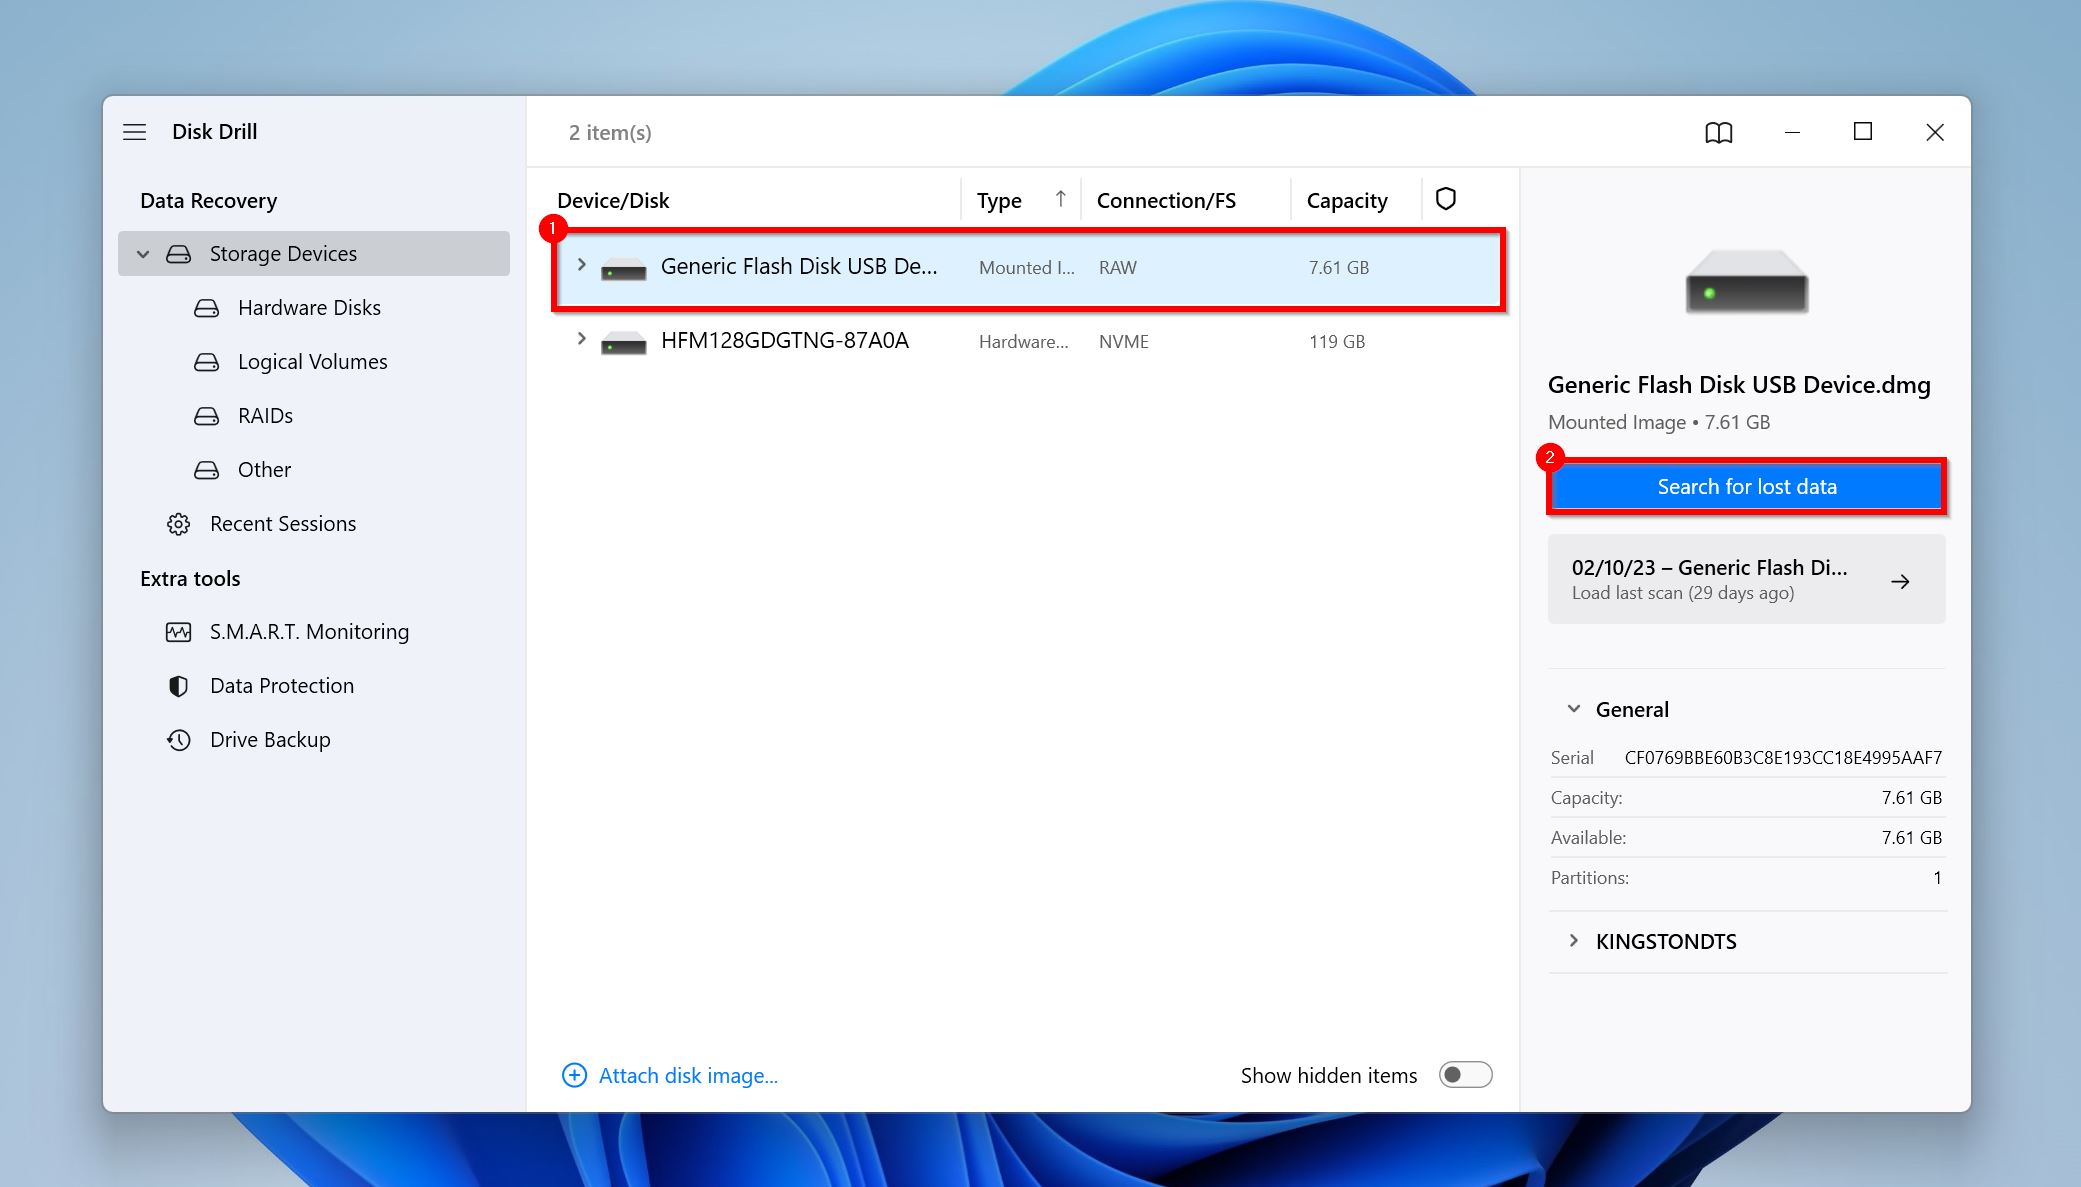
- Open Disk Drill and make sure you’re on the Storage Devices screen.
- Click on the Attach disk image option. Browse for the backup you created earlier and click OK. The disk image will show up as a drive in Disk Drill.
- Now, select the disk image and click Search for lost data.
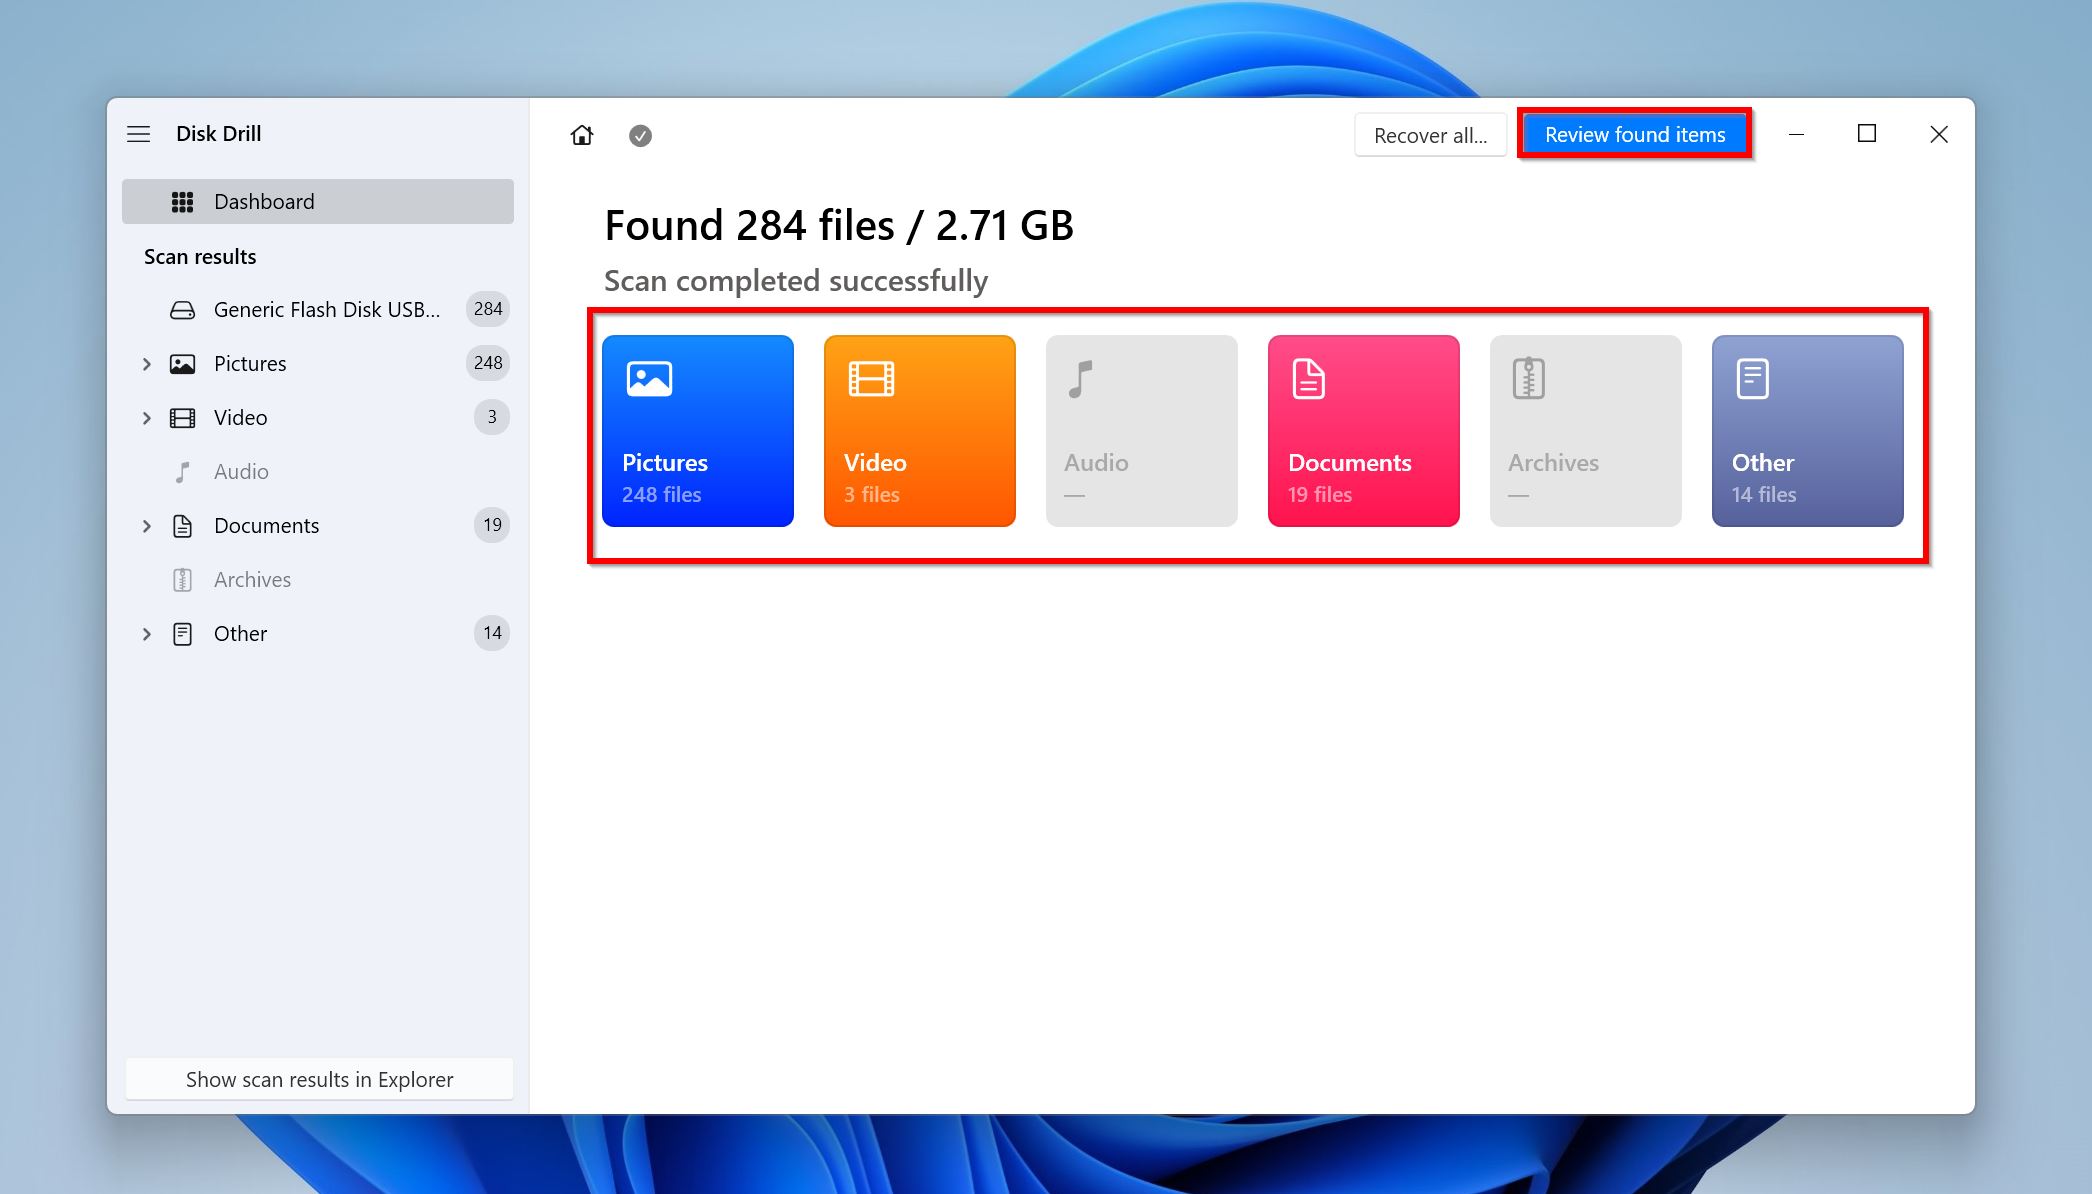
- Click Review found items or directly click on the file type you want to recover.
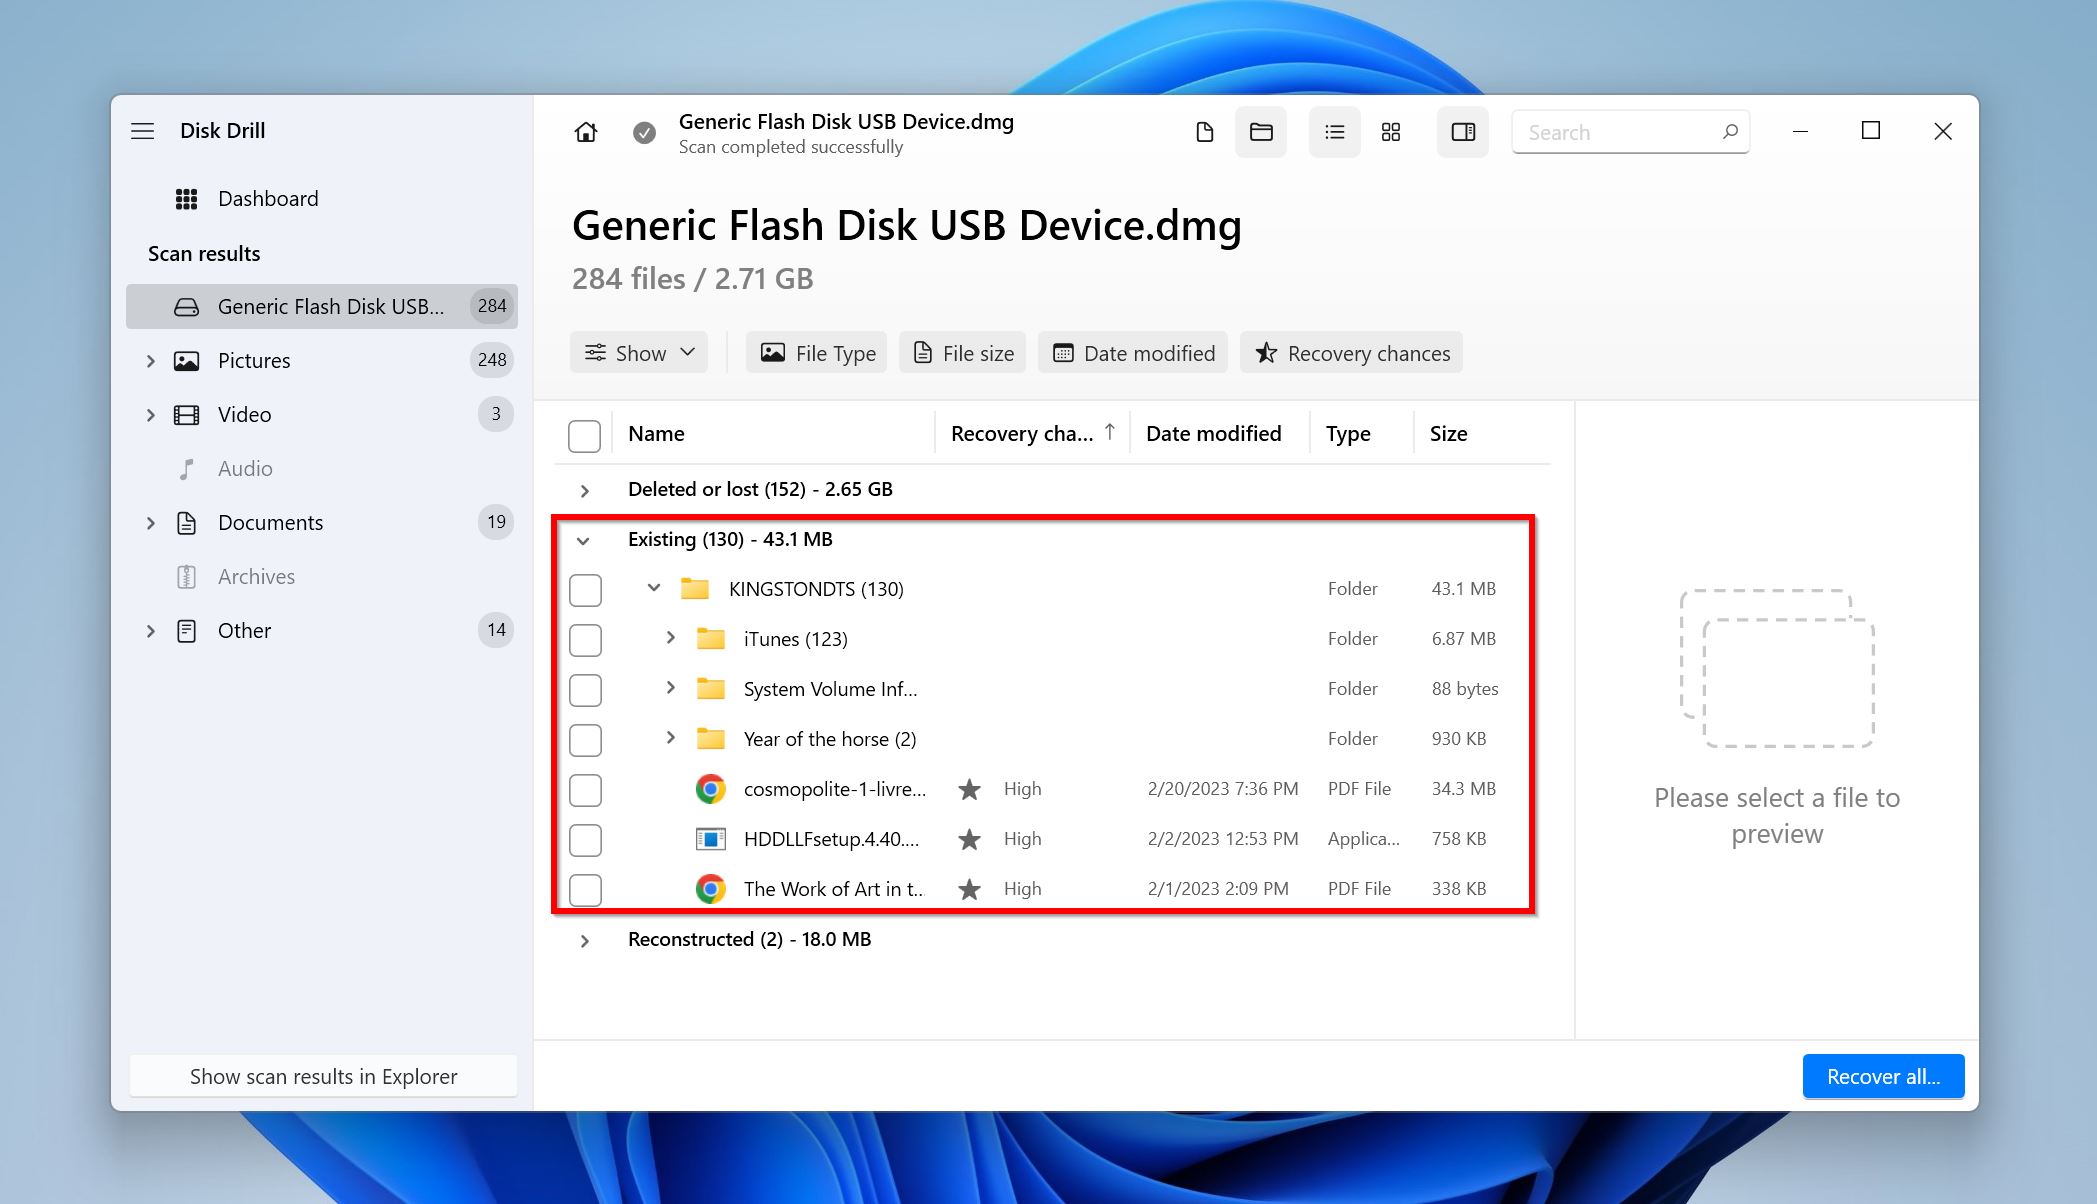
- Expand the Existing option, since you intend to get back the data that was already there on the drive when you created the disk image.
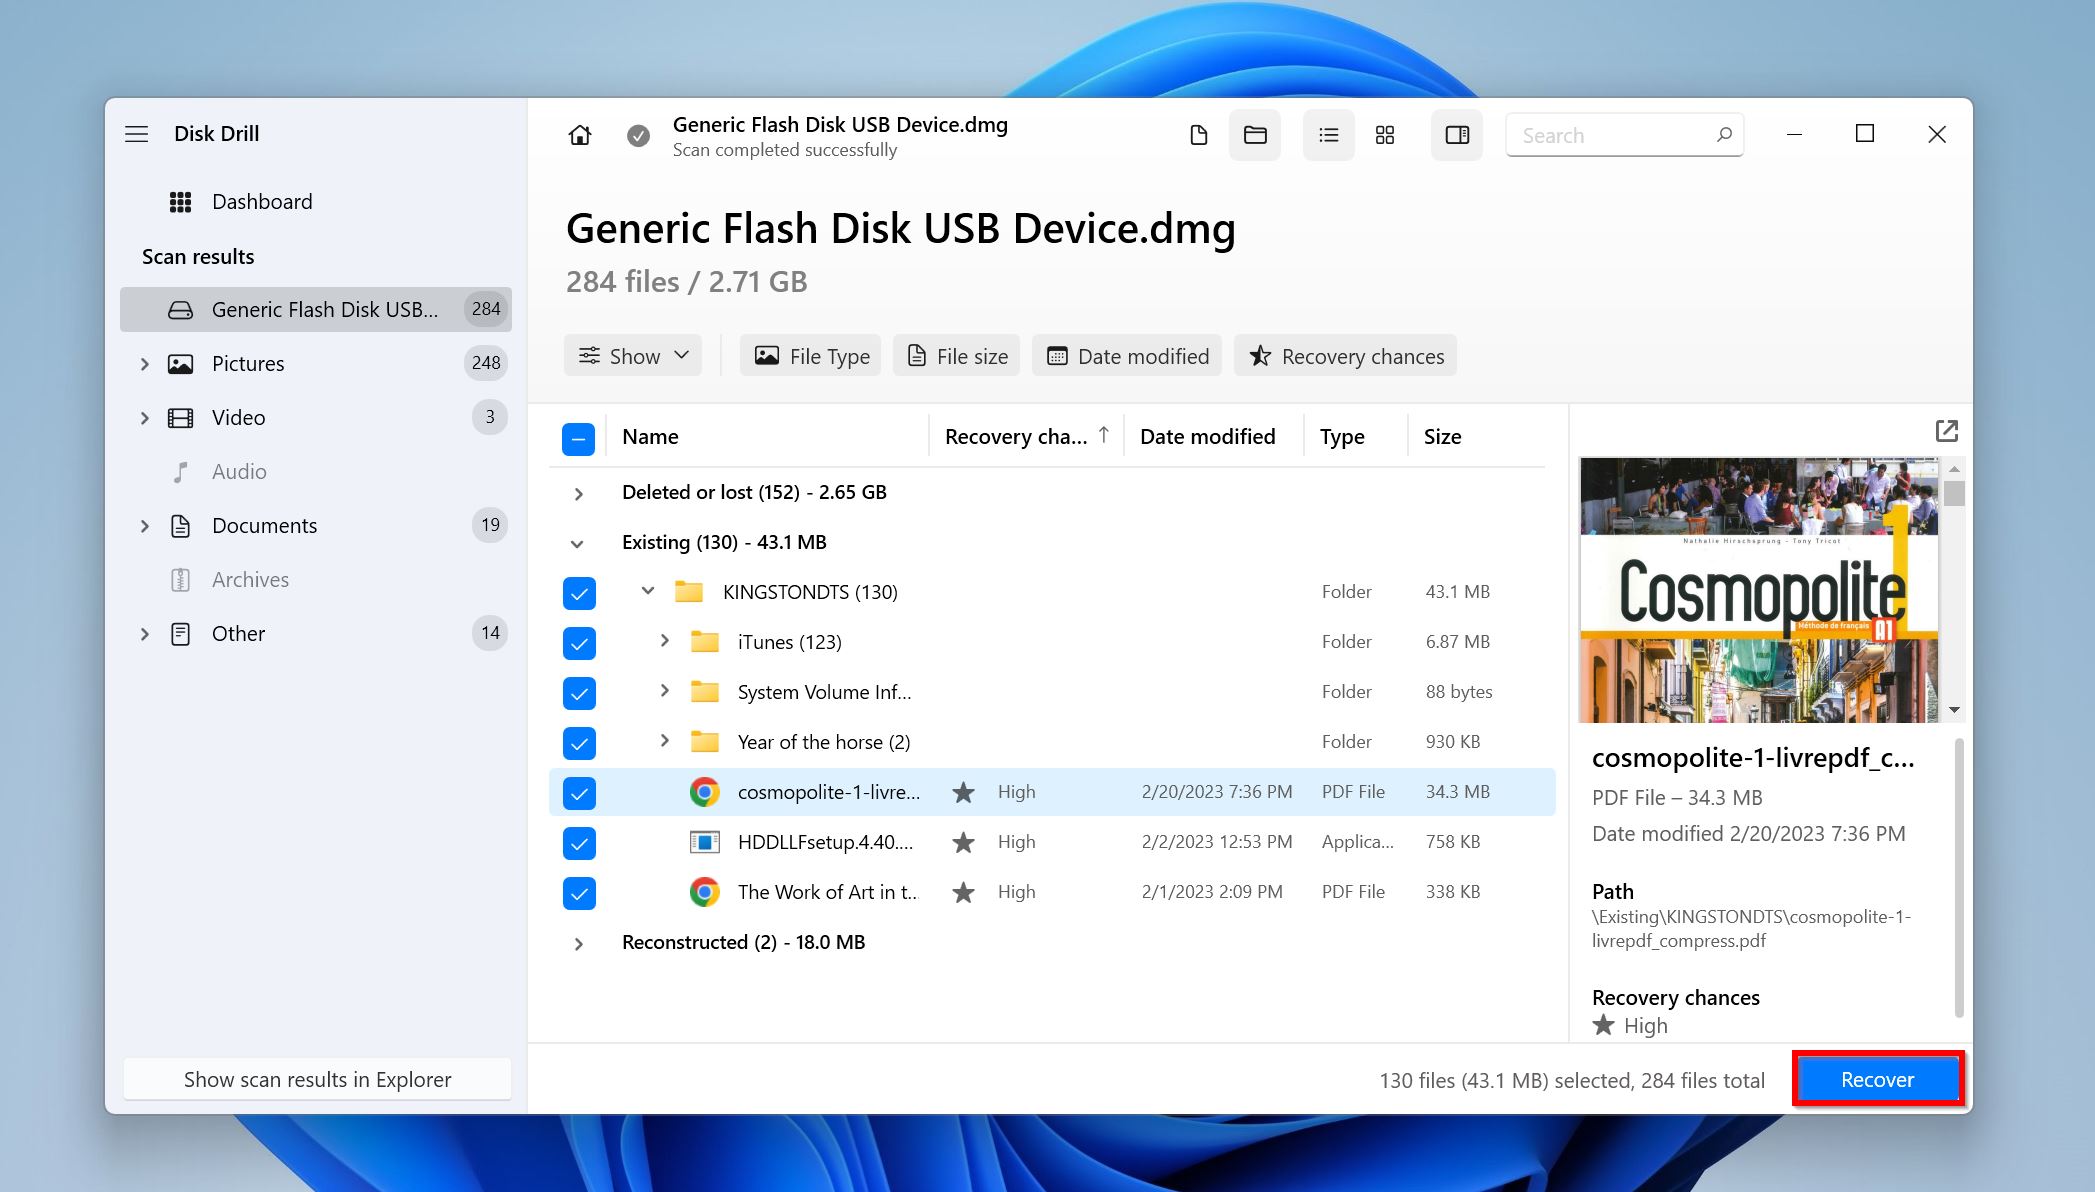
- Use the checkboxes to select the files you want to recover. Disk Drill will display a preview of the selected file. After confirmation, click Recover.
- Choose a recovery destination for the files and click Next.
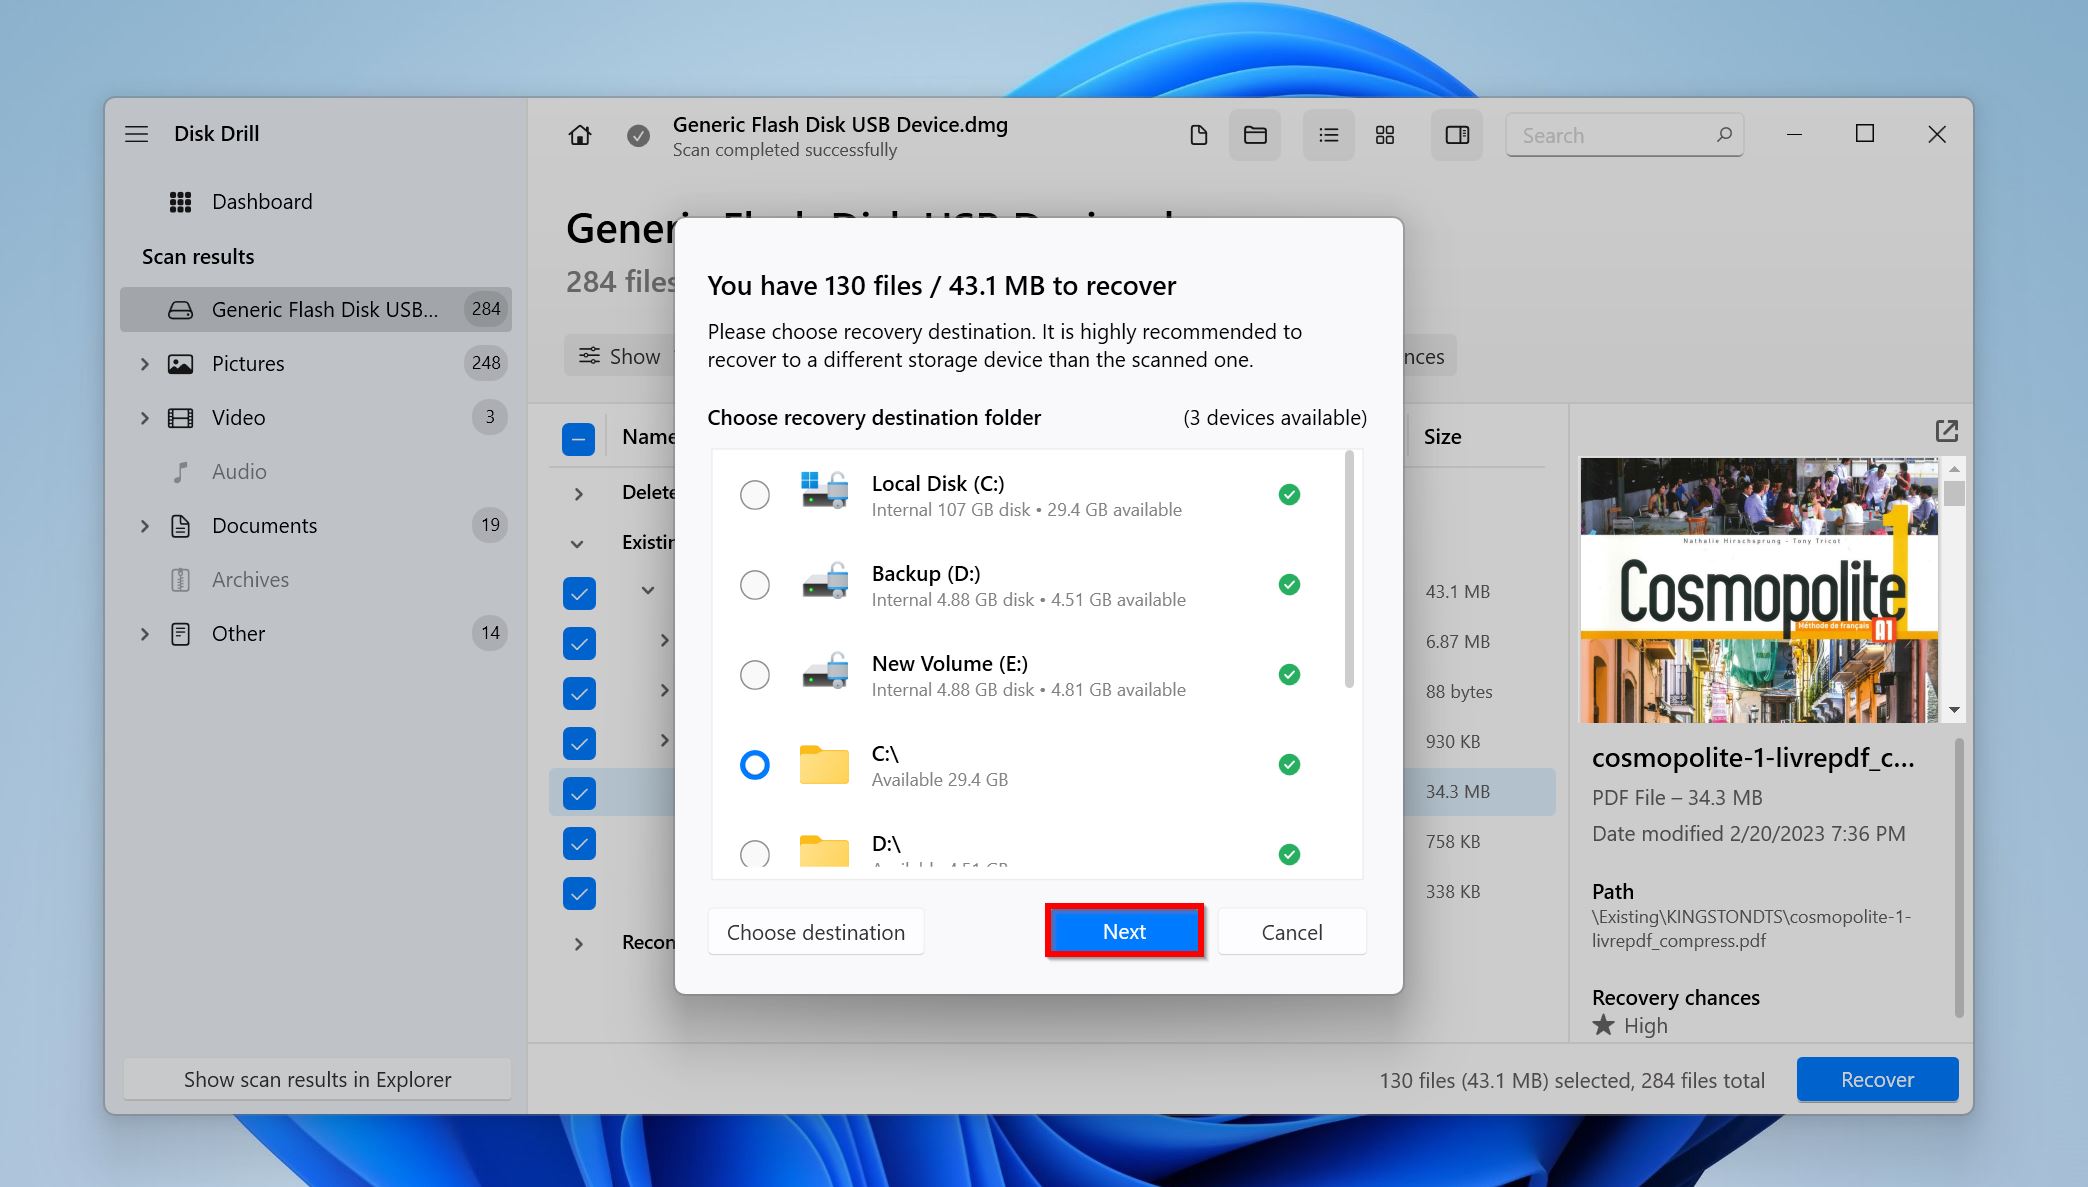
- Disk Drill will get back your files.
To know more about Disk Drill, its various features, and how it compares to other offerings in the market, read through our review of the tool.
How to Convert the System Drive From MBR to GPT Using MBR2GPT.EXE
MBR2GPT.exe is a fantastic tool that lets you convert system drives from MBR to GPT, without data loss on Windows 10. The program only works on system drives.
Being a command line utility, MBR2GPT.exe is a little complex to use. Make sure you carefully follow the guide below.
There are two ways that MBR2GPT can convert a drive from MBR to GPT–offline, and online. We recommend you use the offline mode.
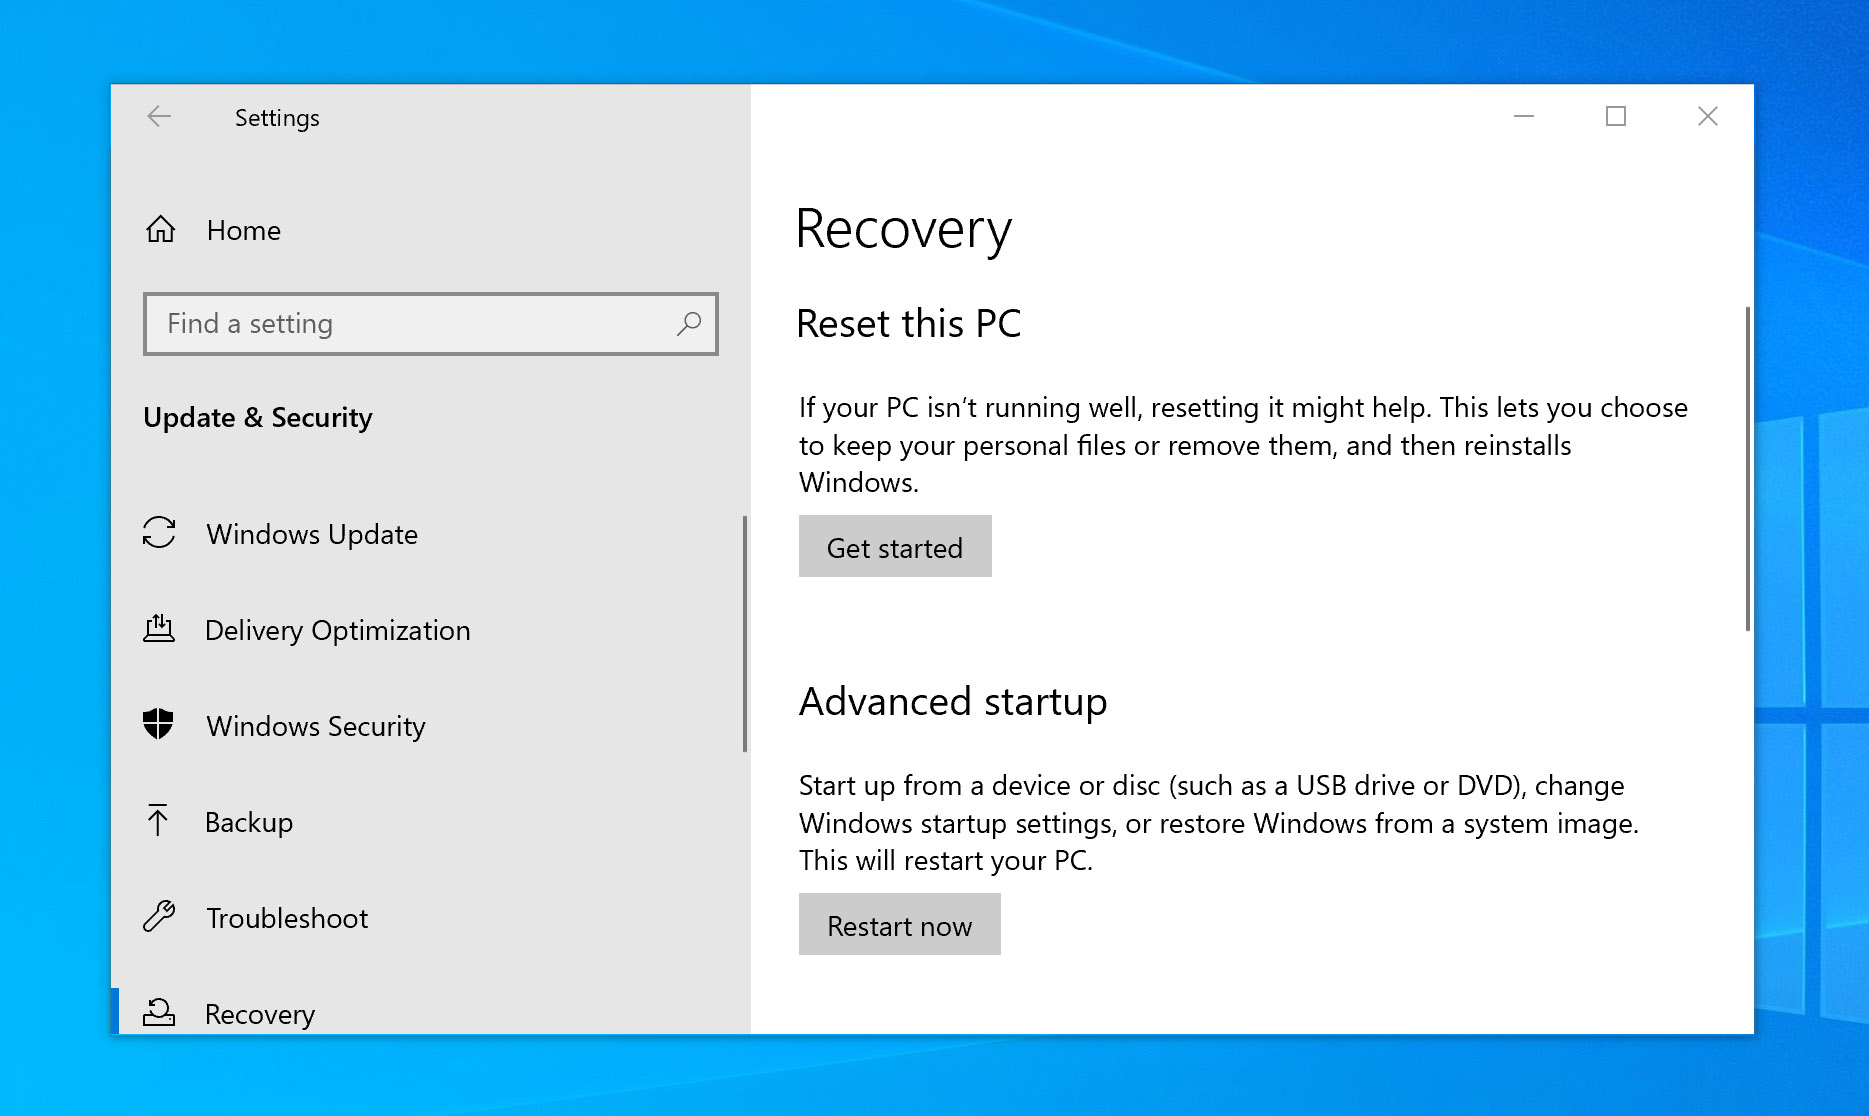
- Click on Start > Settings.
- Go to Update & security > Recovery.
- Under Advanced startup, click Restart now.
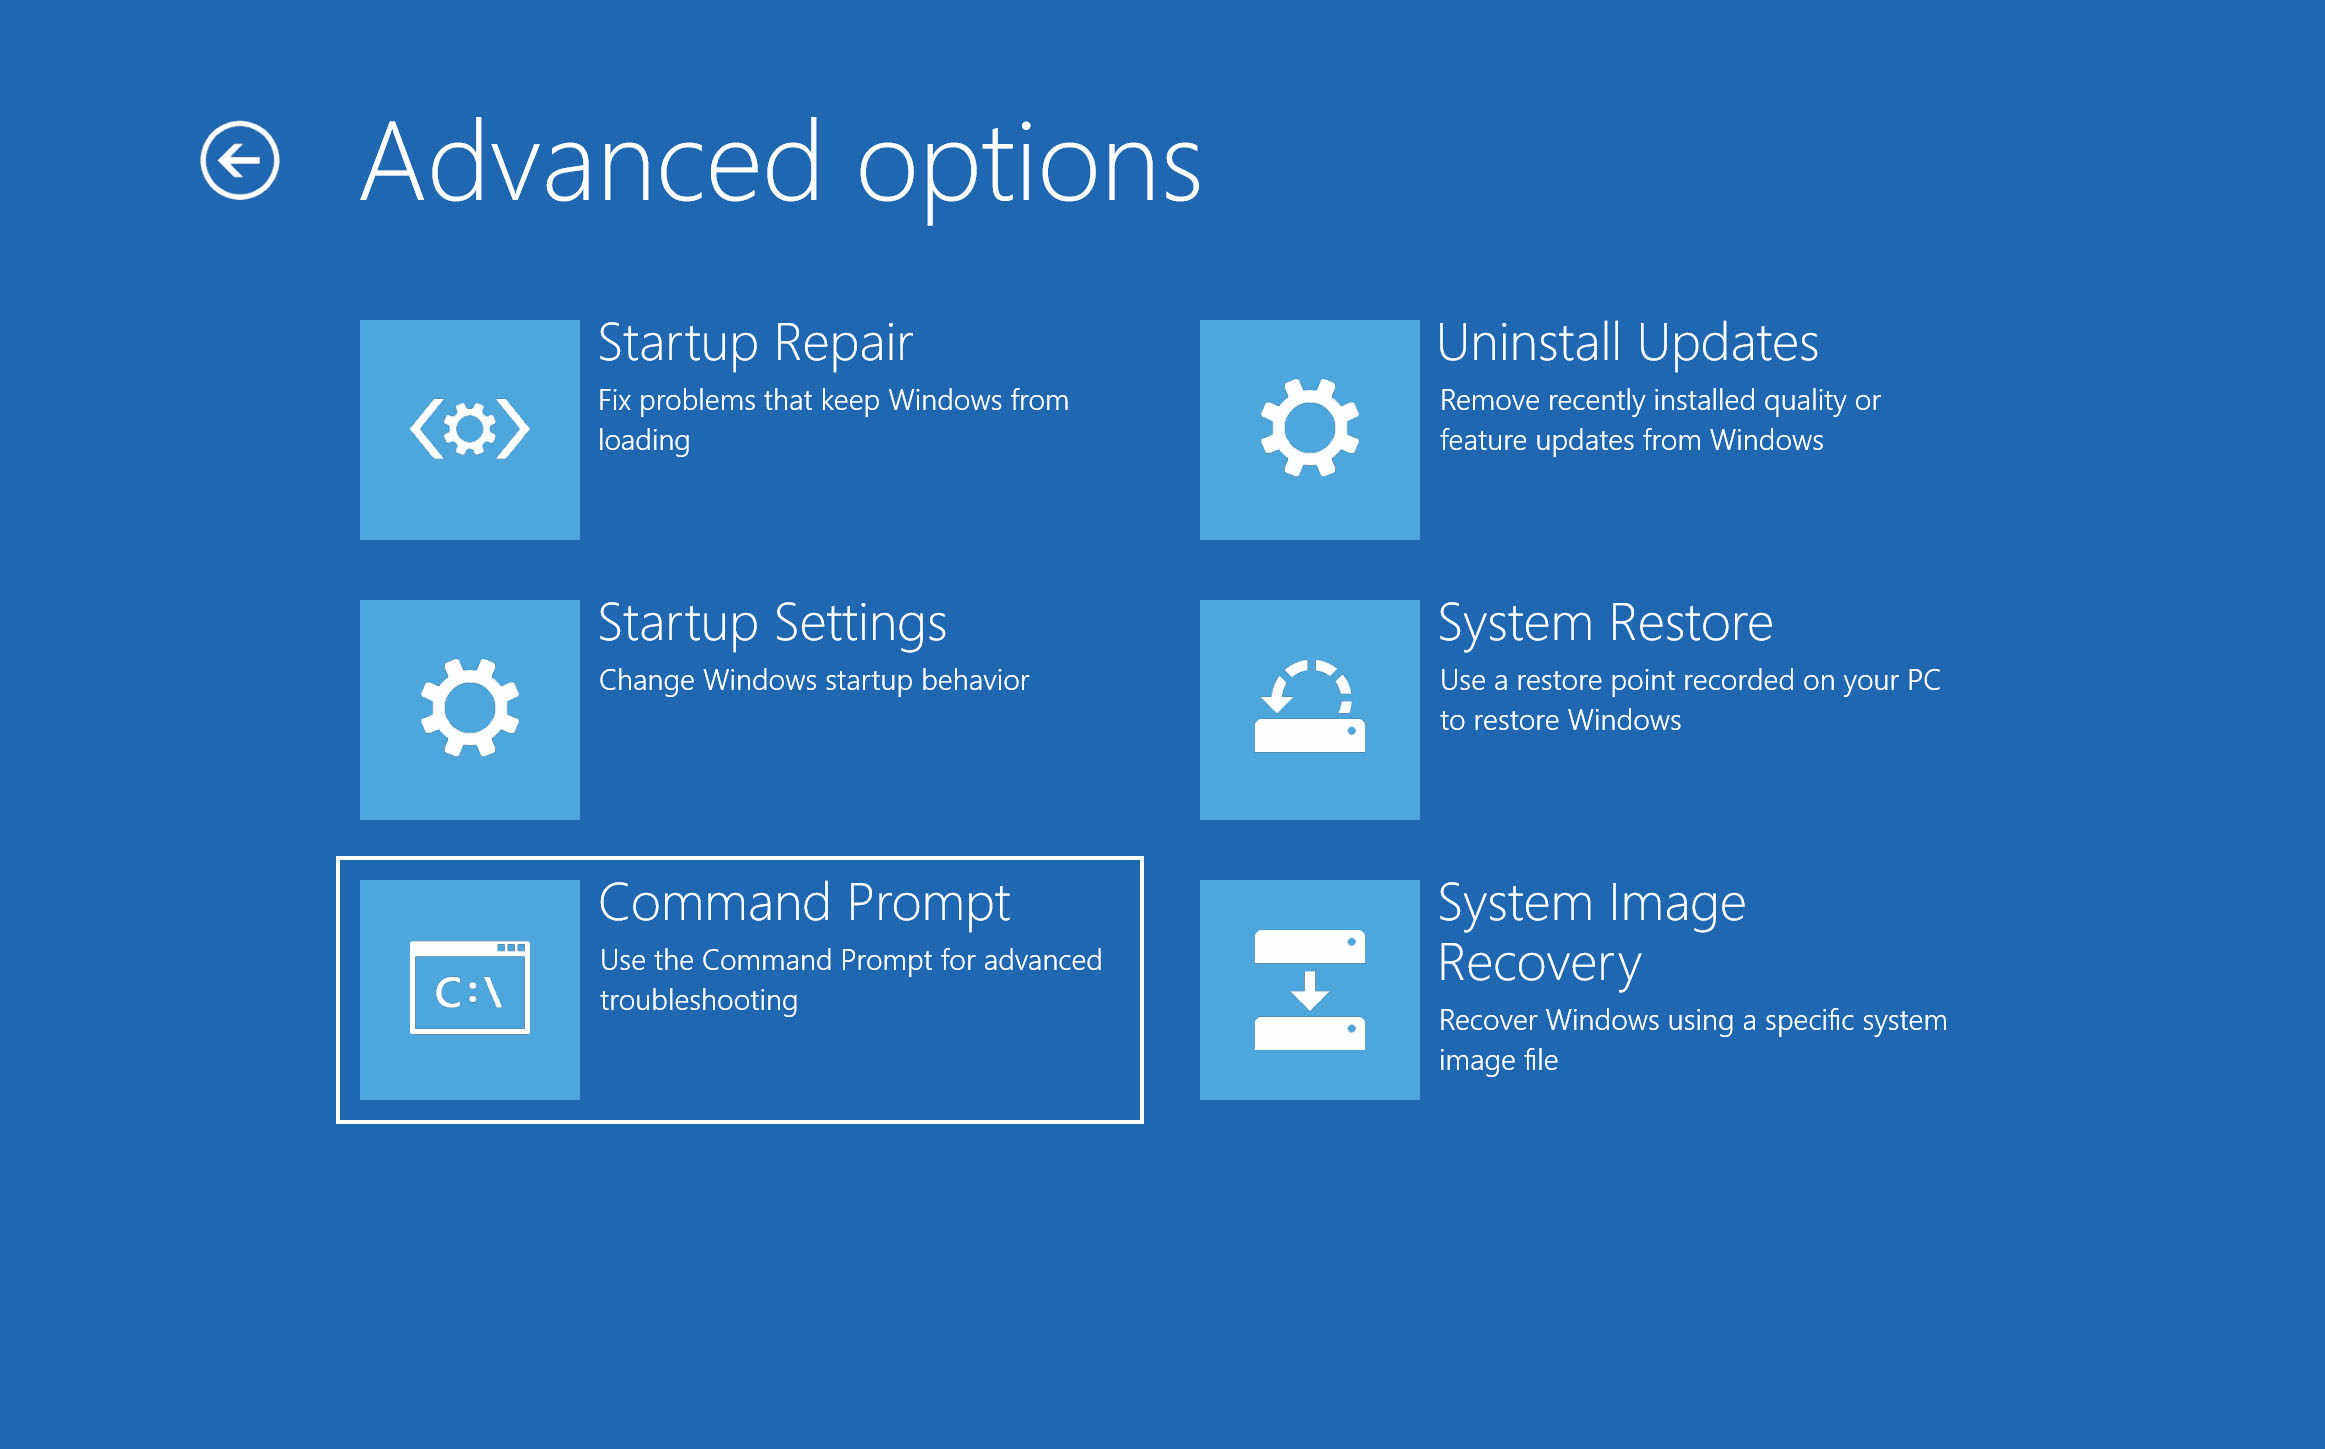
- After your PC reboots, go to Troubleshoot > Advanced options > Command Prompt. You may have to enter the Administrator account credentials.
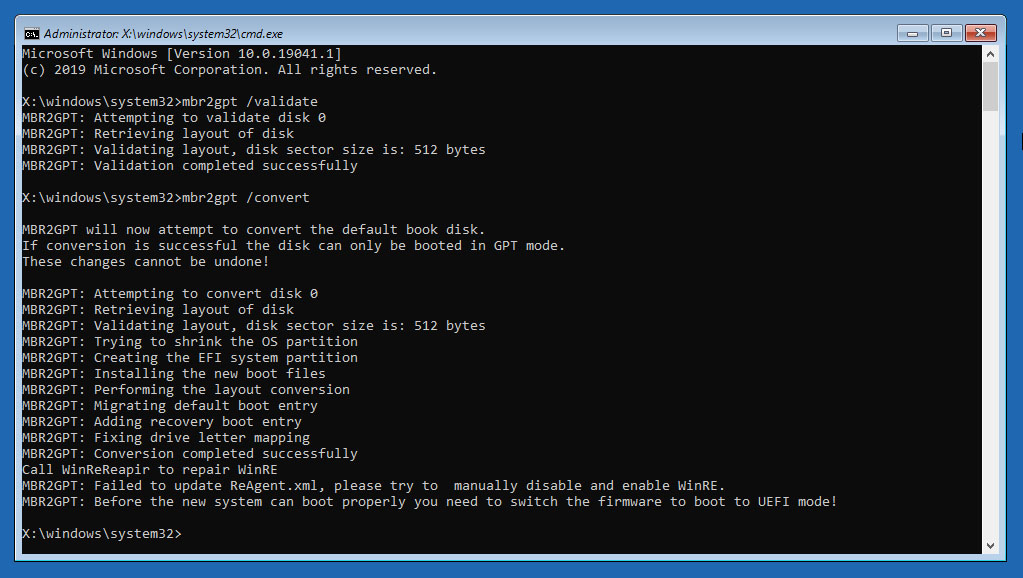
- In the console, type mbr2gpt /validate and press Enter. This will validate whether the system disk can be converted to GPT using MBR2GPT.exe.
- Finally, type mbrgpt /convert to convert the disk to GPT without losing data.
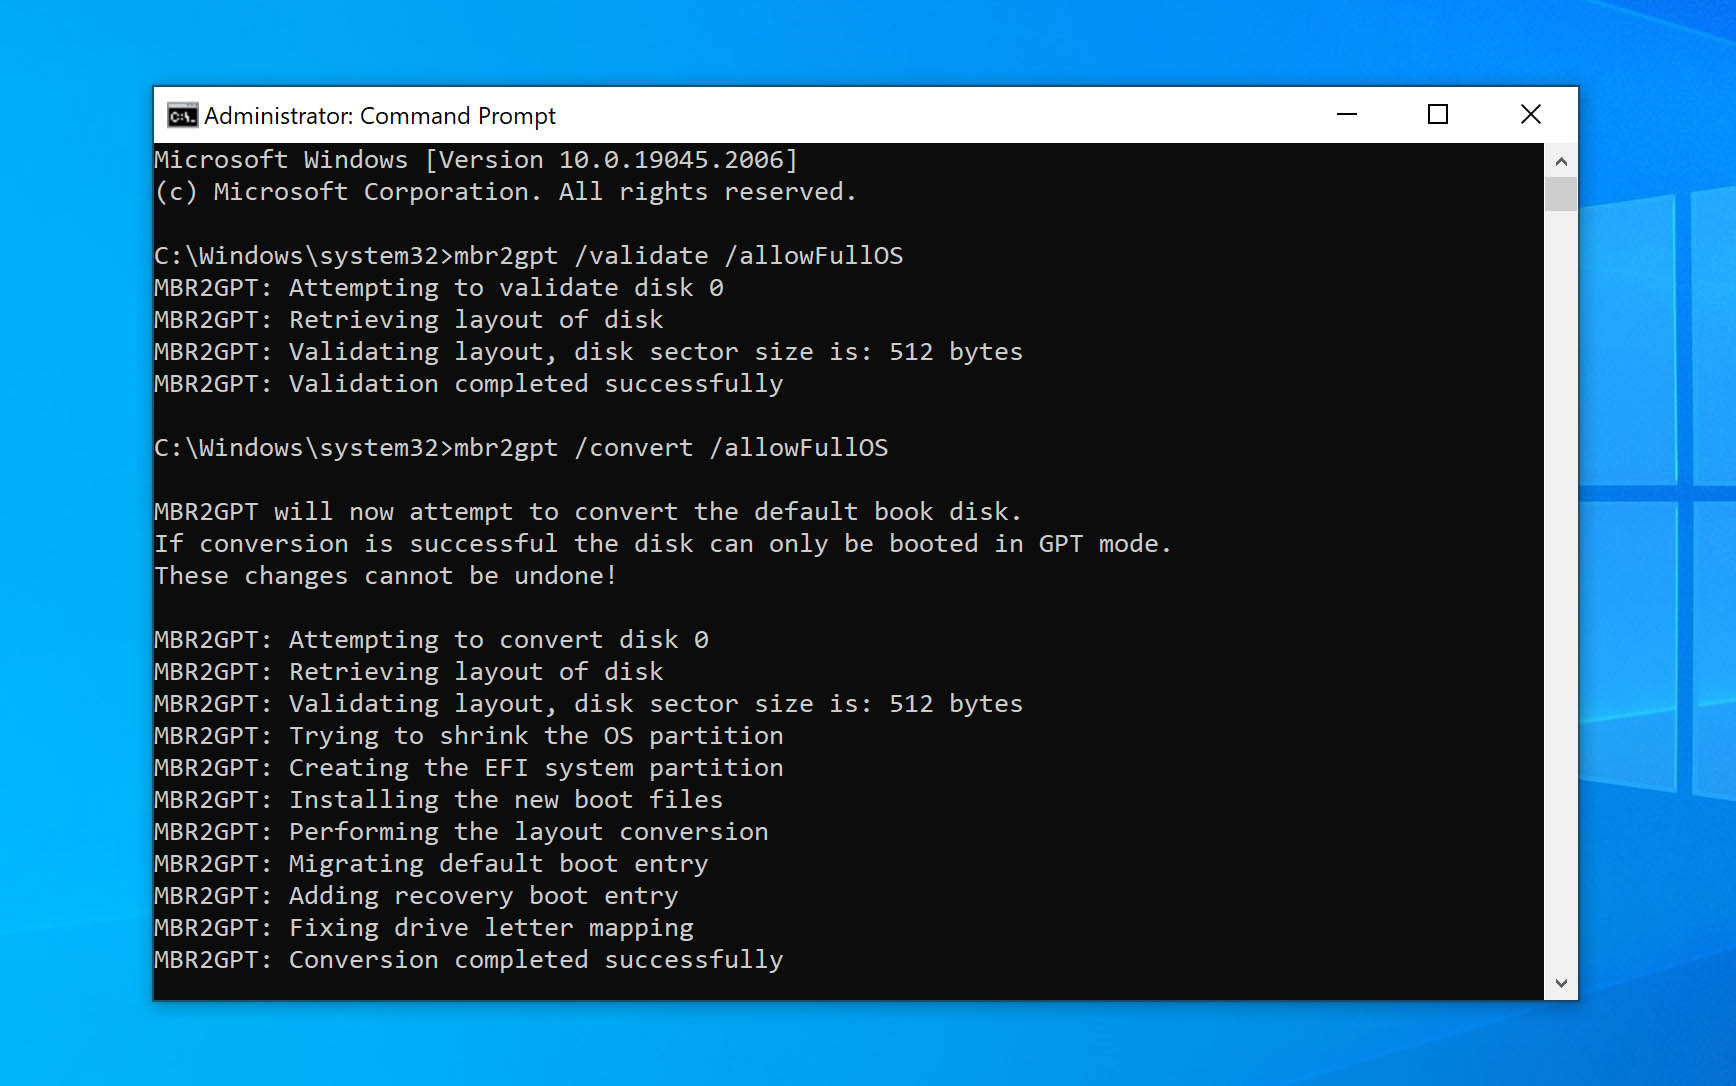
The online mode doesn’t require you to boot into Windows Preinstallation Environment (PE).
- Type “cmd” in Windows Search (Windows Key + S). Right-click on the Command Prompt > Run as administrator.
- In the console, type mbr2gpt /validate /allowFullOS and press Enter.
- To perform the conversion process, type mbr2gpt /convert /allowFullOS and press Enter.
Enabling UEFI Mode
After changing your drive from MBR to GPT, your PC will not boot into Windows, until UEFI is enabled. The exact process of enabling UEFI mode will depend on which motherboard you’re using.
Here is how you would typically enable UEFI:
- Press the F1, F2, F3, F10, F12, Esc, or Delete keys as soon as the manufacturer’s logo is displayed while booting. The key will depend on your motherboard’s manufacturer. Refer to the user manual.
- Navigate to the Boot menu and enable UEFI from there.
FAQ
Can you convert MBR to GPT without erasing data?
Yes. But, the process differs depending on whether it’s a system drive or not.
For a non-system drive, you’ll need the help of third-party data backup and recovery programs to create a disk image and then recover data from it.
A system drive can be converted from MBR to GPT using the MBR2GPT.exe utility in Windows.
Can I convert MBR to GPT without data loss for free?
In some cases, yes.
MBR2GPT.exe is a free MBR to GPT converter that’s in-built into Windows 10 and above. However, it only works on system drives. In all other cases, you’ll need third-party data recovery programs to create a backup of your drive and recover data from it. These programs are typically paid.
How to convert MBR to GPT with the Command Prompt?
There are two ways to convert a disk from MBR to GPT, using Command Prompt–the diskpart utility, or the MBR2GPT.exe tool. The former wipes all data from the drive, while the latter doesn’t. However, MBR2GPT only works on system drives.
Conclusion
While tools such as MBR2GPT.exe make converting a disk from MBR to GPT without data loss possible, it’s still recommended you first back up all the data on your drive. This is a failsafe in case the validation of your drive fails. If you’re using an old machine, first ensure that it is UEFI enabled before attempting to convert a drive to GPT.
This article was written by Manuviraj Godara, a Staff Writer at Handy Recovery Advisor. It was also verified for technical accuracy by Andrey Vasilyev, our editorial advisor.
Curious about our content creation process? Take a look at our Editor Guidelines.