Getting an error that reads “The SD card is write protected” when trying to write files to your microSD card? You’ll need to remove write protection on the microSD card before you can use it on a camera to add new photos or copy new files to it. Removing the write protection isn’t a complicated process.
However, in some cases you’ll need to recover your data first, especially in cases where you’re unable to write to the microSD card because of file system corruption. In this guide, we explain everything you need to know about how to remove write protection from a microSD card and safeguard your data.
Why Has My SD Card Become Write Protected?
MicroSD cards and SD cards can become write-protected for several reasons. Here are a few common reasons why microSD cards may become write-protected:
Reason |
Description |
🔒 Lock switch |
If you’re using an SD card adapter, it might have a lock switch placed on one of its edges. It’s easy to accidentally slide the switch over and unknowingly lock your card. You can simply slide the switch to unprotect microSD card within seconds. |
📖 Card set to read-only |
You’ve erroneously changed the card’s permissions to read-only, which can disallow writing any additional data to the card. |
🐞 Malicious software |
Did you recently insert your card into an unrecognized device? If the device had malicious software, it could’ve write-protected your SD card without permission. |
📁 File system corruption |
Logical errors like file system corruption render the card unusable and disallow writing more data. In such cases, you should first recover data from the corrupted SD card and then work towards fixing it. The card is not locked like in previous cases, but the data will still be inaccessible. |
🆘 Card is about to fail |
The microSD card might lock itself automatically to prevent data loss if it is about to fail. In such cases, you should aim to recover data on the microSD card before trying to fix it. |
How to Recover Data from Write Protected MicroSD Card?
You want to recover data from a write-protected SD card before you try fixing it so in case the card is failing, you’ll be able to safeguard your data against permanent loss. You’ll need a free SD card recovery tool like Disk Drill (read our Disk Drill review) to recover deleted files from a locked microSD card. Here is how you can use Disk Drill:
Step 1: Download and Install Disk Drill
Download Disk Drill and install it on your PC. The free version allows recovering up to 500MB.
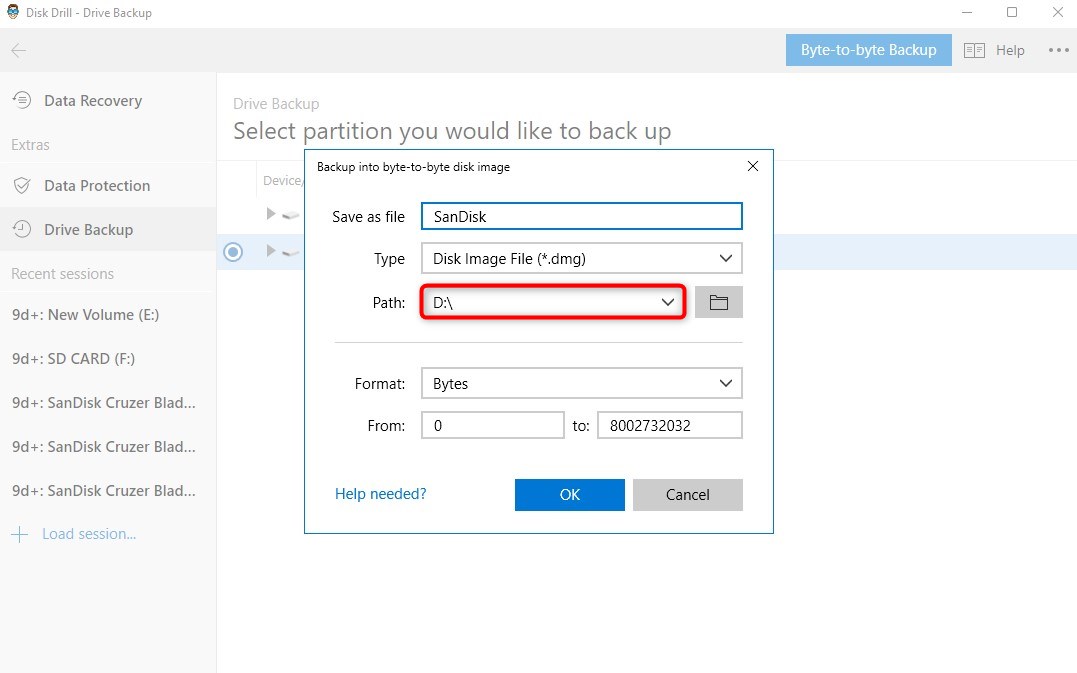
Step 2: Create a Byte-to-Byte Backup
The Byte-to-Byte backup feature in Disk Drill creates a backup image of your card. When your write-protected microSD card is in a near-failure state, putting it through a strenuous activity like scanning could push it over the edge. Creating a backup image is far less intense and won’t damage your card to the point of failure. Once you’ve created the image, Disk Drill can scan the image instead of the SD card.
To create a Byte-to-Byte backup, launch Disk Drill and select Drive Backup from the left sidebar. Select the microSD card you want to scan and click on the Byte-to-Byte Backup option at the top-right. Select a location for saving the backup. Of course, select a location different from the SD card. Then, select OK.
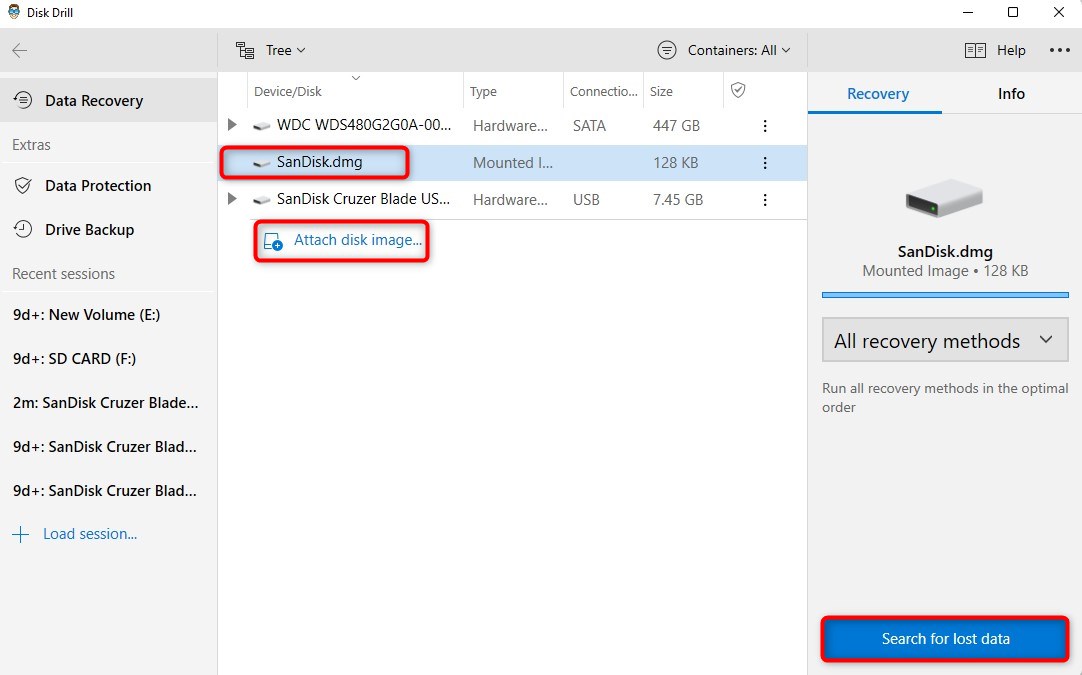
Step 3: Scan the Image
Select Data Recovery from the left sidebar and click on the Attach disk image option. Navigate to the location where you saved the backup image and select it. The image should now appear in the list of disks. Select it and click the Search for lost data button. Doing this will initiate the scan.
Step 4: Recover the Files
Once the scan is complete, you’ll see a list of files you can recover from the write-protected SD card’s image. You can choose to recover all files or select specific files for recovery. Disk Drill allows you to preview the files before recovering them, so you know you’re recovering the right files. To preview, click on the tiny eye icon:
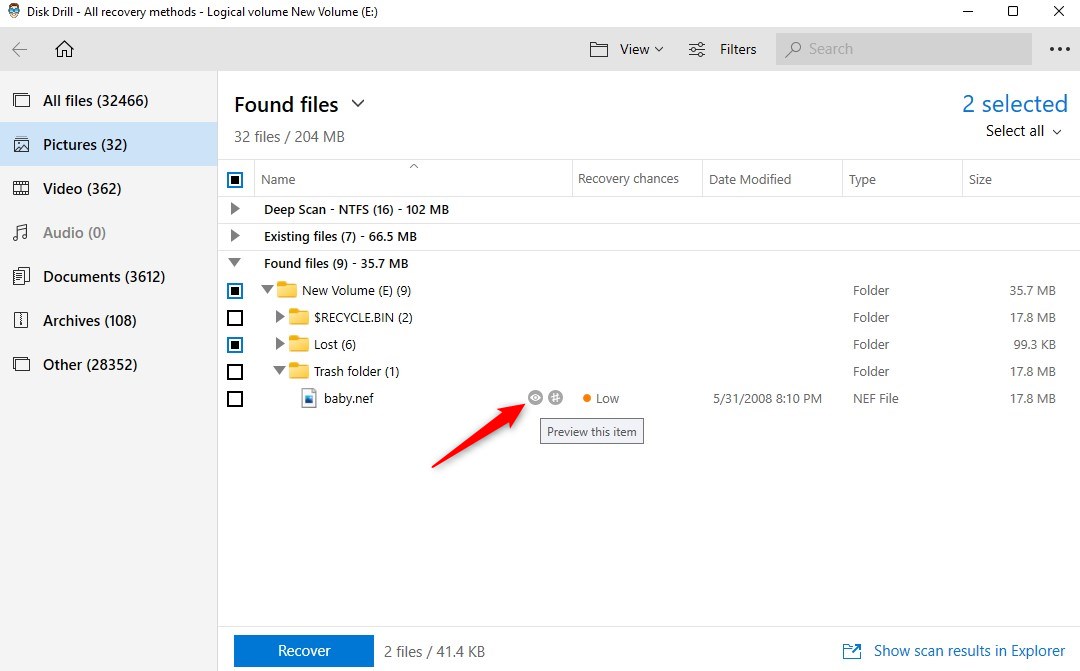
You can also filter the scan results by file type and file extension. For example, you can select Pictures from the left sidebar to only show photos. Alternatively, you can search for a file extension using the search bar.
For example, if you use a Nikon camera, you might want to recover NEF files so you can search for “.nef” to only see .nef files in the search results. You might also see files you had previously deleted from the SD card if they haven’t been written over. As you can guess, this method also works for recovering deleted files from an SD card.
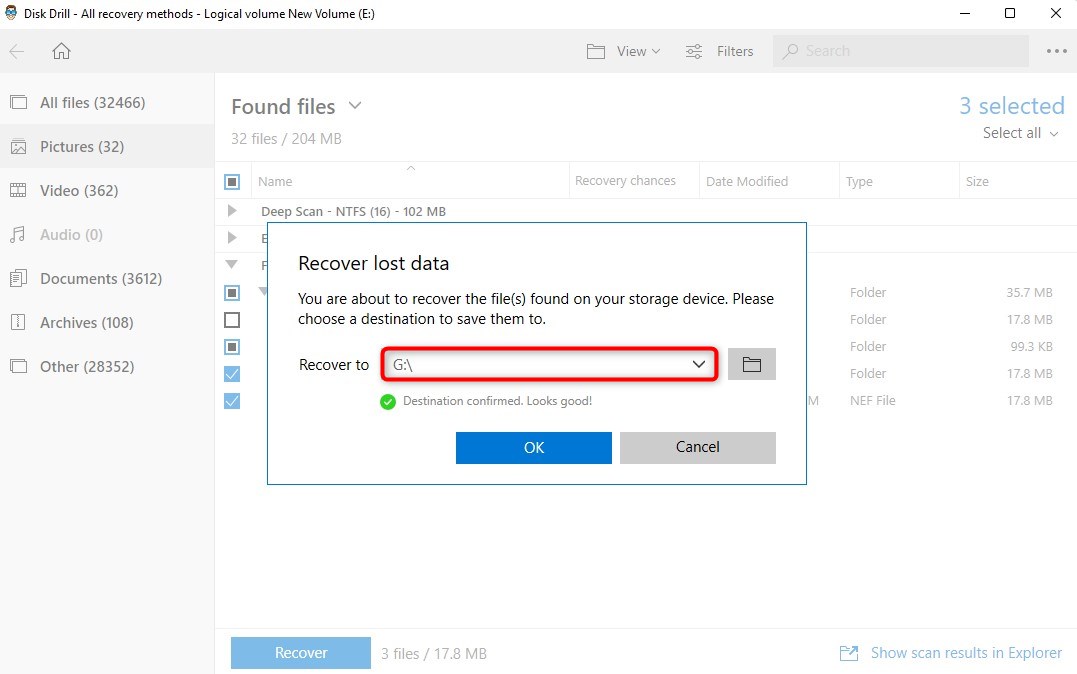
When you’ve found the files you want to recover, check the box to the left of the file name. When done, click the Recover button. Next, enter the location where you want to recover the files and click OK. Make sure you don’t recover them on the SD card.
How to Remove Write Protection on MicroSD Card?
Now that you’ve recovered your data, you can try fixing your memory card so you can use it again. The exact method to turn off write protection depends on what caused the SD card to become write-protected in the first place. Below is a process for fixing a locked microSD card including multiple methods.
Step 1: Check the Position of Lock Switch
If you’ve inserted the microSD card into an SD card adapter, you might have unknowingly changed the position of the lock switch, locking the microSD disk. The solution is fairly simple. You just need to flip the switch back to the unlock position. You’ll find the switch on the left border on card adapters from popular brands like SanDisk and Samsung. However, the switch is generally clearly visible on all SD card adapters.
Step 2: Check MicroSD Card Properties
Your SD card permissions may have been changed from within Windows. You can change it from within the File Explorer:
- Press Ctrl + E to launch the File Manager.
- Select This PC from the left sidebar if you’re on Windows 10, or Computer if you’re on Windows 11 (or the older Windows 7).
- Select Properties.
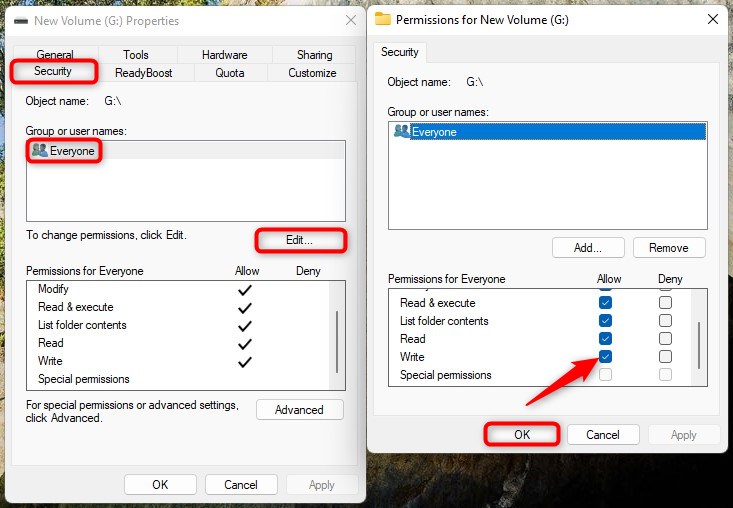
- Select the Security tab.
- Select your user name (or just select Everyone from the list and click on Edit to change permissions.
- Check the box next to Write and select OK.
Step 3: Remove Write Protection with CMD Command
If none of the methods worked so far, you can try changing the microSD card’s locked flag using the Diskpart utility in Command Prompt:
- Press Win + R, type cmd, and press Ctrl + Shift + Enter to run an elevated Command Prompt.
- Execute the following commands in the Command Prompt:
diskpart
list disk
select disk [NUMBER]
attributes disk clear readonly
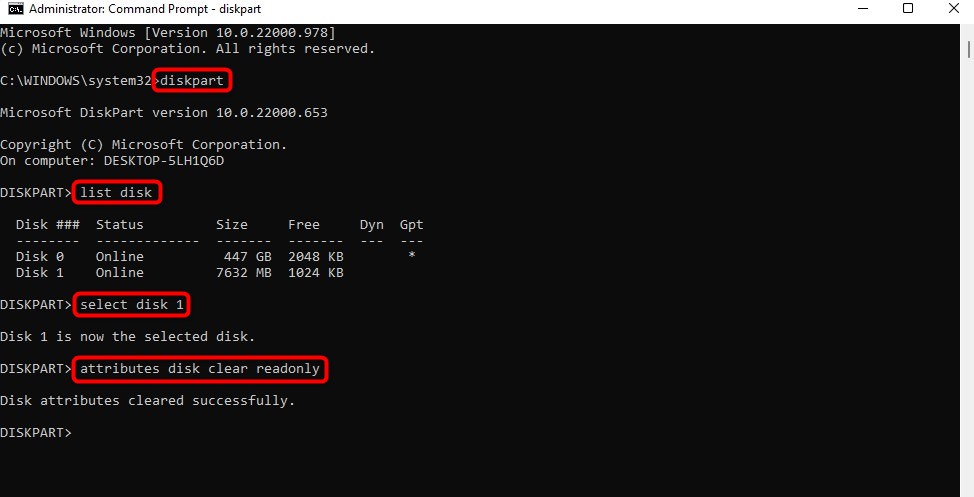
Diskpart will clear all disk attributes, so this should give you write access to the SD card.
Step 4: Contact Data Recovery Service
Card failure can also result in a locked microSD card. If that’s the case with your card, you can try recovering the data from the dead SD card, but you risk overwriting the data.
Since you might not be able to recover data using SD card recovery software or bring it back to its normal operating condition. In such cases, you should consider approaching a reliable memory card recovery service. They are specialists who can bring your microSD card to their lab and use specialized equipment to recover the data for you.
FAQ
How to remove write protection on microSD card without switch?
You can try using the file explorer to change the write permission on the card if your microSD card is write-protected. Alternatively, you can use the Command Prompt and clear disk attributes using the diskpart utility.
How to format a write protected microSD card?
You can format a write-protected microSD card using the File Explorer.
- Launch the File Explorer.
- Right-click on the card and select Format.
- Choose a file system and check the box next to Quick format.
- Click Start.
How to remove write protection on microSD card using a laptop?
You can remove write protection from the SD card using a laptop in two ways. You can change the write permissions using the File Explorer or you can use the Command Prompt to clear disk attributes.
How to remove write protection on microSD card using Android phone?
If the microSD card says it’s write-protected when you’re using it on your Android phone, unmount it and remove it from the Android device. Insert it into a card reader connected to your PC and use the File Explorer or Command Prompt method to undo write protection.
Conclusion
If you can’t write data on your microSD card because of write protection, you should first extract your data and then try to disable write protection on the microSD card using the methods in this guide. Typically, removing write protection isn’t complicated, though some cases can cause data loss.
This article was written by Arjun Ruparelia, a Contributing Writer at Handy Recovery Advisor.
Curious about our content creation process? Take a look at our Editor Guidelines.