If you need to retrieve deleted or lost files from your xD-Picture Card, you’ve landed on the right page. We’ve dealt with every kind of memory card and just about every kind of data loss, and today we’re breaking down everything you need to know about xD card recovery. Whether your files were accidentally deleted or your computer won’t even recognize the card at all, we’ve got you covered.
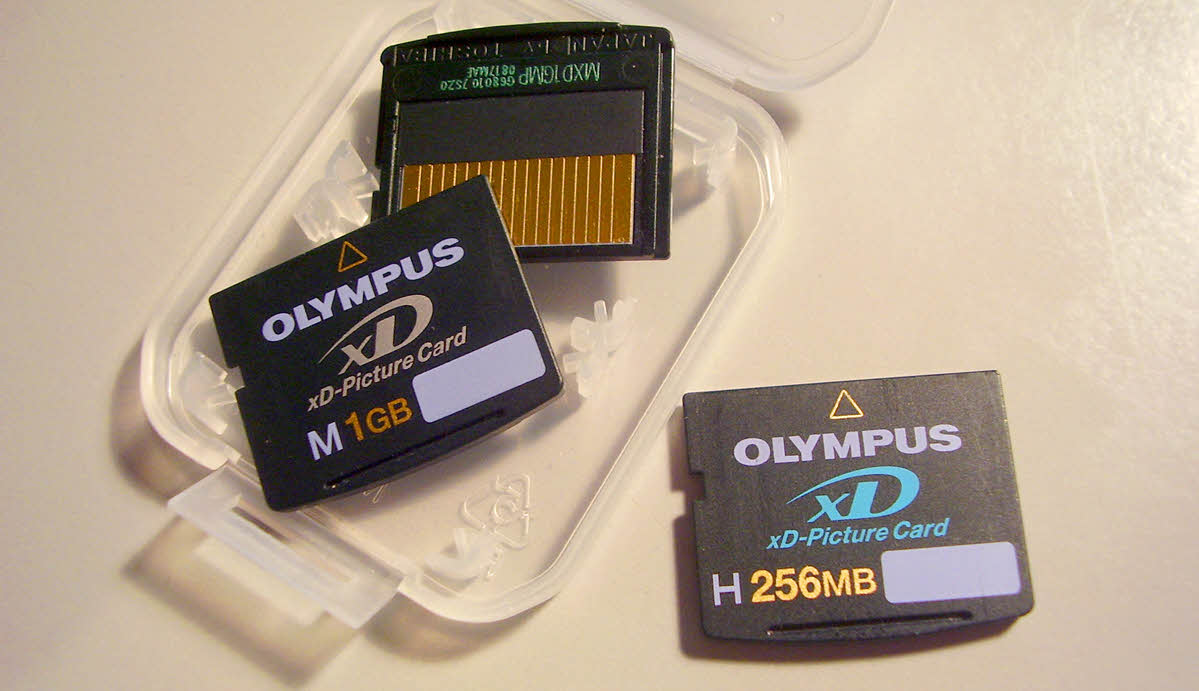
xD cards were introduced in 2002 by Olympus and Fujifilm and used mostly in their digital cameras. They topped out at 2 GB and came in several types (S, M, M+, and H). Since xD-Picture Cards (often just called xD cards) have long been phased out in favor of SD cards, xD card data recovery isn’t something most people talk about anymore. That also means it’s tough to find reliable, up-to-date information when you actually need help. That’s one of the reasons we decided to update this guide – to give you a current, no-nonsense resource that works.
Can You Recover Deleted Files & Photos from xD Cards?
TLDR: Yes, it’s possible to recover deleted files (including photos) from xD-Picture Cards, but your success depends on a few factors.
Let’s talk about why it’s often possible to recover deleted photos from any memory card, including an xD card.
xD cards might be outdated, but at their core, they’re still just flash memory devices, very similar to USB drives or SD cards. When you delete a file from an xD card, the data doesn’t vanish right away. The file system simply marks that space as available for new data. Until something else gets written to that same spot, the original data can still be recovered using the right software.
- But here’s where it gets tricky. xD cards don’t include features like a flash translation layer or wear-leveling, which are common in modern SD cards. That means the xD cards don’t manage aging or errors very well on their own. So over time, they develop more bad blocks and read errors, which can mess with recovery attempts, especially if the card is physically worn out or wasn’t safely ejected.
- Another issue: hardware support. Since most modern PCs and laptops no longer have built-in xD card slots, you’ll need a dedicated xD-compatible card reader that works with your system. If your computer can’t even see the card, no software is going to help until that first problem is fixed.
- And finally, you’re going to need to use xD card recovery software that can actually get the job done. Not every recovery app supports xD cards properly, and some struggle with older file systems or raw image formats from Olympus and Fujifilm cameras. We’ll walk you through a few of the best ones later.
In short, here are a few tips to keep in mind before you start:
- Don’t use or touch the xD card until you’re ready to scan it, any new activity could overwrite the files.
- If your system asks you to format the card, don’t do it. This usually happens when the card is corrupted or uses a file system your OS doesn’t support. Formatting will make recovery harder (and full formatting will make it impossible).
- Use a compatible, high-quality xD card reader (many modern ones don’t support xD, so make sure yours does).
- Check if the card shows up in Disk Management (on Windows). Even if it doesn’t appear in File Explorer, as long as it shows up in Disk Management with the correct size, you’re in a good position to scan it with recovery software.
How to Recover Lost Data From an xD Card
Okay, now let’s get into the practical steps. We’ll walk you through everything with detailed instructions and screenshots, so even if you’ve never recovered data before, you’ll be able to follow along.
To give you more options to choose from, we’re covering not one but two popular data recovery solutions: Disk Drill and Recuva. Let’s take a closer look at each of them.
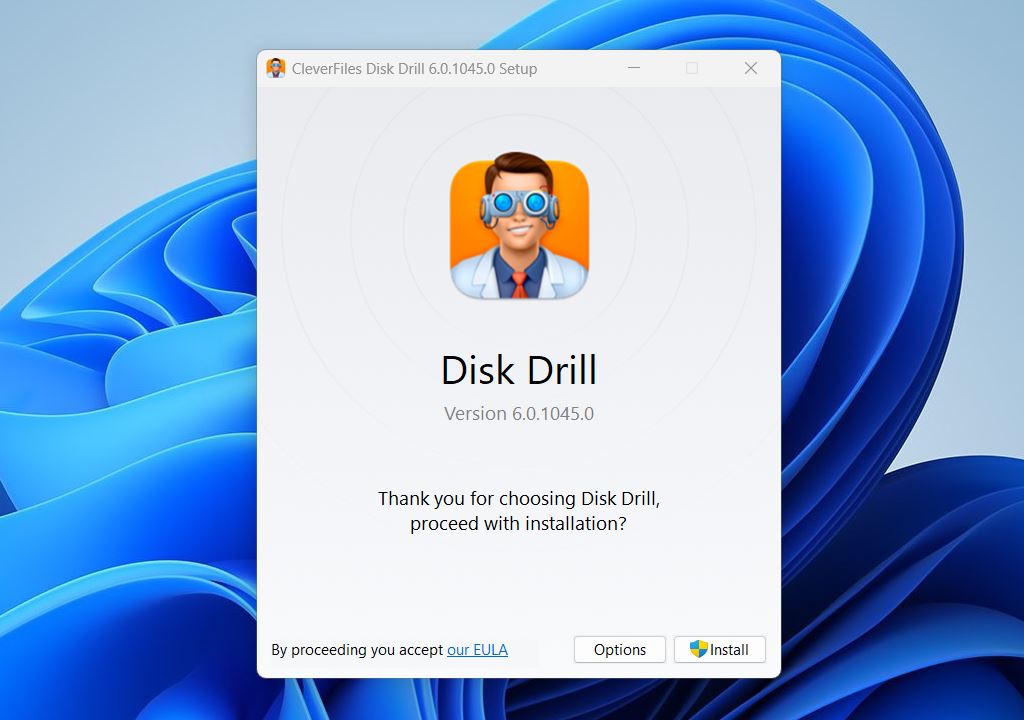
Option A: Disk Drill
Disk Drill is our go-to data recovery software because it delivers best-in-class results, is easy to use, and supports all commonly used file formats.
![]()
Here’s why we chose Disk Drill specifically for this xD-Picture Card guide:
- First, it shows consistently strong recovery results with the file systems you usually find on xD cards (most often FAT16 or FAT32).
- Second, even when the file system is damaged or missing entirely, Disk Drill can still perform a deep scan and recover files by their signatures. It supports exactly the kinds of files that typically live on xD cards. Since these cards were mostly used in Olympus and Fujifilm digital cameras, you’ll often find JPEGs, RAW files (like .ORF and .RAF), and short video clips. Disk Drill handles all of those formats without any issue, and even lets you preview them before recovery.
- And lastly, since xD cards are notoriously less reliable than modern memory cards, there’s a higher risk of read errors, bad sectors, or failure during recovery. That’s where Disk Drill’s disk imaging feature really helps. It lets you create a full byte-for-byte backup of the xD card first—so instead of scanning the fragile original, you can safely work with the image. This reduces stress on the card and gives you multiple chances to recover your files.
Step 1. Download and Install Disk Drill
Disk Drill can be downloaded for free directly from its official website and installed on any computer running Windows 11, 10, 8, 7, Vista, and XP.
You can either choose the version that matches your OS or just download the latest release (version 6) directly.
The free version lets you scan any storage device (including xD cards), preview an unlimited number of files, and recover up to 500 MB of data on Windows without a license. That’s more than enough for dozens, sometimes hundreds, of photos.
The installation process is simple: just open the downloaded file and follow the installation instructions.
Step 2. Connect Your xD Card to Your PC
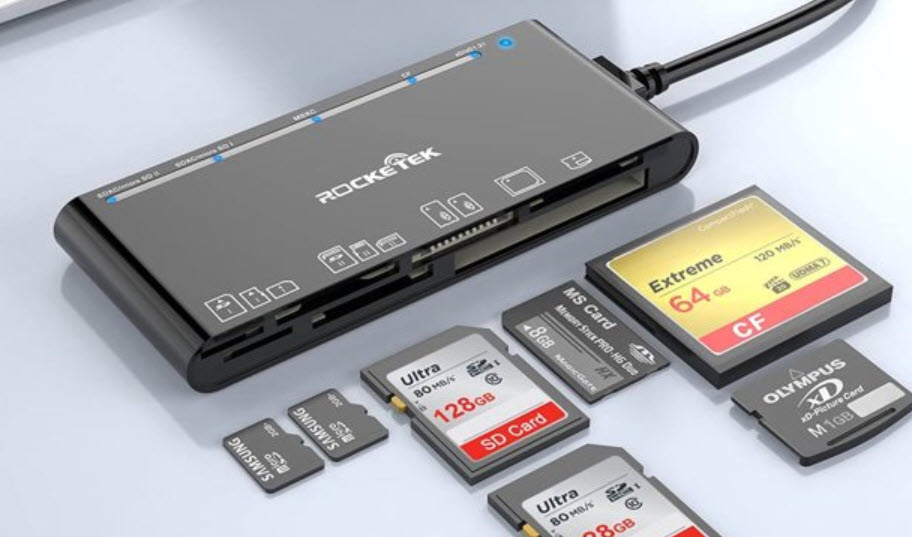
Once you have Disk Drill installed on your computer, it’s time to connect your xD card. Since you would be hard-pressed to find a modern PC with a built-in xD card reader, you will almost certainly have to use an all-in-one external memory card reader. Luckily, such readers are readily available, so buying one shouldn’t be a problem if you don’t own one already.
Remember this. You don’t need the card to show up in File Explorer for recovery to work. As long as it’s detected in Disk Management with the correct size, even if it says “RAW” or “unallocated”, Disk Drill can scan it. That’s your green light to move forward.
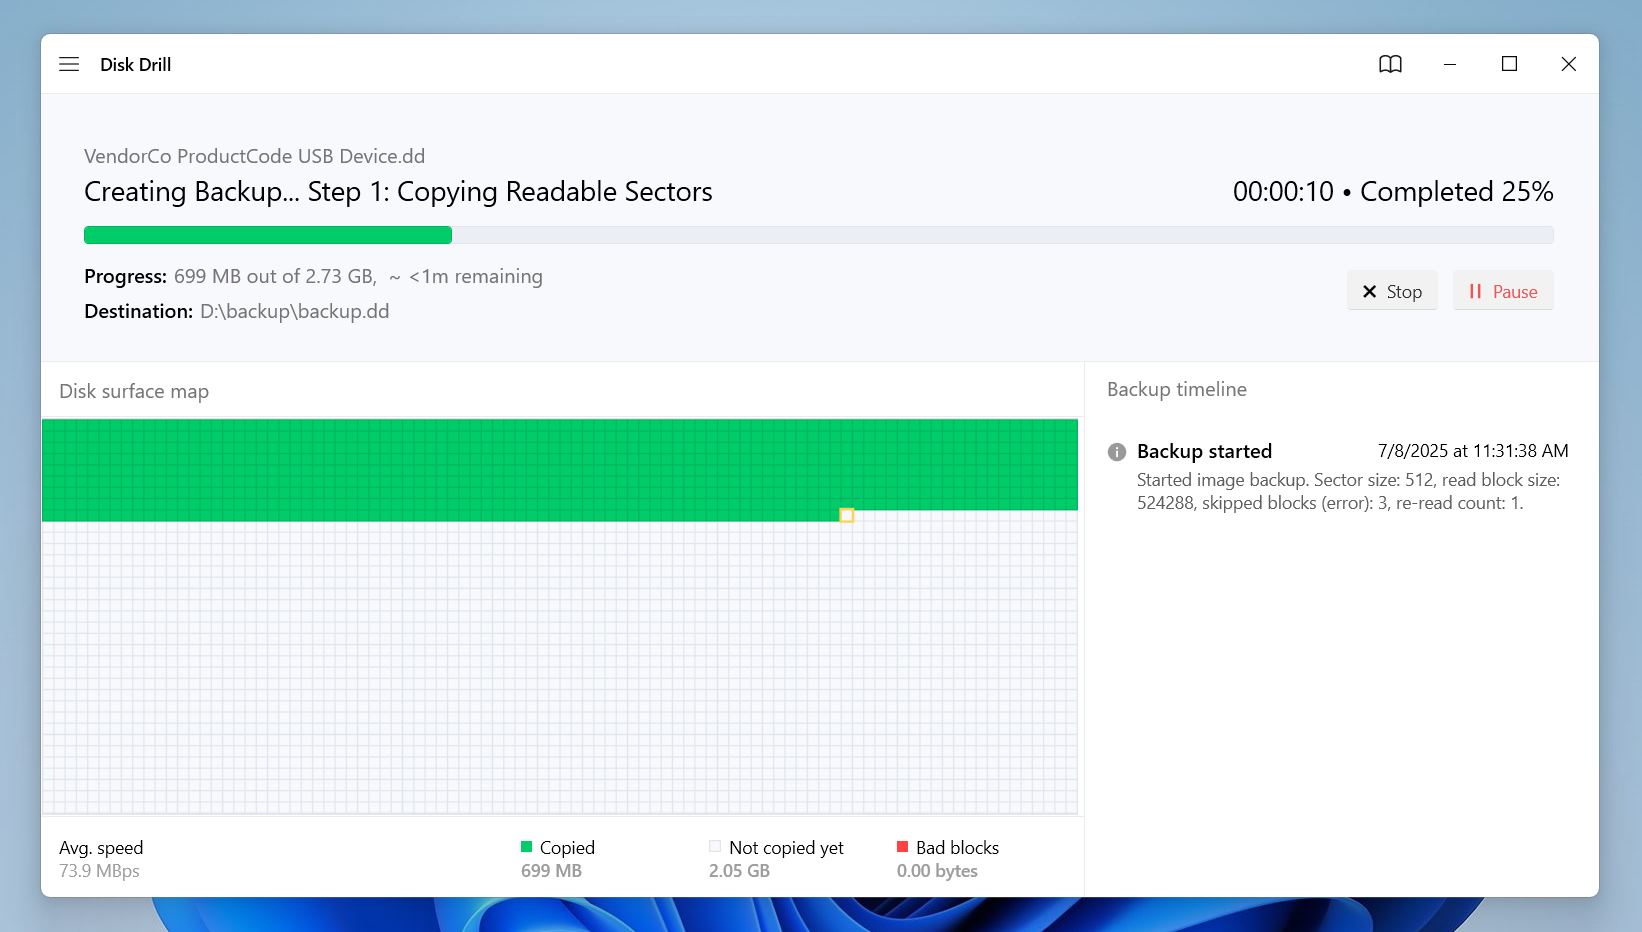
Optional Step. Create a Byte-for-Byte Backup (Recommended for Unstable Cards)
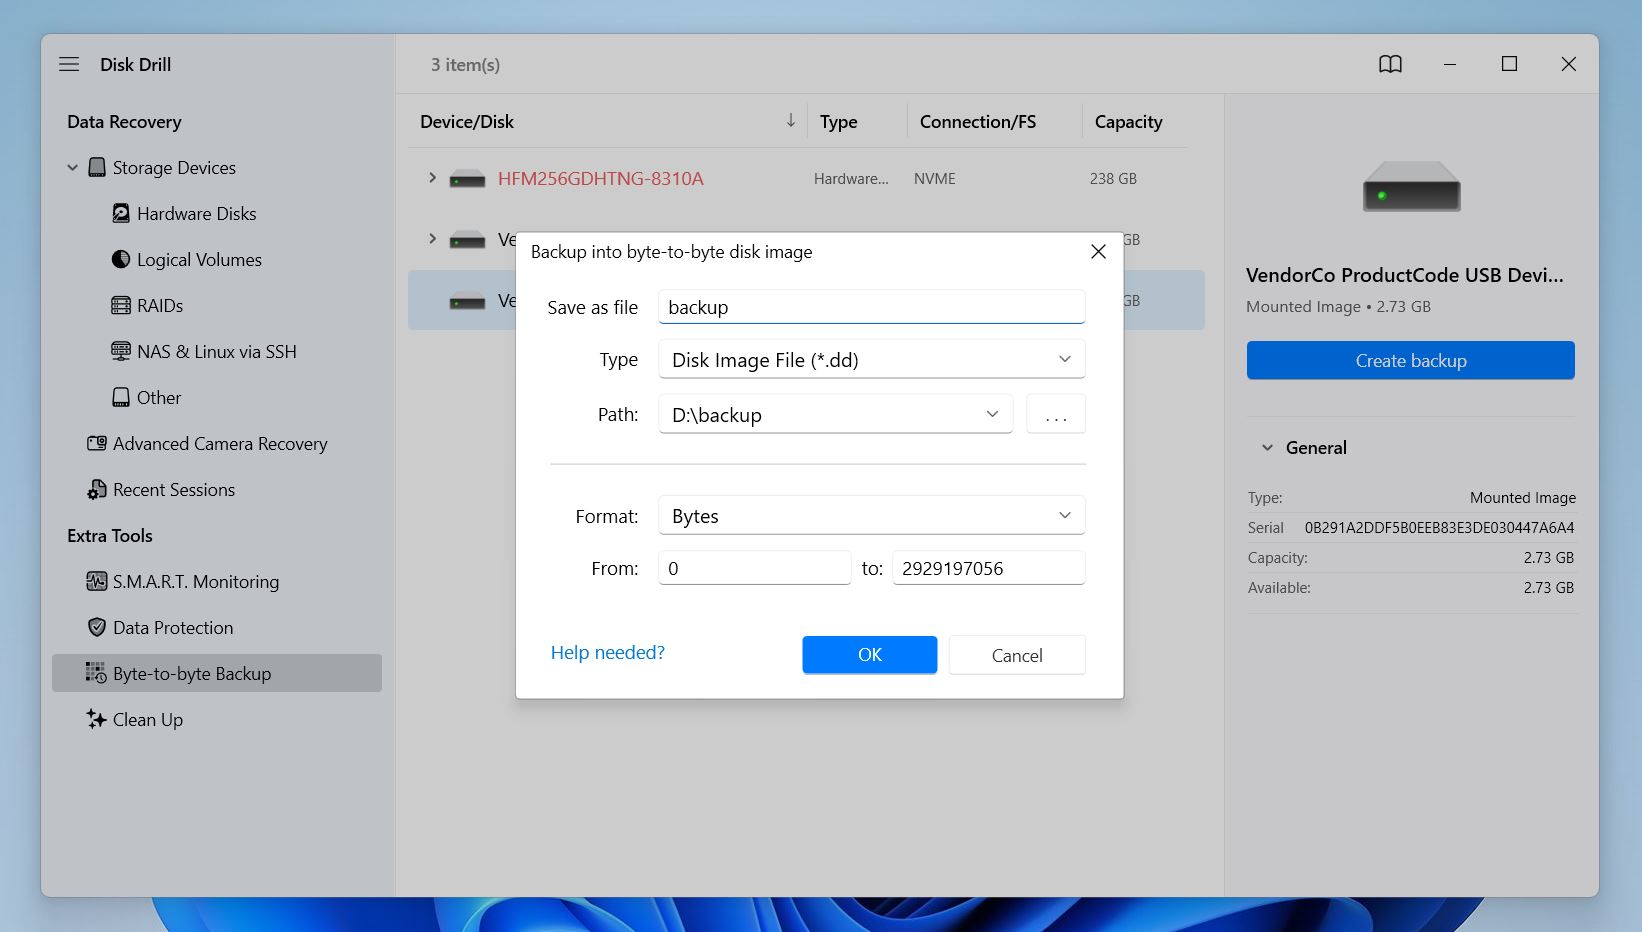
For simple accidental deletions, creating a full disk image might feel like overkill, but with xD cards, it’s often worth the extra step. These cards are more prone to wear and read errors than modern alternatives, so a backup helps avoid further damage during recovery. Plus, xD cards are small by today’s standards (2 GB or less), so creating an image won’t take long or use much space.
If you suspect your xD card has issues – like slow reads, random disconnects – it’s smart to create a byte-for-byte backup before scanning. This protects your data by letting you work with a safe image file, instead of putting more stress on the original card.
To do this in Disk Drill:
- Go to Extra Tools in the left-hand sidebar.
- Select Byte-to-byte Backup.
- Choose your xD card from the list.
- Click Create Backup and choose a save location on a different drive (never save anything to the card you’re backing up).
Once the image is ready, you can mount it in Disk Drill (just click Attach disk image) and scan it as if it were the original card.
Step 3. Launch Disk Drill and Scan the xD Card
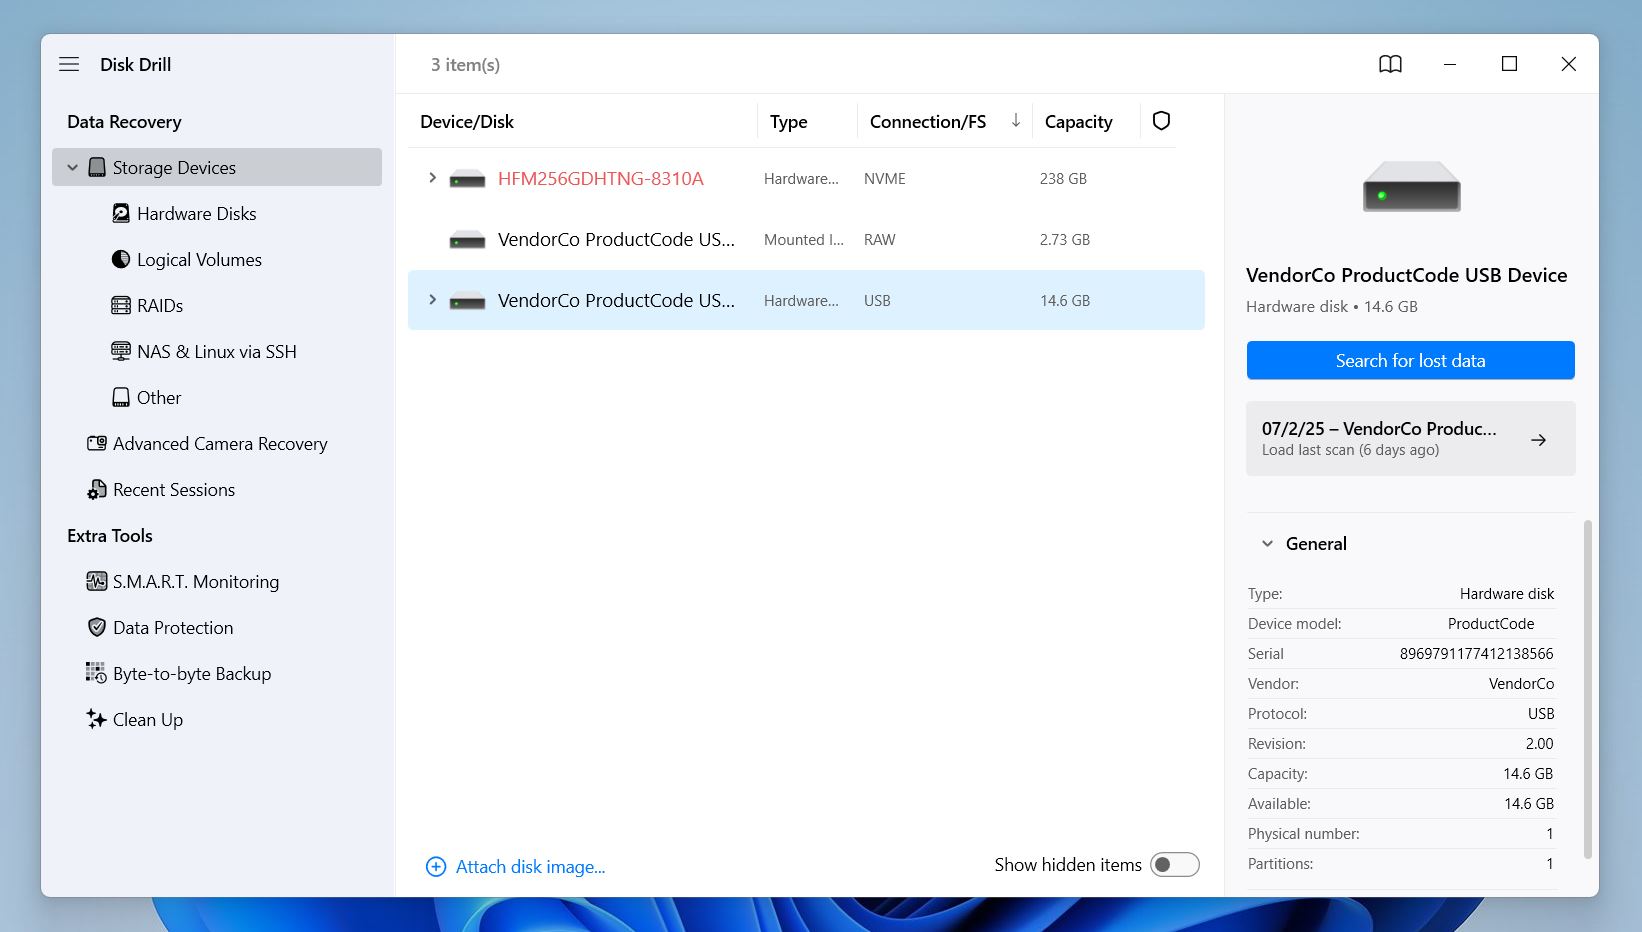
The next step is to start scanning your xD card, or the image you created in the previous step. Either one works the same way inside the app. Select it and click Search for lost data.
Disk Drill will offer two scan types: Universal Scan and Advanced Camera Recovery.
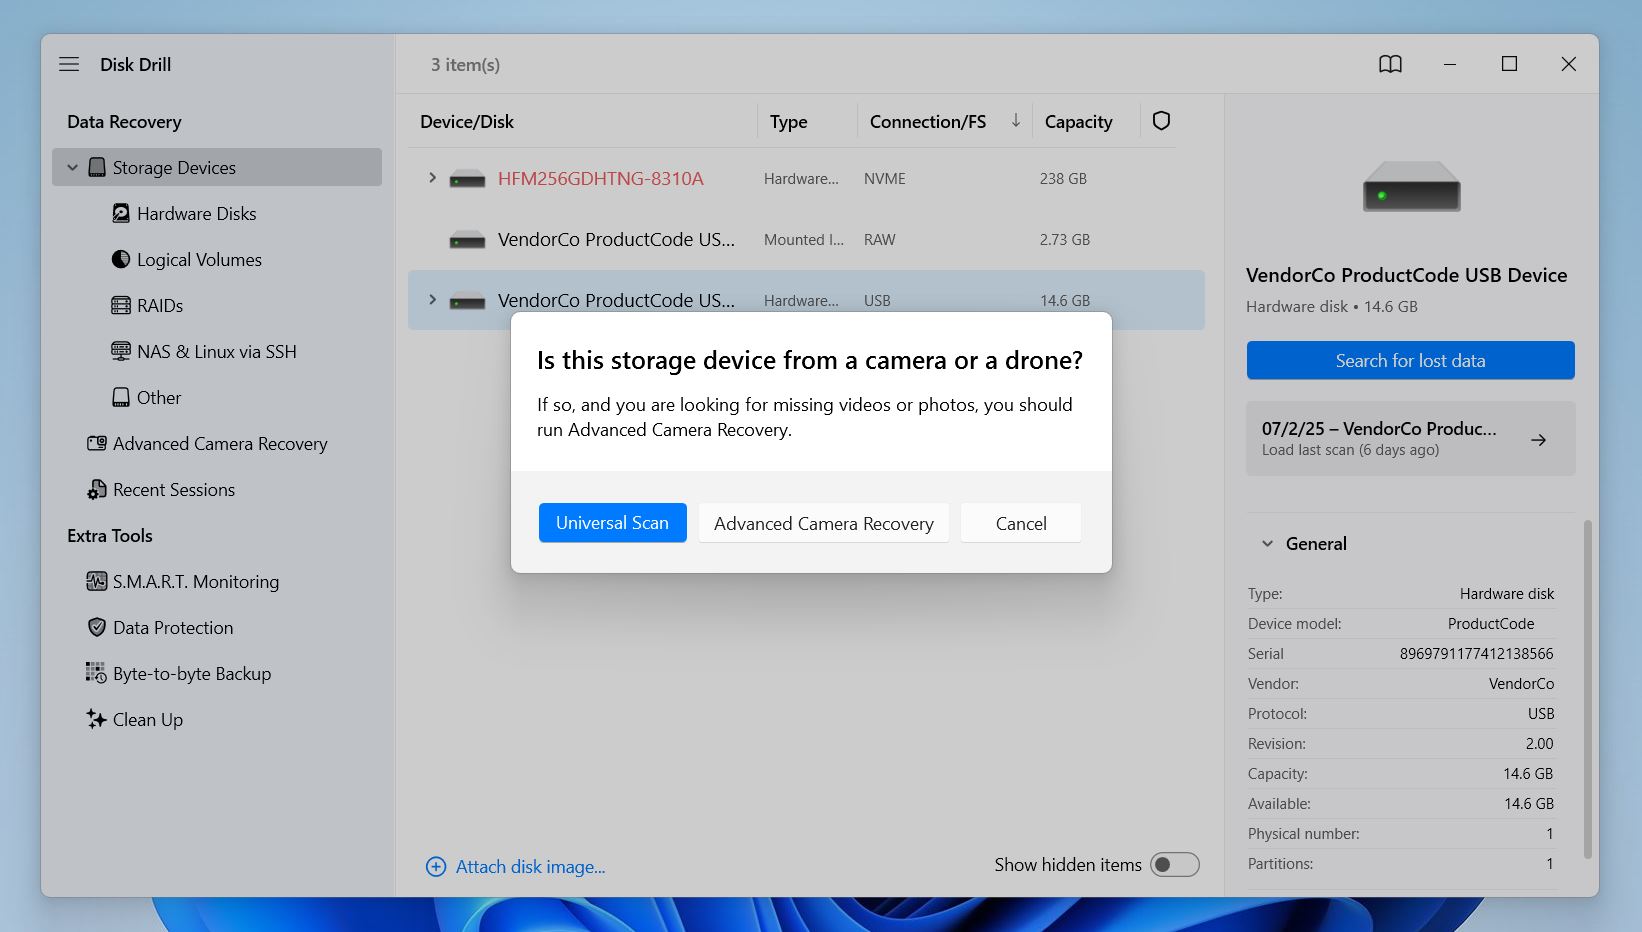
- Universal Scan is the better choice if the files were deleted while the card was connected to your computer (this is ideal for standard deletions or formats done on a PC).
- Advanced Camera Recovery is designed for files deleted directly in the camera or cases where the files were never saved correctly, like if a recording was interrupted or a write error occurred. It’s optimized for camera-specific formats and recovery quirks.
You can start with either scan based on your situation, and if your files don’t appear right away, you can always run the other one afterward. Disk Drill doesn’t overwrite anything during scans, so it’s safe to try both, especially if you’re scanning a disk image, where you literally risk nothing. That’s one more reason we recommend creating an image first when working with xD cards.
Step 4. Analyze the Scan Results and Select Lost Files
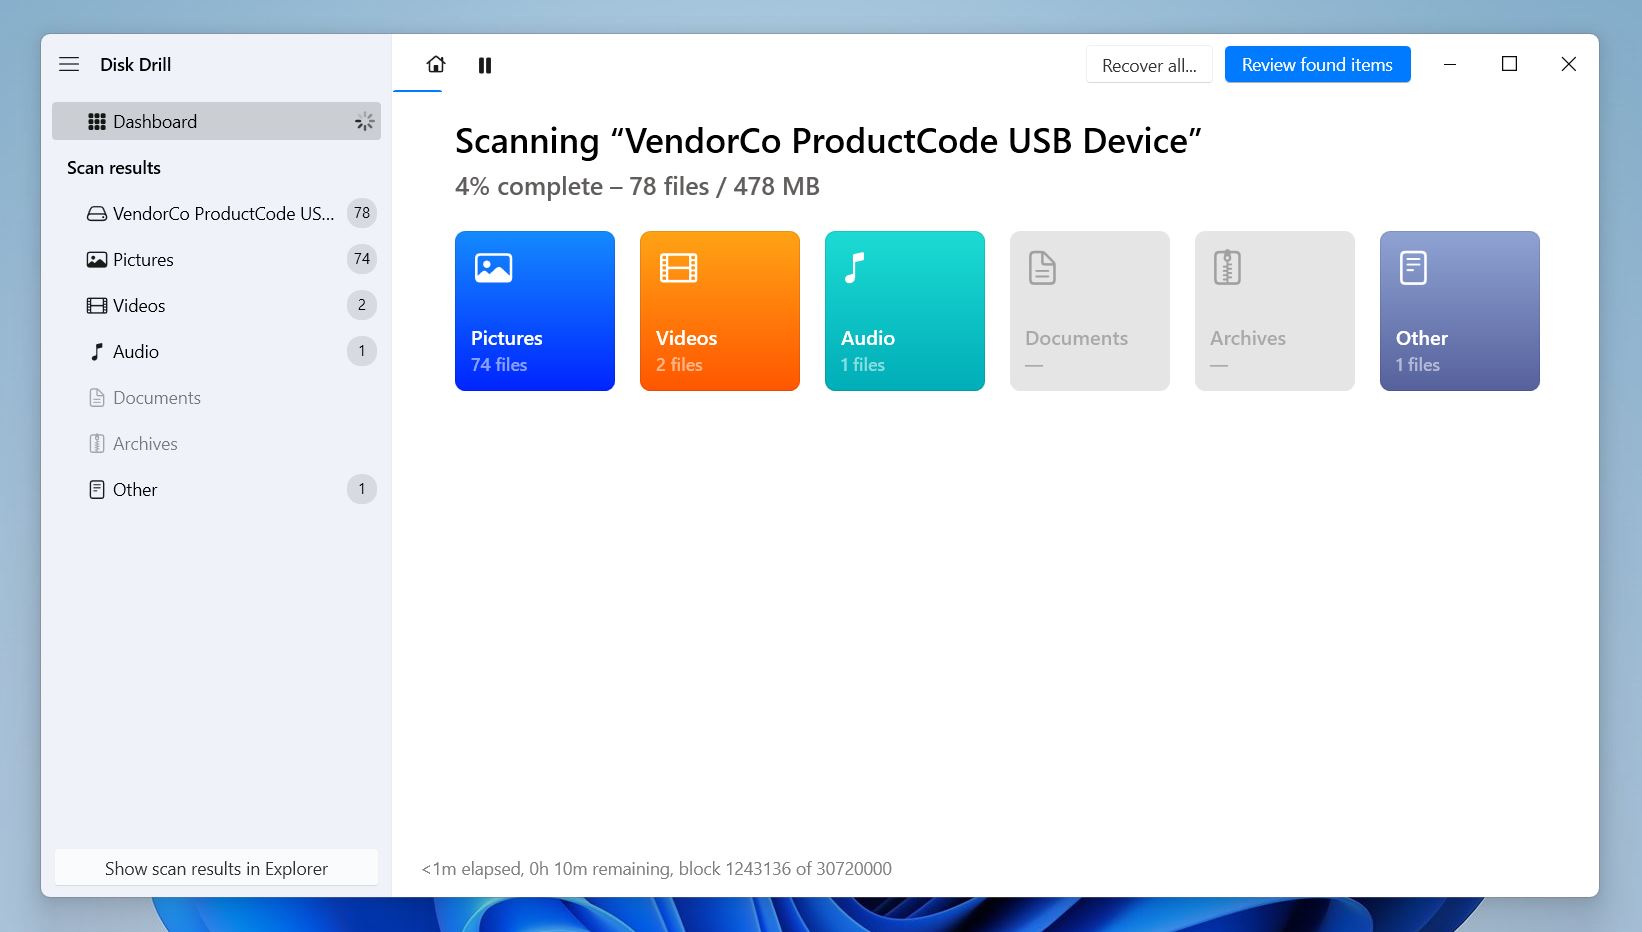
After clicking the Search for lost data button, Disk Drill will automatically run all recovery methods in the optimal order to find as many deleted files as possible. It will then show your results organized by category: Pictures, Video, Audio, Documents, and more. At this point, you’ve got two options:
- Click Recover all… to restore everything Disk Drill found.
- Or click Review found items to browse through the results and pick exactly what you want.
If you need something specific, use the search bar at the top, just type in a file extension (like .jpg, .orf, or .raf) or a keyword to quickly narrow down the list.
Want to check a file before recovering it? Click the eye icon next to the filename to preview it. Disk Drill supports previewing most photo, video, and document formats right in the app. If your system can open it, Disk Drill can too.
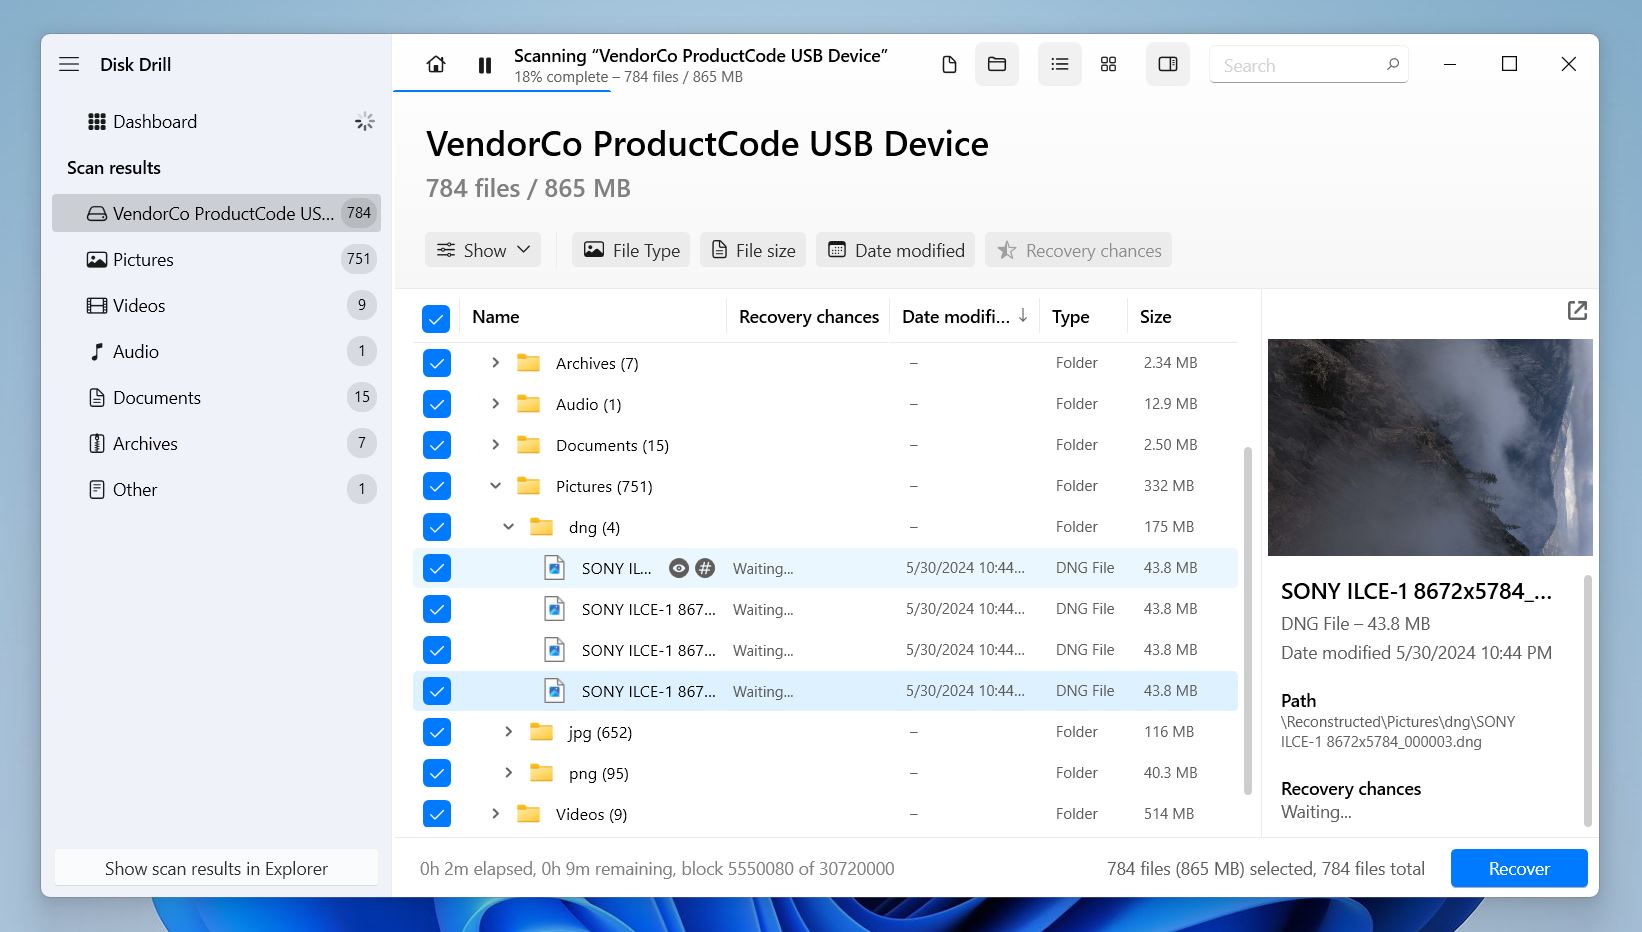
It also shows a recovery chance indicator next to each file (like “High,” “Average,” or “Low”), but here’s a tip: if you can preview the file, it’s a 100% guarantee that it’s recoverable. Preview is the most reliable confirmation that the file is intact and ready to be saved.
Step 5. Recover Selected Files to a Safe Destination
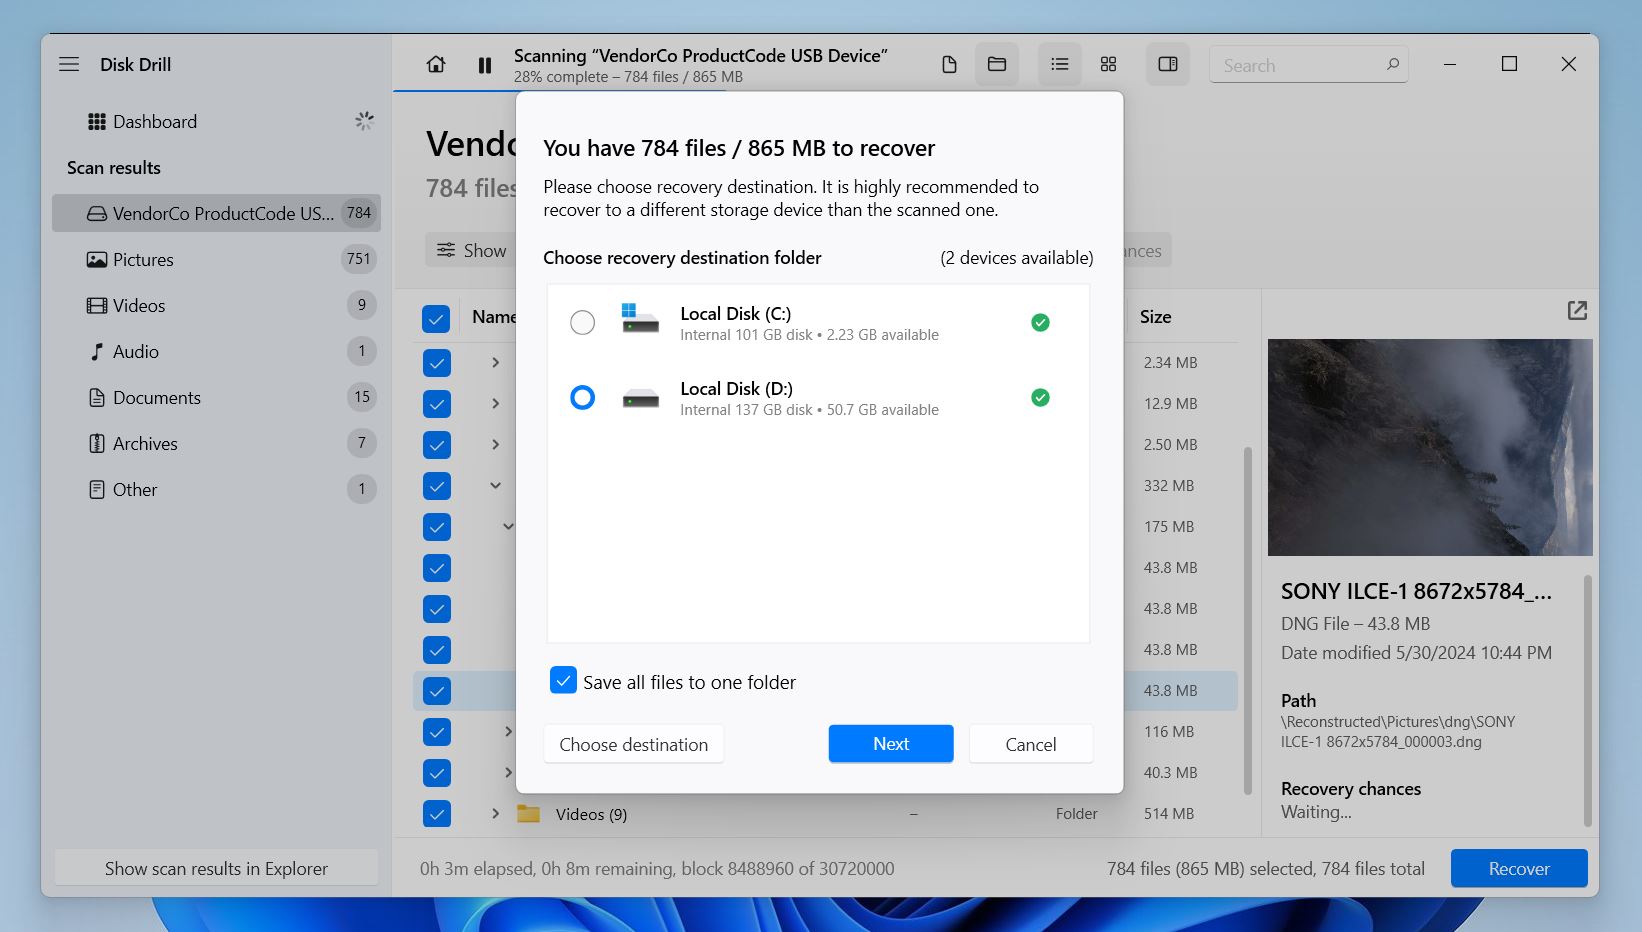
When you’re ready, select the files you want to save and click Recover. Make sure to choose a different destination drive, not the xD card itself. Disk Drill will warn you if you try to recover to the same device, since doing so could overwrite data you haven’t recovered yet.
The process usually doesn’t take long, especially with smaller cards like xD. Once it’s done, Disk Drill will offer to open the destination folder so you can immediately check your recovered files and make sure everything looks good.
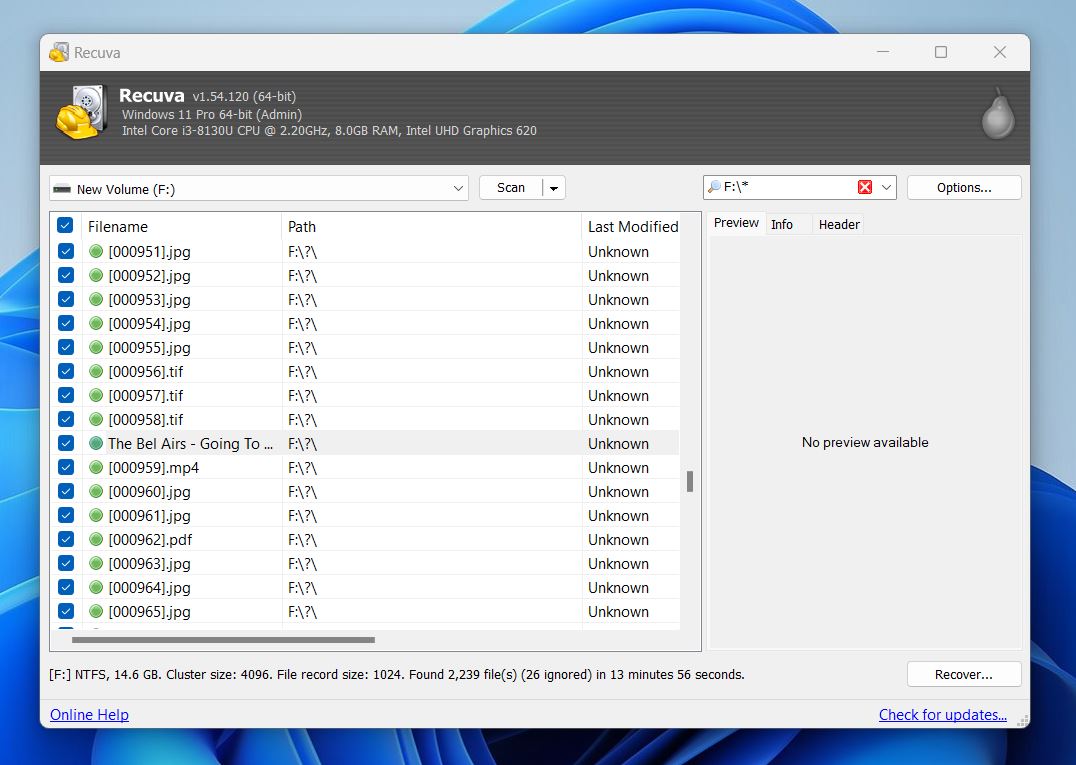
Option B: Recuva
Next up is Recuva, popular among Windows users and a name you’ll almost always find on lists of the best memory card recovery software.
![]()
Here’s why we chose Recuva specifically for this guide:
- While it’s not as powerful or modern as Disk Drill, it does have one major advantage: Recuva lets you recover an unlimited amount of data for free. That makes it a great option if you’re on a tight budget and only need to recover a few JPEGs or documents from your xD card. Just keep in mind that it works best when the file system is intact and the card hasn’t been formatted.
- If you’re a fan of step-by-step wizards, Recuva has you covered. Its recovery wizard guides you through the process in plain English.
- It also features color-coded file health indicators (green, yellow, red) to give you a quick idea of whether a file is likely recoverable. It’s a simple system, but helpful when you’re sorting through a long list of deleted items.
Recuva might not be as consistent or reliable as Disk Drill (especially in tougher recovery scenarios), but it’s free, simple, and often more than enough for basic file deletions. Like any software, it has its pros and cons, which we cover in more detail in our full Recuva review. Now, just like we did with Disk Drill, let’s walk through the exact steps on how to get pictures from your xD card using Recuva:
Step 1. Download and Install Recuva
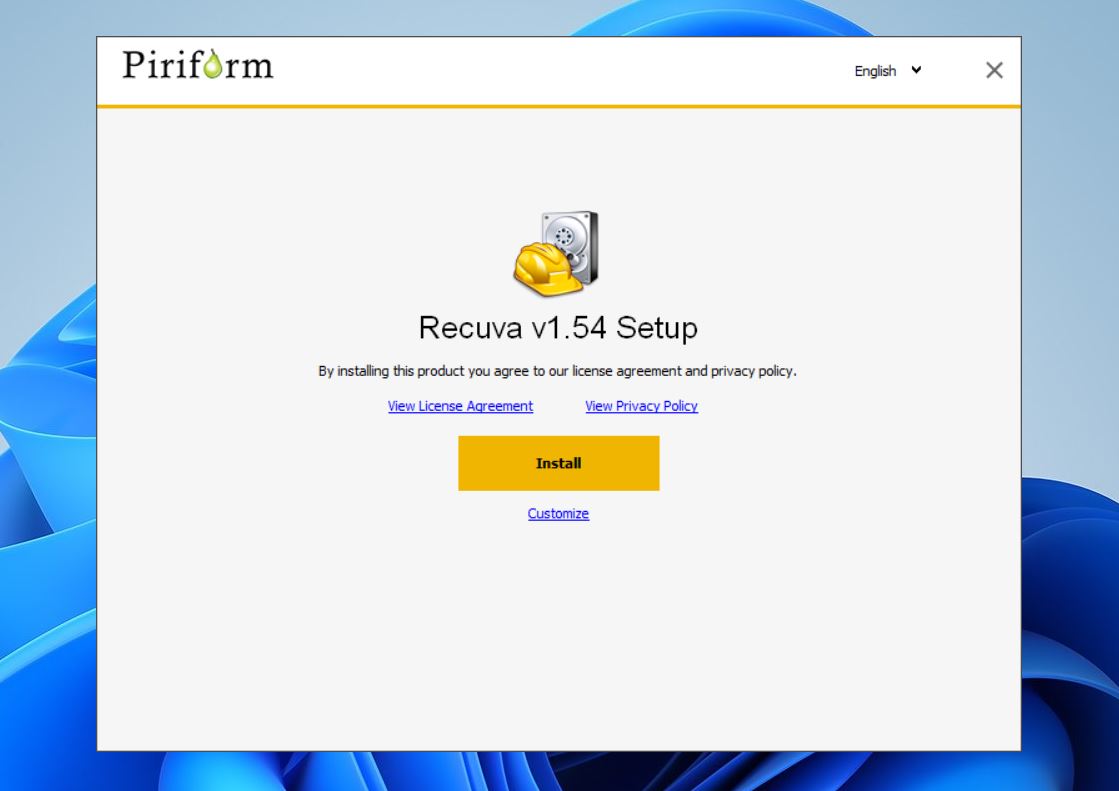
To recover data from an xD card using Recuva, start by visiting its official website. There, download the free version of the software and open the downloaded installer file. Follow setup instructions to complete the installation process. Recuva officially supports only Windows 10, 8.1, 7, Vista, and XP, but we’ve been able to get it to run on Windows 11 without any issues.
Step 2. Connect Your xD Card to Your PC
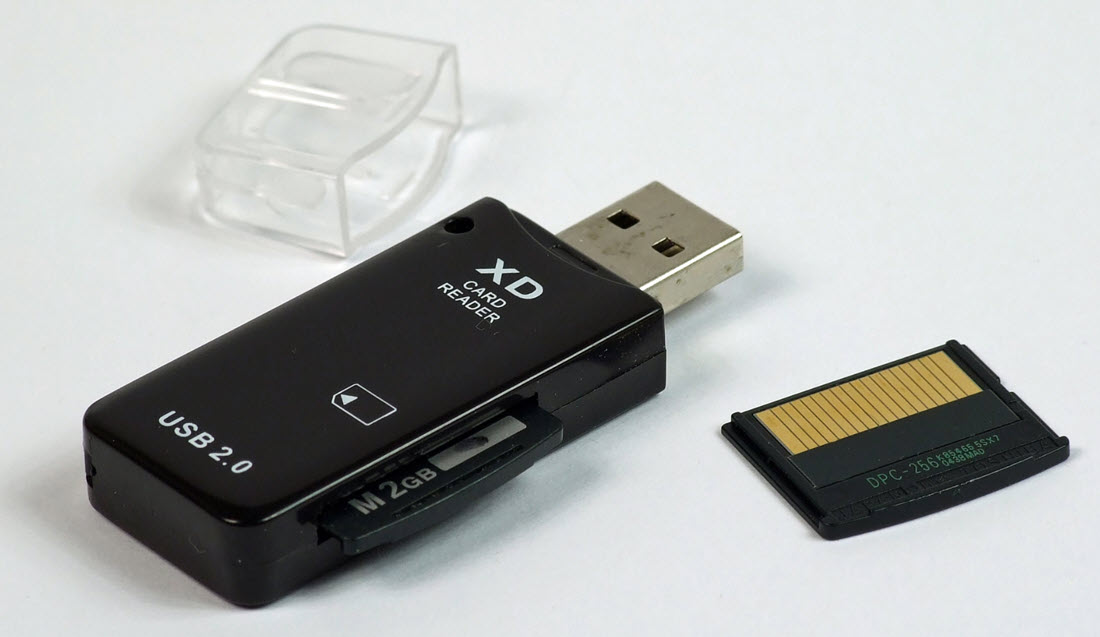
Once you have Recuva installed on your computer, you need to connect your xD card. If you have an xD card memory reader lying around, then you’re good to go. If not, then you can purchase an all-in-one external memory card reader with an xD card slot for just a few dollars online or in your local electronics store.
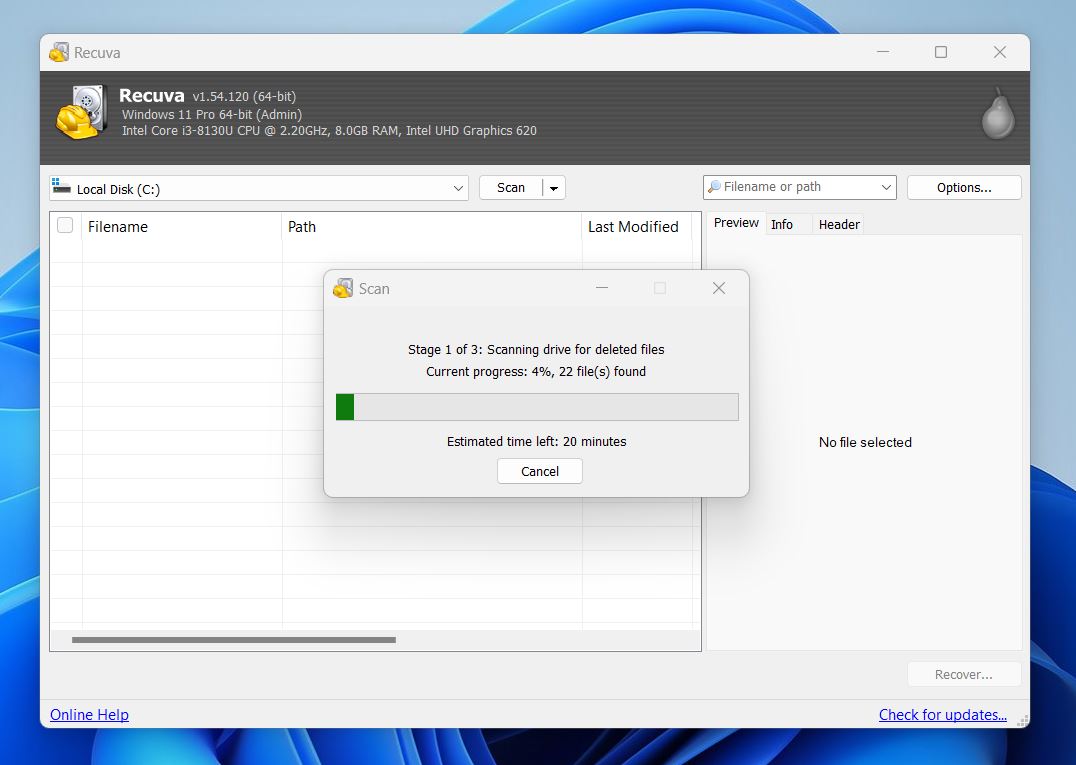
Step 3. Launch Recuva and Scan the xD Card
Now, launch Recuva and let the recovery wizard guide you through a few simple steps. First, you will be asked what sort of files you’re trying to recover. Next, you will be prompted to select the location or storage device you want to recover. Choose the “In a specific location” option and select your xD card.
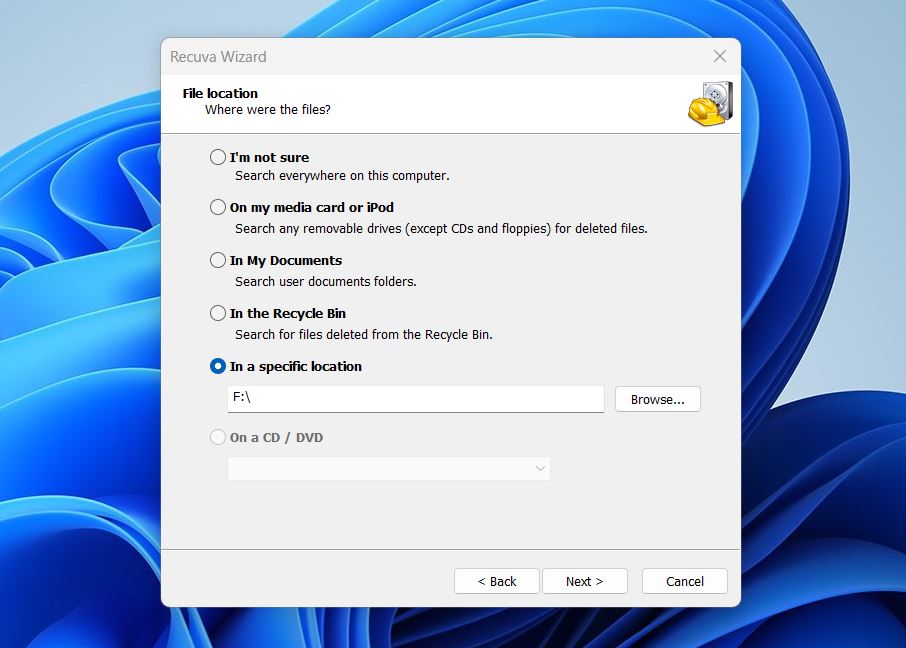
Note: Recuva can only scan storage devices with a drive letter. If your xD card doesn’t have one, then you can launch the Disk Management tool (press Win + X and choose Disk Management) and use it to give it one. Before you click the Start button to search for lost files, we recommend you check the Enable Deep Scan option to find as many files as possible.
Step 4. Analyze the Scan Results and Select Lost Files
We recommend you switch to Advanced mode to see real-time previews and additional information. Unfortunately, Recuva doesn’t make it easy to narrow down the scan results using filters, so you may have to scroll down a lot until you find the files you’re looking for. Once you do, click the checkboxes next to them to select them.
Step 5. Recover Selected Files to a Safe Destination
Have you select all missing files that can be recovered? If so, then you can click the Recover button and select a location for recovery. Any location with enough free storage space that’s not the xD card you’re recovering is suitable. Click OK to confirm and use File Explorer to navigate to the recovery folder and confirm that your files have been successfully recovered.
If a preview doesn’t load, it doesn’t necessarily mean the file is broken. Recuva’s preview feature is fairly basic and does not support many file types, especially RAW formats from cameras like Olympus or Fujifilm.
How to Fix Unmountable/Corrupted/Damaged xD Card(s)
Your xD card data recovery attempts may be jeopardized by various logical and mechanical issues. In this section, we’ll go over a few additional steps and tools you can use if your xD card gives you extra trouble. These issues are common with older cards, but many of them have workarounds. Just be sure to proceed carefully so you don’t make the situation worse.
Issue #1: The xD Isn’t Recognized
This is probably the most common problem, and one we’ve seen come up again and again in forum posts from people trying to work with vintage cameras on modern operating systems.
It’s impossible to recover deleted files from an xD card that’s not recognized by your computer. As we mentioned earlier, you can check whether your xD card is being detected in the Disk Management tool. Just press Win + X on your keyboard and select Disk Management from the menu.
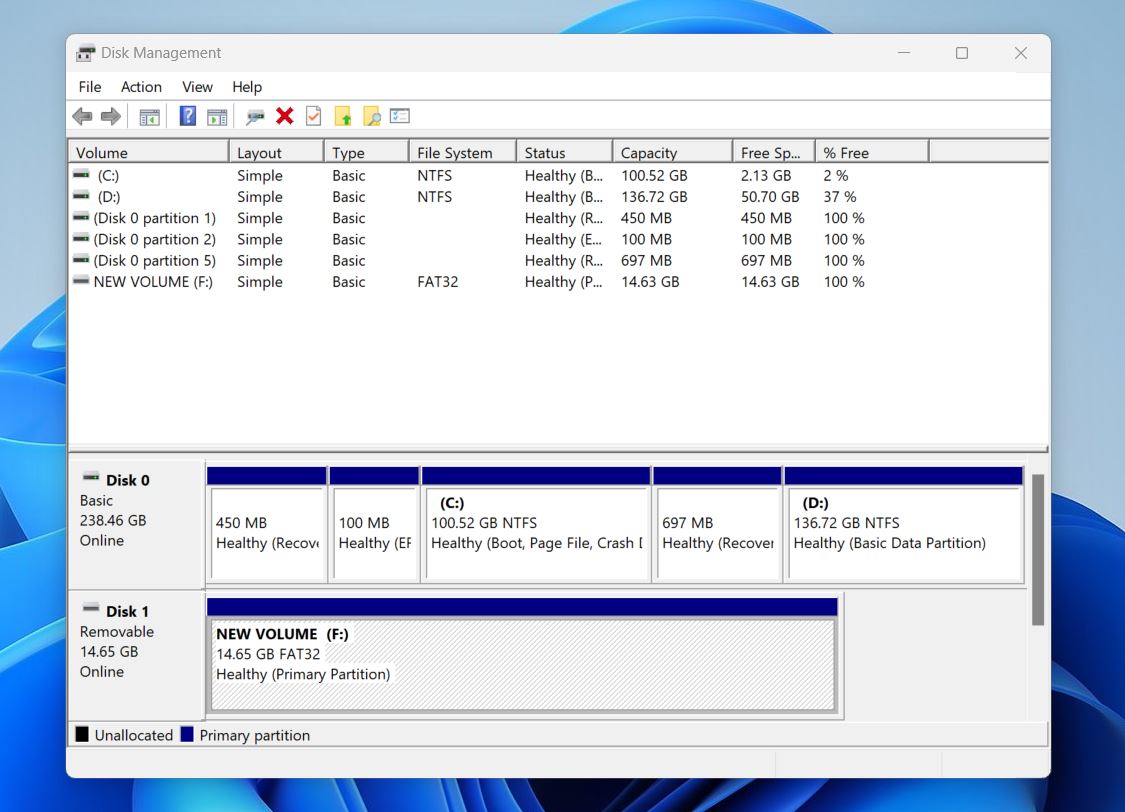
If the xD card appears there with a valid size (even without a drive letter), it means the system can see the card, and recovery software should be able to scan it. If it doesn’t show up at all, try the fixes below to troubleshoot the issue.
Solution A: Try a Different Memory Card Reader
Just because your xD card isn’t recognized properly doesn’t necessarily mean there’s something wrong with the xD card itself. The issue could be caused by your memory card reader, so the first thing you should do is try a different one. You can also try connecting the memory card reader to different USB ports.
Solution B: Reinstall System Drivers
When you connect any storage device to your computer, Windows automatically associates the correct drivers with it. In most cases, the result is a working storage device, but there are many reports on the web of less-than-desirable results. If you suspect that the issue with your xD card not being recognized is caused by system drivers, then this is what you can do:
- Press Win + X and launch Device Manager.
- Locate your xD card.
- Right-click on it.
- Choose the Uninstall device option.
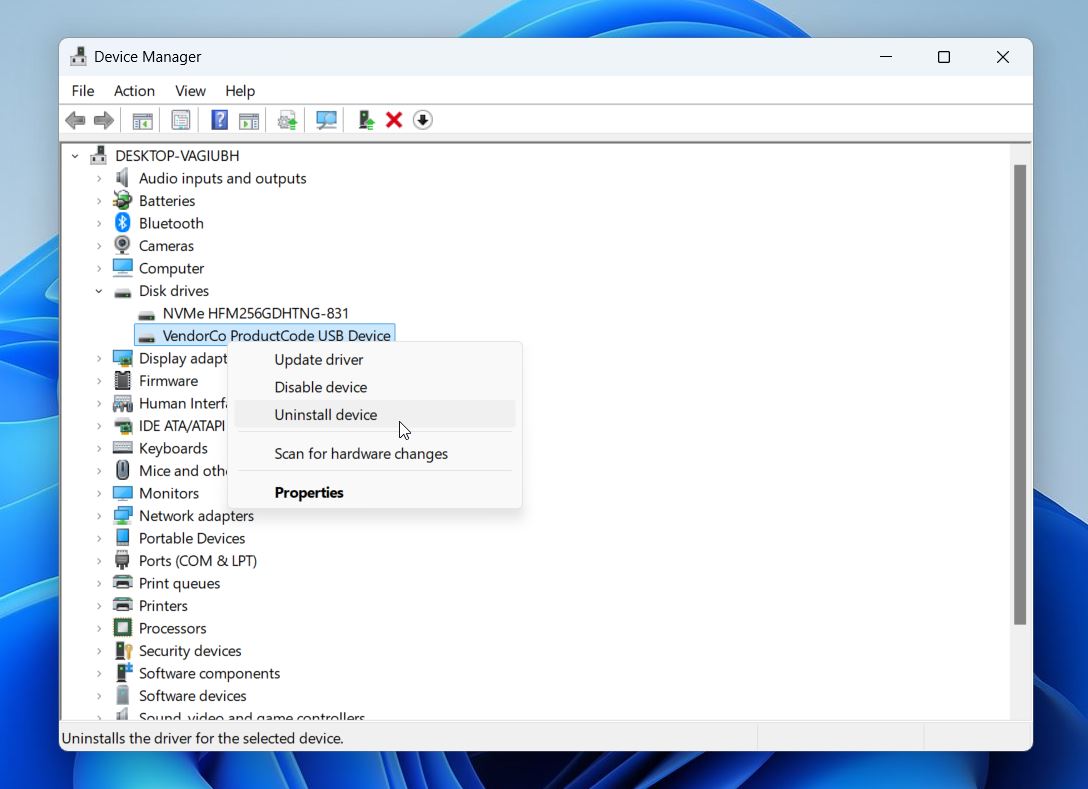
- Restart your computer and connect your xD card again.
Solution C: Check for Physical Damage
Durability has never been a defining characteristic of xD cards. Because the flash memory chips xD cards use to store data are protected only by a thin plastic shell, it doesn’t take much for serious physical damage to occur. If you do notice that your xD card is physically damaged, then scroll down and check the solution to the third issue.
Issue #2: Read/Write Errors
Read and write errors manifest themselves in a number of different ways, such as by triggering various error messages or causing data recovery attempts to fail. Such errors can make it difficult to successfully recover files from a corrupted memory card, so it’s paramount to address them first. Let’s take a look at several solutions that you can try to fix read and write errors.
Solution A: Use CHKDSK
Before we get into this fix, a quick but important warning: Only run CHKDSK after you’ve already recovered the files you care about. While CHKDSK can sometimes repair a corrupted file system, it has also been known to cause minor data loss. It may make some data unrecoverable, so don’t risk it unless you’ve already created a backup or completed a recovery scan.
The Windows operating system comes with a handy command-line tool called CHKDSK, whose purpose is to verify the file system integrity of a volume and fix logical file system errors. To use it:
- Press Win + X and launch Windows Terminal or PowerShell as admin.
- Enter the following command: chkdsk X: /f (replace X with the letter assigned to the xD card).

- Press Enter and wait for CHKDSK to finish.
While CHKDSK won’t help you recover files that have disappeared from your memory card due to being deleted, it can make corrupted xD cards accessible again.
Solution B: Use the Windows Error Checking Tool
Since the Error Checking Tool is essentially a graphical version of the CHKDSK command, it comes with the same risks. We strongly recommend using this tool only after you’ve recovered your important files.
If you find command-line tools to be too intimidating, then you can use the Windows Repair Tool, which can be accessed by following these steps:
- Launch File Explorer.
- Select This PC.
- Right-click your xD card.
- Choose Properties.
- Go to the Tools tab.
- Click the Check button under Error checking.
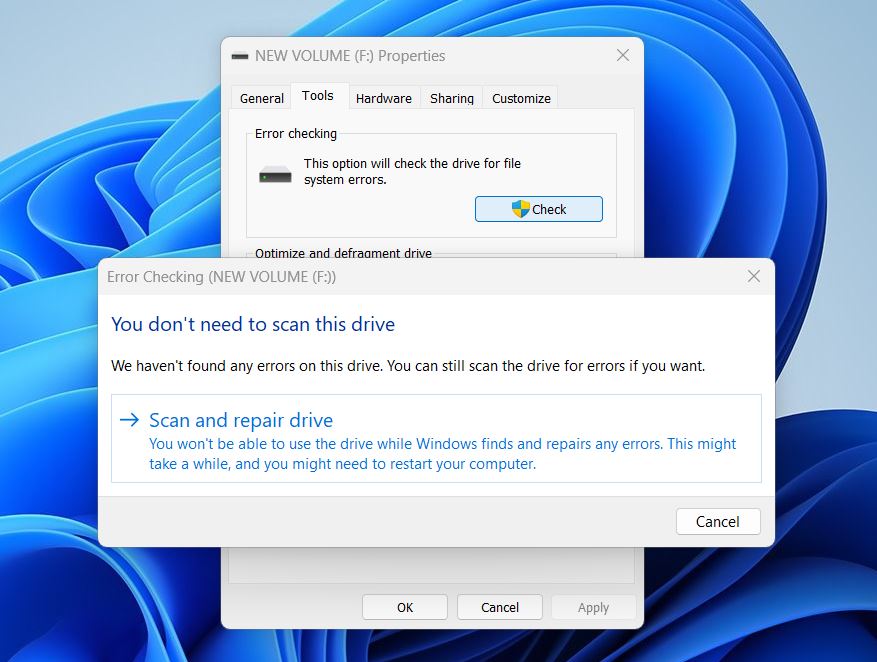
- Select the Scan and repair drive option.
- Wait for the process to finish.
Solution C: Clean the xD Card
It’s also possible for read and write errors to be caused by dirty connection pins on the xD card or your memory card reader. You can clean them using isopropyl alcohol and a soft cloth.
Issue #3: Physical Damage
Physical damage is the worst issue that you can possibly encounter when attempting to recover xD card data because fixing it at home is usually impossible—at least not if you don’t have specialized equipment at your disposal and are not deeply familiar with how xD cards work.
Solution: Use Data Recovery Services
Instead of attempting to fix a physically damaged xD card at home, we recommend you send it to a professional data recovery center. While the services of data recovery professionals are not cheap, they’re able to deliver great results by extracting data directly from the flash memory chip itself.
The best SD card data recovery centers offer a free evaluation, so you have nothing to lose by giving them a try. The cost of professional data recovery typically ranges from several hundred dollars to several thousand, so it’s best to use this solution only when recovering very important data, such as precious family pictures or irreplaceable business documents.
Issue #4: You Recovered Your Files, But They Won’t Open
Sometimes recovery isn’t the end of the road. You might get your files back, but they won’t open, photos won’t load, and videos won’t play. This usually means the files were partially overwritten, fragmented, or corrupted during the original loss or recovery.
Don’t give up just yet; there are tools that can help fix this.
Solution A: Use Photo Repair Tools
If you’ve recovered photos from your xD card but they won’t open, or they show up as half-loaded images, pixelated messes you’re likely dealing with file corruption. This is common when files are partially overwritten. Before you give up, we recommend checking out this guide by DiskTuna. It explains how to recover corrupted or incomplete JPEGs and even covers RAW image formats like .RAF (Fujifilm) and .ORF (Olympus), which are often found on xD cards used in vintage cameras. The article offers real-world examples.
Solution B: Use Video Repair Tools
For videos that were recovered but won’t play, you can try one of the many available video repair tools. One of the simplest we’ve used is Clever Online Video Repair. It’s a free, browser-based tool that works with MP4, MOV, DAT, 3GP, and several other formats, no installation needed.
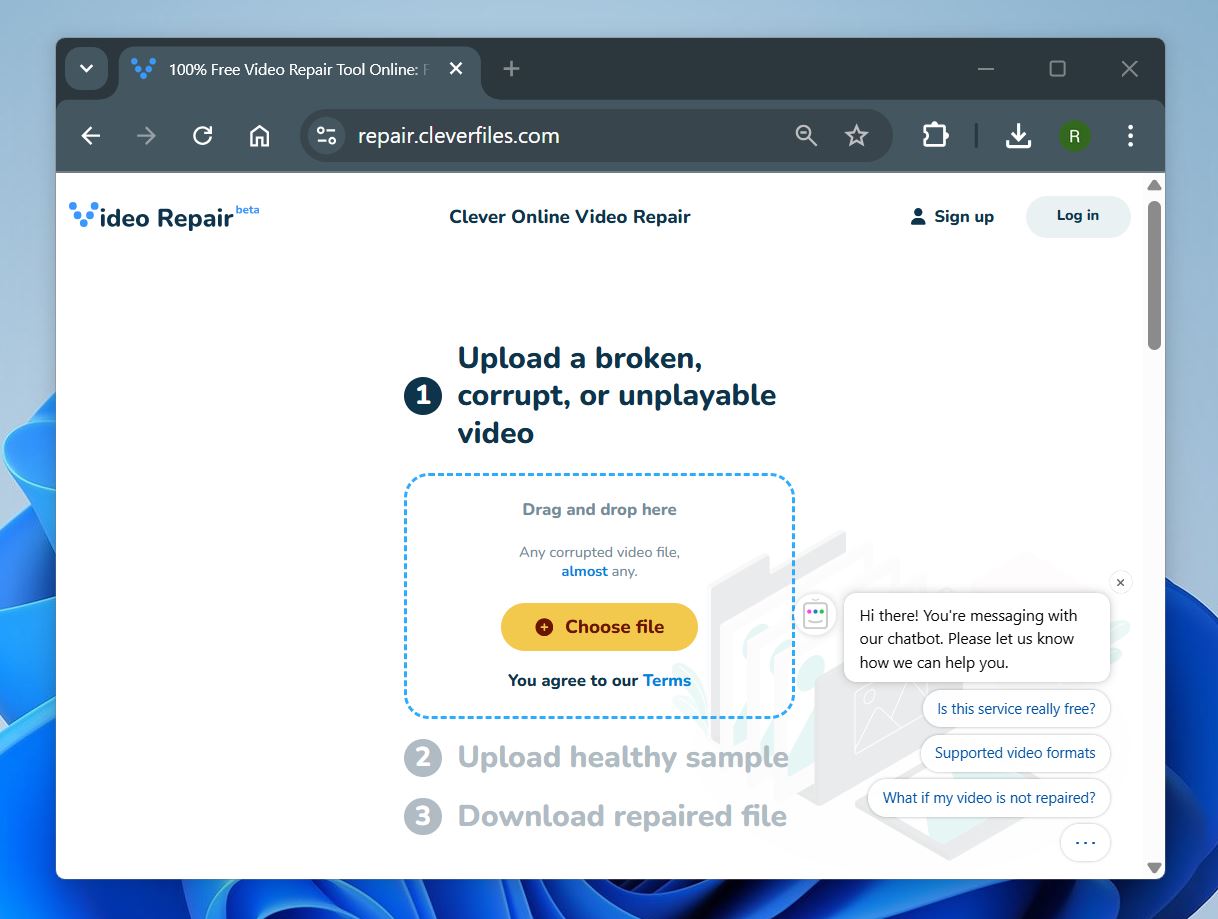
Just upload the damaged video file, add a healthy sample if you have one (from the same camera or device), and let the tool try to fix it. It’s fast, easy, and often surprisingly effective for common playback issues like missing headers or corrupted indexes.
FAQ
How to Recover Files from xD Card?
Here’s a super-quick guide on xD card recovery:
- Download, install, & open data recovery software on your PC.
- Connect the xD card to your computer.
- Launch the recovery tool and select the xD card from the list of detected drives.
- Run a scan to search for deleted or lost files.
- Preview the found files, then select the ones you want to restore.
- Recover them to a different drive (not the xD card itself) to avoid overwriting data.
What is a xD-Picture card used for?
These days, xD-Picture cards are not used by any manufacturers of consumer electronics, but some people still rely on them to store photos captured by older Olympus and Fujifilm cameras.
Are xD cards obsolete?
Yes, xD cards are no longer in production because they’ve been replaced by SD cards, especially microSD cards, which are smaller, faster, and can store more data.
How do I access my xD photo card?
To access your xD photo card, you need an xD card reader. Luckily, there are countless manufacturers that sell multi-purpose memory card readers that can accept all kinds of memory cards, including xD photo cards. Once connected, you’ll be able to view your xD Picture Card just like any other external drive.
Is it possible to repair an xD card?
Whether you can fix your xD card depends on the type of problem. If the problem is logical, like file system corruption, formatting errors, or unmountable partitions, then yes, these issues are usually fixable with DIY tools.
However, if the damage is physical, like broken contacts, water damage, or internal chip failure, then repair becomes much harder. In those cases, recovery often requires a professional lab with specialized equipment.
How do I get pictures off my xD card if it throws an error?
If your xD card throws an error when you try to access it, like “Please format the disk,” “Drive not accessible,” or simply doesn’t open, the first thing to do is check if your computer actually detects the card.
- Open Disk Management (press Win + X > Disk Management) and look for the xD card in the list of drives. If it shows up with the correct size, even if it’s marked as RAW or Unallocated, that means your system can still access it at the hardware level.
- Don’t format the card, even if prompted. That would make recovery harder.
- If the card is visible, we recommend creating a byte-to-byte disk image using a tool like Disk Drill. This gives you a safe copy to scan without putting further stress on the original xD card, especially since these older cards are more prone to failure.
Once the image is ready, you can scan it using recovery software and extract your photos without risk.
Final Words
We get it, some people just love working with older gear. There’s something special about firing up a vintage Olympus camera and seeing it still deliver after all these years. But while the nostalgia is real, xD-Picture Cards are aging fast, and their limitations are hard to ignore.
So here’s our suggestion: once you’ve successfully recovered your pictures from your xD card, consider transferring them to a more modern and reliable storage setup. Back them up to your computer, a cloud service, or an external SSD. If the camera still works and you want to keep using it, look into replacing the xD card with a spare in better shape. Just keep in mind: xD cards are only getting harder to find, so sooner or later, you’ll want to move to a newer format.
If you’re still not ready to move on to modern SD formats, hey at least now you know what xD card recovery looks like and exactly what to do when things go wrong.
This article was written by David Morelo, a Staff Writer at Handy Recovery Advisor. It was recently updated by Roman Demian. It was also verified for technical accuracy by Andrey Vasilyev, our editorial advisor.
Curious about our content creation process? Take a look at our Editor Guidelines.