Kaspersky is one of the most popular antiviruses for laptops and computers. It’s meant to delete files with viruses to avoid them spreading to your device.
However, it can sometimes be a bit of a headache if Kaspersky deletes files without asking, especially if these are important files you don’t want missing from your device.
If this is what you’re dealing with, don’t worry. In this guide, we’ll let you know how to recover files deleted by Kaspersky Antivirus.
Can I Restore Files Deleted by Kaspersky Antivirus from Quarantine?
You can easily recover files deleted by antivirus software like Kaspersky by using the software’s virus removal tool. However, keep in mind that Kaspersky doesn’t disinfect Windows Store apps.
Also, don’t worry about restoring these files because they’ve already been disinfected and are safe to stay on your computer.
Here are some simple steps you can follow to recover missing files by using the Kaspersky Quarantine restoration tool:
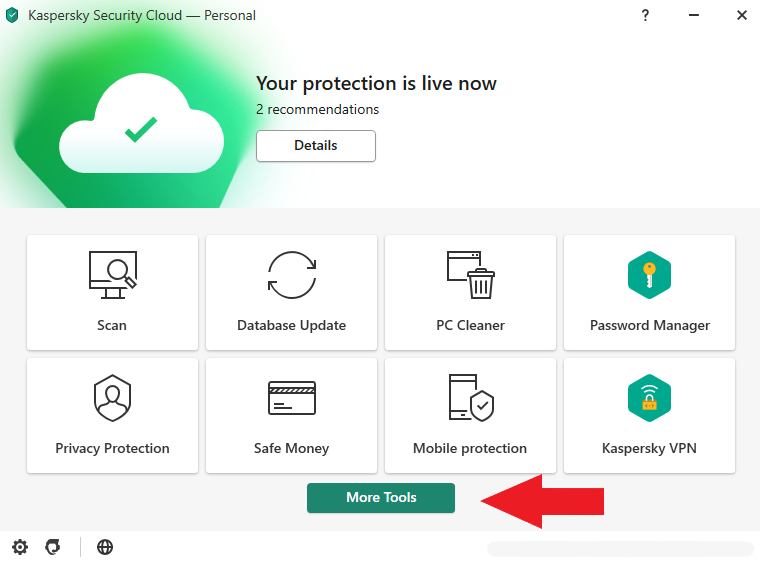
- First, open Kaspersky Antivirus and click More Tools.
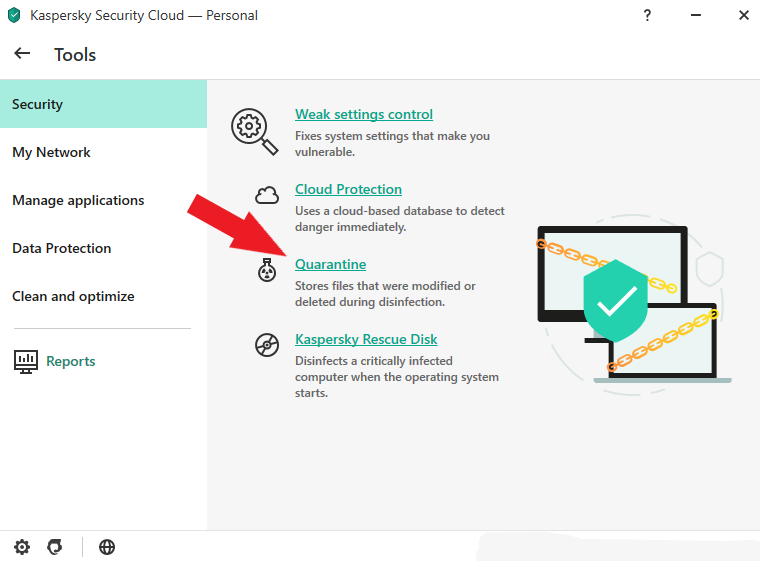
- Next, on Security, click Quarantine to see the files Kaspersky automatically deleted.
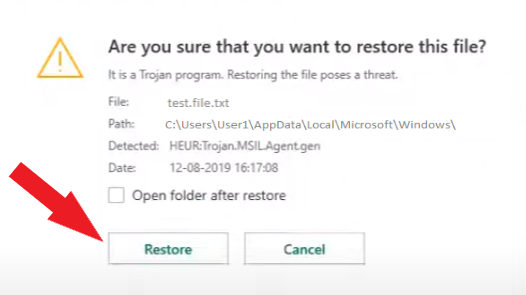
- Select the file you’d like to get back and click Restore.
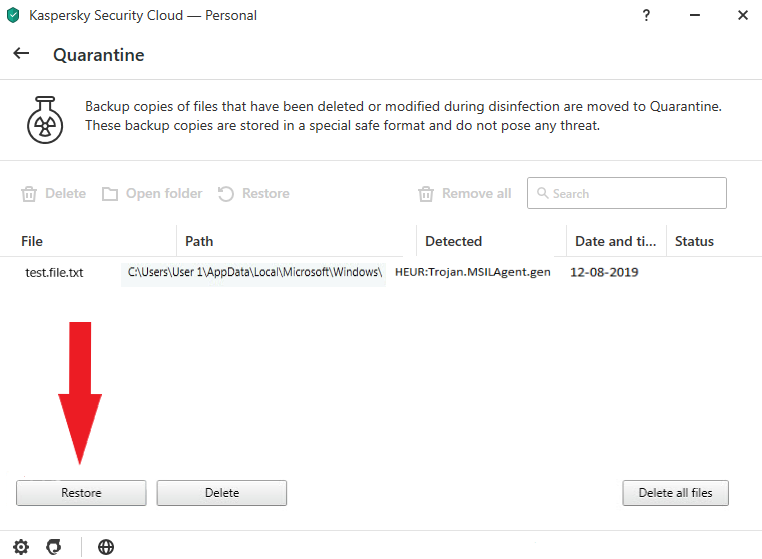
- Upon clicking, a pop-up will ask if you’re sure about restoring the deleted file. Click Restore, and your file will be recovered and saved to the folder where it was originally located.
If you see no files under quarantine, it means that you can no longer recover them from the Kaspersky Antivirus software instead. No need to panic. Keep on reading to see how you can recover the files permanently.
How to Recover Files Permanently Deleted by Kaspersky Antivirus Using Disk Drill Software
If Kaspersky isn’t showing any files on the Quarantine tab, you’ll need the help of other software as you’re now dealing with lost data. Disk Drill is a great data recovery software you can use.
You can download this for free on your Mac or Windows device. It also allows you to recover up to 500 MB worth of data on Windows from different storage devices including infected USB drives without getting its Pro version.
Check out our Disk Drill review here.
Here’s how you can recover your files permanently deleted by Kaspersky Antivirus with Disk Drill:
- To get started, download Disk Drill from its official website.
- Next, launch the downloaded file and click Install.

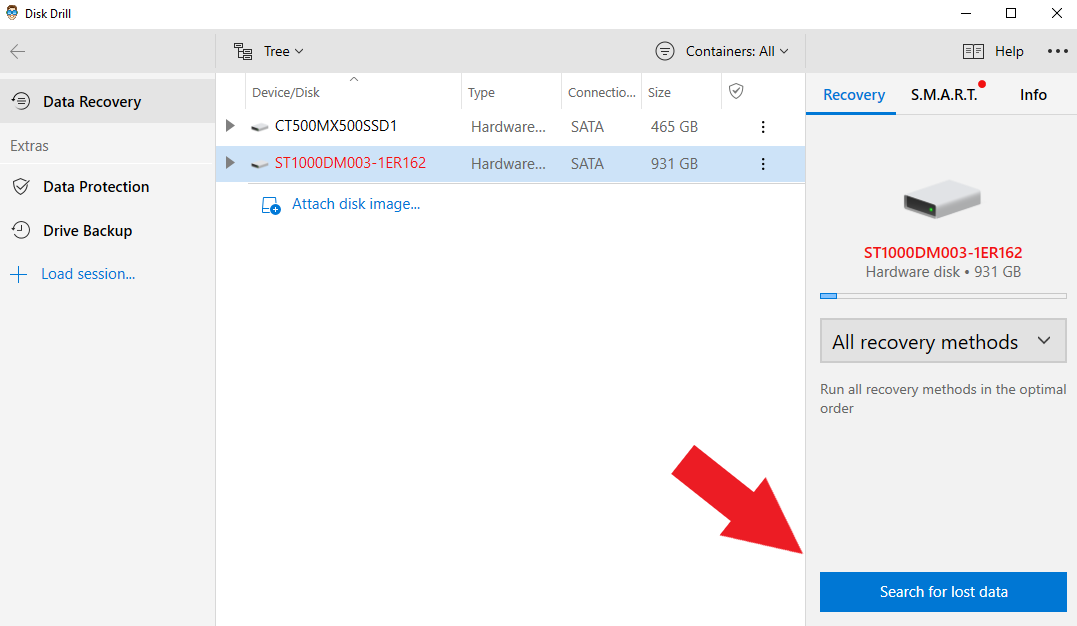
- Once the installation is complete, open Disk Drill and select the hard drive where you originally saved your file. Then, click Search for lost data for the app to start scanning for deleted files.
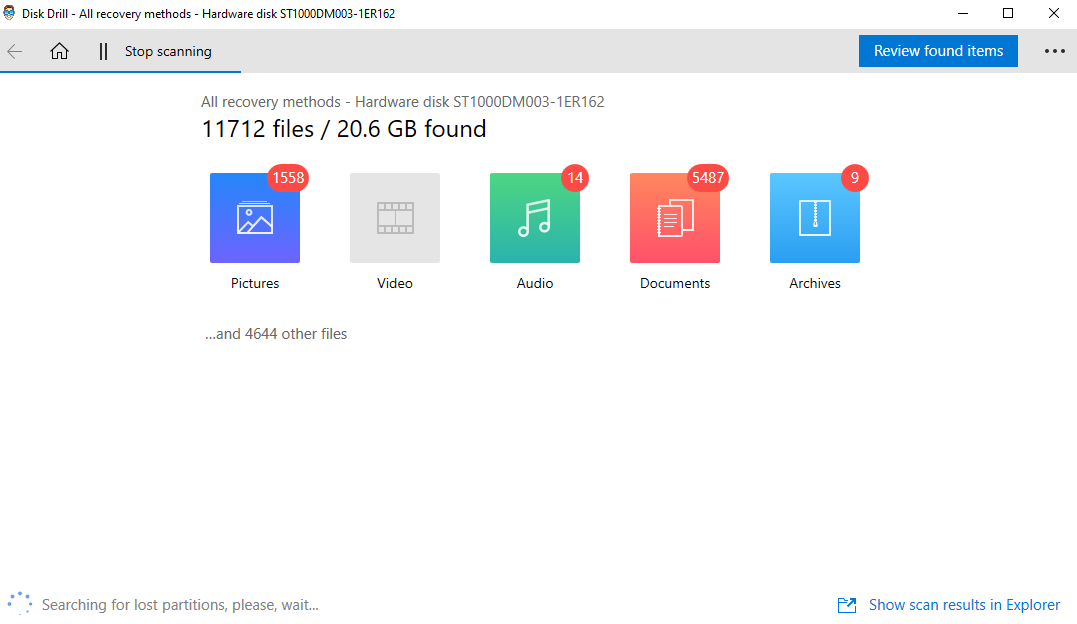
- Upon clicking, the scan will begin. While waiting for the scan to finish, you can already view which deleted files can be restored based on the file’s category. Click whether you’d like to restore pictures, videos, etc.
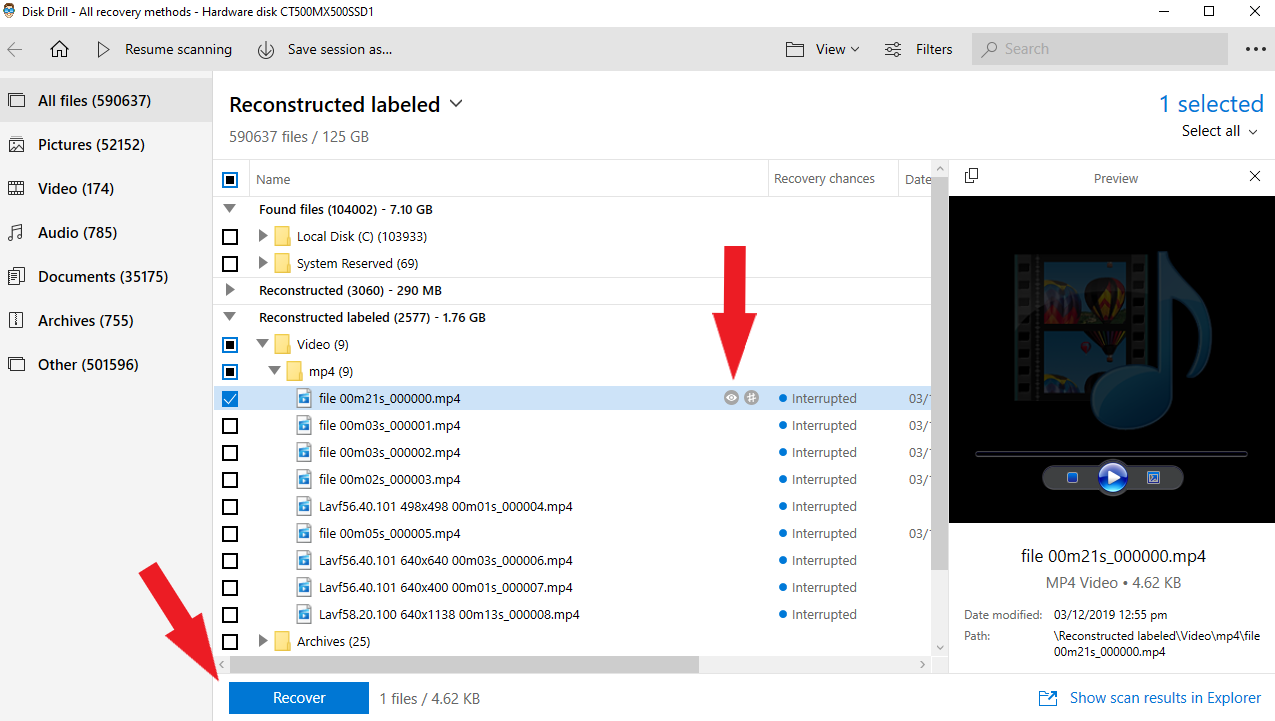
- Next, hover over the recoverable files and click the eye icon to see a preview. If this is the file you’d like to get back, click Recover.
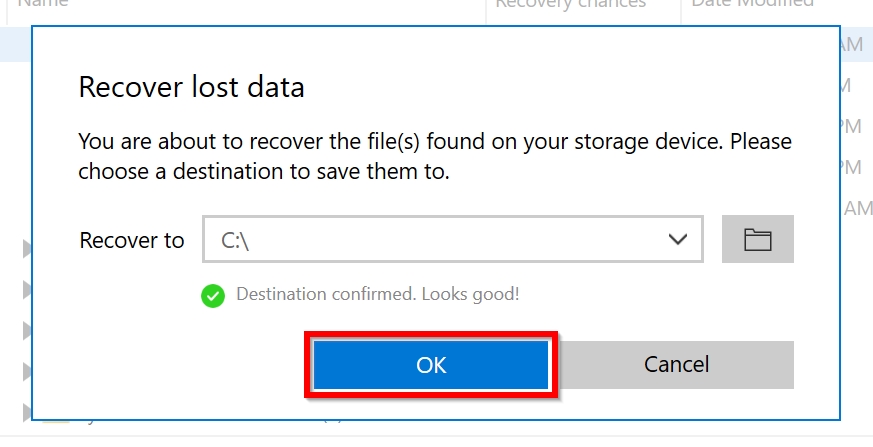
- A pop-up will appear so you can select where you want the recovered file to be saved. Click the folder icon to choose a location and click OK.
- Finally, click Show recovered data in Explorer to open the folder where your file is saved once the recovery process is done.
How Do I Stop Kaspersky From Deleting a File?
If you don’t like to retrieve files deleted by Kaspersky Antivirus all the time, you can disable the automatic removal of files and programs from the software itself. There are two ways you can go about this.
You can disable the automatic removal of certain files/folders or configure Kaspersky’s Trusted Zone to set file paths that the software shouldn’t scan.
How to Disable Automatic Removal of Files or Folders
If you’re mainly bothered about Kaspersky removing only important files or folders, then you need to look into its File Anti-virus feature.
Here’s how you can exclude files or folders when Kaspersky scans your computer:
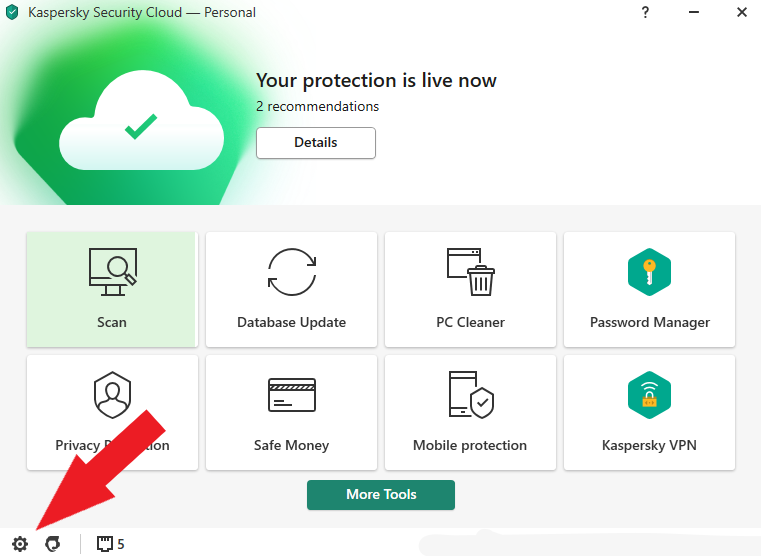
- First, open the Kaspersky Antivirus and click the Settings icon at the bottom.
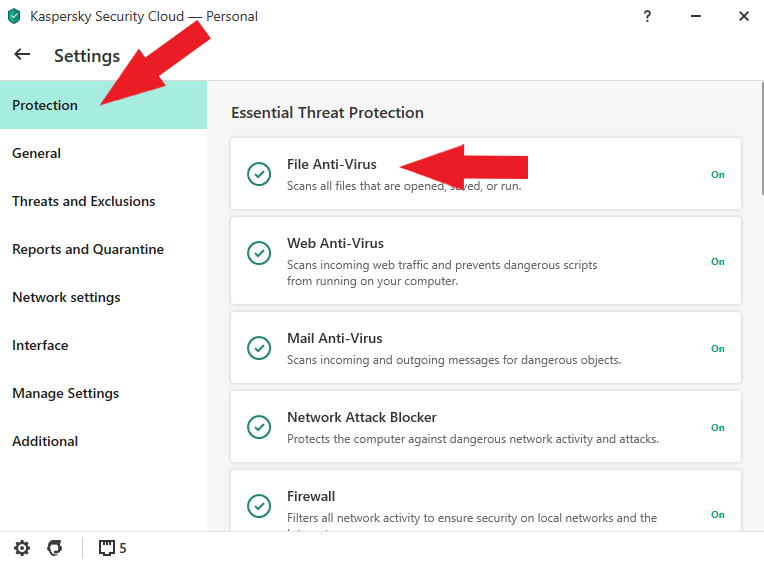
- Next, select Protection and click File Anti-Virus.
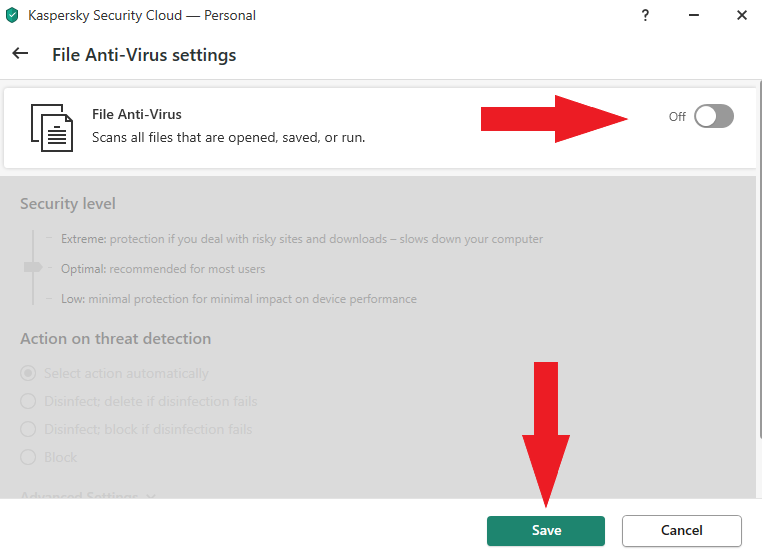
- After that, toggle the File Anti-Virus feature switch button to Off, and click Save.
- Upon clicking, a pop-up will appear to ask if you’re sure of the changes you made. Then click Yes. You can also disable this prompt for as long as you want by clicking the drop-down options.

Turning off the File Anti-Virus feature may mean that your device is more susceptible to getting infected by undetected viruses from files you downloaded. To avoid that, perform regular virus checks and keep Kaspersky Antivirus up to date.
How to Configure Trusted Zone Exclusions
You can change the settings of your Kaspersky Antivirus to not let it delete files automatically. Of course, you can always follow the steps we mentioned above and disable Kaspersky’s File Anti-Virus feature, but if you don’t want to do that, you can manage the app’s Trusted Zone.
The Trusted Zone is the list of files, folders, and programs that Kaspersky won’t scan.
To manage the Trusted Zone, you can follow these easy steps:
- To get started, open the Kaspersky Windows application and click the Settings Icon at the bottom.
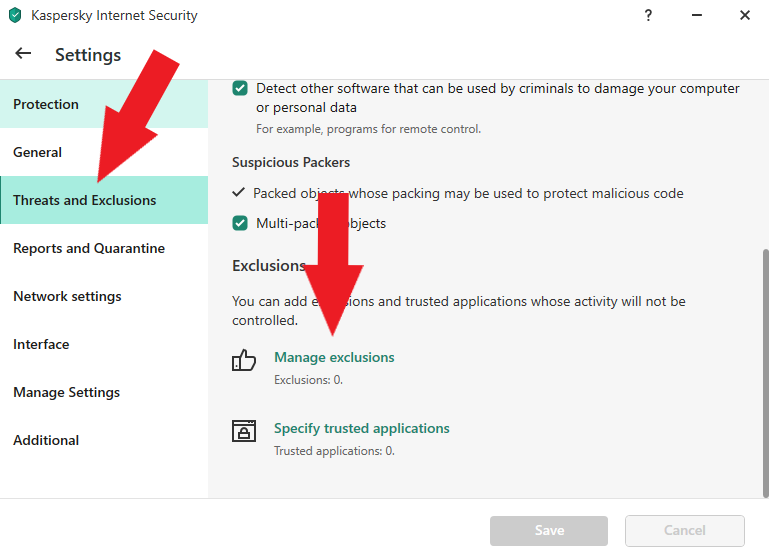
- Next, go to Threats and Exclusions and click Manage exclusions.
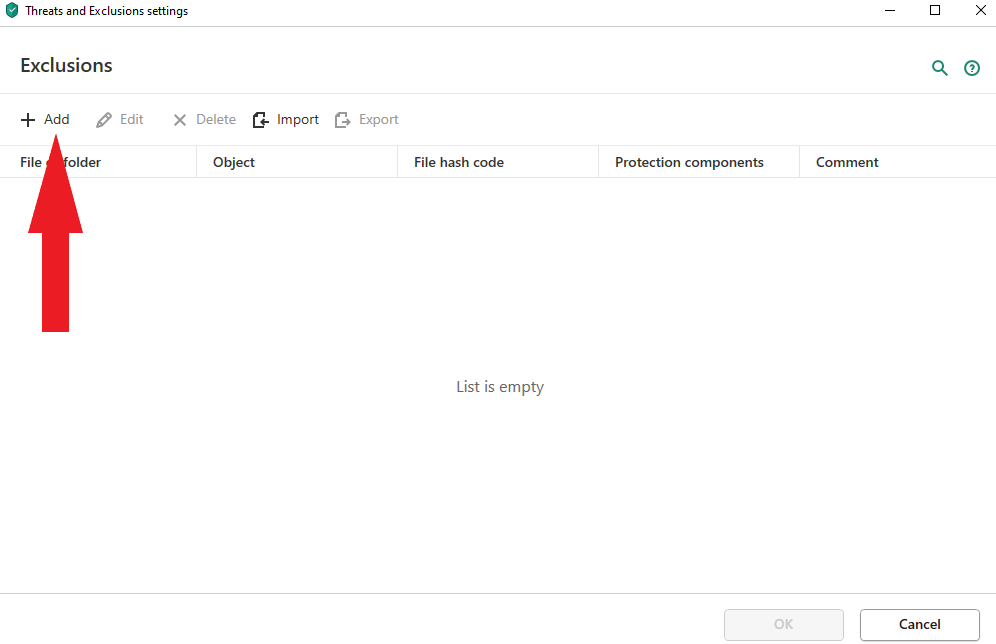
- Then, click Add on the Threats and Exclusions settings Window.
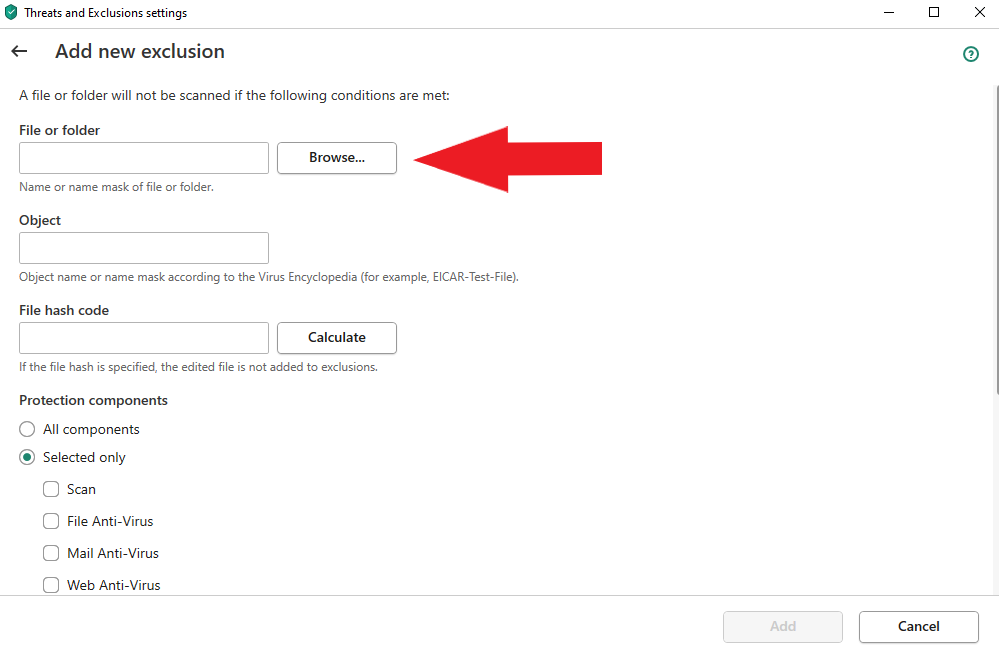
- Click Browse under File or Folder.
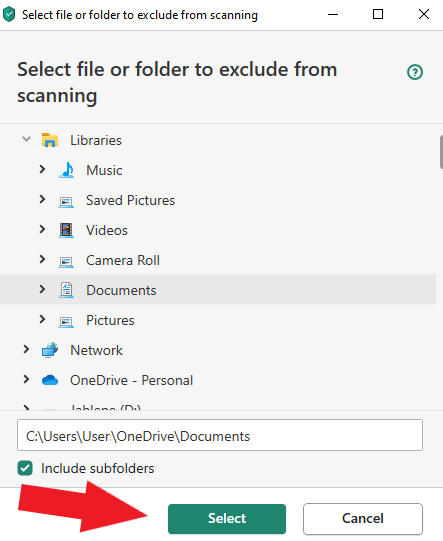
- After that, select a folder you’d like to exclude and click Select.
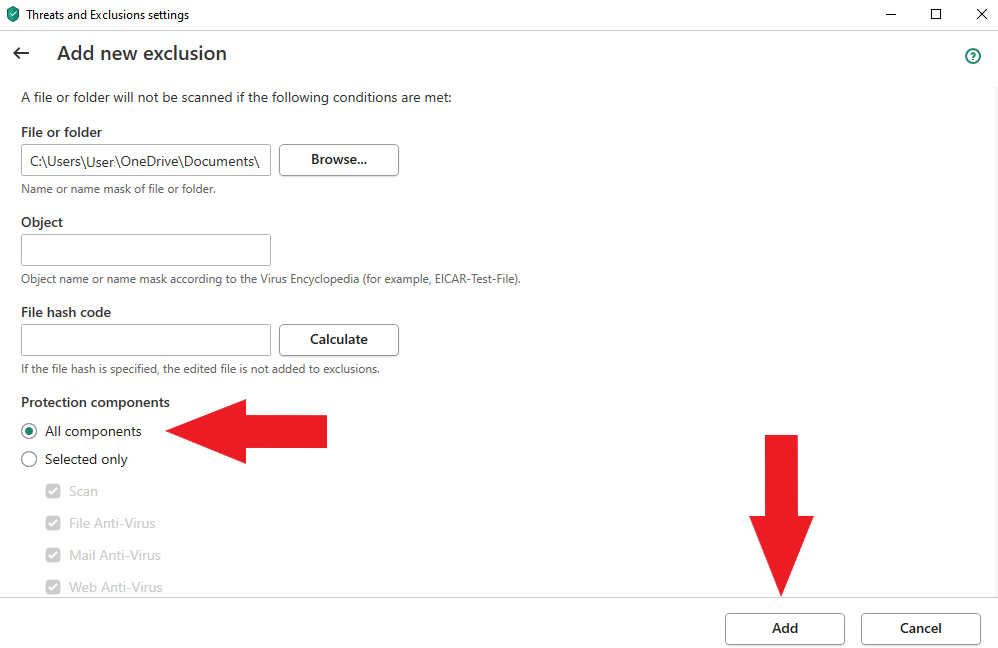
- Next, select All components under Protection components and click Add.
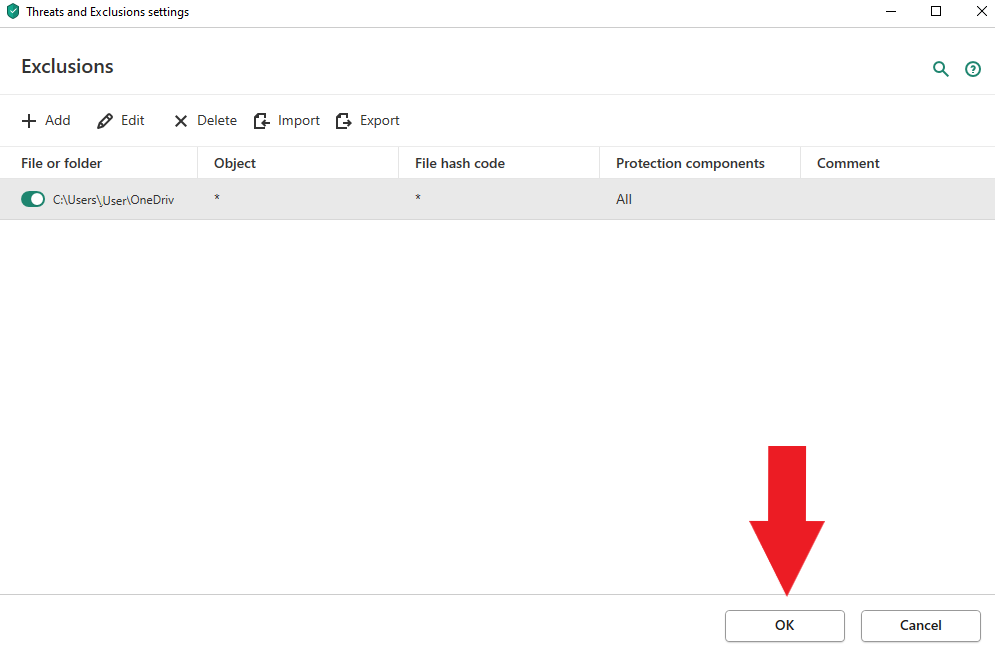
- You can add more folders by doing steps 3 to 6 again and once you’re done, click OK.
- Don’t forget to click Save so your changes will apply.
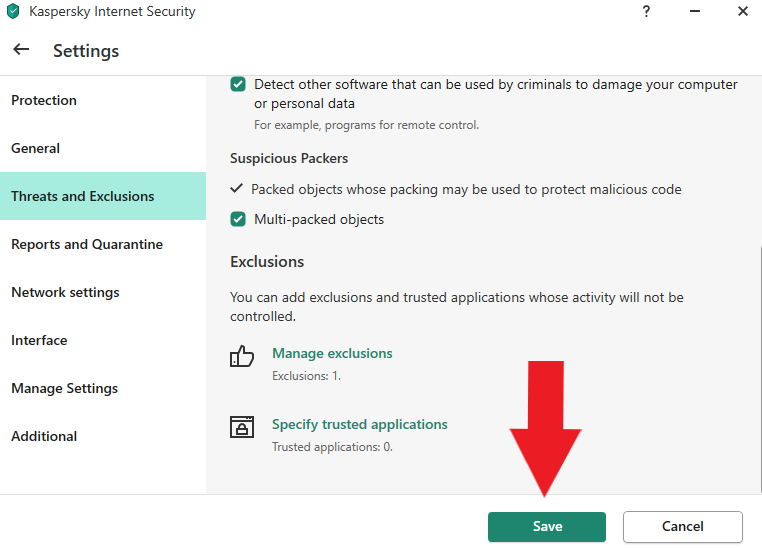
You can also do the same for applications or programs that you don’t want Kaspersky to scan and automatically remove files. Just go to Specify trusted applications and add programs to the excluded list.
Tips to Protect My Files From Getting Deleted by Kaspersky Antivirus
Aside from configuring your Kaspersky app to avoid files and folders when scanning your computer, you can also go straight to Windows and ensure that your files are always backed up with features like Backup and Restore.
This way, even if Kaspersky automatically deletes anything from your device, you can easily get them back. This is especially if Kaspersky doesn’t have the deleted files under Quarantine.
How to Enable Windows Backup and Restore
Enabling Window’s Backup and Restore feature will keep your files safe, and here’s how you can do that:
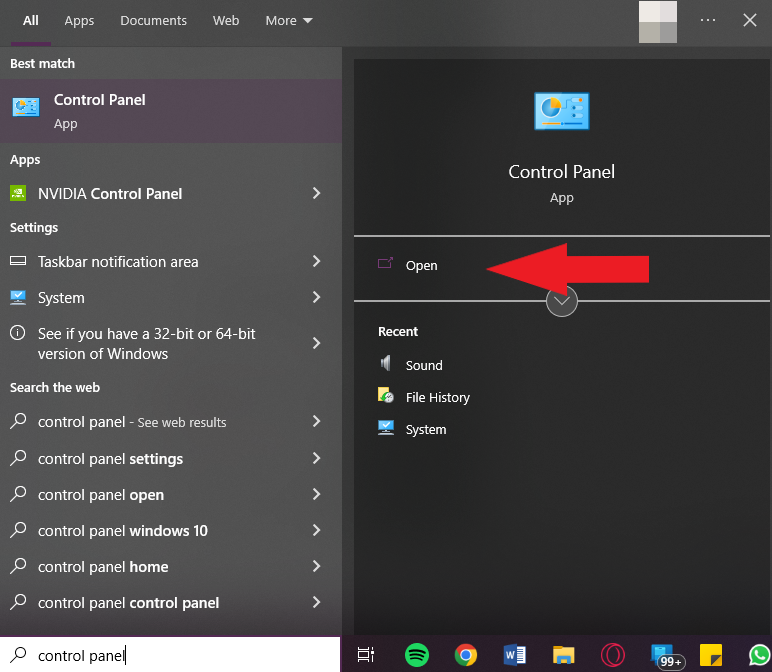
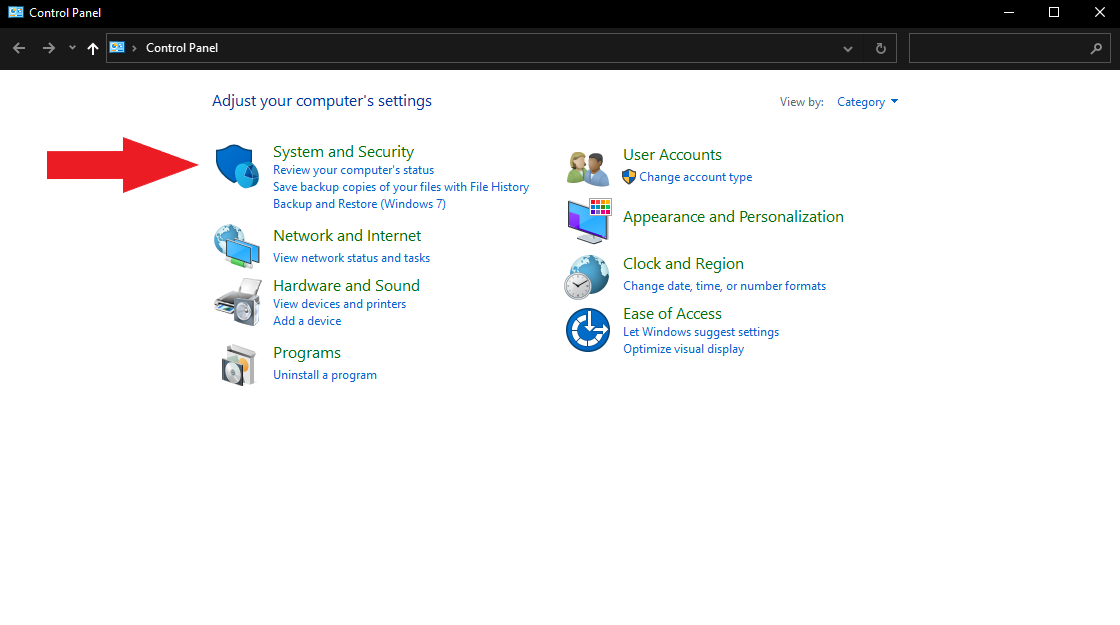
- First, on the Windows Search Bar, type Control Panel and click Open.
- Then, go to System and Security.
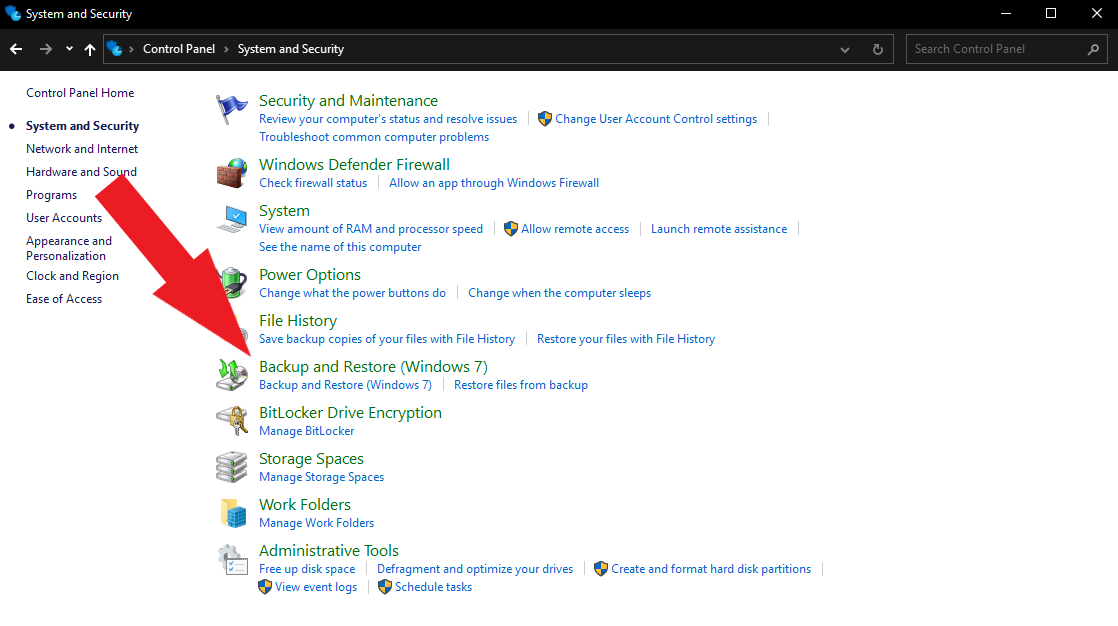
- Next, click Backup and Restore.
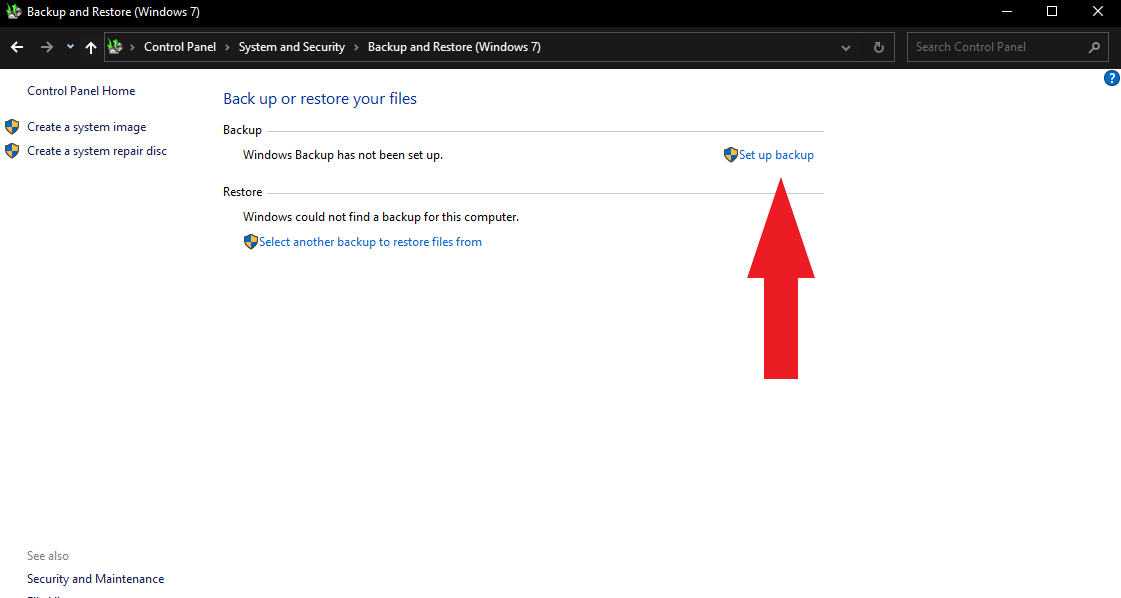
- If you’ve never used this feature before, click Set up Backup.
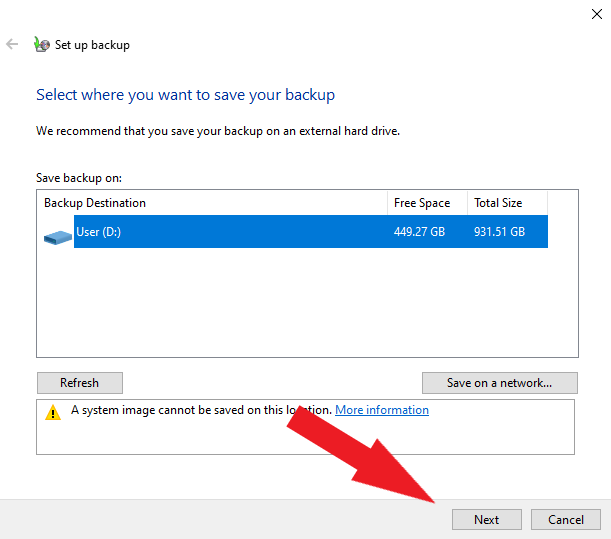
- After that, select where you want the backup files to be saved. Do not use the same drive where your files are originally saved. Click Next.
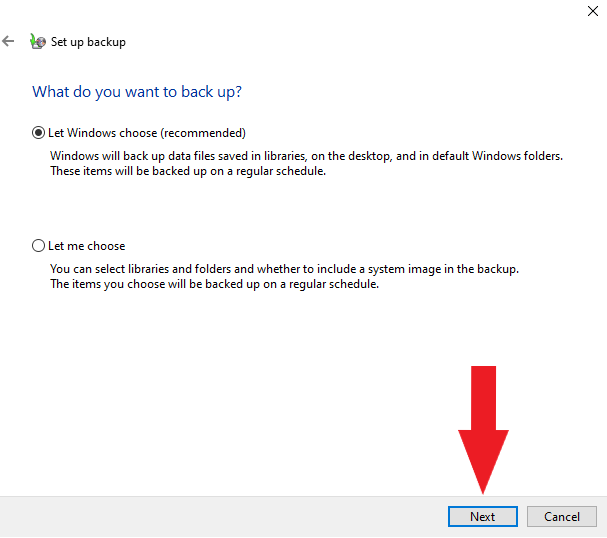
- Choose libraries or folders you’d like to backup or let Windows do this for you. Click Next.
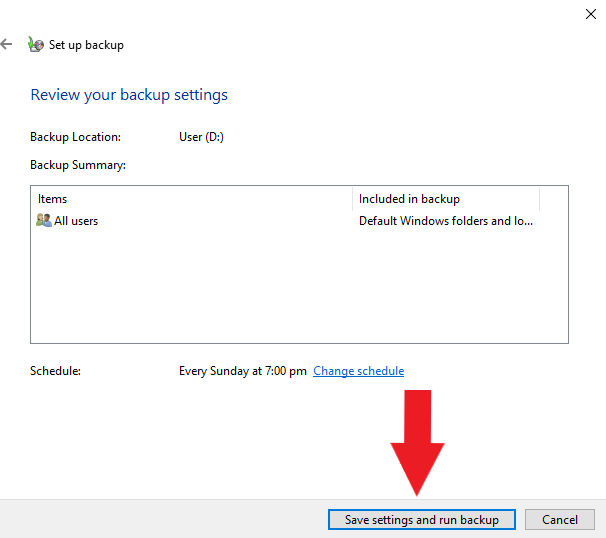
- Review the file paths that will be backed up. If you’re good with the list, click Save settings and run backup.
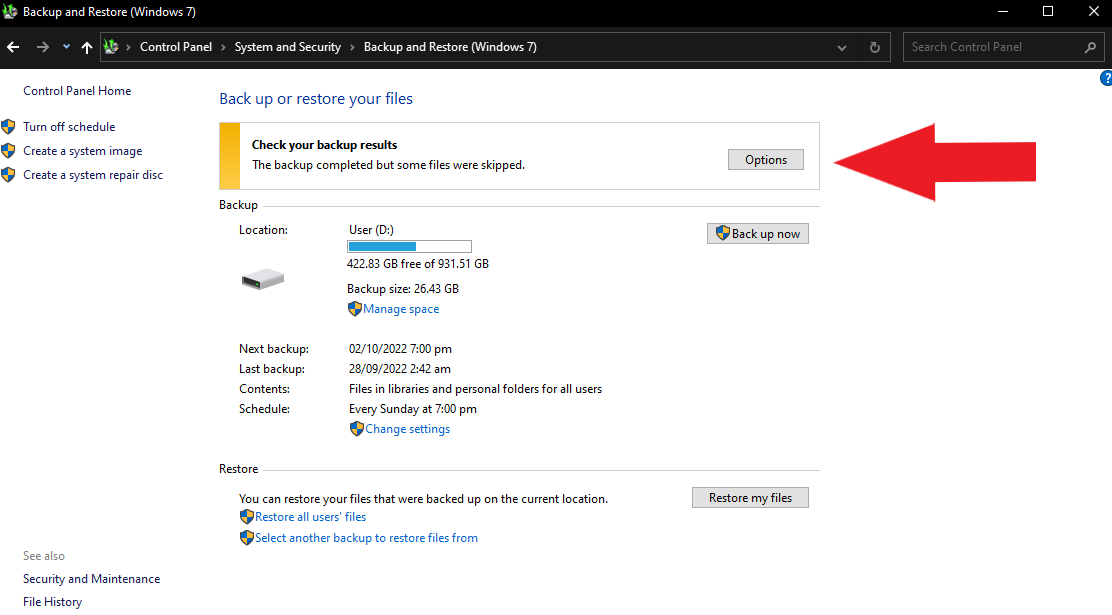
- The backup process can take a while if you have plenty of files on your computer. Once done, Click Options to check which libraries were skipped if you let Windows choose which to back up.
How to Restore Deleted Files on Windows Backup and Restore
If you’ve enabled Windows Backup before, then all you need to do is to restore your files.
Simply follow these steps below to recover your files:
- First, open the Windows Control Panel.
- Next, go to System and Security.
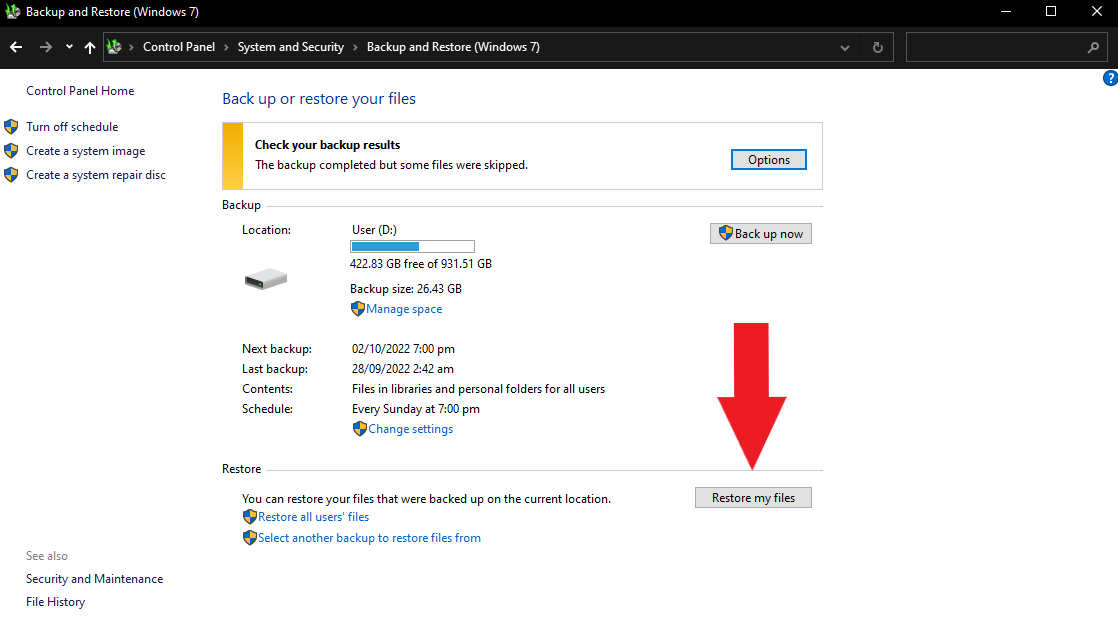
- Then, click Backup and Restore.
- Click Restore my files.
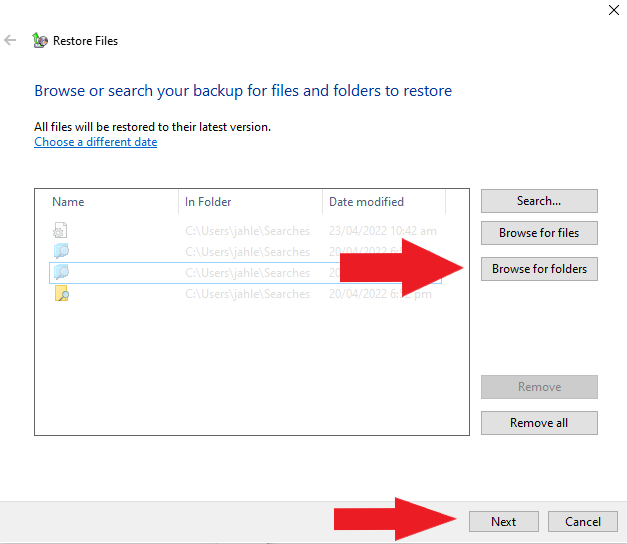
- After that, click Browse for files to select which files to restore and click Next.
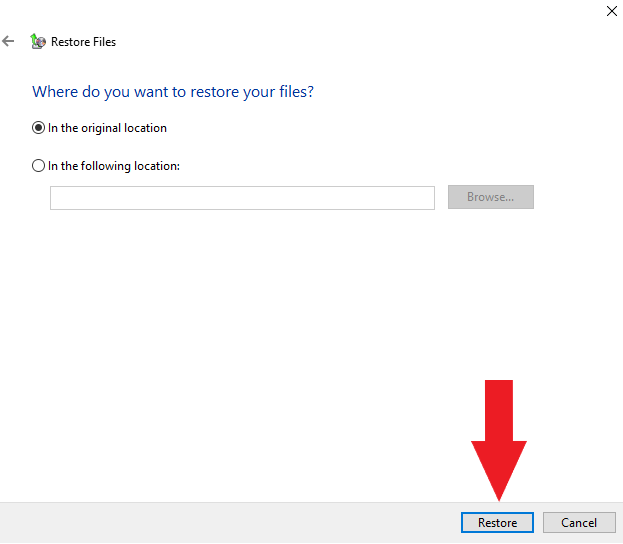
- Then, select where you want the recovered files to be saved and click Restore.
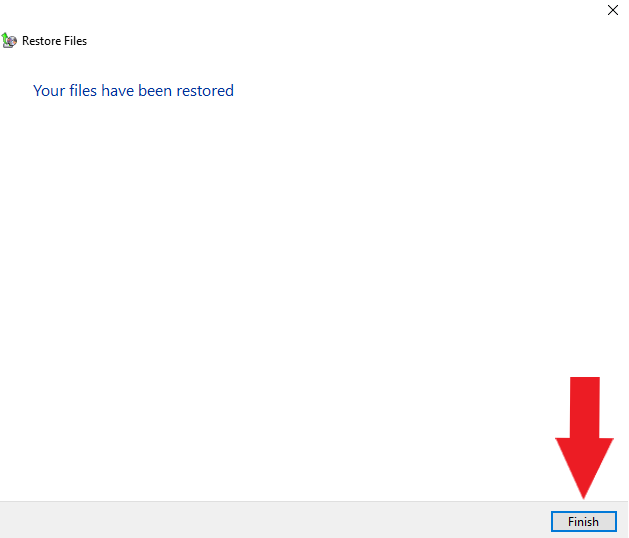
- Upon clicking, a pop-up will confirm if your files are successfully restored. Click Finish.
Note that only backed-up files will be restored, and any file that wasn’t scanned by Windows during the latest backup schedule won’t be recovered. That said, it’s best to schedule this feature every day or a few days if you’re dealing with big files.
FAQ
How do I restore quarantined files from Kaspersky?
To restore quarantined files from Kaspersky, open the software and click More Tools. Under Security, click Quarantine and select the files you want to get back. Click Recover.
How do I exclude folders in Kaspersky Internet Security?
To exclude folders in Kaspersky Internet Security, open the application and click Settings. Next, go to Threats and Exclusions and scroll down. Finally, click Manage Exclusions to add files, folders, or objects to the list of exclusions.
How do I disable Kaspersky from my computer?
You can disable Kaspersky by right-clicking the Kaspersky app icon on the taskbar and selecting Pause protection. You can also completely remove or uninstall the Kaspersky application on your Windows Settings.
How to delete infected files in Kaspersky?
To delete infected files in Kaspersky, Click More Tools. Then, under Security, go to Quarantine and open the storage window. Next, select the files you’d like to delete one by one and click Delete. You can also delete all infected files altogether by clicking Delete All.
How do I stop Kaspersky Internet Security from Blocking my downloads?
To stop Kaspersky Internet Security from blocking any download, open the application and go to settings. Click Advanced Threat Protection and select Host Intrusion Prevention. Clear the Update control rules for known applications from the KSN databases and click Save.
Conclusion
Having important files automatically deleted by antivirus software like Kaspersky or other software too like Norton, Avast, McAfee or even Windows Defender can be frustrating, but it can help your computer be safe from viruses and malware.
The best you can do is to include a list of folders that you don’t want Kaspersky to scan or touch. This way, you don’t have to keep on recovering files every time.
If your files are already deleted, you can always check Kaspersky’s quarantine list to recover disinfected files, but if you can’t find your file there anymore, you can always download data recovery apps like Disk Drill.
This article was written by Princess Lescan, a Staff Writer at Handy Recovery Advisor. It was also verified for technical accuracy by Andrey Vasilyev, our editorial advisor.
Curious about our content creation process? Take a look at our Editor Guidelines.