
Keynote is a native macOS application that allows users to create multimedia presentations. It’s a great tool for sharing information with others using text, images, and embedded video. A lot of time can be spent creating the perfect presentation for use in a business or educational setting.
Losing or accidentally deleting your presentation the night before a big meeting can be devastating. Don’t worry. We are going to show you several methods that enable you to recover deleted Keynote files on Mac so you don’t have to duplicate all of the hard work spent creating your presentation.
Quick navigation
Problem |
Solution |
I have recently deleted the Keynote presentation in question. |
Check your Mac Trash Bin for recently deleted files that can be recovered with a single click. (Solution 1) |
I have accidentally deleted an important Keynote file and it’s not in the Trash. |
Use data recovery software to recover deleted Keynote files that are no longer in the Trash. (Solution 3) |
I lost my Keynote presentation and I don’t have a backup. |
Data recovery software can scan your storage device to attempt to locate and restore the presentation. (Solution 3) |
My Mac crashed and I had not saved my Keynote presentation. |
You might be able to recover the files from your Mac’s temporary folder or by reverting to a previous version of the file. (Solution 5) |
My Keynote file suddenly disappeared. |
Use the Autosave feature to recover the most recently saved version of your file. (Solution 4) |
I want to restore an earlier version of my Keynote presentation. |
Use Keynote’s Autosave feature which allows you to Revert To previous versions of a presentation. (Solution 4) |
I accidentally deleted shared presentations from my iPhone. |
If you used iCloud to store and share the files, you can recover them by logging into iCloud. (Solution 6) |
Methods to Recover Lost Keynote Presentations on Mac
There are several different ways to recover deleted, lost or unsaved Keynote files on your Mac or MacBook. Some use native features or applications that are packaged as part of the macOS operating system. We will also show you how to use a third-party data recovery software tool to safely get your deleted Keynote files back.
Recover a Deleted Keynote File From the Mac Trash Bin
The developers who designed the Mac operating system were well aware of the fact that data can be accidentally deleted very easily. That’s why they included the Trash Bin feature to give users a method by which they can quickly recover items that were recently deleted from their Mac.
Your Mac’s Trash Bin is just a special folder that stores items that have recently been deleted from your computer. Files remain in the Trash until they are manually deleted or removed automatically due to space or time constraints. You can find out how to set up your Mac to automatically remove files from the Trash after 30 days at this Apple support page.
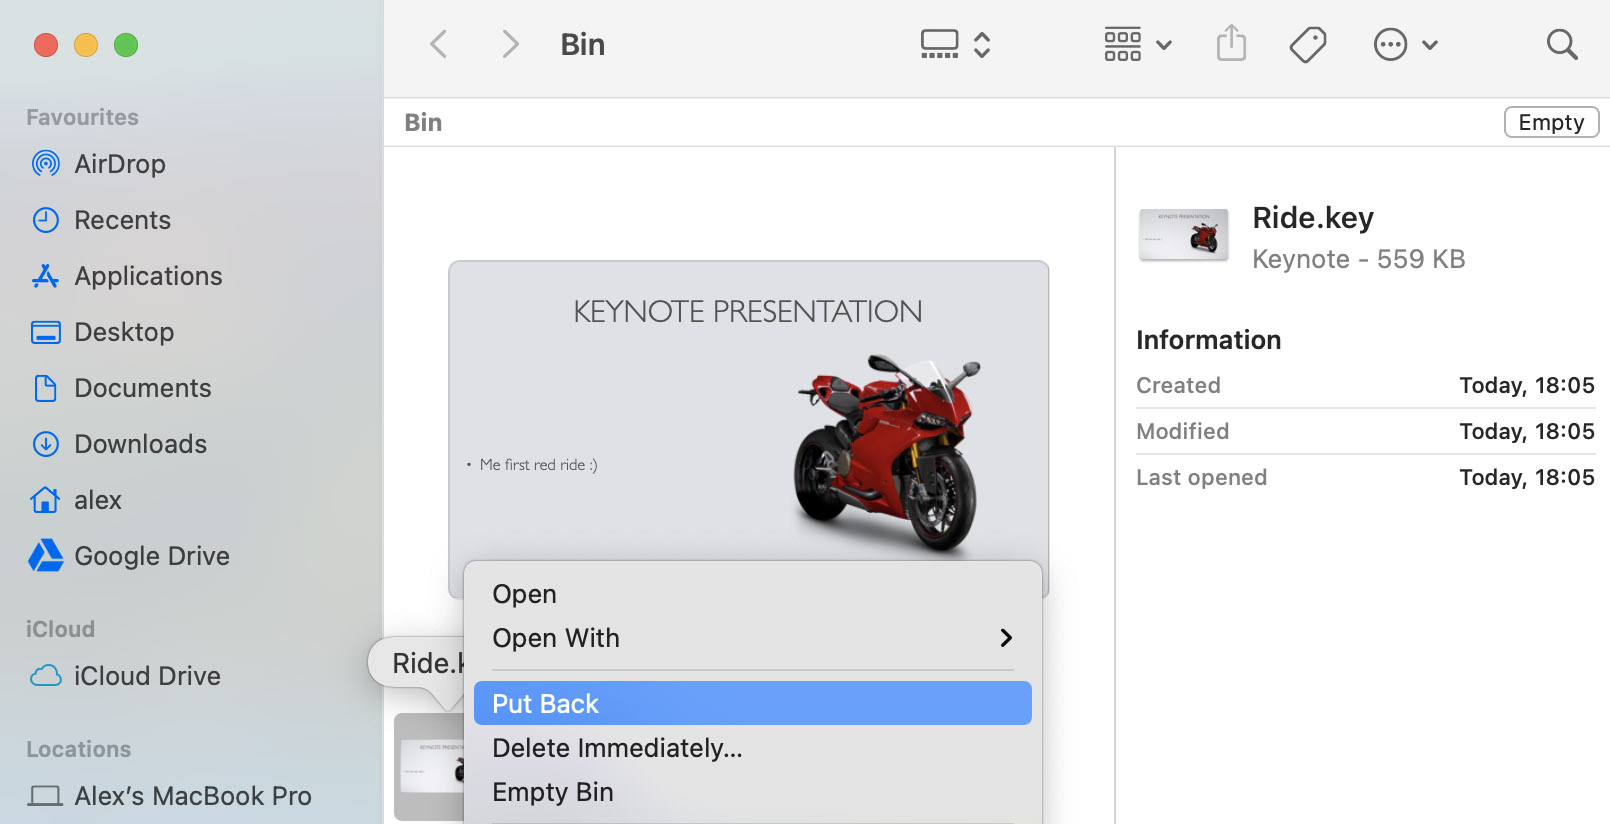
Use the following procedure to retrieve a deleted Keynote presentation from the Mac Trash Bin.
- Open the Trash Bin by clicking on its icon.
- Search through the folder to determine if the Keynote presentation you wish to recover is in the Trash.
- Right-click on the presentation if it is found and select the Put Back option to restore the file to its original location.
Restore Deleted Keynote Presentations From a Time Machine Backup
Taking regular backups of your valuable data is considered the best practice throughout the computing world. Your Mac comes equipped with a native backup and restore solution called Time Machine. It offers users a great way to protect their data using local back-up media like a USB drive.
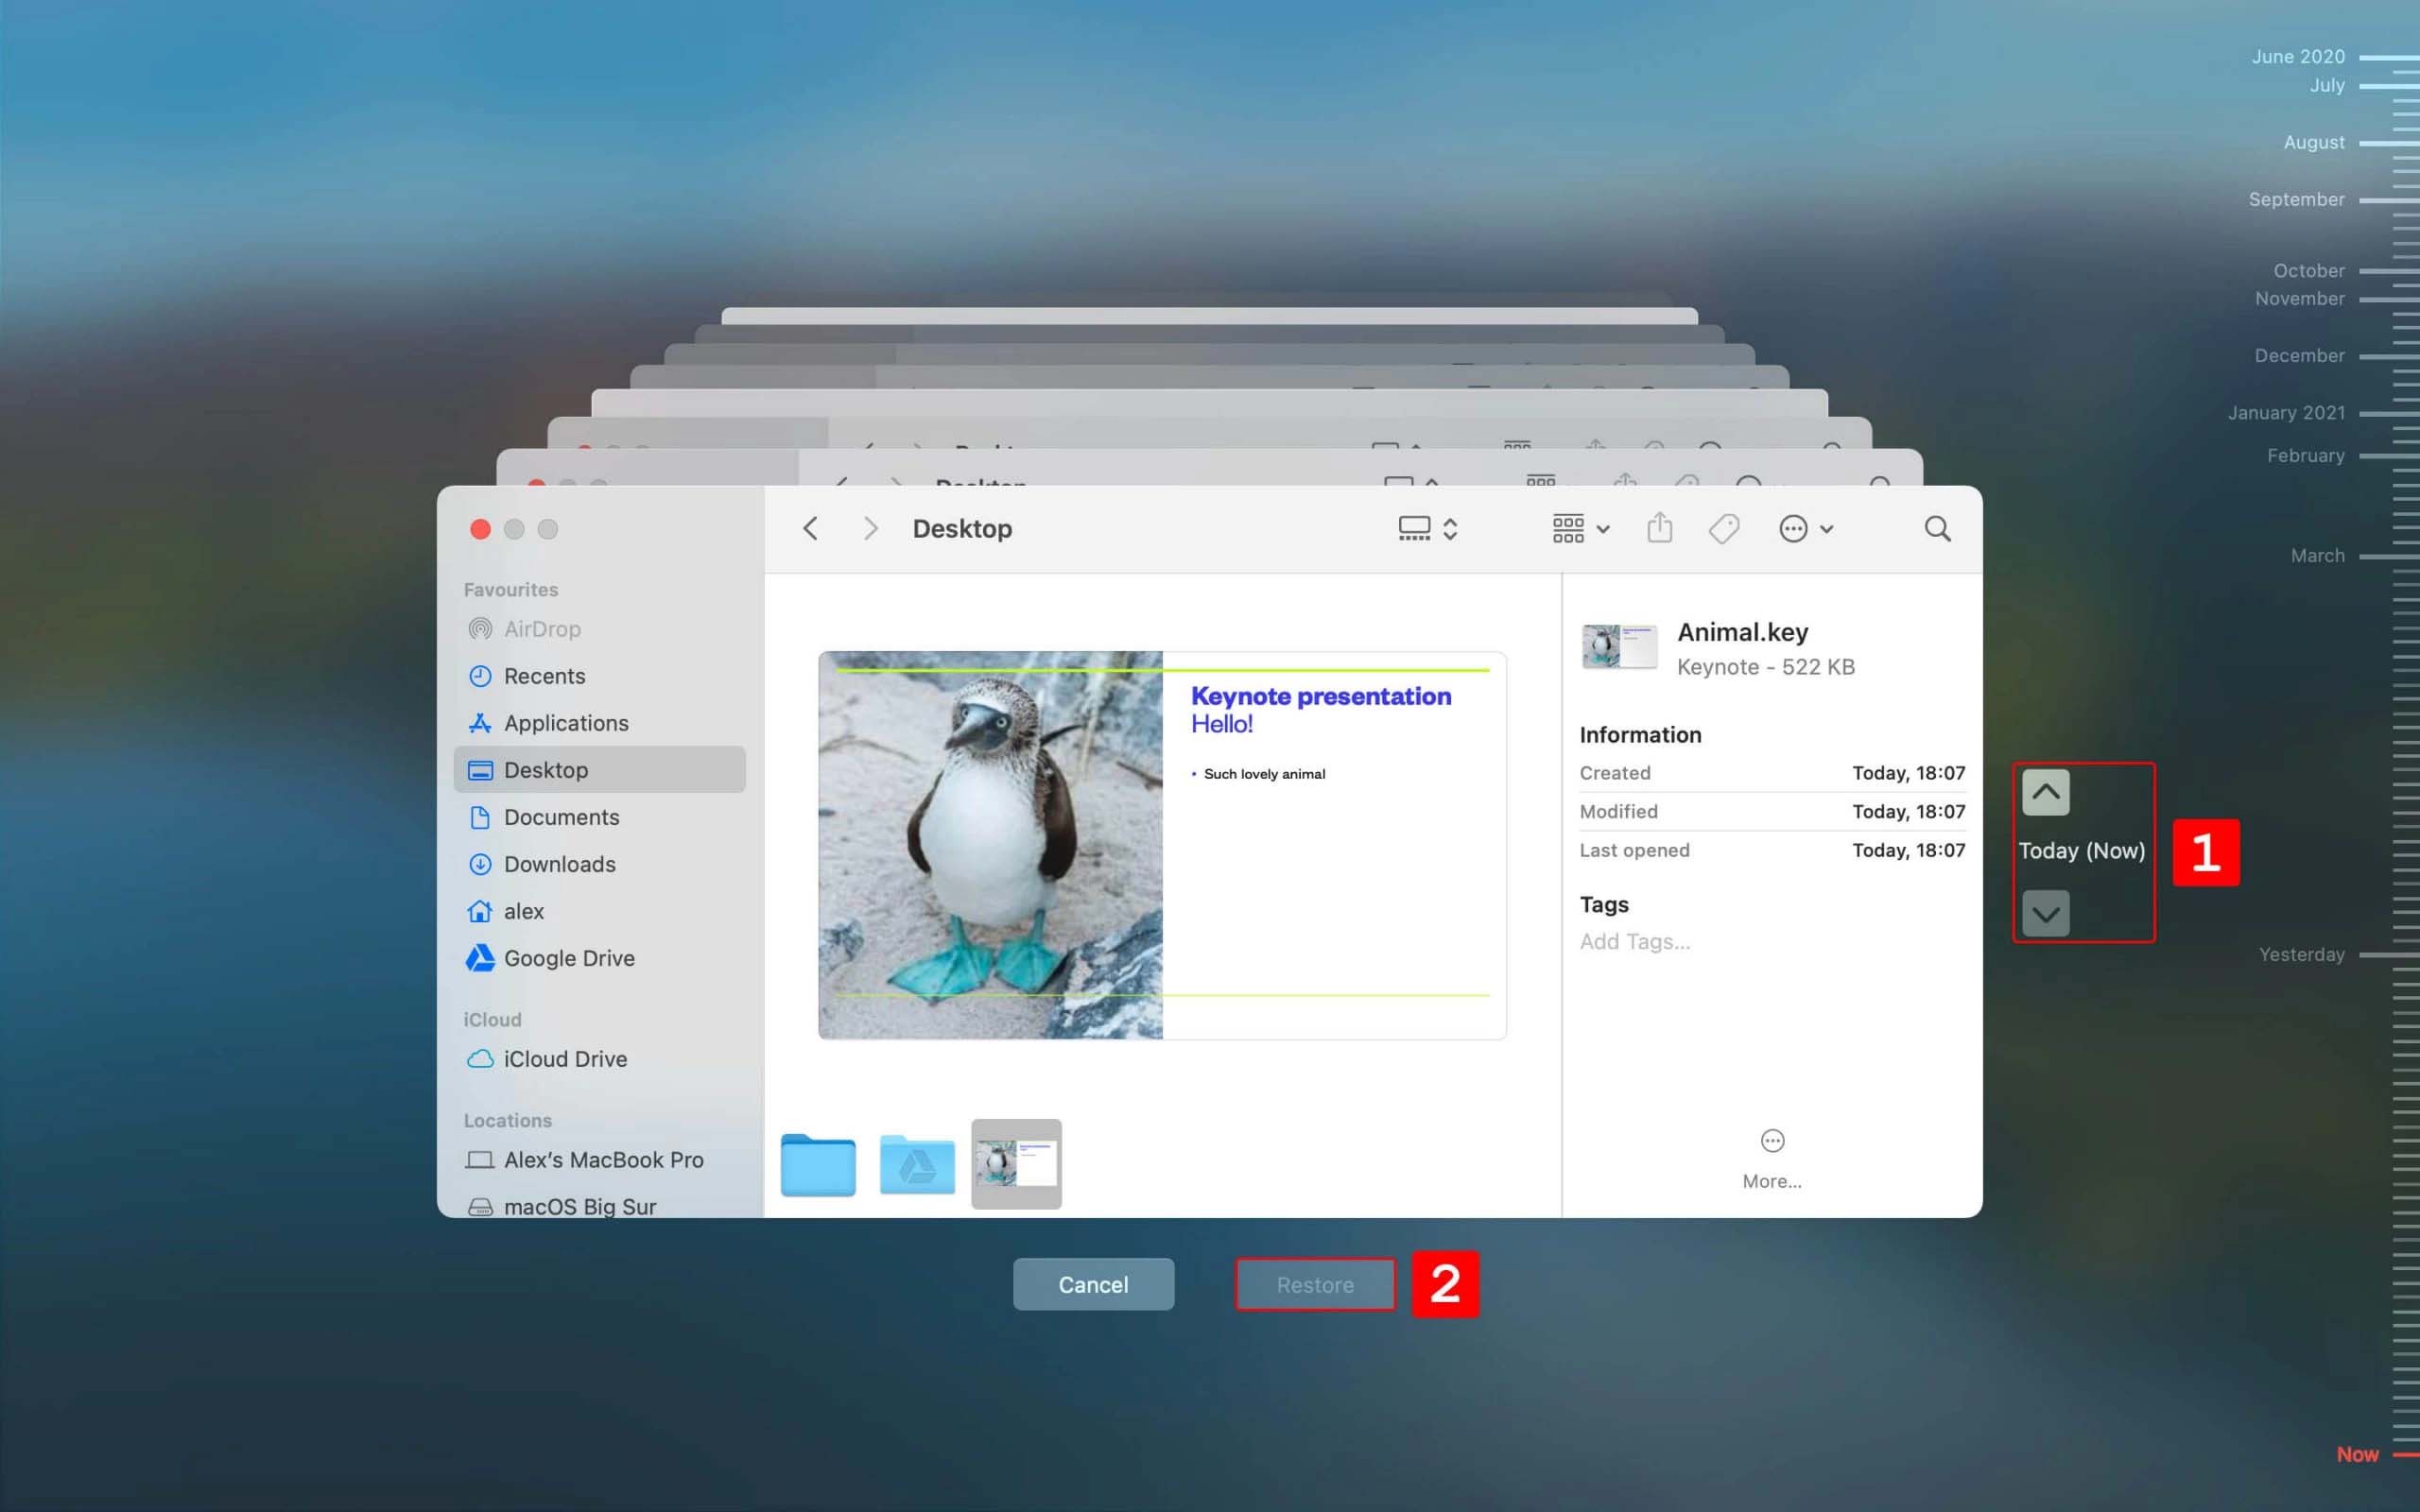
The following procedure should be used to recover a lost Keynote presentation from a Time Machine backup.
- Connect the storage device that contains the Time Machine backup to your Mac.
- Open a Finder window in the folder that contained the lost presentation. If you store your Keynote files in a folder called Presentations, open a Finder window to show its contents.
- Launch Time Machine by clicking the Time Machine icon on the menu bar.
- Use Time Machine’s arrows and timeline to scroll through the local snapshots and backups to locate the files you want to restore.
- Click the Restore button to recover your selections to their original storage locations.
You need to have previously created a backup using Time Machine to use this recovery method. If you are not currently performing regular backups, we strongly suggest you start doing so as soon as possible. When data loss rears its ugly head, you will be glad you took the time to create backups.
More details about recovering deleted data from a Time Machine backup can be found on this page.
Retrieve Lost and Deleted Keynote Files on Mac with Data Recovery Software
Hopefully, one of the methods outlined above is enough to recover your lost presentation. But this may not always be the case. You may have neglected to include the presentation in backups, or not be taking backups at all. Even if the file was recently deleted, you may have manually emptied the Trash, making it unavailable for a quick recovery. Data recovery software can help in this kind of situation.
How data recovery software works
Data recovery software works due to the way macOS deletes files from your computer. When the Mac operating system deletes a file, it removes the logical links that make the item available to other applications. The physical data is not immediately removed from its storage device. Rather, the space it occupies is marked as being available for future use by the operating system. Until the data is overwritten by new information, it can be retrieved with data recovery software.
Check out our informative page that provides more detail about how data recovery software works.
IMPORTANT: Using a storage device after you suspect it has experienced data loss risks overwriting or corrupting the file you want to recover. For this reason, we urge you to stop using the device as soon as you think data loss has occurred. Don’t write anything to the disk until the recovery process is complete. This includes downloading and installing the data recovery software on a USB drive if the data loss involves your system’s main disk drive.
Choosing a data recovery software solution
There are many data recovery software tools on the market, and we have compiled a list of some of the best Mac solutions available. We have tried all of these tools and usually go with Disk Drill for our data recovery needs. This is our data recovery tool of choice for several reasons.
- ✨ Disk Drill features a user-friendly interface that takes the stress out of the data recovery process.
- 💽 Deleted user data can be recovered with just a few clicks by anyone with general computing skills.
- ✔️ We have had great success with Disk Drill and it has recovered our lost files each time we’ve used it.
You can learn more about this reliable recovery tool in our full Disk Drill review.
Using Disk Drill to recover deleted Keynote files on Mac
The following steps demonstrate how to recover deleted Keynote files on a Mac using Disk Drill data recovery software.
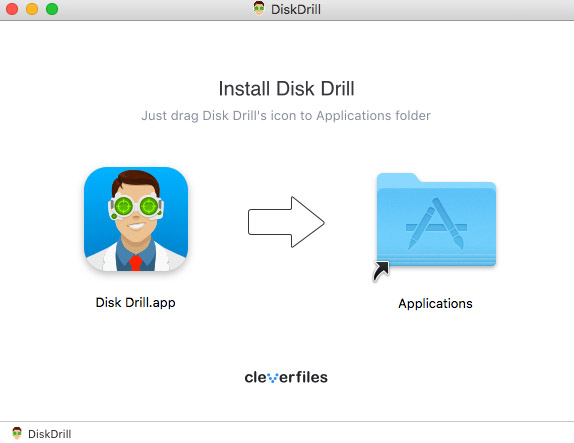
- Download and install Disk Drill for Mac on your computer. As stated previously, if your main disk contained the lost Keynote file, don’t use it to download and install the software. Use a removable storage device instead to protect your data.
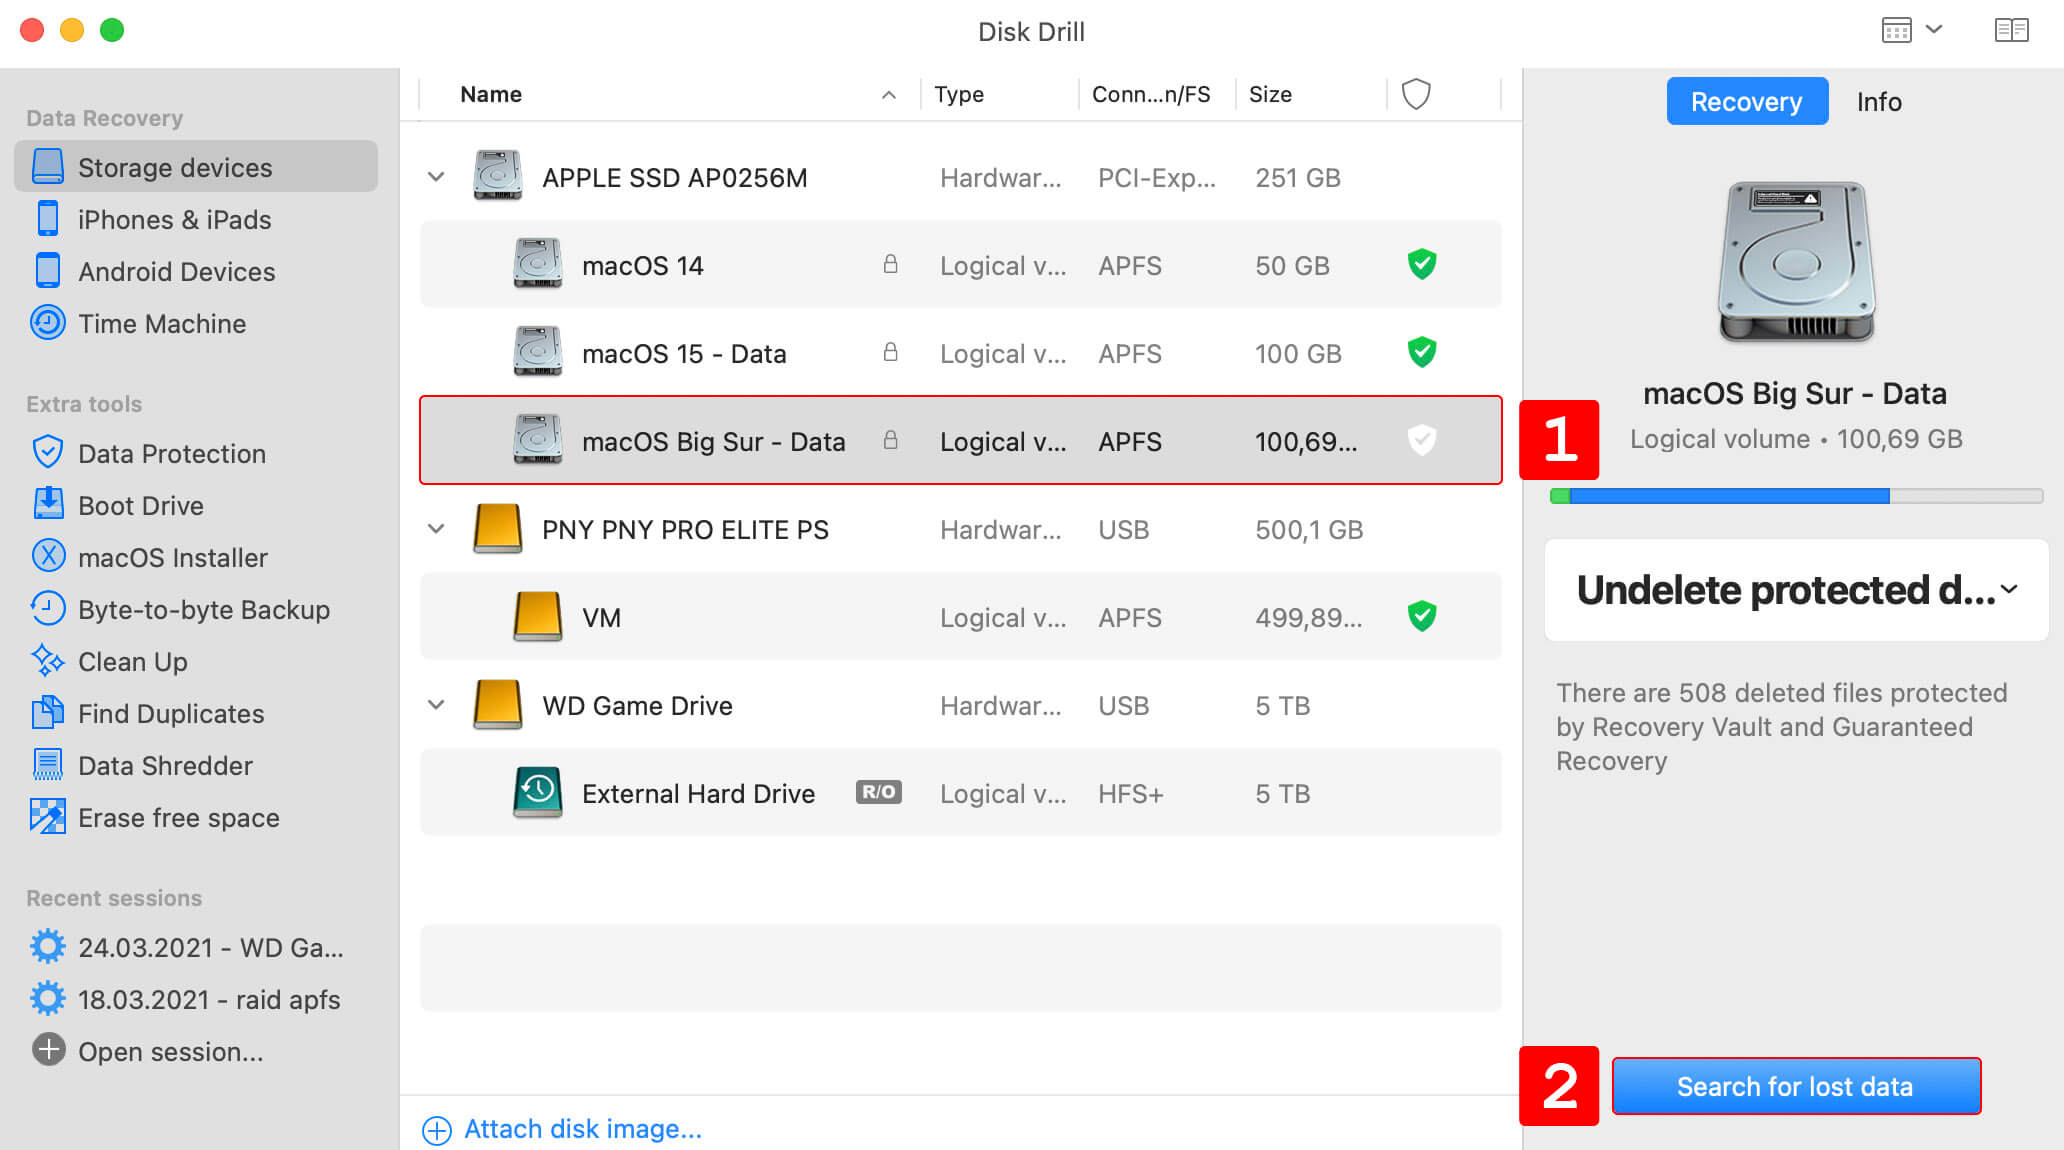
- Launch Disk Drill and select the disk that contained the lost presentation files from the list of available devices.
- Click the Search for lost data button to begin the scanning process which searches the device for recoverable files.
- Preview the list of found files and select those that you wish to recover. You can type in “.key” in the textbox to filter the results by Keynote presentation documents. Choose a safe storage location for the recovered files that is not on the same disk that experienced data loss.
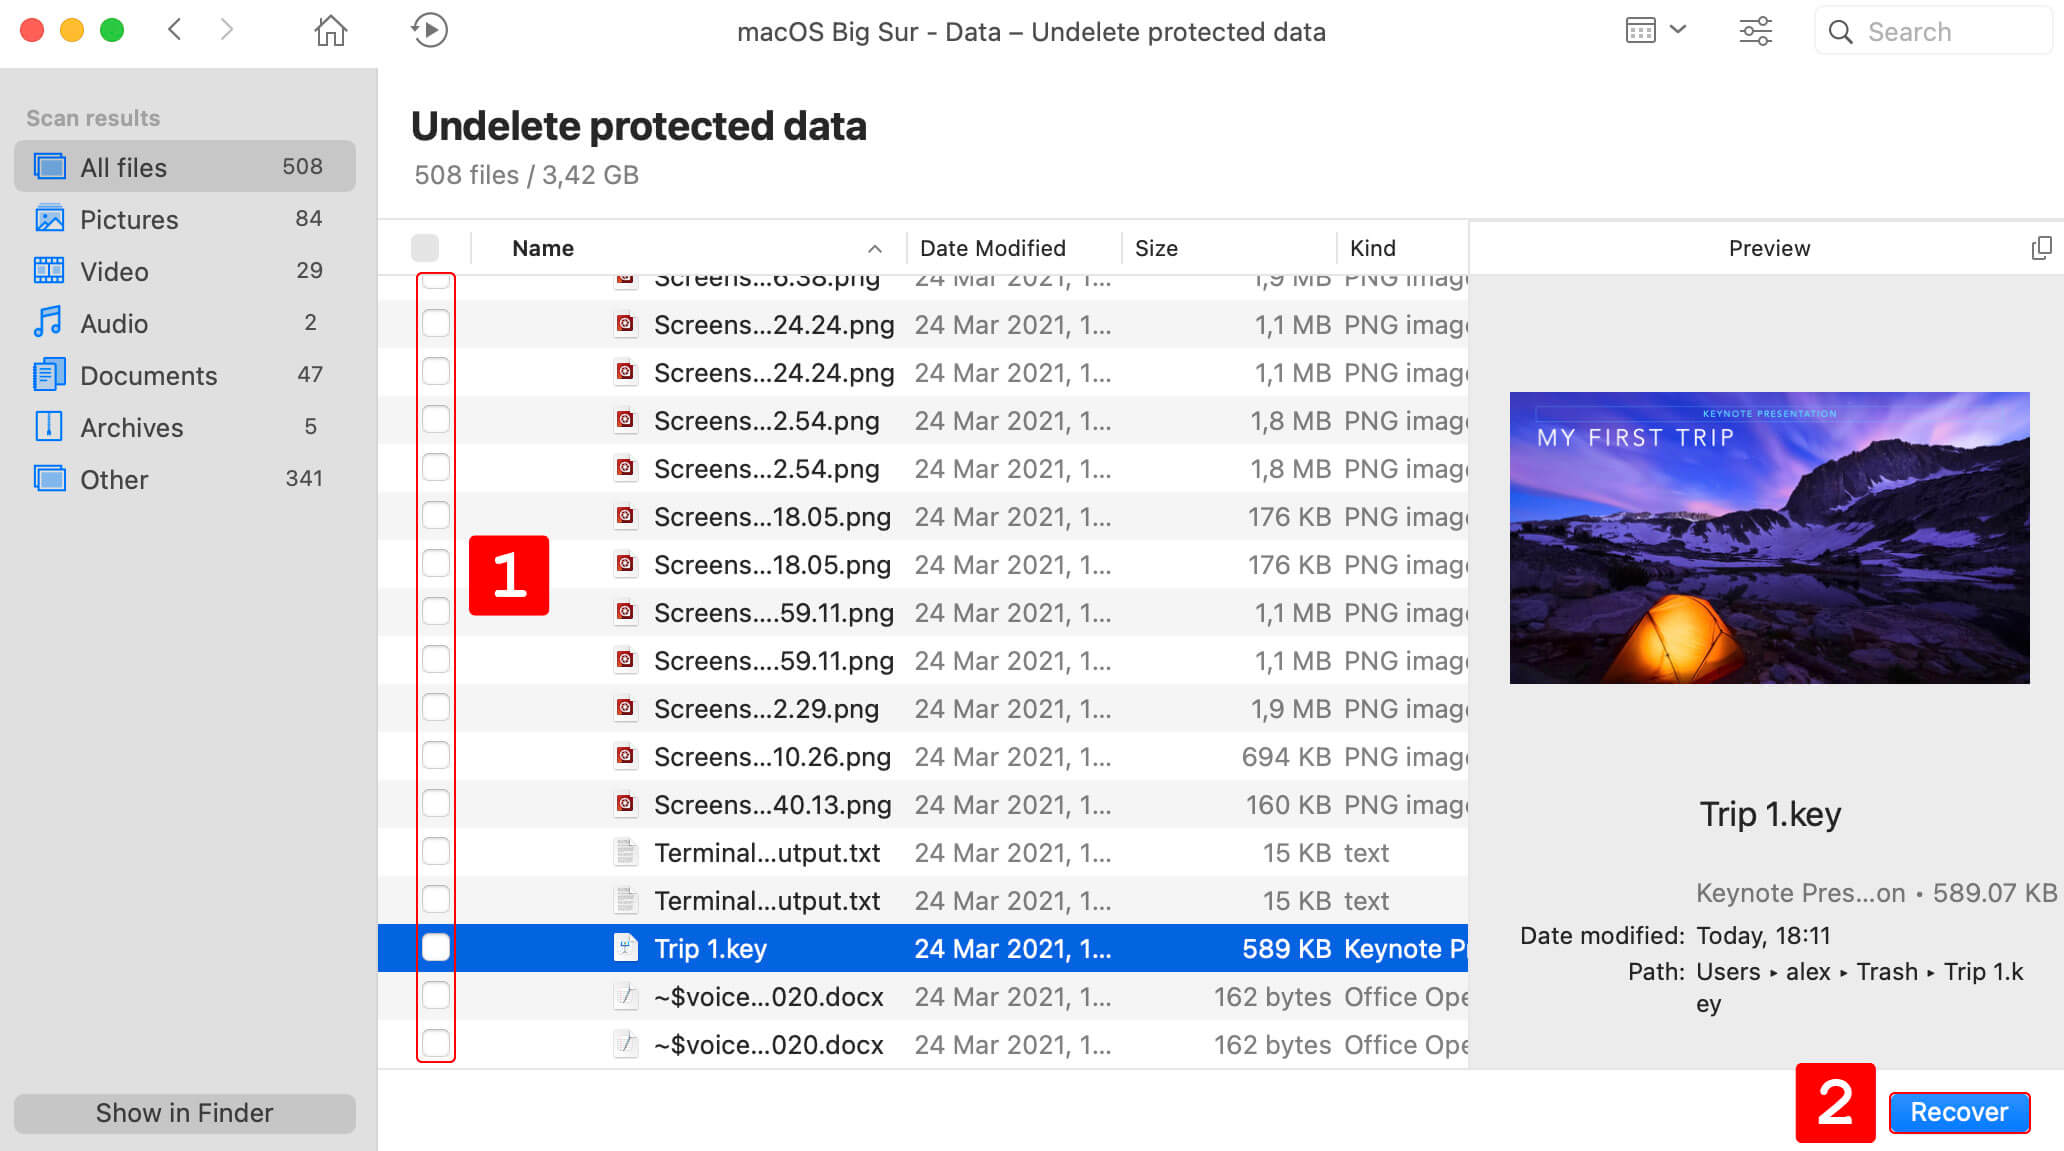
- Click the Recover button to complete the process.
This simple procedure will recover lost and deleted Keynote presentations as long as they have not been overwritten by new information. Speed is of the essence when using data recovery software. Stop using the affected device and perform the recovery procedure as soon as possible.
Recover an Unsaved Keynote Presentation From the Autosave Folder
Use the following procedure to recover the last saved version of a Keynote presentation from the Autosave Folder.
- With the current version of the presentation open, click File > Revert To.
- Choose Last Opened to delete all changes made to the presentation since you last opened it.
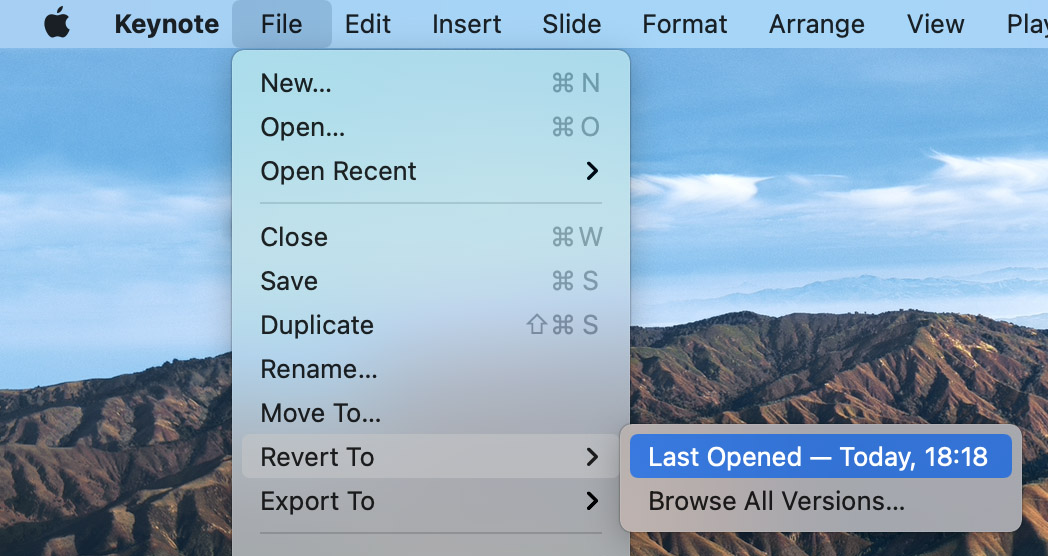
- Choose Previous Save to delete all changes you made to the presentation since you last saved it.
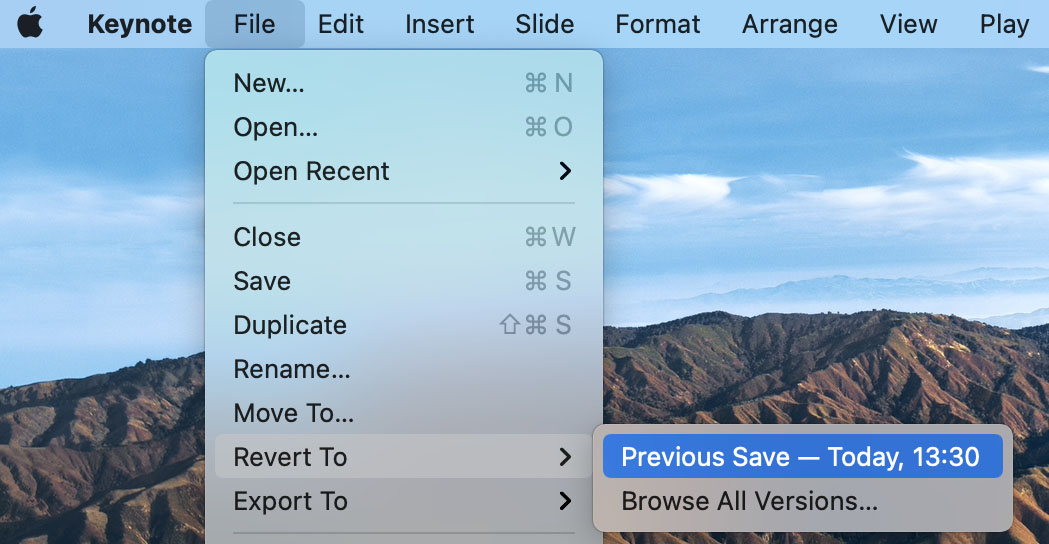
- Click Restore to restore the file.
Recover an Unsaved Keynote File From a Temporary Folder
You may be able to recover an unsaved Keynote file from your Mac’s temporary folder using the following steps.
- Go to Finder>Applications>Utilities.
- Start the Terminal application.
- Type this command into Terminal: open $TMPDIR and press Enter.

- Locate the Keynote file in the folder.
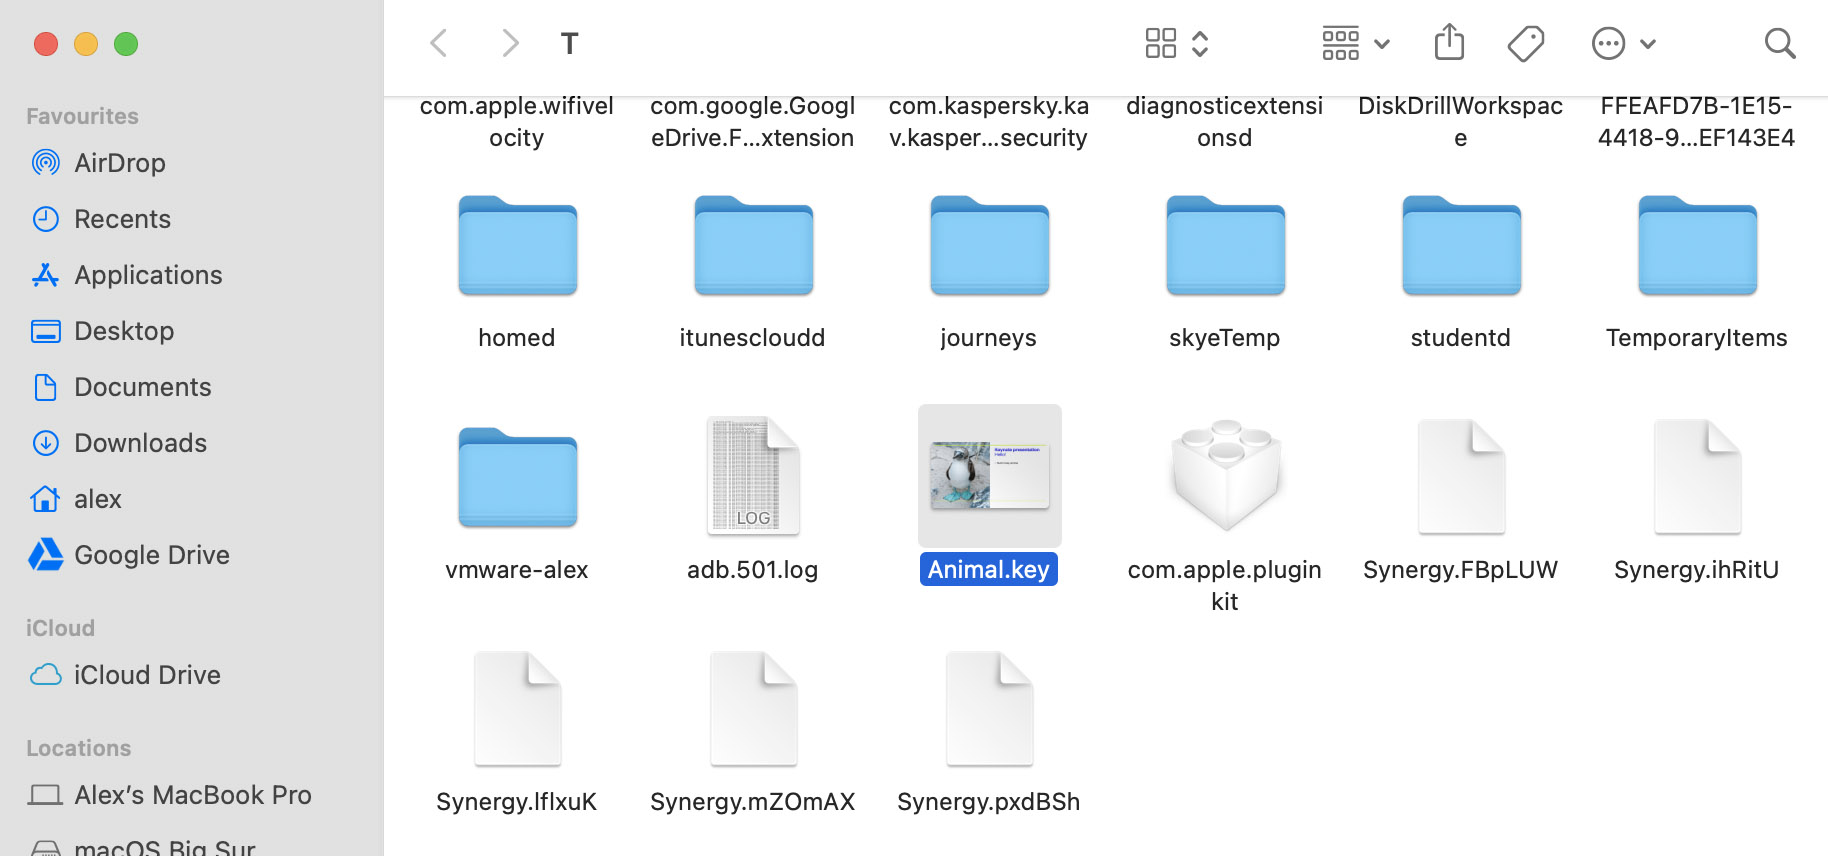
- Open the file and save it.
Recover a Deleted Keynote File From iCloud
iCloud is Apple’s cloud storage solution and your Mac has a direct connection to it through your iCloud Drive. Look at this Apple help page if you need some help setting up your iCloud Drive. You can configure the drive to automatically store items from specified folders, like your Keynote presentation folder.
Files stored on your iCloud Drive are backed up to the cloud. Items in your iCloud Drive can be recovered from iCloud if they are deleted. Follow these steps to recover files deleted from within Keynote on your Mac.
- Go to iCloud.com and login with your Apple ID.
- Under your Profile’s drop-down menu, select Account
- Click Restore Files.
- Select the individual Keynote presentation files you want to recover.
- If you see the message “No files to restore” go to this website.
- Log in with your Apple ID.
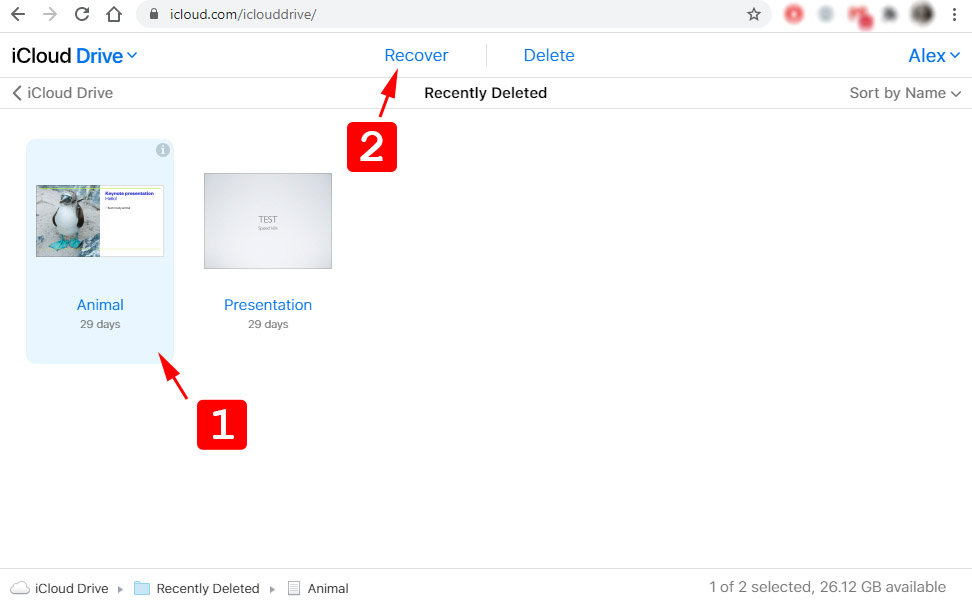
- Click on Recently deleted in the bottom right corner.
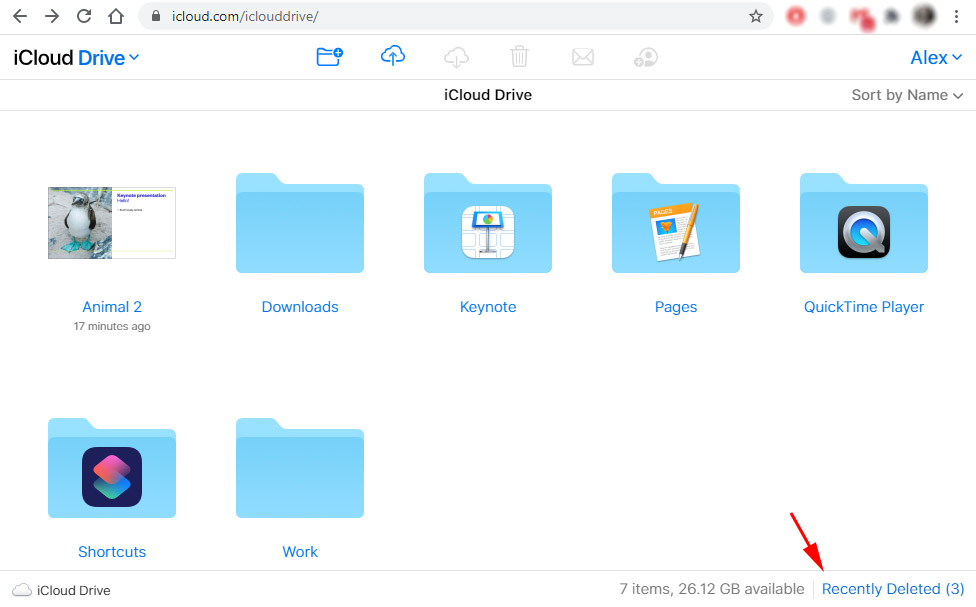
- Select the files you want and click Recover.
To use this recovery method, you must be using iCloud. Files are available for 30 days after being deleted.
Opening a Previous Version of a Keynote File
You may be able to recover from a major editing mistake by opening a previous version of a Keynote presentation with the following procedure.
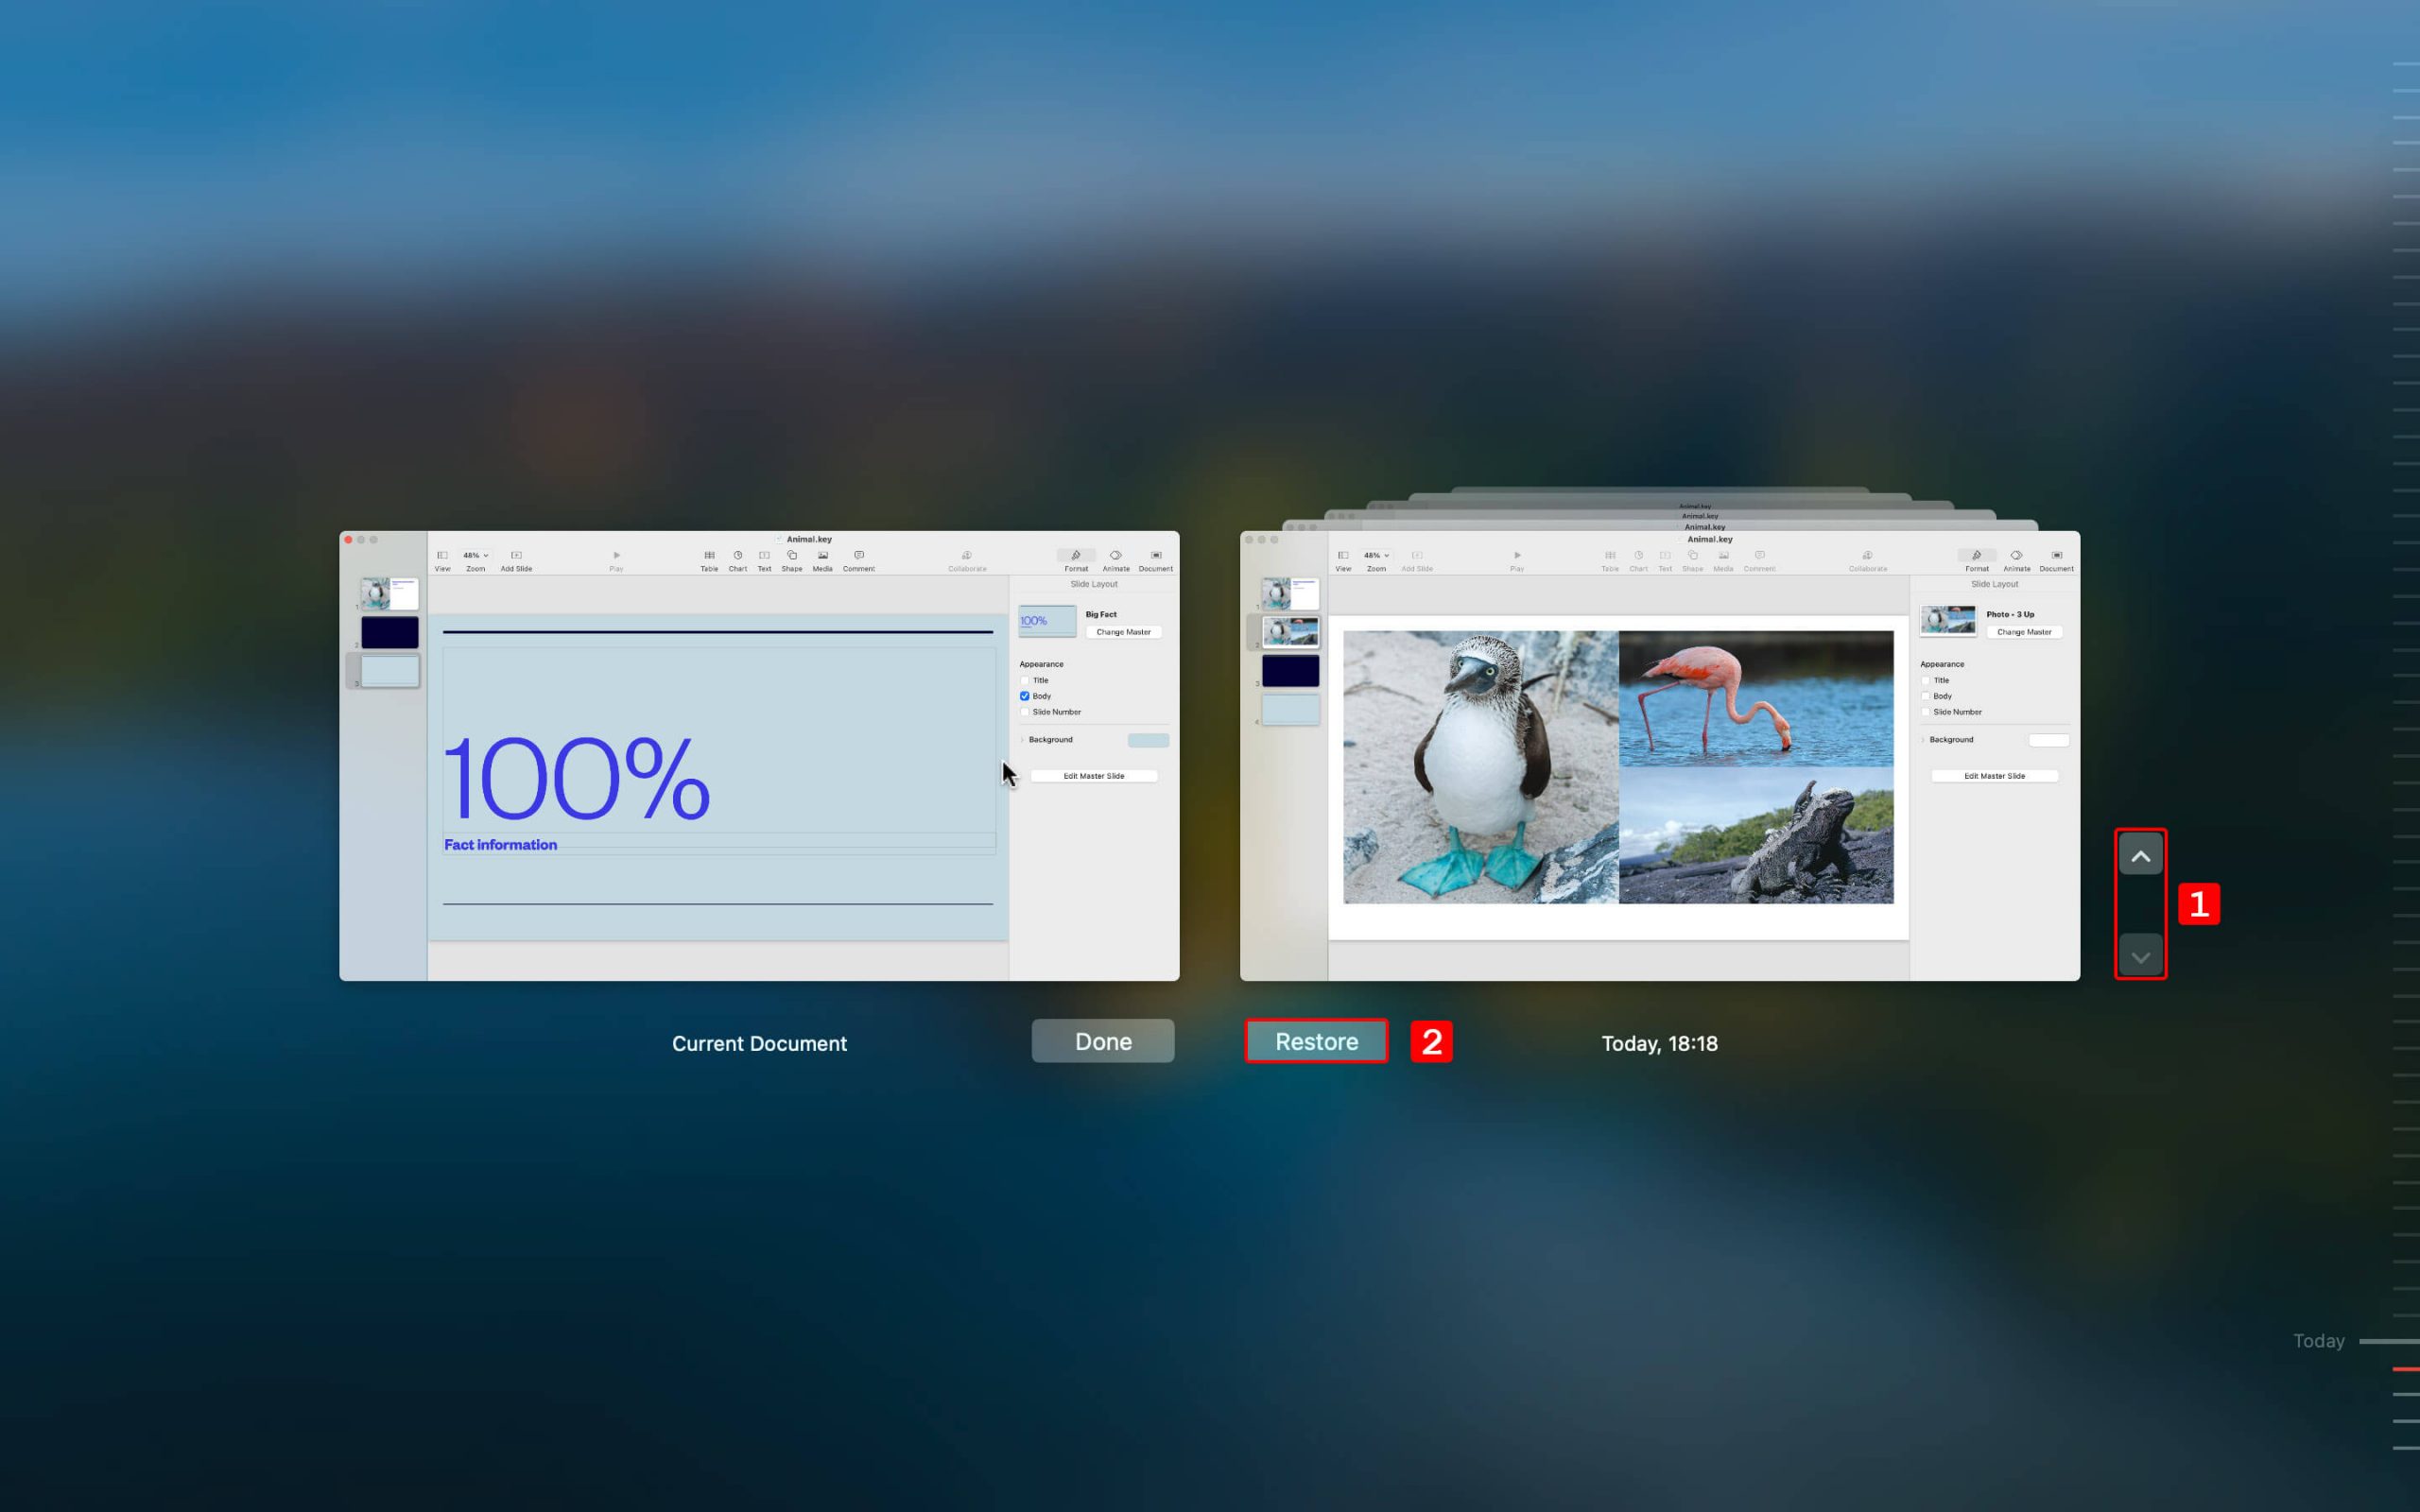
- With the presentation open, choose File > Revert To > Browse All Versions.
- Use the tick marks and arrows to view different versions of the presentation.
- Locate the version you want and click Restore below its thumbnail.
- The current version of the presentation is replaced by the restored file.
FAQ
How do I recover a Keynote presentation?
We have described multiple ways to recover a Keynote presentation in the body of this article. If the lost file is not in your Trash, the most reliable recovery method is with data recovery software. This process involves:
- Download, install, & launch Disk Drill.
- Select the disk containing lost Keynote files.
- Click on “Search for Lost Data” & wait for the scan to complete.
- Select the files you want to recover & click “Recover”.
- Choose a recovery destination & hit “OK”.
Does Keynote autosave presentations?
Yes, it does. The first time you save a presentation you must name it. After that, Keynote automatically saves your presentations as you work.
Where does Keynote save files?
The first time you save a Keynote file, you are prompted for a storage location. This is where the file will be saved, as well as subsequent automatically saved versions of the presentation.
How do I retrieve a deleted Keynote presentation on iPad?
Use the following procedure to retrieve a recently deleted Keynote presentation on your iPad.
- Open Keynote on your iPad.
- Tap the link in the top-left corner to see the Locations list.
- Tap on Recently Deleted.
- Tap Select > choose the presentation > tap Recover.
Conclusion
As you can see, there are multiple methods by which you can recover a lost or unsaved Keynote presentation. Although it’s never an optimal situation to suddenly lose an important file, one of the solutions we have discussed should help you recover your lost Keynote presentation.
Some takeaways from this article are that you should be backing up your Mac and data recovery software can get back files that you thought were lost for good. So we recommend you start using Time Machine to protect your data. We think you should also check out some data recovery solutions for Mac in our review. We hope this information has been helpful and that you successfully recover your lost Keynote presentations.
This article was written by Robert Agar, a Staff Writer at Handy Recovery Advisor. It was also verified for technical accuracy by Andrey Vasilyev, our editorial advisor.
Curious about our content creation process? Take a look at our Editor Guidelines.