
Without a doubt, it’s essential to keep your Mac up to date to ensure its top-notch performance and security. But unfortunately, sometimes doing this might leave you with a not-so-funny issue, such as having to deal with missing files after a Mac update.
In this article, we’ll offer you the most effective solutions with detailed step-by-step instructions for recovering those missing files after a Mac update.
Is It Possible to Restore Missing Files After a Mac Update?
Yes, it is possible to recover files that went missing after a Mac update. But of course, the outcome mostly depends on each individual data loss scenario. For you to get a better idea of what to expect from all this, here are the most common situations that users are in when dealing with missing files after a macOS update and the optimal solutions to try.
I do not use Time Machine or iCloud backups. |
Use a specialized data recovery tool to restore the missing files. |
I have Time Machine backups enabled. |
Either recover the missing files from a Time Machine backup or a local snapshot. |
My important files are synchronized with iCloud. |
Go to your iCloud account to retrieve the missing files. |
Now we’ll show you how to recover the files that went missing after your Mac update using the methods from the chart.
How to Recover Missing Files After a Mac Update
Here are the most effective data recovery methods that can help you restore missing files after a Mac update. You can either choose one that’s best suitable for your situation and follow the step-by-step instructions or go through these methods one by one.
Method 1: Check the Relocated Items Folder on the Desktop
If, during the update, your Mac has found any files that are damaged or not valid, the system will place those files in a special folder called Relocated Items or Previously Relocated Items. Usually, those are configuration files that were modified by you or an app, and, because of those modifications, are not compatible with the updated macOS version.
After the update, this folder should appear on the Desktop. If not, here’s how to manually locate the Relocated Items folder on your Mac to see whether any of the missing files are there:
- Open the Finder app.
- Click your Mac’s name from the sidebar on the left under the Locations section.
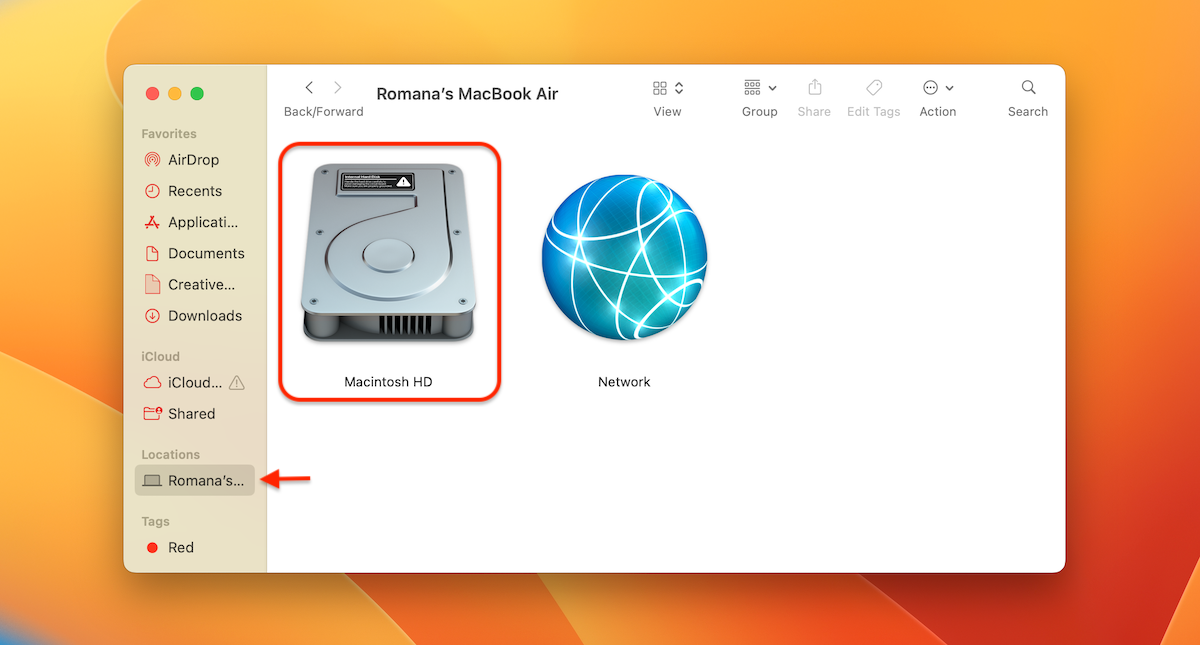
- Double-click Macintosh HD to open it.
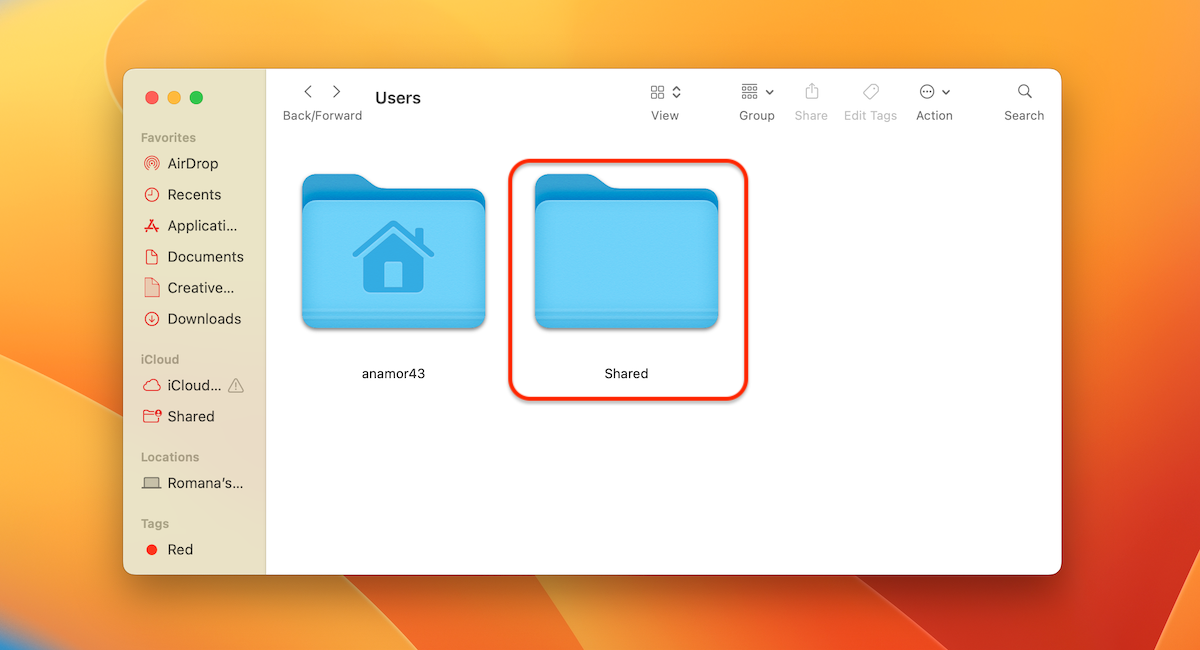
- Go to the Users folder > Shared.
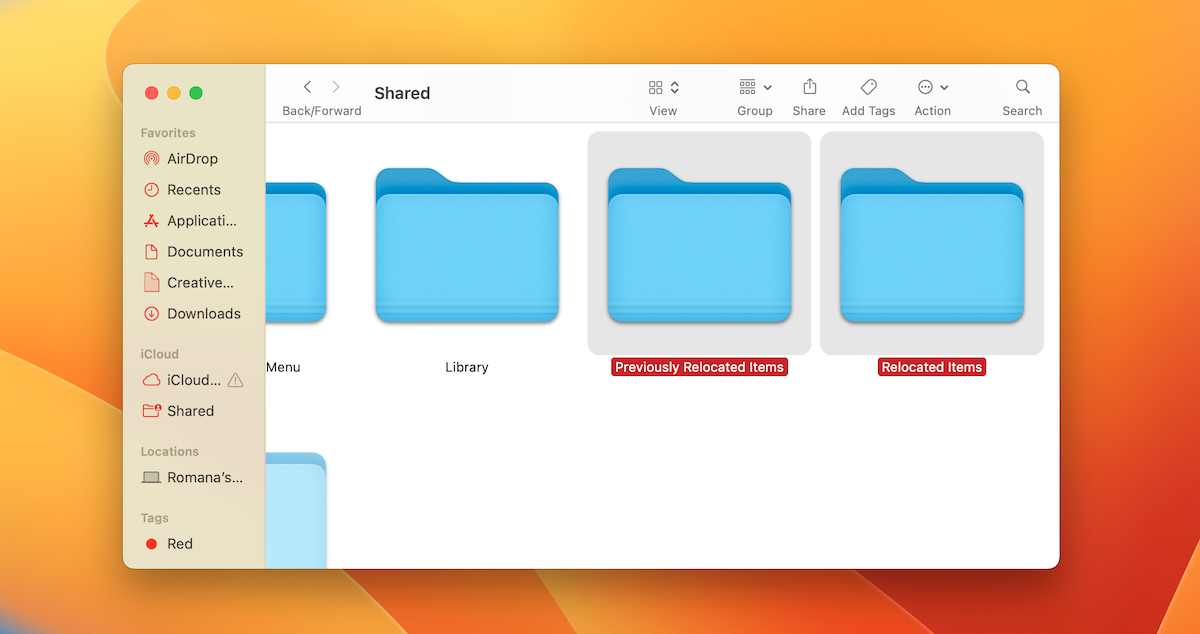
- Check the Previously Relocated Items and Relocated Items to find your missing files.
Method 2: Try to Locate Your Files Using Search
Maybe the files that you are looking for aren’t really gone from your Mac after the update? Even if there is the slightest chance that you’ve misplaced them by yourself, it’s a good idea to try to find those files on your computer before moving forward with a more thorough data recovery method.
Basically, there are two ways you can find files that went missing after a Mac update:
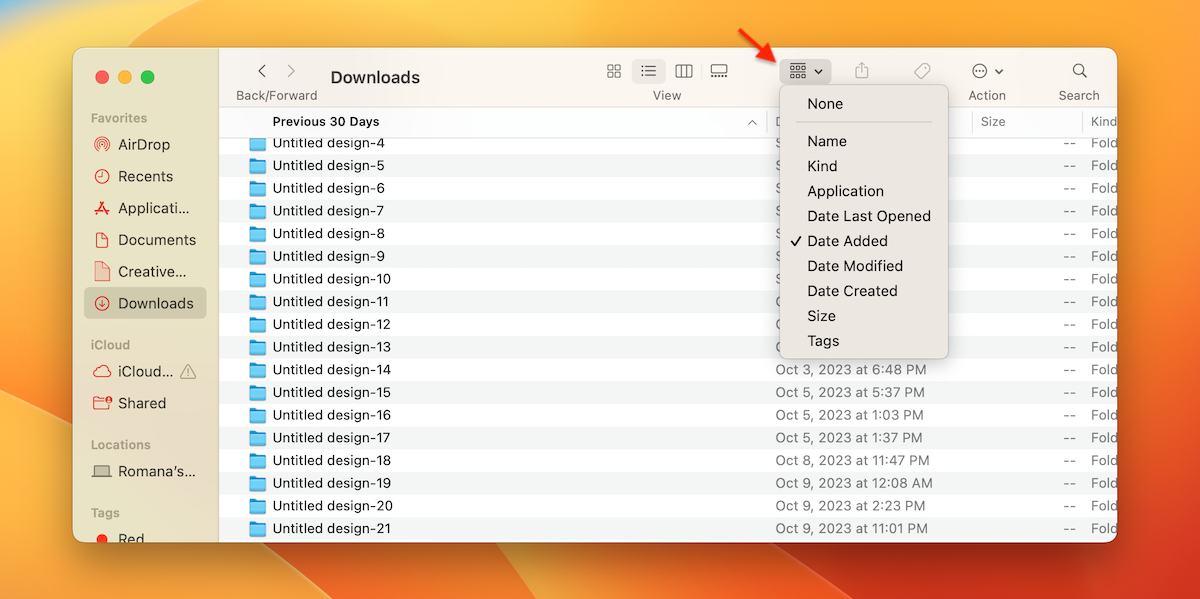
- With Finder: To open the tool, click the first icon on the Dock. Then, you can either click the Group button on the top to view the files according to their kind, size, name, date created, etc. Or use the search tool on the top-right to type in a specific keyword that is related to the file you’re looking for (for example, Taxes, 2023, .pdf).
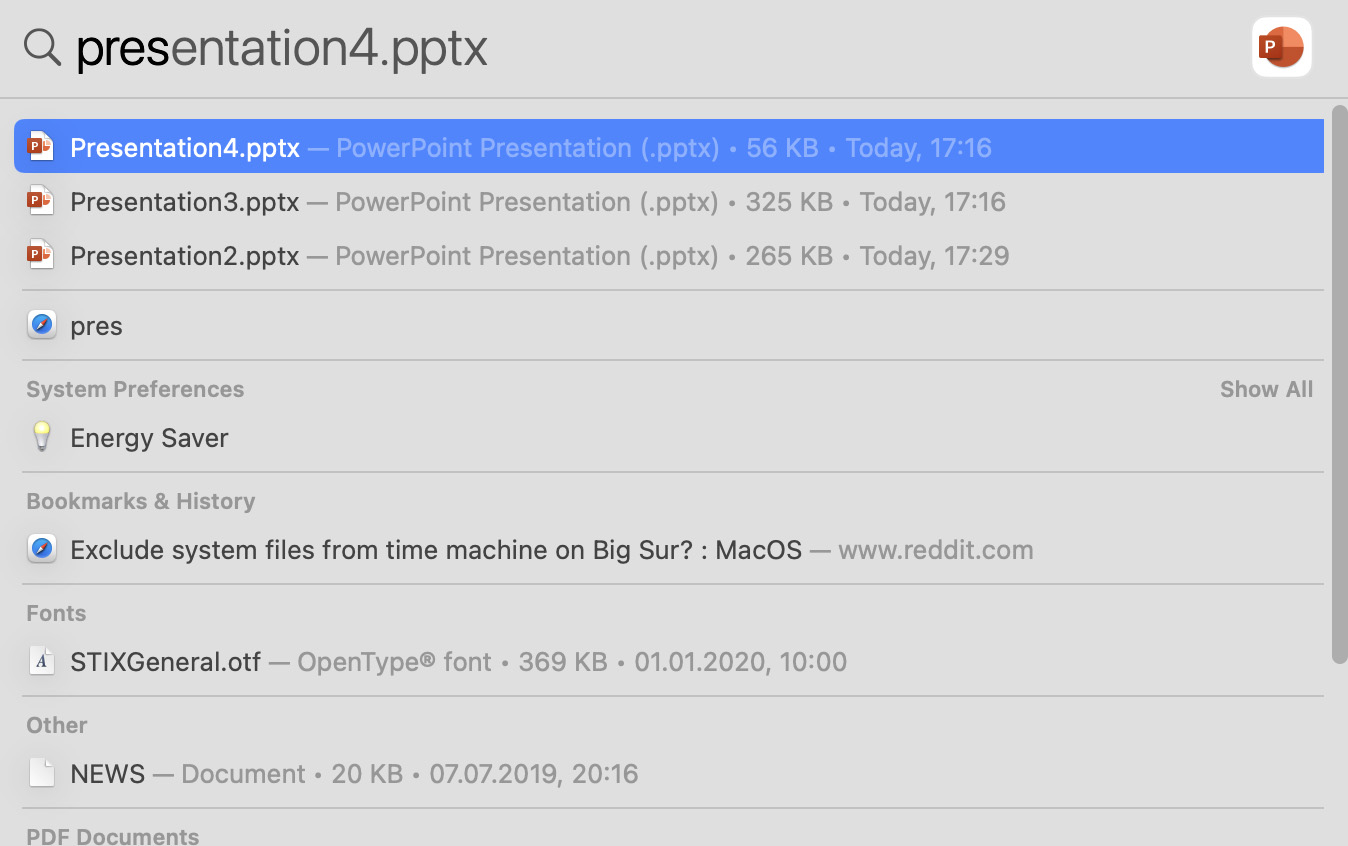
- With Spotlight: Hit Command + Space Bar to open the Spotlight tool. Type a word that best describes the file you’re looking for in the search field on the top.
Method 3: Restore Files from Time Machine Backup
If you have the Time Machine tool set up on your Mac and have been using it to back up your computer, then this data recovery method is a reliable option. You should be able to recover the missing files from a Time Machine backup version that was either saved to an external drive or made automatically by the tool using local snapshots.
Here’s a detailed guide for both options.
Option 1: By Using a Backup Drive
For this option, you’ll need the external HDD containing the recent Time Machine backup version and your Mac. Follow these steps to recover missing files after a Mac update with the help of a Time Machine backup:
- Connect the external hard drive with the needed Time Machine backup version to your Mac.
- Using Finder, go to the location where the missing files were located.
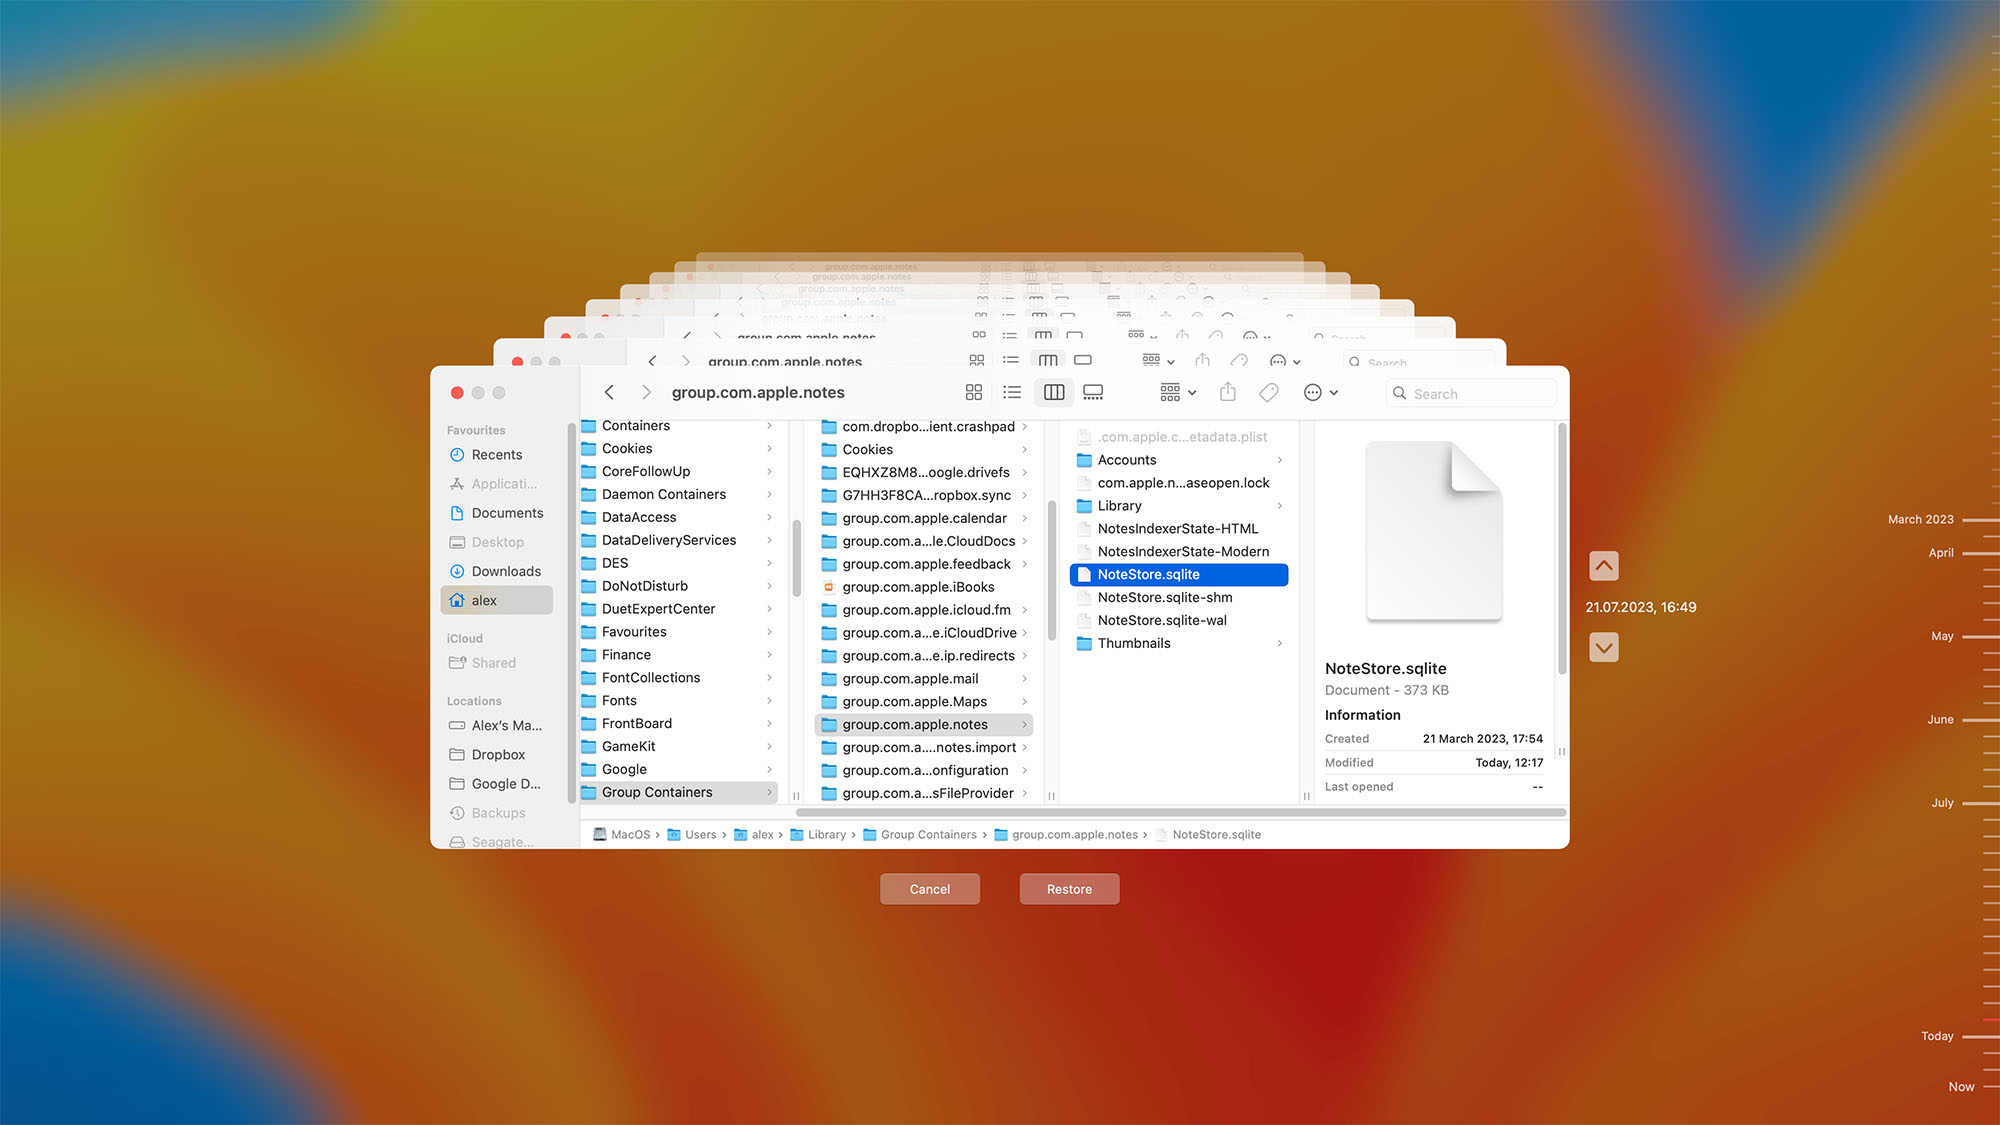
- Click the Time Machine icon on the menu at the top of your screen and choose Browse Time Machine Backups from the drop-down.

- Use the timeline on the right to choose the needed versions of the files that you wish to recover.
- Choose the files and click the Restore button.
Option 2: By Using Local Snapshots
Local Snapshots are backup files made almost every hour by Time Machine and kept for 24 hours. So, if less time has passed since the disappearance of the files, you can use one of those local snapshots to recover them.
Follow these steps to recover files that went missing after a macOS update using Local Snapshots:
- Go to the location where the missing files were previously stored.
- Click on the Time Machine icon in the menu bar and choose Browse Time Machine Backups from the available options.
- Look through the available snapshots to find the missing files.

- Choose the files you wish to restore and click the Restore button.
Method 4: Retrieve Files from iCloud
If you’ve been using iCloud to synchronize your Mac files, you should be able to use it to recover any files that went missing after your macOS update. You can use any device that is connected to your account to recover the files from iCloud.
Follow these steps to restore missing files after a Mac update using iCloud:
- Go to iCloud.com and use your Apple ID details to log into the account.

- Choose the app that would contain the files you’re looking for: Photos, Mail, Notes, Pages, etc.

- Locate the file you wish to recover and click the download button on the top-right of the screen.
Method 5: Recover Missing Files Using a Data Recovery Tool
If the methods mentioned above cannot be applied to your data loss scenario, you should try to restore the missing files on your Mac using a specialized data recovery tool. This option is suitable for almost any situation: whether the files were relocated, disappeared, deleted, or missing due to macOS updates.
One of the best data recovery software for Mac is a tool called Disk Drill. I recommend using it with such a data loss issue since it supports the newest macOS versions (including macOS Monterey, macOS Ventura, and macOS Sonoma) and is compatible with M1/M2/T2 and other Macs. Also, I’ve tested this tool to see how well it performs specifically in recovering missing files after a Mac update and it did an outstanding job in retrieving all of those files (archives, images, videos, audio files, documents, emails, and others).
Follow these steps to recover missing files after a Mac update using Disk Drill:
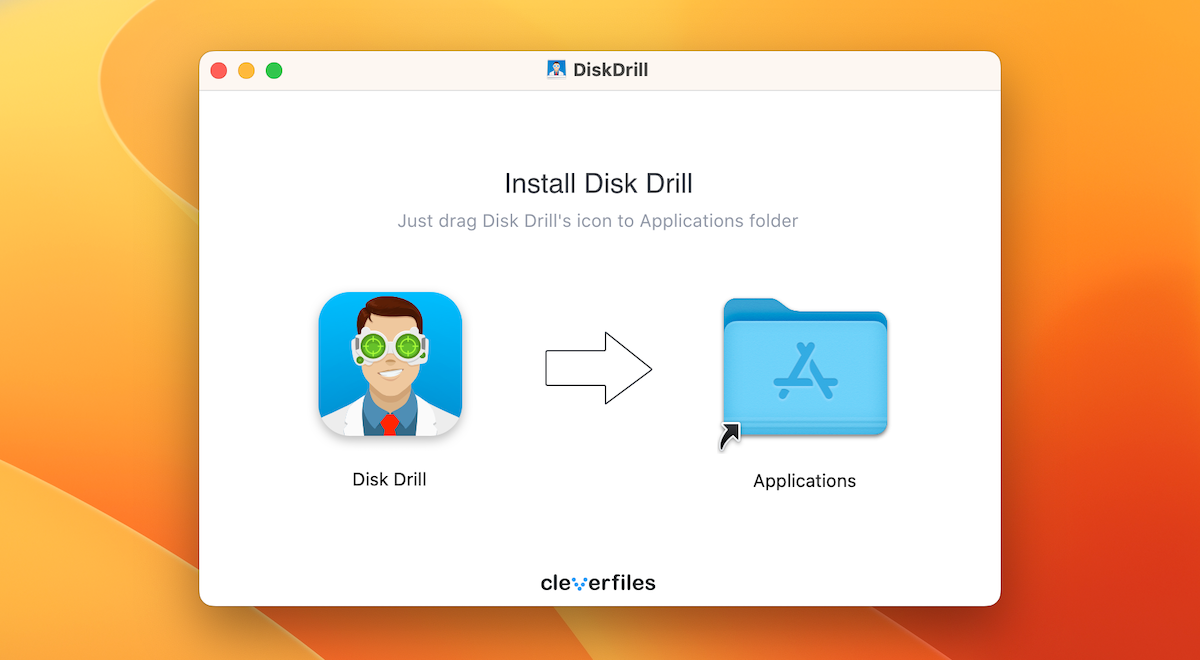
- Download Disk Drill for Mac and follow the onscreen instructions to install it.
- Open the tool.
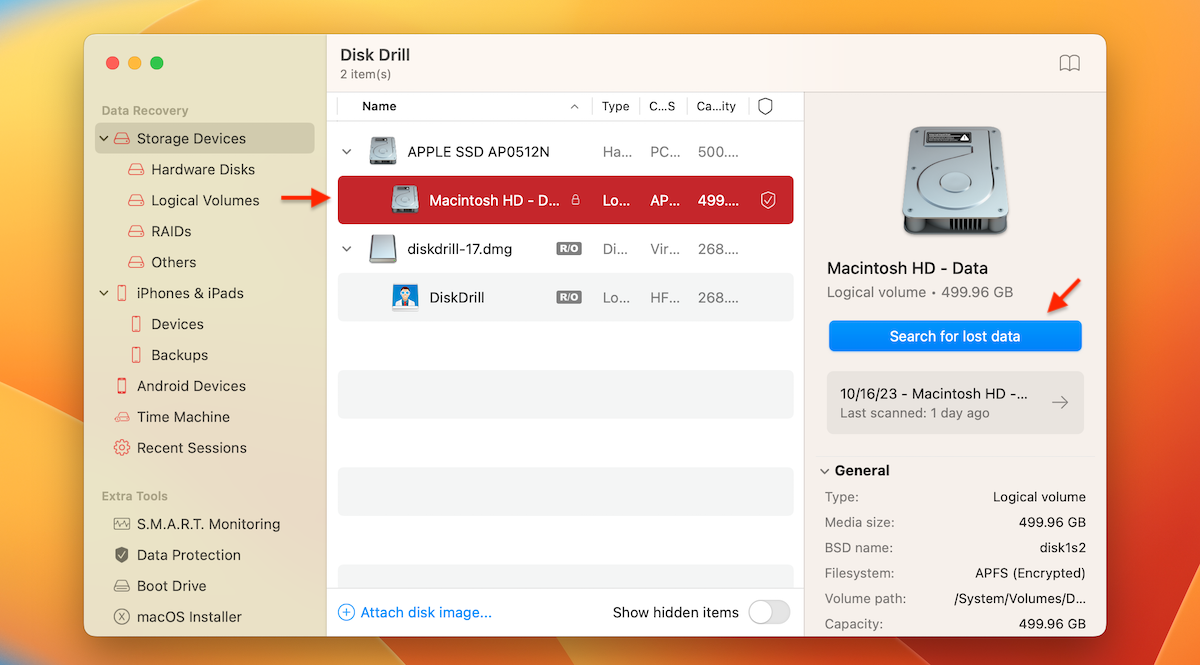
- Choose your Mac’s hard drive from the list of available devices.
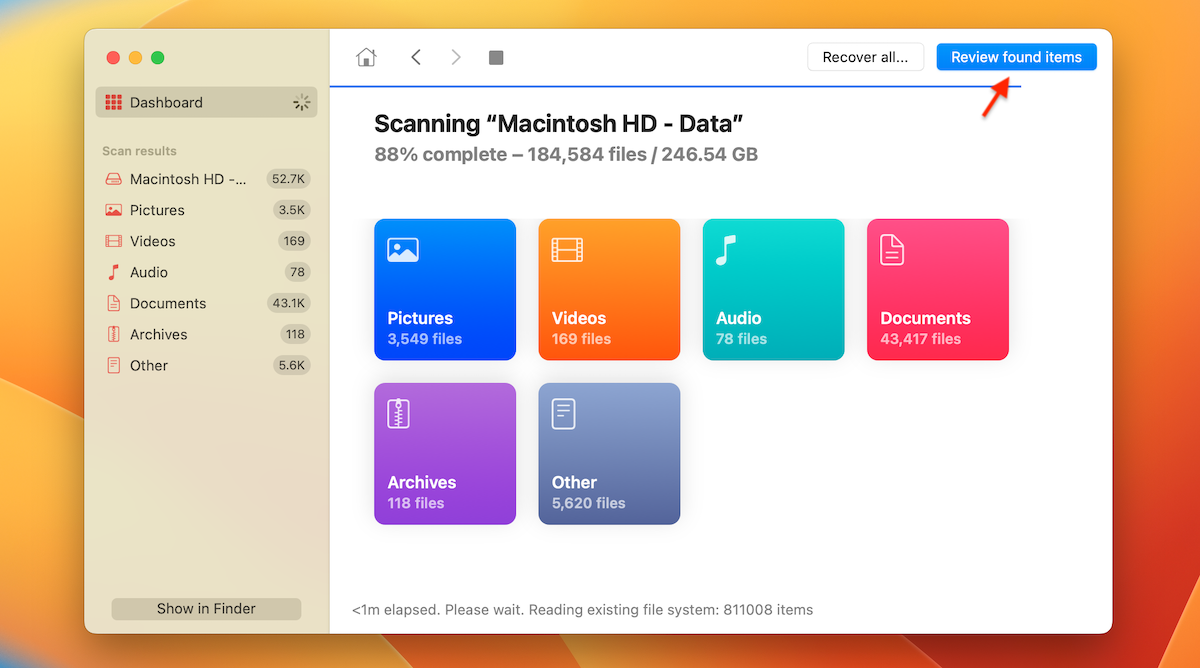
- Click the Search for lost data button to start the scan for files missing after the Mac update.
- Wait for the scan to finish and click Review found items to view the missing/lost files.
- Look through the scan results. You can click Show to choose whether you want to view the Existing files, All files, Deleted or lost, or Reconstructed (you can also hide/show duplicates and system & hidden files). To narrow down your search, you can filter the scan results by file type, date, or size using the toolbar on top of the search results.
- Preview the files to see whether they’re the right ones (if a file can be previewed, it can be potentially recovered).
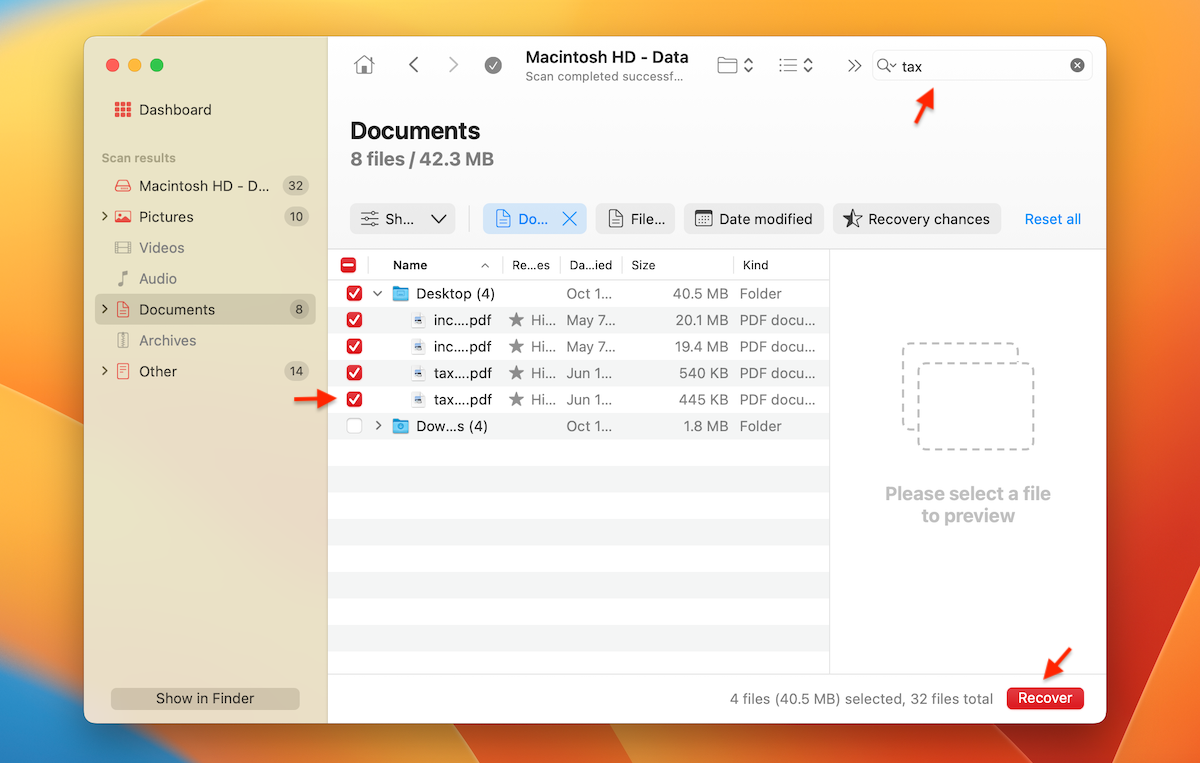
- Choose the files you wish to restore and click the Recover button.
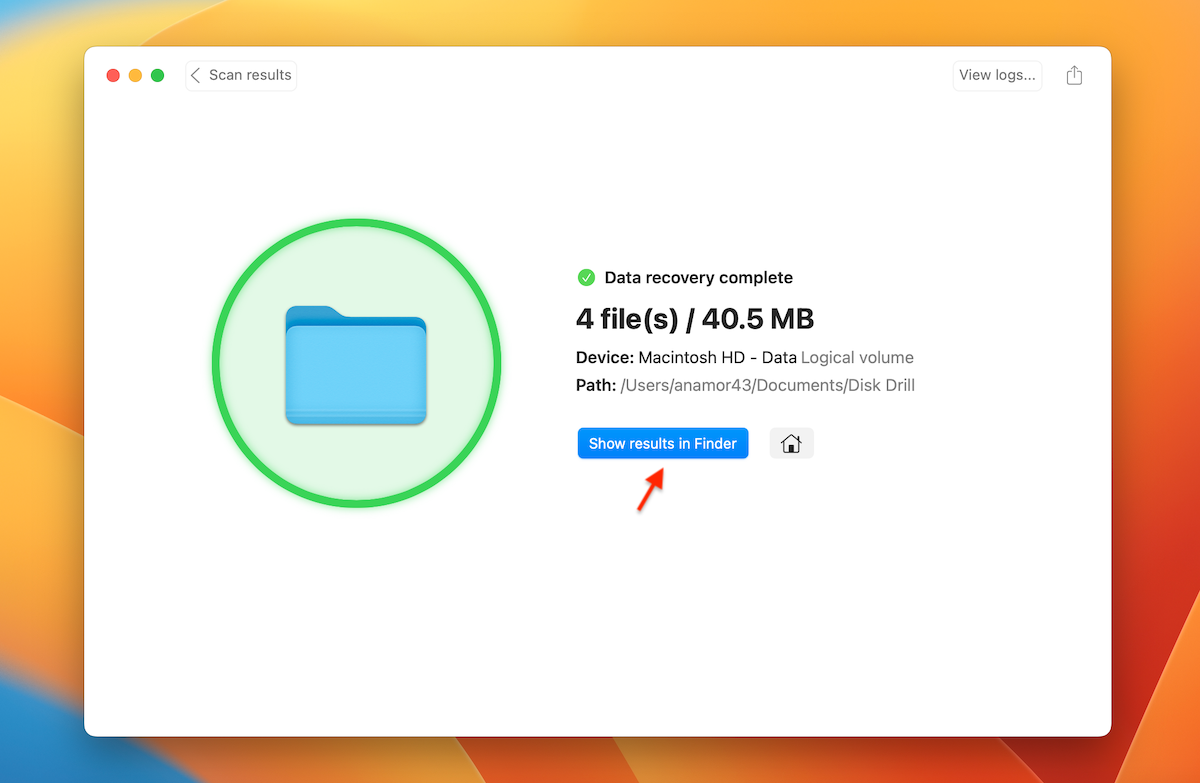
- Select a preferred location for the recovered data and click OK.
- Click Show results in Finder to view your restored files.
FAQ
What to do if you updated your Mac and lost all documents?
First of all, don’t panic. In most cases, you should be able to easily recover the lost documents. Here are a few ideas of what you can try:
- Check the Trash folder on your Mac
- Restore the files from a Time Machine backup or a local snapshot
- Retrieve the documents from your iCloud account
- Use specialized data recovery software for Mac like Disk Drill
How do I restore files after an update on Mac?
There are a few ways to restore files that went missing after a Mac update: by using a specialized data recovery tool (this is the most universal option since you don’t need to have a backup for it to work), restore the files either from a Time Machine backup or from iCloud. And if the DIY methods were of no success, you can get help from a professional data recovery service.
How to find missing files after a Mac update?
Sometimes, after a Mac update, you might notice that your files are misplaced or missing. If this happened to you, try these options to locate the missing files:
- Launch the Spotlight search feature (press Command + Spacebar) and type a keyword related to the file you’re looking for to search for it.
- Use the search feature in Finder to locate the missing file.
- Check the Trash Bin folder on your Mac.
If you still can’t find the missing files, try to recover them from a Time Machine backup or your iCloud account. Another good option is to use a specialized data recovery tool to retrieve the files that went missing after a macOS update.
Conclusion
Losing files after a Mac update can be quite a terrifying experience. But luckily, there’s no need to let go of the files in an instant. First, it’s a good idea to check the Relocated Items folder, the Trash, and go a manual search for the files since there might be a tiny chance that the files are still on your Mac. If not, there are a few effective data recovery methods that can help you bring back those missing files without any trouble: by using a data recovery tool, Time Machine backup, or iCloud.
So even if your Mac update deleted everything, these methods should help you to easily recover the files.
This article was written by Romana Levko, a Staff Writer at Handy Recovery Advisor. It was also verified for technical accuracy by Andrey Vasilyev, our editorial advisor.
Curious about our content creation process? Take a look at our Editor Guidelines.