
WPS Office is an excellent productivity application suite that serves as a first-rate alternative to both Microsoft and Google’s office offerings. It also includes a stellar-free version, making it particularly attractive to those who aren’t willing to pay up.
But, just like some other productivity suites, it doesn’t do a great job of explaining how to retrieve documents that were lost or not saved correctly, despite having the built-in capabilities to do so.
In this guide, we’ll go through the different ways you can recover unsaved WPS documents or ones that were deleted prematurely.
Problem |
Solution |
I wasn’t able to save the document. |
|
I accidentally erased the document. |
Recovering from the Recycle Bin Recovering through a data recovery program Recovery through File History |
My deleted document is not in the Recycle Bin. |
Recovering through a data recovery program Recovery through File History |
My computer crashed before I could save the document. |
|
I would like to restore a previous version of the document. |
How to Recover Unsaved WPS Documents
A common issue plaguing a lot of users is when WPS Office shuts down abruptly before the document you’re working on can be saved. This may be due to a power failure, program error, scheduled computer restart, etc.
Whatever the reason, there are a couple of methods you can use to potentially get your unsaved documents back.
Method 1: Recovering Unsaved WPS Documents By Relaunching Program
The easiest method to retrieve unsaved documents in WPS is by simply relaunching the software suite. If you’re lucky, a pop-up will appear explaining that the software encountered an unexpected error, and you’ll be given the option to recover the unsaved file you were working on.
Method 2: Recovering Unsaved WPS Documents Through Auto Backup Feature
You can still recover unsaved files in WPS Office through the program’s Auto Backup feature if you don’t get the recovery prompt after relaunching WPS Office. Here’s how you can access it:
- First, open a blank document, spreadsheet, presentation, etc.
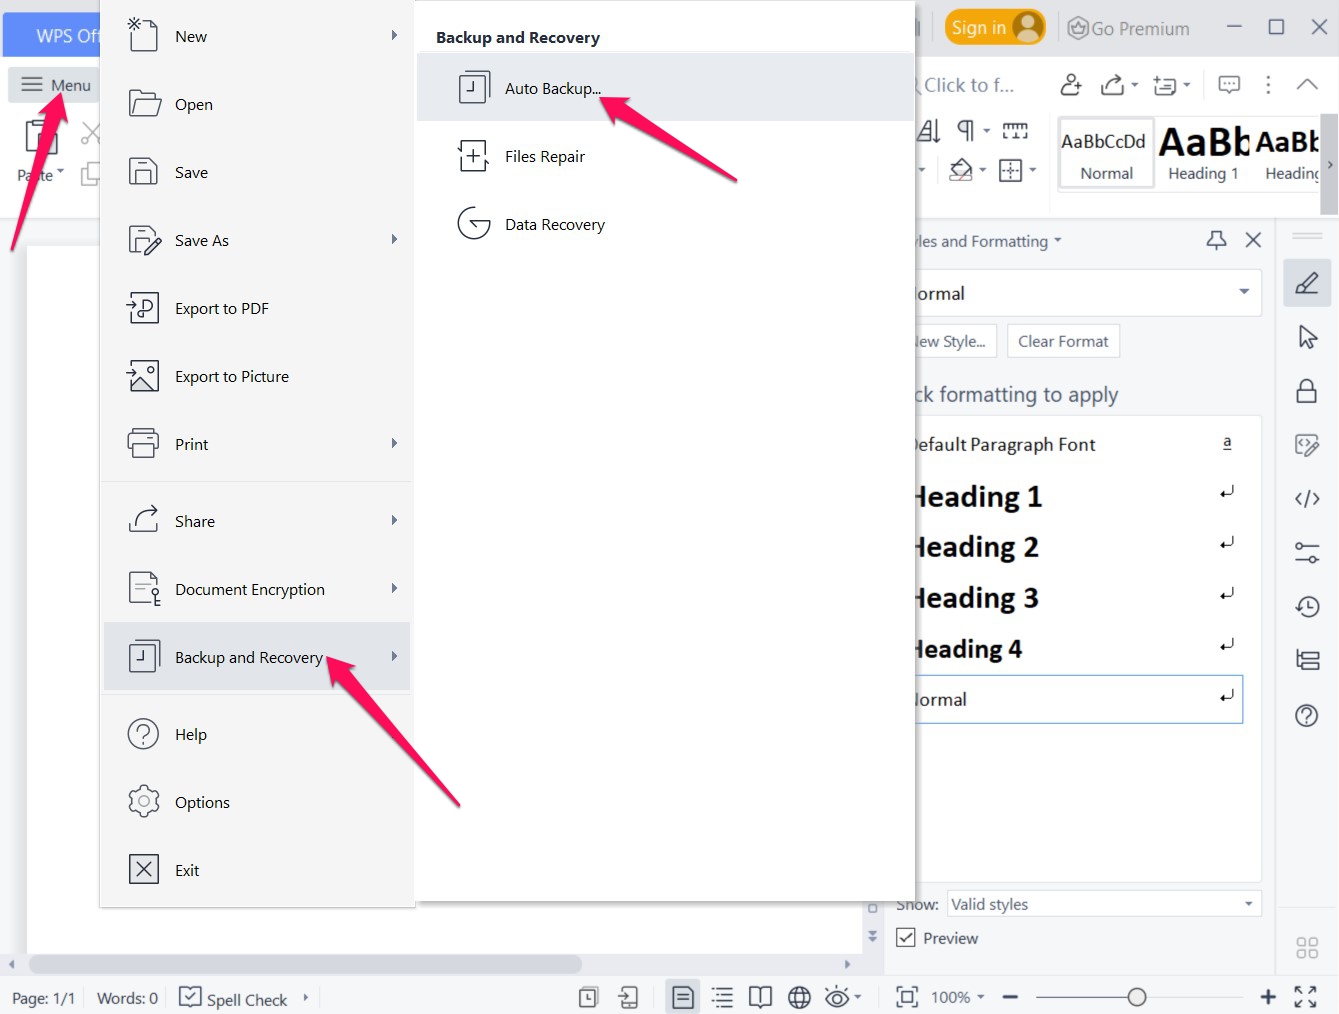
- Next, click Menu from the top-left corner of the window, then head to Backup and Recovery > Auto Backup.
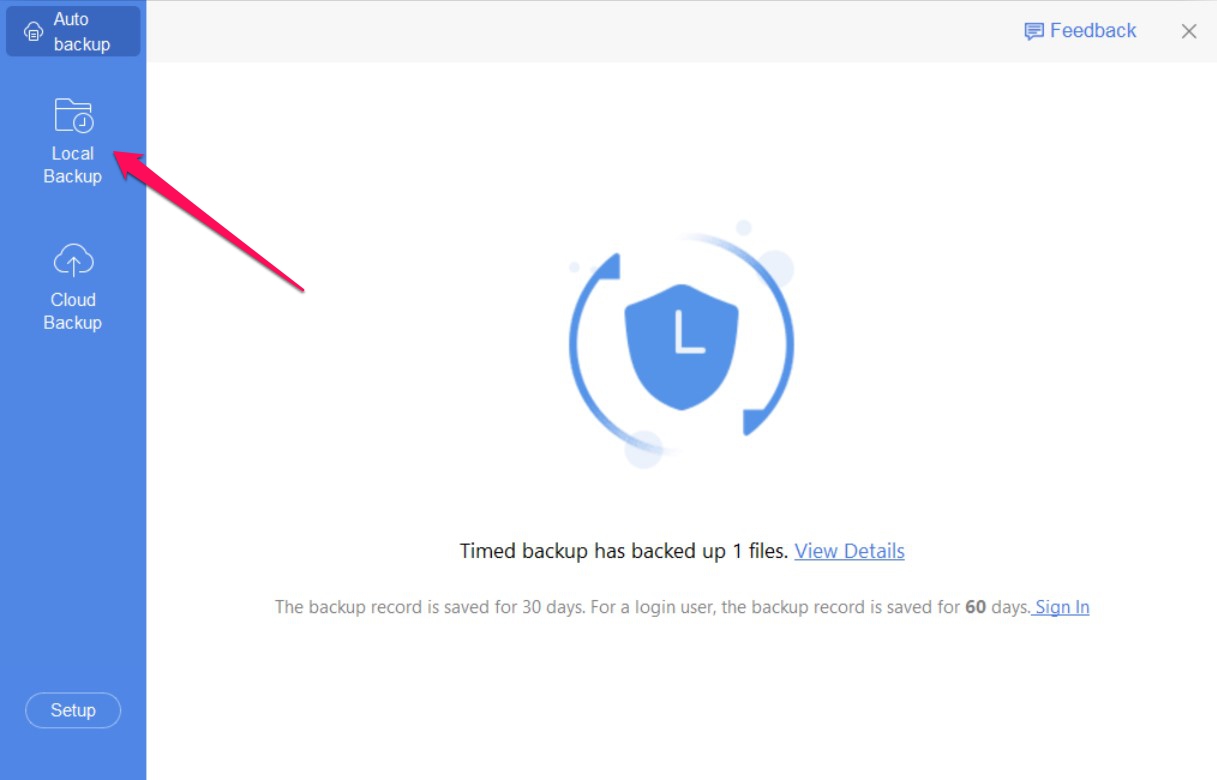
- A pop-up window will appear. Select Local Backup or Cloud Backup, depending on which option you have enabled.
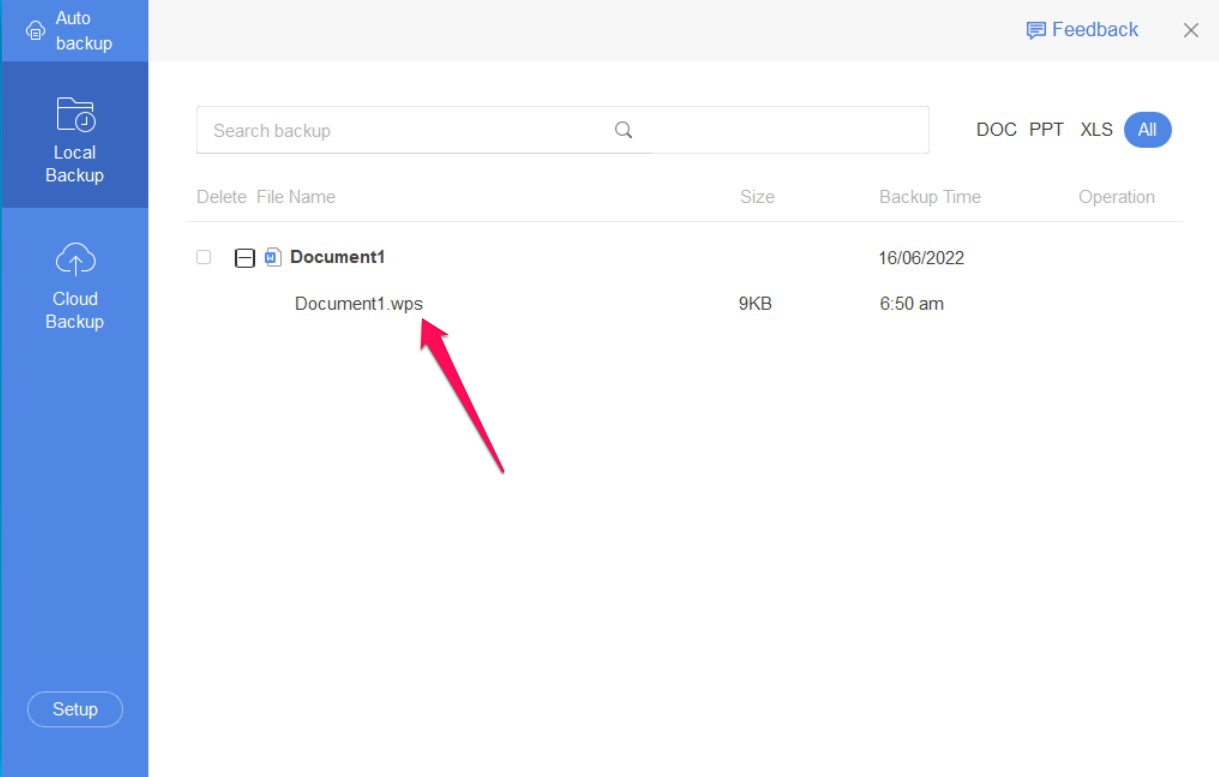
- You’ll see a list of WPS backup files on-screen. Find the one that matches your unsaved document in terms of date/time, then double-click it to open the document in an editor. From there, you can simply save it properly.
How to Recover Deleted WPS Documents
In case you accidentally deleted your WPS document, you’ll need to resort to techniques outside of the WPS Office program.
These are the top two DIY methods that can help you recover deleted documents in WPS Office:
Method 1: Recycle Bin
This method only works if you deleted your WPS document by using the Delete key or through the right-click > Delete command. If you used Shift + Delete, Windows will bypass the Recycle Bin, and you’ll end up having to use the next recovery method on this list. Here’s how to perform a Recycle Bin recovery:
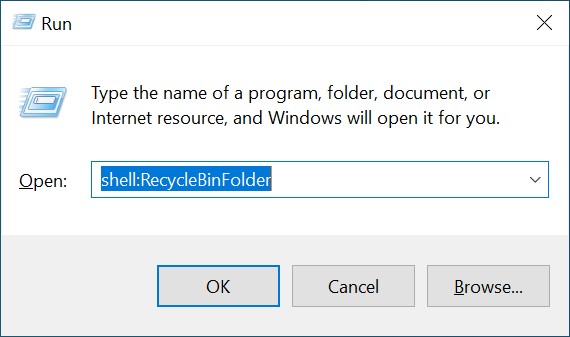
- Double-click the Recycling Bin icon on your Windows desktop. If it’s unavailable or you have desktop icons hidden, simply open the Run tool by pressing Windows + R, then type in “shell:RecycleBinFolder” and hit Enter.
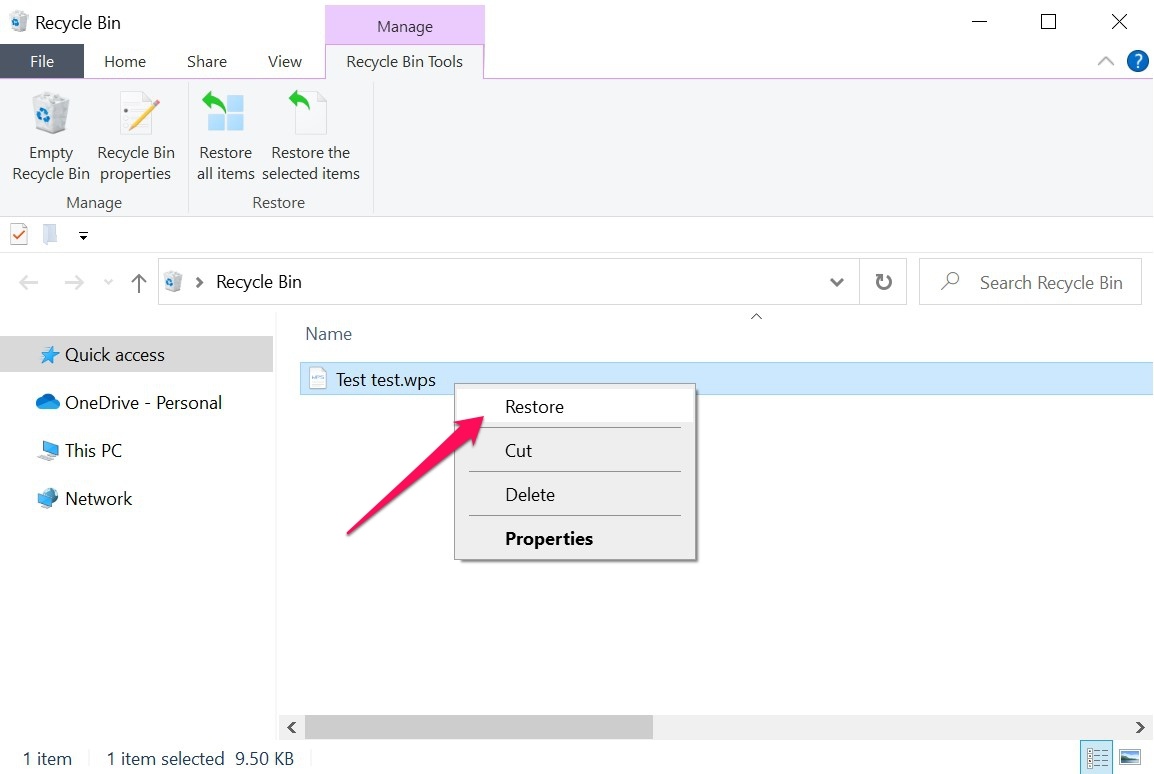
- If you see your deleted WPS document inside the Recycle Bin, just right-click it and select the Restore option. It should be returned to the folder it was last in before being deleted.
Method 2: Data Recovery Software
If you weren’t able to find your deleted WPS document in the Recycle Bin, then the best course of action is to utilize a data recovery program to recover your deleted files on Windows 10.
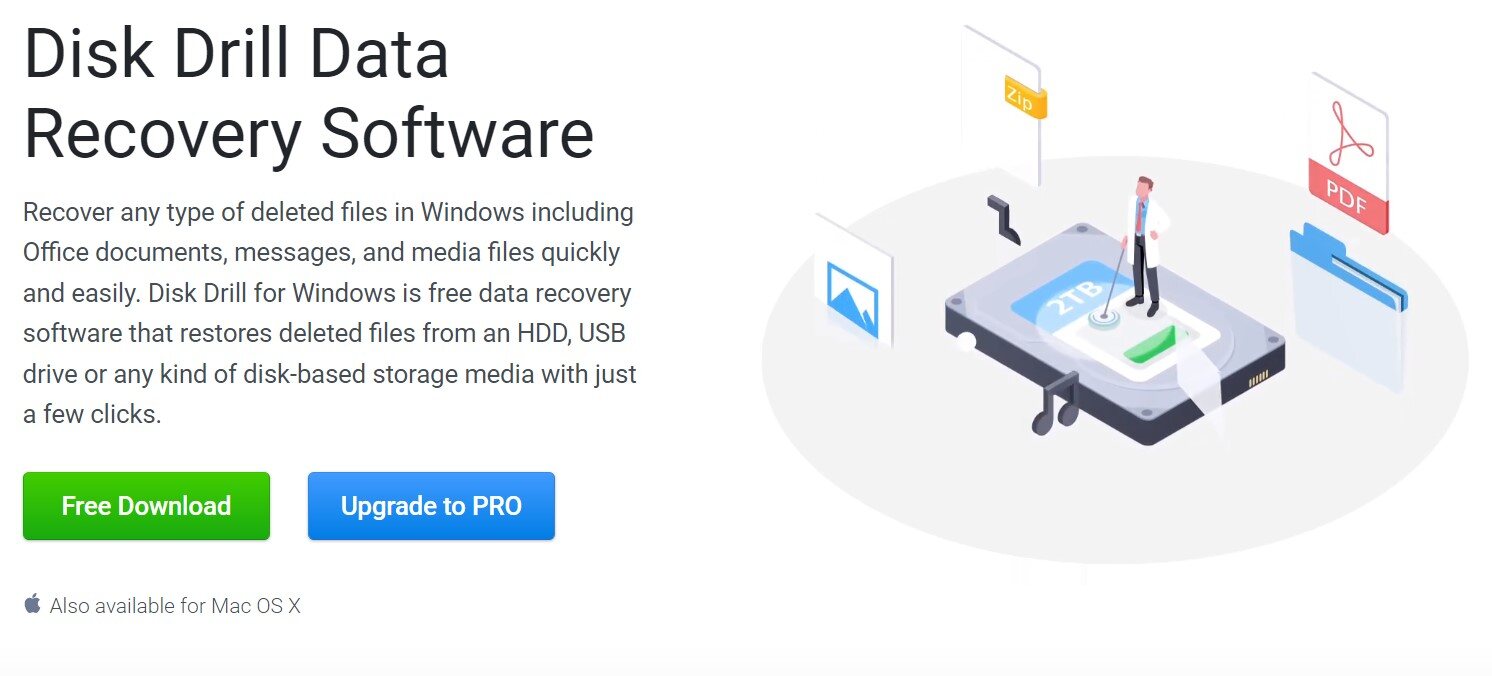
Option A: Disk Drill
![]() Disk Drill is one of the premier data recovery apps on the market, boasting incredible recovery rates, an easy-to-use UI that’s great for both newbies and advanced users, and some useful extra tools. There’s also a free option that lets you try out all of the program’s features, along with the ability to recover up to 500 MB’s worth of data.
Disk Drill is one of the premier data recovery apps on the market, boasting incredible recovery rates, an easy-to-use UI that’s great for both newbies and advanced users, and some useful extra tools. There’s also a free option that lets you try out all of the program’s features, along with the ability to recover up to 500 MB’s worth of data.
Follow these steps to retrieve deleted files from WPS with Disk Drill:
- Download the Disk Drill installation file from the Cleverfiles website.
- Open the downloaded setup file and follow the installation wizard until the program is properly installed.
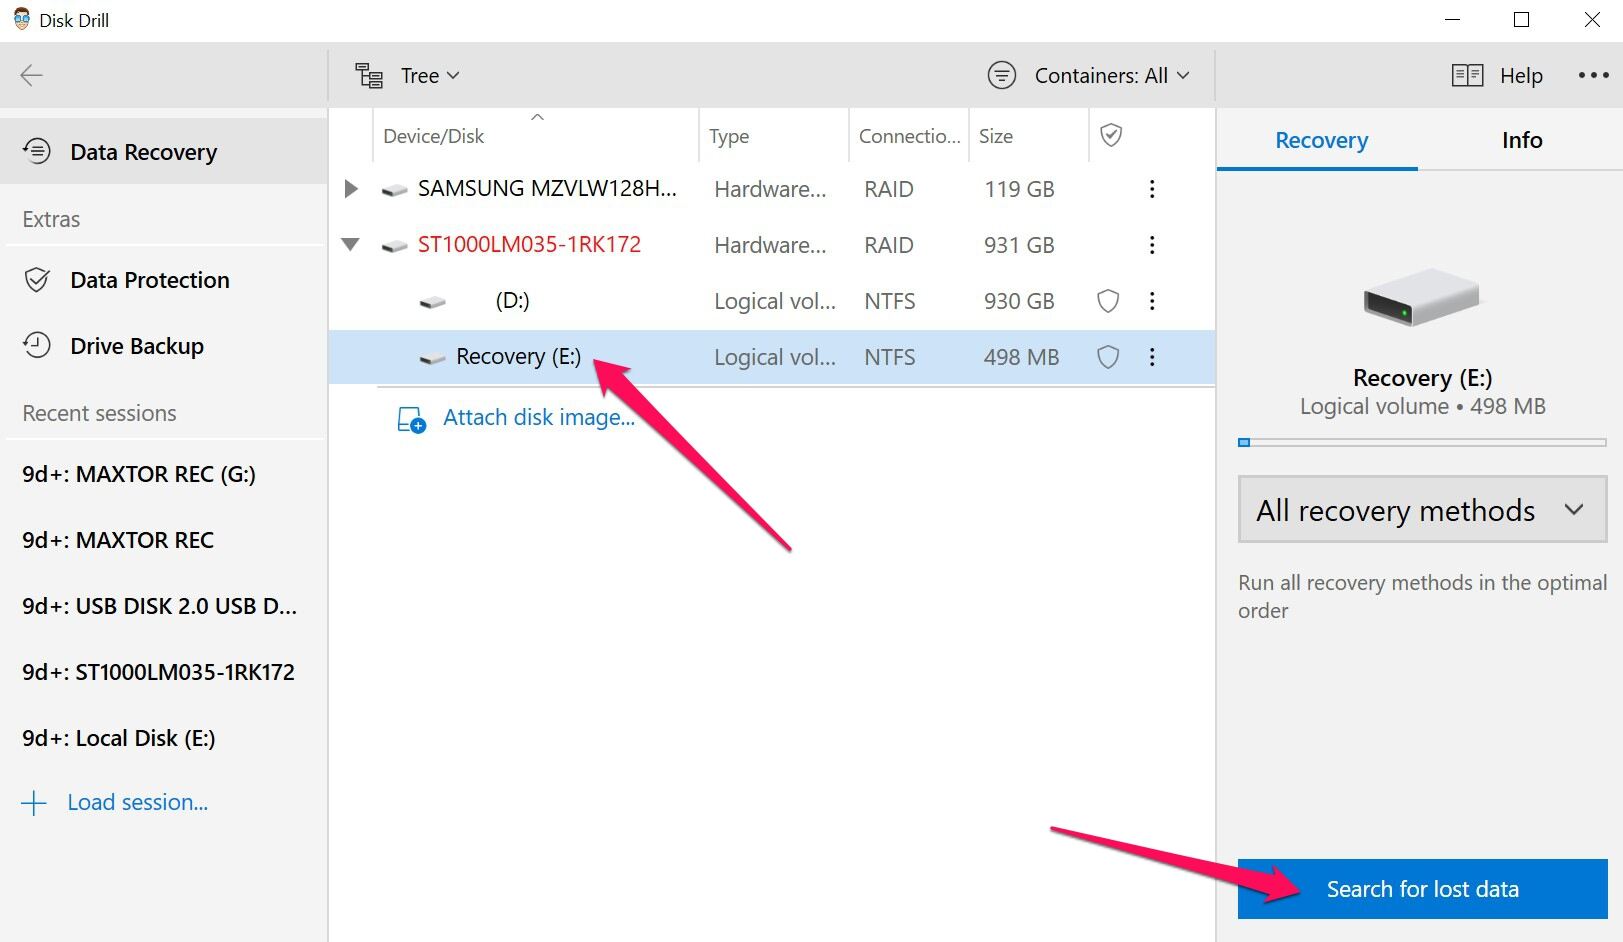
- Launch the Disk Drill app and select the storage medium where your deleted WPS documents were last located. Then, click Seach for lost data once you’re ready.
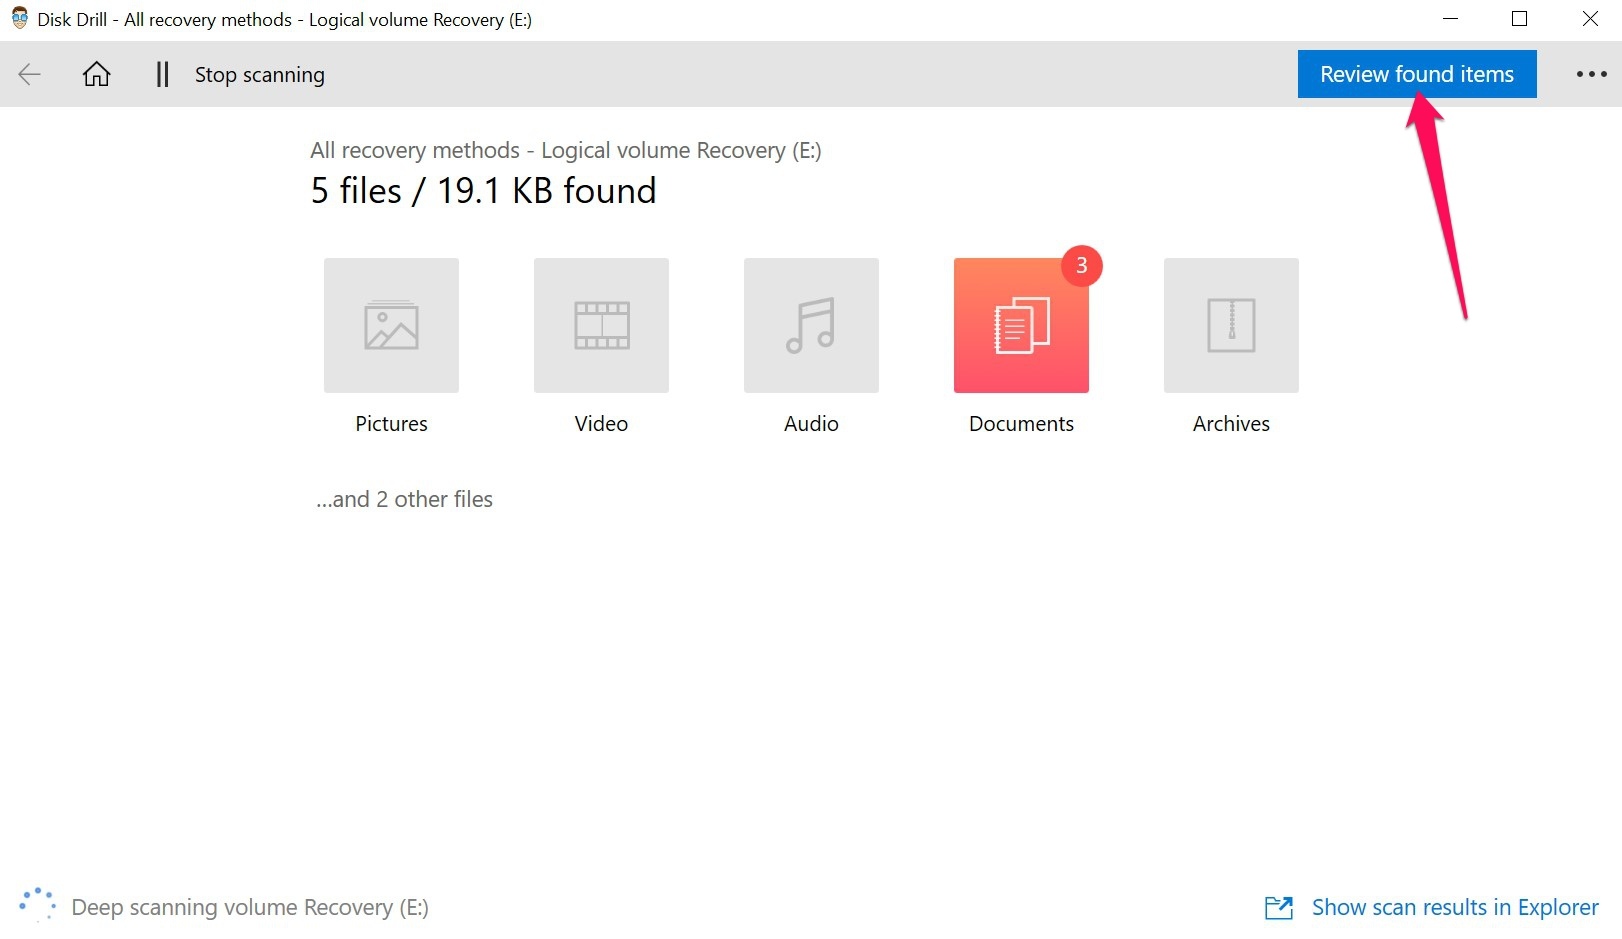
- The program will now scan your chosen drive for any recoverable files. The duration of this process depends primarily on the size of your selected storage medium. While waiting, you can click the Review found items button on the top-right corner of the window to go to the results page, where you can browse through the files Disk Drill has found so far. You can also choose to wait for the scan to complete before clicking the same button.
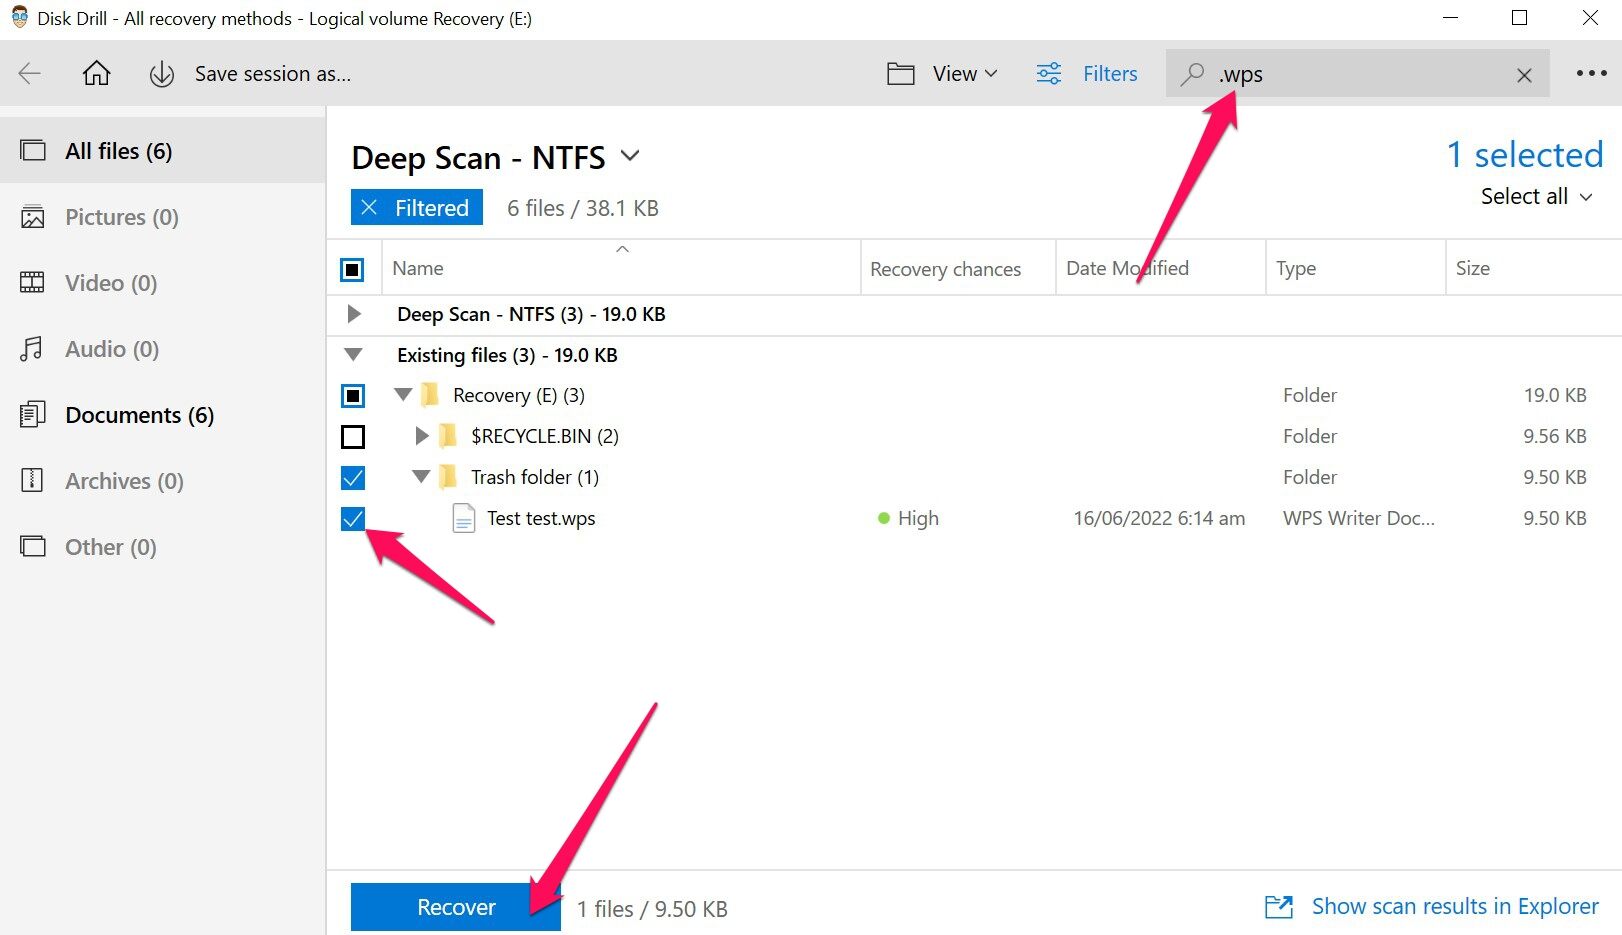
- Once you’re on the results page, you can narrow down your search by typing the file extension of your deleted file into the search bar in the top-right corner. For example, typing in “.wps” or “.doc” and hitting the Enter key will filter the results to only show documents with that particular file extension. When you find the deleted WPS documents you want to recover, you can highlight them by ticking the checkbox on the left of the file name. Click the Recover button along the bottom of the window when you’re ready to proceed.
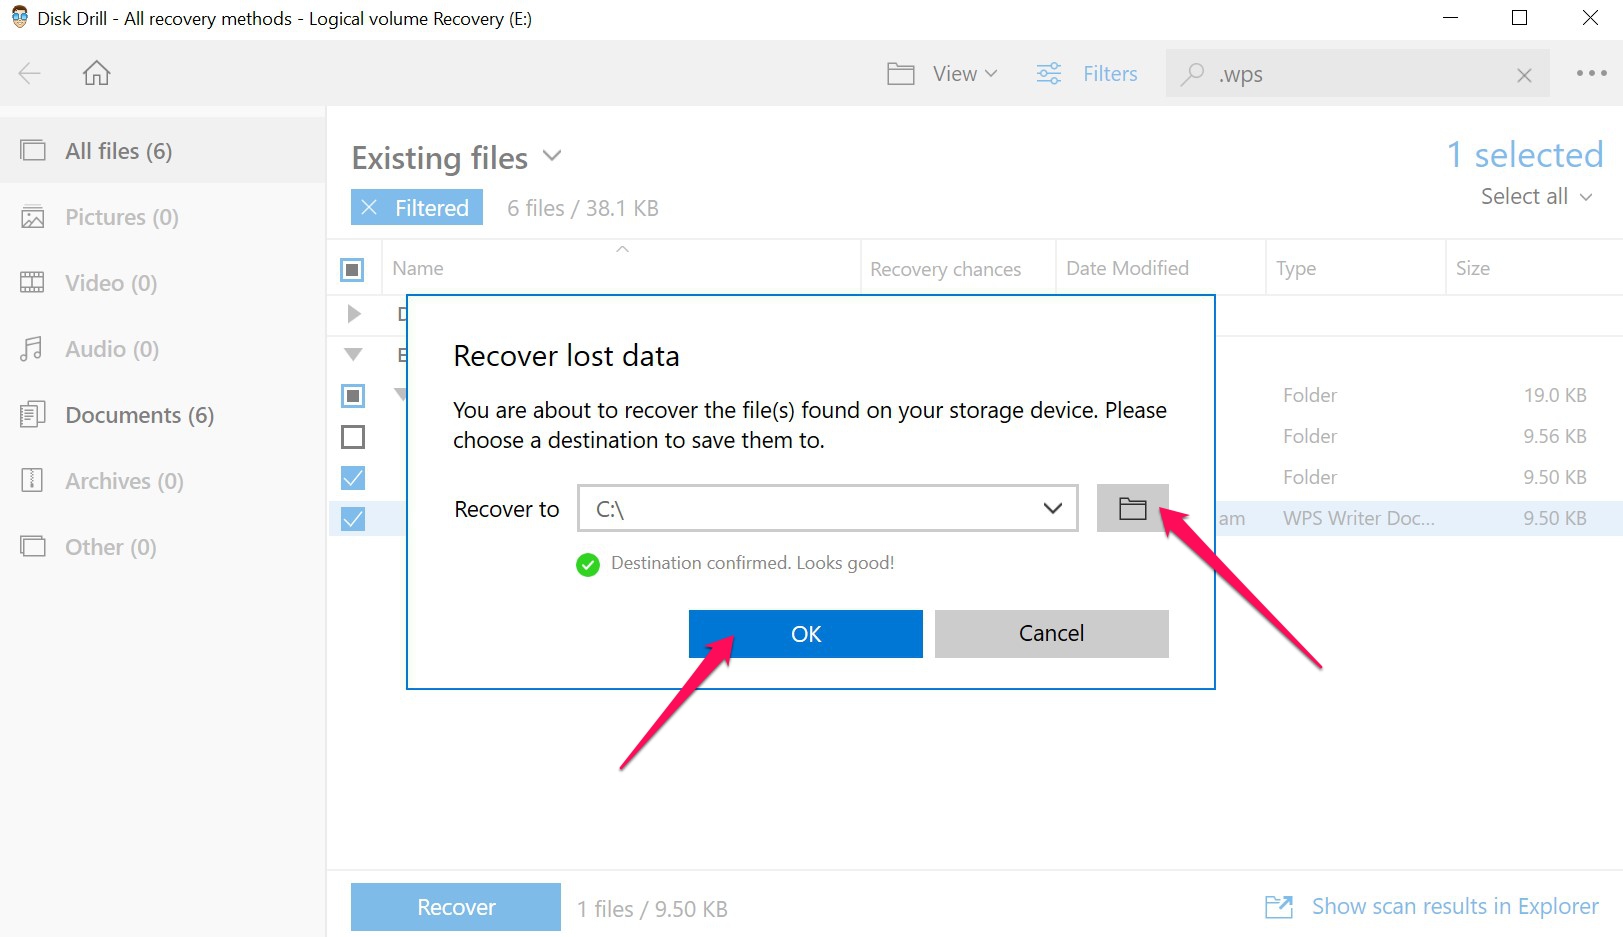
- A pop-up will appear, asking you to choose the destination folder where your recovered files are to be saved. Make sure that it’s in a different storage medium than the one you’re trying to retrieve files from, or else you’ll receive an error message. Click OK to continue.
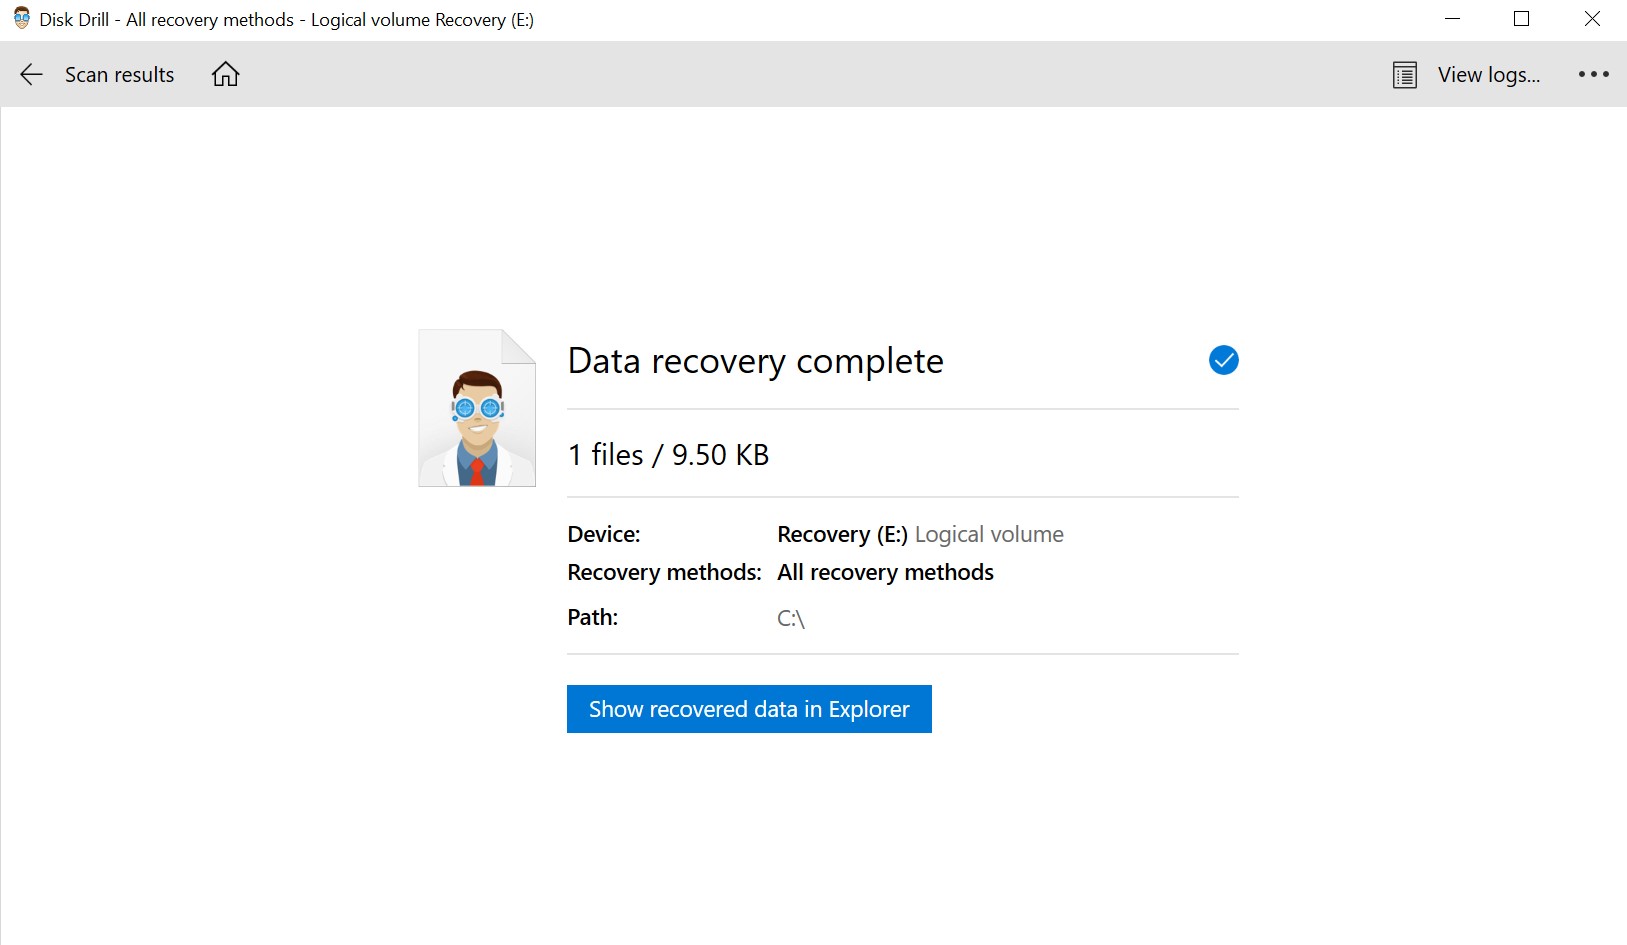
- Disk Drill will now try to recover your deleted WPS documents. Upon completion, you’ll see a Show recovered data in Explorer button that you can click to go directly to the folder where your recovered files were saved.
Option B: Windows File Recovery Tool
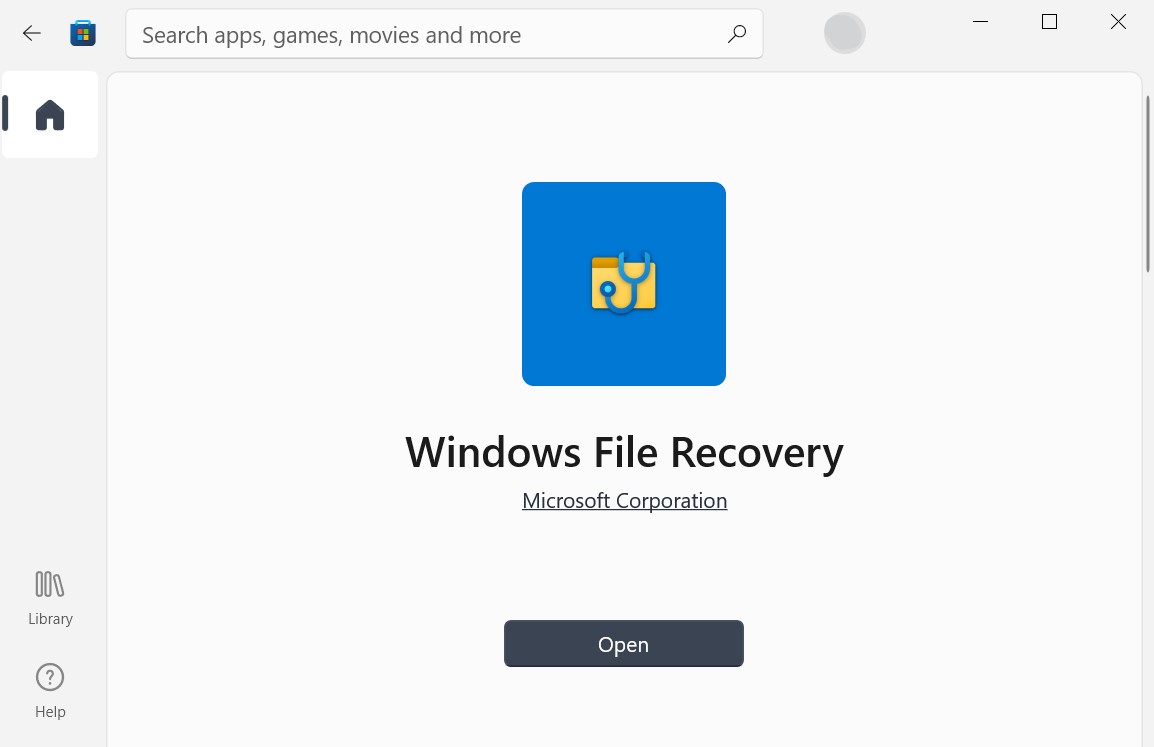
![]() If you’re not keen on using Disk Drill, you can always try Windows File Recovery. This is an official tool created by Microsoft to recover lost and deleted files from a host of different storage devices.
If you’re not keen on using Disk Drill, you can always try Windows File Recovery. This is an official tool created by Microsoft to recover lost and deleted files from a host of different storage devices.
Be warned, however, that this tool doesn’t feature a graphical user interface and utilizes a rudimentary command-prompt-based UI instead.
Nevertheless, here’s how to use it to get back your deleted documents:
- Launch the Microsoft Store and download Windows File Recovery Tool from it for free.
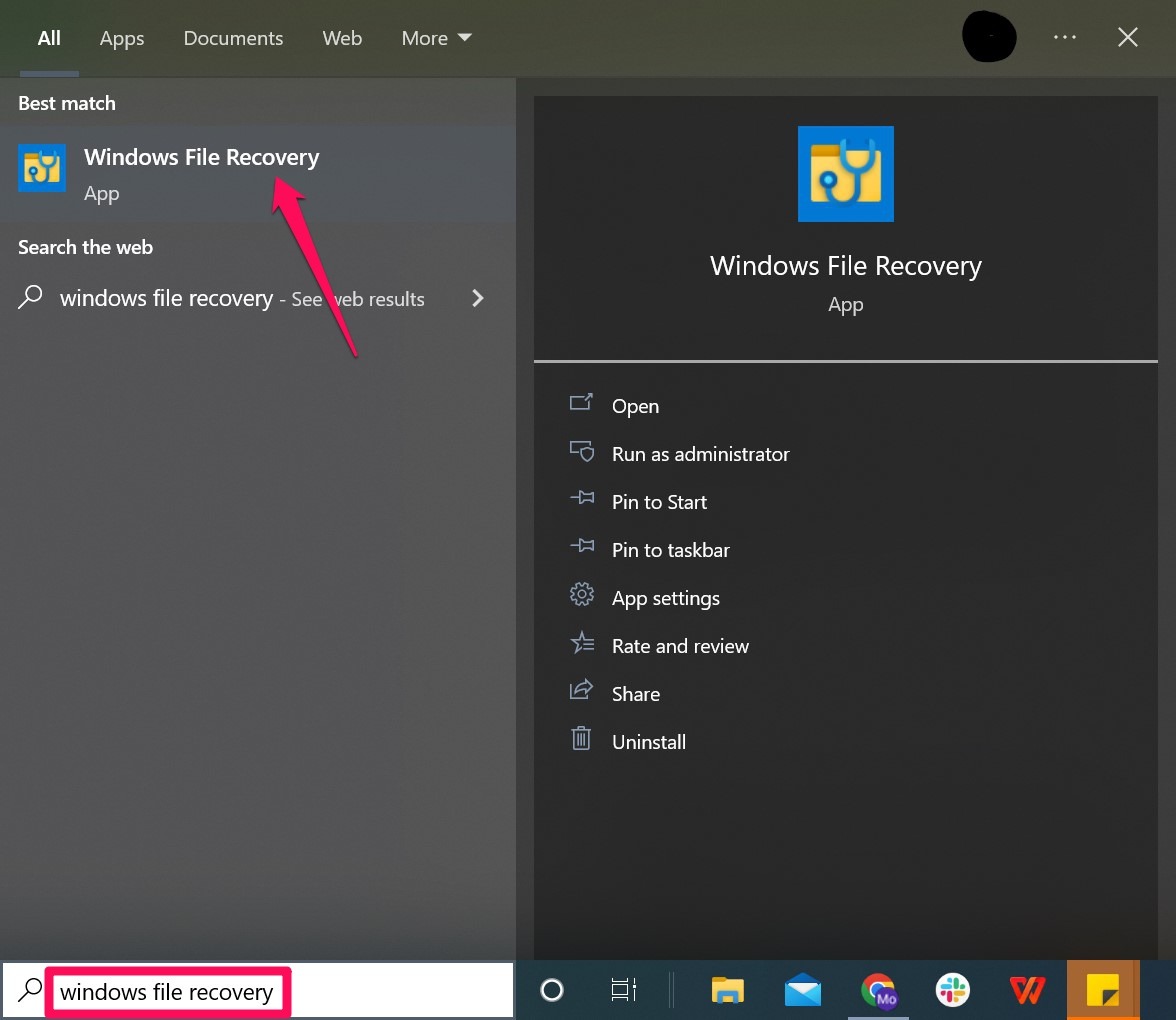
- Type “Windows File Recovery” into your taskbar search tool and select the top result that appears. You may be asked to allow the program to make changes to your device. Click Yes if that’s the case.
- A command prompt instance will appear with Windows File Recovery ready to go. It’s a fairly complex tool with a lot of commands to work with, but here are the ones that we’ll be using to recover your deleted WPS documents:👀
- winfr: This is the starting command that’s required to run the Windows File Recovery tool.
- /signature: This is a recovery mode that allows pretty much any file system, which is good for scanning a variety of different storage devices.
- y:[filetype]: This is a filter parameter that’s used to specify a particular file extension to recover.
With that in mind, your ensuing command should look similar to the following: winfr e: c: /signature /y:wps
In the example mentioned above, “e:” refers to the drive you want to recover your deleted WPS documents from, while “c:” designates the drive where your recovered files will be stored. As for “/y:wps,” this is the filter parameter that advises the tool to only recover files of the WPS file type. This can easily be substituted to “/y:doc” or whatever other extensions your WPS documents use. Once you type out the command in accordance with your requirements, hit Enter.
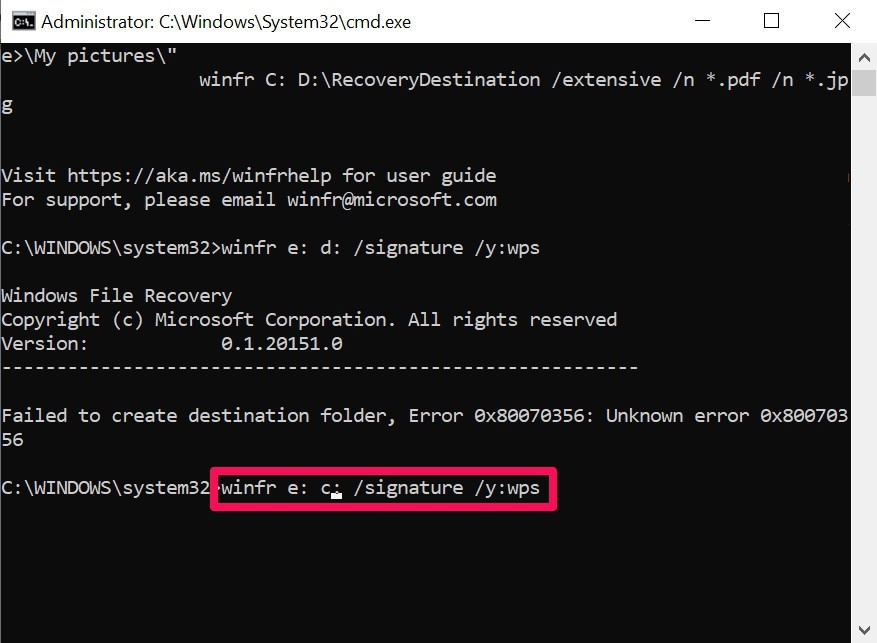
- You’ll find an outline of the operation you’re about to execute. To continue, simply press “y.”
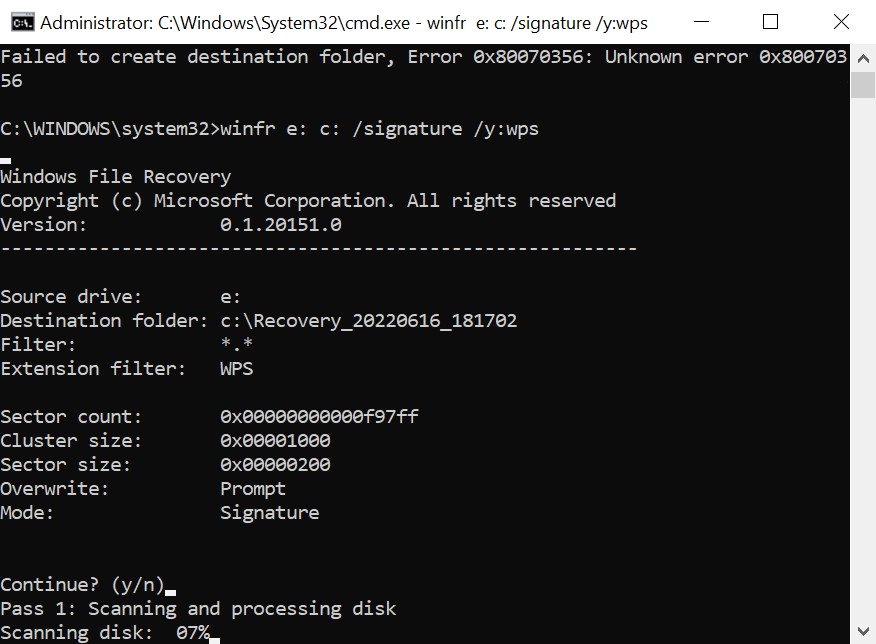
- The Windows File Recovery tool will now attempt to retrieve your deleted documents. Once it’s finished, the tool will let you know if it was able to recover any files with your chosen file type.
Is it Possible to Recover an overwritten WPS Document?
If you want to retrieve an older version of your WPS document that was overwritten in error, your best bet is to leverage a Microsoft tool known as File History.
File History
File History is a built-in operating system feature that was introduced in Windows 8.1. It allows users to retrieve specific versions of their files, whether they were overwritten, lost, or deleted. It’s generally more flexible than Windows Backup and Restore, but it does have a few caveats.
For one thing, it only works if you have the feature enabled before the overwriting or deletion occurs. Furthermore, it’s limited to files within a specific location, and you need a second storage medium to utilize it.
Here’s how you can use File History to get back an overwritten WPS Document:
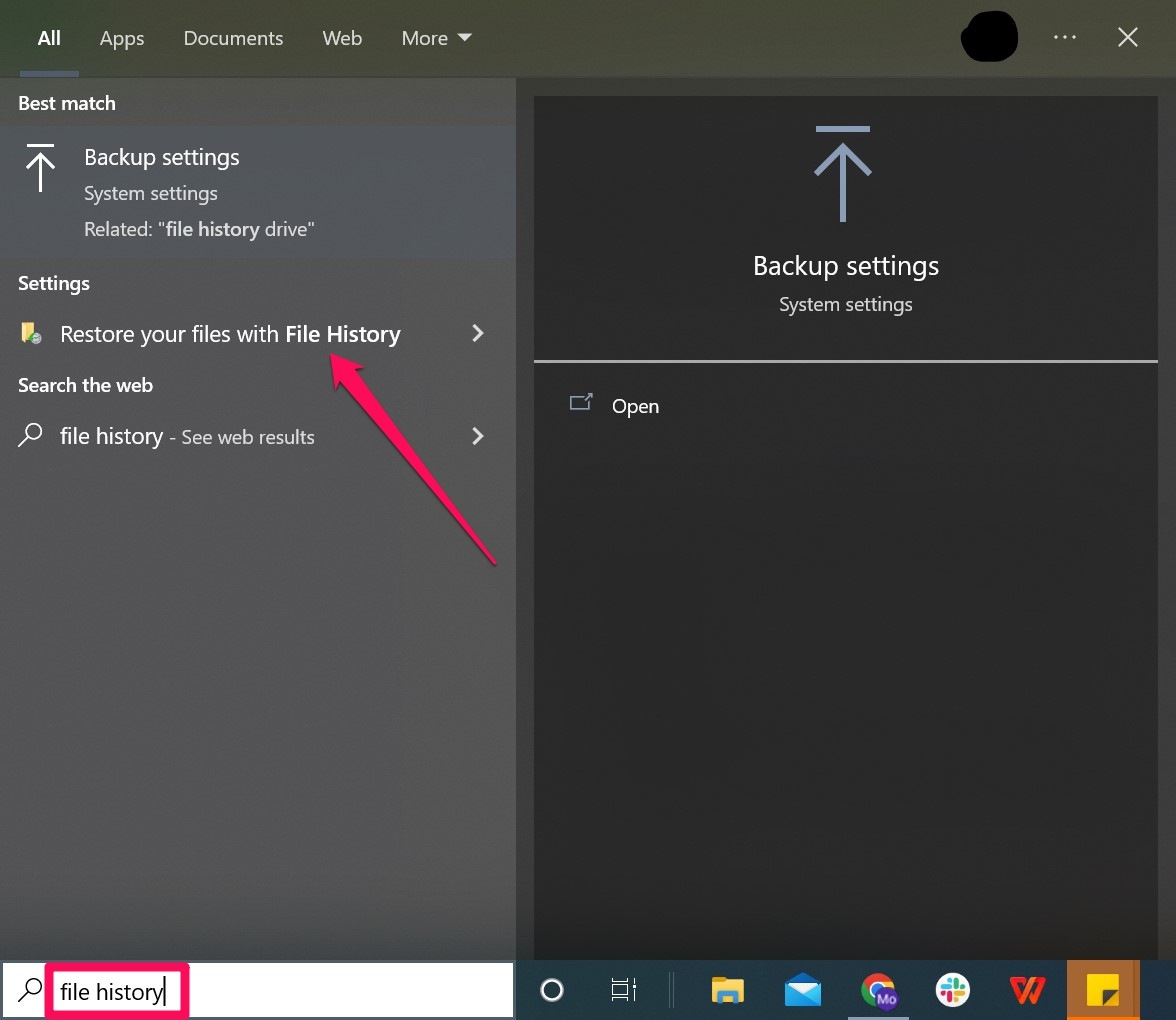
- Type “file history” into the taskbar search tool and select “Restore your files with File History.”
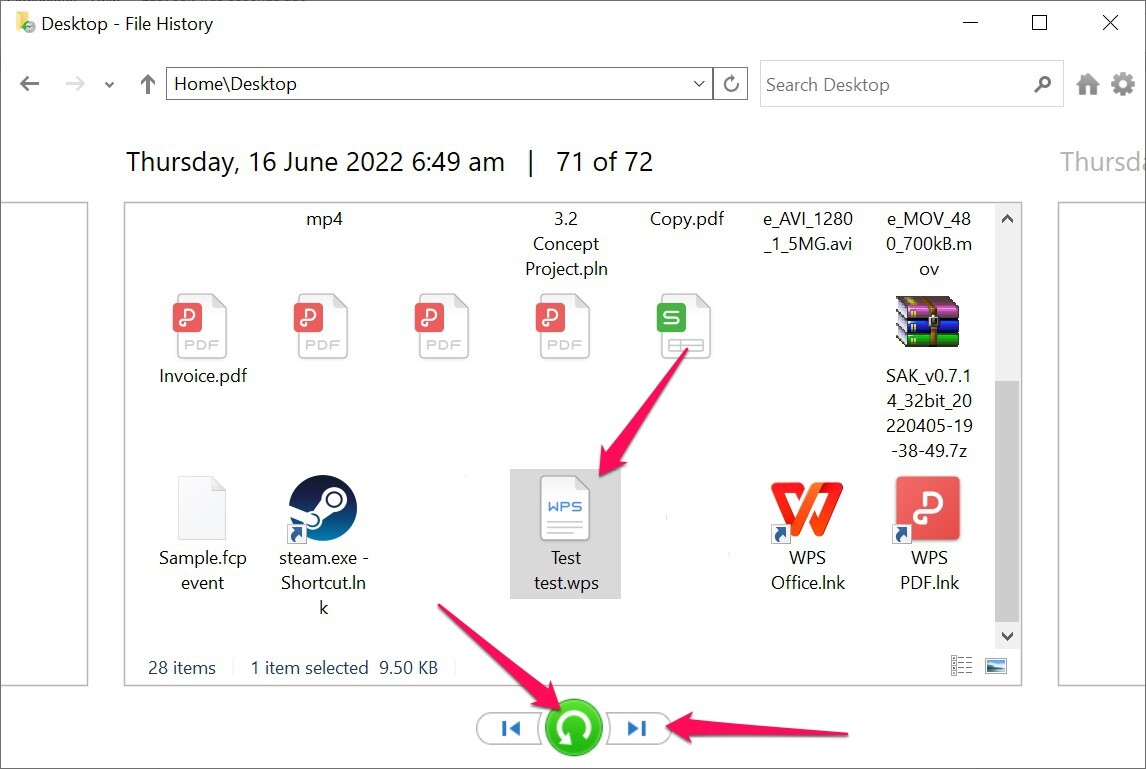
- Head to the folder where your overwritten WPS document is located and use the arrows along the bottom of the window to navigate to the version you want to retrieve. Once you’re ready, click the rounded green arrow to recover that specific version of the file.
FAQ
How to recover a deleted WPS document?
The best way to retrieve lost files on WPS is through a quality data recovery app, like Disk Drill. Here’s how:
- Download and install Disk Drill.
- Run the app and scan the appropriate drive.
- Browse the results for your lost WPS document.
- Click Recover and choose the save location.
- Wait for the completion screen to appear.
How do I recover unsaved files from WPS?
WPS Office comes with an Auto Backup feature that you can use to retrieve files that weren’t saved before the program was exited. Here’s what you can do:
- First, launch WPS Office and open a blank document of any kind.
- Next, head to Open a blank document, spreadsheet, presentation, etc.
- Click Menu from the top-left corner of the window, then head to Backup and Recovery > Auto Backup.
- A pop-up window will appear. Select Local Backup or Cloud Backup, depending on which option you have enabled.
- You’ll see a list of backups on-screen. Find the one that matches your unsaved document in terms of date/time, then double-click it to open the document in an editor. From there, you can simply save it properly.
- Head to Menu > Backup and Recovery > Auto Backup.
- Choose between Local Backup or Cloud Backup, depending on what you’re using.
- Double-click your desired backup from the list on-screen, and it will open in an editor.
- Save the document wherever you like.
How do I enable autosave in WPS?
There is an auto save option in WPS Office, though it’s a bit hidden. To get to it, simply follow these steps below:
- Launch WPS Office and open a blank document of any kind.
- Navigate to Menu > Backup and Recovery > Auto Backup.
- Click the Setup button on the bottom-left.
- Select Incremental Backup. This option saves the document every time you make a change.
Is it possible to recover files in WPS without a premium?
Yes, it is possible to recover files in WPS Office without subscribing to the premium plan. Just use the Local Backup option in the Auto Backup feature, which we’ve outlined above. The Cloud Backup option is the one that requires a premium subscription.
Conclusion
WPS Office is an incredibly nifty software suite that comes with some interesting features, including some fail-safes in case you’re unable to save your document before your device shuts down or the program closes. You just need to know where to look. As for accidentally deleted files, you’ll need the help of a solid third-party data recovery app.
This article was written by Princess Lescan, a Staff Writer at Handy Recovery Advisor. It was also verified for technical accuracy by Andrey Vasilyev, our editorial advisor.
Curious about our content creation process? Take a look at our Editor Guidelines.