
Screenshots capture a unique instant in time that may not be repeatable. Users take screenshots to provide evidence of a problem with a piece of software or to keep a copy of a beautiful image found on a webpage. Your Mac or MacBook provides a few different ways of capturing onscreen content as can be seen on this Apple support page.
The singular nature of these artifacts can make the ability to recover deleted screenshots on Mac extremely important. There may not be another chance to reproduce the lost images. Restoring the deleted screenshots might be the only viable option.
Most Common Scenarios for Losing Screenshots on a Mac
Screenshots are saved by macOS as regular files with a .png file extension. By default, they are saved to your desktop. They are subject to the same data loss scenarios as any other type of file. Let’s take a quick look at how those valuable screenshots may have disappeared from your computer.
- 🗑️ Accidentally deleting files and emptying the Trash – It’s very easy to get involved in cleaning up clutter on your Mac and inadvertently delete important screenshots. While trying to maximize your storage space, you go ahead and manually empty the Trash. Then you realize there was a very important screenshot that can no longer be found. Don’t feel bad. It happens all the time.
- ⚠️ Formatting the wrong disk or partition – Formatting the wrong disk or partition can quickly delete a lot of data. It’s also easy to do if you don’t pay attention or get distracted while performing the operation. After clicking along with the prompts thrown at you by macOS, you suddenly realize you just formatted the wrong device.
- 😲 Random unexpected events – Screenshots and any other types of files can be lost due to a wide variety of unexpected events that can plague your computer. Storage devices can become corrupted as the result of power surges or malware attacks. Files can inexplicably disappear in the aftermath of a system crash or power outage. The convenience of digital storage is accompanied by the ever-present threat of data loss. This is why regularly taking backups is a critically important part of owning a computer.
Photos are related to screenshots, and if you need some info on recovering lost photos, we suggest you check out our guide.
Three methods to Recover Deleted Screenshots on Mac
Here are three different methods for restoring lost screenshots on your Mac. The first two use native macOS features while the third employs dedicated commercial or freeware software tools.
1. Recover Deleted Screenshots from Mac’s Trash Bin
If you have recently deleted the screenshot, you may be able to get it back using Mac’s Trash bin. It’s a special folder that holds deleted items temporarily so they can be restored quickly. The following procedure will recover deleted screenshots from the Trash.
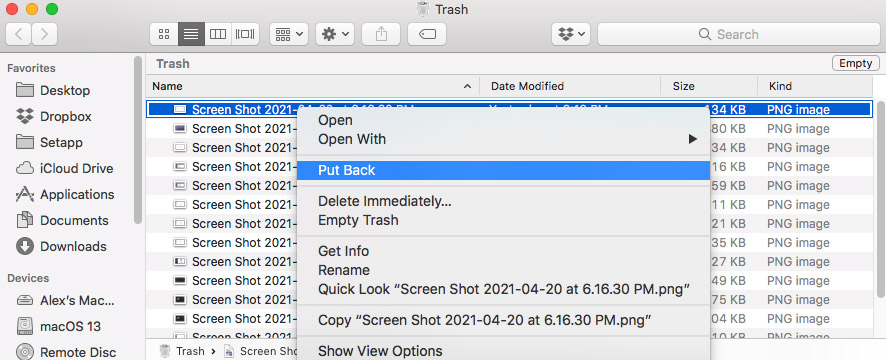
- Open the Trash by clicking its icon.
- Scroll through the folder and find the screenshot you want to recover.
- Right-click on the file and select the Put Back option to restore the screenshot to its original location.
Files are stored in the bin until it gets manually emptied. The Trash can also be configured to automatically delete files after 30 days. Check out this Apple support page which provides information about how to work with the Trash bin.
Consult our guide for more information on recovering deleted files from an accidentally emptied Trash.
2. Retrieve Old Screenshots with Time Machine
If you take advantage of Time Machine to back up your Mac, you might have a copy of the deleted screenshots available on your backup media. Use the following procedure to locate and recover old deleted screenshots on Mac.
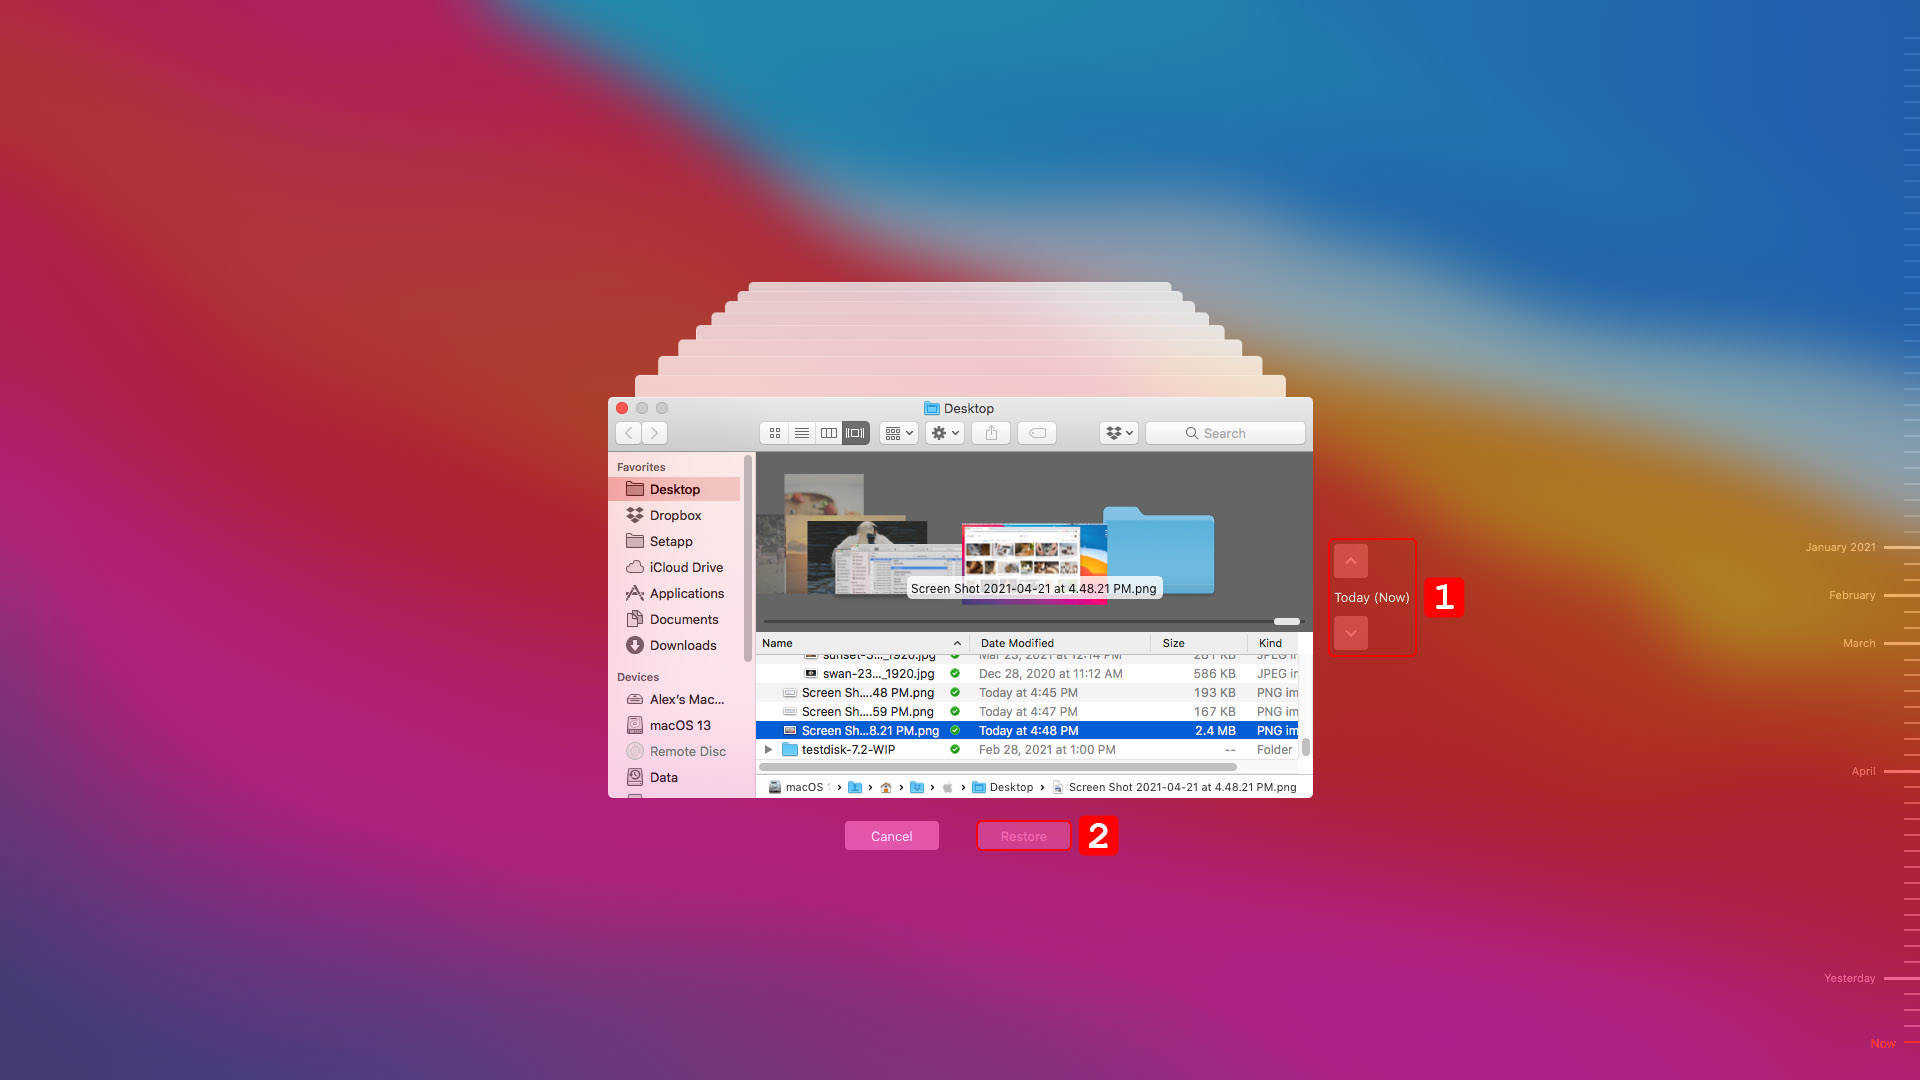
- Connect the storage device that you use to store the Time Machine backups to your Mac.
- Open a Finder window in the folder that held the screenshots. You do not need to open a Finder window if the screenshots were located on the Desktop.
- Open Time Machine by clicking the Time Machine icon on the Mac menu bar.
- Scroll through the snapshots and backups using Time Machine’s arrows and timeline to find the screenshot you want to retrieve.
- Select the screenshot to be recovered and click the Restore button. The screenshot will be restored to its original location.
Of course, this procedure will only work if you have backed up the screenshots in question. If you would like a more complete discussion of recovering from Time Machine backups, we direct your attention to our guide on the subject.
3. Recover Permanently Deleted Screenshots Using Data Recovery Software
Data recovery software can help get back deleted screenshots that are not in the Trash or have not been backed up. The software must be used before new information is saved to the storage device that contained the lost screenshots. Here’s why that is the case.
IMPORTANT: When the Mac operating system deletes an item, it remains physically on the storage device until overwritten by new data. Every time you use the storage device that contained lost screenshots, you might be overwriting the files you want to restore. You need to stop using the device until you are finished recovering the lost files. This includes not using the device when you download or install the recovery software.
➡️ Selecting data recovery software
There are a lot of data recovery solutions to choose from. We have compiled a review of the best options available for Mac. We suggest you take a look at it to see what options are out there.
We like Disk Drill and are going to use it in our example of recovering deleted screenshots. The tool has a nice interface, has great recovery capabilities, and offers users free data protection tools. A full review of Disk Drill gives you much more information on this valuable data recovery tool.
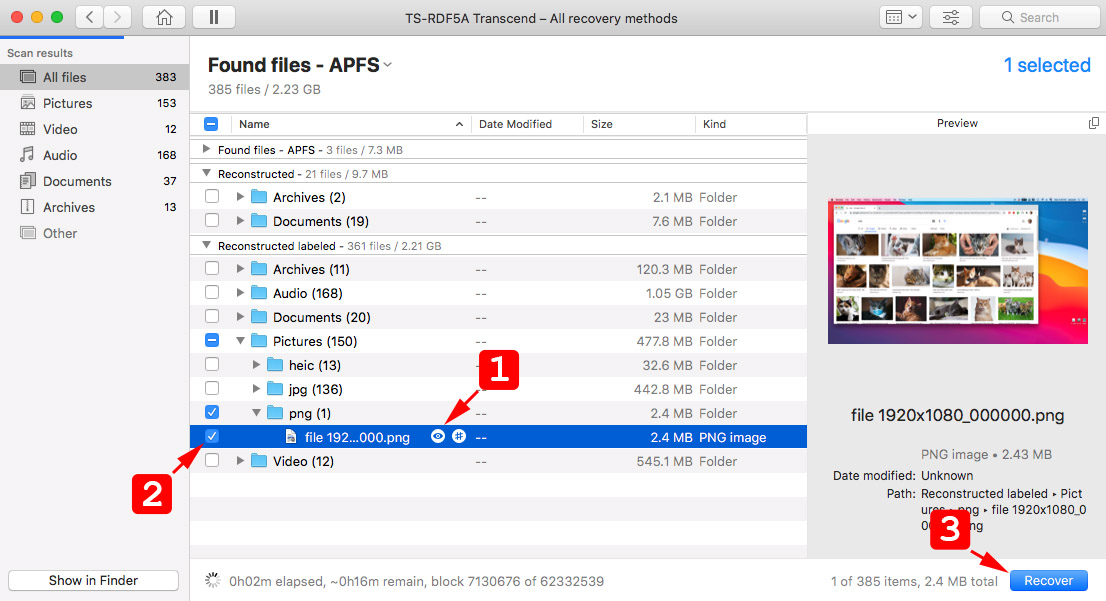
➡️ Recover deleted screenshots on Mac with Disk Drill
Follow these simple steps to use Disk Drill to restore deleted screenshots.
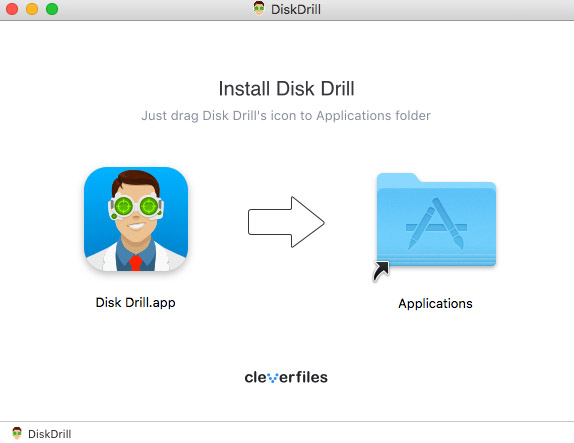
- Download and install Disk Drill for Mac on your computer. Don’t use your main disk drive for the installation if the screenshots were located there. If that’s the case, use an external storage device like a USB drive for the download and installation.
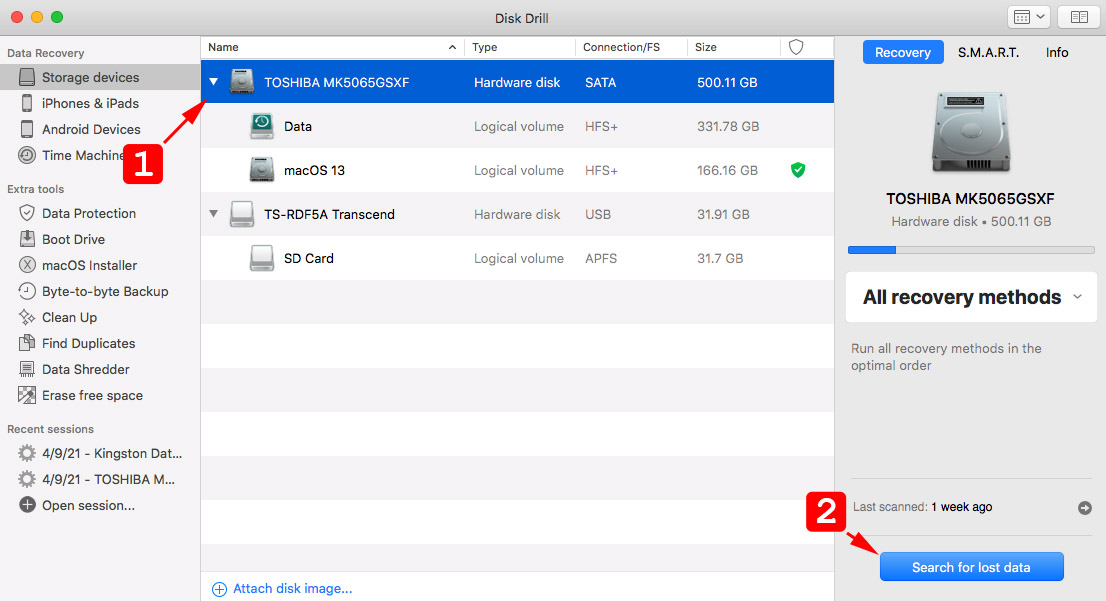
- Launch Disk Drill and select the disk that contained the lost screenshots.
- Click the Search for lost data button to scan the disk. Use the default scanning method which employs all possible scan modes for the best recovery results.
- Preview the found files and pick the ones you want to retrieve. Choose a storage location that is not on the original disk to avoid overwriting files.
- Click the Recover button to complete the process. The files will be restored to the user-defined storage location.
You need to stop using the device that contained the lost data as soon as possible to ensure the best chance of a successful recovery. Once the data is overwritten, even data recovery software will not be able to get it back.
FAQ
Can I recover deleted screenshots on Mac?
Yes, you can. Based on your situation, you can use the Mac Trash, a backup, or data recovery software to restore deleted screenshots.
How to find screenshots on Mac?
Screenshots are saved to the Desktop by default with the .png file extension. Conducting a Finder search for .png files will locate the screenshots on your Mac using the following steps.
- Open a Finder window.
- Enter this search term in the box in the top-right corner: KIND:png.
- This search will find the screenshots on your Mac.
Is it possible to recover deleted screenshots on Mac without software?
Yes, it is. If the screenshot was recently deleted, it is very possible that it’s currently in the Trash where it can easily be recovered with a click.
What is the best way to recover permanently deleted screenshots on a Mac?
The best way to recover permanently deleted screenshots is with data recovery software. There will be slight differences in how these tools work, but in general, they follow a similar path when recovering your deleted screenshots.
- Install the software.
- Scan the storage device or devices for lost screenshots.
- Preview the found files and select those to be recovered.
- Perform the recovery.
How to recover deleted screenshots using Mac Terminal?
You can access Time Machine and recover deleted screenshots using the tmutil command in Terminal. Check out this website for more information on controlling Time Machine from Terminal.
Conclusion
Accidentally deleting or losing an important screenshot should not be seen as a disaster. We have shown you several ways to recover screenshots on a Mac, and we hope one gets your images back safely. If you don’t currently use Time Machine to back up your Mac, we suggest you start today.
Data recovery software like Disk Drill can recover deleted screenshots on a Mac that seem to have been lost for good. Make sure to stop using the disk that contained the screenshots until after you have recovered them to avoid corrupting the data you want to restore. Good luck with your screenshot recovery efforts!
This article was written by Robert Agar, a Staff Writer at Handy Recovery Advisor. It was also verified for technical accuracy by Andrey Vasilyev, our editorial advisor.
Curious about our content creation process? Take a look at our Editor Guidelines.