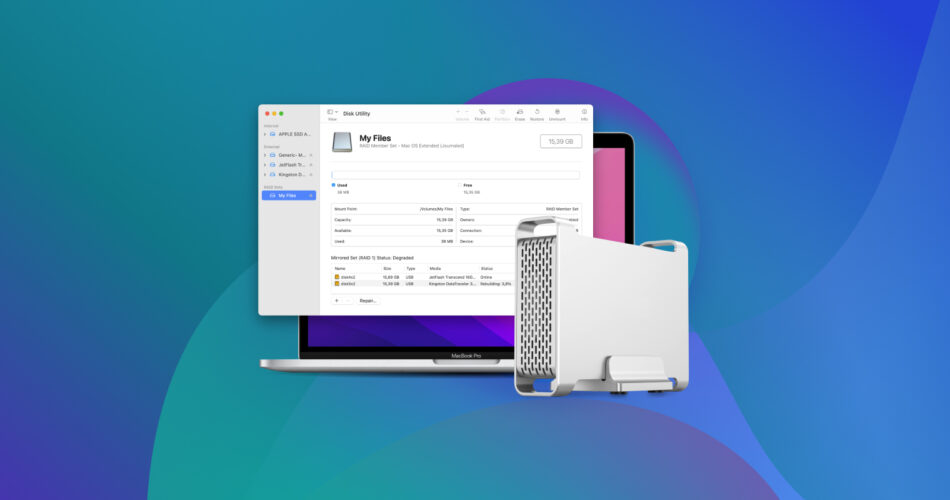
Are you experiencing data loss on your RAID array? Given their architecture, it’s a common scenario. Fortunately, RAID recovery on Mac is possible and it doesn’t have to be difficult. However, to recover (and even repair) your RAID, you have to isolate the problem and understand what caused it.
This article is your ultimate guide on how to recover data from RAID on Mac, as well as how to diagnose and repair it. We provide a couple of different methods with step-by-step instructions and screenshots. Read on!
A Guide to the Software RAID Options Available on Mac
Before we proceed with recovering and repairing your RAID, let’s quickly revisit the software RAIDs available on Mac. These are also the RAID levels that we will primarily be working with for this article.
- RAID 0 – RAID 0 (or “striping”) combines 2 or more disks into 1 volume and distributes data blocks evenly among them. This allows the RAID array to perform faster because it can read/write data from multiple disks (even if it appears as a single volume). But this means that if one drive fails, all of your data or even the array becomes unreadable.
- RAID 1 – RAID 1 (or “mirroring”) creates copies of the drives in the array. So if 1 drive out of a 2-drive RAID 1 array fails, you still have a copy of your data. If 1 drive out of a 3-drive RAID 1 array fails, the array itself will continue to work AND your data will be safe. However, it’s possible to delete the configuration files of 1 drive and cause the array to fail.
- JBOD – JBOD (Just a Bunch of Disks) pools all of your disks into 1 giant volume but still treats them as separate disks. If one disk fails in a multi-disk JBOD setup, only the data on that disk will be lost. However, if the disk contains part of a large file located in that same volume but on another disk, that file will become unreadable.
There are a LOT more RAID configurations than these 3, but they aren’t natively supported by Disk Utility. They also aren’t as commonly used as RAID 0, RAID 1, and JBOD (which pretty much cover every logical scenario of using RAID for most users). If you are using a RAID configuration not listed here, we have other recommendations for you.
How to Recover Data from the Software RAID on a Mac
To recover data from your software RAID, you need to use RAID recovery software for Mac. For this guide, we’ll be using a tool called Disk Drill to demonstrate the recovery process. It supports all Mac software RAIDs (RAID 0, RAID 1, and JBOD) and all Mac file systems (APFS and HFS+). Disk Drill is also super easy to use and highly visual so it’s a great option if you’re new to data recovery.
If you want a breakdown of this software’s many features (or you just want to check it out before installing it), you can read our full Disk Drill review.
To recover software RAID on Mac using Disk Drill:
- Download and install Disk Drill to your MacBook.
- Launch Disk Drill (Finder > Applications).
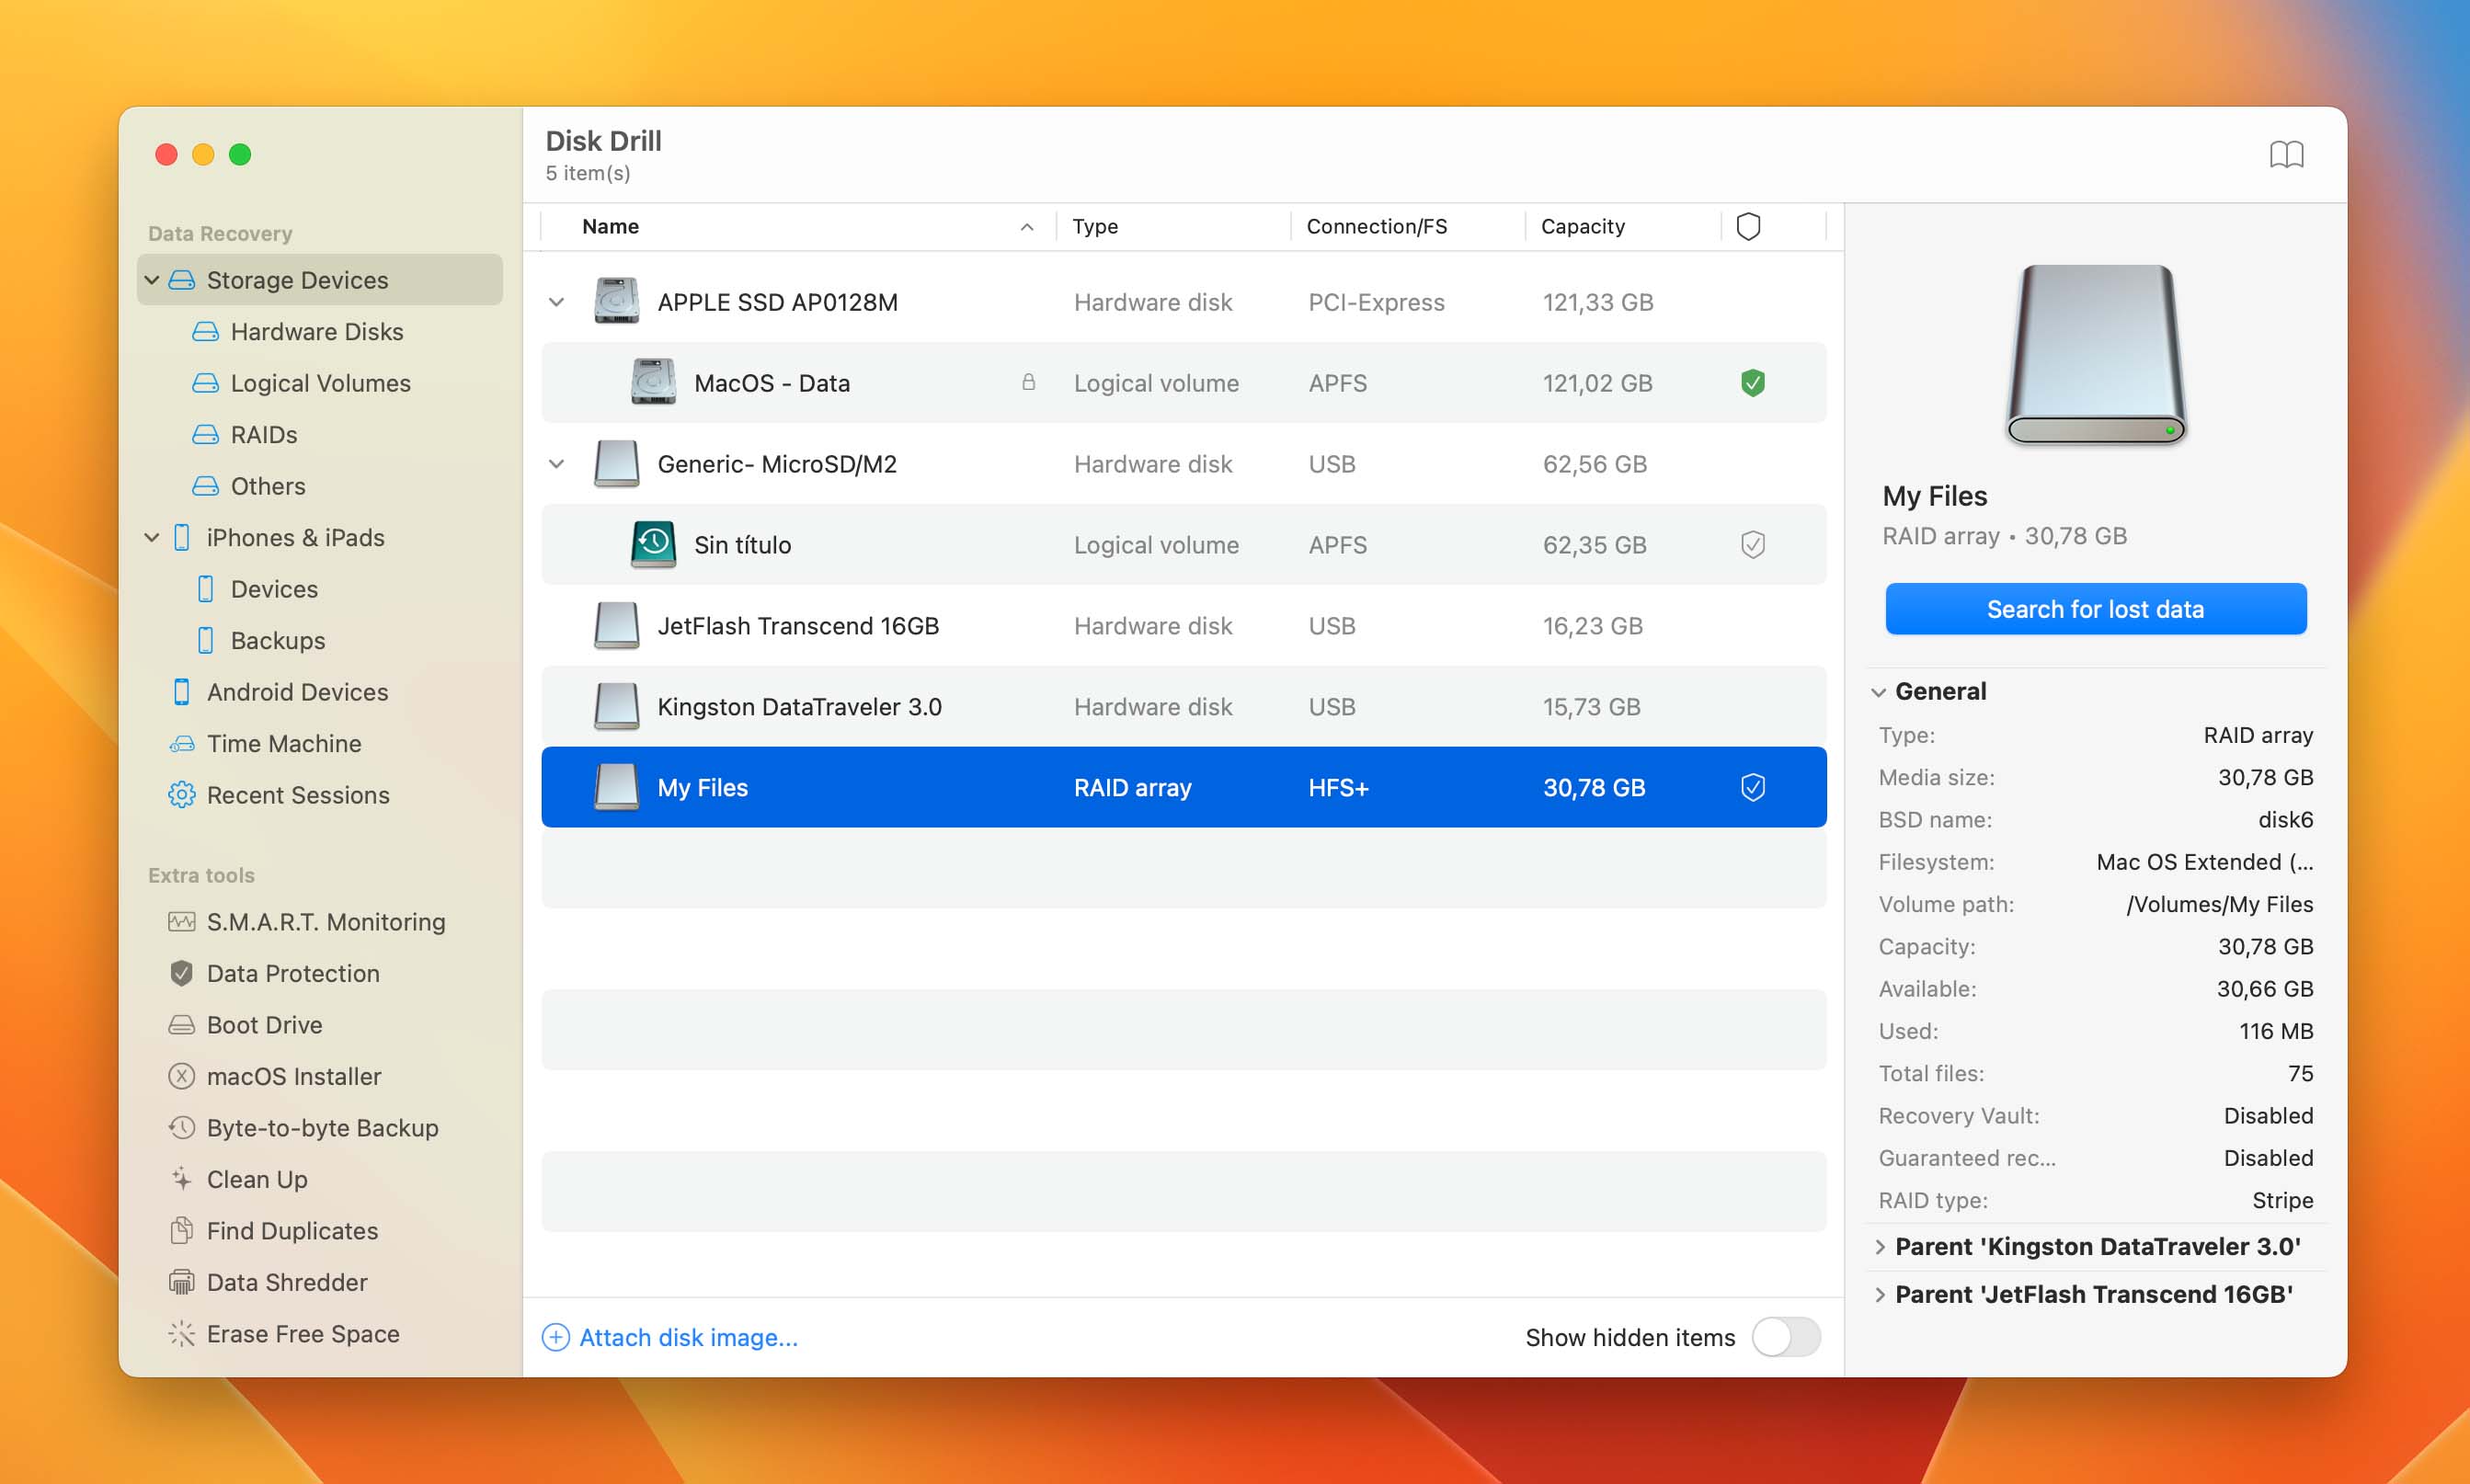
- Select your RAID from the list of drives and click Search for lost data. Make sure that you select your entire RAID array and not just one of the disks in your set. Due to how RAID stores copies of your data, you might end up losing files if you only scan some of the disks and not the entire array.
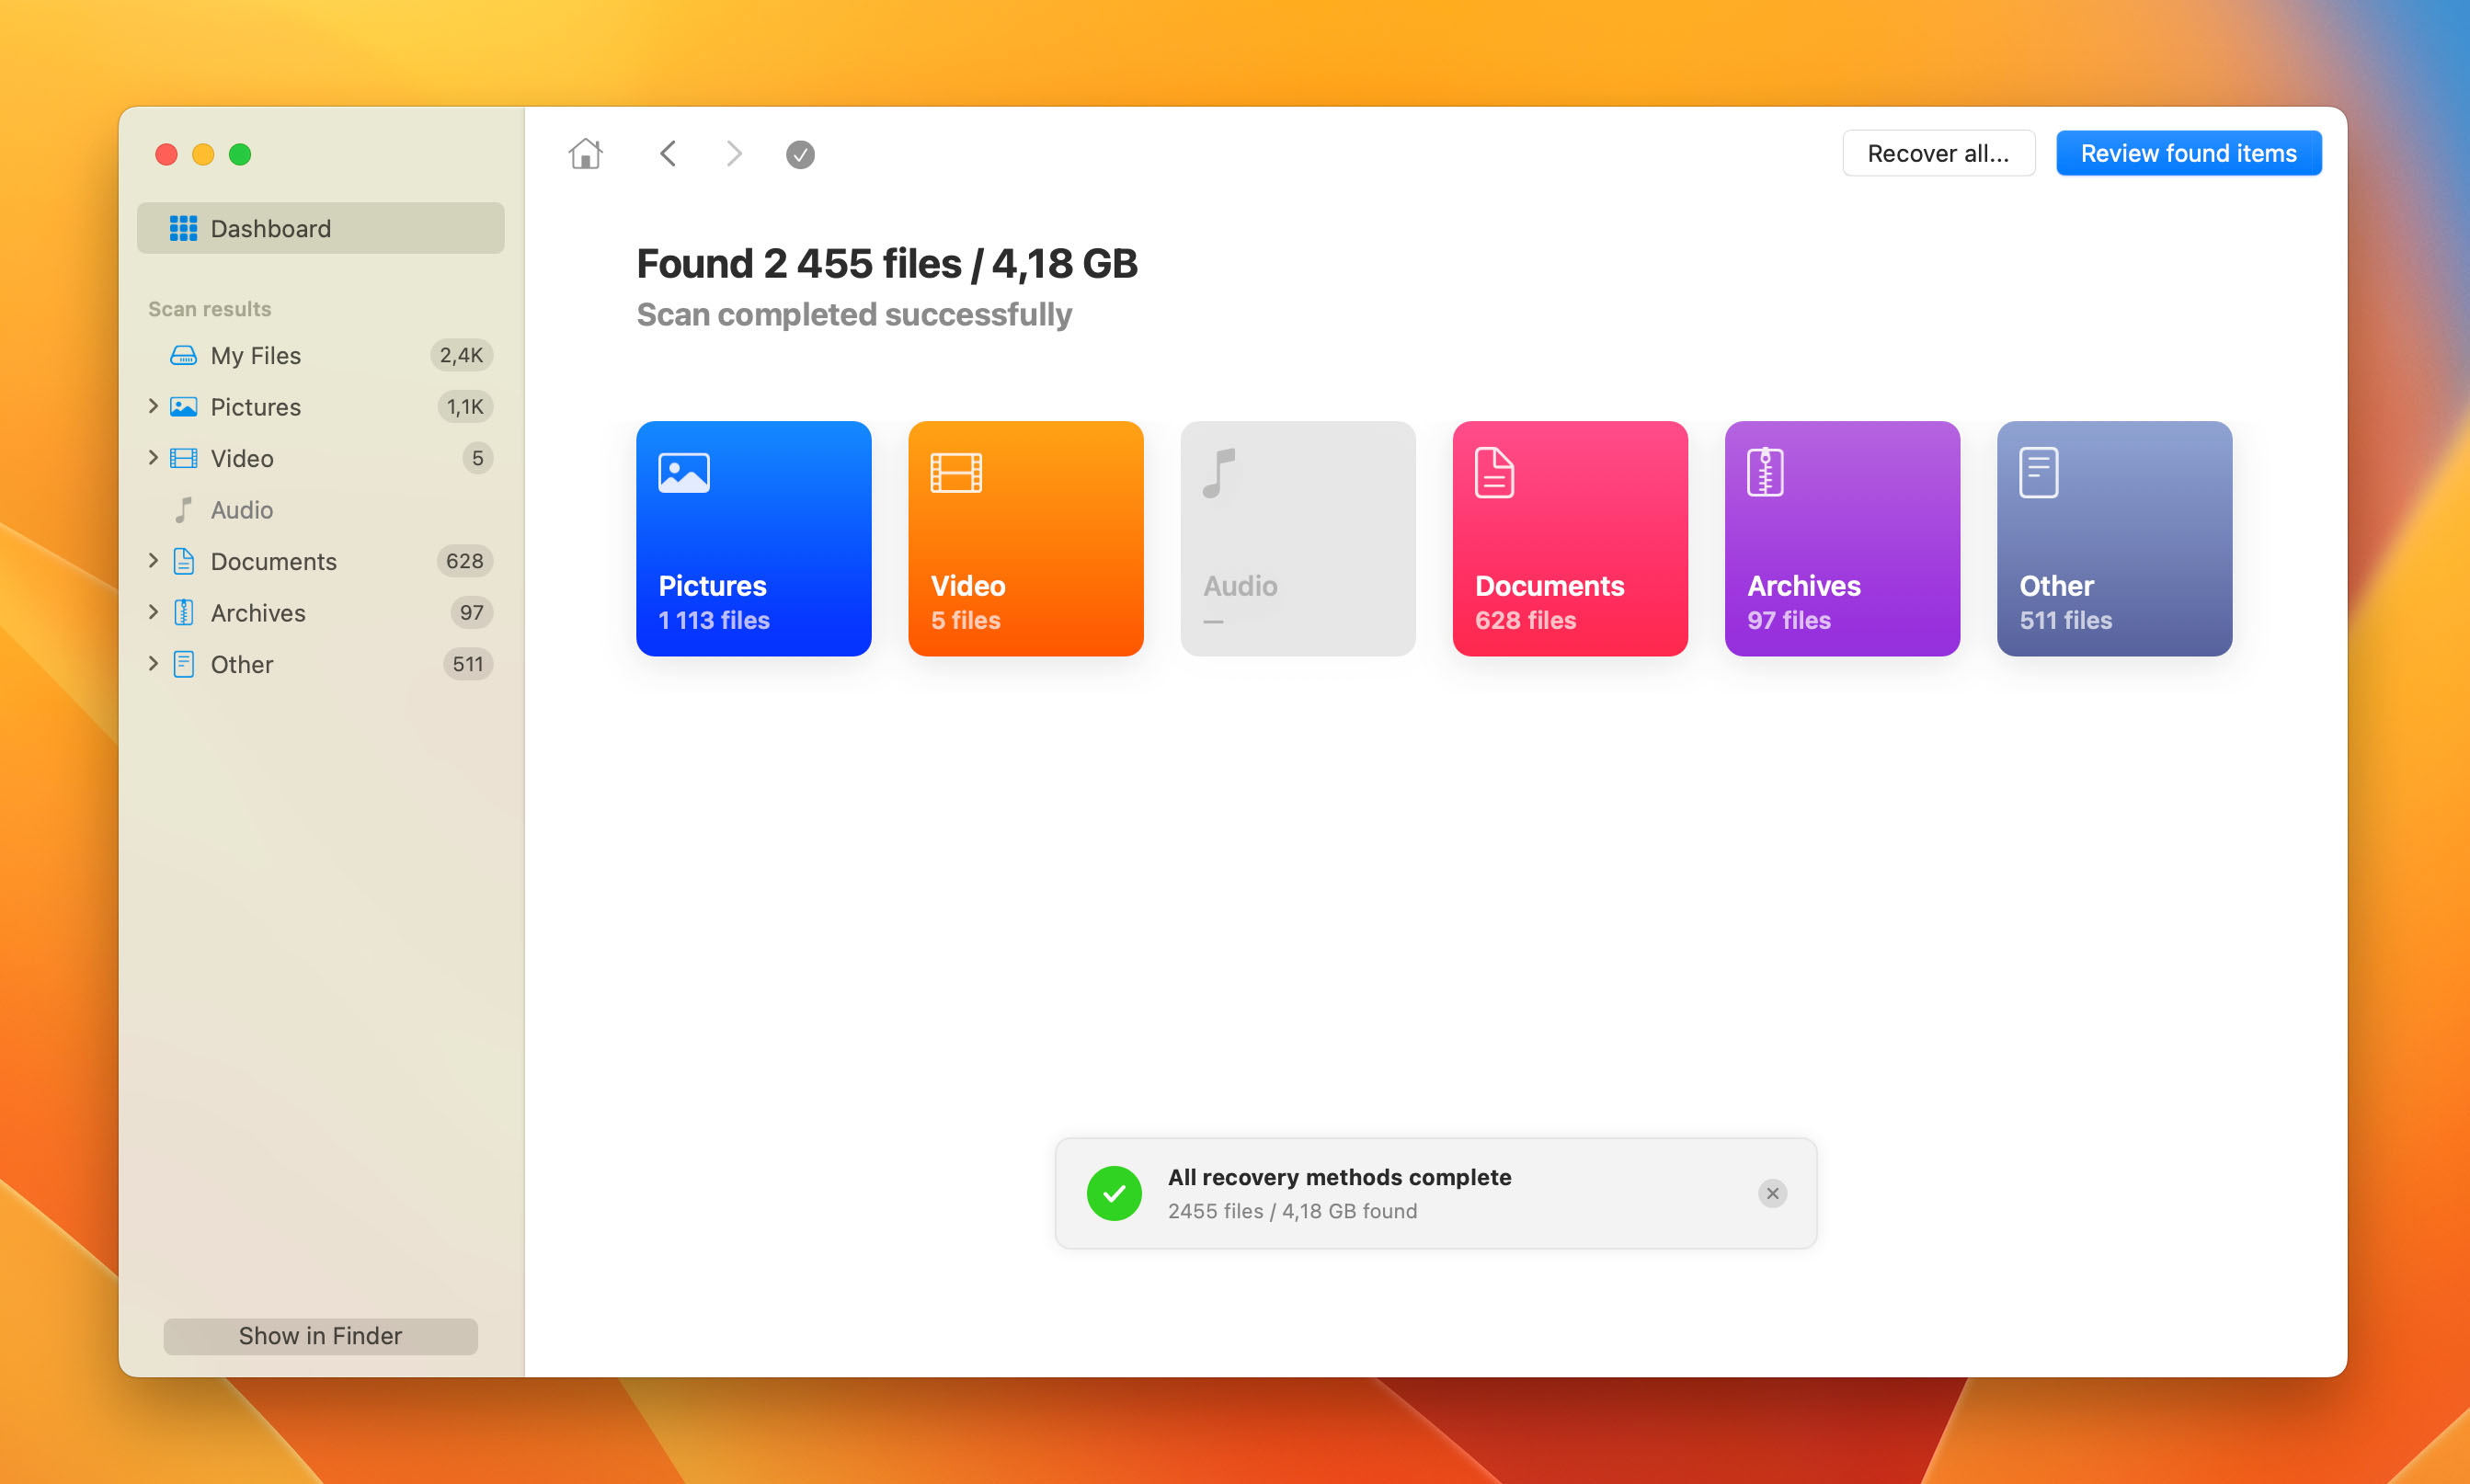
- Once Disk Drill is done scanning your RAID, click Review found items.
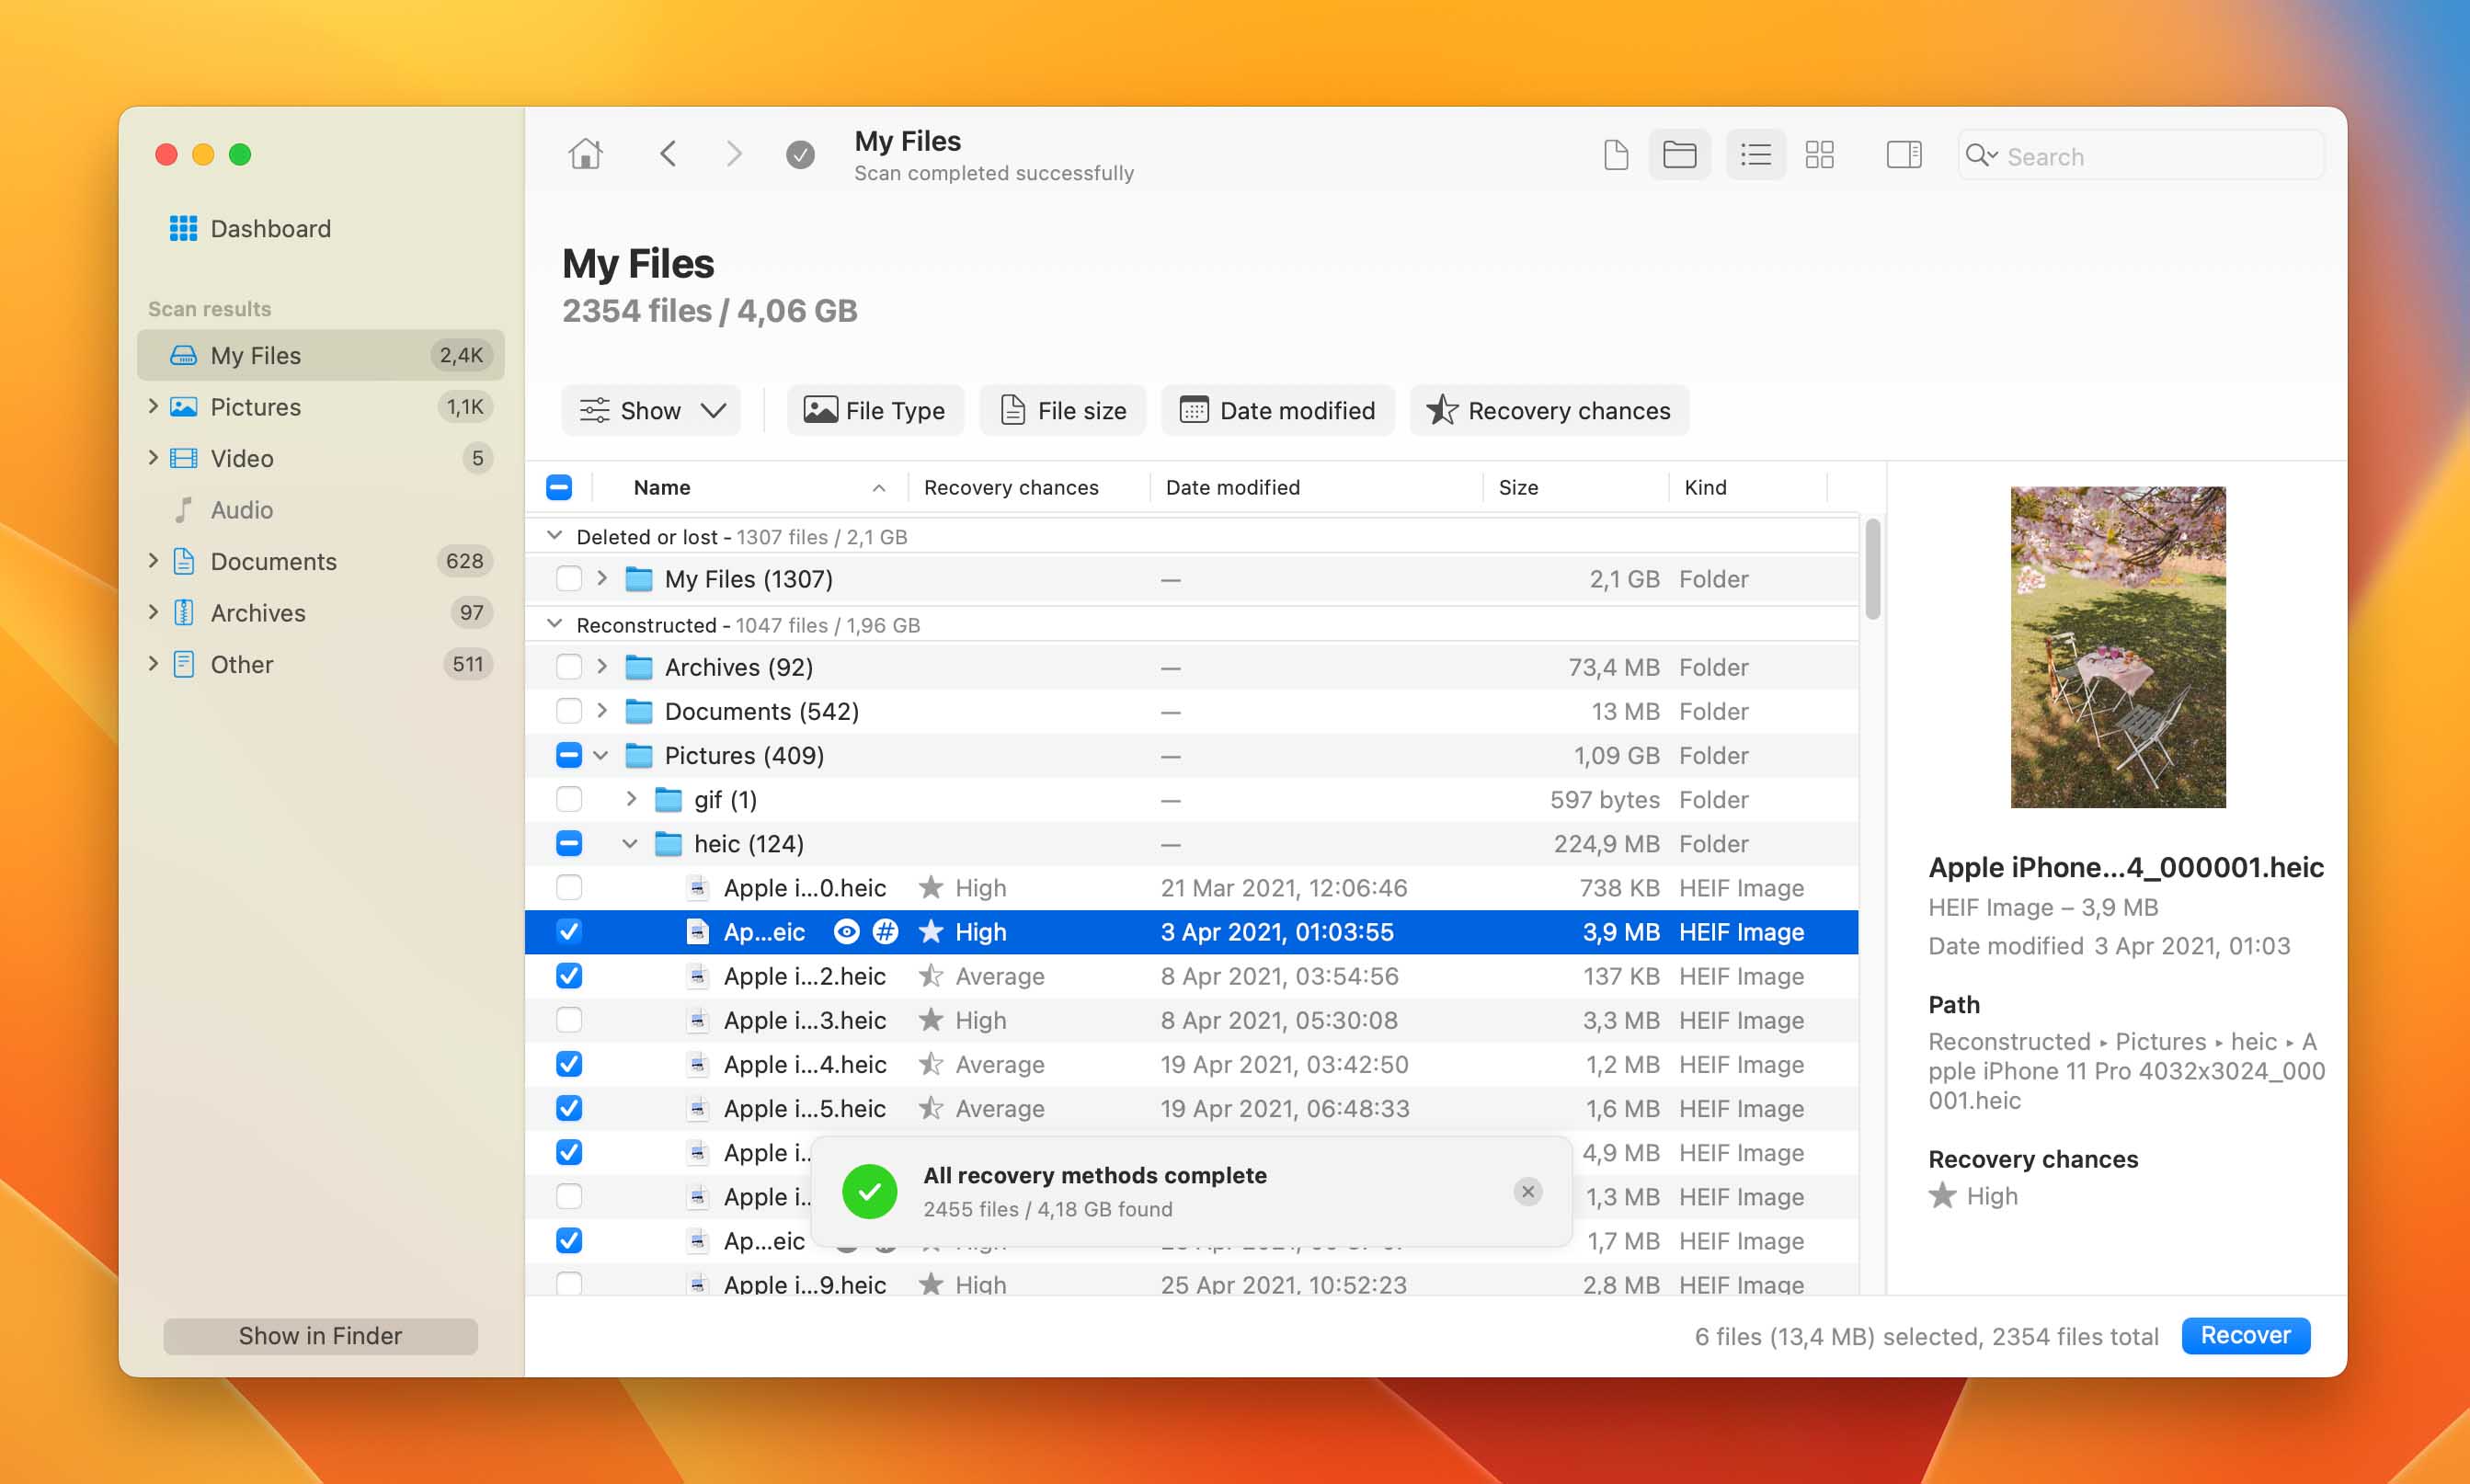
- If the data loss on your RAID was caused by accidental deletion or formatting, expand the Deleted or lost tab. In case of corruption, try checking the Reconstructed tab.
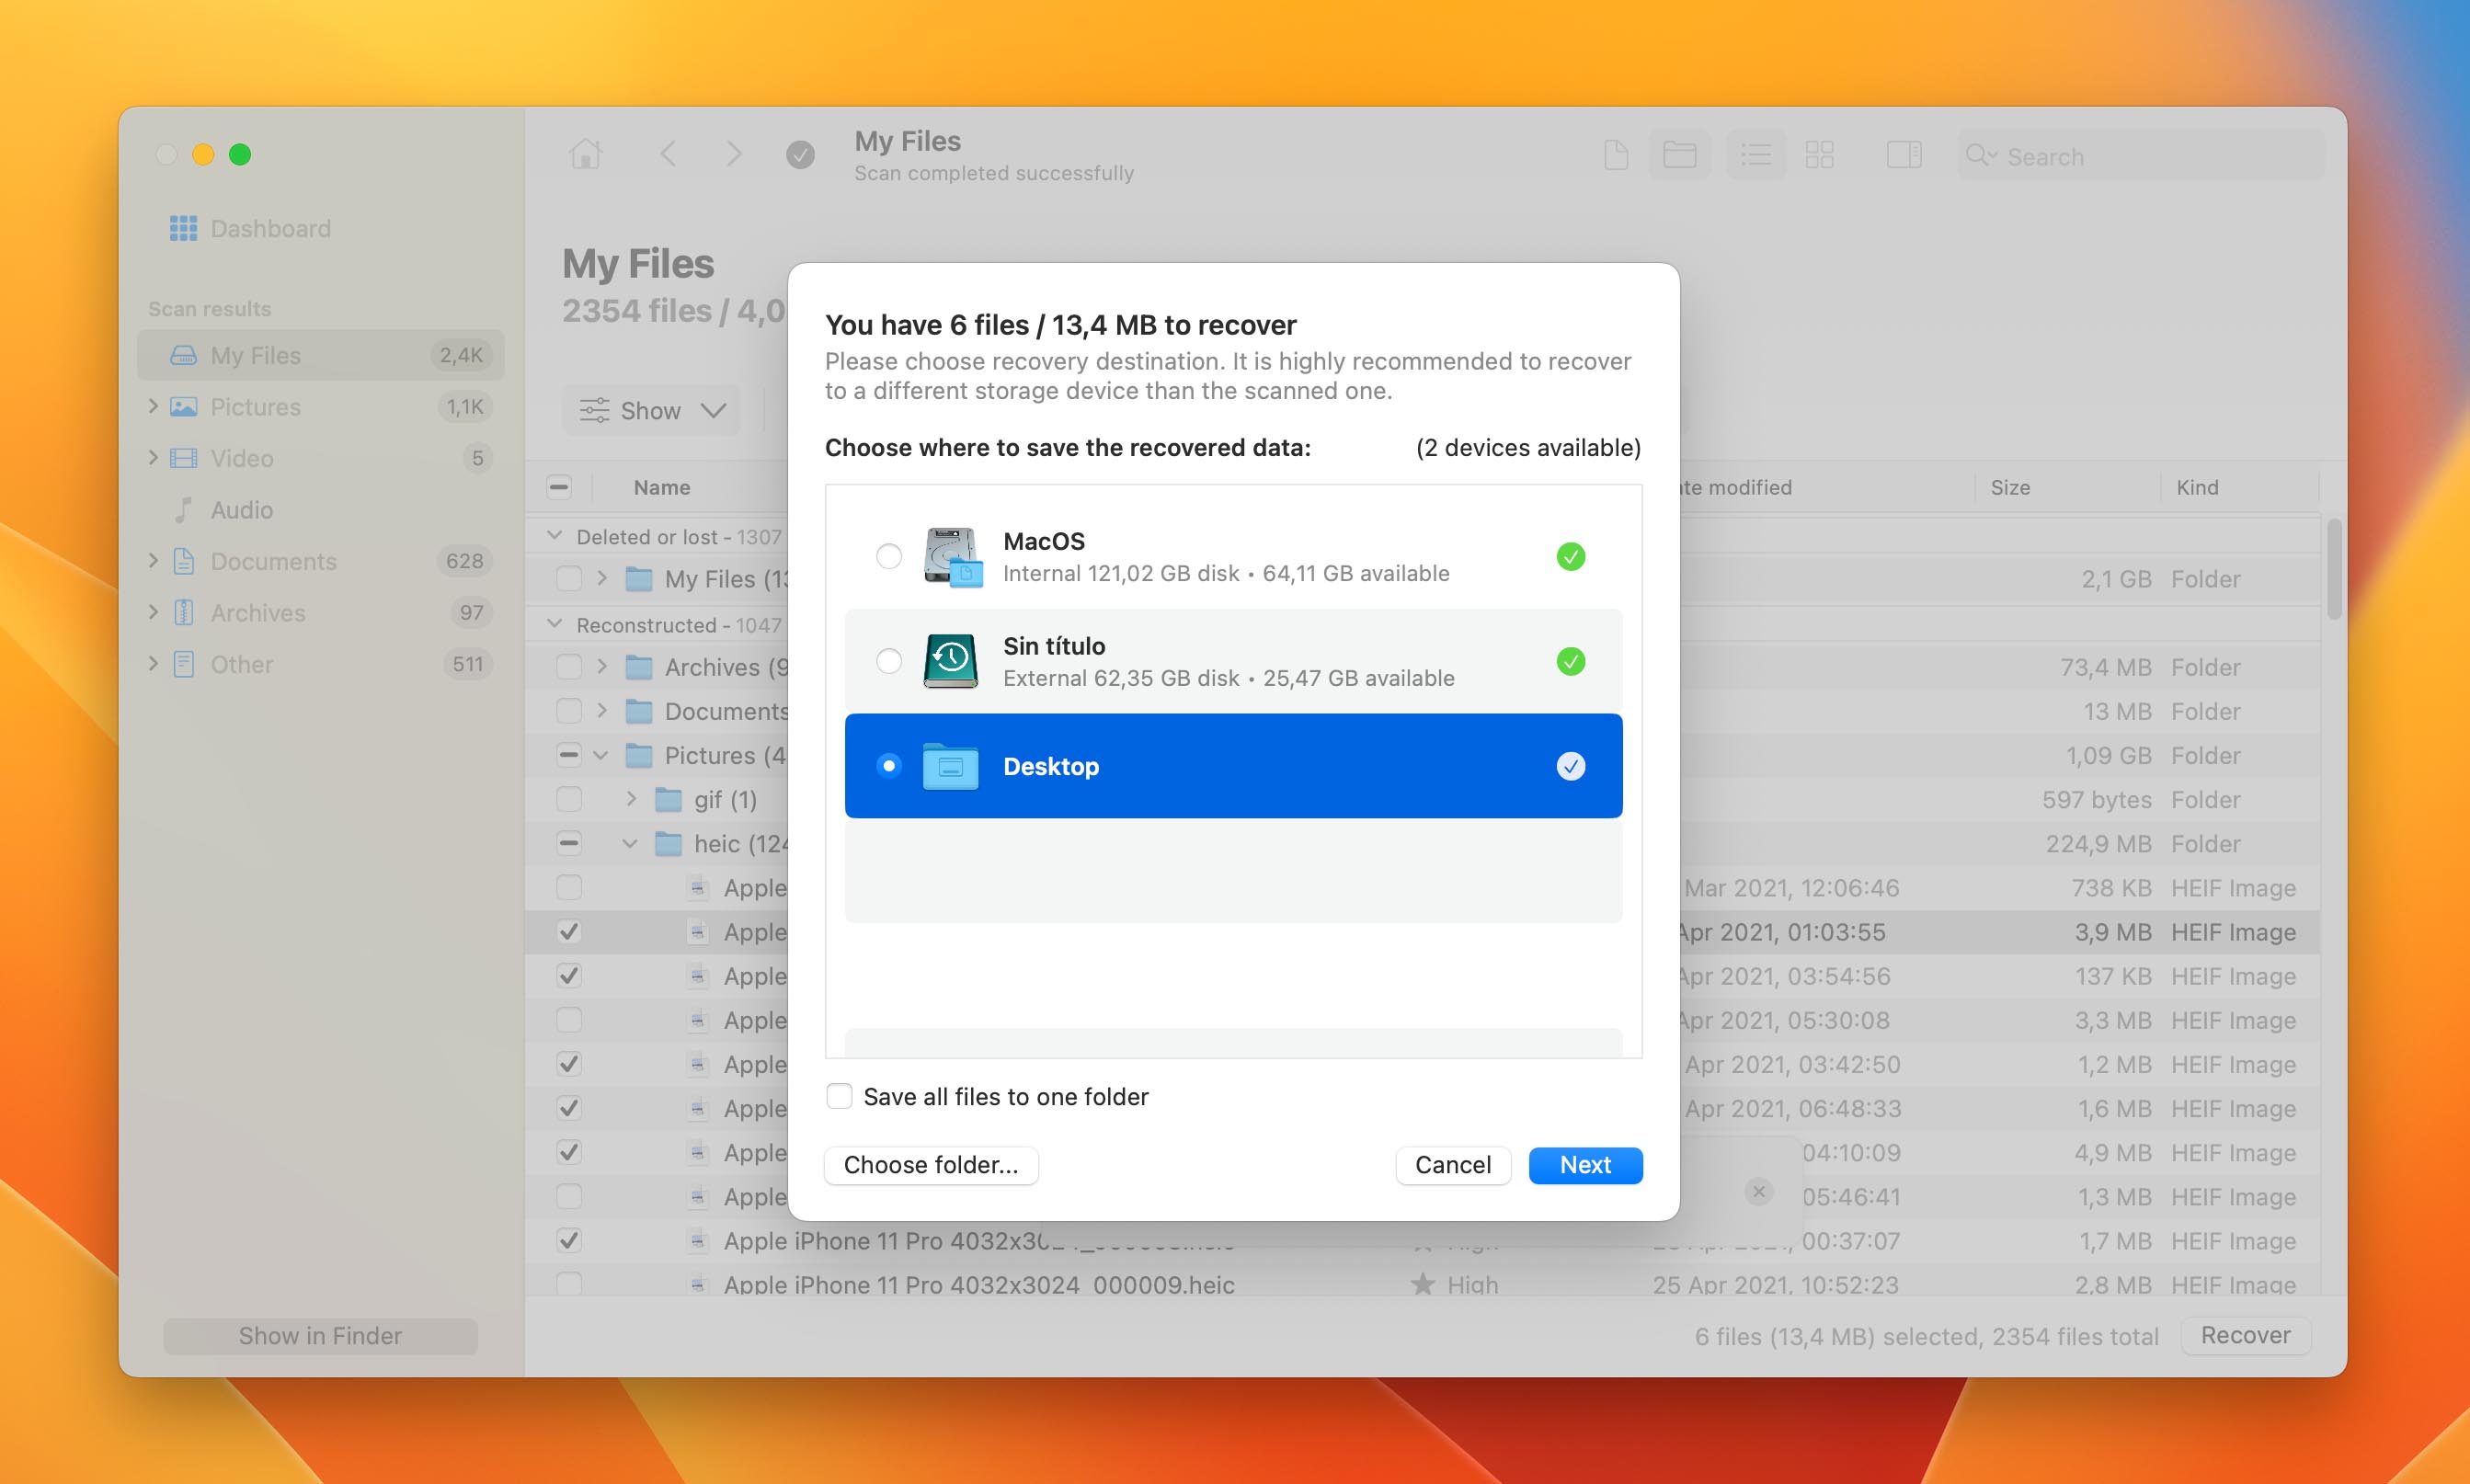
- You can click a file once to display its preview. Once you’ve found the files you want to restore, use the checkboxes in the leftmost column to select them. Then, click Recover.
- Select a folder in a location other than your RAID array where Disk Drill will save the recovered data. Then, click Next to proceed with Apple RAID recovery.
Disk Drill Basic for Mac does not offer free data recovery. You can, however, scan and preview your data for free. By previewing your files, you can at least find out if your data is still recoverable (if you can preview a file, you can usually recover it). You can also create backups for free in case something goes wrong.
Resolving Corrupted RAID Issues on a Mac
Depending on your RAID setup, there are multiple ways you can try to fix your corrupted array. This section is dedicated to step-by-step guides for all of them. Read the short descriptions at the top of each guide to figure out if it’s the right one for you.
Most of these methods will cause data loss. If you haven’t already, we highly suggest that you go through our recovery guide in the last section before proceeding.
Method 1: Reboot Your Mac
RAID issues may be caused by temporary errors – such as app conflicts, driver problems, or incomplete/buggy system updates. Rebooting your Mac will refresh the system and clear many of these issues. That might be enough to resolve the RAID corruption.
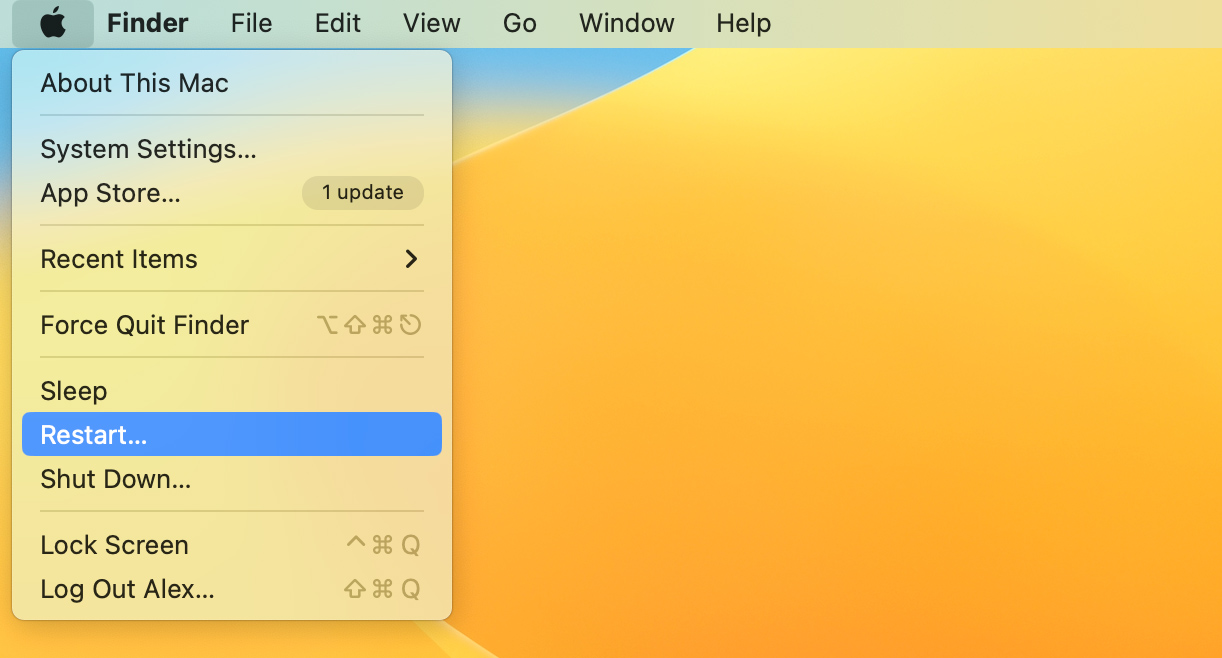
Make sure to disconnect your RAID before rebooting and reconnect it once your operating system is fully loaded.
Method 2: Diagnose Hard Drives In Your RAID Setup
If a reboot doesn’t work, we can diagnose the individual hard drives in the RAID array to isolate the problem and prevent further damage to the rest of the array.
- Check your connections – Check your cables, ports, and any other components related to your RAID array, and make sure they’re secure. Try using other external hard drive cables and ports. The corruption may simply be caused by a connection issue.
- Reconnect the drive – You can connect the individual hard drives that make up your RAID to your Mac. You should be able to access your data without issues on a healthy drive (do NOT modify it, though!). A problematic drive may cause errors or not mount properly. In some cases, your hard drive won’t show up.
- Check S.M.A.R.T. status – Use Disk Utility (or Disk Drill, if you used it for the recovery stage) to check your RAID drives’ health status. The Verified status means that your drive is healthy while Failing indicates a problem. The Not Supported message may also show up in case of corruption.
- Check RAID logs in Disk Utility – Select your RAID array in Disk Utility and click the Info button in the toolbar. In the RAID Set Information window, click Logs. You should find a list of events related to your array, including any errors and warnings.
- Replace the hard drive – Another way to diagnose your RAID is to replace the hard drive you suspect is faulty. If you replace a certain drive and the array works, you’ve isolated the issue. Make sure you turn off your computer and unplug all cables before physically replacing the hard drive. In the cases of RAID 0 and JBOD, you will have to rebuild the array after.
Method 3: Repair Disk Errors With First Aid
Are you encountering alerts related to failed or missing drives or software-related errors, such as: “Disk Not Found”, “No Bootable Device”, and “Volume Needs Repair” (among others)?
These may indicate disk errors. macOS provides a native tool called First Aid, which can automatically diagnose and attempt to fix such errors.
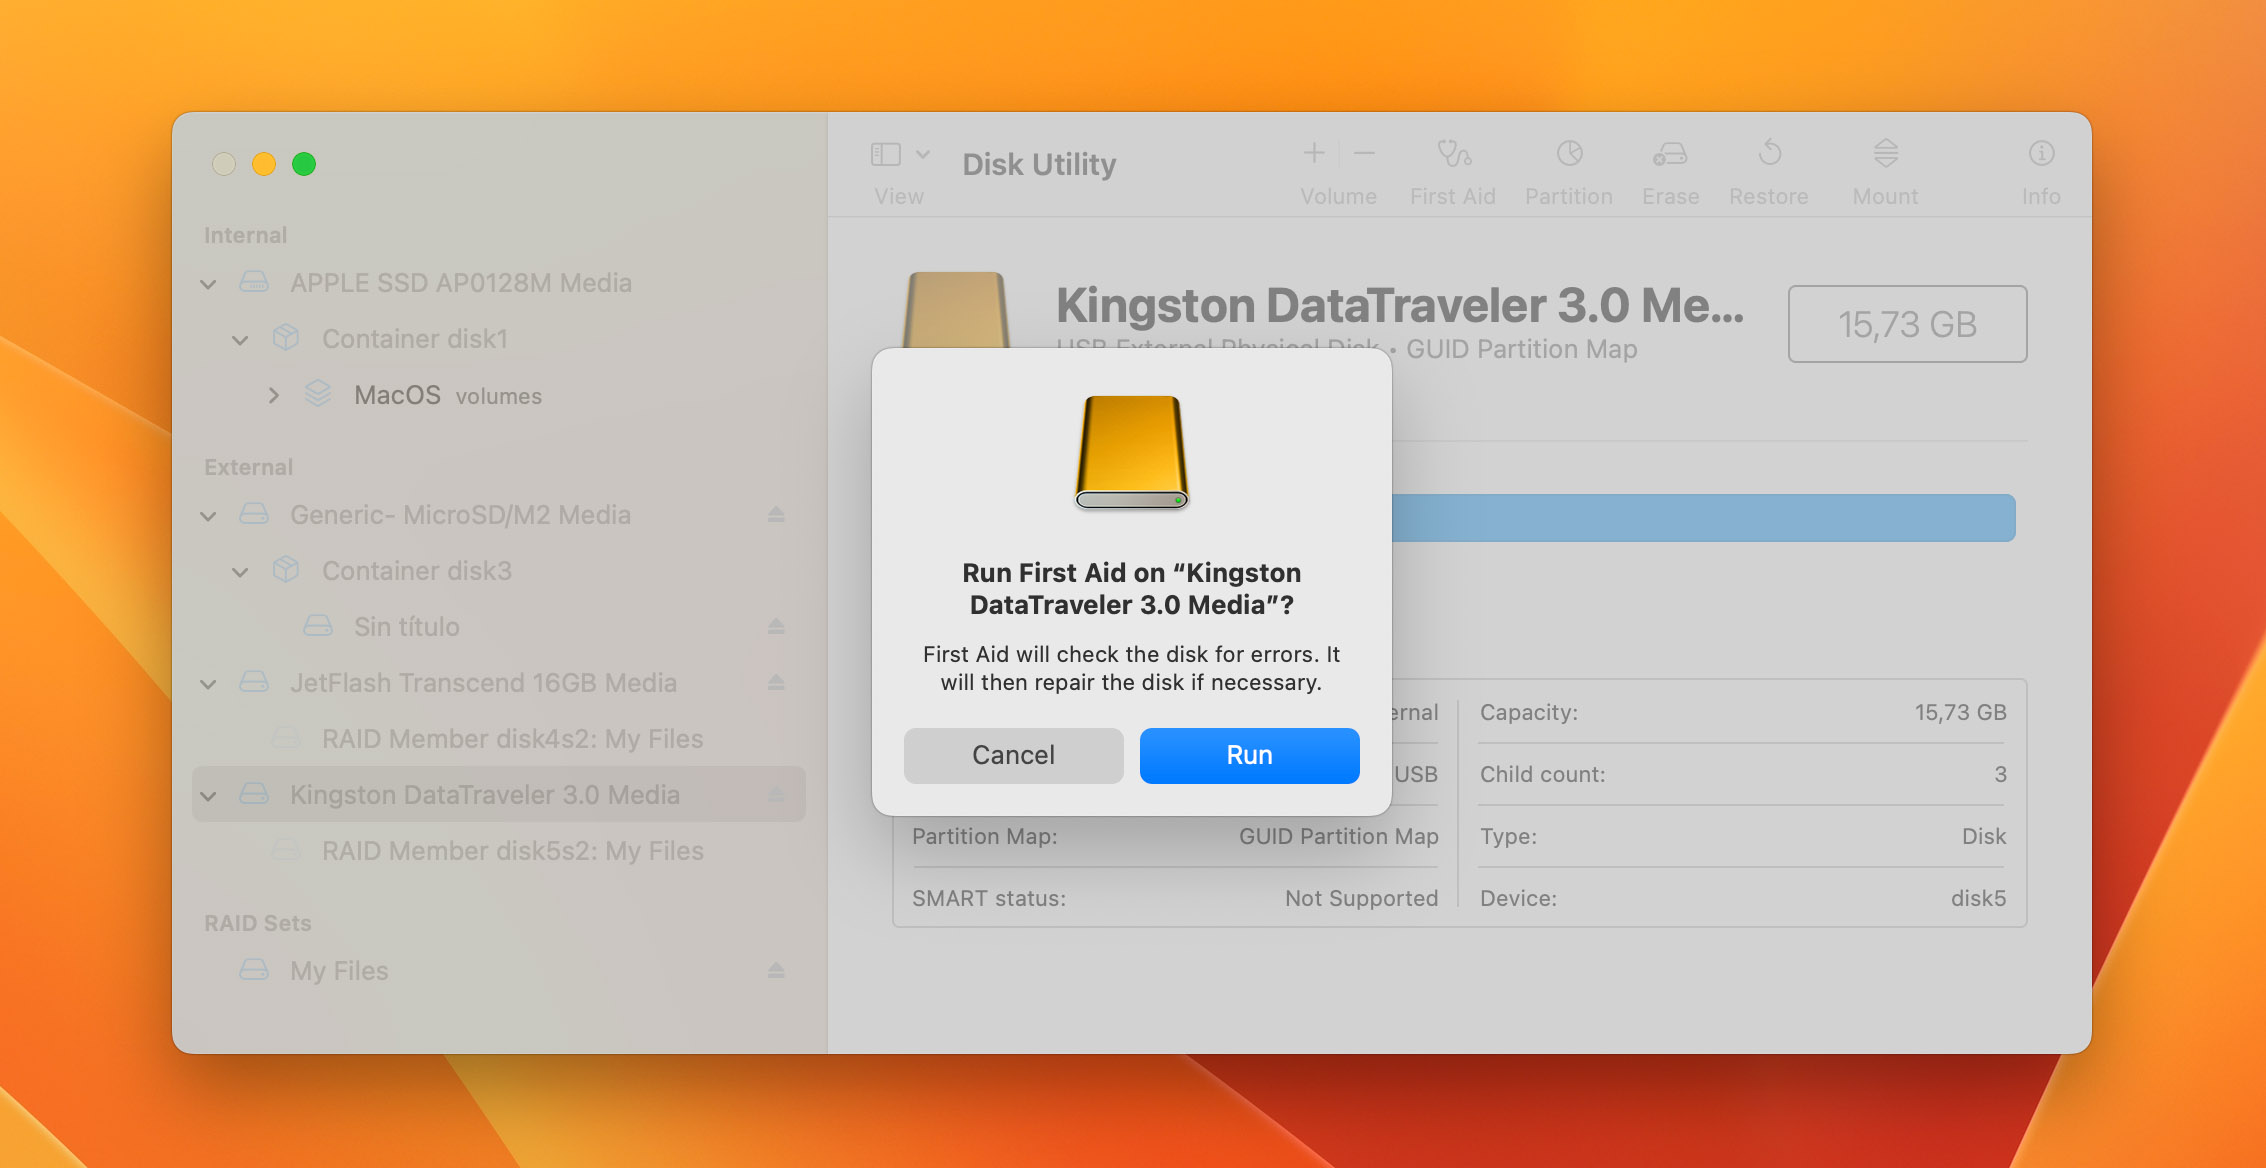
To use First Aid to repair disk errors on your RAID array:
- Make sure your RAID is securely connected to your Mac. Then, launch Disk Utility (Finder > Applications > Utilities).
- Click View > Show All Devices.
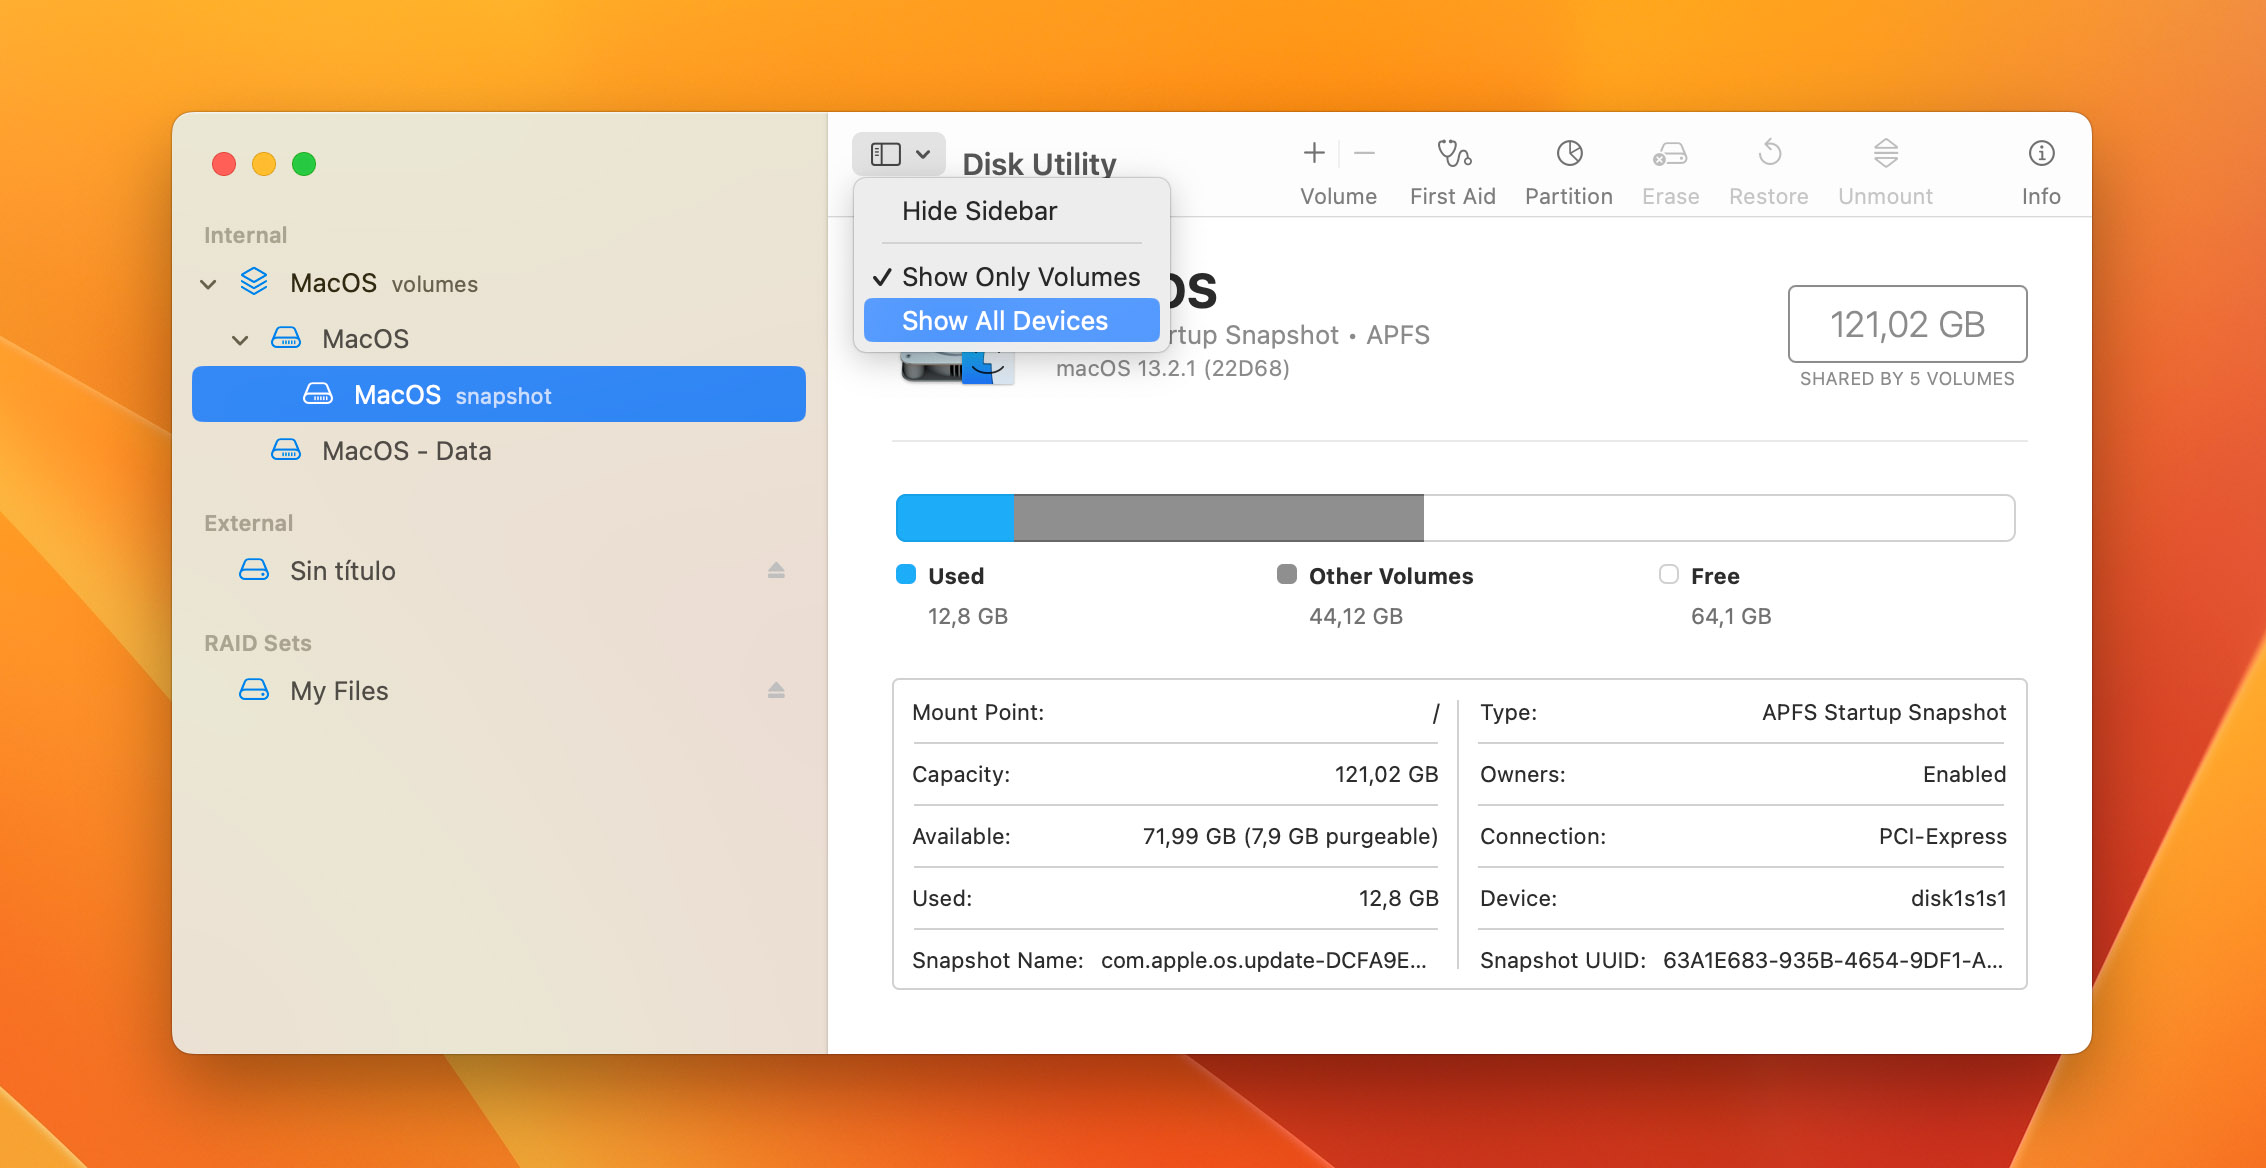
- On the left sidebar, select your RAID. Then, click the First Aid button in the toolbar.
- Click Run to confirm the action.
Method 4: Rebuild a Mirrored (RAID 1) Disk Set
If one of the disks in your RAID 1 disk set gets disconnected, you will have to rebuild the array after reconnecting it. However, if you enabled the Automatically rebuild setting when you created your RAID, you don’t need this method.
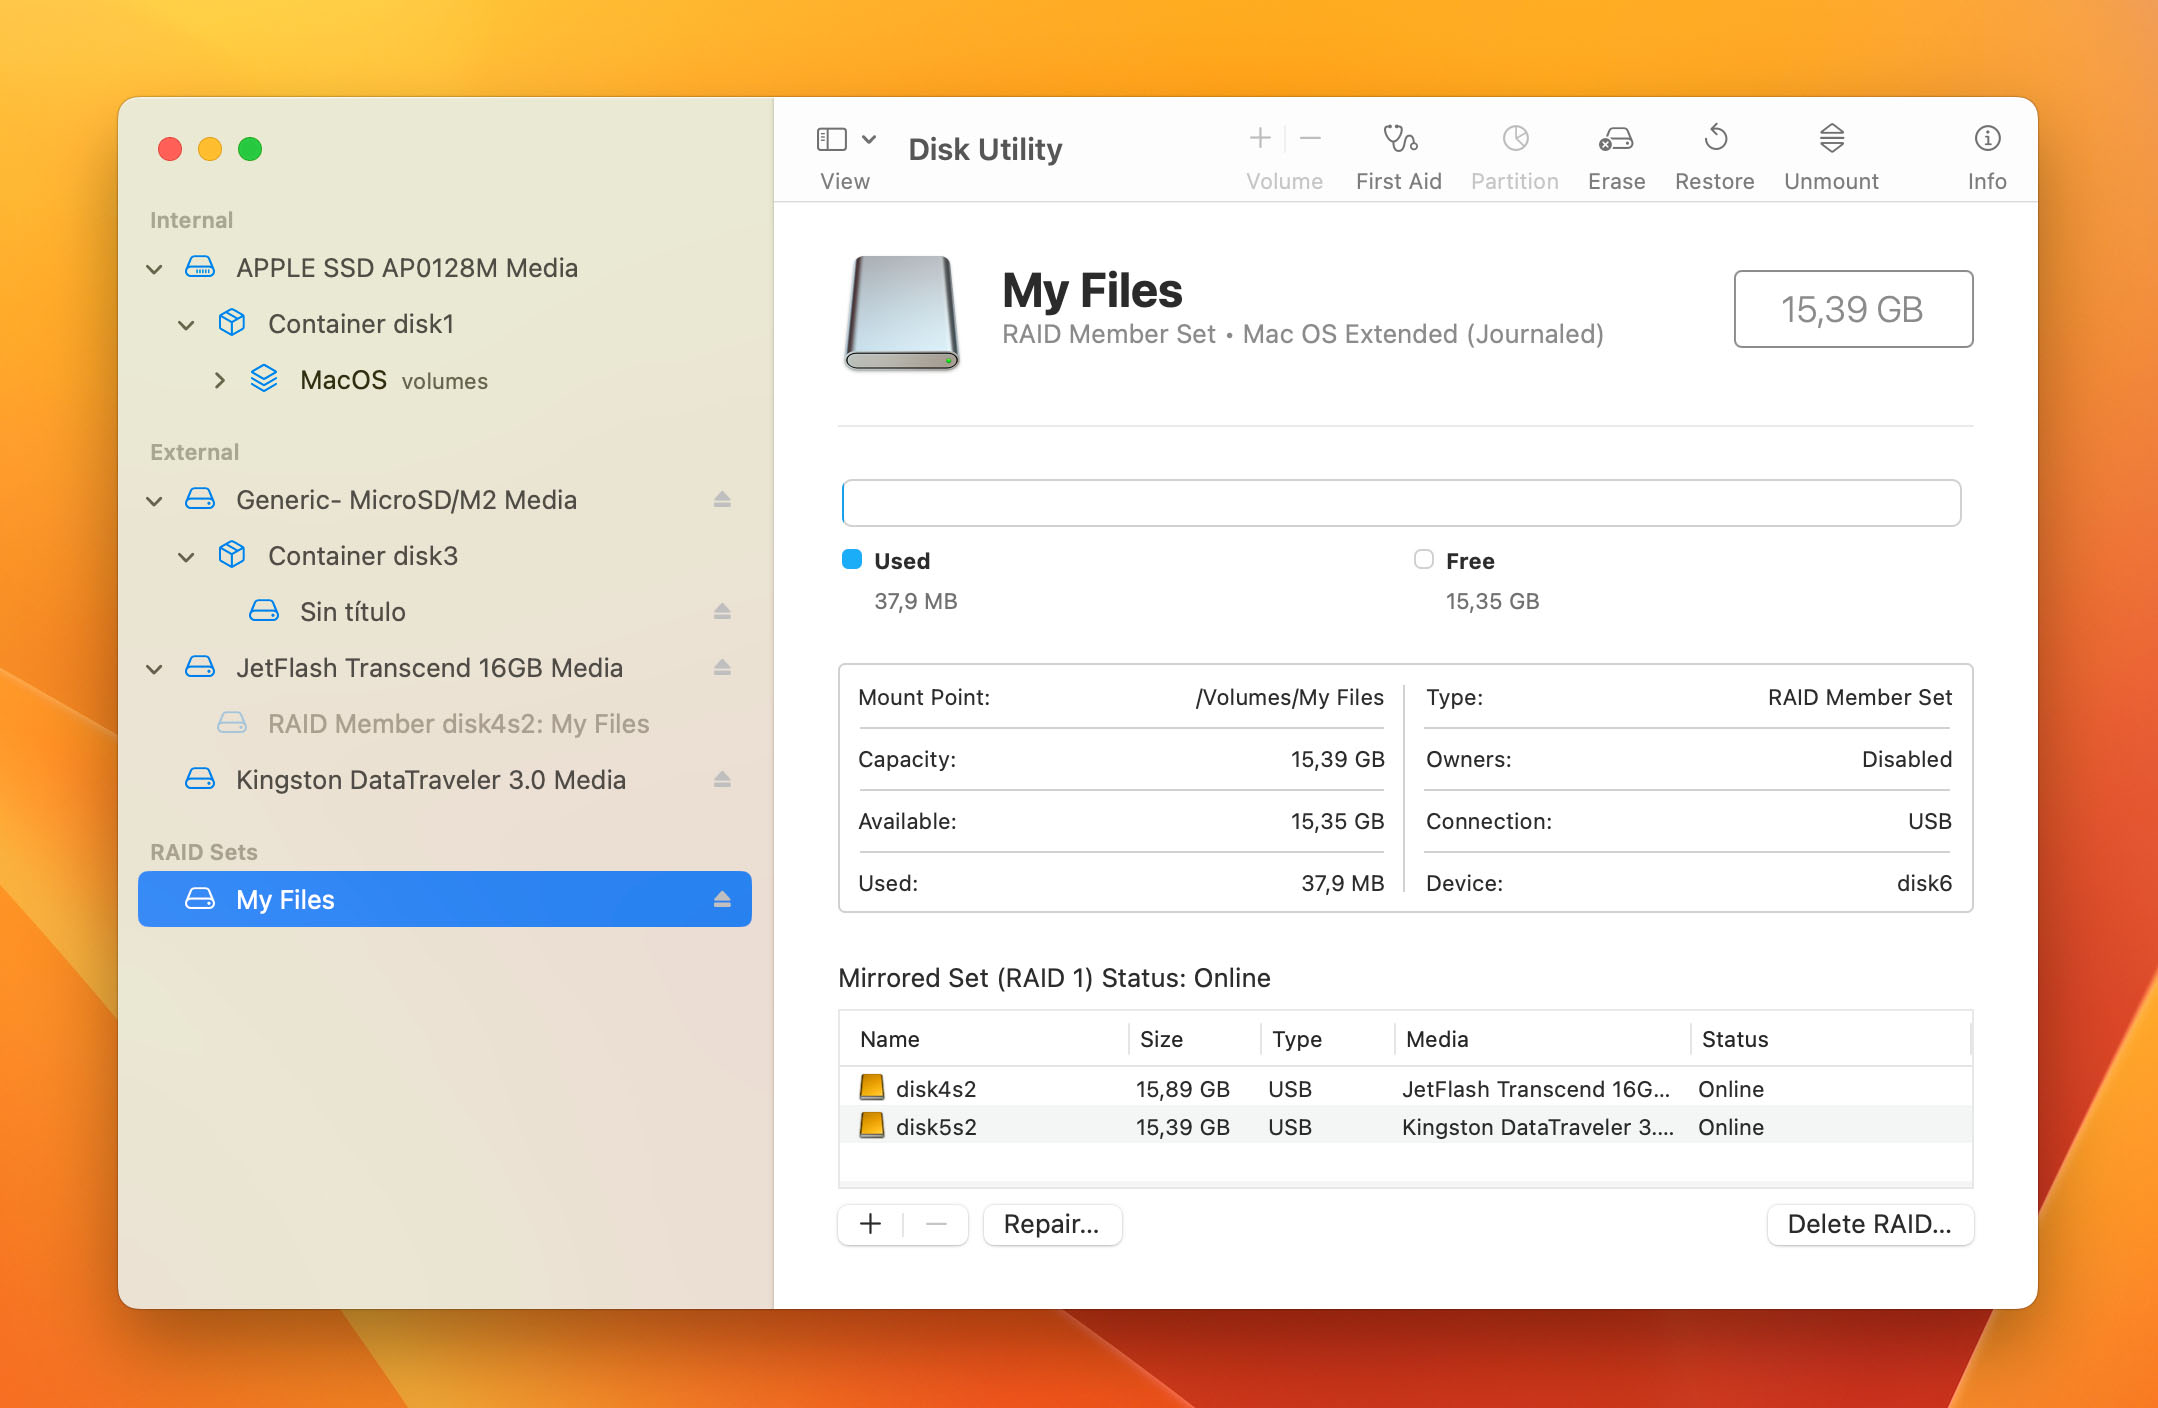
To manually rebuild a mirrored (RAID 1) disk set using Disk Utility:
- Reconnect your drive to your RAID array.
- Launch Disk Utility (Finder > Applications > Utilities).
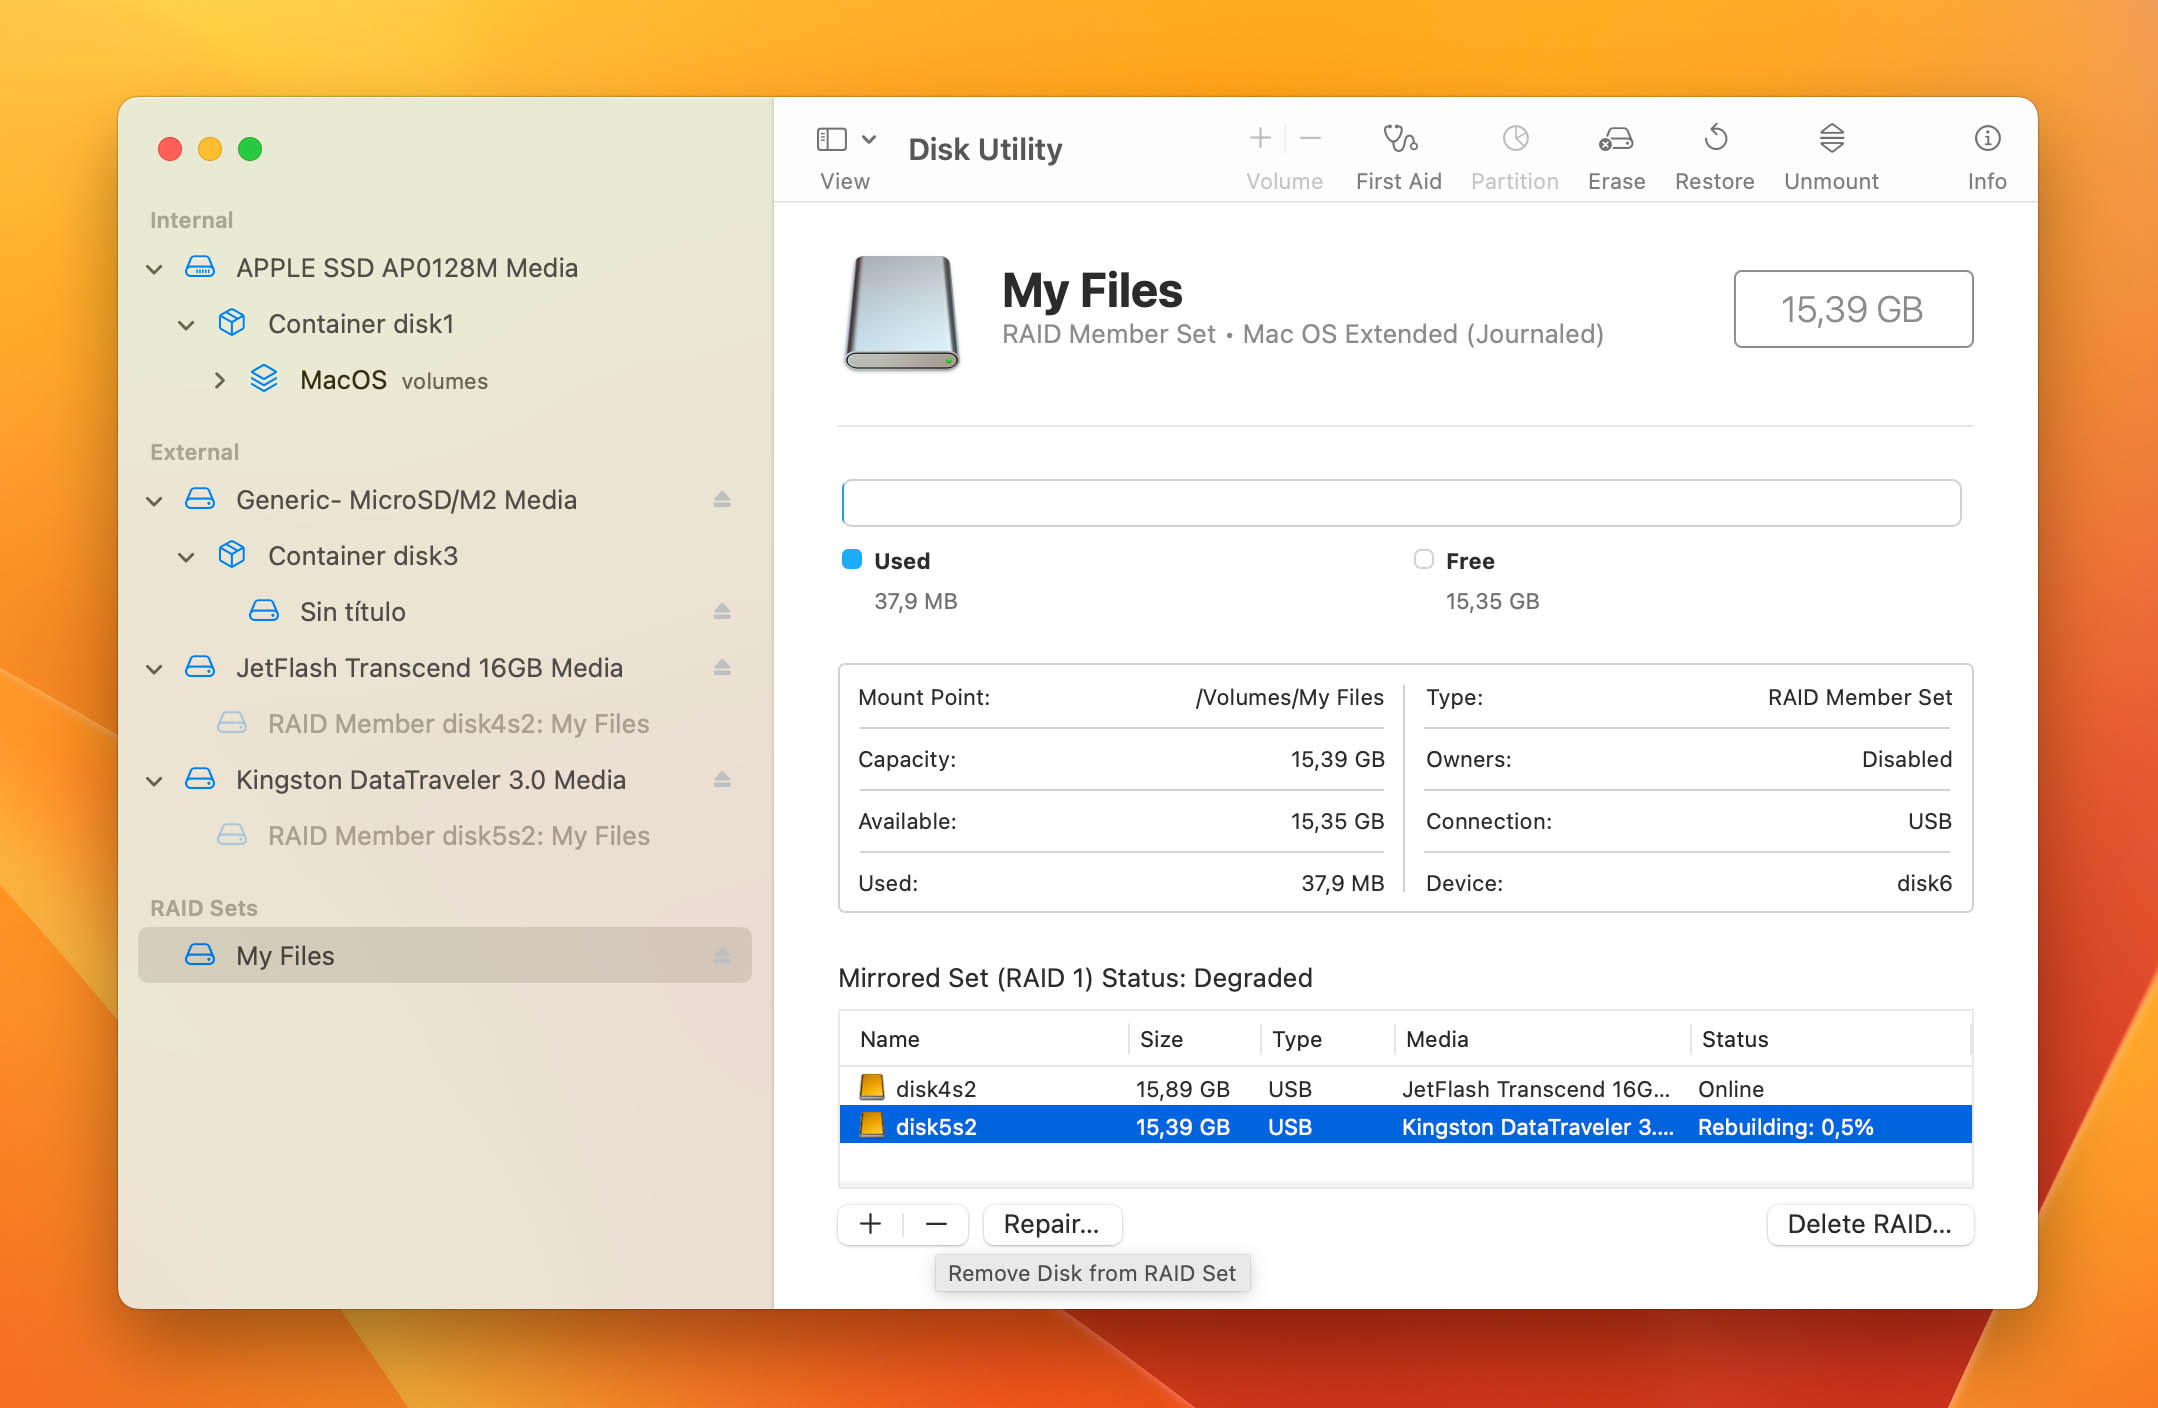
- Select your RAID in the left sidebar and click Repair.
- Select the disk you reconnected to your RAID and click Choose.
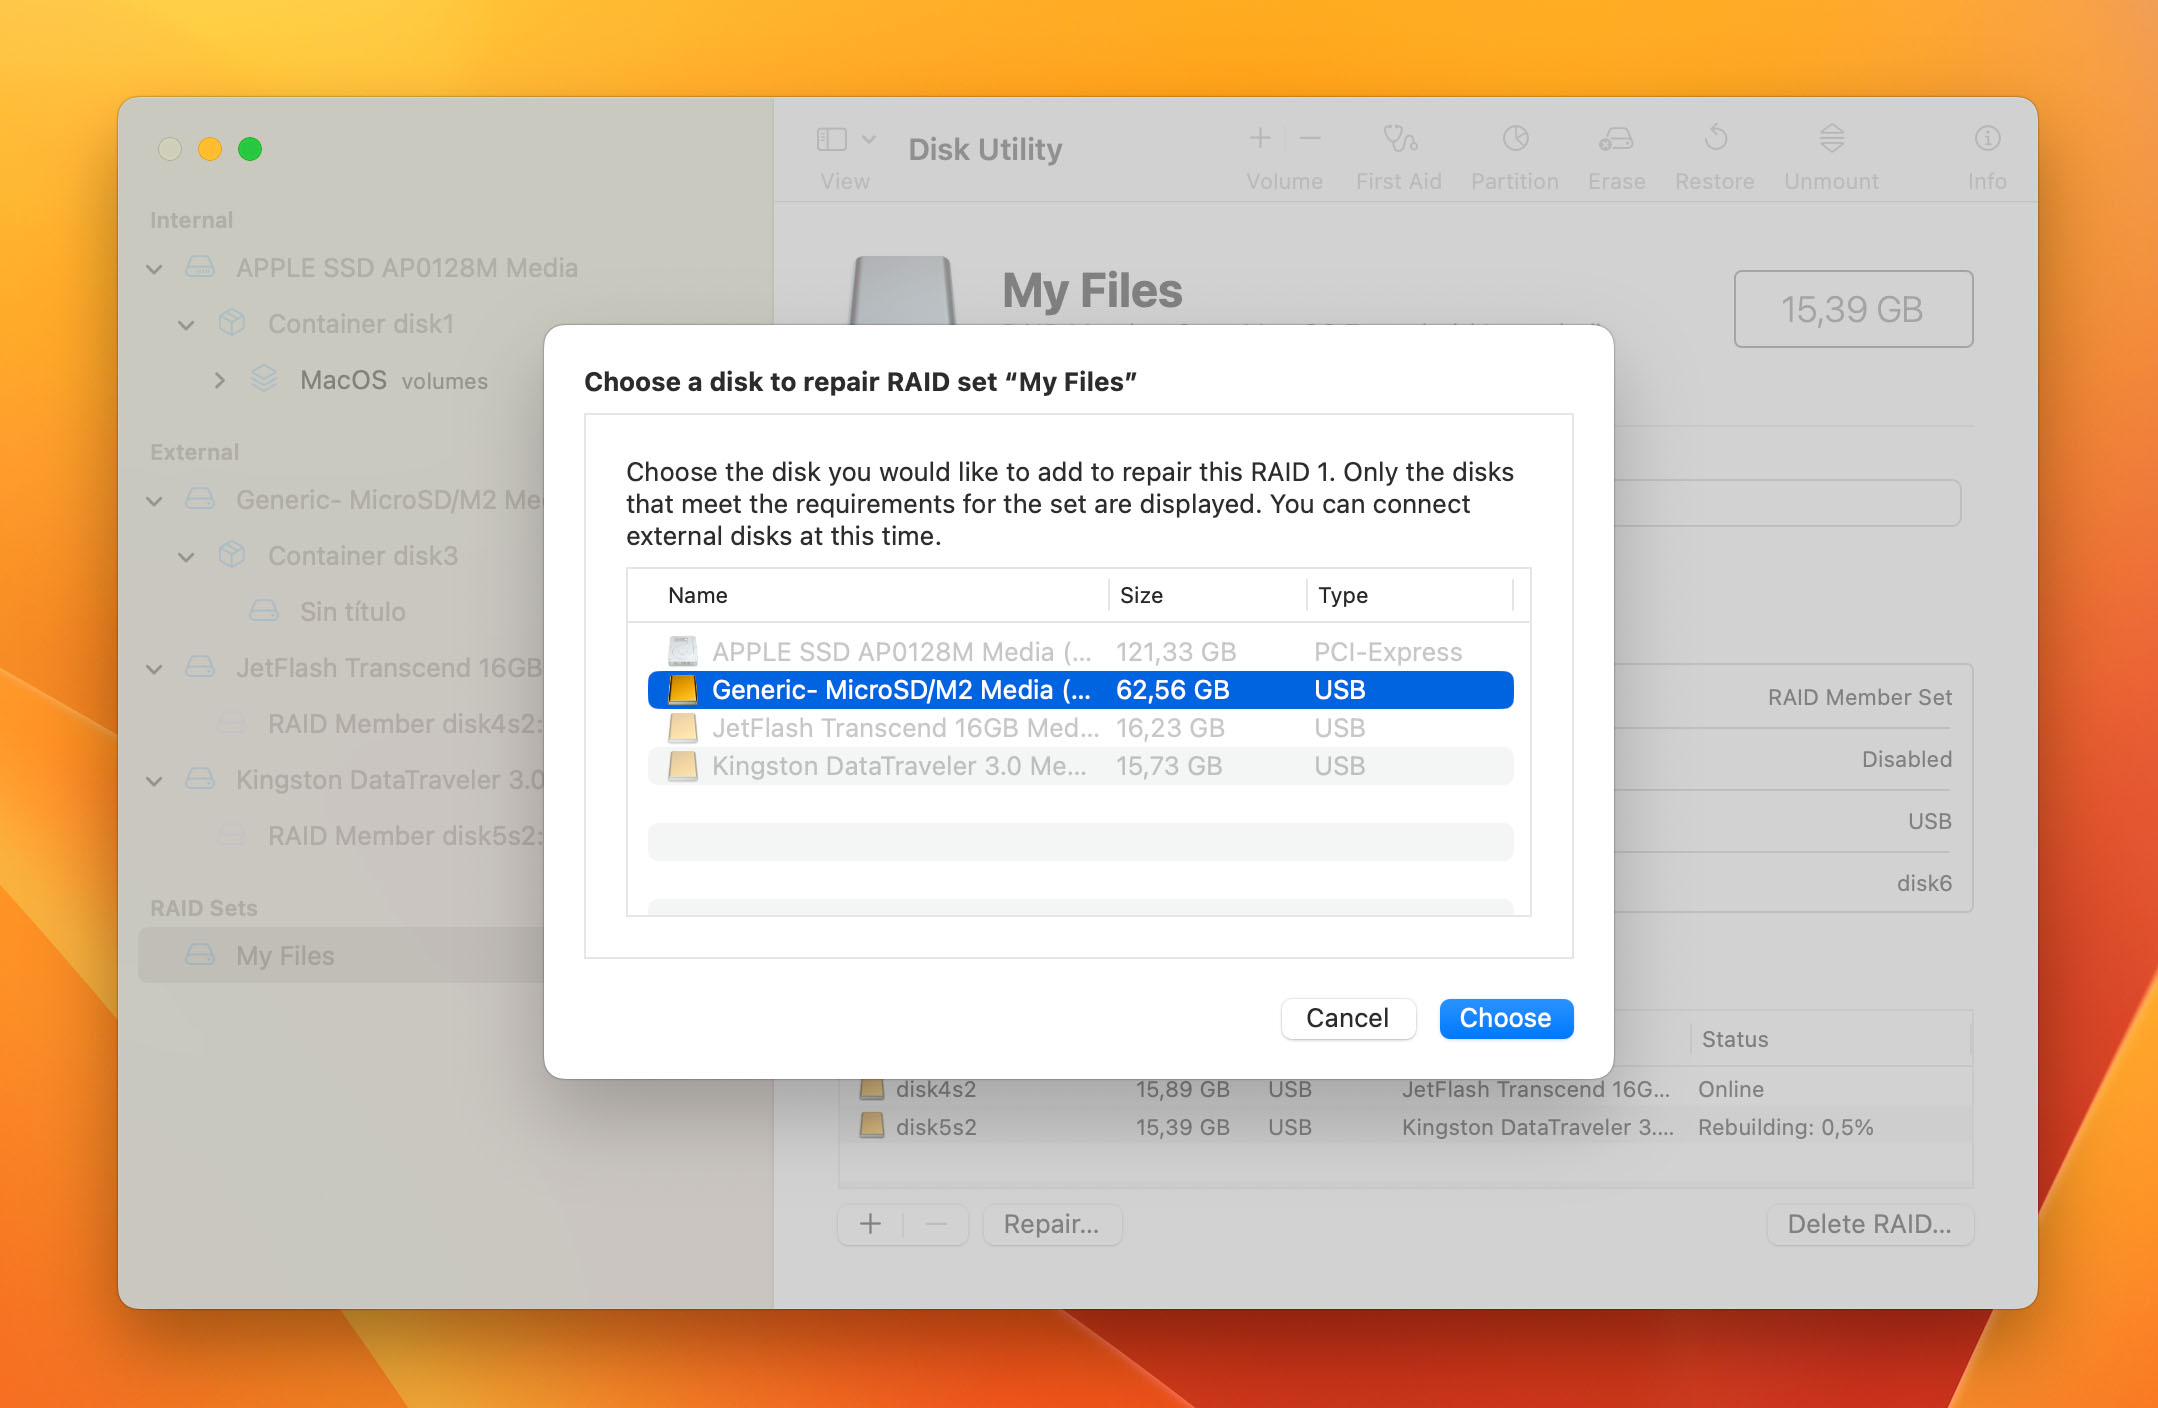 Click Repair to confirm the action.
Method 5: Remove a Faulty Disk from a RAID Without Affecting the Data
If you think one of the disks in the set is irreparable, you can opt to remove it from your RAID array entirely. This way, you can prevent the issue from spreading and get your array back in working order.
Fortunately, Disk Utility provides us with the tools to do it without affecting your data. However, this is only true in the case of RAID 1 arrays and the last disk in a JBOD array.
In the case of RAID 1, your data’s mirrored copy remains on one of the other disks. For JBOD arrays, all your data will be transferred to the first disk (if it has enough space).
Do NOT use this method for RAID 0 (striped) arrays if you haven’t restored your data yet. Removing one of the disks will cause complete data loss on the entire array. We strongly recommend following the recovery section of this article before proceeding.
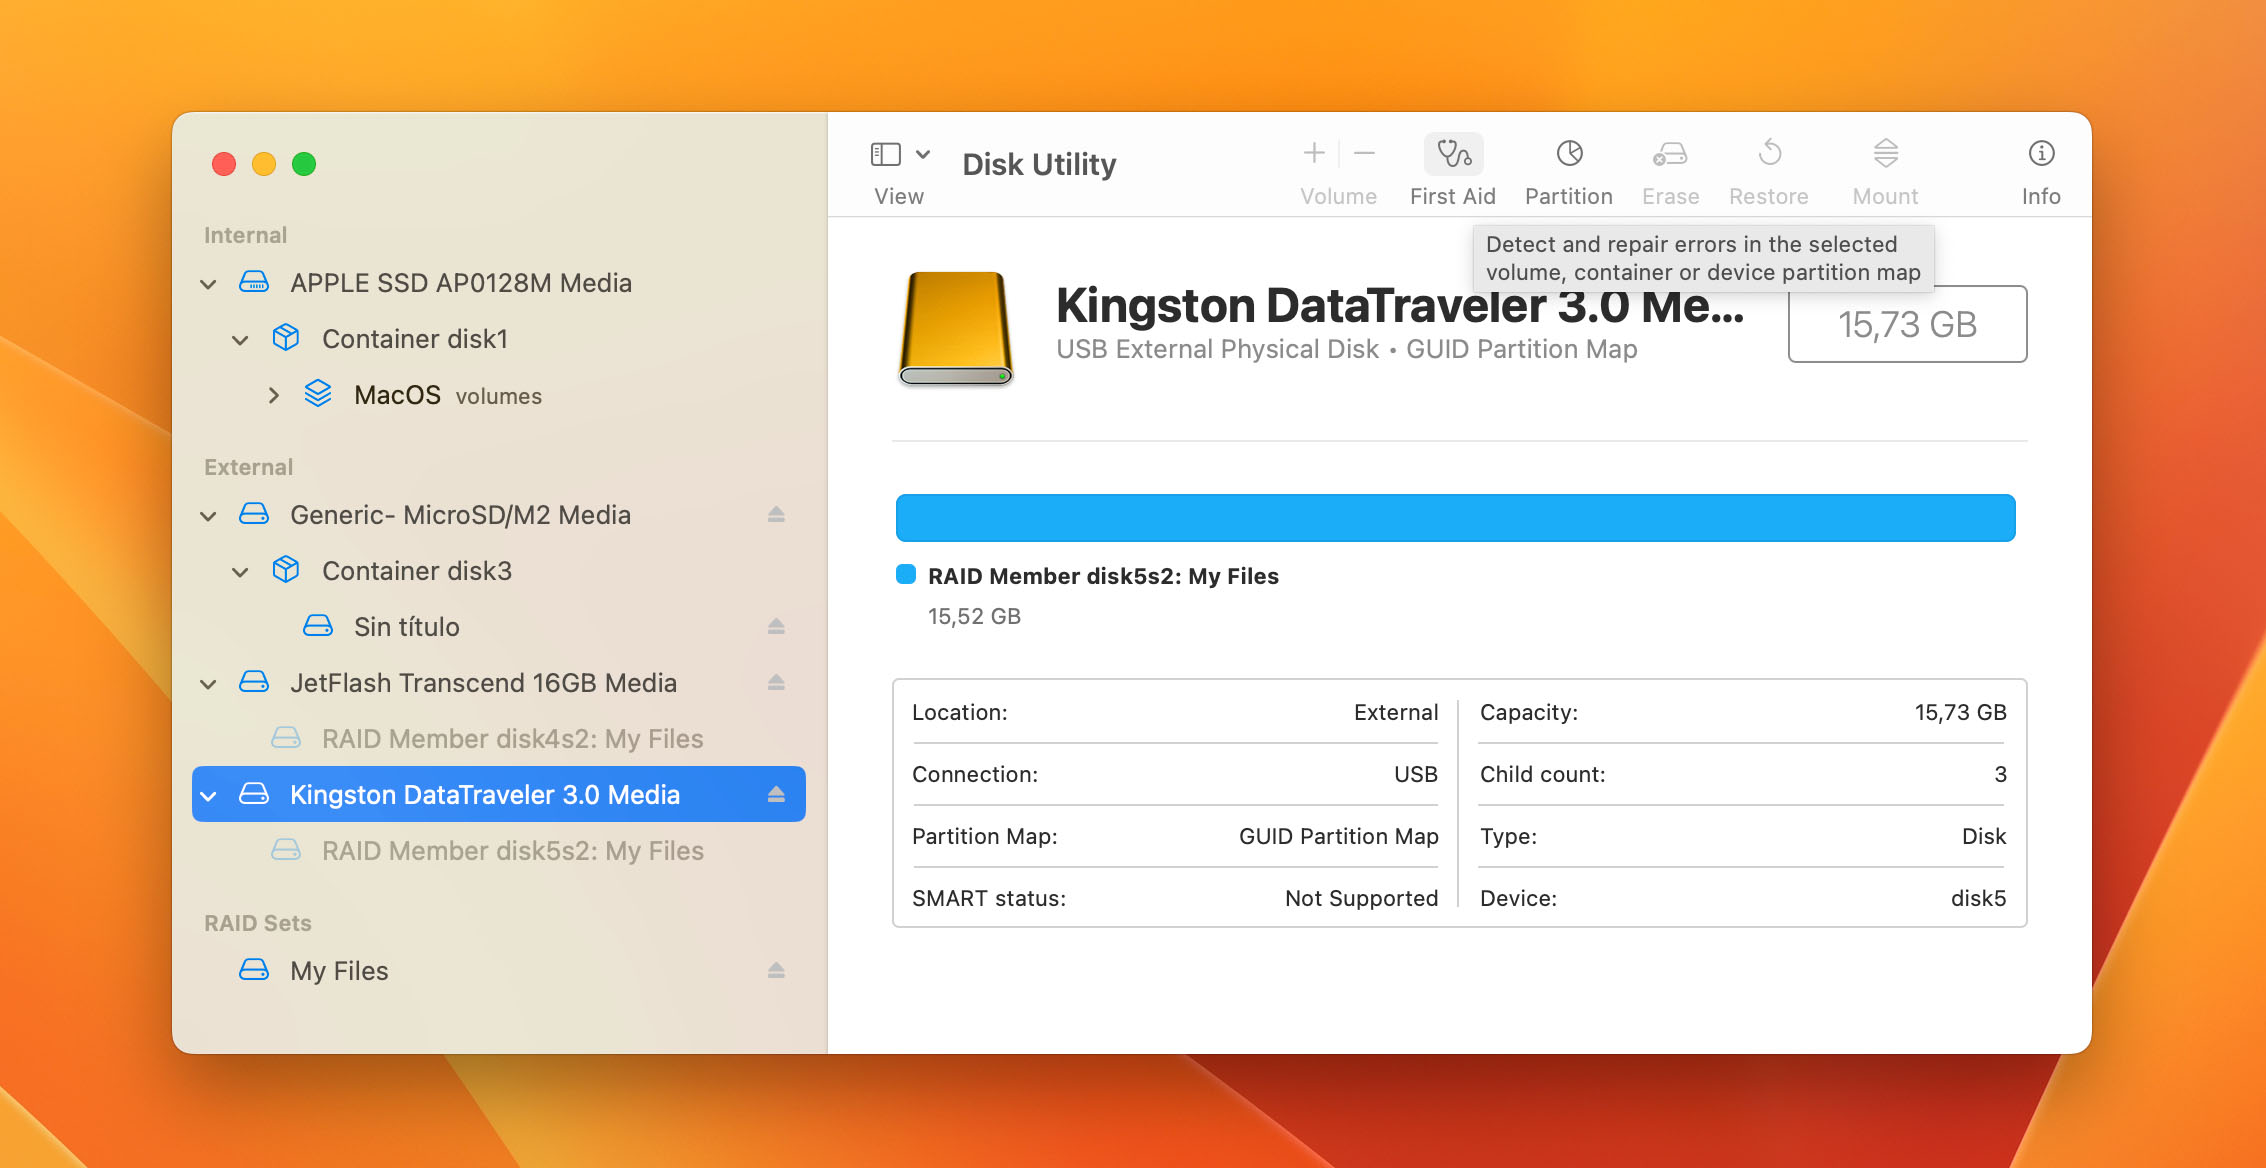
To remove a faulty disk from your RAID array using Disk Utility:
- Make sure your array is securely connected to your Mac.
- Launch Disk Utility (Finder > Applications > Utilities).
- Select the disk you want to delete from the set. Then, click the Remove button.
- Click Remove again to confirm the action.
Other Solutions to Consider for Mac RAID Recovery
Aside from the tools we’ve mentioned in this article so far, there are other RAID recovery software that can recover and even repair your RAID array. These tools can also support more advanced RAID configurations than Disk Drill and Disk Utility (which only support RAID 0, 1, and JBOD).
Our recommendations below also fully support all Mac file systems (HFS+ and APFS).
This option is useful if you want an all-in-one solution and/or use higher RAID levels – but be ready to pay for a license and endure a slight learning curve. These tools were primarily designed for technicians.
R-Studio for Mac ($79.99)
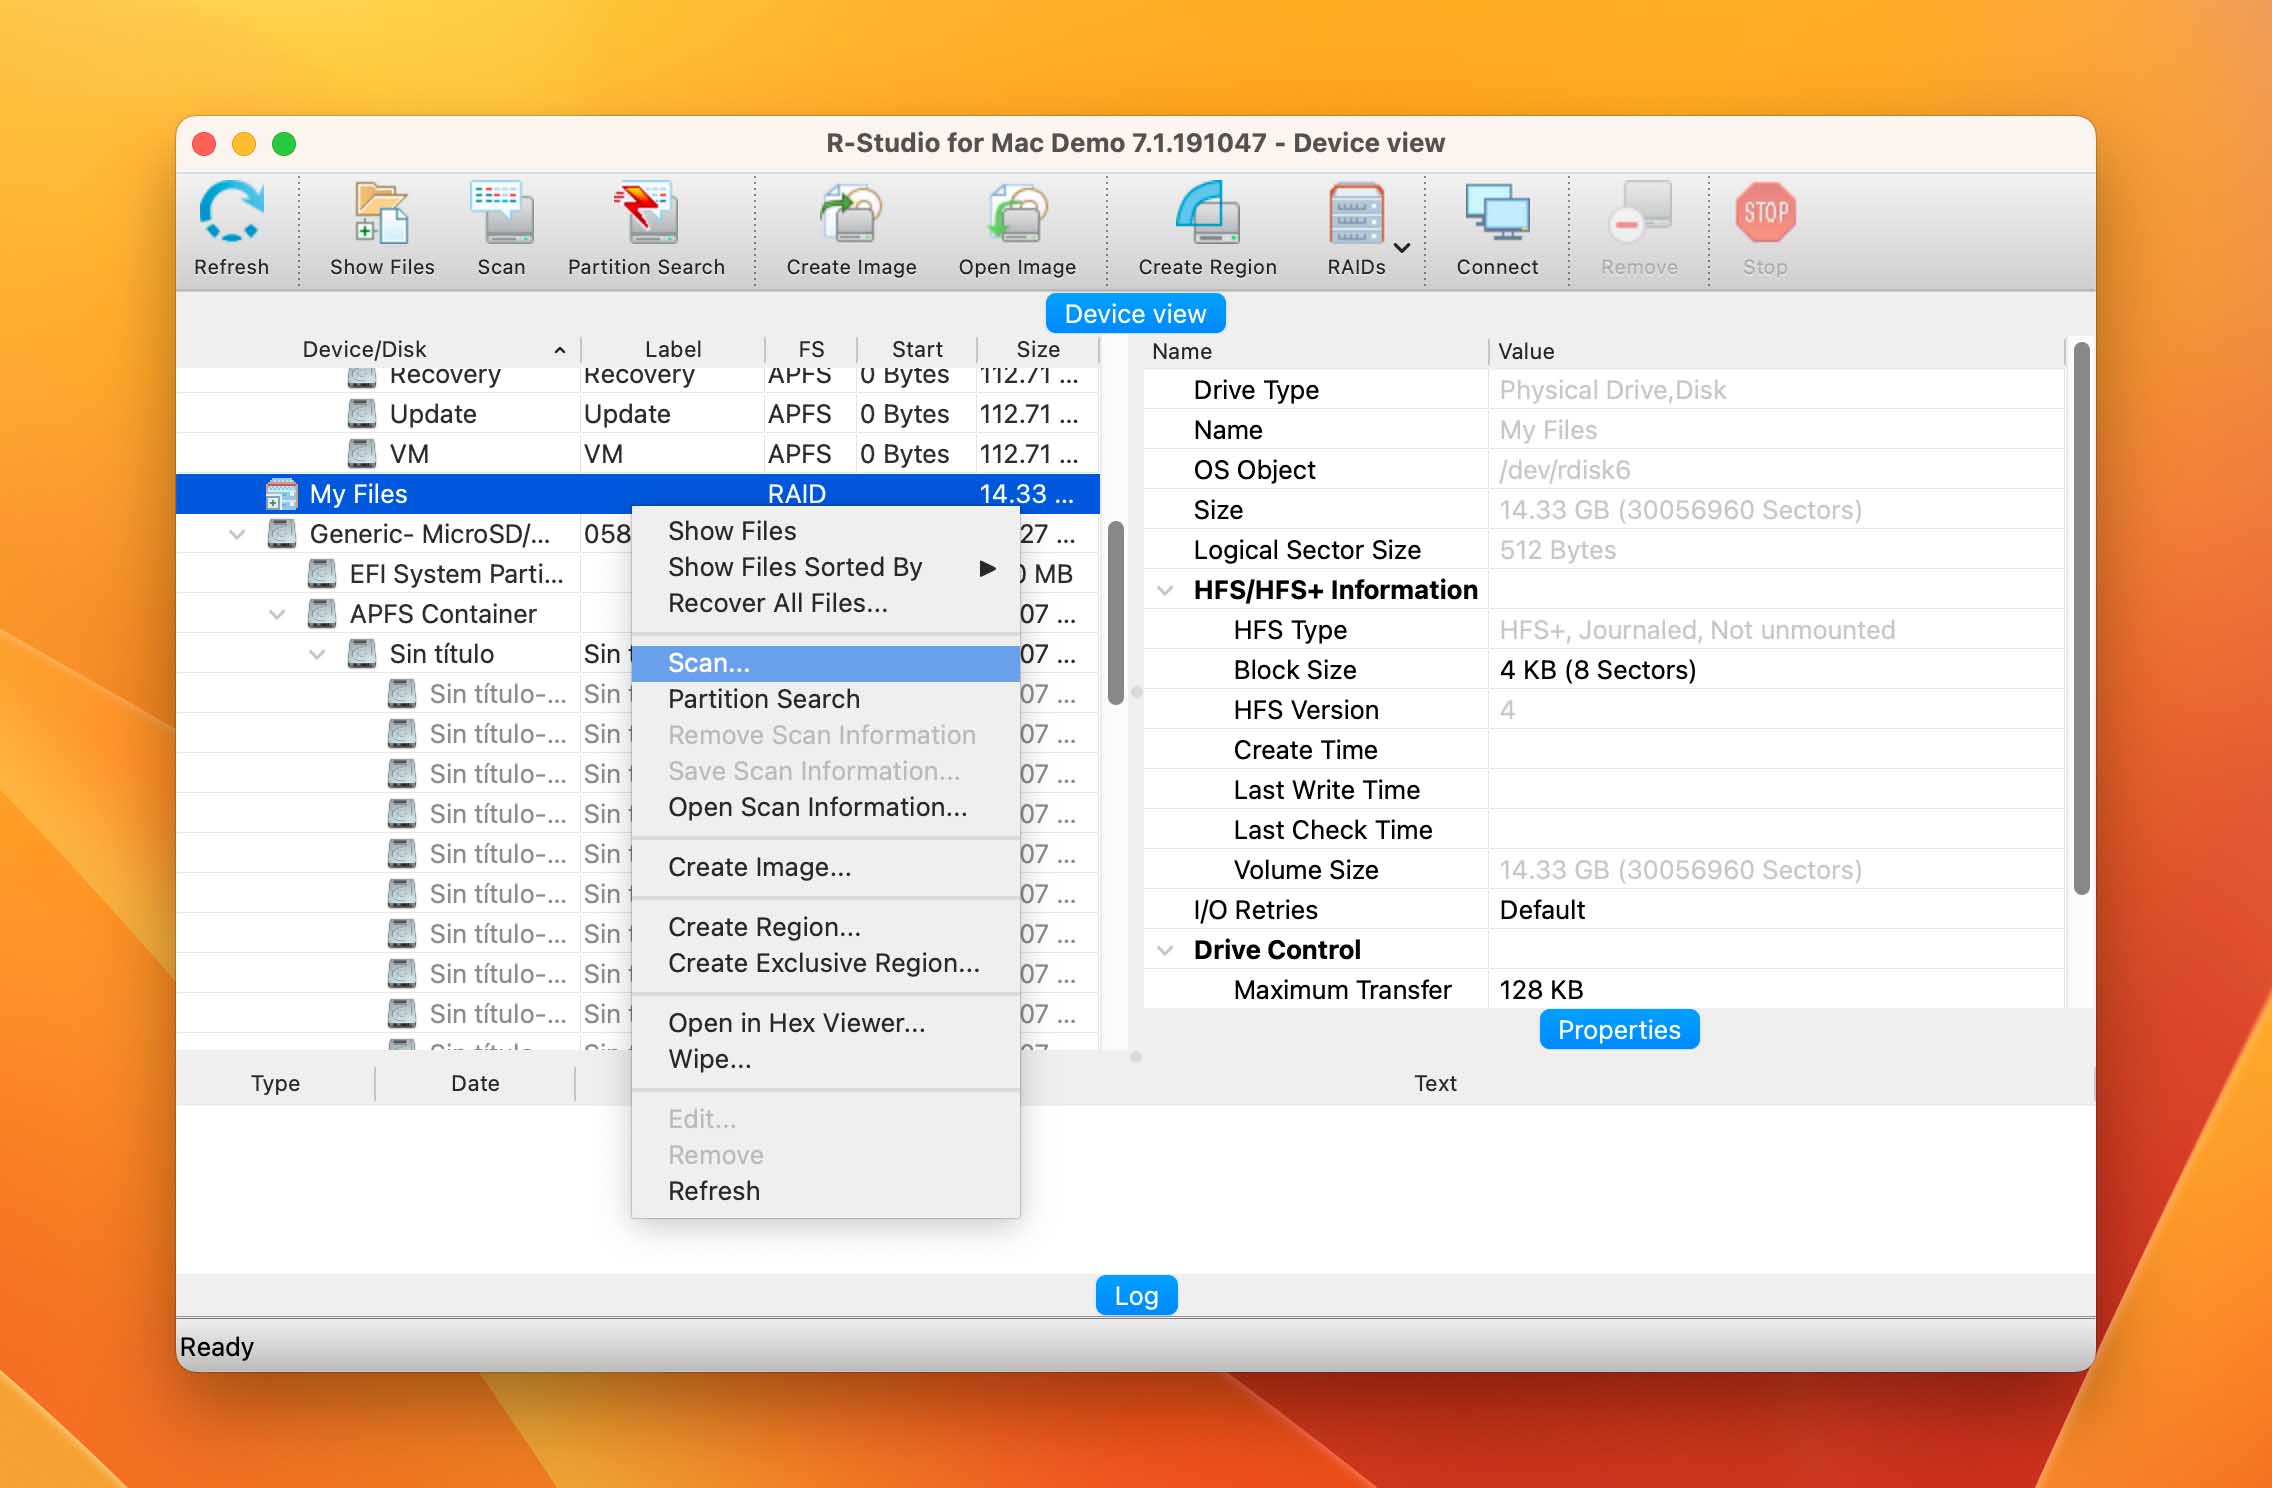
R-Studio is a well-loved data recovery software with advanced RAID recovery and repair capabilities. It recovers RAID data by reading the remaining healthy disks and uses advanced algorithms to locate and reassemble data blocks. R-Studio then uses the recovered data to rebuild the RAID array.
R-Studio is especially useful in case of errors because it can fix corrupted hard drives and other logically damaged devices.
It supports RAID 0, 1, 4, 5, 6, 10, 1E, 5E, 5EE, and 6E, as well as nested, hybrid, and custom RAID configurations.
We think R-Studio deserves its title of “crowd favorite”, but if you want to learn more about the app’s features and see it in action, read our in-depth R-Studio review.
UFS Explorer RAID Recovery ($139.95)
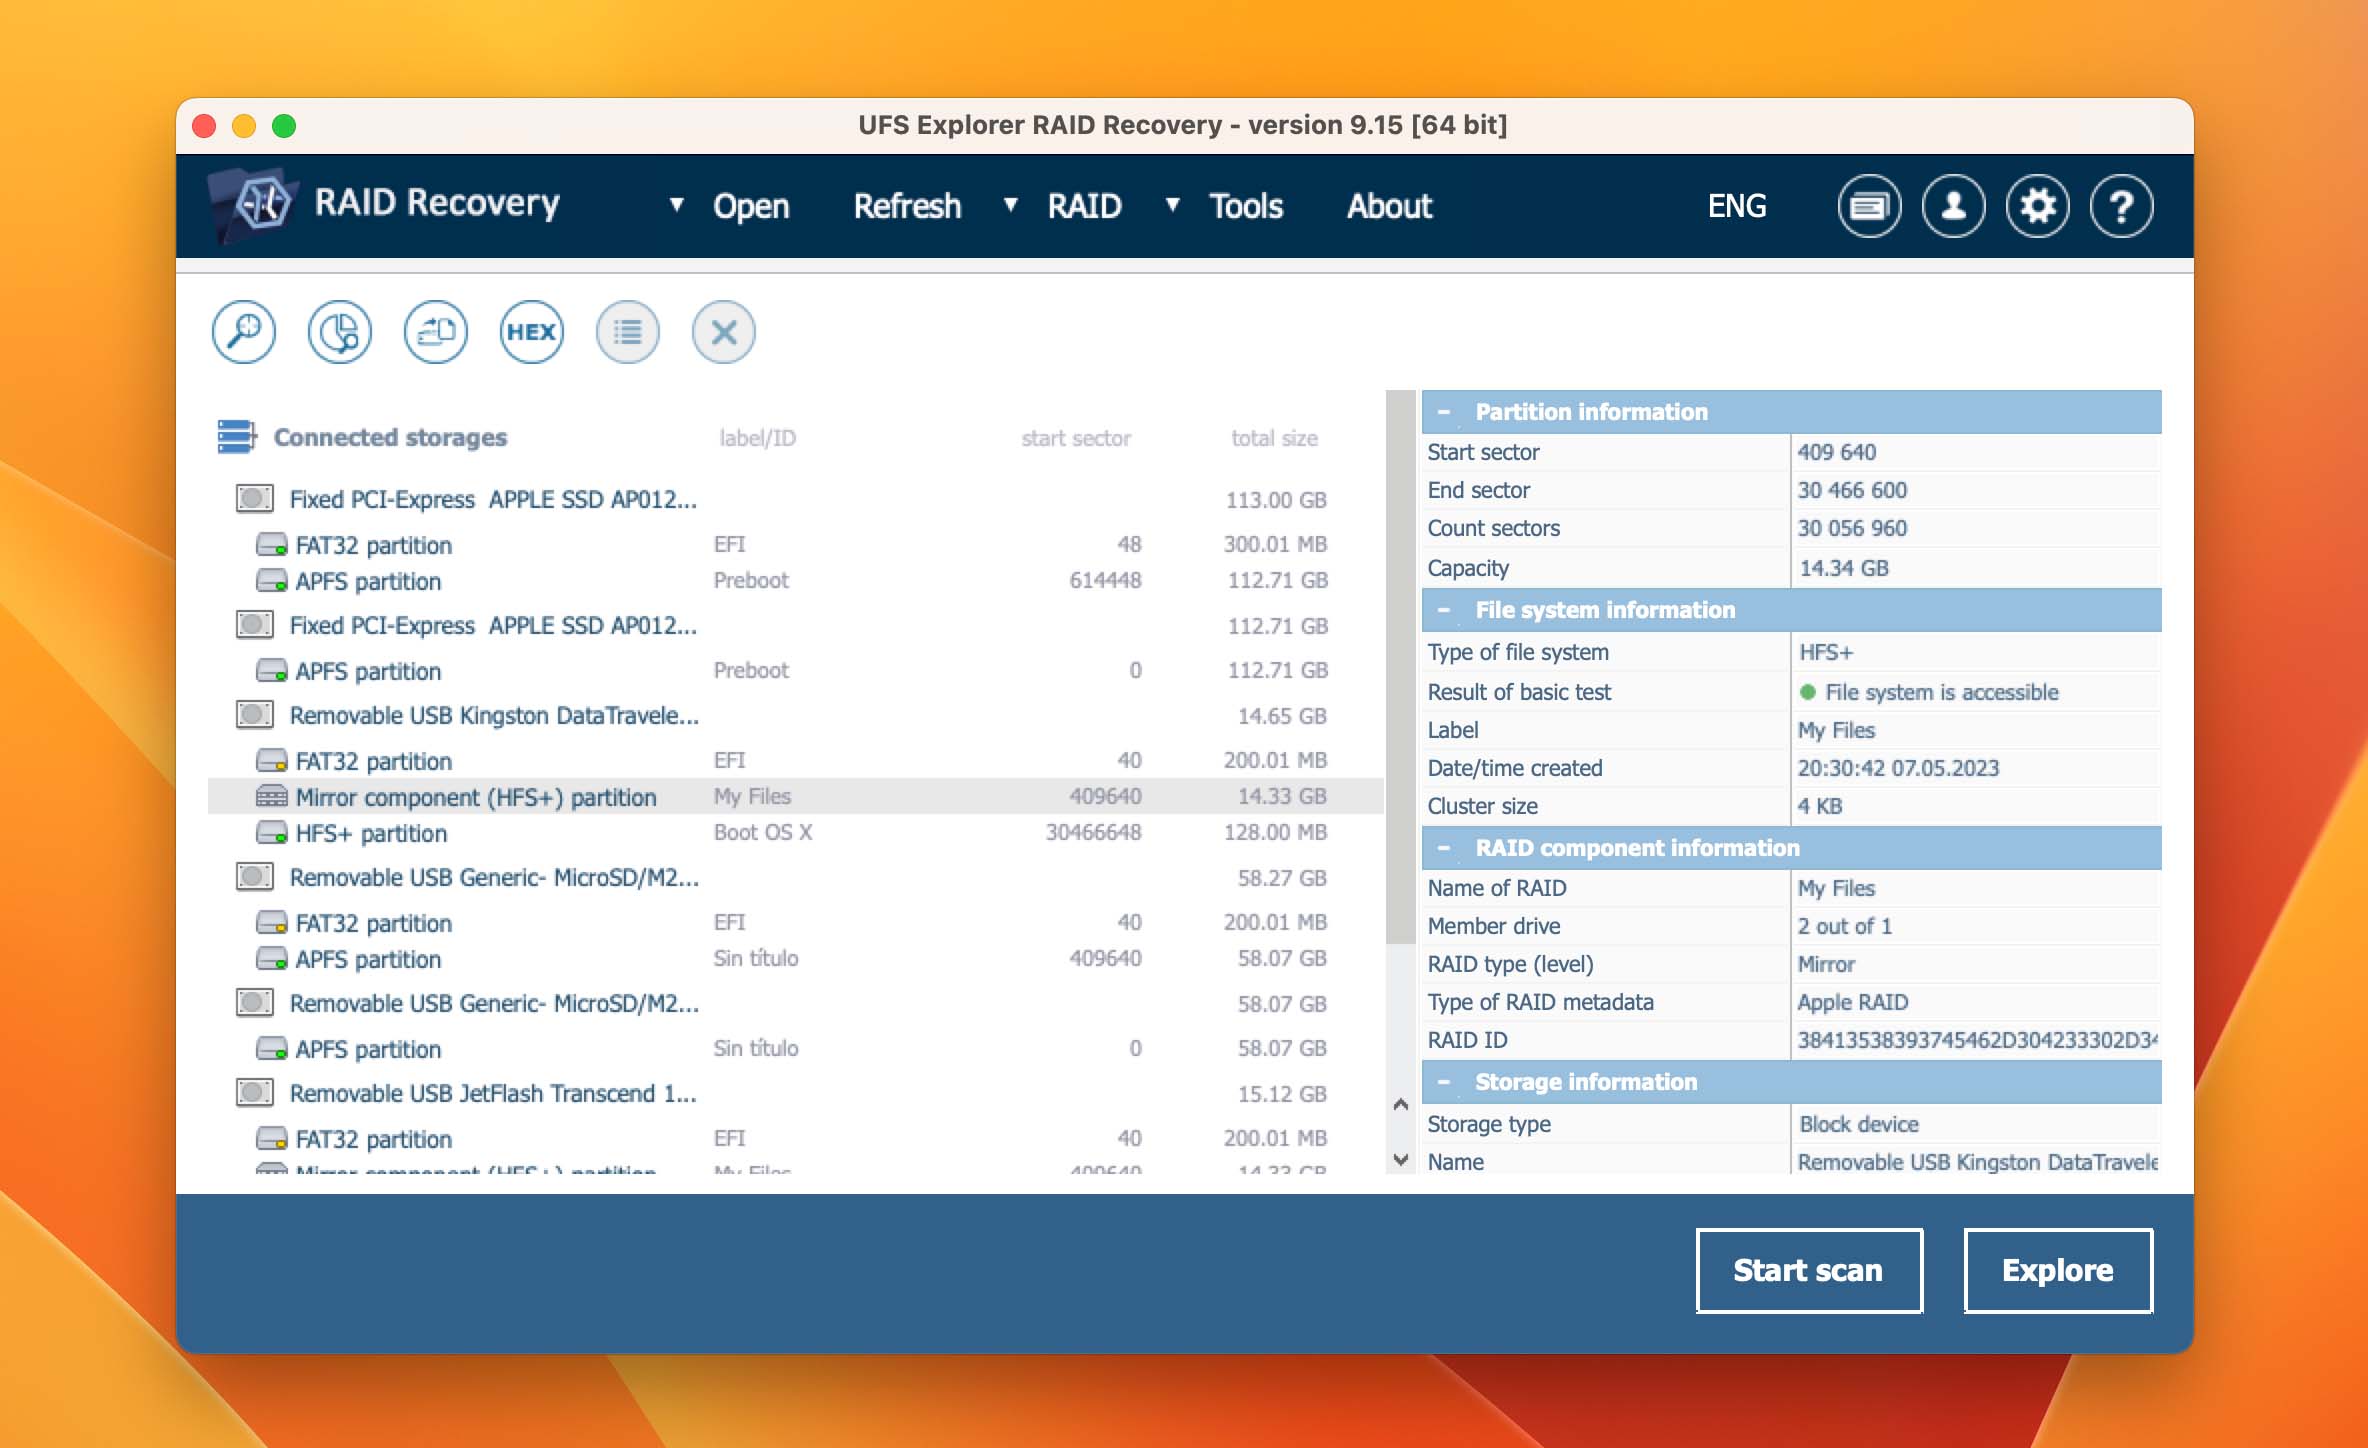
UFS Explorer uses similar techniques as R-Studio but uses its own proprietary algorithm to recover your RAID data and reconstruct the array. While more expensive, UFS Explorer has a much better graphical user interface than R-Studio.
UFS Explorer also supports more RAID configurations than R-Studio, including RAID 0, 1E, 3, 5, 6, 7, 10, 50, 60, 50E, and more.
For more information on this app’s massive list of supported RAID levels and a breakdown of its many other features, check out our UFS Explorer review.
Always make sure to check each developer’s website to find out if your specific RAID setup is supported as their Apple RAID recovery tools are often updated. If you want to check out even more tools before making a decision, we reviewed the best RAID recovery software on the market.
FAQ
Can you recover data from a RAID drive?
Yes, you can recover data from a RAID drive! However, you need to use data recovery software that specifically provides RAID support. You can also only recover files that haven’t been overwritten by new data.
How do I restore data from RAID drives?
To restore data from RAID drives:
- Download, install, and launch Disk Drill.
- Select your RAID array and click Search for lost data.
- Click Review found items once the scan is complete.
- Select the files you want to restore and click Recover.
- Choose a save location and click Next.
What is the best Mac RAID recovery software?
Our top 3 recommendations for the best Mac RAID recovery software are:
- Disk Drill – Supports RAID 0, 1, and JBOD, as well as other types of drives. Powerful, affordable, and super easy to use.
- R-Studio – Supports higher RAID levels and more advanced configurations, such as nested and hybrid RAID setups. Affordable but a bit complicated.
- UFS Explorer – Supports even more RAID configurations than R-Studio (check their website for more details). It’s also better-looking than R-Studio, but more expensive.
This article was written by Alejandro Santos, a Staff Writer at Handy Recovery Advisor. It was also verified for technical accuracy by Andrey Vasilyev, our editorial advisor.
Curious about our content creation process? Take a look at our Editor Guidelines.