Cloud storage is a valuable and efficient way to access data, including photos, videos, and other important documents, across all your Apple devices.
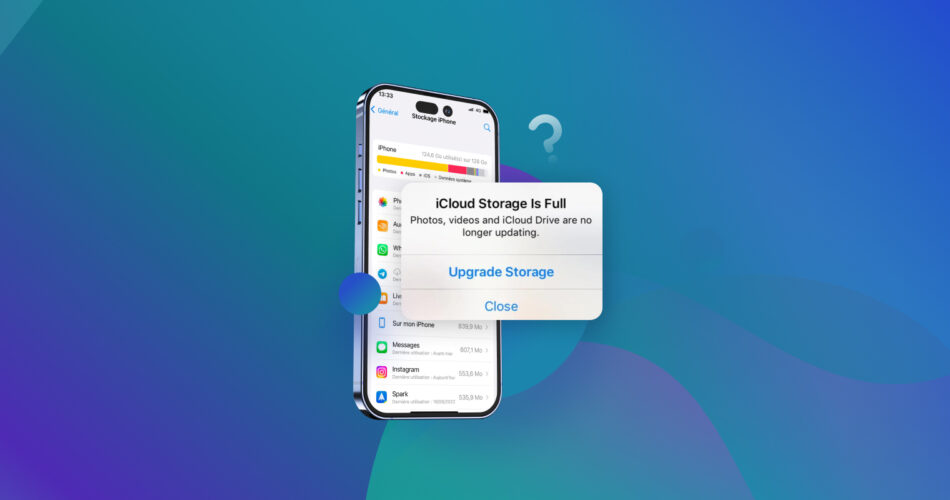
But if you’re encountering an unusual problem where iCloud storage says full but isn’t, all the efforts to keep your iCloud clean would seem pointless. So what should you do if you are persistently having this issue?
In this guide, we’ll give you all the common reasons why you may be encountering this problem, along with practical solutions to help you fix the issue.
Why Does iCloud Storage Says Full But It Isn’t?
Before providing any solution to resolve the ‘iCloud Storage Is Full But It’s Not’ problem, you need to understand why this is happening in the first place.
It’s important to know that even if you don’t upload files manually to iCloud, there are still some app data and other files that can take up a large amount of space on it.
Along with that, there are other factors at play when iCloud says full but isn’t. Here’s a quick breakdown of some of these underlying causes:
- Temporary Glitches. Some iCloud storage issues can simply be caused by temporary glitches in the server or the system, which can include incorrectly reporting the amount of storage left. These issues often resolve themselves, though, so a solution can just be waiting for a while and refreshing to see if the storage information is now correct.
- A Large Amount of Data in the Recently Deleted folder. iCloud retains all deleted files in the Recently Deleted folder for up to 30 days before permanently removing them. Files in this folder still occupy space unless you permanently delete them immediately. To fix this, empty the Recently Deleted folder on your iCloud and check again if the storage has been cleaned up.
- Extensive Amount of Data Backups. If you have multiple devices using the same iCloud account, iCloud can perform automatic backups based on your current settings. Consider checking your settings and deleting older backups to see if they are the ones filling up your storage.
- Pending Uploads. Any pending uploads to the iCloud can contribute to the storage holdup. This can happen when you set your device to sync with the cloud. See if any data is still pending upload to the cloud, and allow them to finish uploads to correct your iCloud storage information.
Once you understand the possible factors that can contribute to your storage fill-up, you can now try to troubleshoot when your cloud storage is not full but says it is and organize your file storage.
How to Fix the ‘iCloud Storage Says Full But Isn’t’ Issue
Resolve the ‘iCloud storage is full but it’s not’ issue effortlessly with our user-friendly, easy, step-by-step solution you can do by yourself. To get started, simply follow the steps outlined below:
Step 1: Check Your iCloud Storage Usage
Make sure you’re keeping track of your iCloud storage by assessing its contents for the most space-consuming files. By doing this, you can get a clearer idea of why your iCloud says it’s full.
Here’s how to check your iCloud storage on an iPhone:
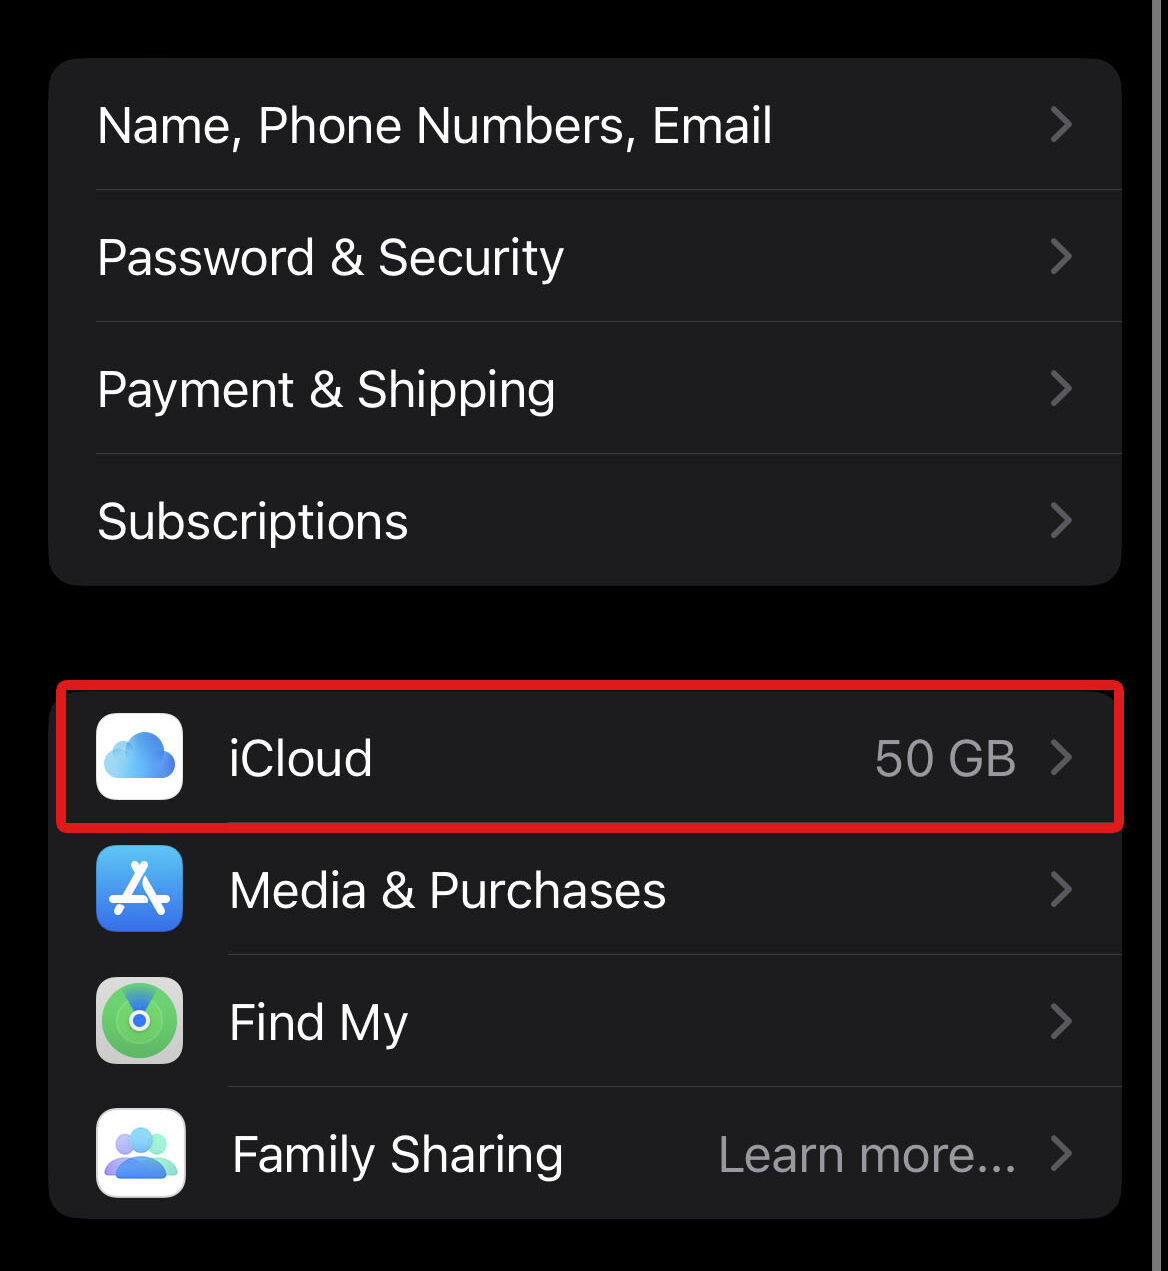
- Go to your phone’s Settings app.
- Tap your Apple ID at the upper part of the screen and select iCloud.
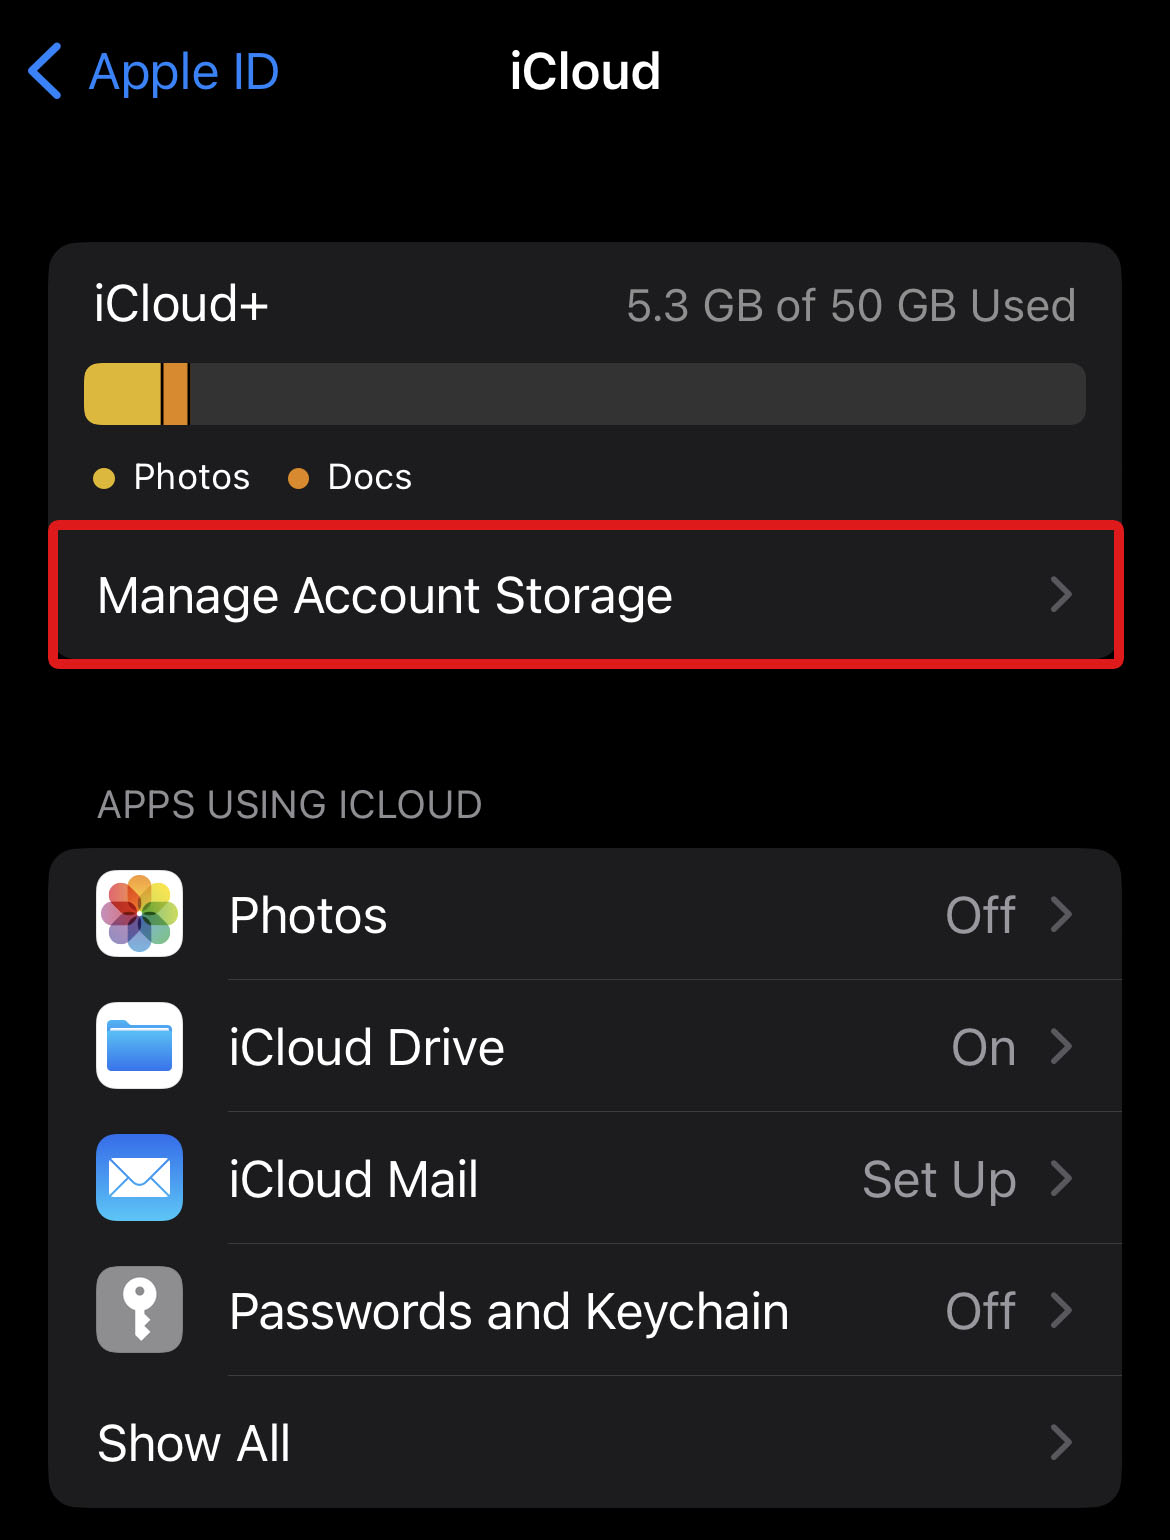
- Next, tap Manage Account Storage under iCloud Storage info.
You can also do this via iCloud.com by going to iCloud Settings and tapping on the Your Storage tab. Checking out your iCloud storage can also help clear your iPhone storage, as you know which files you can delete from the cloud.
Step 2: Re-login to Your iCloud Account
Logging out and logging back into your iCloud account can refresh your session, solving possible glitches in your iCloud storage.
Here’s how you can do this:
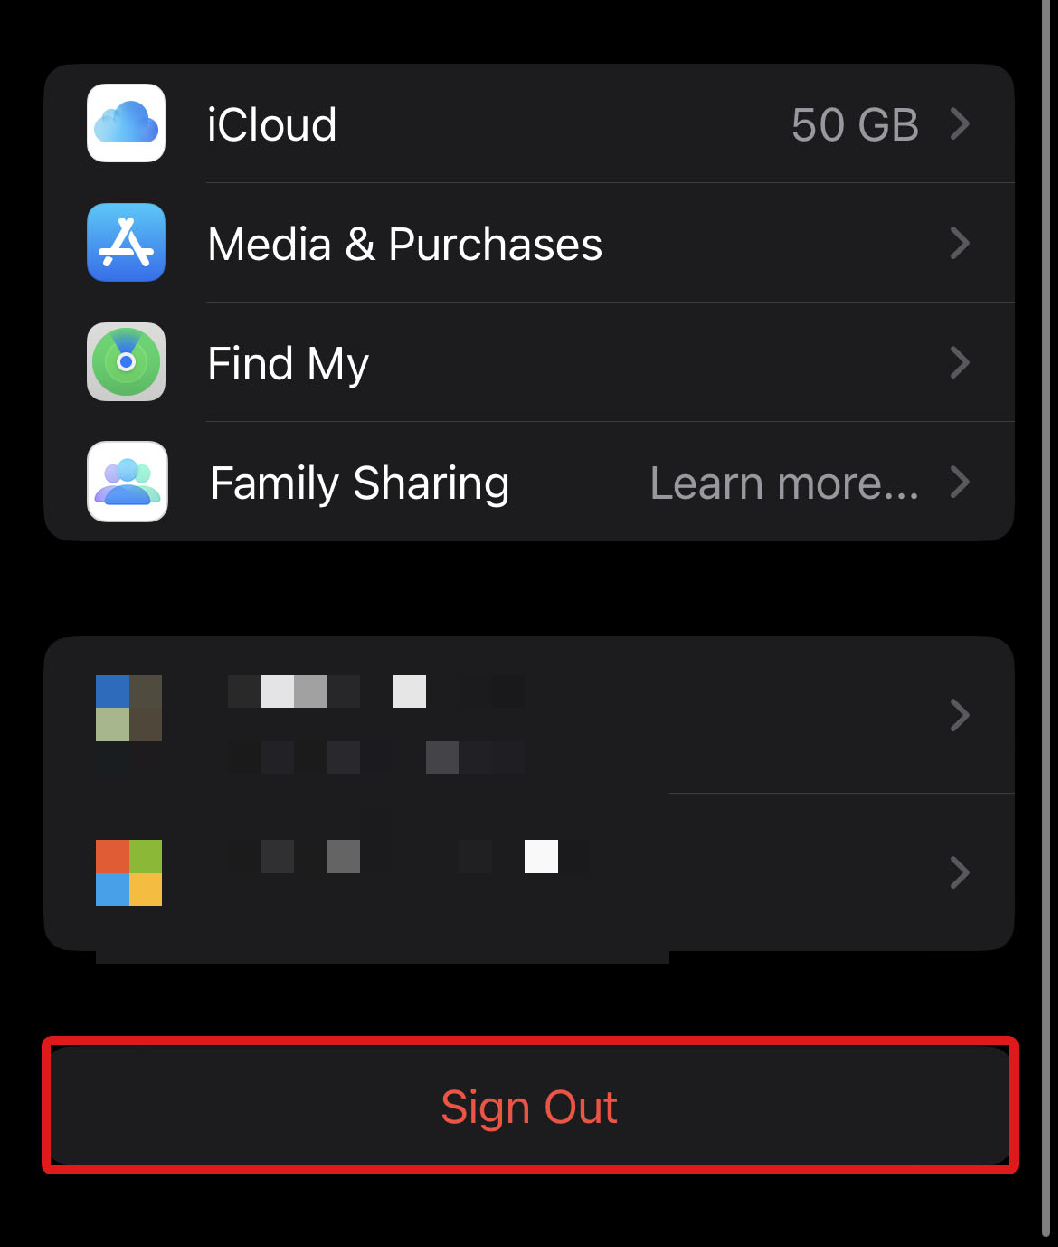
- To get started, open the Settings app. Then, tap on your Apple ID.
- Scroll down to the bottom and select Sign Out.
- Choose which data you’d keep a copy of on your device and tap Sign Out on the top-right corner of the screen.
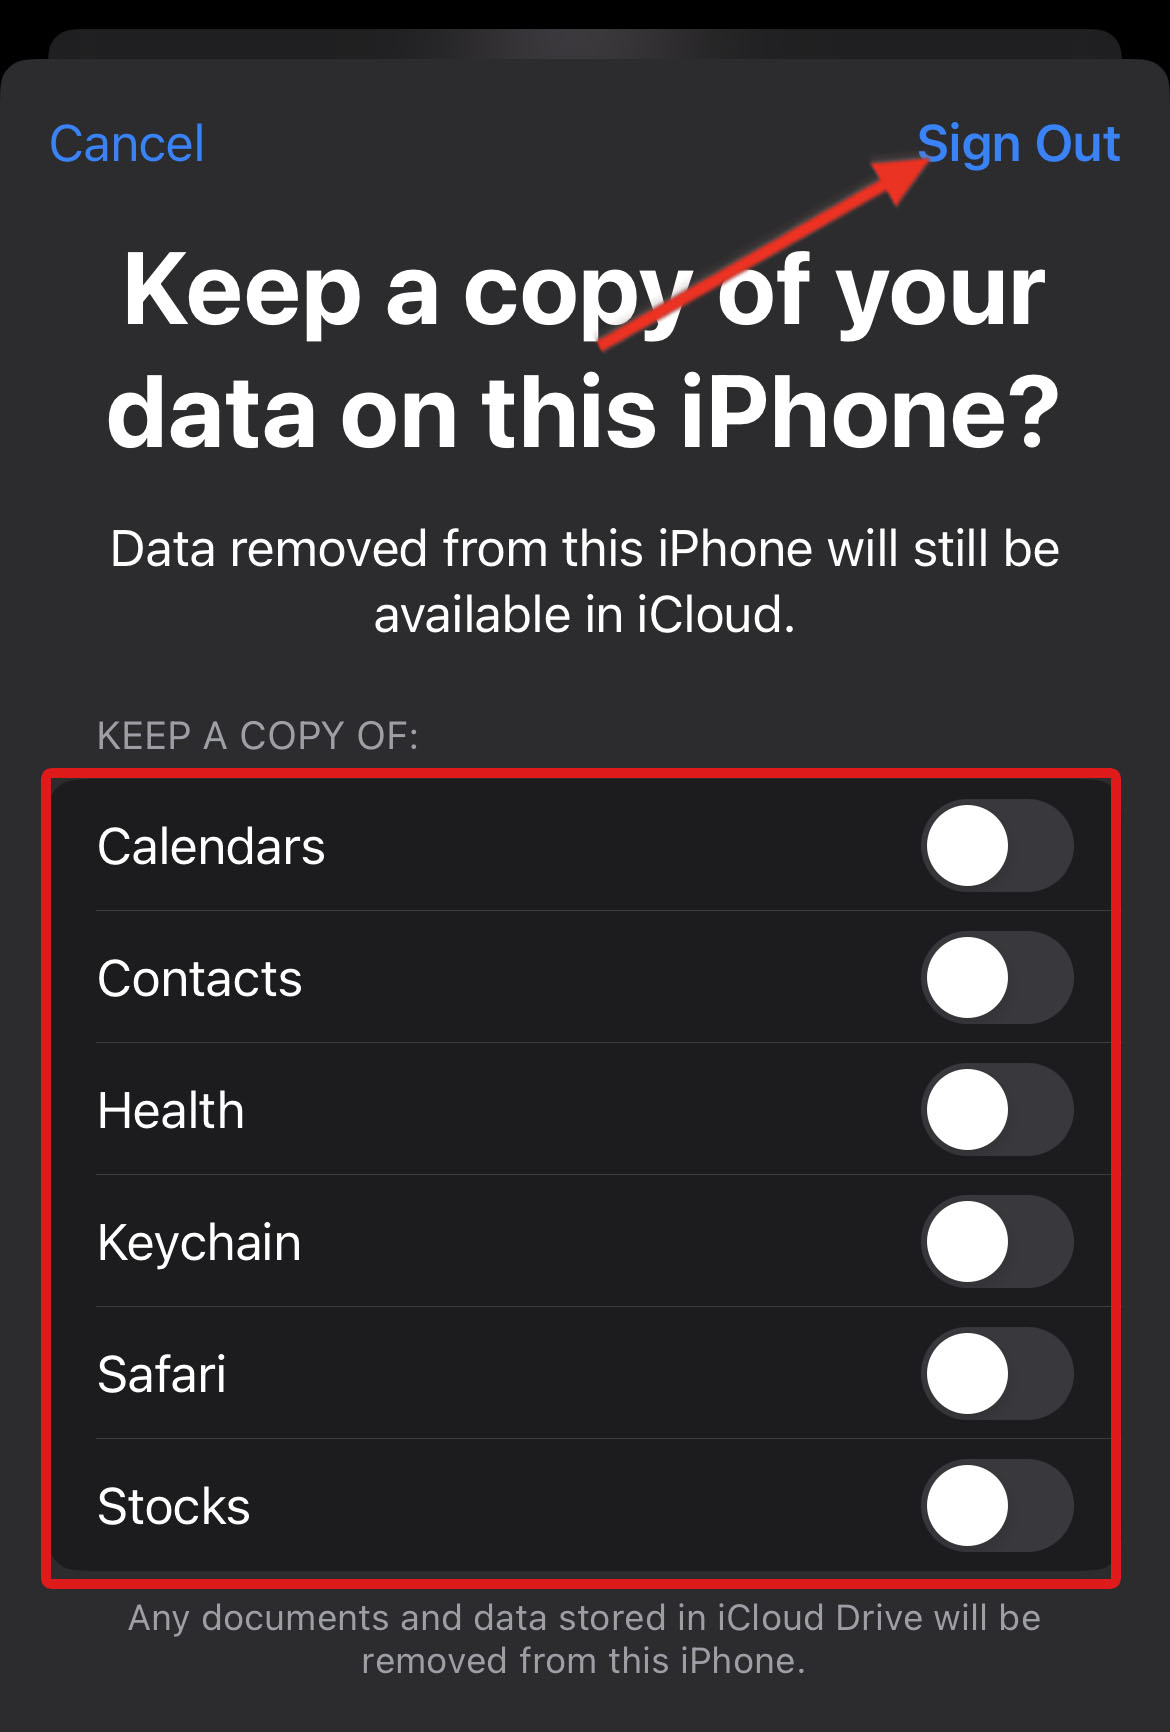
- Confirm signing out by typing your Apple ID password.
- Now, re-enter the same Apple ID and password to log back in.
Re-logging into your iCloud can potentially solve the ‘iPhone storage full but not iCloud’ issue by refreshing authentication and updating the iCloud storage status. But if doing so does not fix your iCloud storage information, proceed to the next step.
Step 3: Reduce the Amount of Data You Back Up
Managing your current backup settings is another effective way to regain a part of your iCloud storage. Double-check and remove all unnecessary apps that take up a large amount of space on your iCloud storage.
Here’s a quick guide on how to access your backup settings on an iPhone:
- Open the Settings app.
- Tap your Apple ID on the upper part of the screen and select iCloud.
- Tap Manage Account Storage (or Manage Storage, depending on your iOS version).
- Tap Backups. Then, select the device you are backing up.
After checking the backup information on your device, select the apps you don’t want to back up anymore. This should free up space in your iCloud storage.
Step 4: Manage Your Photos
If you’re one to utilize the iPhone’s camera capabilities, you’ll likely notice that your iCloud storage gets clogged up with a lot of photos first. This can be the reason why Photos says iCloud storage is full but it’s not, which is why we will address managing your photos first.
Let’s explore some straightforward methods to manage your photos from your iPhone:
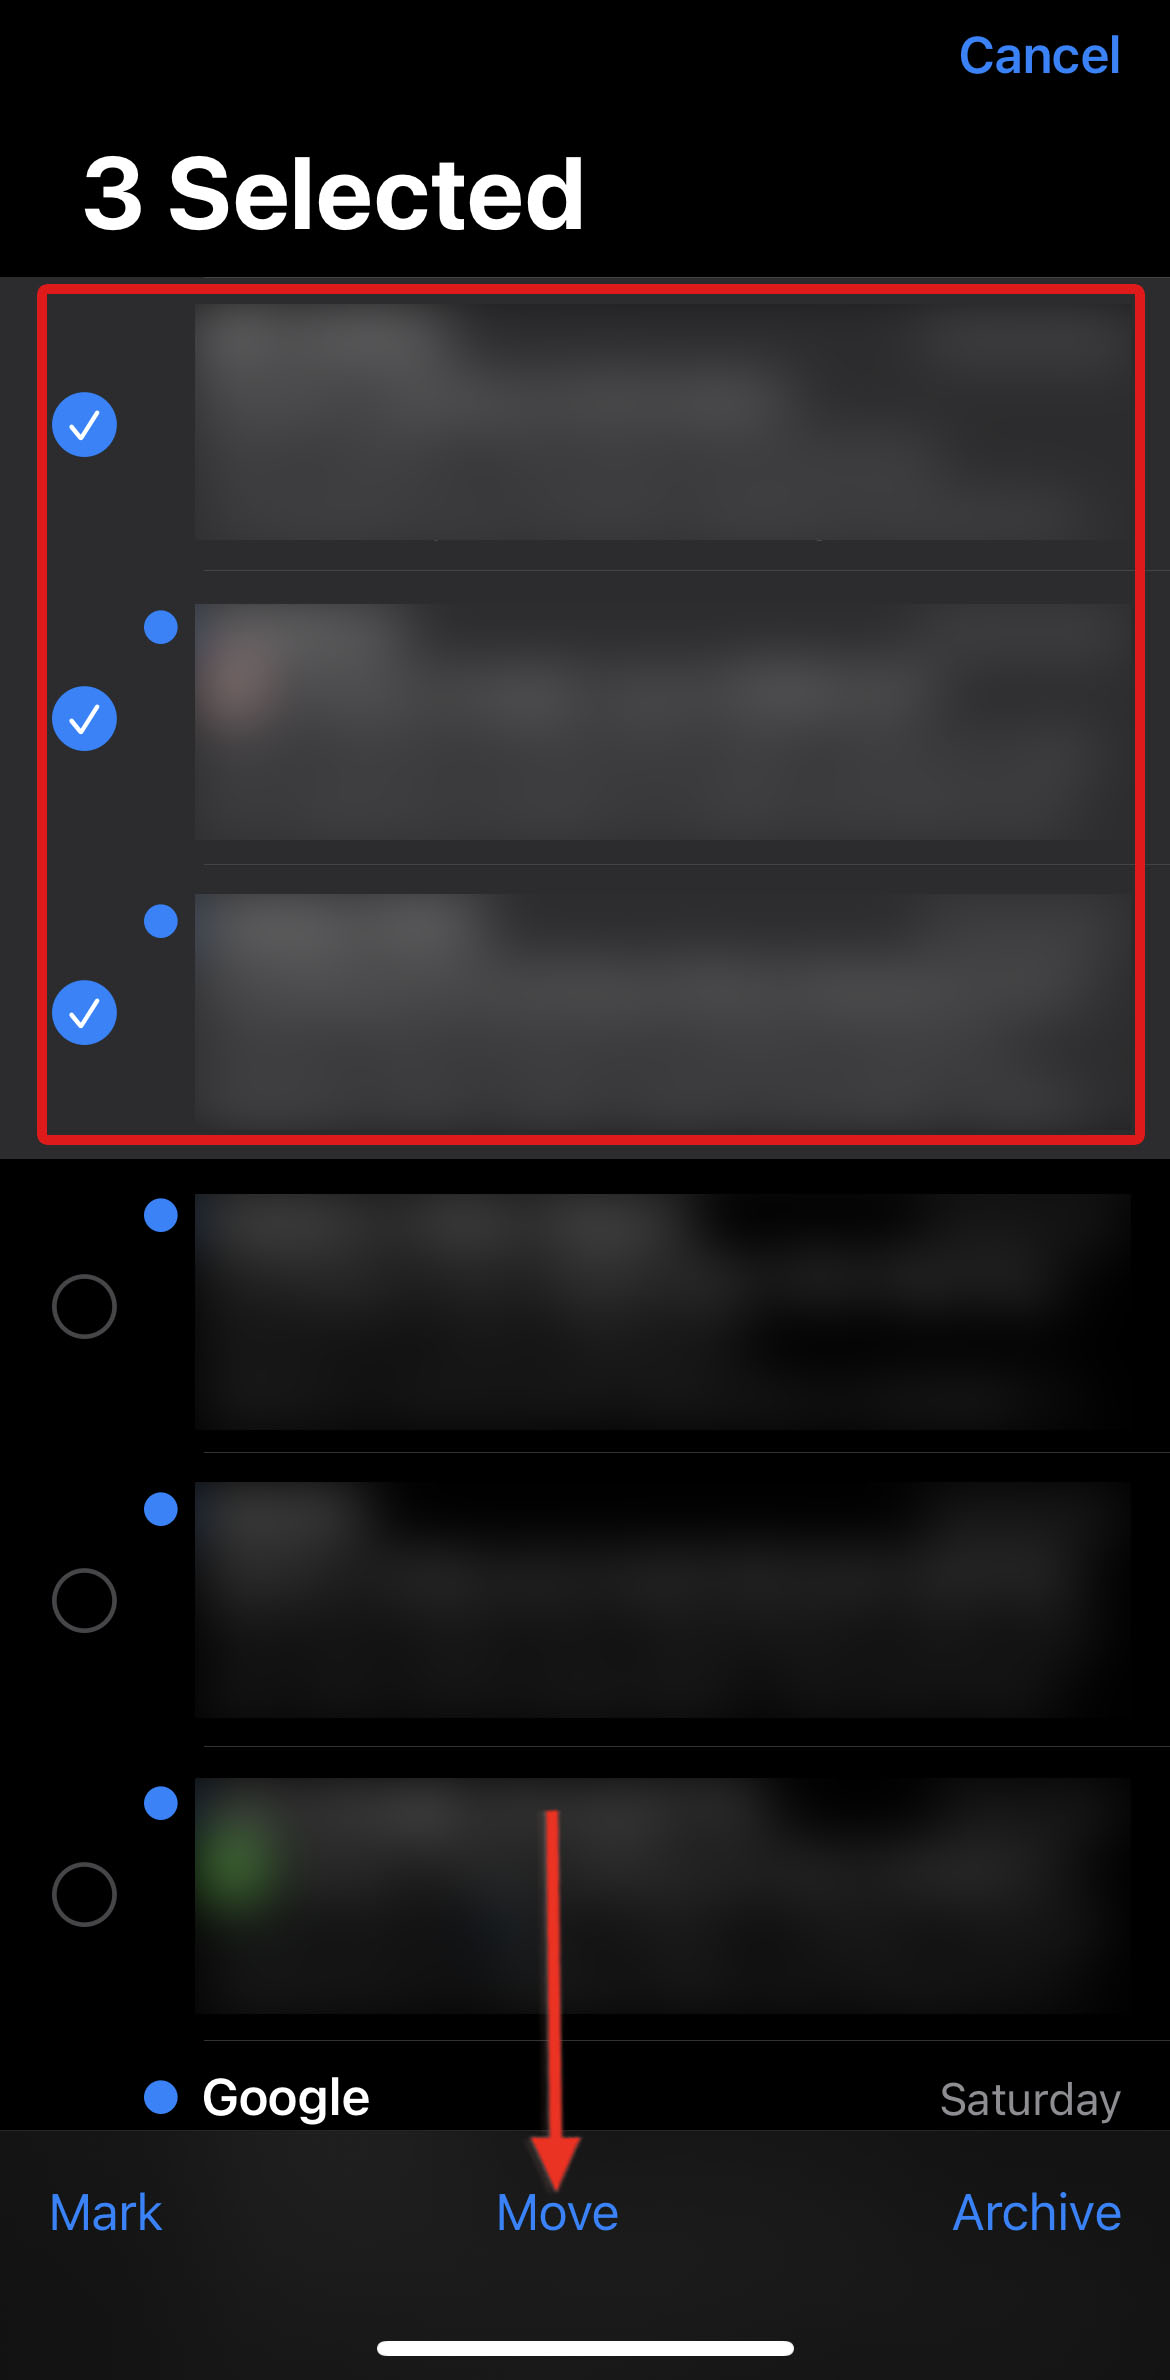
Erase Your ‘Recently Deleted’ Album
As mentioned earlier, the Recently Deleted album acts as temporary storage for all the photos and videos removed from your iCloud. Emptying this album is an effective way to get more storage for iPhone for Photos in the cloud.
To get started, simply follow the steps below:
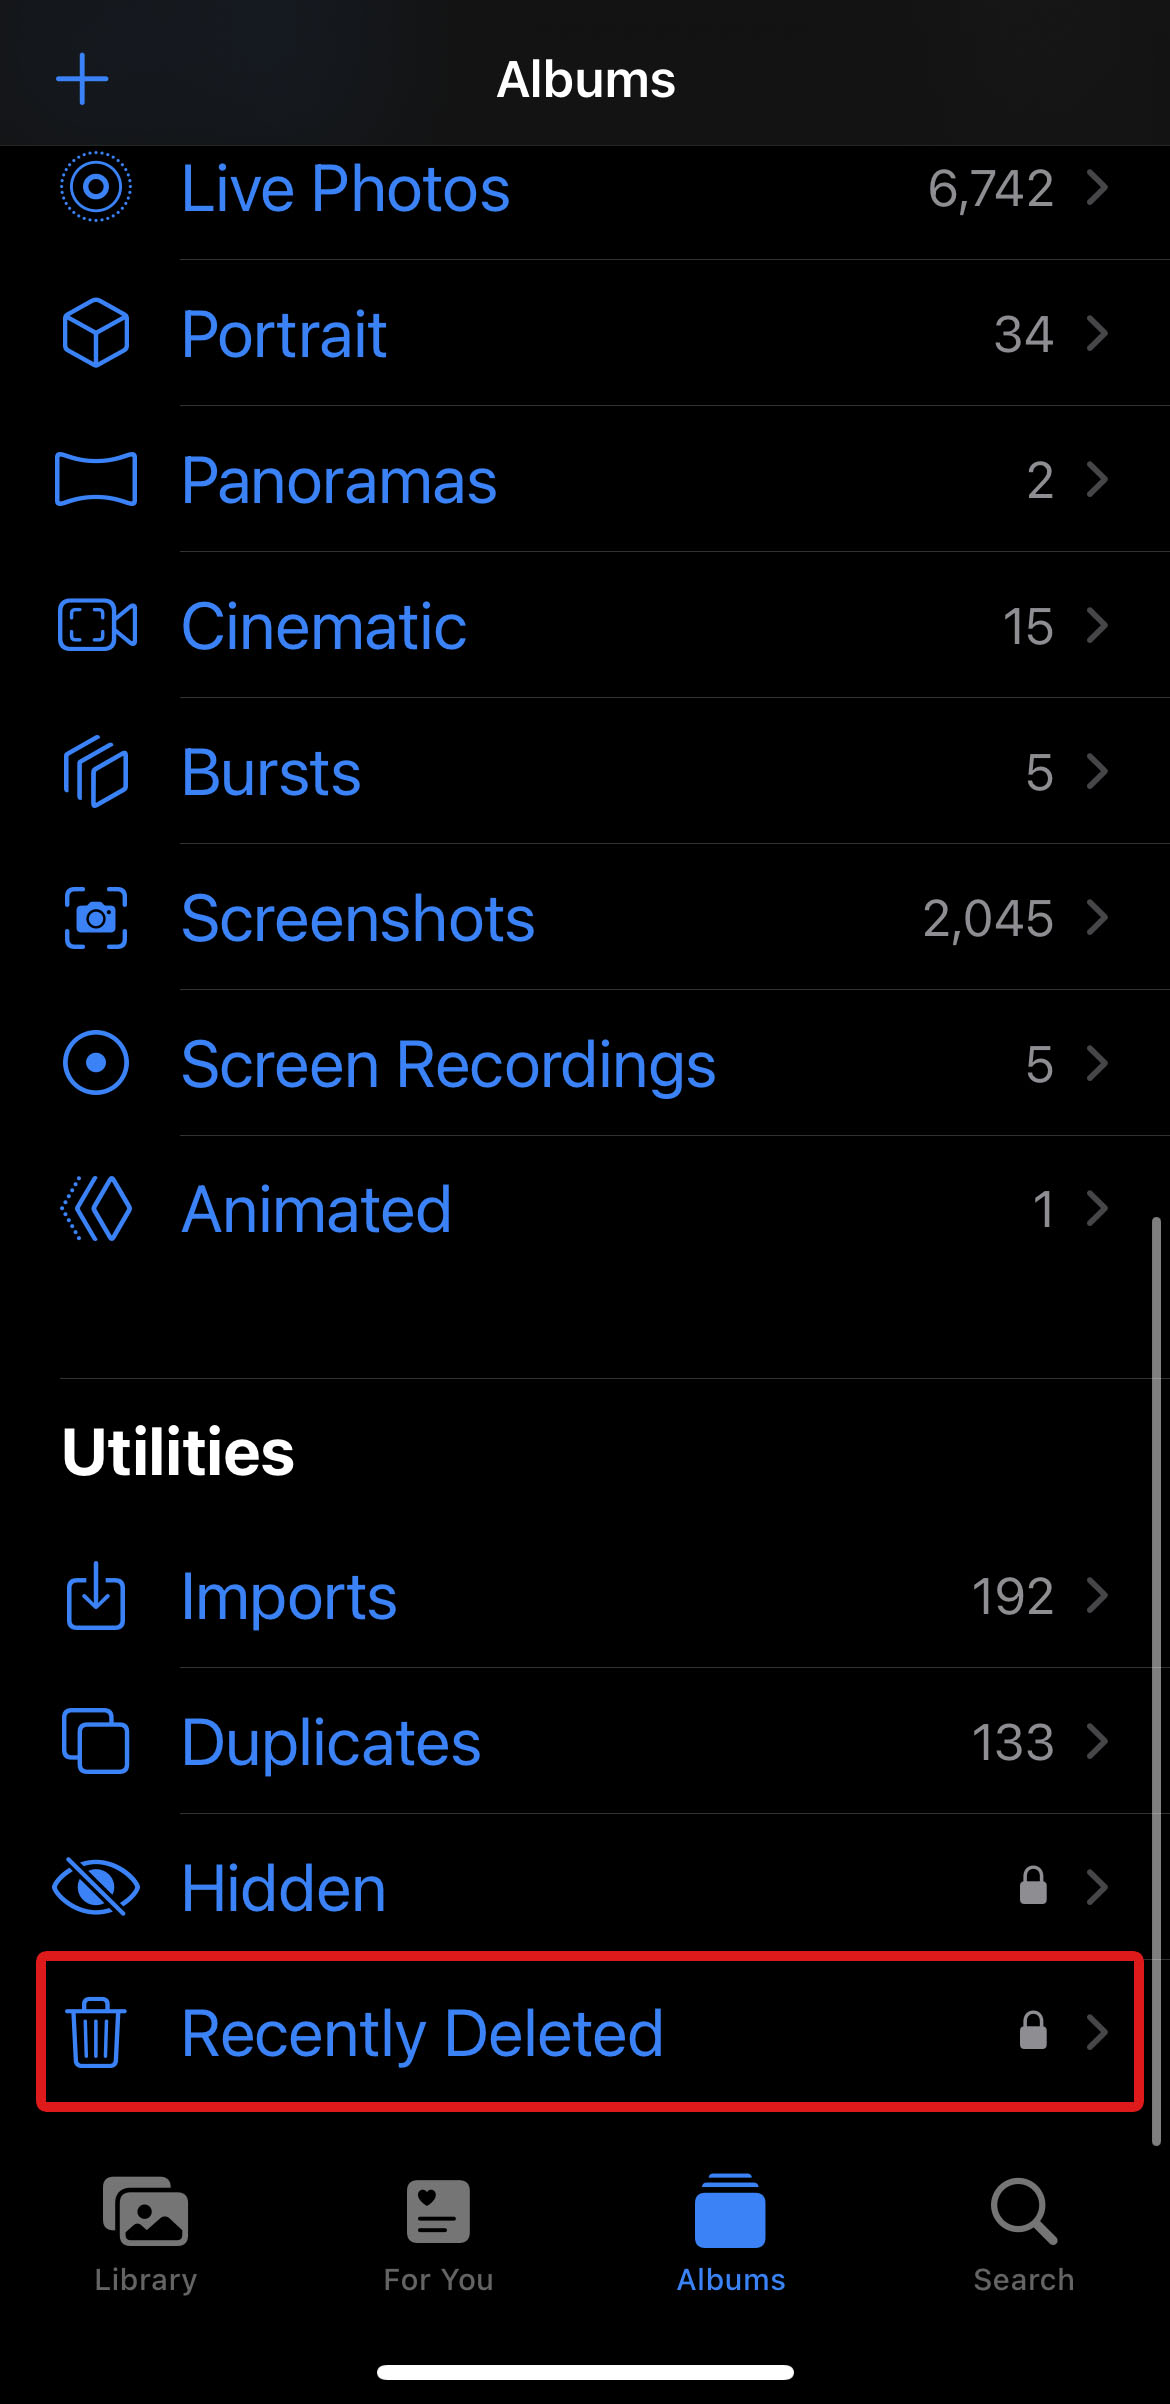
- Open the Photos app.
- Navigate to the Albums tab at the bottom part of your screen and scroll down the album list to find the Recently Deleted album.
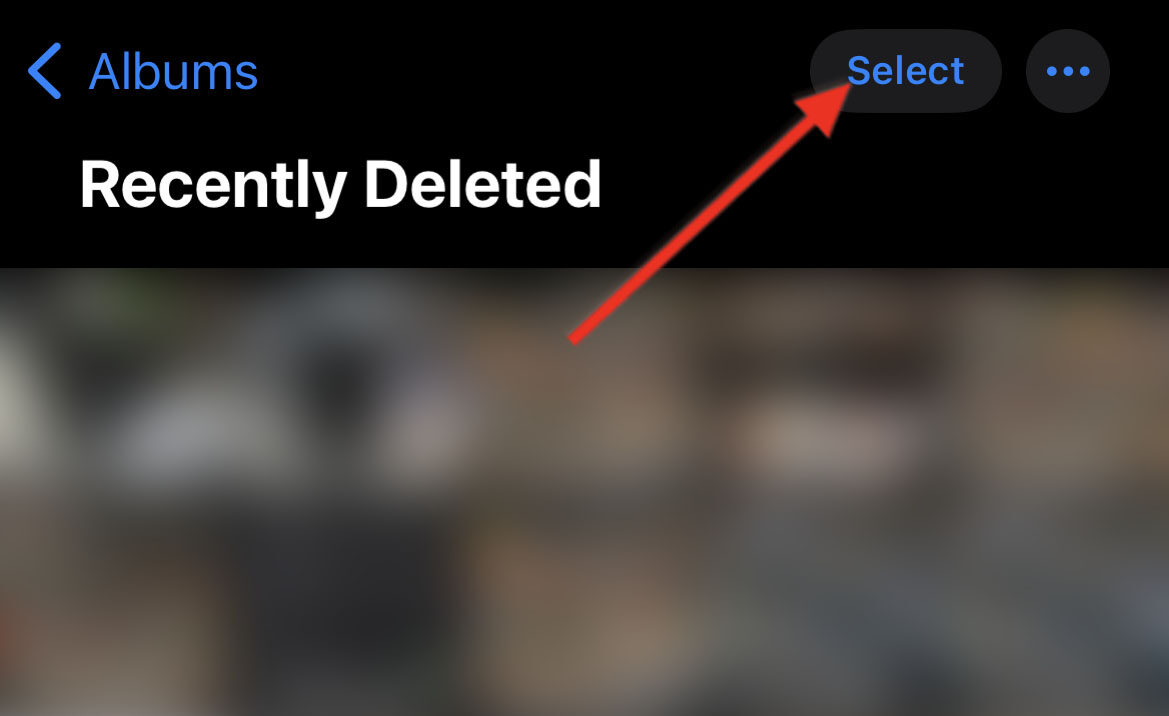
- Next, tap Select in the upper-right corner of your screen.
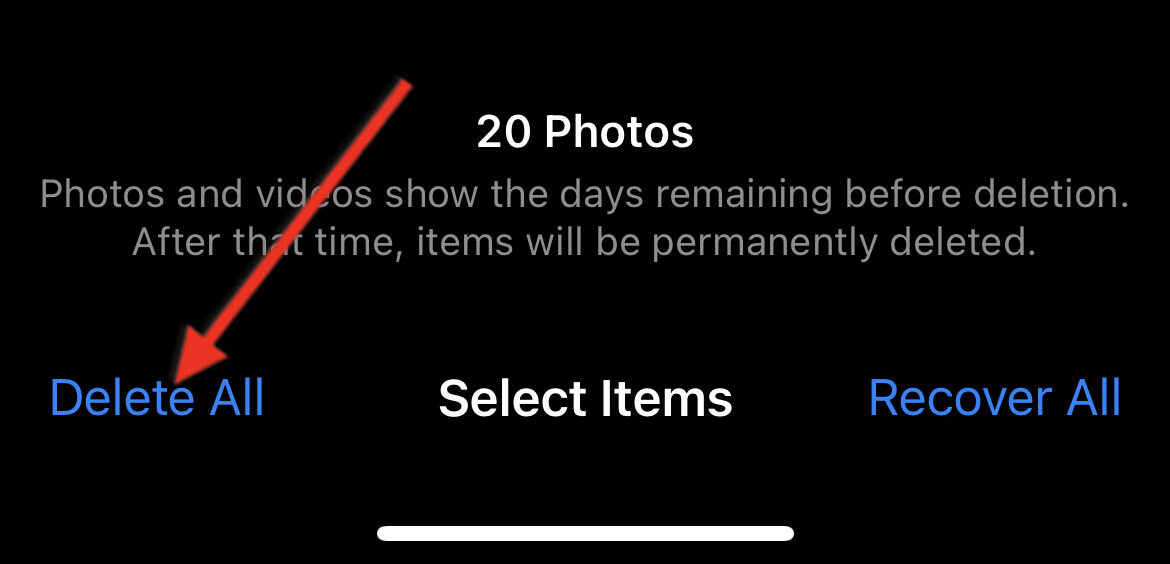
- Select Delete All if you want to permanently delete all the media files in this album. Otherwise, select the ones you want to remove and select Delete. Then, confirm the deletion once prompted.
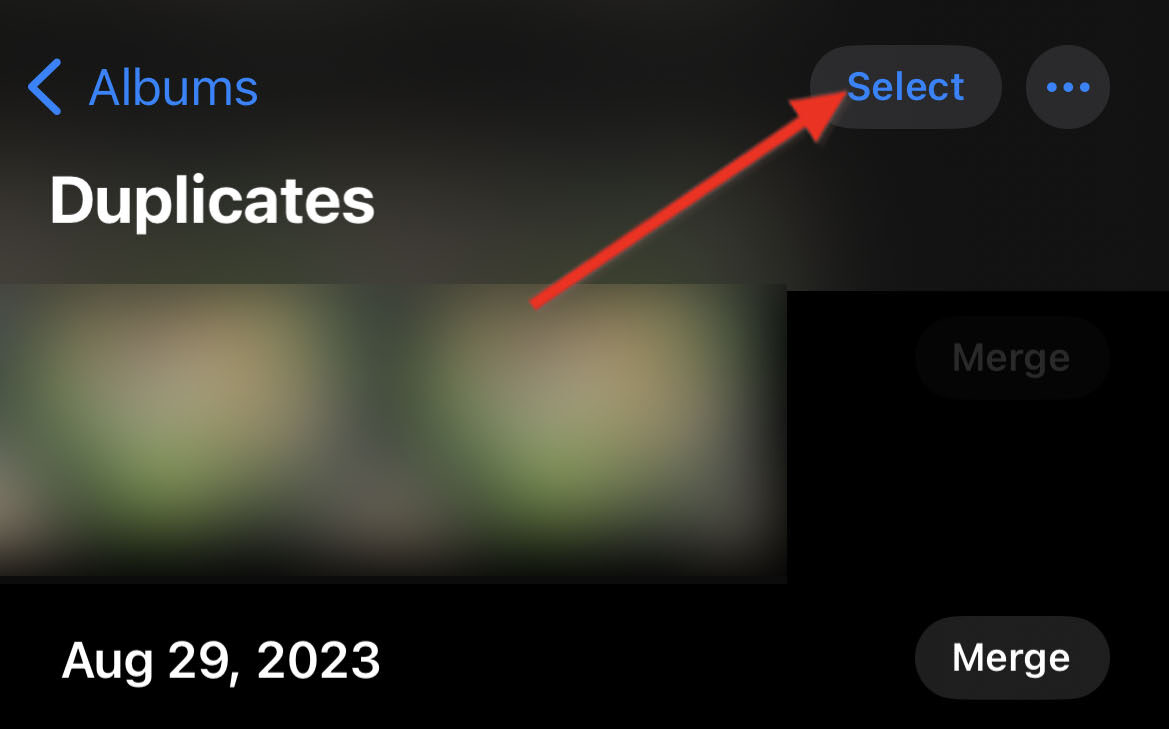
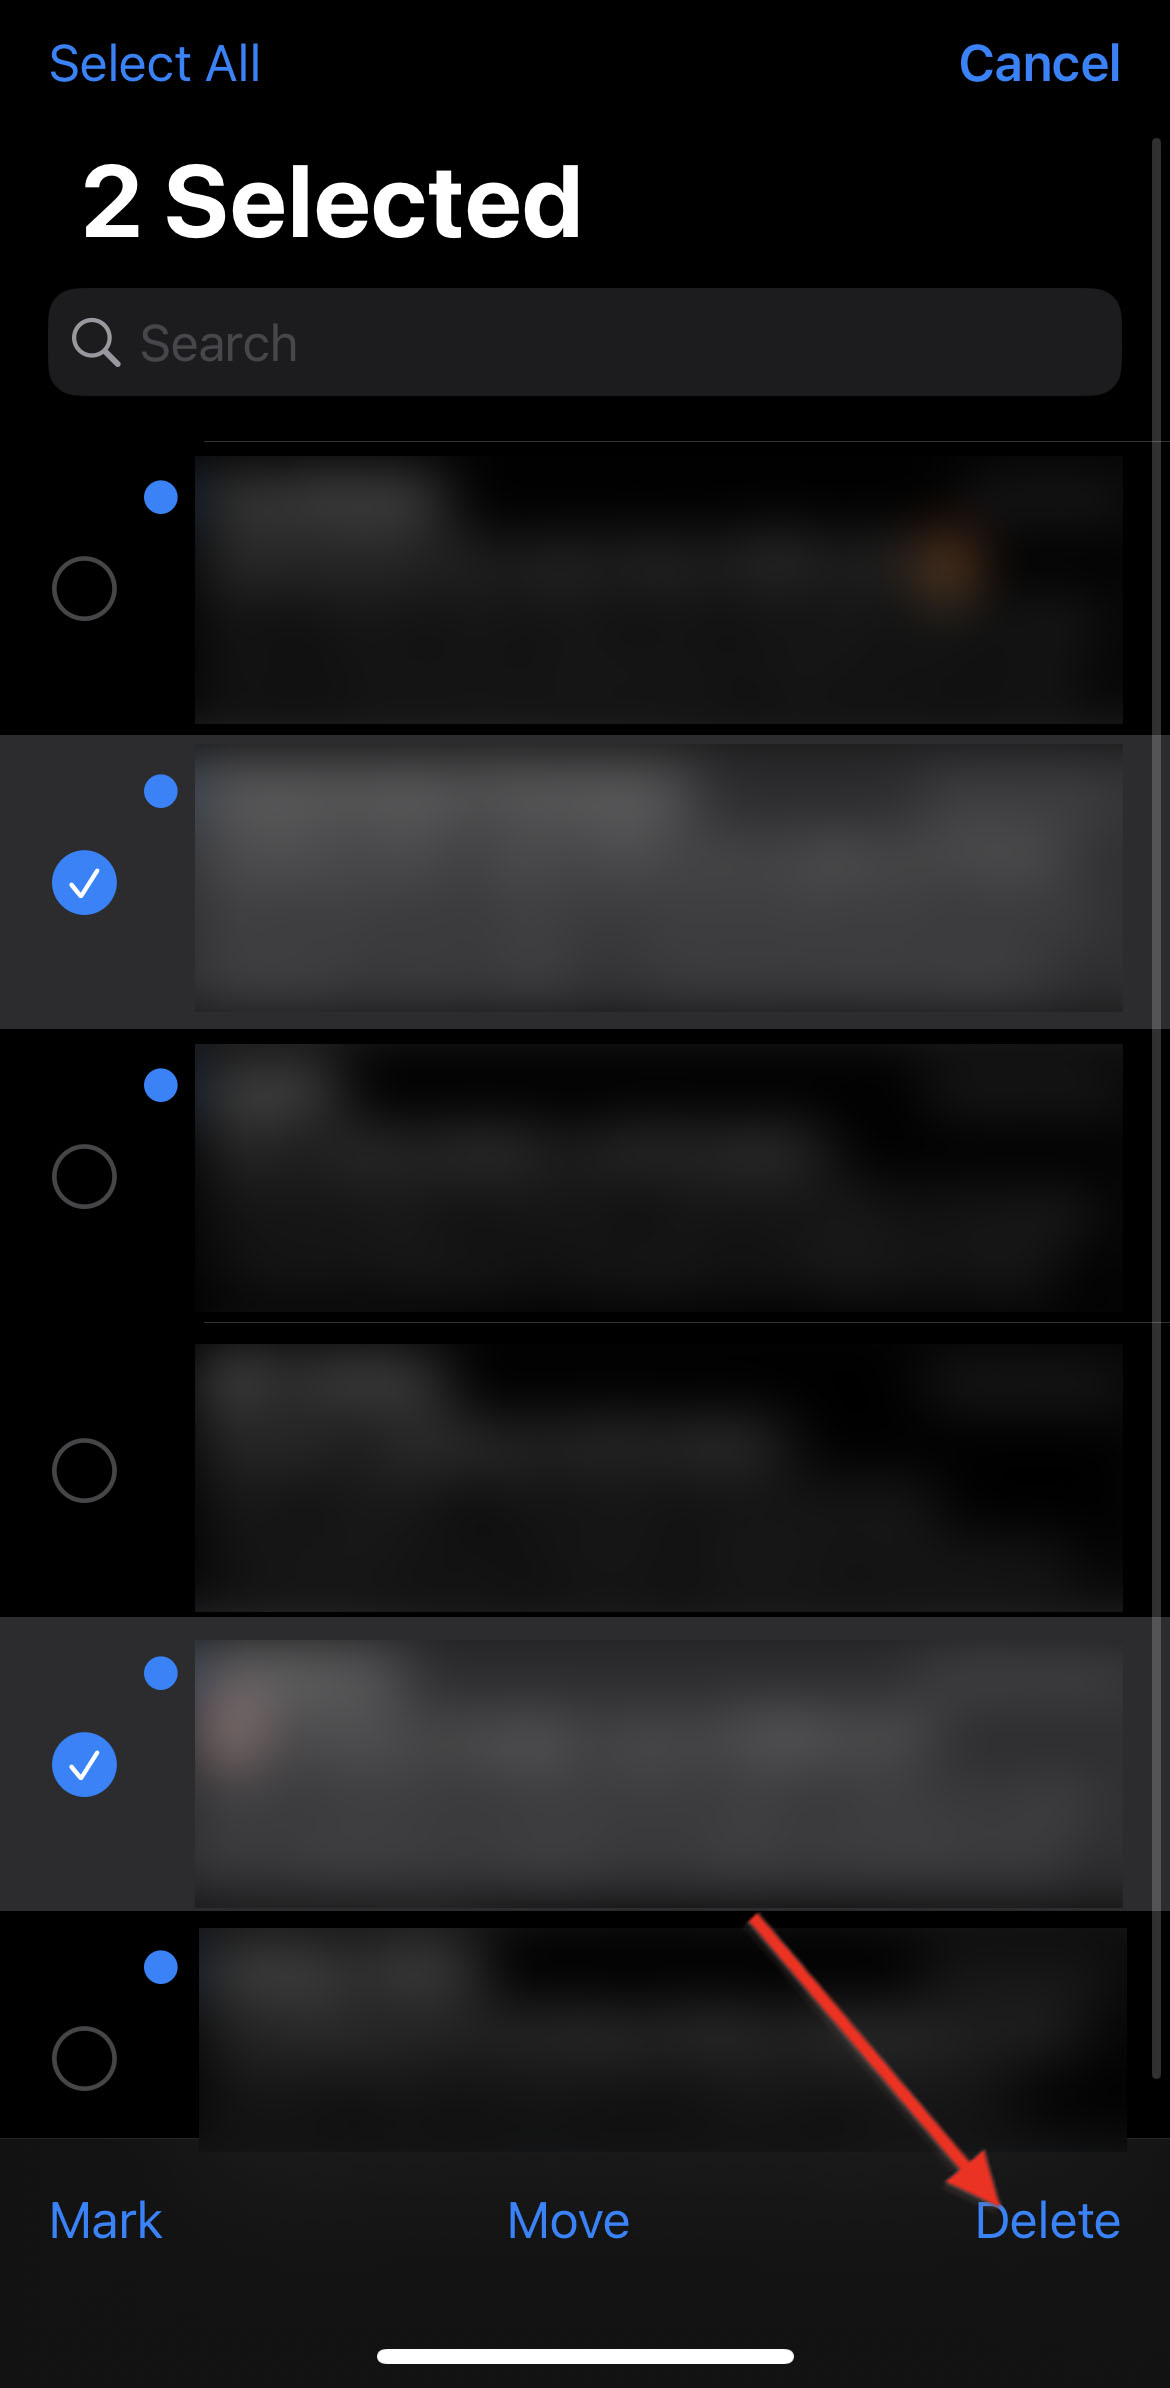
Remove Duplicates
Similar photos are often undetected deadweight, consuming space on your iCloud. Manually removing duplicate photos by using the Photos app is always a good start to clearing up some space.
Find your duplicate media files by going to the Photos app and following these steps:
- Go to the Albums tab. Then, scroll down to the Utilities section and select Duplicates.

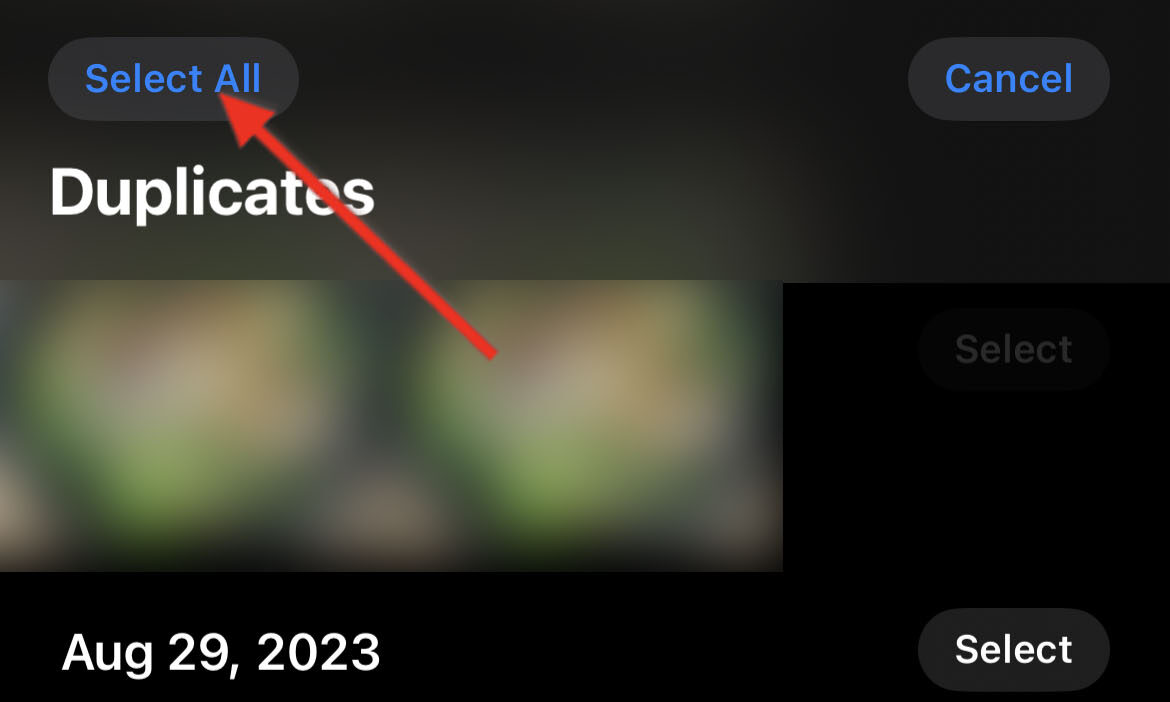
- Next, tap the Select button on the top-right corner of the screen. Alternatively, you can merge duplicate photos or videos individually by tapping the Merge button on the right side of the date when the media was taken.
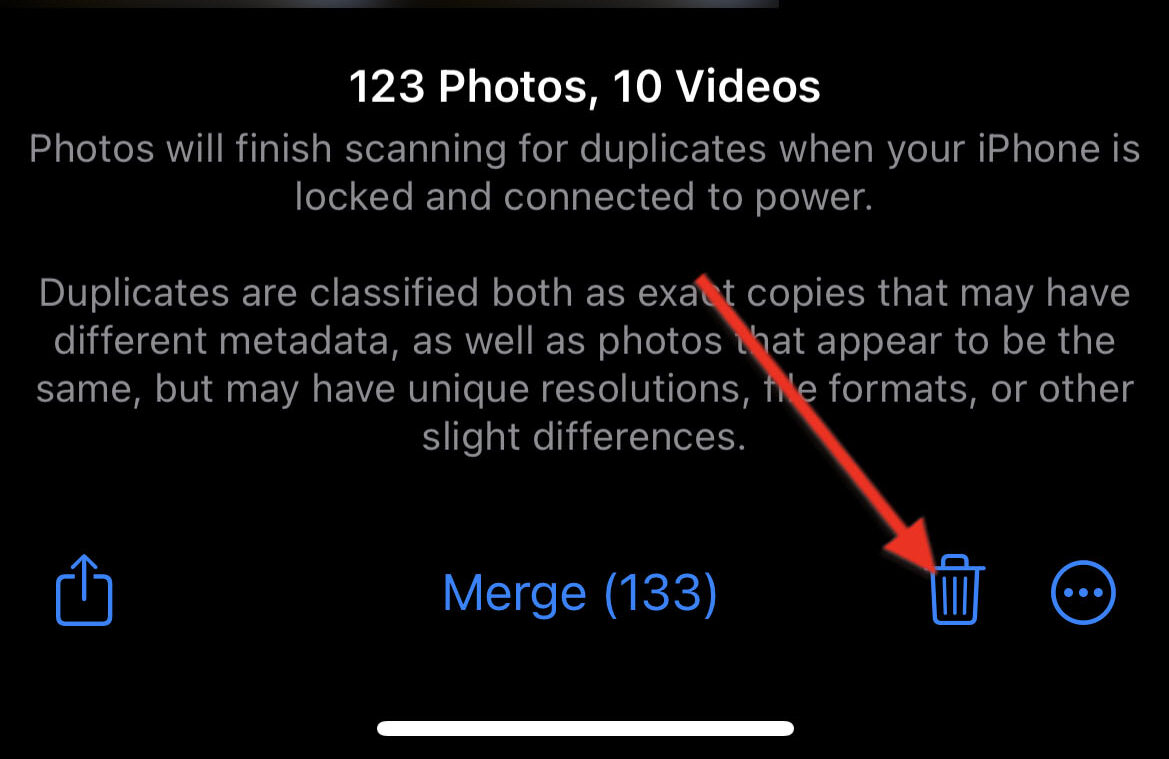
- Select the photos and videos you want to delete, or tap Select All to highlight all duplicate media.
- After that, tap the Trash icon on the bottom-right part of the screen. Then, confirm the deletion when prompted to remove duplicate photos and videos.
Leverage Third-party Tools
If you prefer a more streamlined process, third-party apps with specialized tools for photo management will help you remove duplicate photos on your iPhone in less time than using the native Photos app.
The right third-party tools make the process convenient even when handling tens of thousands of files. Some provide gallery organization and clean-up features that can save you a couple of times as opposed to using the native Photos app.
Other third-party tools like Cleaner for iPhone are versatile enough to feature contact management, mailbox cleaner, bulk deletion, duplicate photos removal, AI editing, advanced tagging and filtering capabilities, and clean junk files on iPhone.
Step 5: Disable Photo Optimizing Storage Feature
Disabling the Optimize iPhone Storage feature helps avoid possible issues when synchronizing your gallery to the cloud. It also prevents your iPhone from uploading excessive versions of photos to iCloud, which can consume unnecessary space.
To disable the Optimize iPhone Storage feature, follow these steps:
- Open the Settings app.
- Next, tap on your Apple ID to access account settings and select iCloud.
- Tap Photos.
- After that, de-select the Optimize iPhone Storage feature by tapping the Download and Keep Originals option.
Remember that while this process frees up the load on your iCloud storage, it will store full-resolution versions of your photos locally. This might become a reason why iPhone storage is full but not iCloud.
Step 6: Clean Up Attachments in Messages
All the attachments in your Messages app, including photos, videos, and documents, can accumulate over time and take up significant space in your iCloud storage.
Clean up your iCloud storage by removing your attachments in messages with these steps:
- Open the Messages app and select the conversation with attachments that you want to delete.
- Tap the person’s name to access the options. This should also display a list of attachments you send to each other.
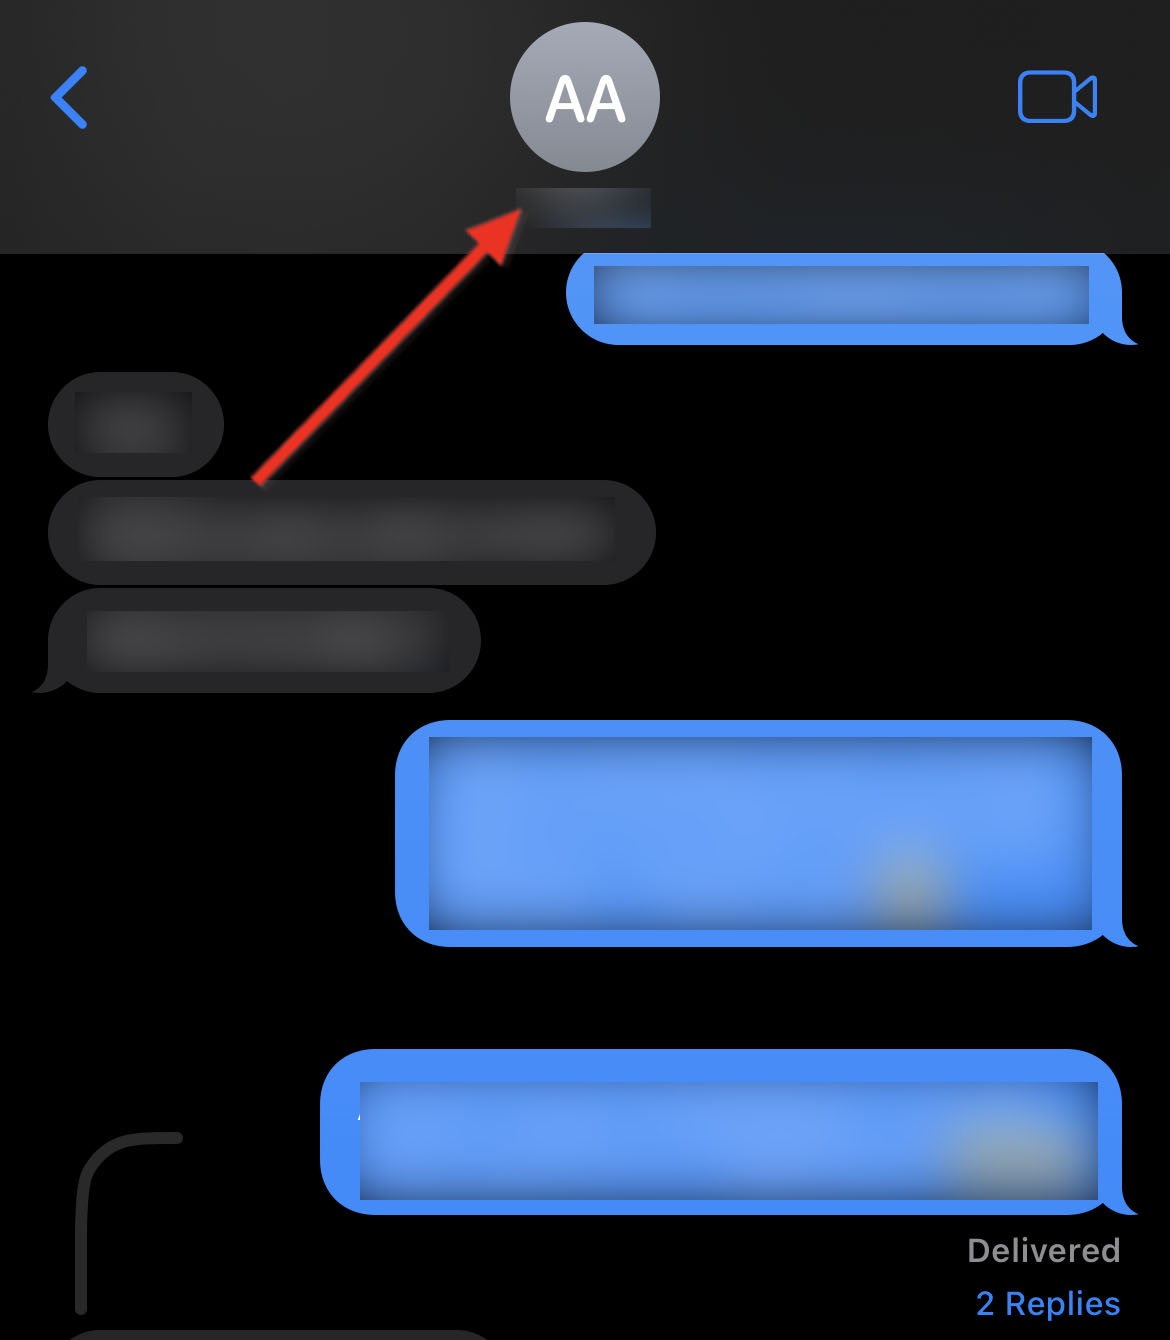
- Next, scroll down to the attachment you want to delete. Then, press and hold the attachment and tap on Delete in the menu that appears.
 a. Alternatively, you can select multiple attachments by tapping See All.
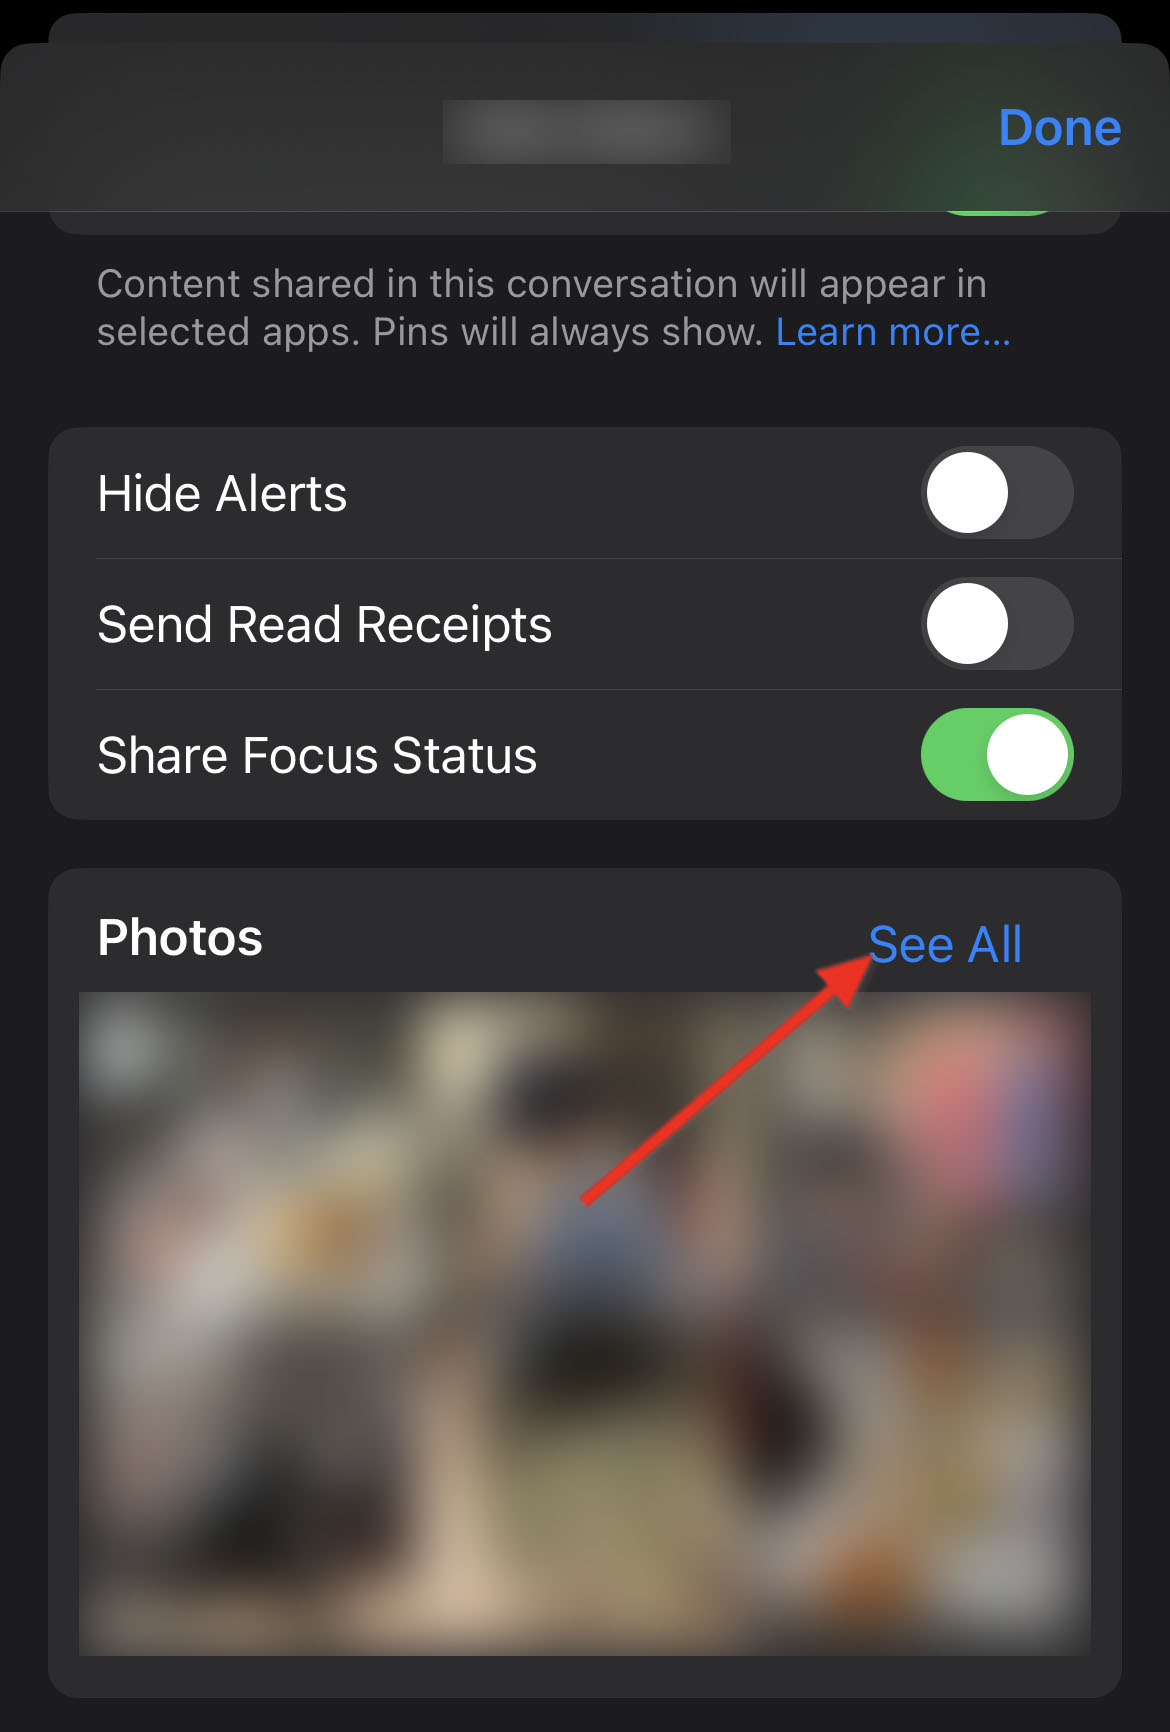 b. Then, tap Select on the top-right corner of the screen to begin selection. Now, tap each attachment that you want to remove. Once all your photos and videos are selected, tap Delete.
Step 7: Clean Your Mail
If you have set up your mail to get synced to the cloud, your emails can eventually take up space in your iCloud storage without you noticing.
To free up storage by cleaning your mail, here’s what you can do:
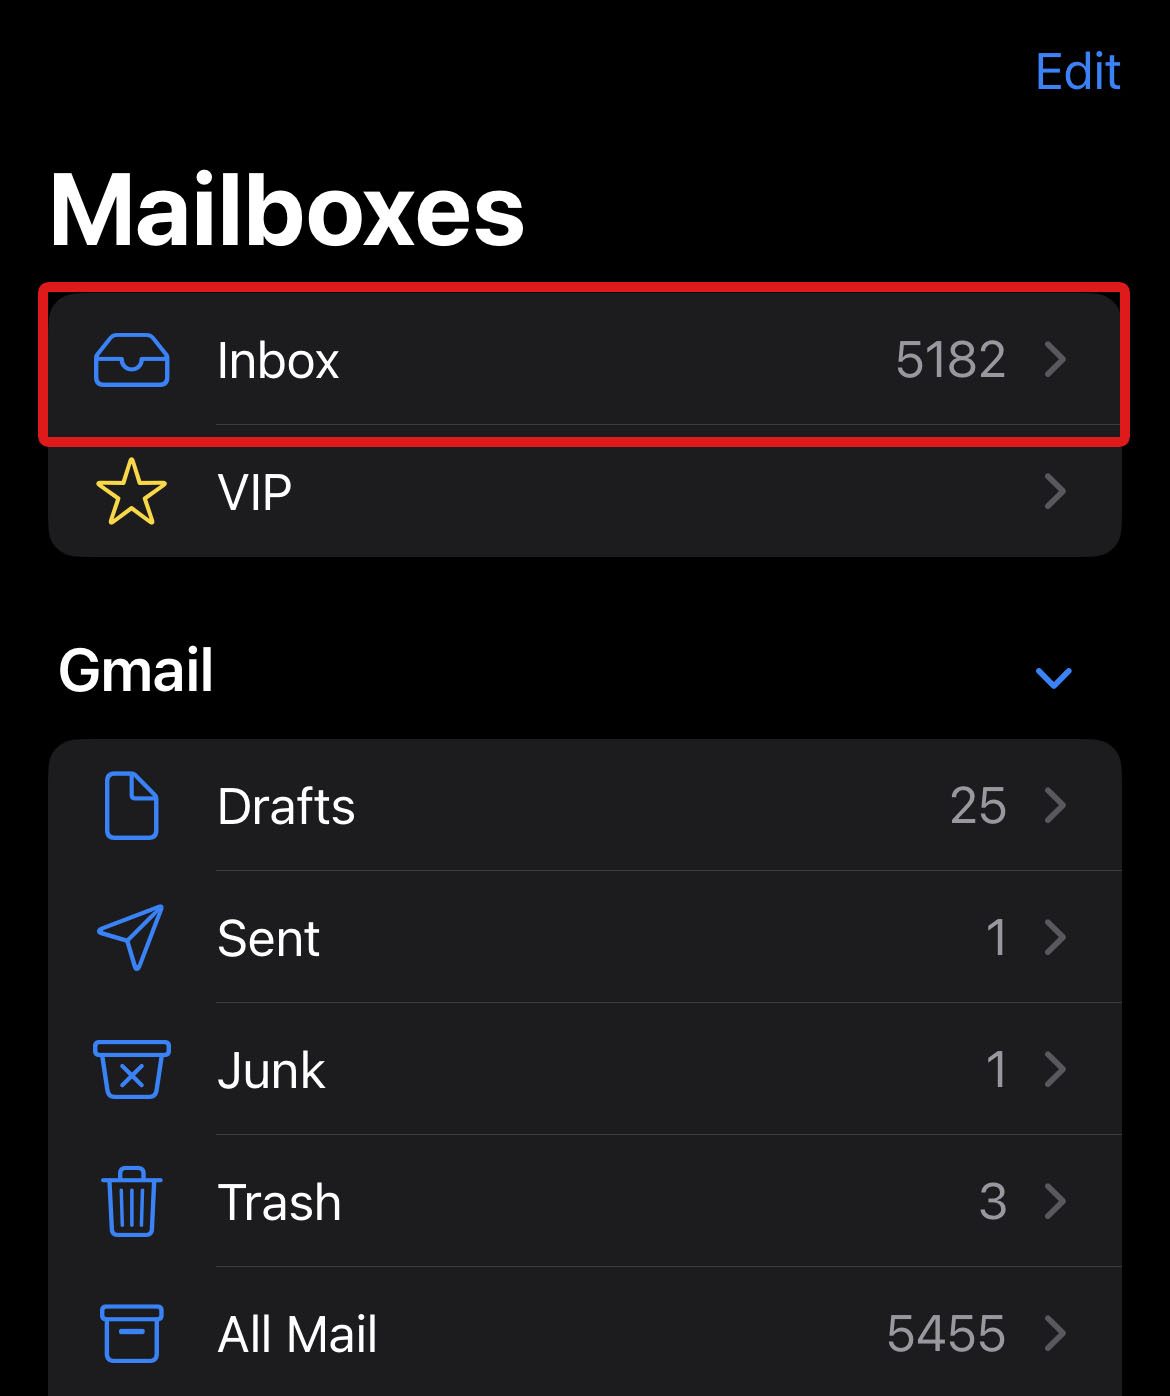
- Go to the Mail app and head over to the mailbox that you want to clean up.
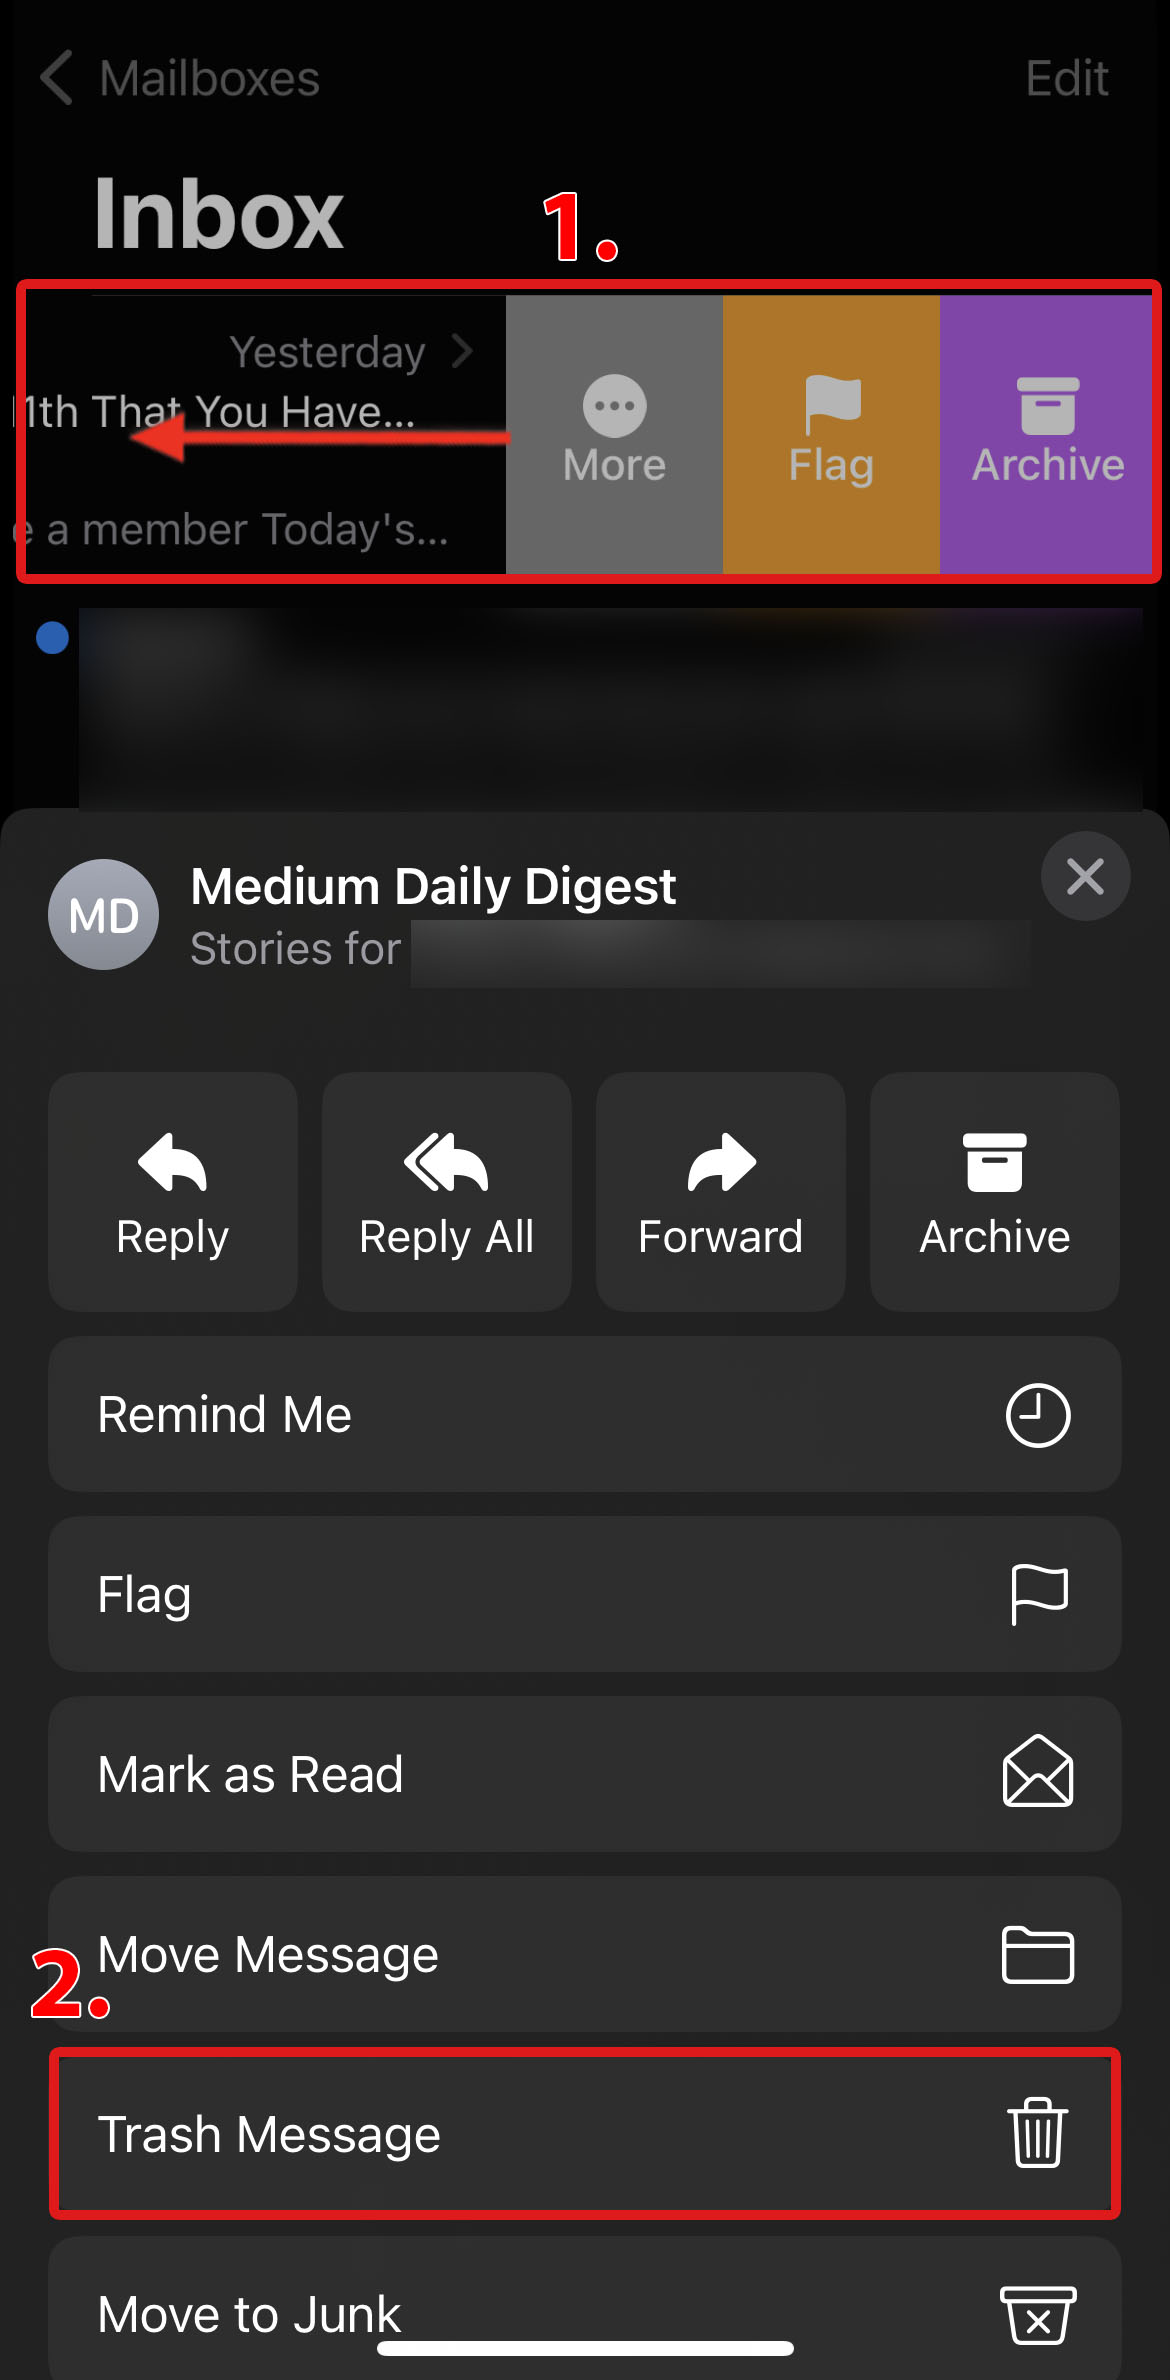
- If you want to move one email to the Trash, simply swipe left across the message > Move > Trash Message.
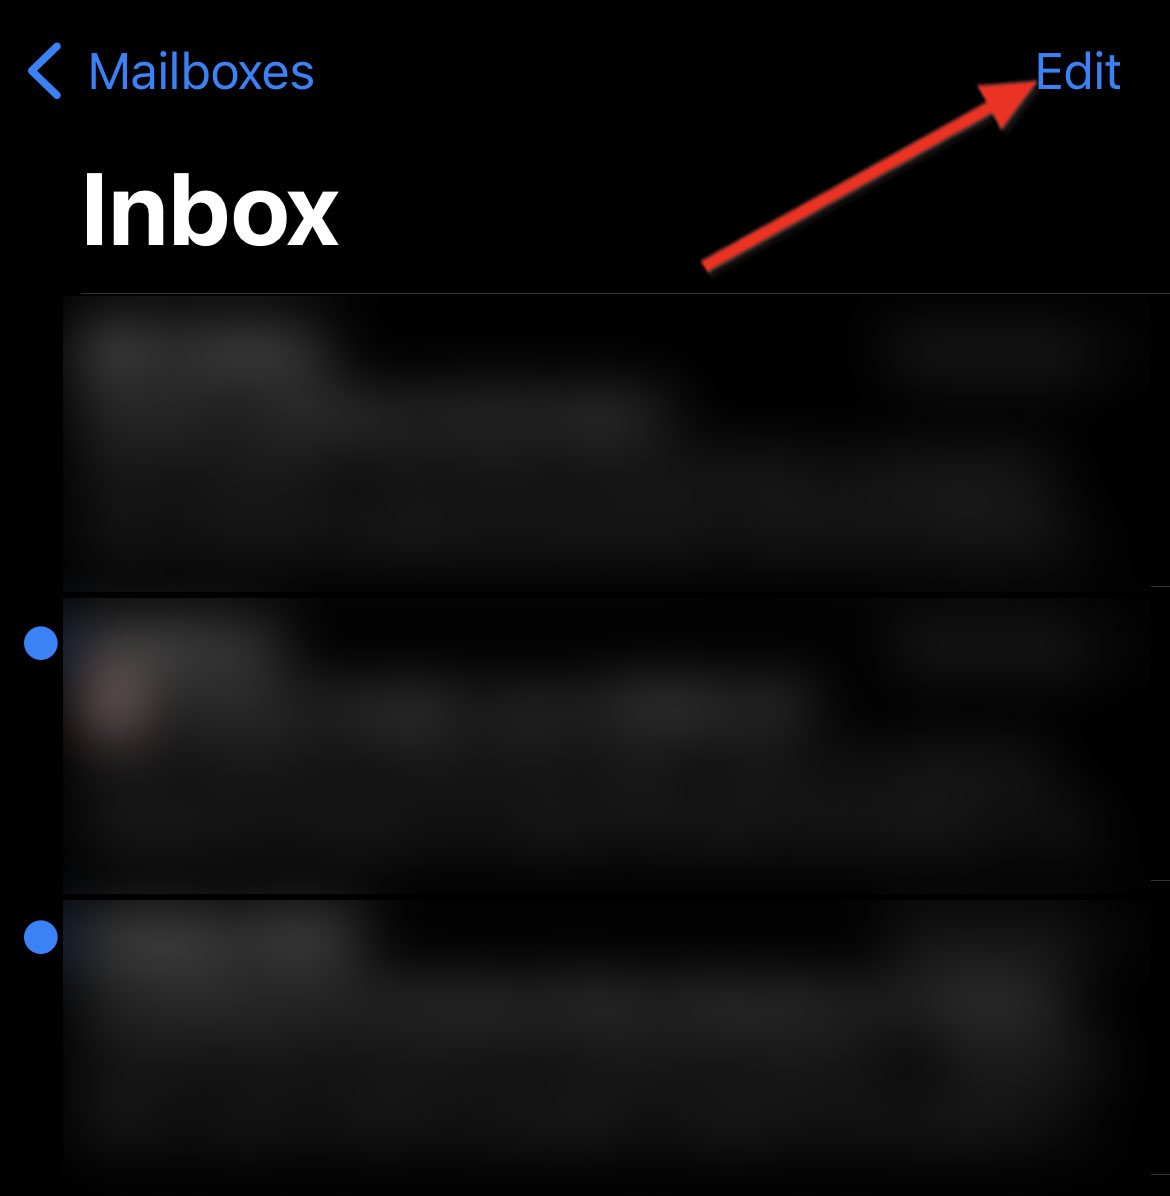
 a. If you want to select multiple emails, tap Edit.
 b. Then, select the emails you want to delete. Next, tap and hold to trigger the menu and select Move on the bottom part of the screen.
 c. Finally, select the Trash folder.
Once your emails are in the Trash folder, you have to empty the folder itself by doing the following:
- Under Mailboxes, go to the Trash folder. Then, tap Edit.

- Select the emails you want to permanently delete and select Delete.
Step 8: Remove Old Backups
If you’ve been using iCloud for a while now, you’ve probably stored more backups than you can recall. To ensure that your iCloud storage is efficiently managed, it’s advisable to review your older backups and identify which ones you can safely remove.
Here’s how you can remove these old backups from iCloud:
- Open the Settings app > Tap your Apple ID > Select iCloud.
- Tap Manage Account Storage/Manage Storage.
- Tap Backups. Then, select the name of the device that you are using.
- You should see all the apps that use your iCloud storage, as well as the space they are occupying. You can turn off any app that you no longer want to back up by selecting Turn Off & Delete.
FAQ
Why does iCloud backup say there’s not enough storage but there is?
iCloud backup might say there’s not enough storage, but there actually is due to several reasons. It may be simply due to iCloud not yet updating its storage status after you have freed up some space.
It may also be because of software glitches, unmonitored Recently Deleted album, or accumulated backup files.
Why is my iCloud storage full even after emptying it?
Your iCloud storage might still be full even after emptying it because you have not deleted the files from the Recently Deleted album. This folder retains deleted photos, videos, and other files for a specific amount of time before automatically deleting them.
To free up space on your iCloud, make sure to empty the Recently Deleted folder.
Why am I getting more iCloud storage but it's still full?
If your storage remains full even after upgrading, you can check your Settings > Tap your Apple ID > iCloud > Storage > Manage Storage/Manage Account Storage to check how different files occupy your storage.
You can also check if there are files that are automatically being synced and are filling up your iCloud storage. If you’re still encountering problems, you can check on Apple’s website or contact their support to verify if there are server problems on their end.
Conclusion
Troubleshooting the “iPhone storage full but not iCloud” issue can be a straightforward task using our step-by-step guide to managing your iCloud.
To lessen the risk of encountering this issue in the future, make sure to optimize your files, update your backups, and see that you also remove your files from the Recently Deleted album.
This article was written by Princess Lescan, a Staff Writer at Handy Recovery Advisor.
Curious about our content creation process? Take a look at our Editor Guidelines.