
Burst photos on iPhones can be incredibly handy, especially when capturing motion. However, if you’re tired of triggering this feature unintentionally, sifting through similar photos to find the perfect shot, or simply want to save storage space, it’s time to learn how to turn off burst mode on your iPhone.
In this guide, we will walk you through the various methods you can use to disable the Burst feature, as well as how to delete burst photos on your iPhone.
Does the iPhone Take Burst Photos Automatically?
Your iPhone does not take a series of photos for no reason. The iPhone’s Camera app takes burst photos depending on how you press the Shutter button or what settings you enable.
There is also a feature called Smart HDR (Auto HDR on the iPhone X and lower releases down to the iPhone 8) that takes a series of photos and consolidates them into the best-exposed version of your shot.
However, note that you can no longer manually turn off this feature if you have any of the iPhone 13/14 series phones or the later releases.
How to Avoid Using Burst Mode on an iPhone
Avoiding Burst mode on an iPhone can be done in different ways, depending on what settings you want to retain or change. In the following sections, we have laid out five simple methods you can try to prevent your phone from using this feature.
Method 1: Use Flash When Taking Photos
In the latest iPhone releases, the camera system automatically detects when the lighting conditions are not optimal and switches to Night mode. One shot can take longer to capture in this mode.
While using flash when taking photos does not necessarily turn off burst photos on iPhone, it can prevent unnecessarily triggering Night Mode. This is because shooting with the flash turned on disables the Night mode.
You can turn on the flash when taking photos by simply swiping up in your Camera app to trigger the options. Then, select the Flash icon and choose On.
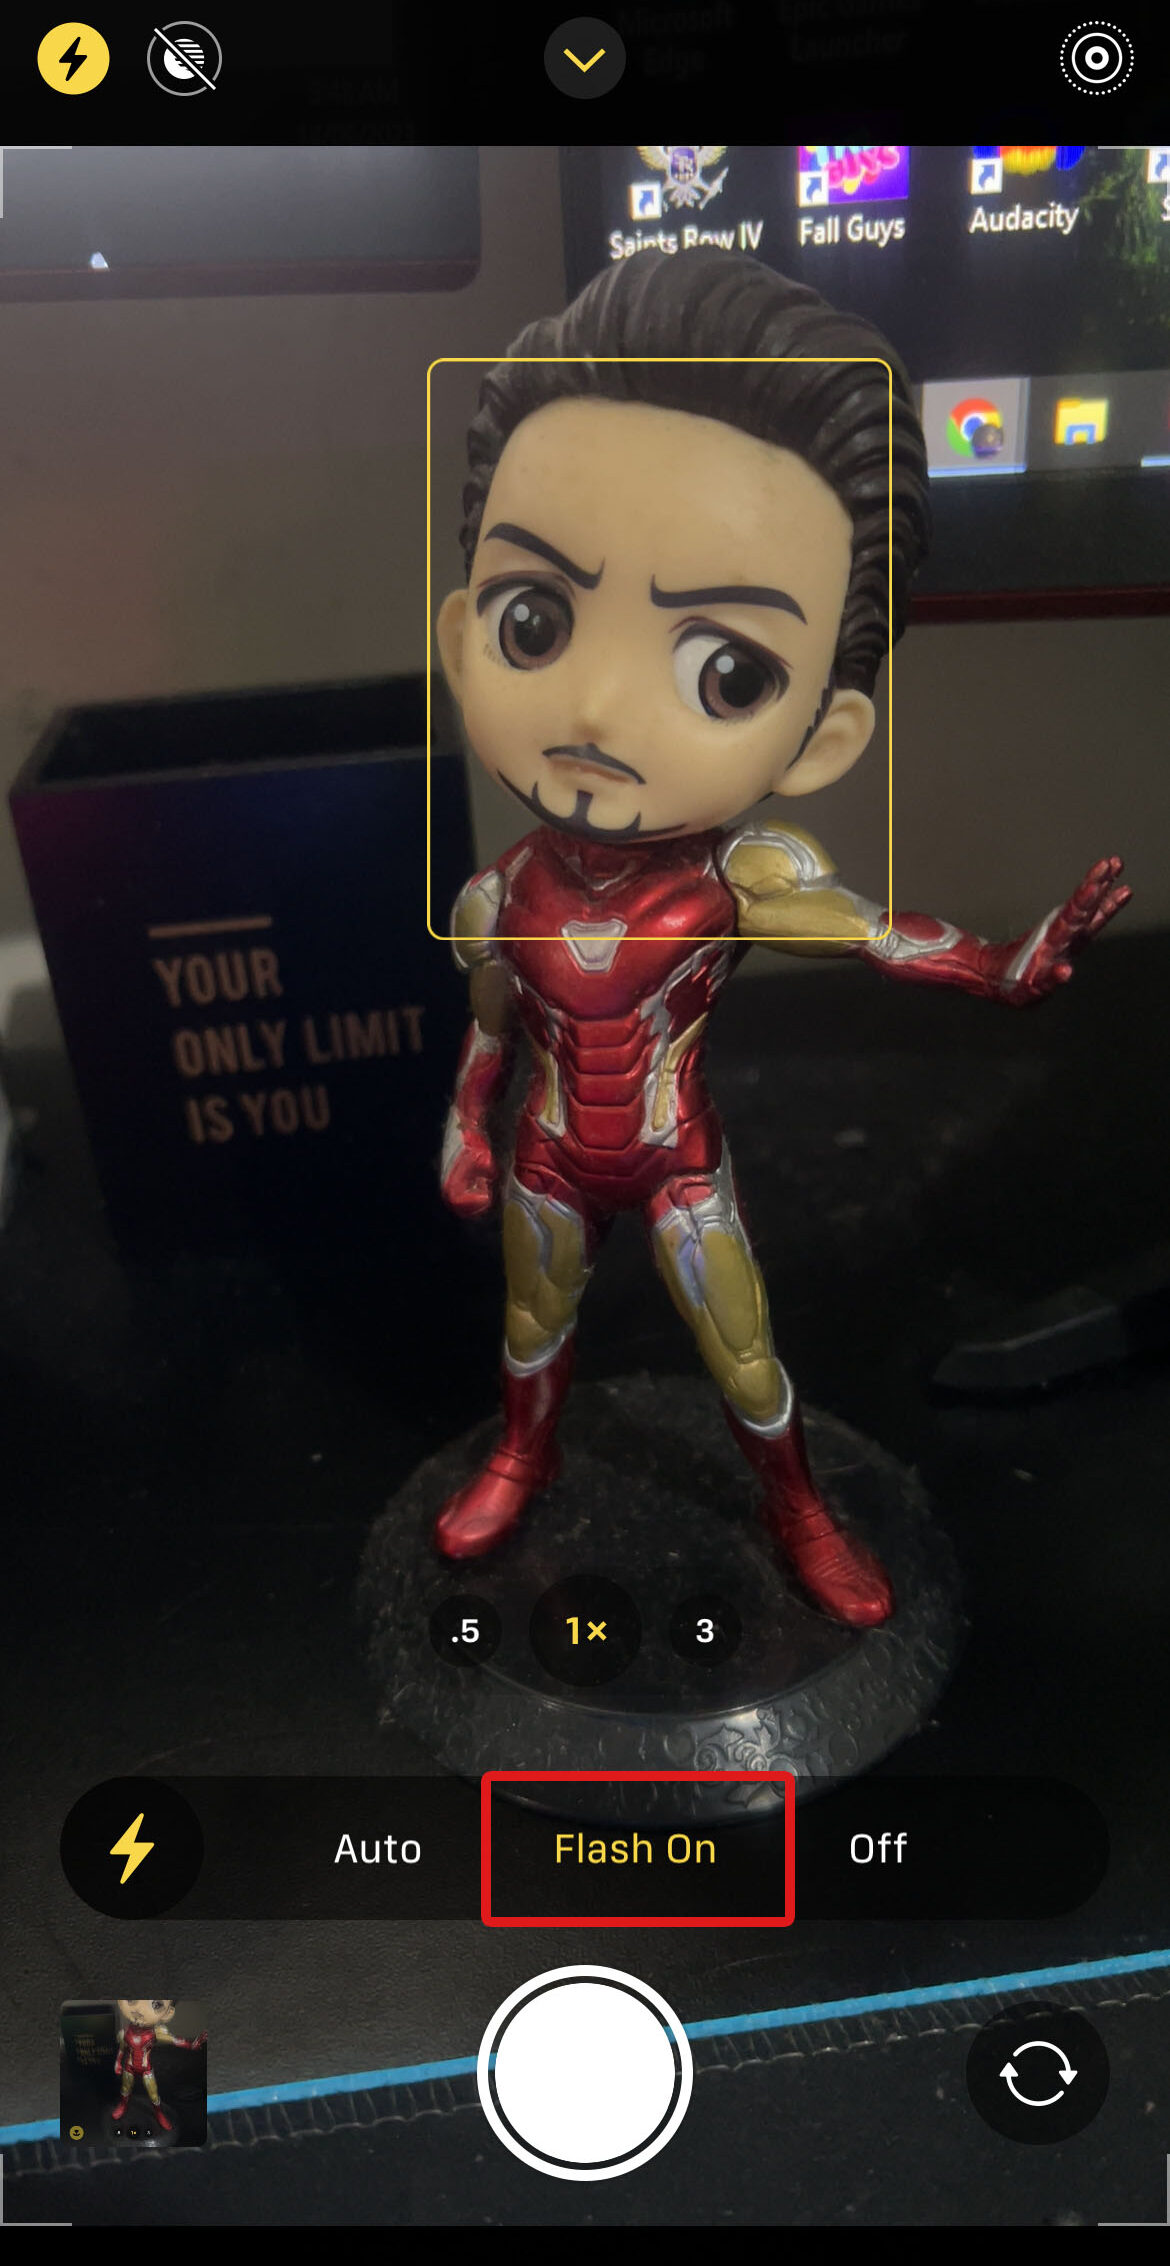
Remember that not all shooting scenarios work well in this setting. Plus, having the camera flash enabled every time you take a photo can drain your battery, so be careful when keeping this setting turned on.
Method 2: Use the Live Feature When Taking Photos
When you activate the self-timer on your camera without enabling the Live Photo feature and flash settings, every photo you take will be in Burst mode. If you wish to turn off burst on iPhone while keeping your timer settings, you can enable the Live Photo feature. Just remember that live photos can sometimes take up more storage space.
Note: In addition to the Live Photo, you can enable the Portrait mode, which will also disable the burst mode.
Here’s an easy guide on how you can turn burst off on iPhone by changing the Live Photo settings:
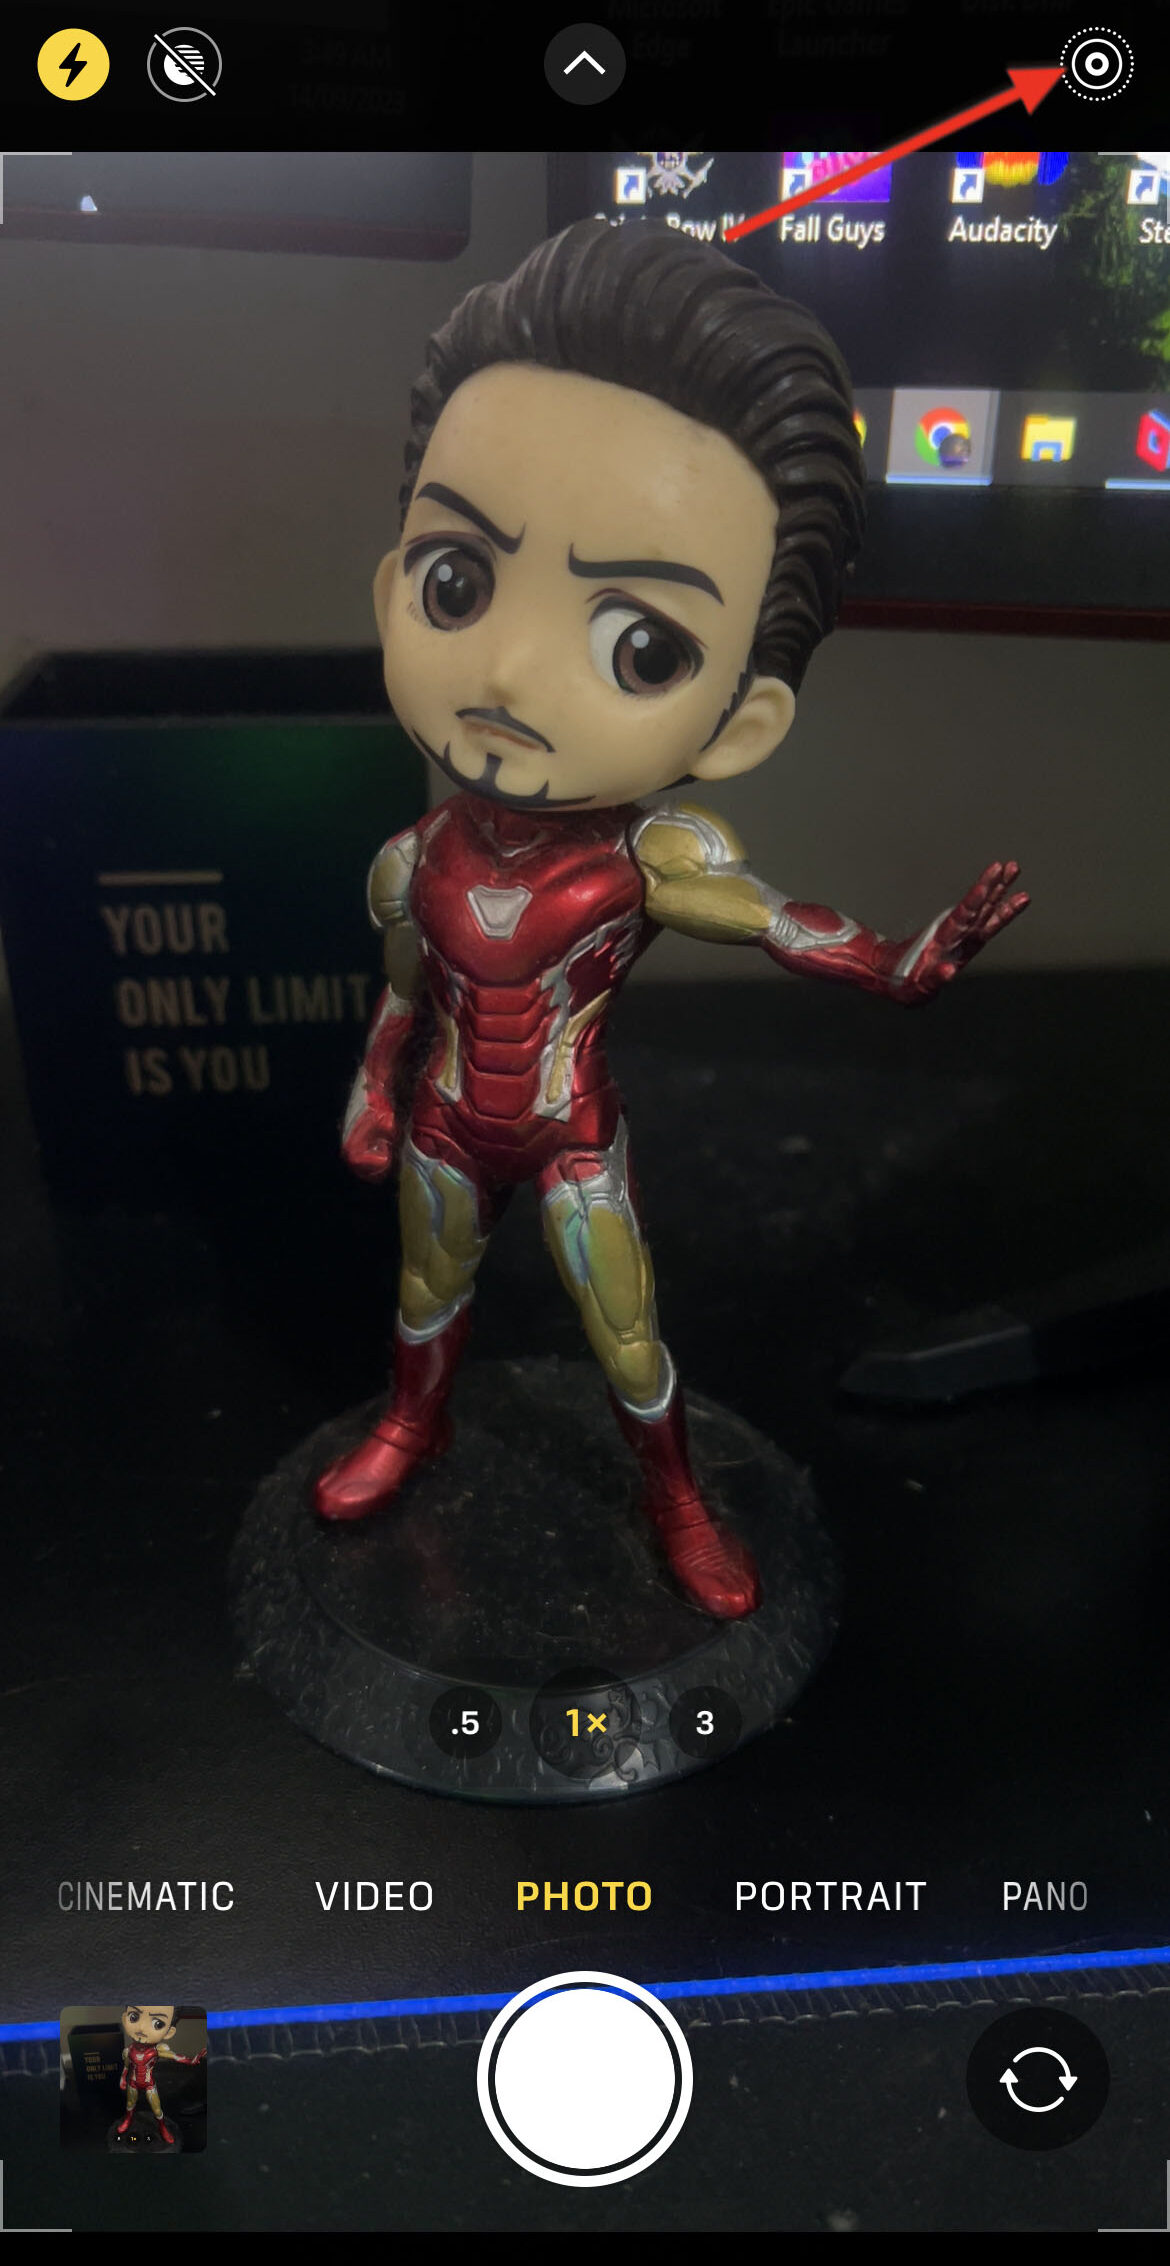
- To get started, open the Camera app on your iPhone.
- Tap the Live feature on the top-right corner of your screen.
After that, you can set the timer for photos again and capture photos without triggering the Burst mode.
Method 3: Turn Off ‘Volume Up for Burst’
The Camera app allows you to use the volume up button to trigger the Burst mode. If you don’t want to accidentally take burst photos, here’s an easy tweak in the Settings to turn this feature off:
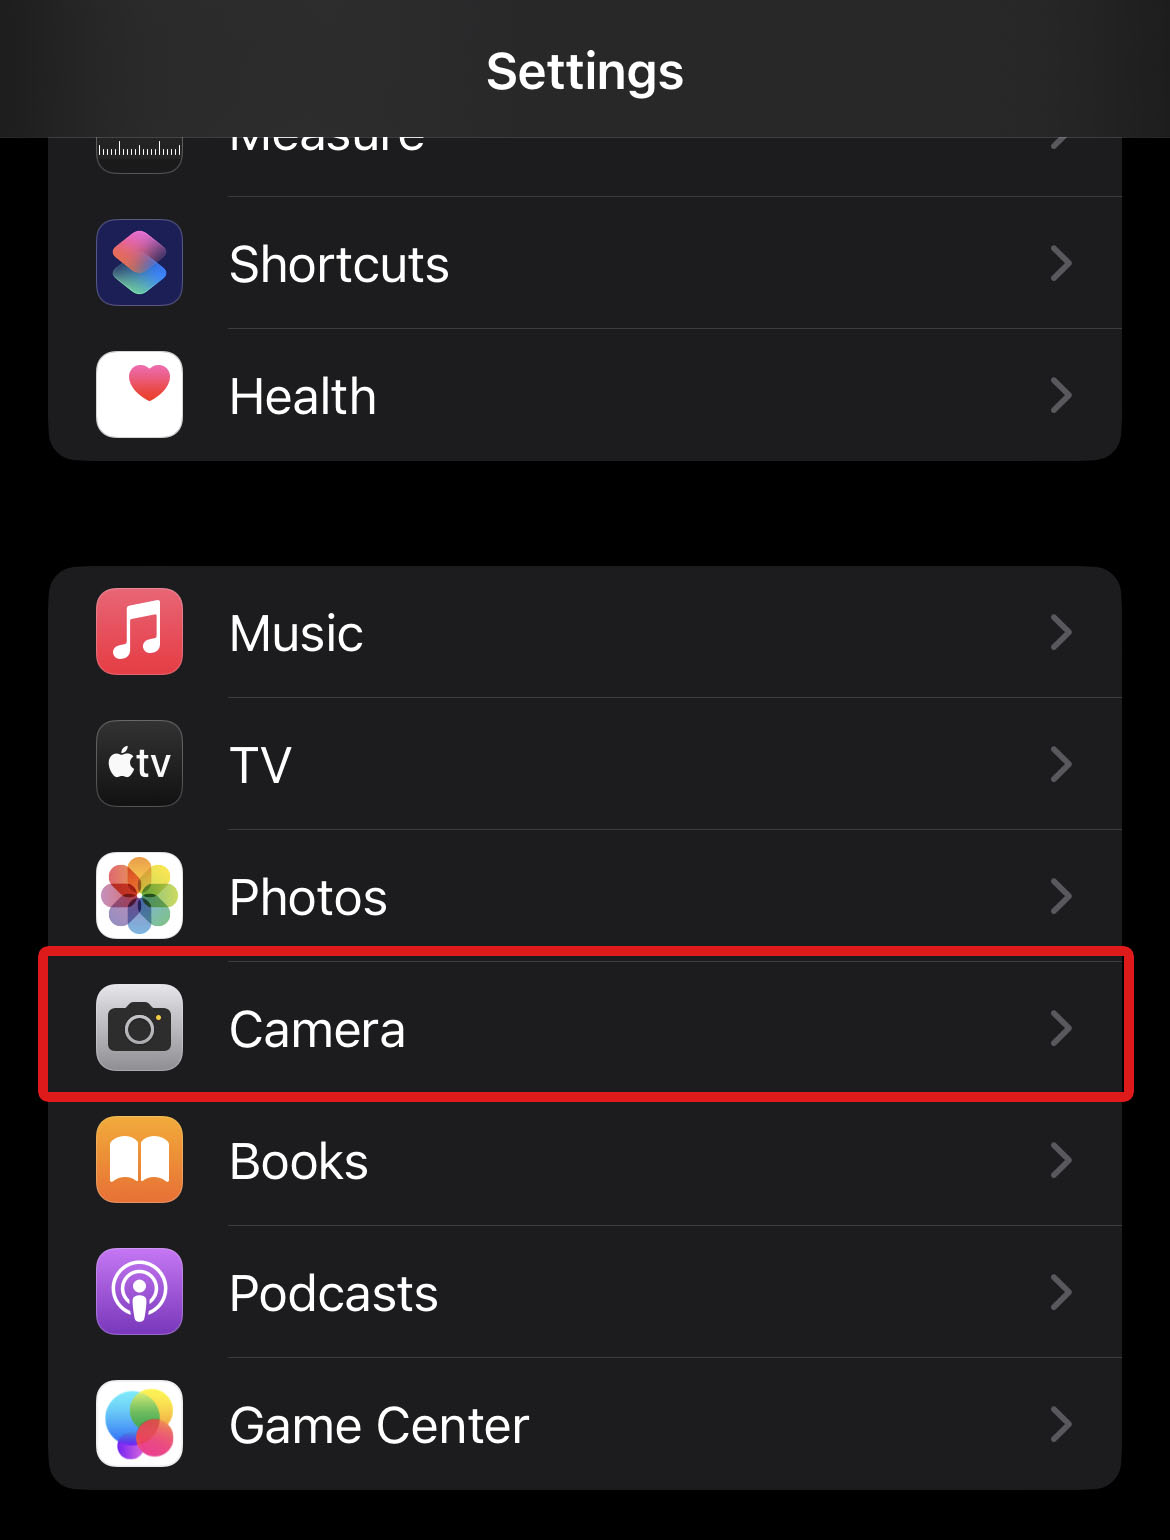
- Open the Settings app on your iPhone. Then, scroll down to access the Camera settings.
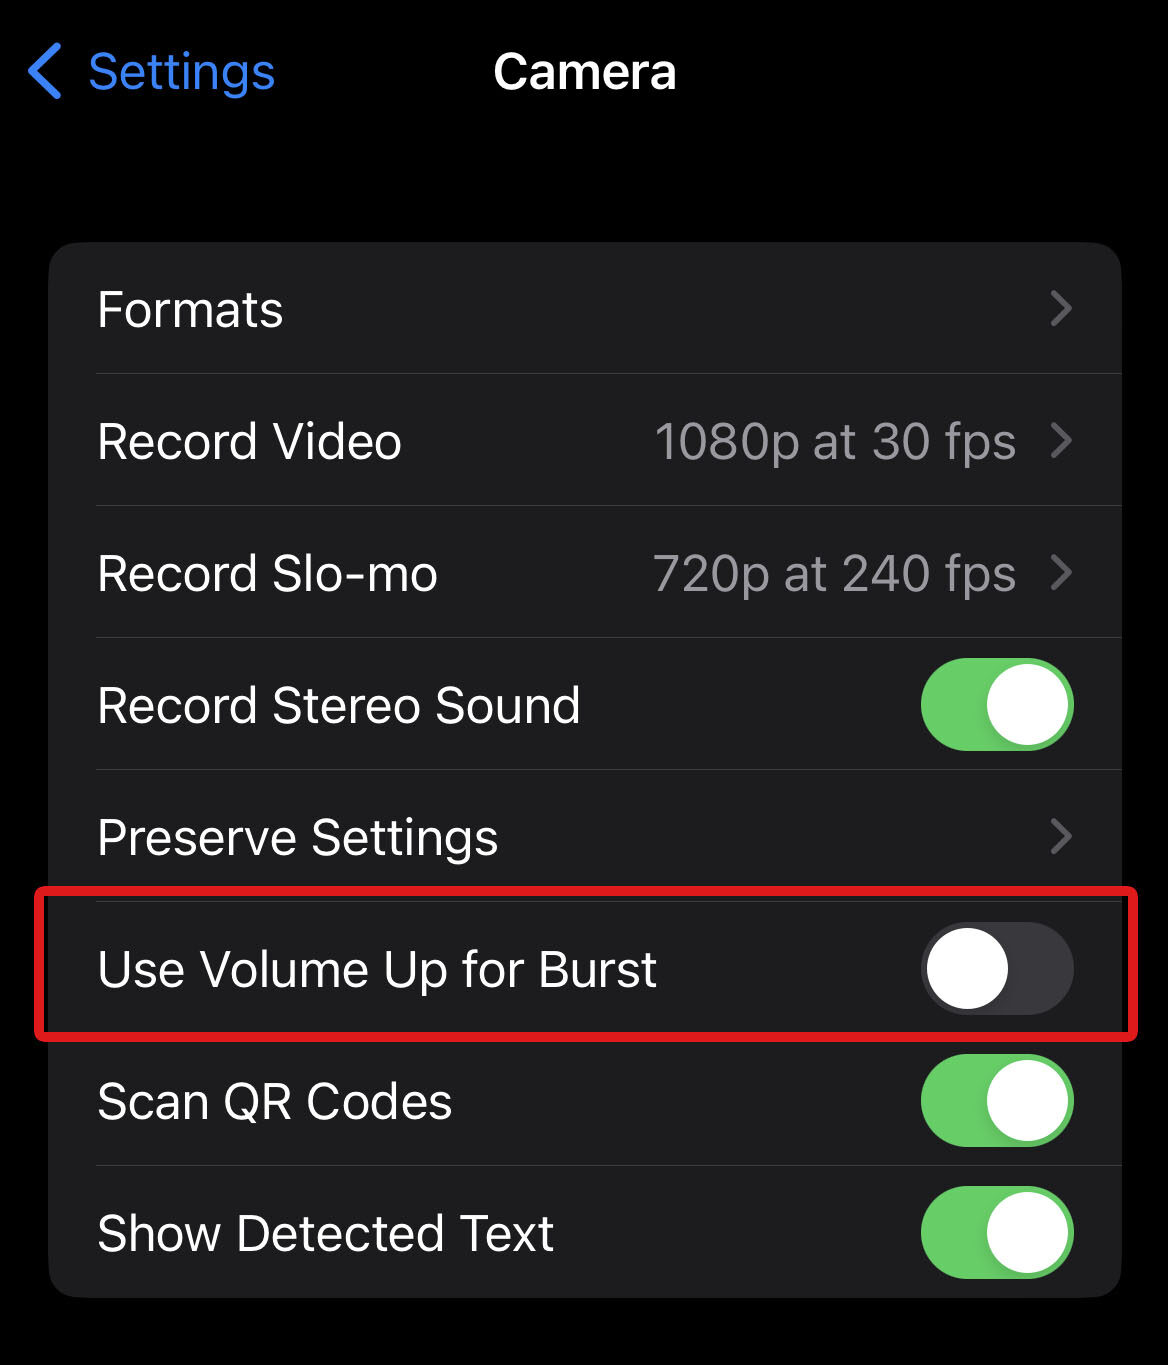
- Next, find the Use Volume Up for Burst toggle and switch it off.
Method 4: Avoid Holding the Shutter Button
A single tap on the Shutter button of the Camera app captures a photo on your iPhone. However, some gestures can accidentally trigger burst photos. The simplest way to turn off burst mode on iPhone is to avoid these gestures:
- On iPhone X and earlier models, you can trigger Bust photos by touching and holding the Shutter button.
- On iPhone XS and later models, you can trigger this feature by swiping the Shutter button to the left.
Remember that these gestures also depend on whether your device currently has iOS 14, 15, 16, or 17 installed.
Method 5: Disable Smart HDR
While the Smart HDR option is not the same feature as the Burst mode, this technology also creates a series of photos and can clutter your iPhone’s storage.
When using Smart HDR, your camera system takes several photos in rapid succession and compiles them to add more detail to your photos. This capture method is automatically turned on for the latest iPhones, including the iPhone 11, 12, 13, and 14.
On iPhone models lower than the iPhone 13 series, you can change the HDR settings manually using these steps:
On the iPhone XS to the iPhone 12 models:
- Open the Settings app > Camera.
- Turn off the Smart HDR option.
On iPhone 8, iPhone 8 Plus, and iPhone X models:
- Open the Settings app > Camera.
- Turn off the Auto HDR option.
You can manually turn the HDR option on or off from the Camera app afterward by tapping the HDR option on the screen.
How to Remove Burst Photos from an iPhone
Of course, you can simply choose your favorite photos among the burst photos and delete the rest of the copies. But if you have tons of burst photos, managing and deleting them can get more photo storage on your iPhone.
In the following sections, we’ll explain methods to efficiently remove burst photos on iPhone.
Delete Photos From the ‘Bursts’ Album
iPhone conveniently segregates your gallery by media type, thus having a Bursts album by default. Here’s a quick step-by-step guide on how to remove burst photos from this album:
- First, go to your Photos app. Then, tap the Album tab.
- Scroll down to find the Bursts album under Media Types.
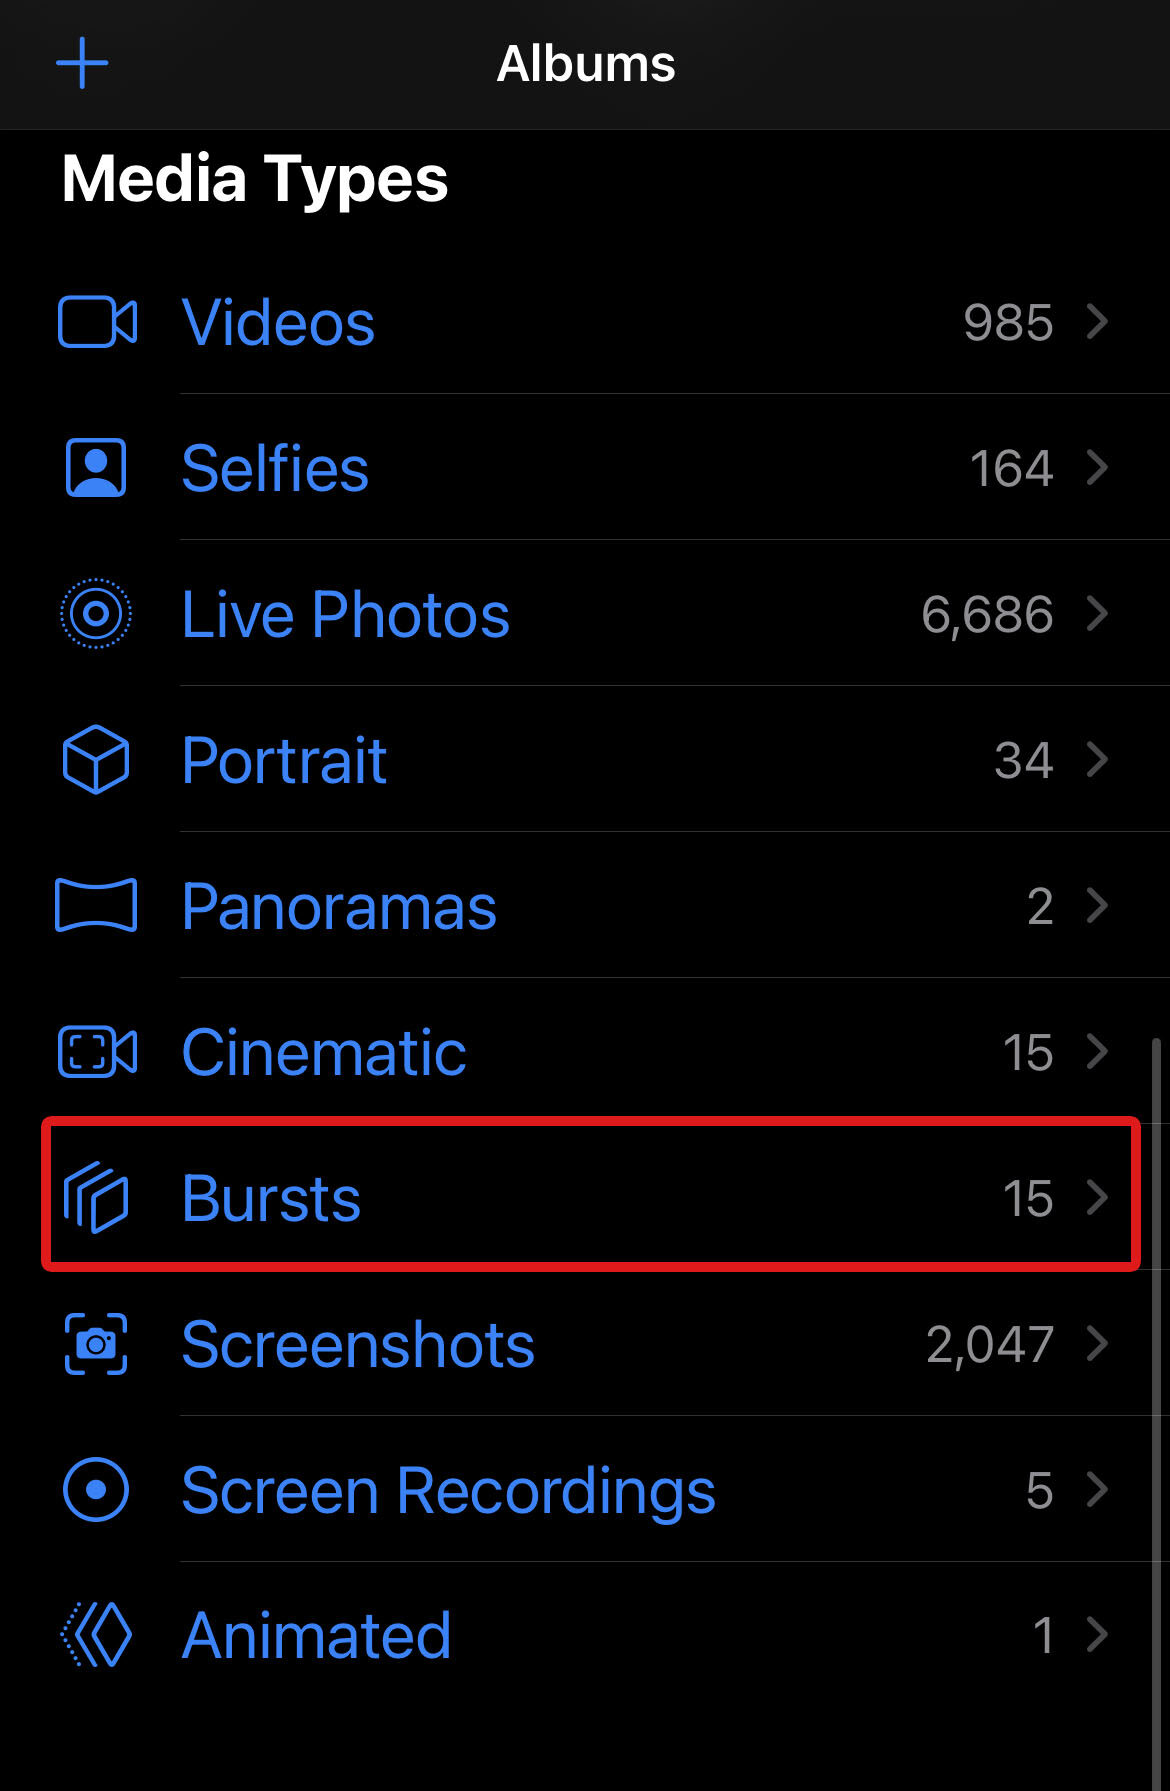
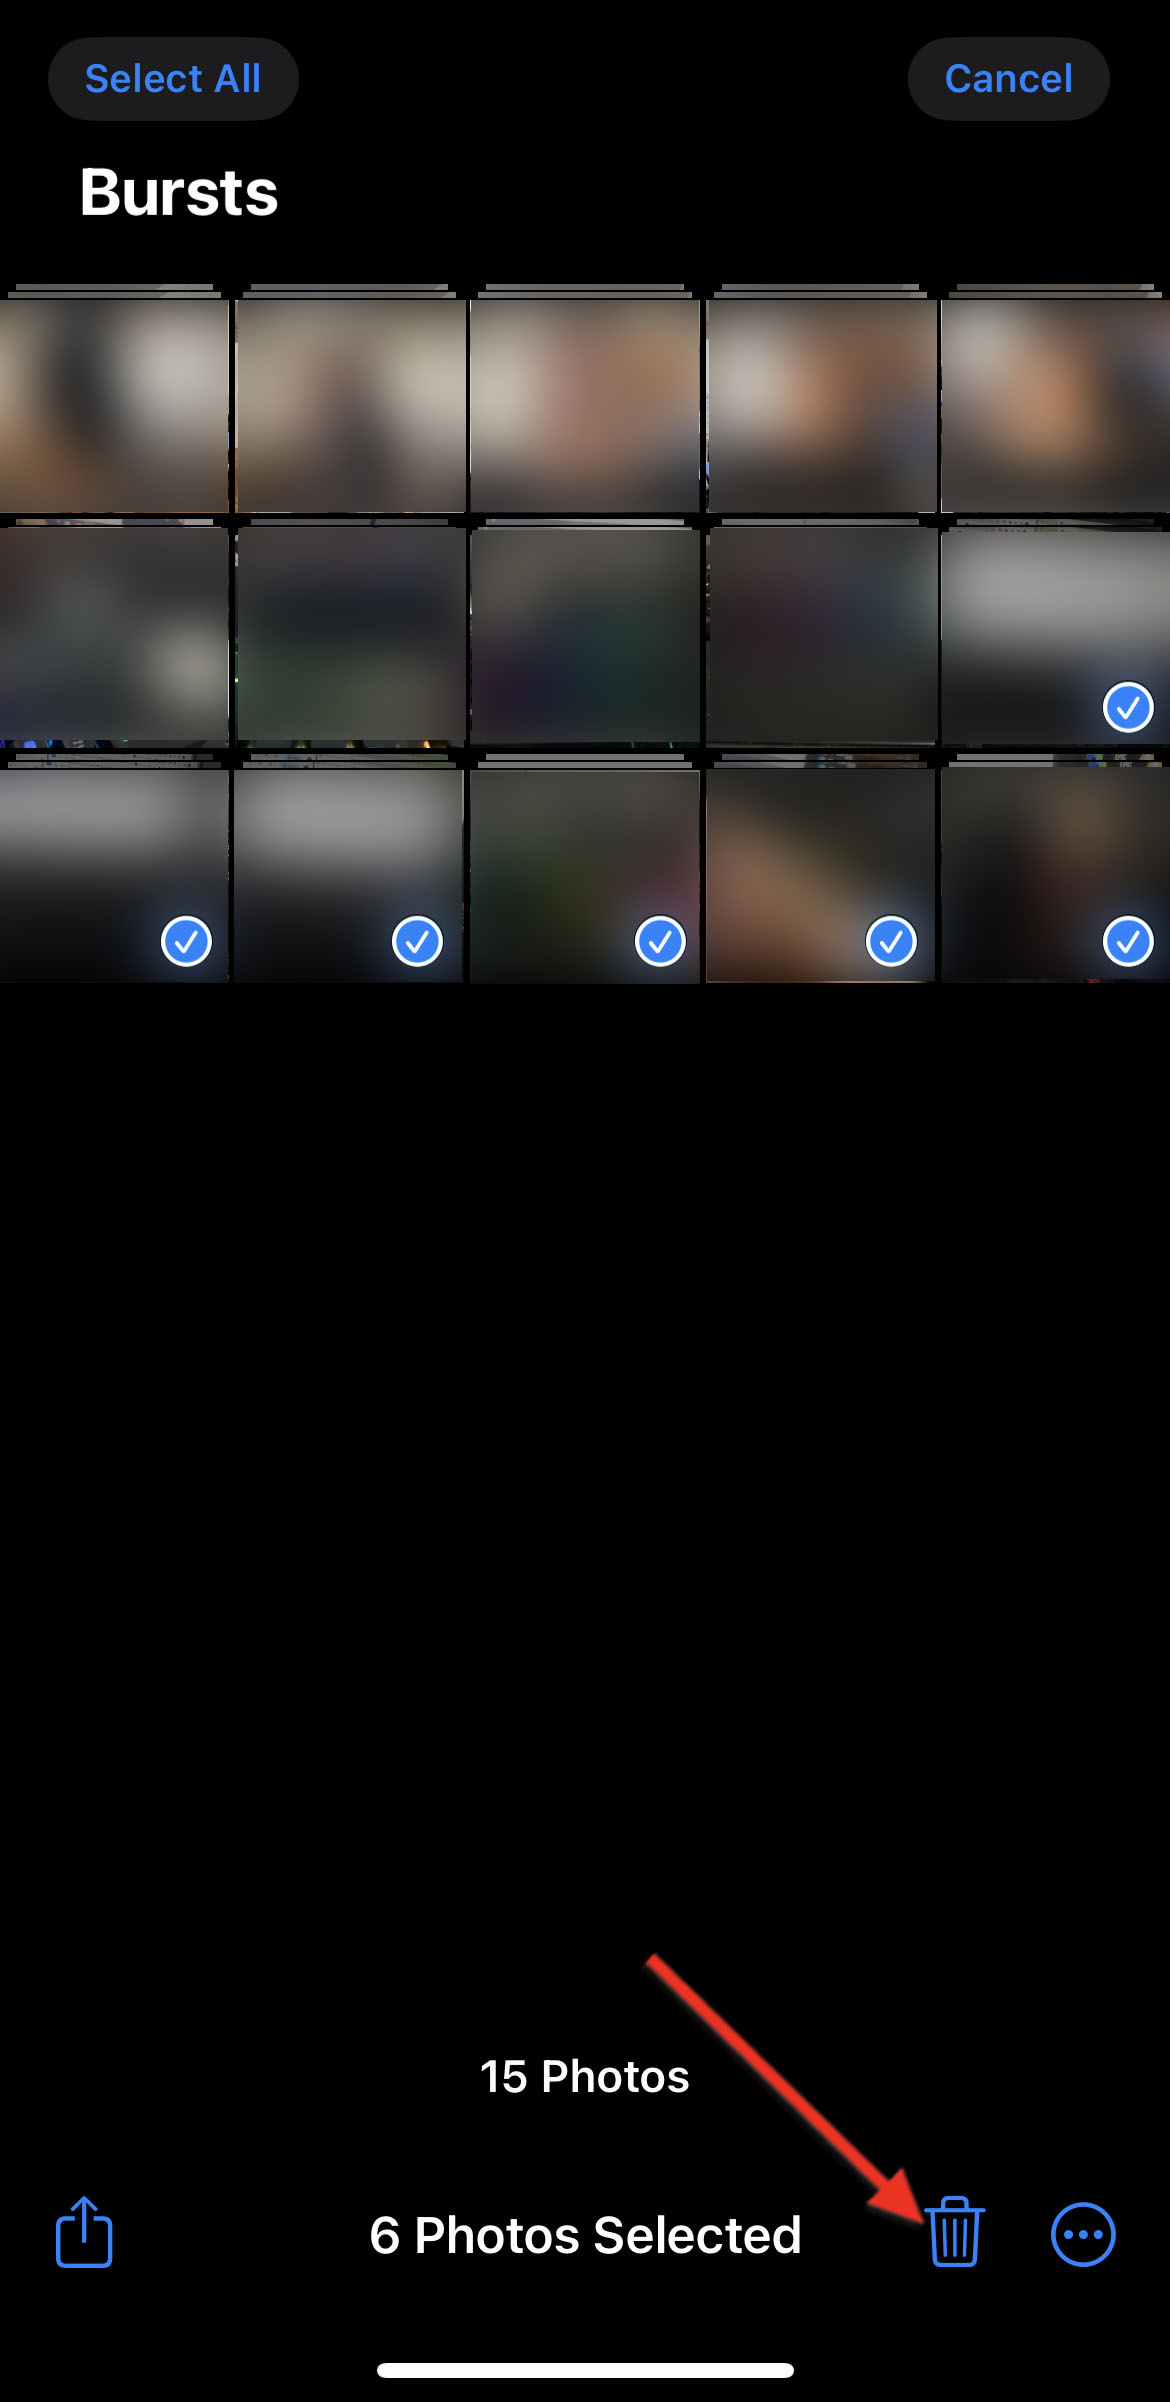
- After that, tap the Select button on the top-right corner of your screen and select the photos you want to delete.

- Finally, tap the Trash icon and select Delete n Photos to confirm the deletion.
Don’t forget to delete the photos from the Recently Deleted album if you want to free some storage space immediately and permanently delete your pictures.
Remove Burst Photos Using a Third-party Tool
While the Photos app can help you easily find burst photos, it does not have advanced features such as sorting and filtering photos by size or date taken. The lack of these features can give you a hard time when managing hundreds or thousands of burst photos. This is where third-party apps shine.
Third-party photo managers have comprehensive tools, going as far as being able to backup and restore your photos.
Here are some of the most notable advantages of using a third-party tool to remove bursts on iPhone:
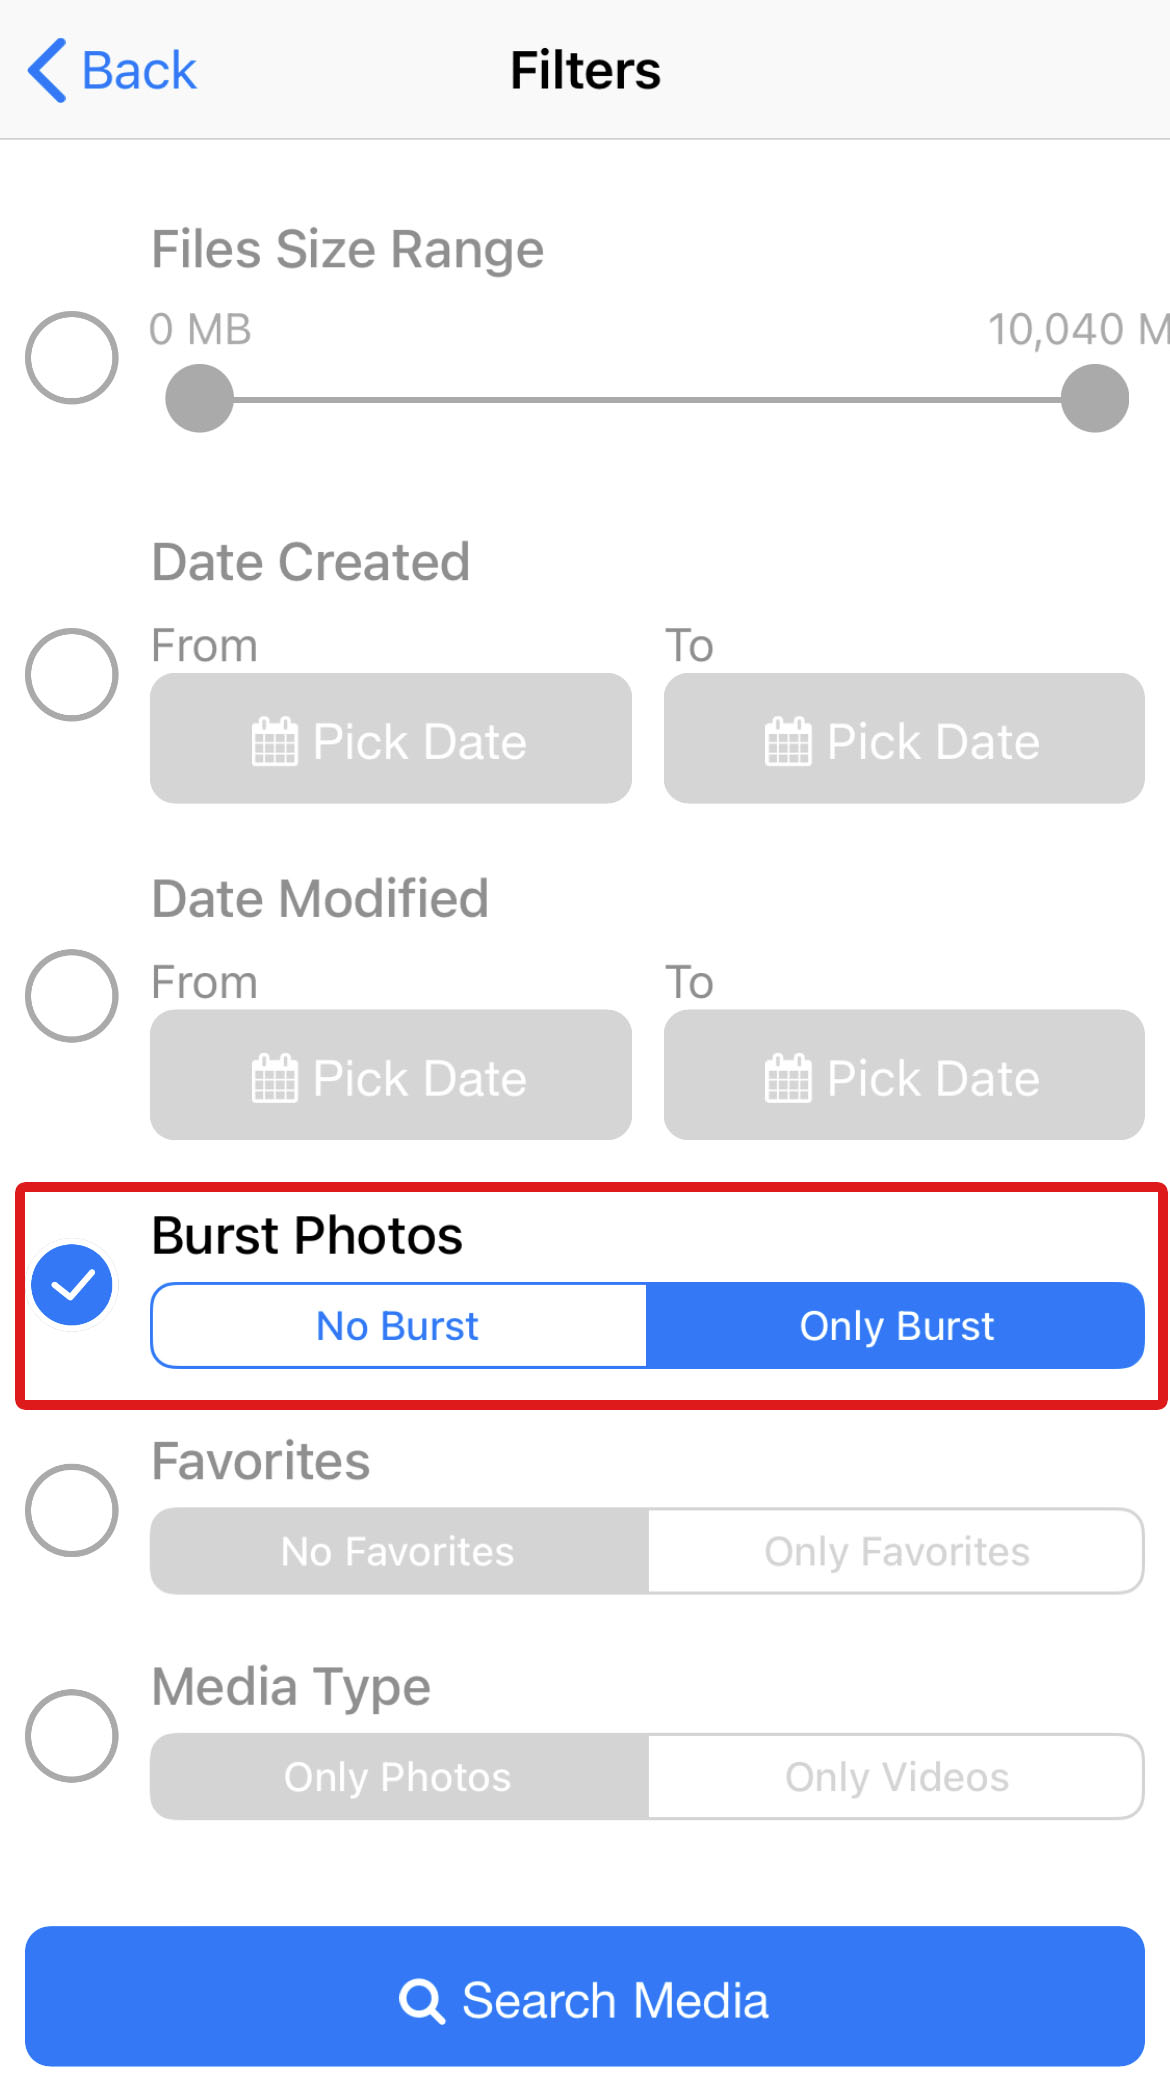
- More advanced sorting options – Some third-party tools offer better sort and filter options (file size, date, location, etc.) that can help you remove burst photos with fewer taps, helping you conveniently declutter huge amounts of photos from your gallery.
- Detection of duplicate photos – While the Photos app has a utility to manage duplicate photos on your device, some third-party duplicate removal tools feature more robust capabilities to find and delete duplicate photos on your iPhone.
- More efficient bulk deletion – a huge advantage of third-party tools lies in their ability to bulk select and delete photos, consuming way less time than when done in the Photos app.
Third-party tools like the Phone Cleaner app can filter your media to burst photos and bulk delete them. However, it requires you to purchase the premium version of the app to enjoy its full capabilities..
FAQ
Why is my iPhone making burst photos?
Your iPhone may be capturing burst photos because of how you tap the Shutter button in the Camera app or your camera settings. Burst mode can be triggered if you hold the Shutter button for too long (for the iPhone X and earlier models) or swipe the Shutter button to the left (for the iPhone Xs, iPhone Xr, and later models).
You can also check if you have enabled the Volume Up for Burst option on your phone (on iPhone Xs, iPhone Xr, and later).
Why I can't delete burst photos from an iPhone?
There can be several reasons why you can’t delete burst photos from your iPhone, but most are caused by software glitches. You can try to force close your Photos app or restart your iPhone to see if this fixes the problem.
After that, try to delete burst photos again by doing the following: In the Photos app, tap the Select option on the top-right corner of your screen > tap the burst photos you want to delete > select the Trash icon on the bottom menu.
What is the difference between burst mode and Smart HDR?
Burst mode and Smart HDR are distinct features on your iPhone. Burst mode allows you to capture a rapid series of photos from which you can select your favorites and remove the rest.
The Smart HDR feature enhances the quality of your photos by capturing multiple photos and combining them to create a single crisp, well-exposed image. Unlike burst photos, you won’t be able to access the other shots when using Smart HDR.
Conclusion
With our straightforward guide, you can now easily disable burst mode on your iPhone with just a few taps. Keep your gallery organized and clutter-free by preventing the accidental capture of burst photos and deleting those you no longer need.
The steps to turn off Burst mode may vary from one iPhone model to another, so it’s essential to follow the settings that apply to your specific device. Additionally, consider backing up any important photos you intend to delete to avoid data loss.
This article was written by Princess Lescan, a Staff Writer at Handy Recovery Advisor.
Curious about our content creation process? Take a look at our Editor Guidelines.