
Partitioning your hard drive can be a useful way of organizing your files so you know exactly where everything is. Unfortunately, it can be just complicated enough to be confusing for the average user. If it’s your first time partitioning a hard drive, you must be careful what actions you take to avoid losing your data.
In this article, we’re going to look at what partitioning is and provide an answer to the question “Does partitioning a drive erase data?”.
Why Do You Need to Partition Your Hard Drive?
If you’ve ended up here after searching for an answer to the question “Does partitioning a drive erase data?”, then it’s safe to assume that you already have some data on the drive. Your drive will have at least one partition that is used by the operating system, which is considered a volume as it contains a file system. Partitioning your drive isn’t always necessary, so before you make any changes, it’s best to understand what you want to accomplish. Do you want to resize an existing partition or create a completely new one using unallocated space?
There are some benefits to having multiple partitions, like the ability to compartmentalize your data. For instance, if you want to keep your photos and videos separate from all of your other data, you can dedicate an entire partition to it.
You can partition your hard drive when installing your operating system or by shrinking an existing partition and using the unallocated space to create more. If you encounter issues, like a corrupted file system or bad sectors, you may be required to reformat the volume to fix it. In doing so, though, you will lose the data stored on the volume, as formatting is an inherently destructive action that results in data loss. Next, we’ll talk about what partitioning actions will affect any data on the volume.
Does Partitioning a Drive Erase Data?
It depends on what partitioning actions you perform. Resizing (shrinking or extending) a partition can be done without data loss, as Windows keeps a record of where your data is and ensures no occupied sectors are affected. However, if you’re reformatting a partition, then data loss is to be expected, as it completely changes how your data is logically stored on the drive.
There are two types of formats to be aware of, and they each handle your data in two distinctly different ways which ultimately determine its recoverability after completion:
- Quick format – A quick format merely deletes the records used by your operating system to find the data, so the majority of your data will still be on the disk, just not accessible. This gives you a chance to recover the deleted partition if it was deleted accidentally.
- Full format – Contrarily, a full format will overwrite all sectors of the disk with zeros. Because of how this works, none of the data will be recoverable, as there will be nothing to recover once it’s overwritten.
Even though a quick format gives you a chance to recover some data after it has been performed, you shouldn’t treat it the same as a backup, as unlike with a backup, there’s no guarantee that the data will be recoverable afterward.
How to Recover Data from a Partitioned Drive
In instances where you’ve already partitioned your hard drive incorrectly and lost data, you may still be able to recover some of your lost files if you act quickly. To do this, you will need to use partition recovery software, like Disk Drill.
Such software is able to scan your hard drive for recoverable data and move it to a safe location on a separate storage device. Disk Drill in particular is a popular choice, as it’s easy to use and features very robust recovery capabilities that support a wide range of file systems, including FAT16/FAT32/exFAT, NTFS, NTFS5, HFS, HFS+, APFS, EXT2/EXT3/EXT4, as well as RAW or corrupted partitions. It can also recover data from formatted partitions, so long as it was a quick format that was performed. Learn more about the software in our Disk Drill review.
If you need to recover data from a partitioned external hard drive, make sure the external hard drive is connected before beginning recovery.
Follow these steps to recover files from a partitioned drive using Disk Drill:
- Download and install Disk Drill. Avoid installing it on the same drive that contains the lost partition, as it may overwrite some of the data.
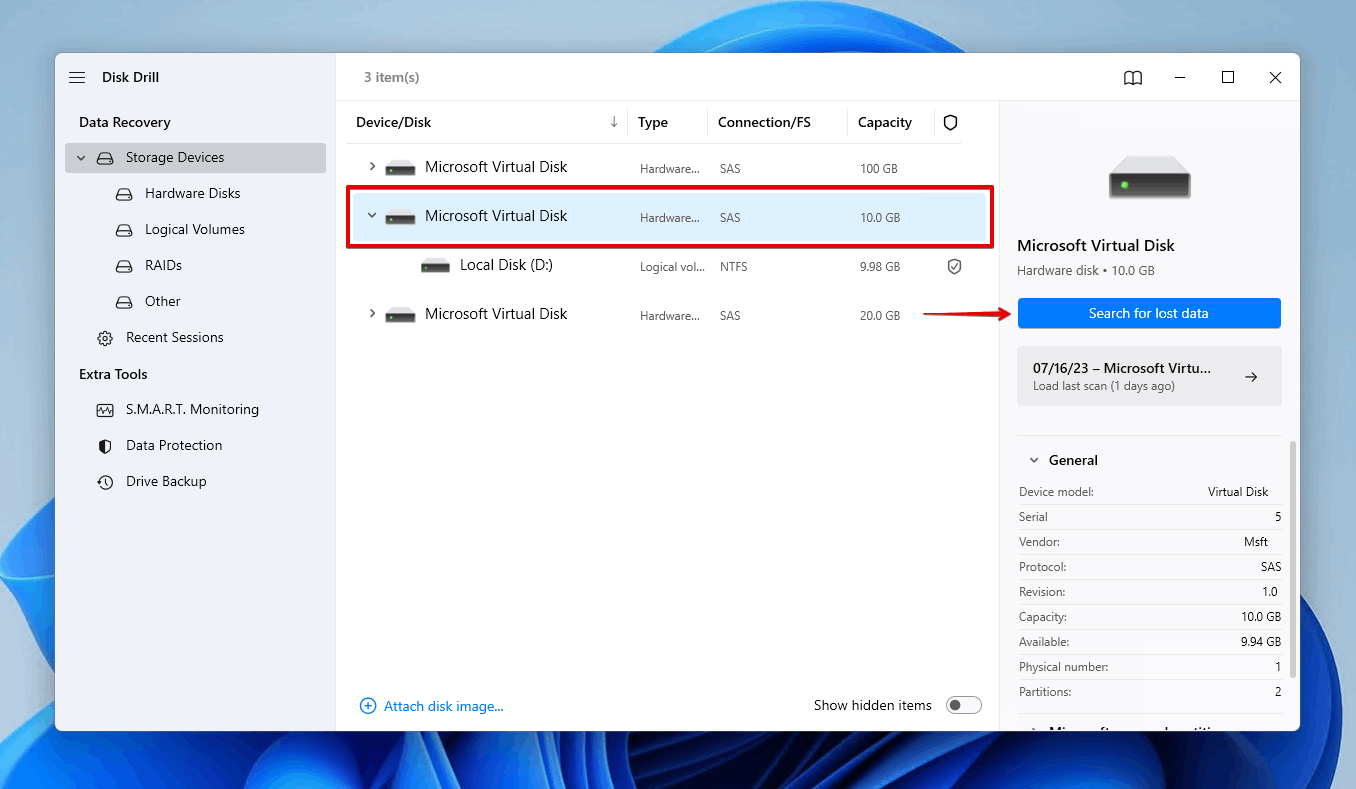
- Select the drive and click Search for lost data. This scan will find data along with any lost or deleted partitions. If you want to scan only the partition instead, click the dropdown next to the disk it resides on and select the partition.
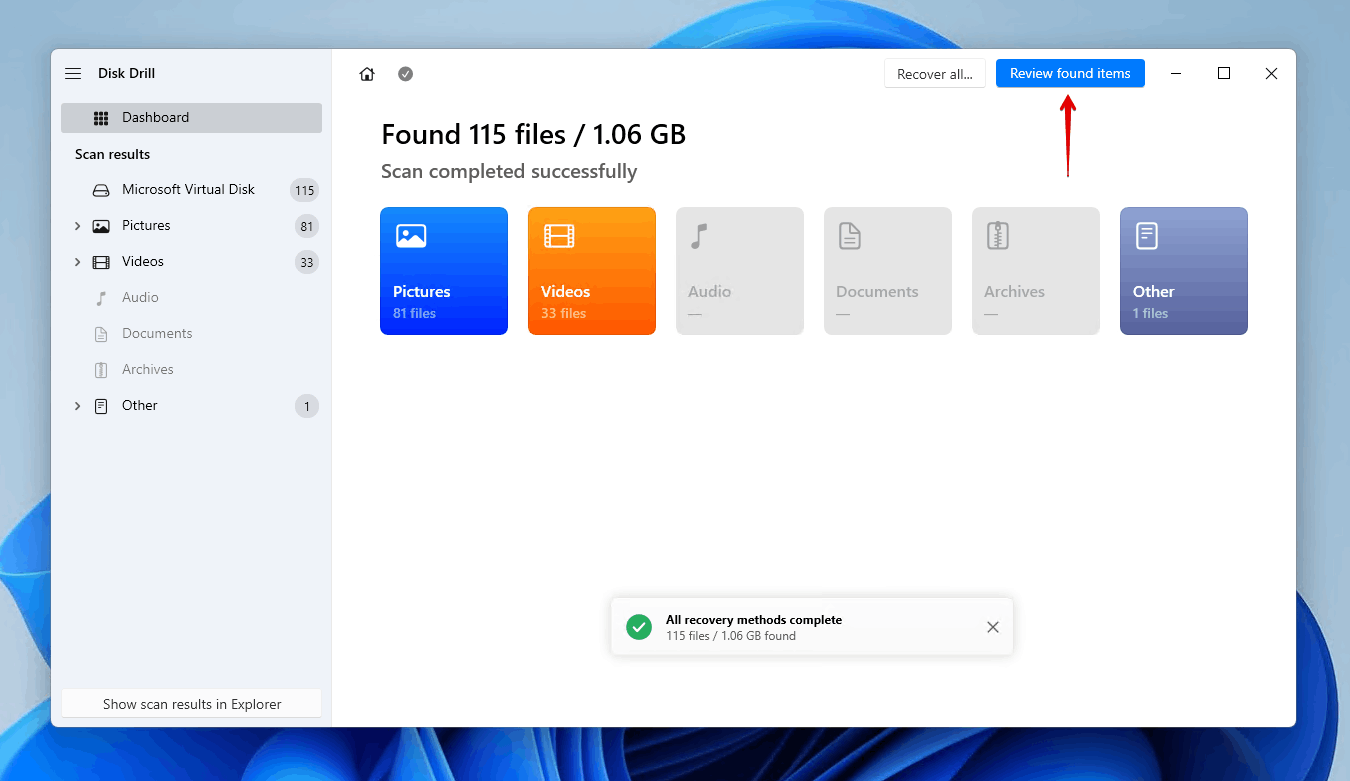
- Click Review found items once the scan is finished. You can also click on your lost partition if it’s found, which will only show the data on that specific partition. Alternatively, click Recover all to immediately restore all recoverable files.
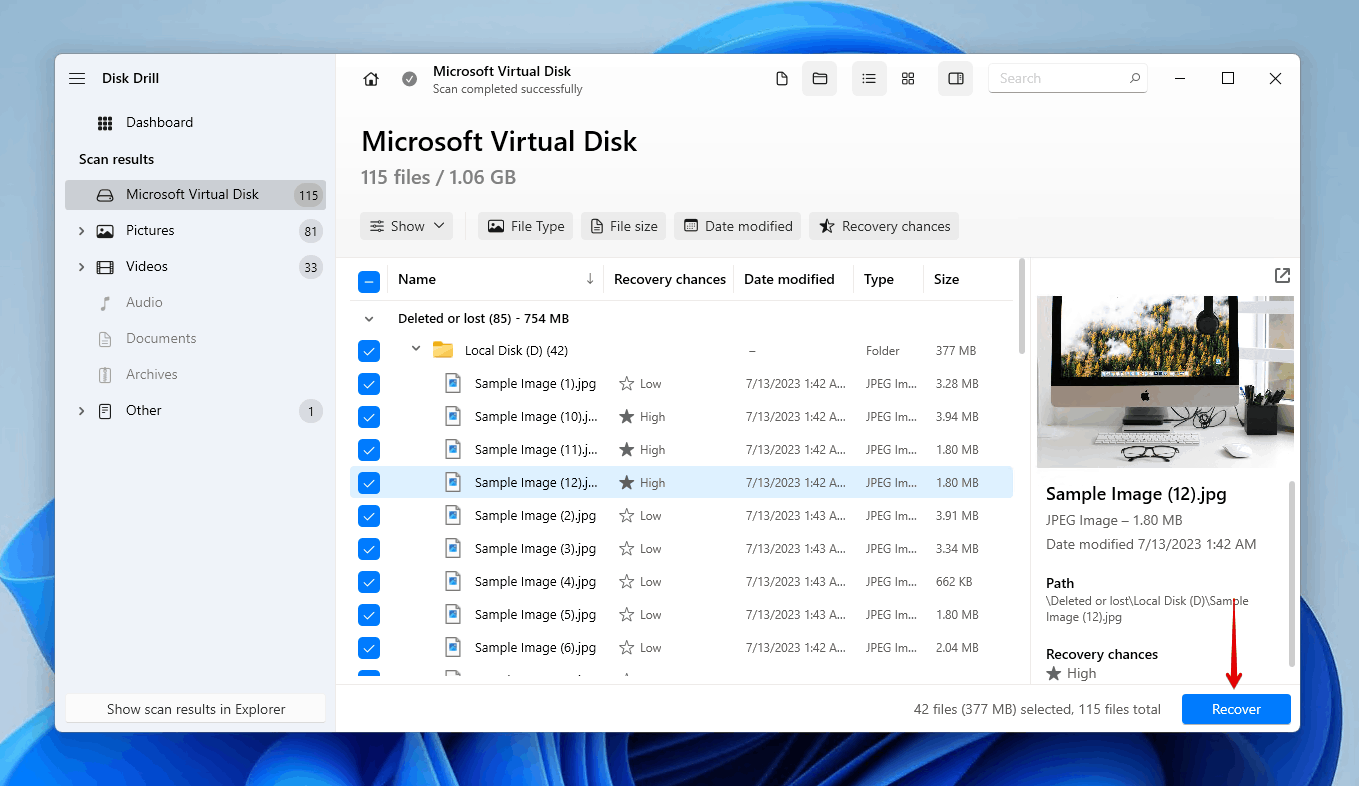
- Select the data you wish to recover from the partitioned drive. Lost data can be found in the Deleted or lost dropdown while existing data can be found in the Existing one. When you’re ready, click Recover.
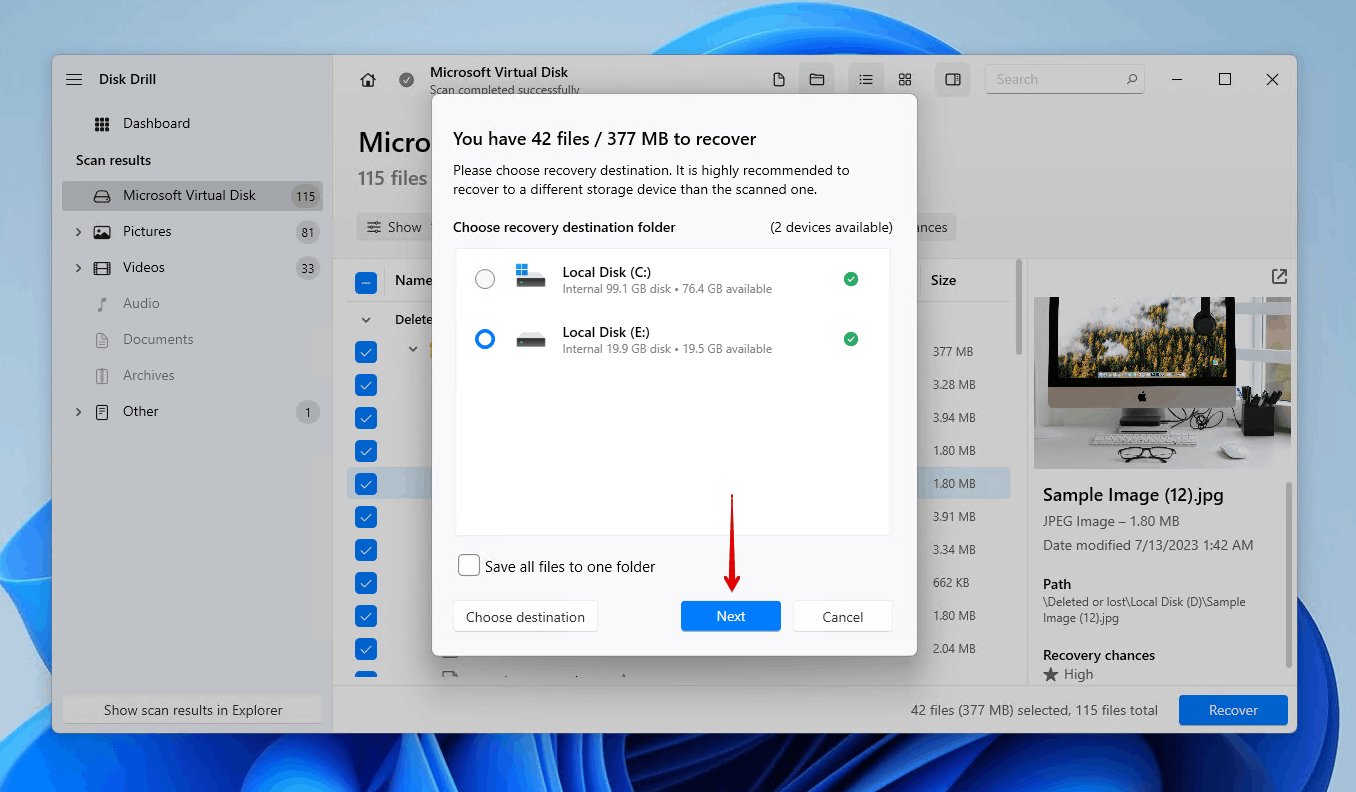
- Choose a safe location to store the data recovered from the partitioned hard drive. Again, avoid saving it to the same disk you’re recovering it from. When you’re ready to complete data recovery, click Next.
If you want to shop around for alternatives, check out our list of the best partition recovery software that we’ve tested so far.
How to Partition a Hard Drive Without Losing Data
To clear up any confusion around partitioning your hard drive, we’ve included step-by-step instructions below that cover any changes to your partition you wish to make.
Step 1: Determine Your Partitioning Scenario
Before we begin, think about what you’re trying to achieve. Figuring this out now is important, as it dictates whether or not a backup is needed and helps us guide you in the right direction. We’ve included a handy table below that you can use to jump straight to the section you need.
I want to use my unallocated space |
If you want to create a partition using unallocated space, you can do so without backing up data first. |
I want to shrink one of the partitions and use this space to resize another one or create a new partition |
You can shrink your partition and create a new partition with the unallocated space without backing up your data first. |
I need to reformat my partition |
In any instance where you need to reformat your partition, you must back the data up first. Once the data is safe, you can reformat the existing partition. |
Step 2: Backup Your Data If Needed
In order to partition a hard drive safely without data loss, you should back it up first when necessary. A backup is encouraged for most partitioning actions, but for others, it’s essential.
We’ll guide you through two ways of backing up your data, one using Disk Drill and the other using Backup and Restore.
Method 1: Using Disk Drill (Best for Malfunctioning Volumes)
We’ve already demonstrated how to recover data from a partitioned hard drive with Disk Drill, but did you know that Disk Drill also has a Drive Backup feature you can use to make full copies of your partition? It’s super quick and available to all users for free.
You will need a Disk Drill PRO license in order to restore the data from the Disk Drill backup, but you can recover up to 500 MB for free before upgrading.
Here’s how to make a byte-to-byte backup of your drive or partition using Disk Drill:
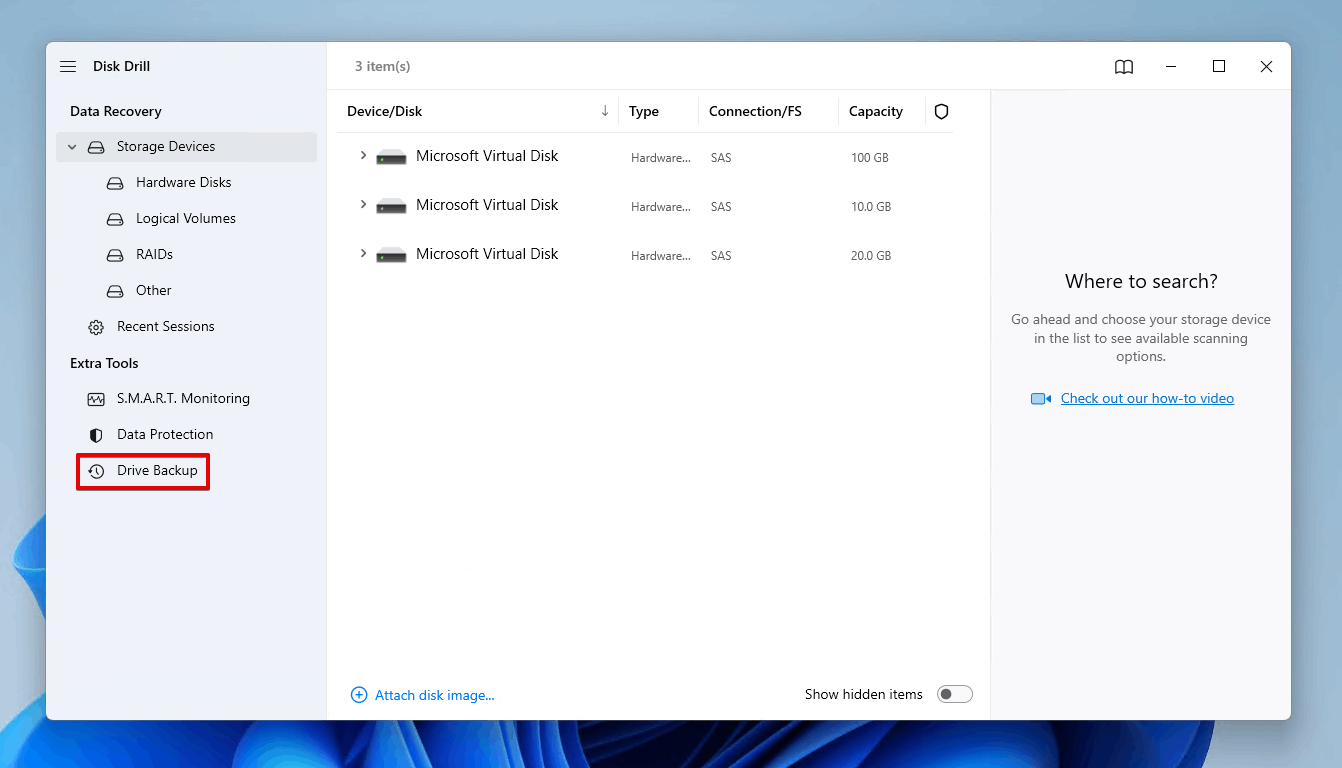
- Click Drive Backup.
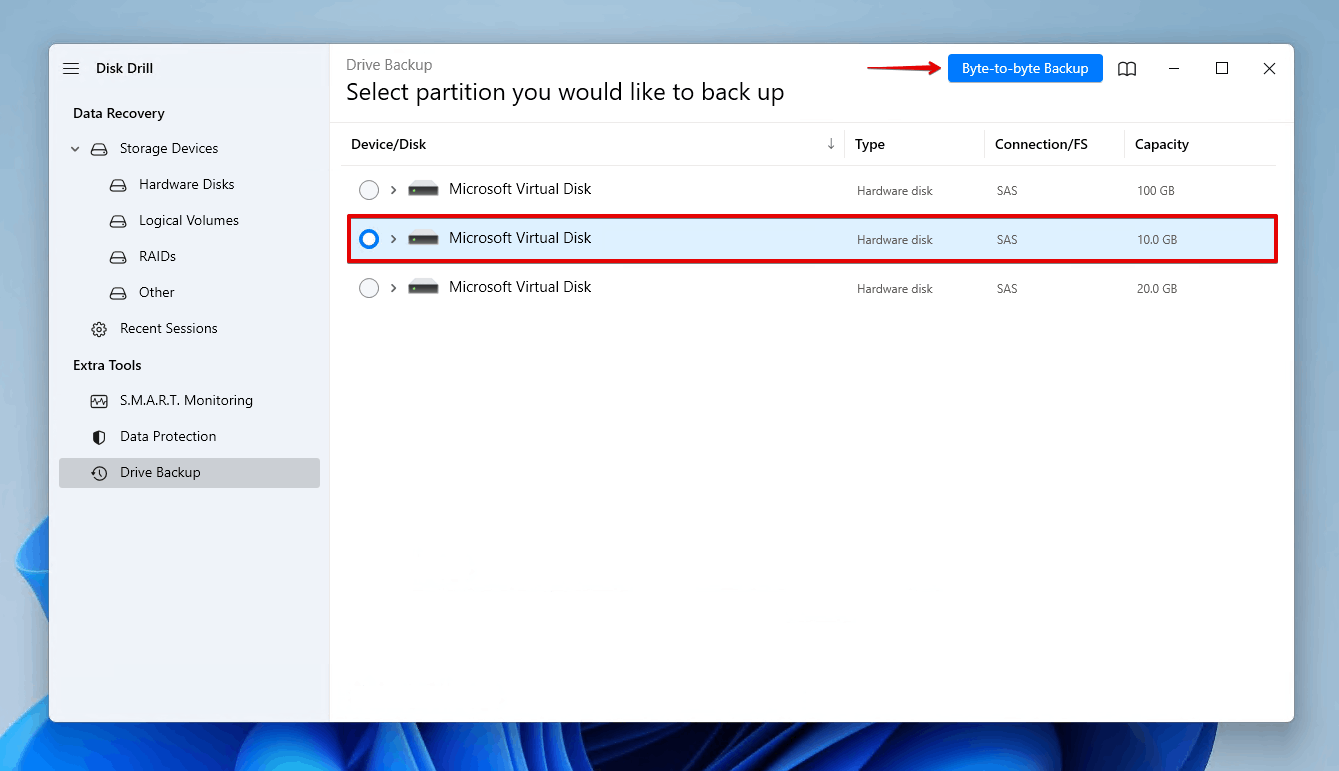
- Select the disk or partition you want to back up, then click Byte-to-byte Backup.
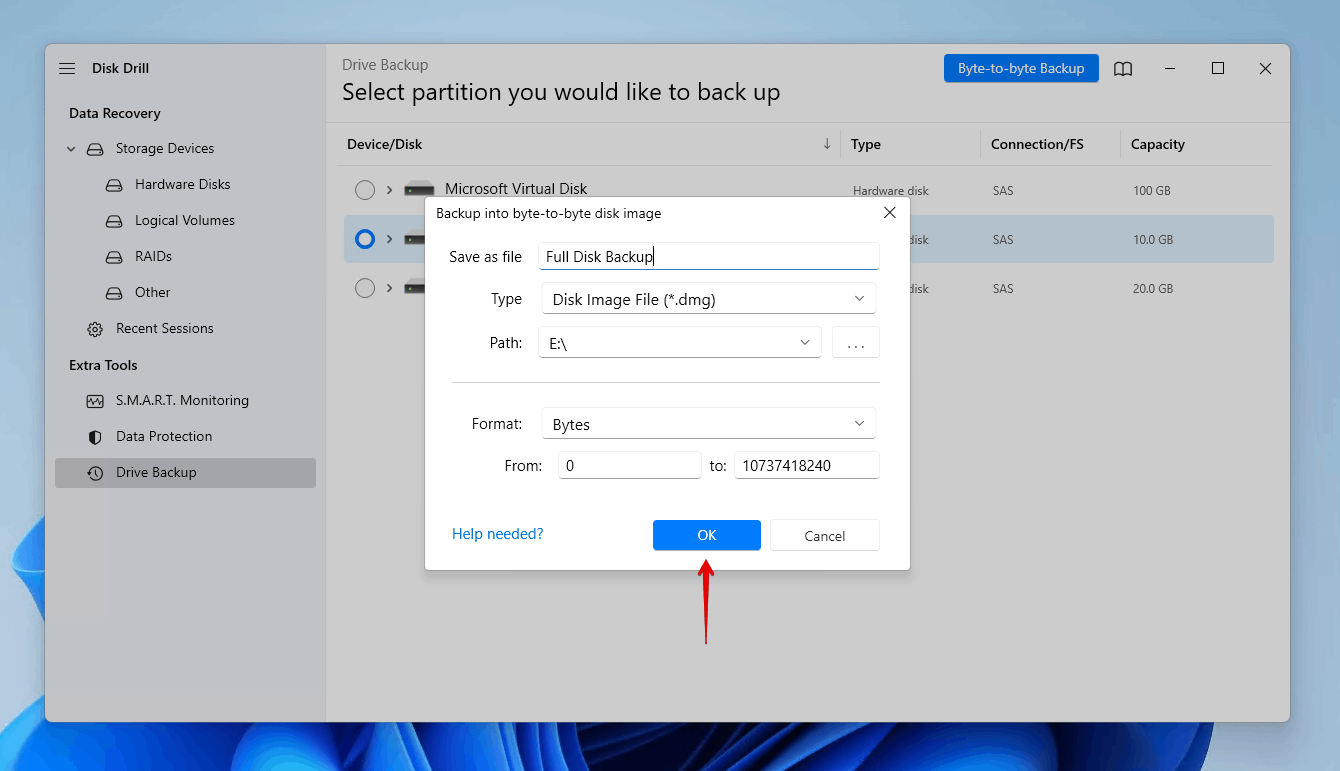
- Give the backup a name and choose where you want to store it on another storage device. Click OK to create the backup.
Method 2: Using Native Windows Methods (Best for Healthy Drives)
If you’d prefer a native backup solution that’s included with Windows, you can use File History or Backup and Restore. Both are great options for backing up the data on your partition and easily restoring it after you’ve finished making any changes to the partition.
Here’s a demonstration of how to back up data using Backup and Restore:
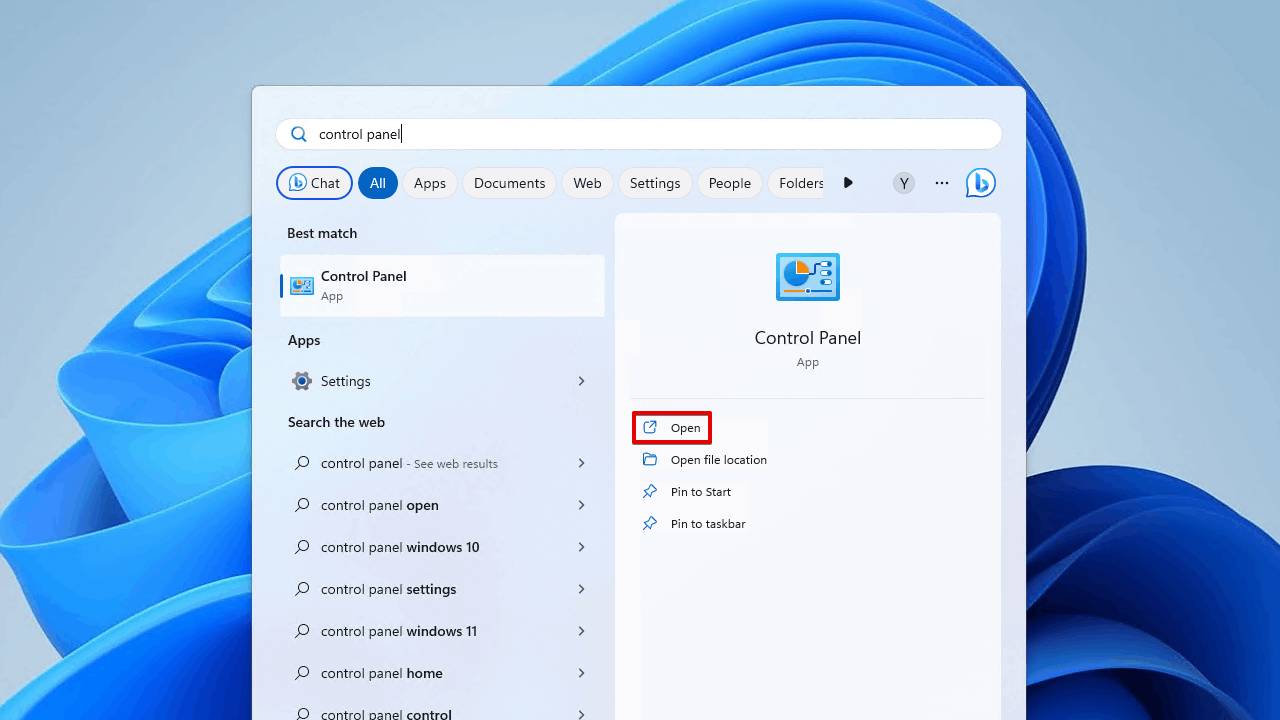
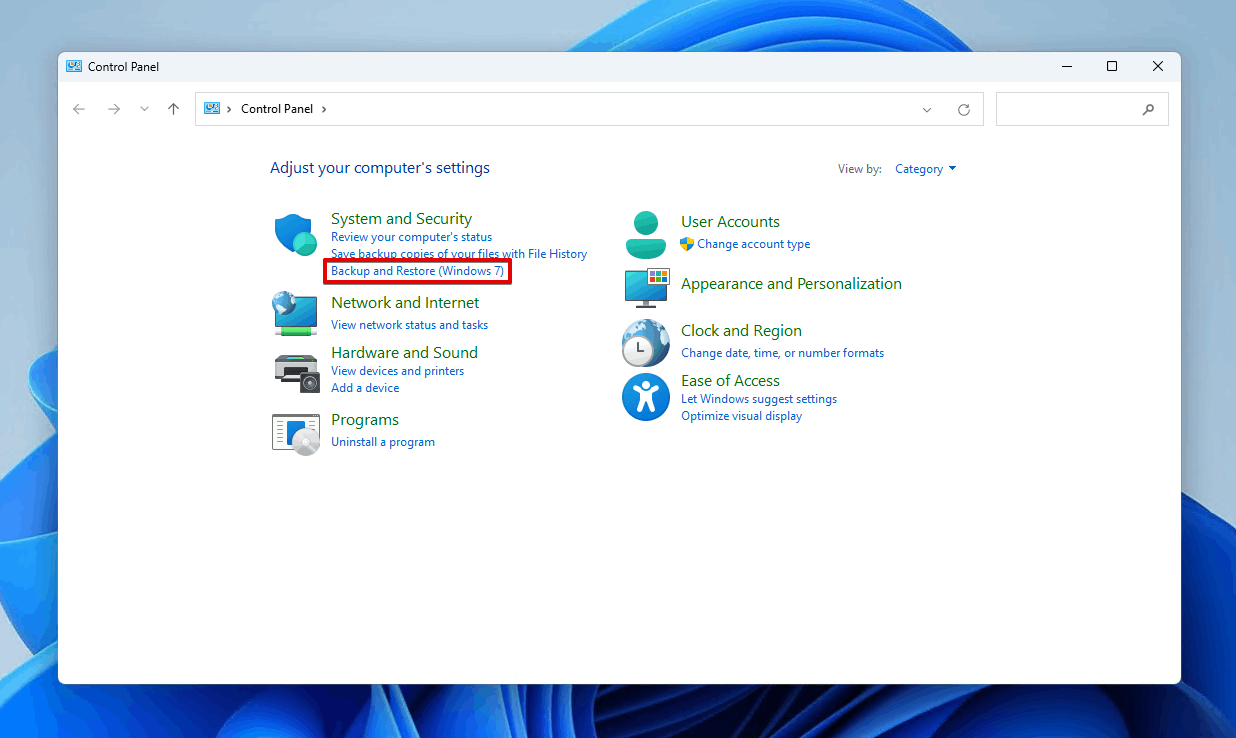
- Open Start and search “Control Panel”. Open it.
- Click Backup and Restore (Windows 7). If you don’t see it, make sure you’re using the Category view in the top-right.
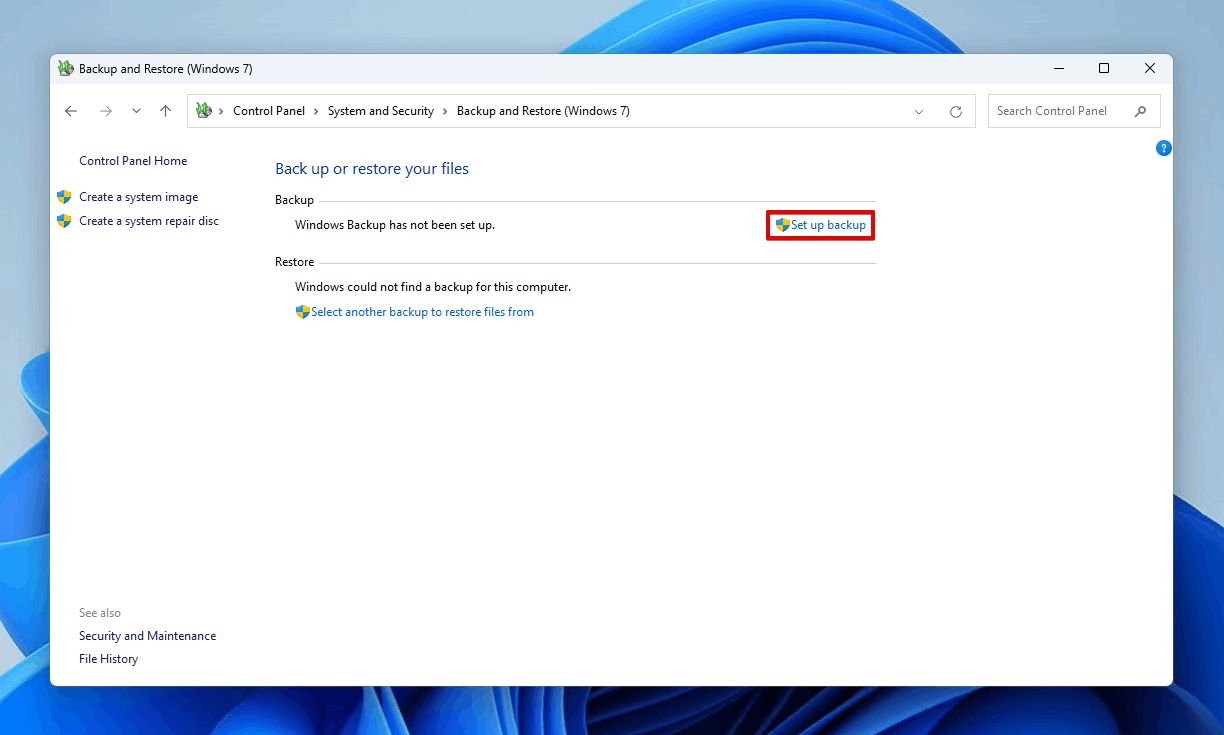
- Click Set up backup.
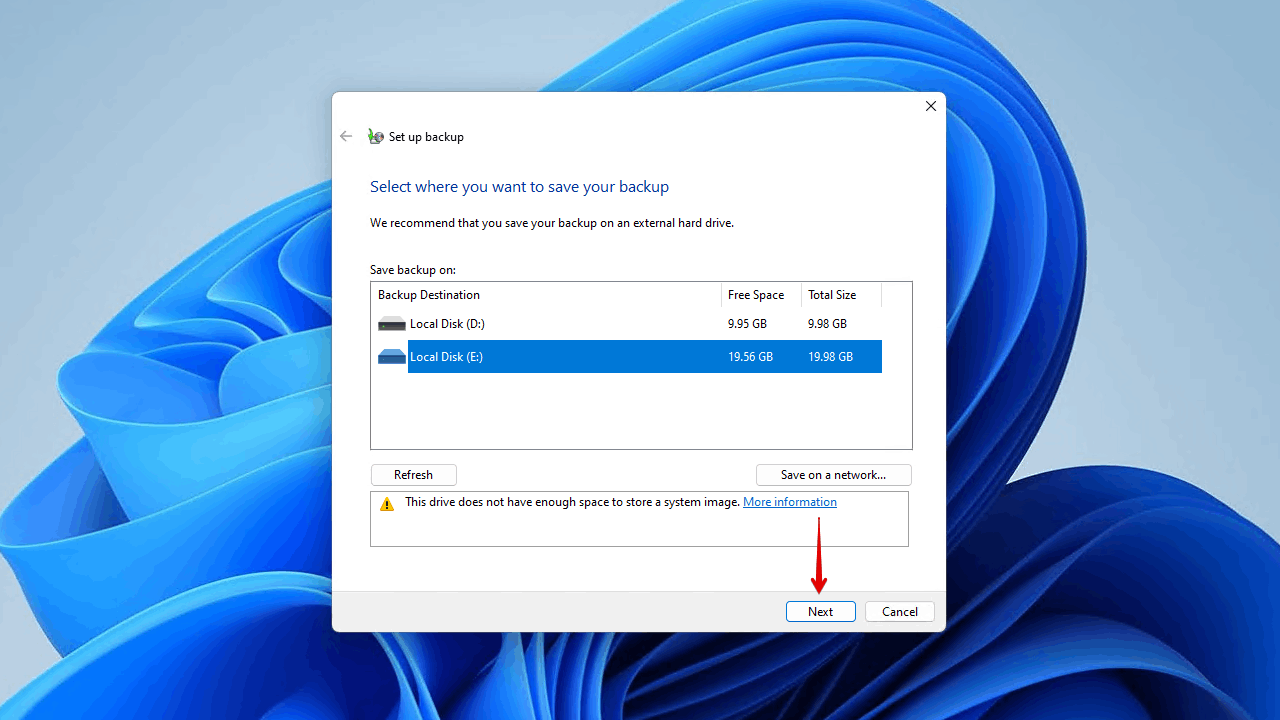
- Select the drive which will hold the backup then click Next.
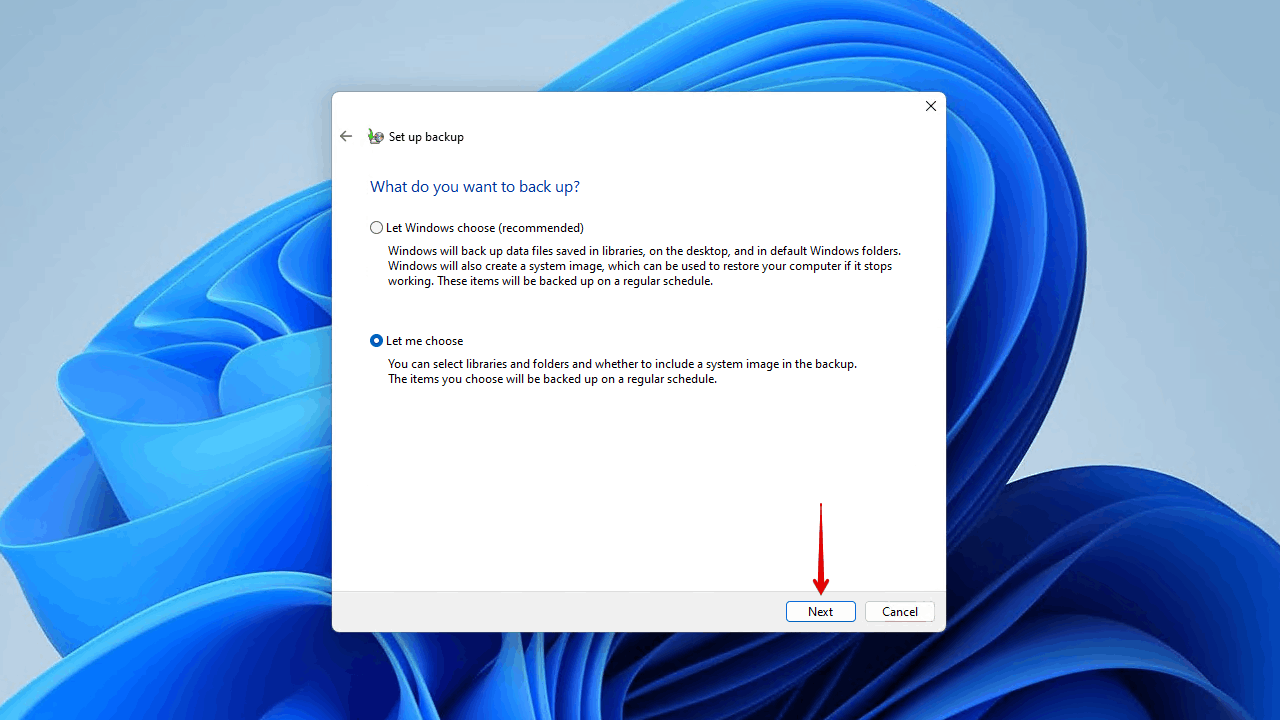
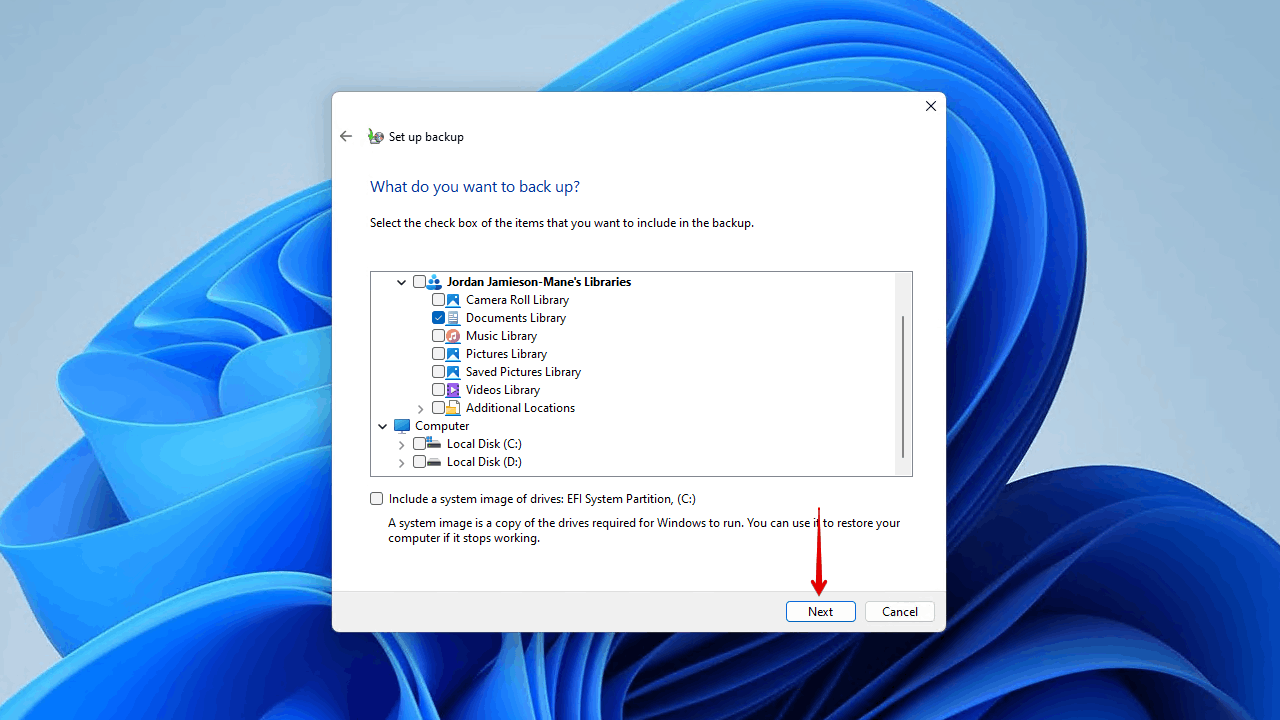
- Choose what you want to back up. You can let Windows choose what to back up, or you can manually select files and folders to back up. We’re going to select the Let me choose option then click Next.
- Select the data you wish to back up and click Next.
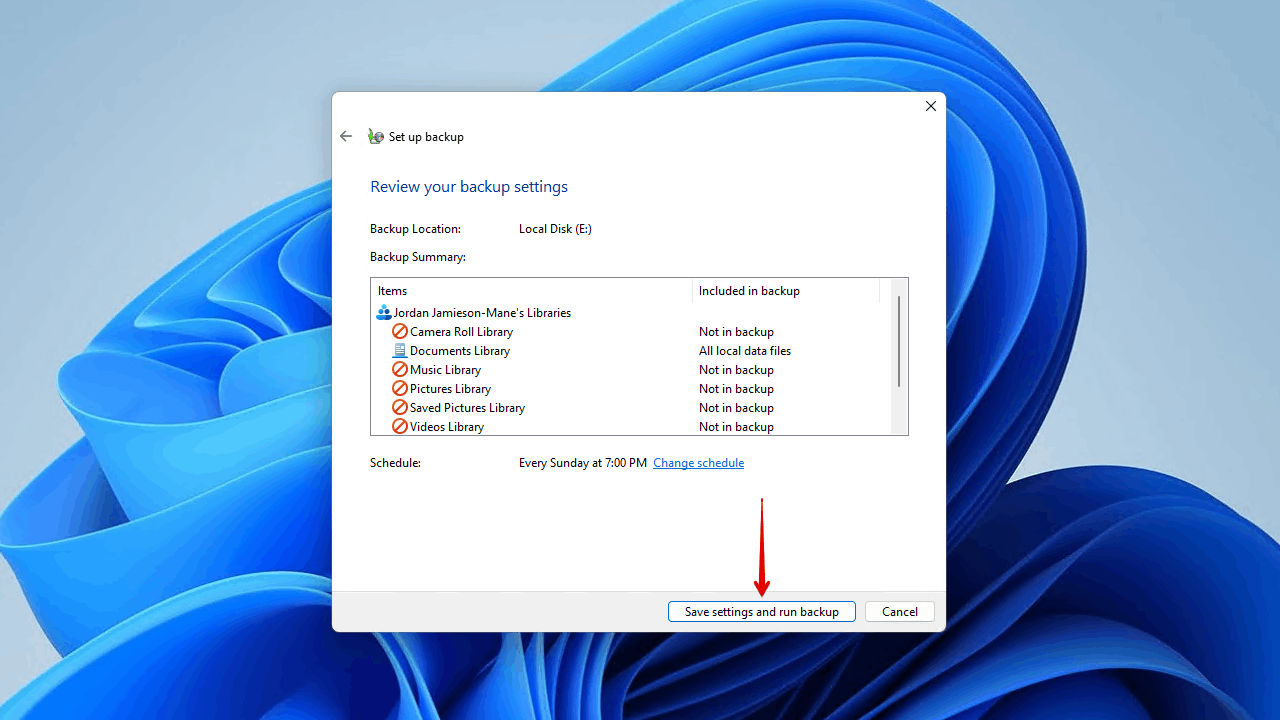
- Click Save settings and run backup.
Step 3: Perform Partitioning
Now comes the fun part. The options outlined below will show you various ways of partitioning your hard drive. Most of them will be using Disk Management, as it’s more than enough for basic tasks. However, we’ve also included a third-party tool that can perform the same actions (plus more) if Disk Management doesn’t work out for you.
Option A: Use Unallocated Space If There Any
Disk Management is a built-in disk management utility that you can use to modify drives and partitions. It’s more than enough if you’re only looking to perform basic partitioning tasks, like creating new partitions, resizing existing ones, or deleting them to start fresh.
Follow these steps to set up a new partition using unallocated space with Disk Management:
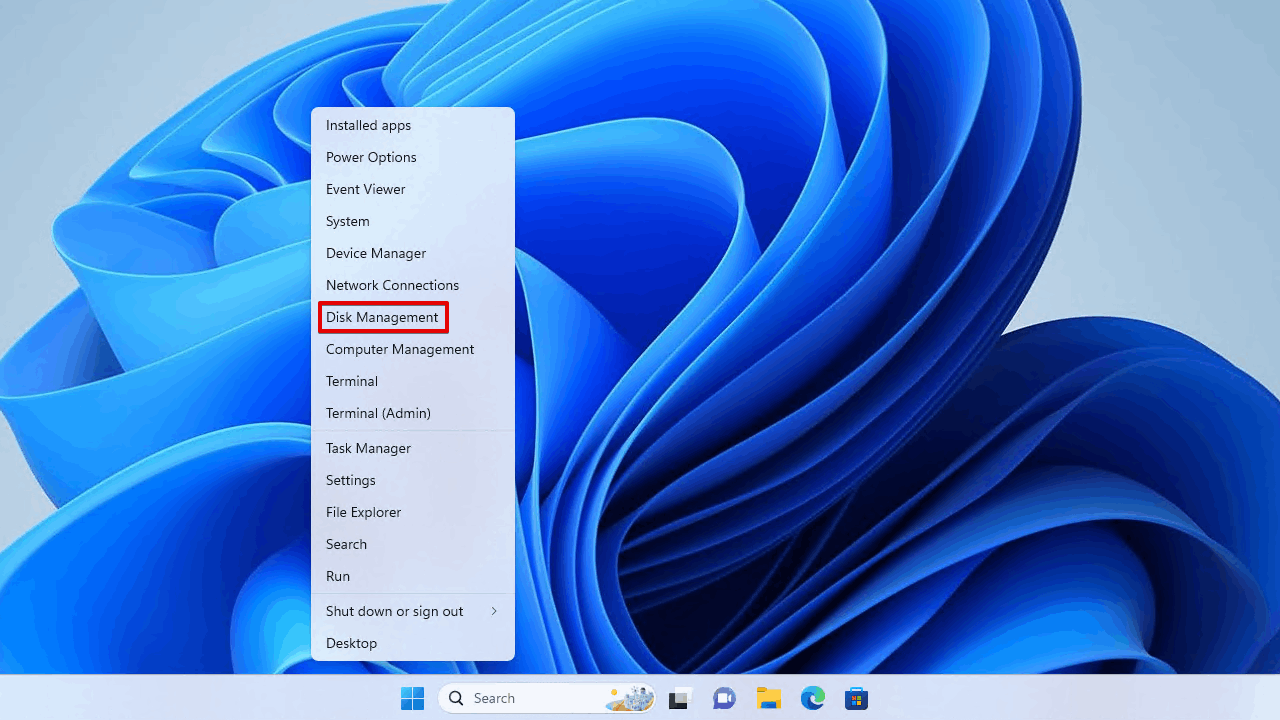
- Right-click Start and click Disk Management.
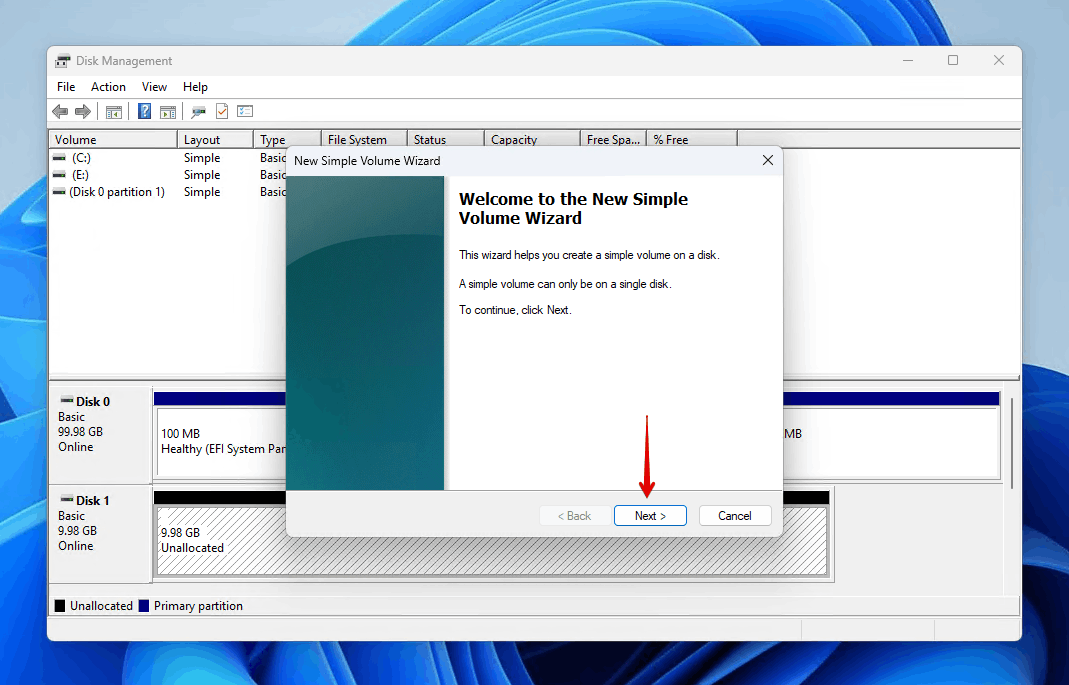
- Right-click the unallocated space and click New Simple Volume.

- Click Next.
- Specify a volume size. If you’re only creating one partition, you can leave this as is. Click Next.

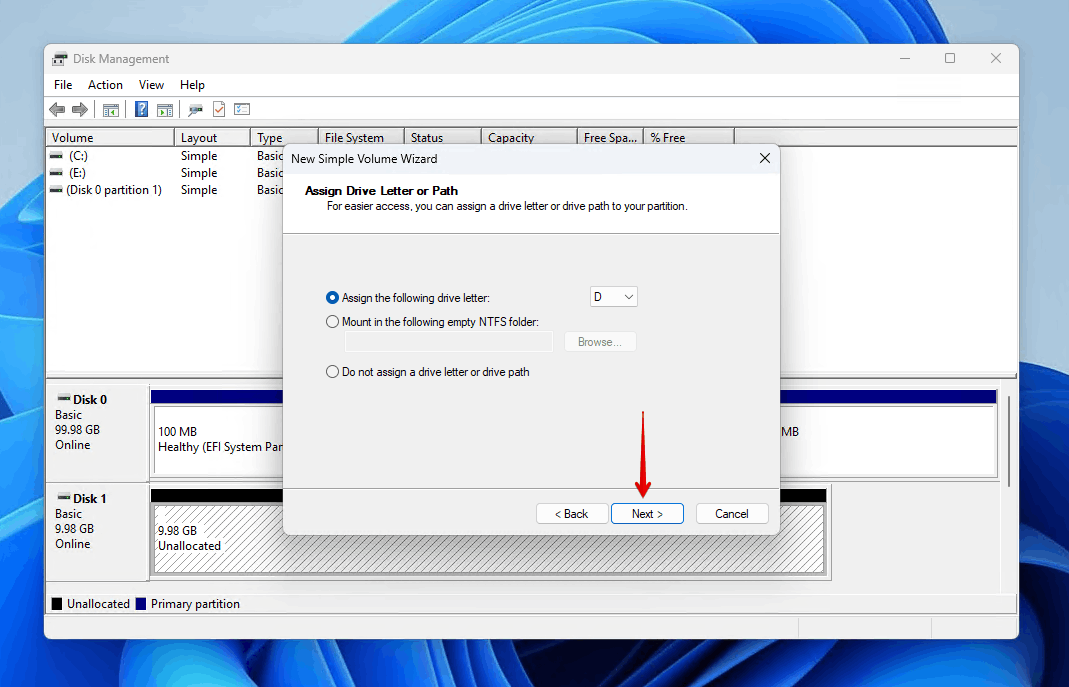
- Choose a drive letter and click Next.
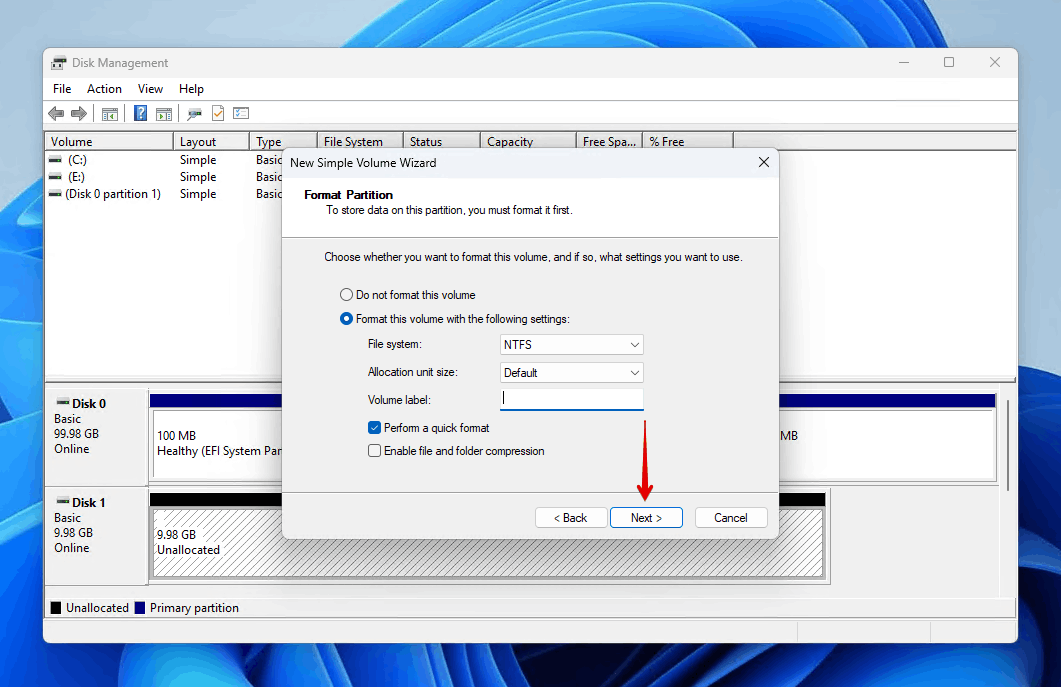
- Choose what file system you’d like to use. Give the volume a label and make sure Perform a quick format is ticked. Click Next.
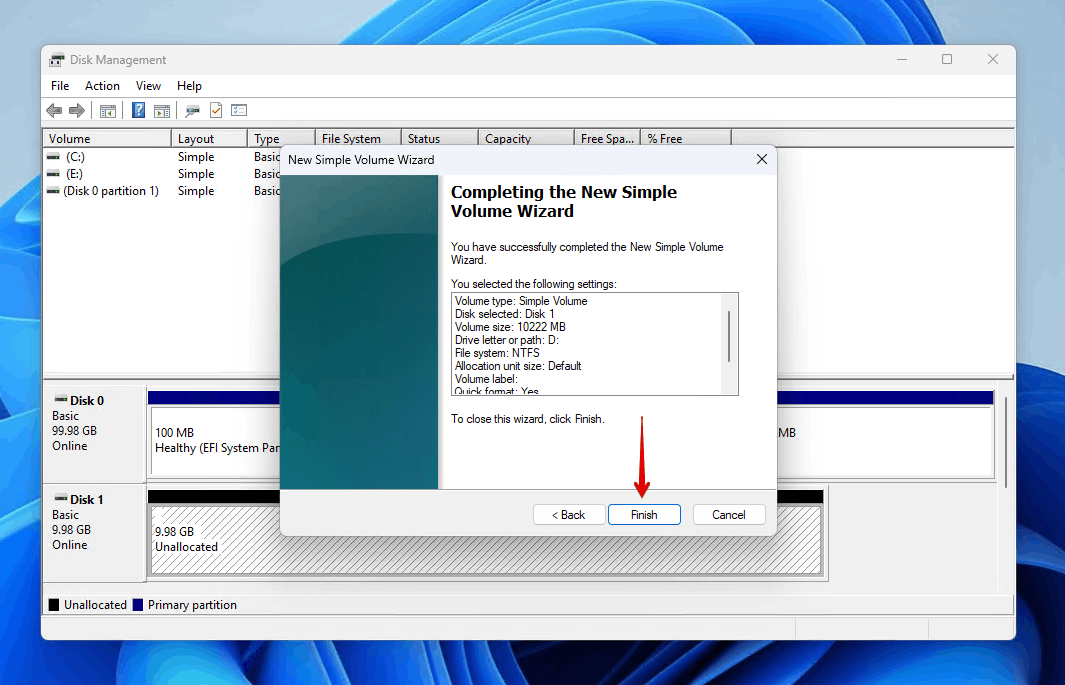
- Click Finish.
Option B: Shrink the Existing Partition
You can shrink your partition using Disk Management too. This function has a built-in safety feature that won’t allow you to shrink the volume any smaller than where the existing files are located to prevent data loss.
This is how you shrink a partition using Disk Management:
- Right-click Start and click Disk Management.
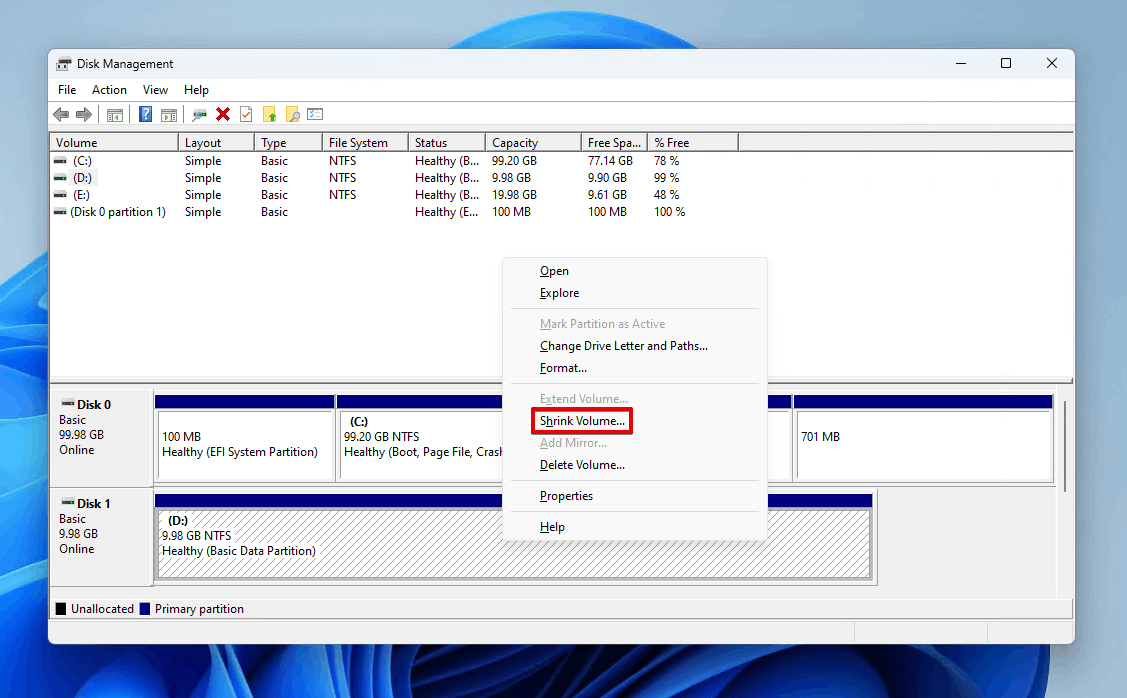
- Right-click the volume you want to shrink, then click Shrink Volume.
- Specify (in MB) how much you wish to shrink the volume. Then, click Shrink.

Once done, you can then create a new partition using the unallocated space on the drive and begin writing data to it.
Option C: Reformat the Existing Partition
Reformating an existing partition will delete any data it contains. Because of this, we highly recommend backing it up first so you can easily restore the files once the partition has been reformatted.
While you can recover data that’s lost in a quick format, there’s no guarantee that the data will still be in a usable state, unlike a backup which contains a full, working copy of the data.
Here’s how you reformat a partition in Disk Management:
- Right-click Start and click Disk Management.
- Right-click the existing volume, then click Format.
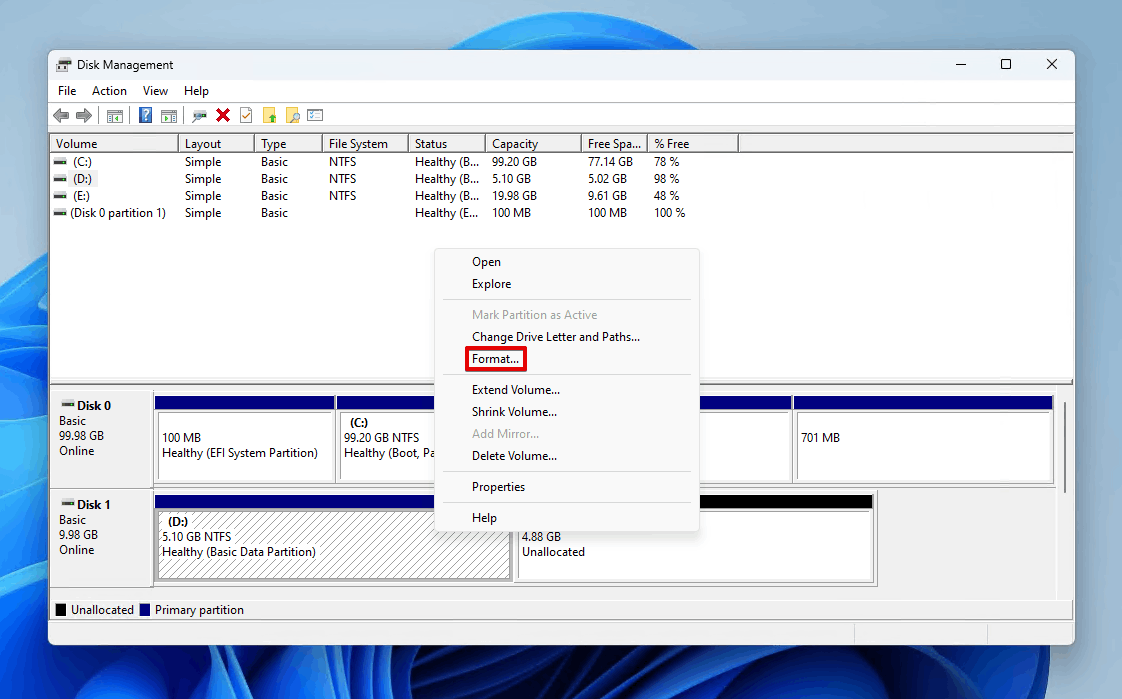
- Name the volume and specify what file system you wish to use. Make sure Perform a quick format is ticked, then click OK.
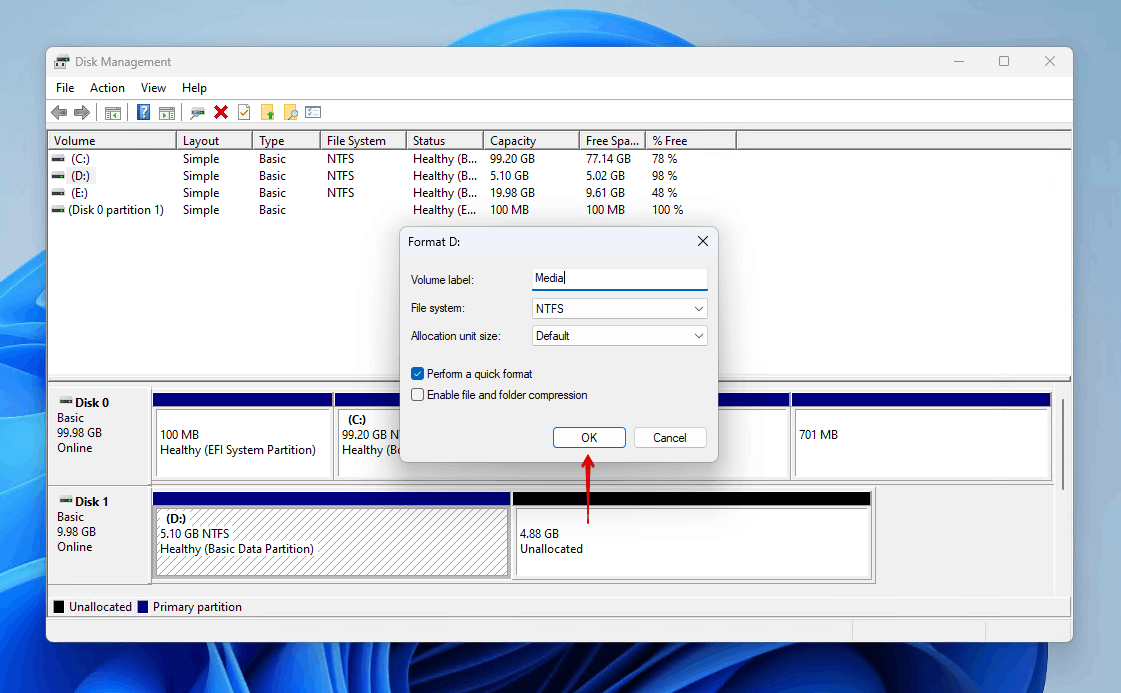
- Click OK again to confirm.
Option D: Use Third-Party Tools
If Disk Management doesn’t have enough functionality to accomplish what you need, then you can also try third-party software.
There are many options to choose from, but we’re going to demonstrate how to create a partition using MiniTool Partition Wizard. You can perform many basic actions with the free version, but you will need to upgrade in order to access more advanced features like OS migration, converting disks, and lost partition recovery.
Follow these instructions to set up a partition using MiniTool Partition Wizard:
- Download and install MiniTool Partition Wizard.
- Right-click the unallocated space on your disk, then click Create.
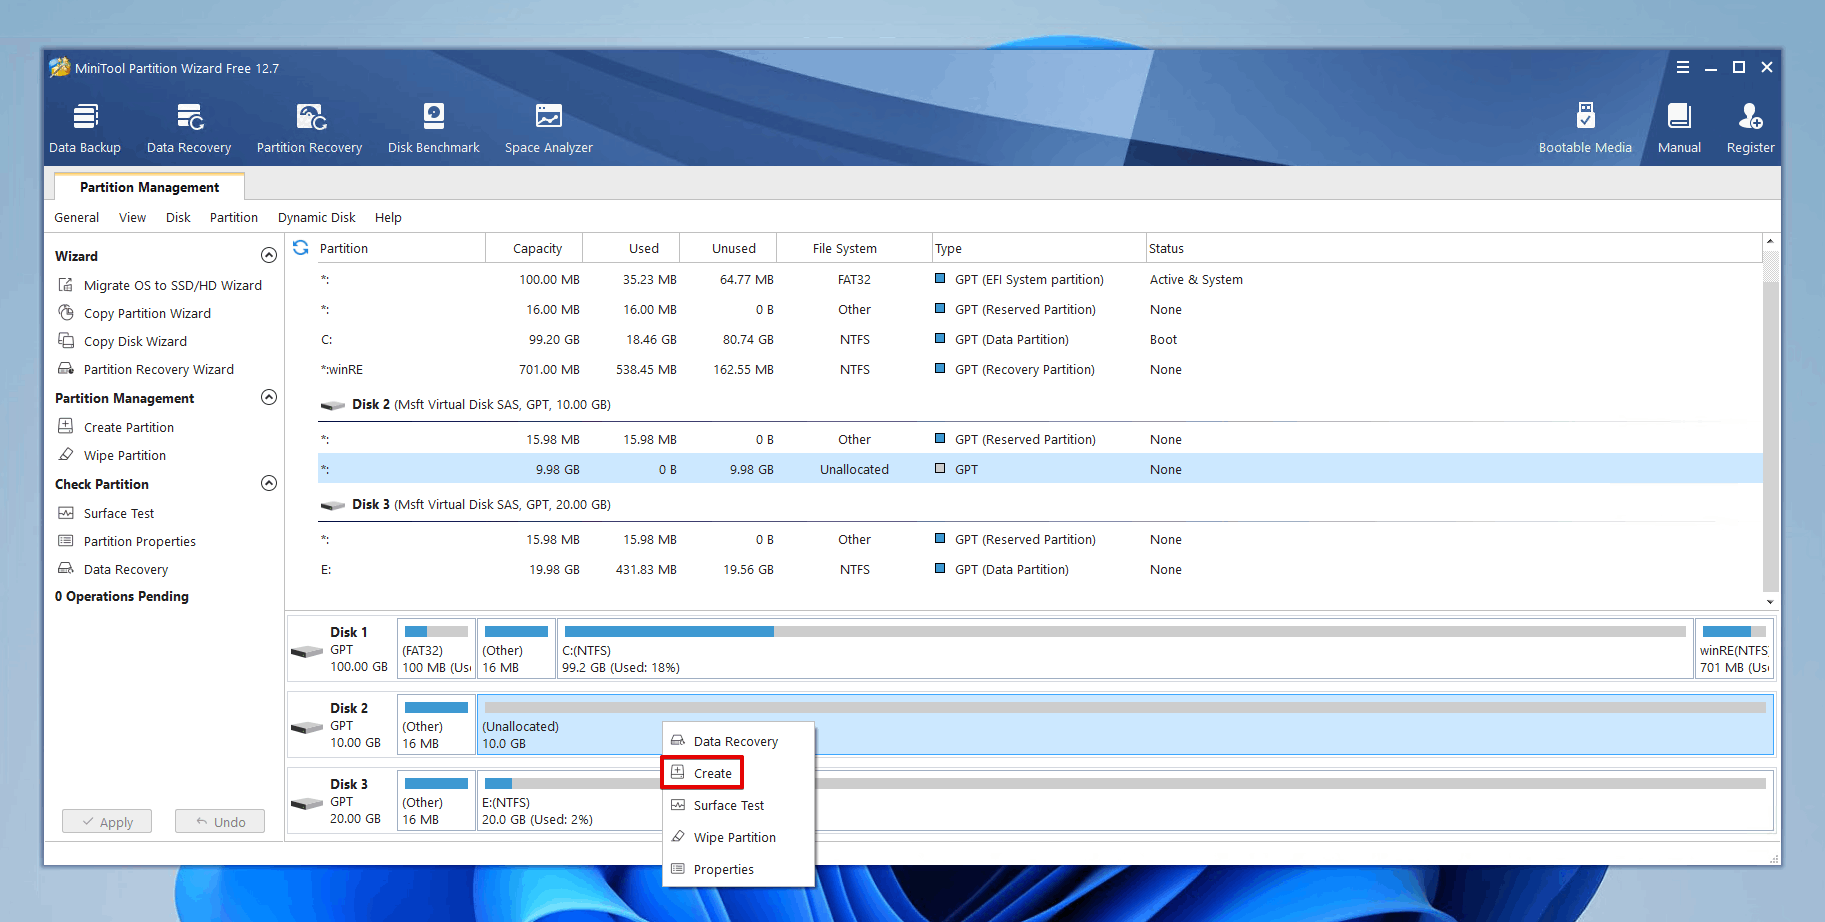
- Specify a partition label and choose a drive letter and file system. Use the slider to choose how large you want the partition to be, or manually enter the values. When you’re ready, click OK.
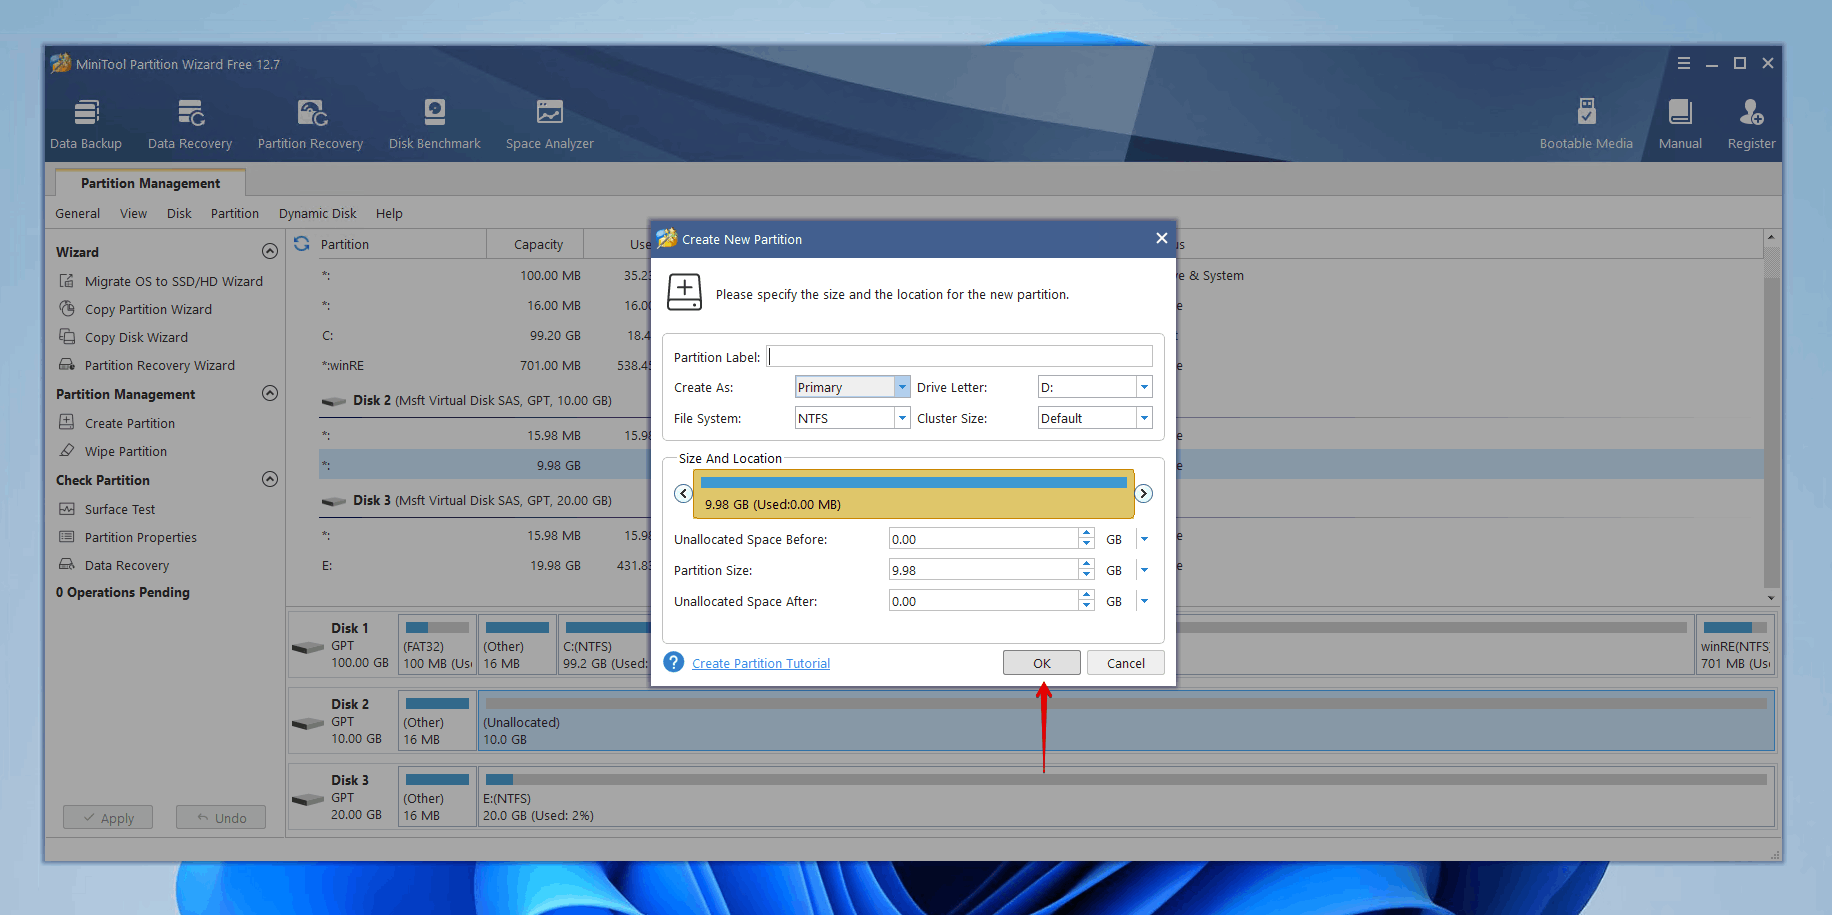
- Click Apply.
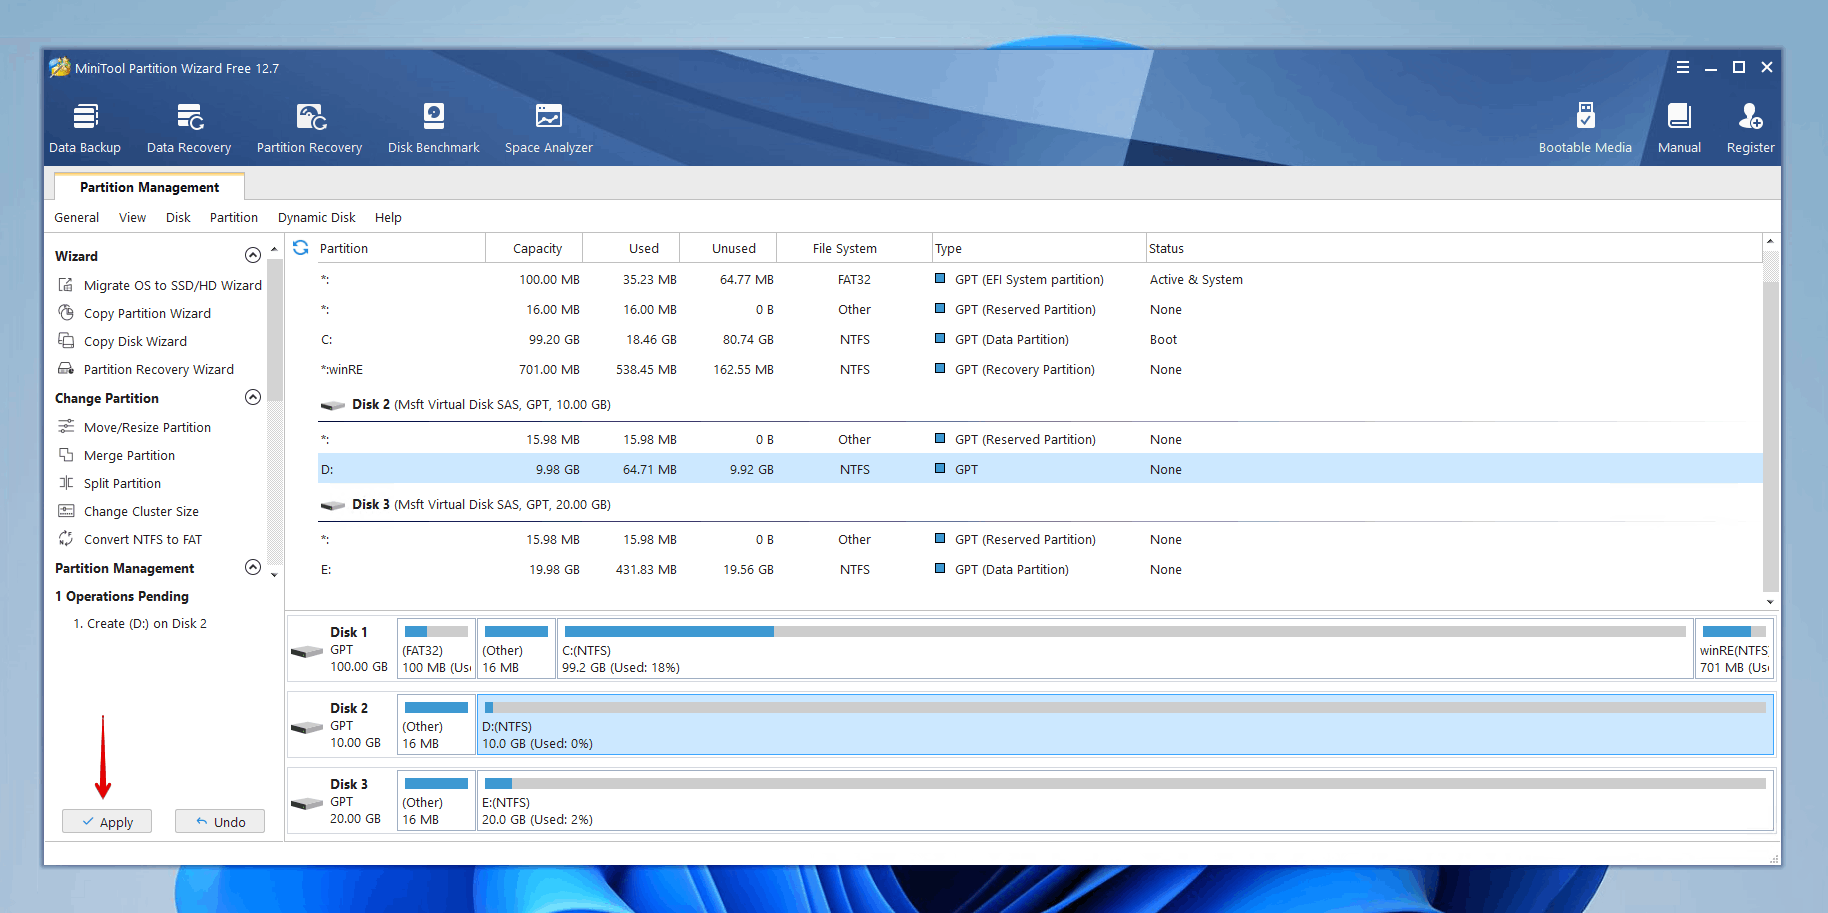
- Click Yes.

FAQ
Can I partition a drive with data on it?
You can, but certain actions will delete the data on your partition. Shrinking or extending your partition will not affect your data (unless it’s not done correctly), but formatting the partition will delete all data on it.
Does partitioning SSD erase data?
Partitioning doesn’t inherently erase your data. It’s possible to resize partitions on your SSD and create new ones without the loss of your data. However, if you’re deleting or formatting an existing partition, then all of the data on that partition will be deleted.
Does partitioning a drive erase data on Mac?
Modifying existing partitions on a Mac will not erase the data if you’re merely resizing them, but deleting or formatting the partition will delete your data.
Does partitioning a drive make it faster?
In and of itself, partitioning does not make the drive faster. However, it does make it easier to keep your data organized so it’s easier to find, resulting in less time being spent trying to find what you’re after.
Conclusion
We hope the information in this article has helped you answer the question “Will partitioning a drive erase the data?”. To conclude, partitioning your hard drive isn’t an inherently destructive process, but there are some actions you must be aware of that will result in the loss of your data.
Resizing your partition can be done without worry, as well as creating new partitions using unallocated space. However, formatting or deleting a partition will delete all of the data on it. In any case, you should create a backup before making any adjustments to your drive or the partitions on it. If you’ve already partitioned a drive and lost some data, you should perform data recovery as soon as possible to get that data back before it’s overwritten for good.
This article was written by Jordan Jamieson-Mane, a Staff Writer at Handy Recovery Advisor. It was also verified for technical accuracy by Andrey Vasilyev, our editorial advisor.
Curious about our content creation process? Take a look at our Editor Guidelines.