
Oh no! You’ve accidentally smashed delete on your Mac, and your iMessages have disappeared from the earth. That’s your entire life vanished – everything including the texts from your Gran, work documents, holiday videos, and the saucy snaps from your lover.
Because iMessage is about more than just messages or notes- it’s a completely secure communications and storage platform – one which you trust with your life.
And it gets worse – although iMessage does have cloud backup and sync – this works against you as the iMessages you’ve wiped from one device are automatically scrubbed from everywhere else, too.
Take a deep breath, calm down, make yourself a nice cup of tea, and we’ll tell you how you can recover iMessages on a Mac.
Where should your iMessages be?
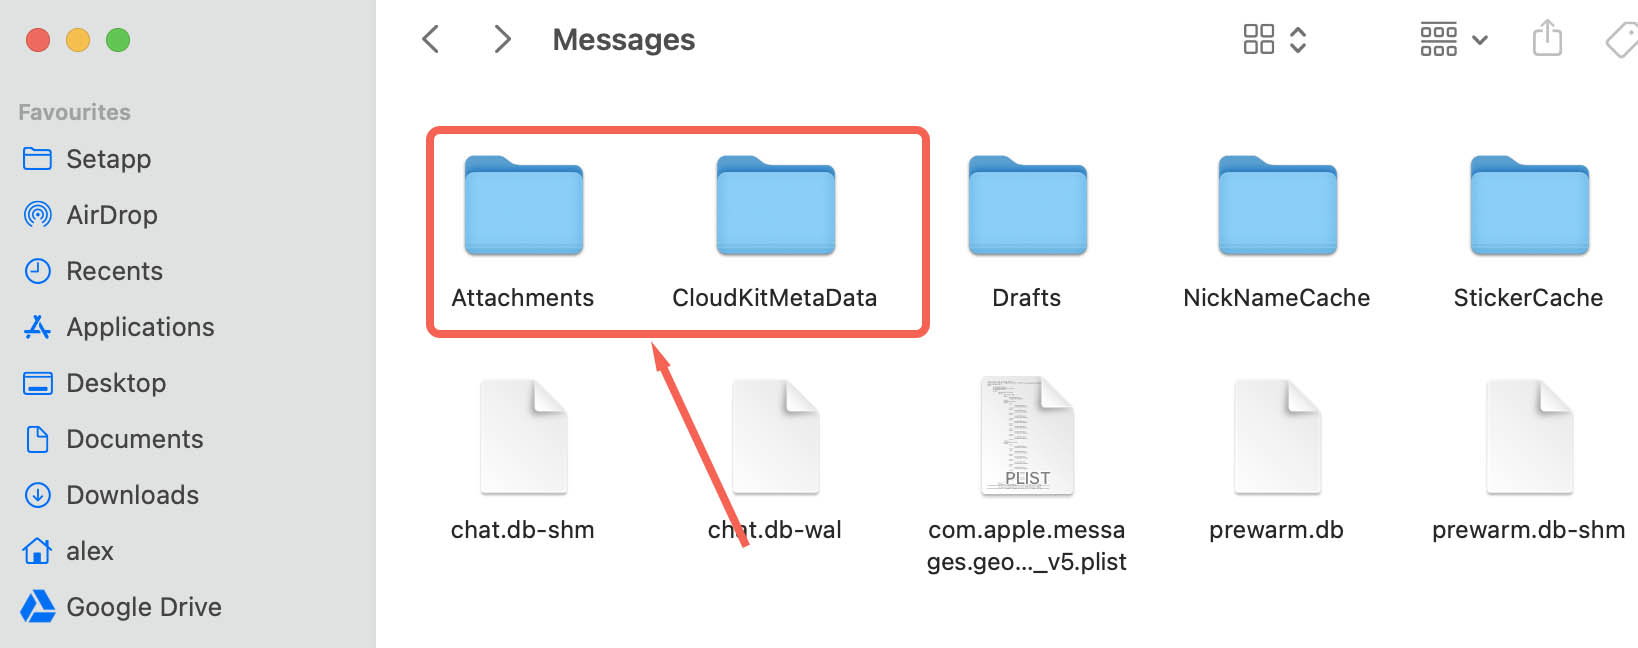
By default, your Mac stores iMessages in ~/Library/Message.
You are searching for folders called:
- Attachment;
- Archive;
- CloudKitMetaData;
- A file called “chat.db”.
Under ideal circumstances, your iMessages should be on every apple device you own. They’re on your MacBook, your iPad, your iPhone, on any other device you own which begins with “i” and they’re stored in encrypted form on Apple’s servers (actually Amazon, but never mind that right now) in the cloud.
This level of redundancy means that losing one or more of your devices isn’t a complete disaster – your iMessages will still be available to you on your secondary Apple devices and can be restored from the cloud. This is not the case if you accidentally delete your iMessages while connected to a network. The command will ripple out and scrub them from everywhere.
Lost a week’s worth of iMessages and don’t know why – they were there a few hours ago. Please help me. How can I restore individual message threads?! Some of those message threads are 5 years old 🙁
— v i o l e t (@IAmVioletSkies) January 22, 2021
If your iMessages disappeared from your Mac – as in, if they’re not showing up in the iMessage app, your first step should be to check if they’re physically still on the disk.
Exactly where they’ll be depends on which version of macOS you’re using.
- Open up finder and navigate to ~/Library/Message. You’ll be looking for folders called “Attachment”, “Archive”, and “CloudKitMetaData”, and a file called “chat.db”.
- If you can see them, then your messages are (probably) intact and you should copy them to a USB stick or an external drive. Well done!
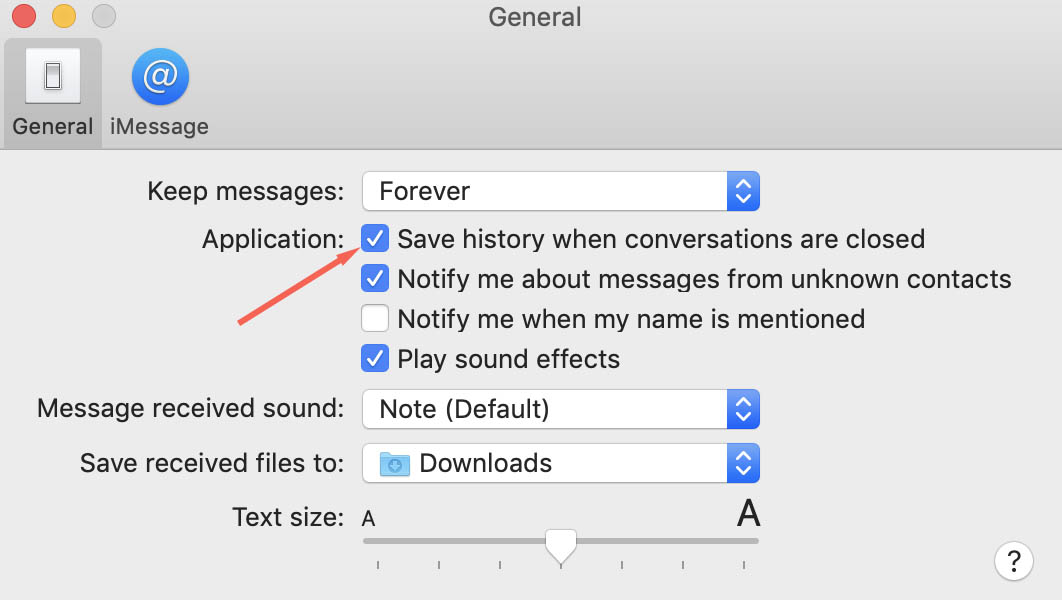
If you’re rocking a later version of macOS, there’s a chance that your iMessages haven’t been saved to the hard disk at all, as Apple is leaning more and more towards a cloud-only approach.
You can check whether or not your Mac is configured to save iMessages locally by opening “Preferences” and looking at whether the “Save history when conversations are closed” option is active.
In the unfortunate event that you are on a later version of macOS and haven’t set the option to save locally, well then. It sucks to be you. Just kidding – there’s still a non-zero chance that your iMessages may be saved as temporary files on your hard disk.
Do not turn off your machine or use it until you have some disk recovery software ready to go.
But my iMessages aren’t anywhere on my Mac
To be honest, we didn’t think they would be, it was an unlikely and a long shot, but it’s always worth trying the simplest things first.
Now fight down those rising waves of panic and we’ll sort this. Don’t worry.
And you can stop wishing for a time machine to go back and recover iMessages on your Mac because Apple has thoughtfully included a fully functional temporal transporter with every desktop operating system since Mac OS X 10.5 Leopard.
Sadly, Time Machine is an incremental backup utility and will not transport you back to before you accidentally deleted your iMessages so that you can prevent yourself from doing so. Steve Jobs was aware of potentially catastrophic nature of temporal paradoxes and commented out the code which would allow users to create them.
If you’ve recently made a Time Machine backup of your Mac, read on, otherwise skip ahead to the next method.
Here’s how you restore your iMessages with Time Machine…
- Shut down the iMessage app completely, and make sure it’s not running in the background.
- Open the Time Machine app, and using the finder tool, look for the files and folders we mentioned previously. These are named “chat.db”. These are folders called “Attachment”, “Archive”, and “CloudKitMetaData”, and a file called “chat.db”. Make sure that they were created as recently as possible – but before you accidentally deleted your iMessages.
- These files contain everything you need to get up and running again, so just hit “Restore“, and your missing iMessages will be back in the app.
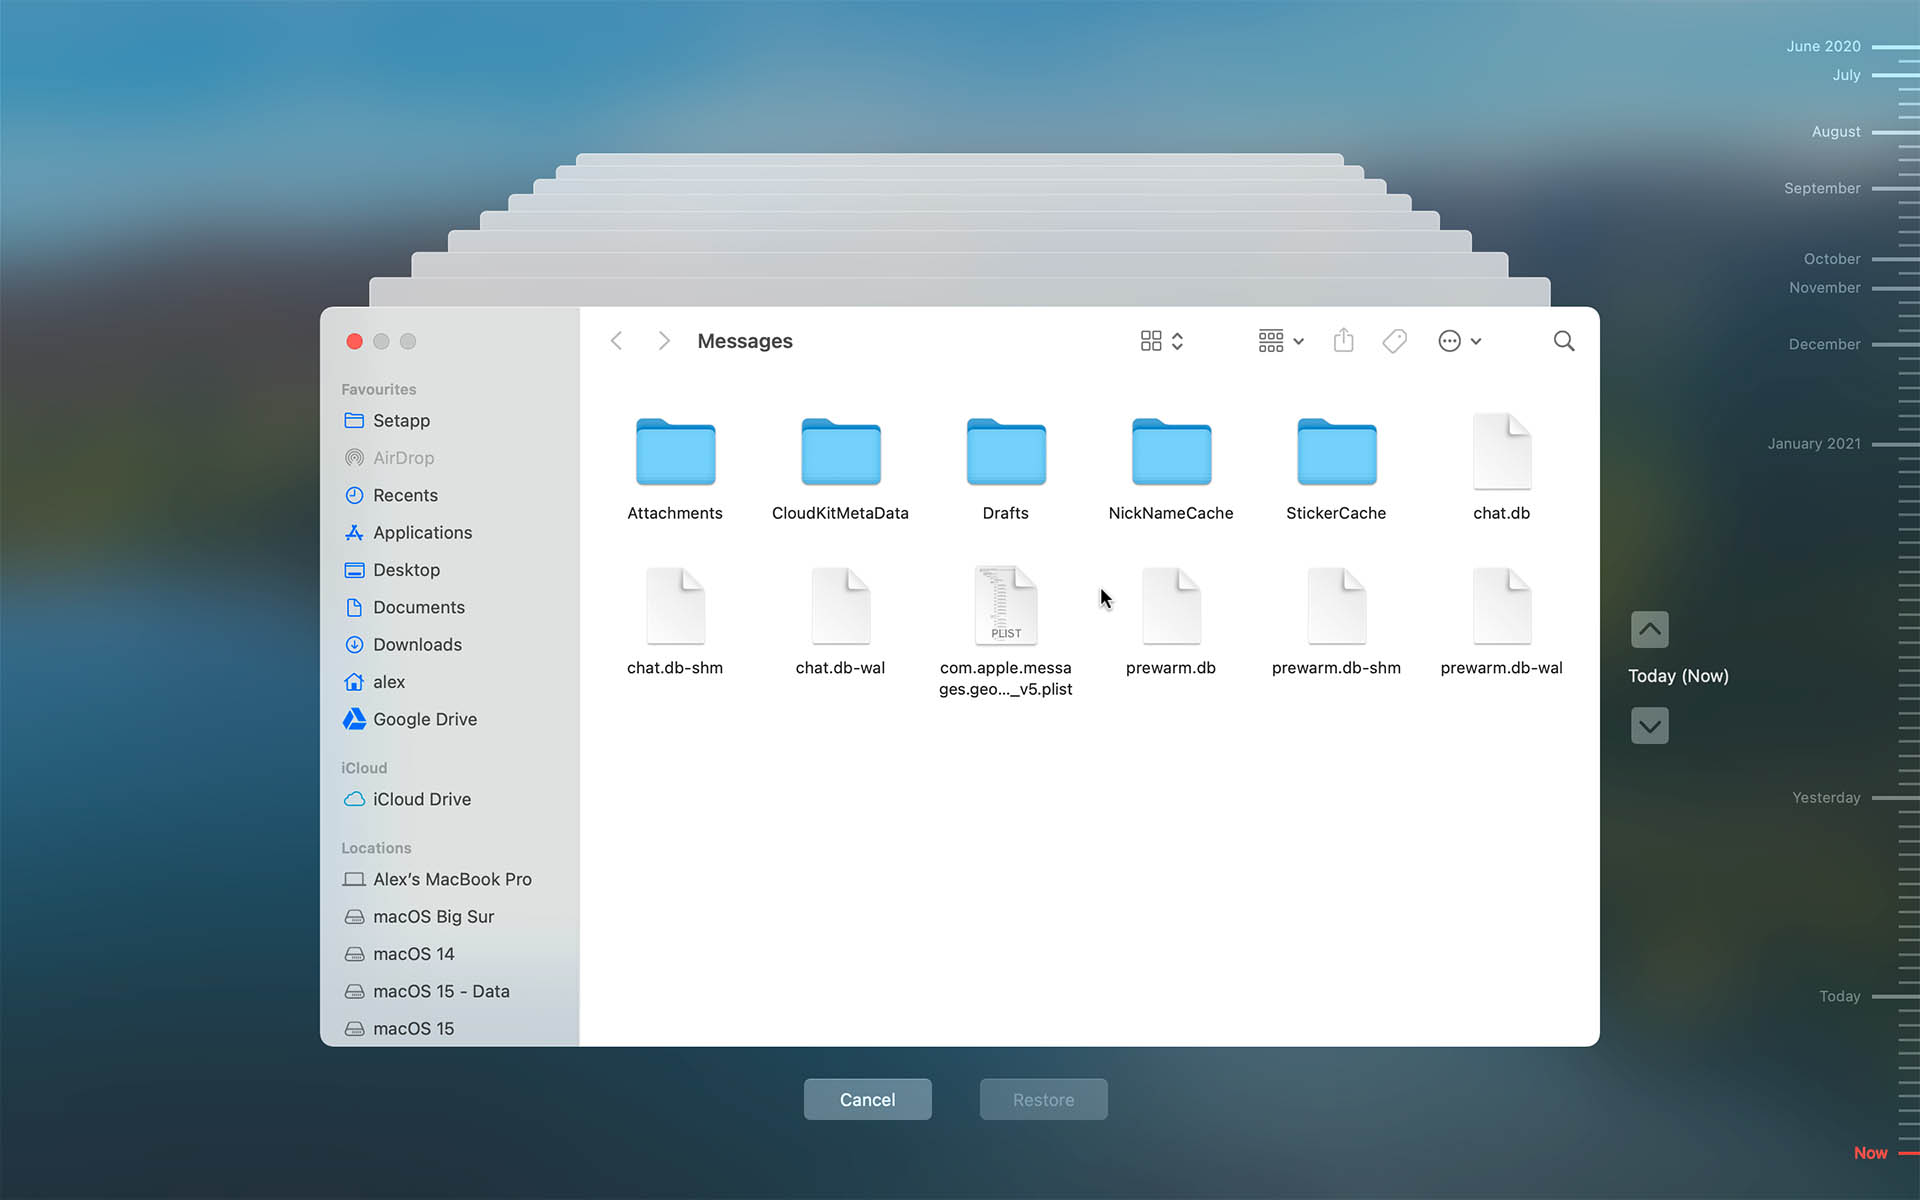
It’s that simple.
What about the copies on my iPhone or iPad
So you’ve accidentally deleted your iMessages from your desktop but they’re still present on your portable devices – goddamn you’re lucky. Kill the network connection, quick! Turn off WiFi, pop the SIM. Do whatever you have to do, because once your iPhone or iPad recieves the signal that those iMessages are supposed to be gone, those iMessages are… gone.
Retrieving them is fairly easy:
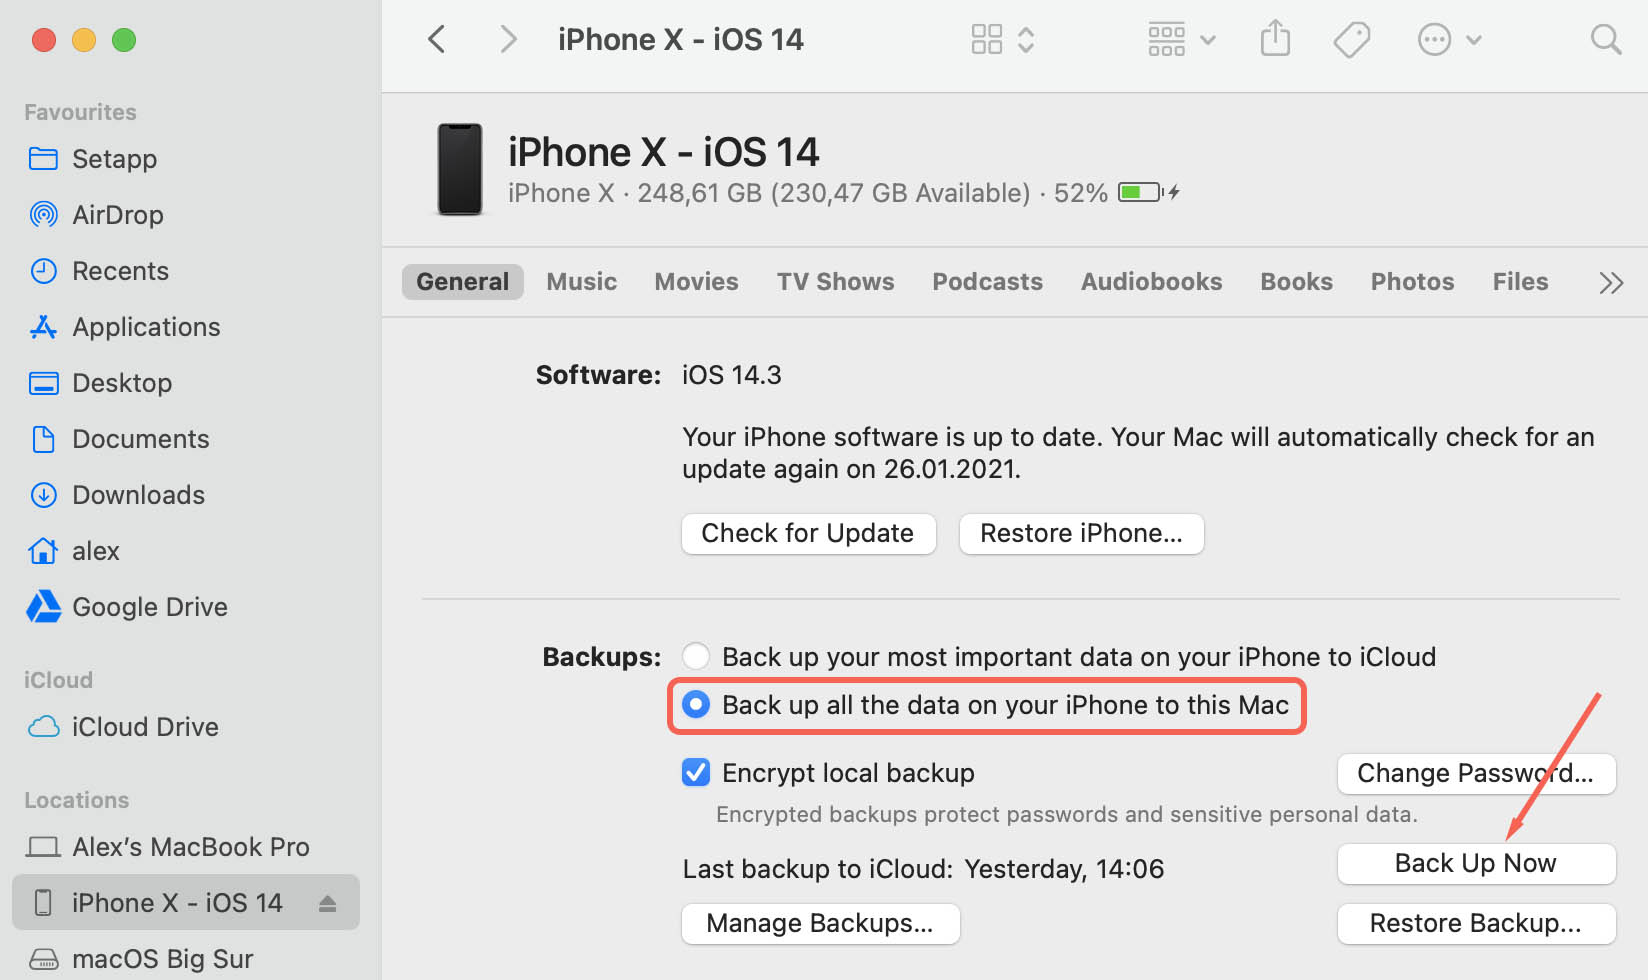
- Connect your device to your desktop Mac with a data cable – cheap charging cables won’t work here. It’s always best to go with Apple’s original.
- Launch Finder by clicking on its Dock icon, or by invoking Spotlight (press the command key and tap the space bar) and typing “Finder”.
- Select your iPhone or iPad from the list of available locations in the left pane.
- Make sure the “Back up all the data on your iPhone [or iPad] to this Mac” option located in the Backups section of the General tab is selected.
- Click “Back Up Now” to create a local backup of your iMessages.
Still no luck?
OK, We’ll level with you here, all the options we’ve discussed so far have been sort of long shots. Apple has been in the tech business since the 1970s and makes quality hardware and software.
For your iMessages to have survived on any device after you mistakenly told your mac to delete them, would require a colossal amount of luck, a network outage, or a device left overlooked in a WiFi dead zone down in the basement.
Likewise, the odds are stacked against you having a Time Machine backup recent enough for all of your iMessages to be up-to-date, but not so recent that they’ve already vanished.
If you’ve read this far down and tried what we’ve suggested, you’ll just have to face it – your iMessages are gone from everywhere. But there’s a difference between gone and gone, and just because they are gone, doesn’t mean they’re gone for good. And no – your deleted iMessages won’t be in the recycling bin.
You need Disk Recovery Software
Computers are weird. Think of your hard drive as a warehouse full of wooden crates – kind of like in the end scene of Indian Jones and the Raiders of the Lost Ark. When your operating system creates a file, it puts it in one of these boxes among millions of other boxes, and then it notes down the location of the box, in case you ever need that file again. It puts a sticker on the box to make sure nothing else gets put in there by mistake and ruins the contents.
When you decide you want to delete the file because honestly, the Spice Girls aren’t your thing anymore, and having their entire discography taking up hard drive space is embarrassing, your OS won’t simply toss the contents into the nearest landfill to be devoured by worms. It will simply mark the box as unoccupied, and strike out any mention of “Wannabe” from its ledgers.
Your 90s girl band hits are still in their crate, but it’s now unmarked and there’s no way in hell you’ll be able to find them. There’s a very real danger that something else will be put in the box and Geri Halliwell’s ginger wig will be gone for good.
Did you like that analogy? We thought it was fab. No. There isn’t a real warehouse – it’s a shiny piece of tech either on your lap or your desk.
Back to the real world, and this is where Disk Drill iOS Recovery comes in. Because your iMessages are still physically on the disk, the specialist software can inspect each individual box and check what’s inside. It doesn’t need a map or an index, or even a marking on the box showing that it is or was occupied.
When Disk Drill has located recently deleted files, users can preview the contents and then recover them to a safe location. No drama.
Here’s how to recover your deleted iMessages:
- Download Disk Drill from the Cleverfiles website.
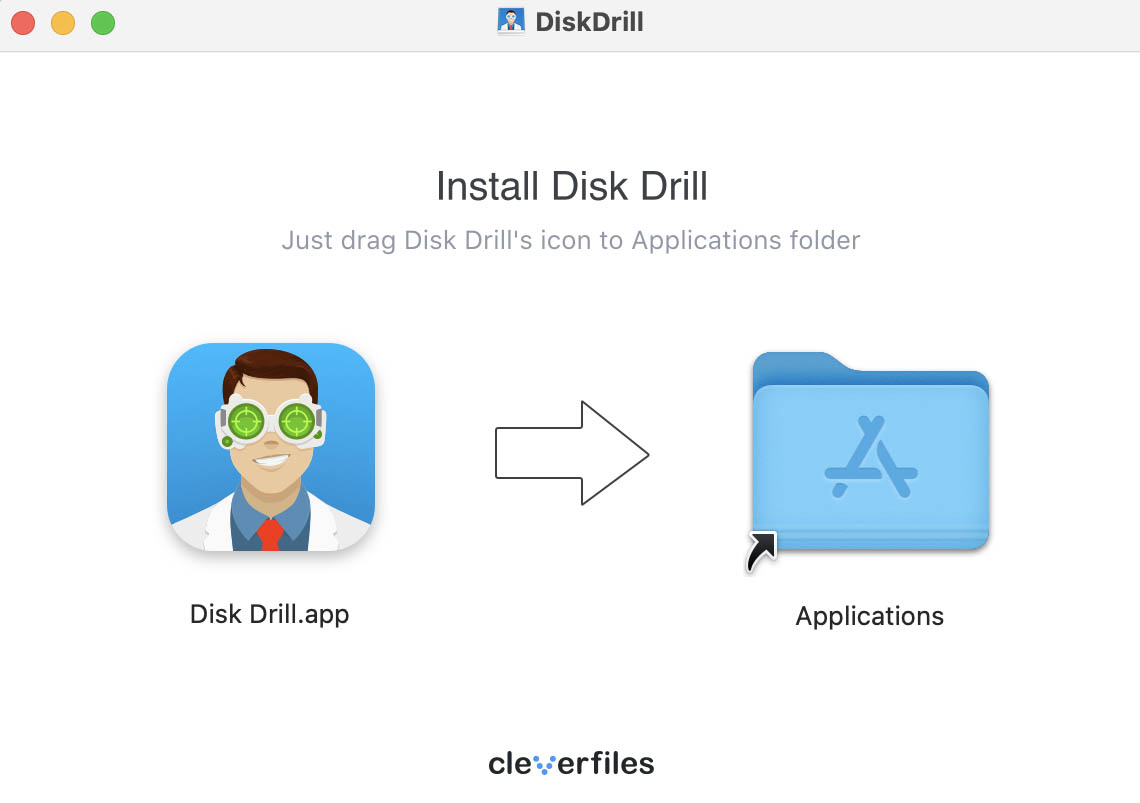
- Install the app by dragging the Disk Drill icon to the Applications folder.
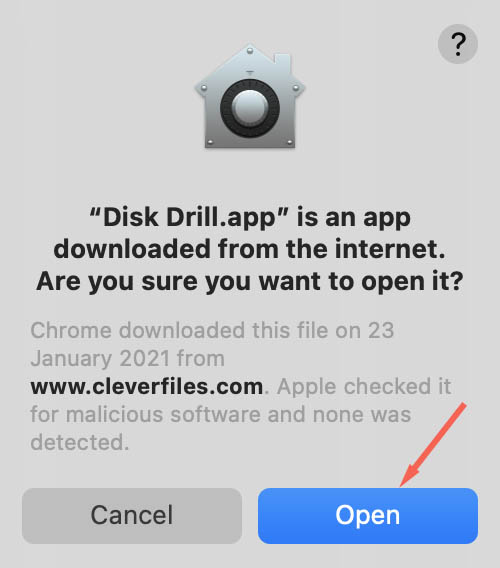
- Launch the app. Your Mac may give you a warning that Disk Drill is an application downloaded from the internet, and ask for confirmation. You should click “Open“.
- The disk drill interface will show all drives connected to your Mac, and the one you want should be labelled “Macintosh HD“.
- Select “Macintosh HD” in the center pane.
- In the recovery panel on the right of the screen, hit “Search for lost data“.

- Go and make a nice cup of tea while disk drill performs its magic.
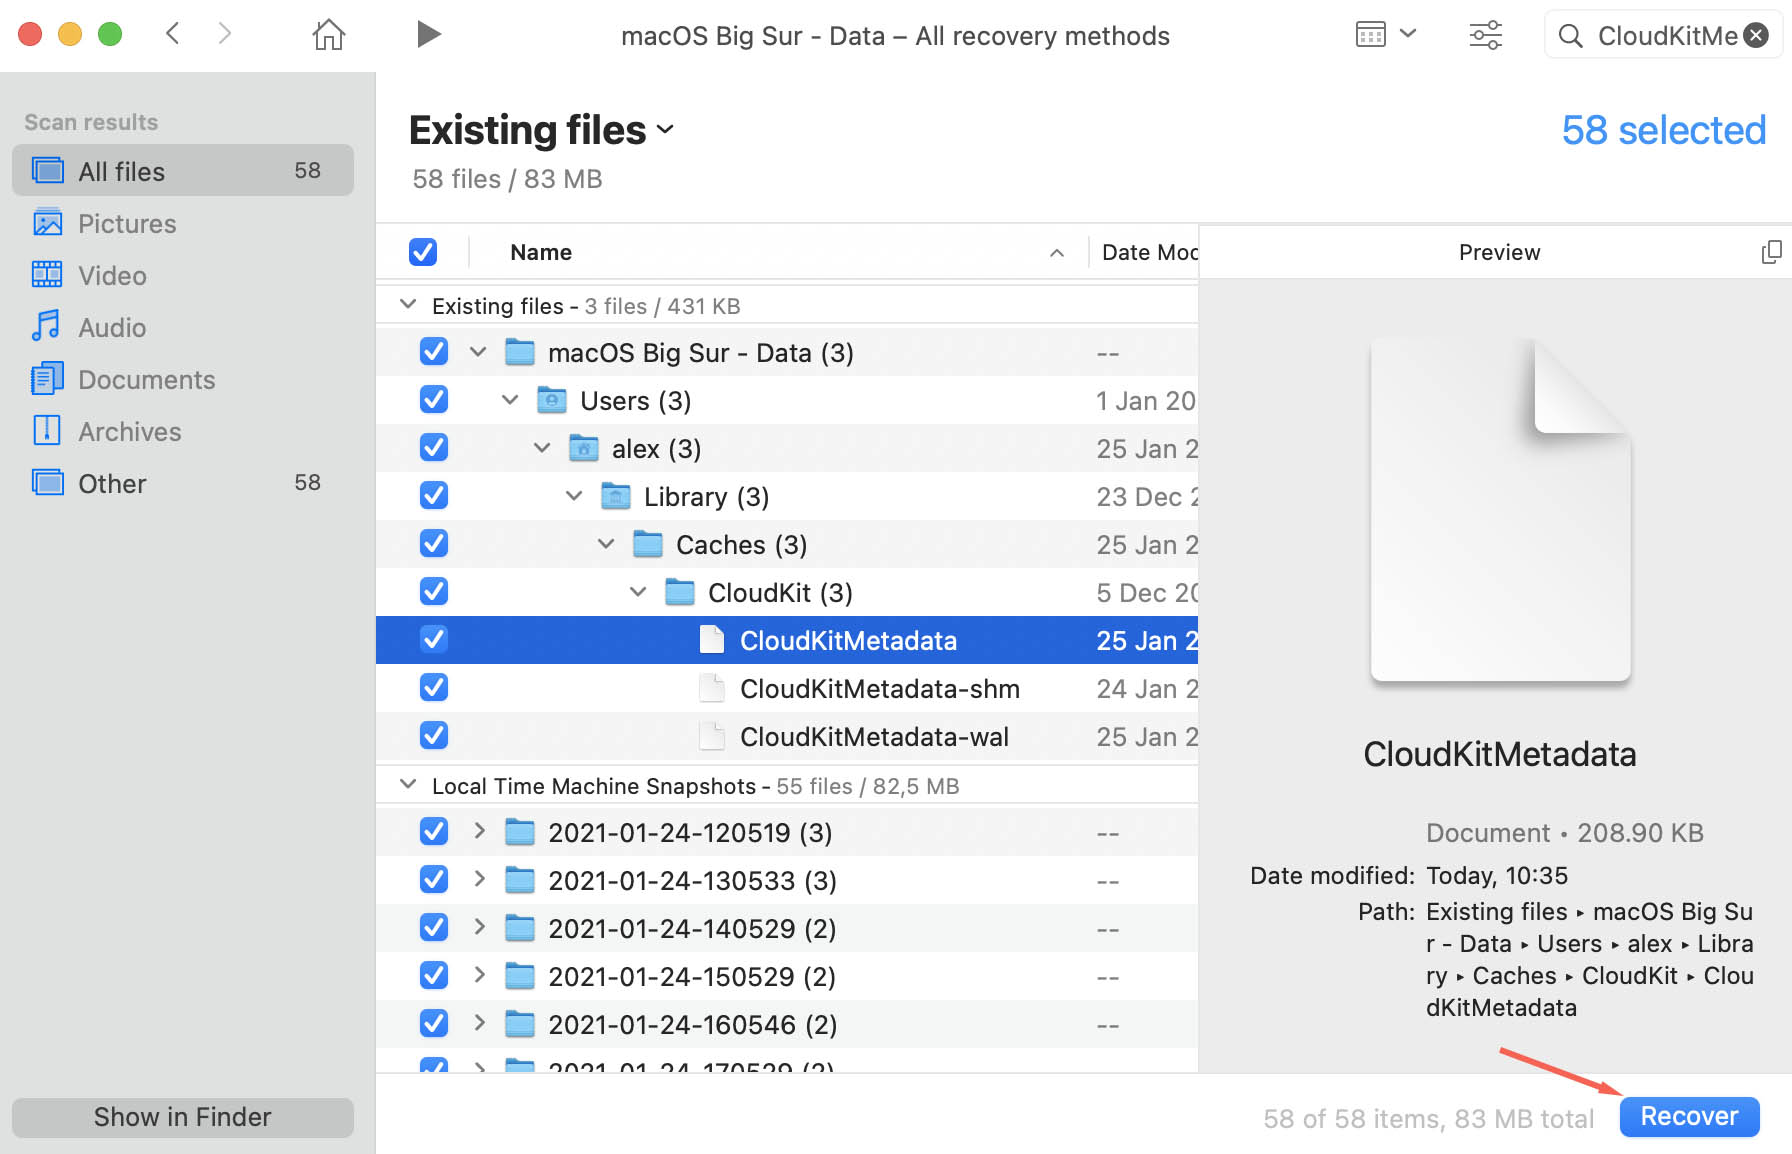
- On your return, you’ll see that the scan is finished and Disk Drill will present you with a categorized list of files which can be recovered.
- Review the files to find your deleted iMessages and check the checkboxes to mark them for recovery.
- Press “Recover” to have Disk Drill recover them to a safe location.
- Done.
Disk recovery software has been around for decades and there are a lot of options out there. We like Disk Drill particularly because it’s up to date, has a clean interface and is capable of dealing with different file systems. It also has a proven record of successful recoveries and is priced at only $89 for the PRO version.
This article was written by Jeff Cochin, a Author at Handy Recovery Advisor. It was also verified for technical accuracy by Andrey Vasilyev, our editorial advisor.
Curious about our content creation process? Take a look at our Editor Guidelines.