
When your Mac or MacBook crashes, it can leave you with no way to access important files and data. The crash might have been caused by a broken hard drive on your Mac or some physical damage that rendered the machine inoperable. While this certainly isn’t an optimal situation, you shouldn’t panic. There are multiple ways to recover data from a dead MacBook Pro or another type of Mac computer.
We are going to look at several recovery methods that may be appropriate depending on why and how your Mac crashed. These range from restoring from a backup or a bootable macOS installer to using specialized data recovery software to get your files off the damaged machine.
Is it Possible to Recover Data From a Crashed/Dead Mac?
The solution you use to recover data from a dead Mac hard drive needs to take into consideration the specific type of problem you are experiencing with your computer. The following table summarizes some of the most common reasons you need to get files off a dead MacBook Pro or Mac hard drive.
❓ Problem |
💡 Solution |
I need to transfer files from a broken Mac to a new machine. |
Disk Drill and the target disk mode solution may work in this situation. |
I can turn on my Mac, but OS doesn’t boot. |
Use a bootable macOS installer. |
My Mac/MacBook and/or hard drive won’t boot at all. |
You may need to engage a professional data recovery service to gain access to your data. |
My machine is physically damaged. |
Use a professional recovery service. |
My MacBook disk is corrupted. |
Recover files with Disk Drill or restore the contents from a Time Machine backup. |
How to Recover Data From a Crashed or Dead Mac/MacBook Hard Drive Using a Recovery Tool
You can use a data recovery tool like Disk Drill to retrieve files from a dead drive on MacBook Pro. Disk Drill can be used to create a byte-to-byte copy of the information on the damaged disk that can later be used to recover its data. Using this copy eliminates the risk of further damaging the drive while recovering its information.
Use the following procedure to boot Disk Drill in Recovery Mode and use it to create a byte-to-byte copy. You will need an external hard drive with as much capacity as the original disk to use this method.
- Shut down your Mac or MacBook.
- Connect an external disk drive to your machine.
- Start your computer in Recovery Mode by turning on your Mac and holding the Command (⌘) and R keys until you see the Apple logo.
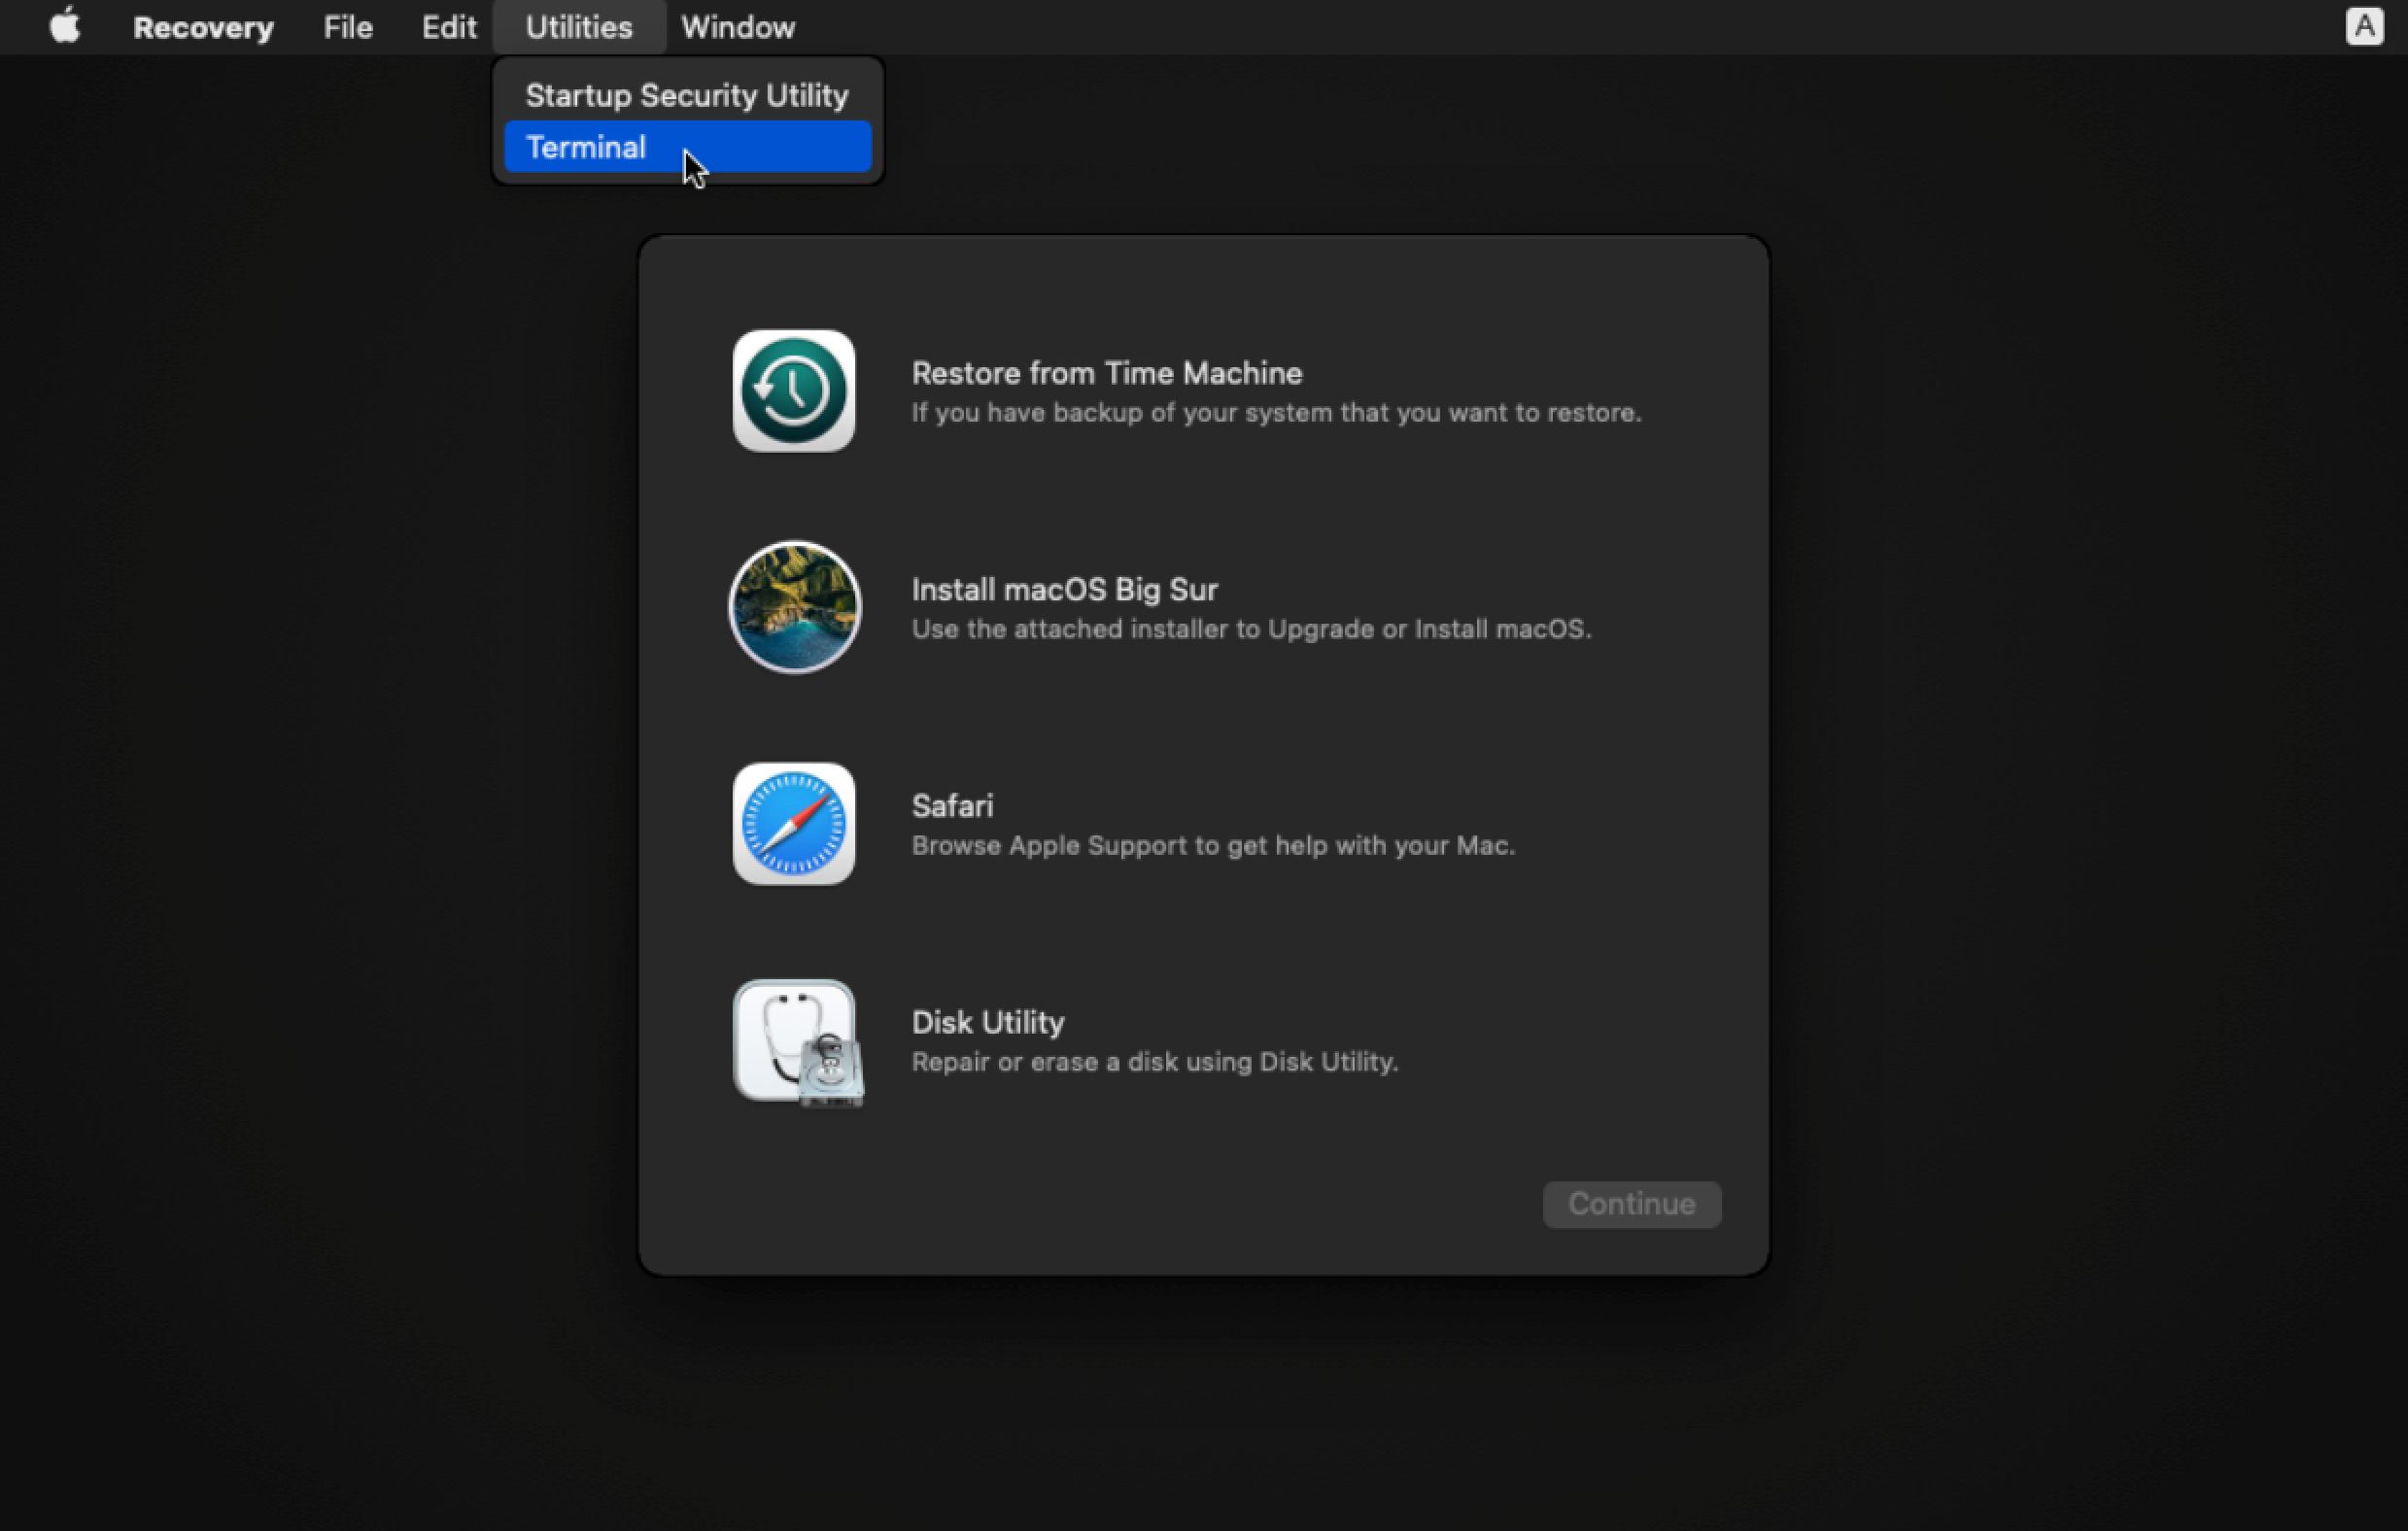
- Open the Terminal app by pulling down the Utilities menu and selecting Terminal.
- Use the appropriate command if you are using Disk Dill 4 –
sh <(curl http://www.cleverfiles.com/bootmode/boot4.xml)
- Or Disk Drill 5
sh <(curl http://www.cleverfiles.com/bootmode/boot.xml)
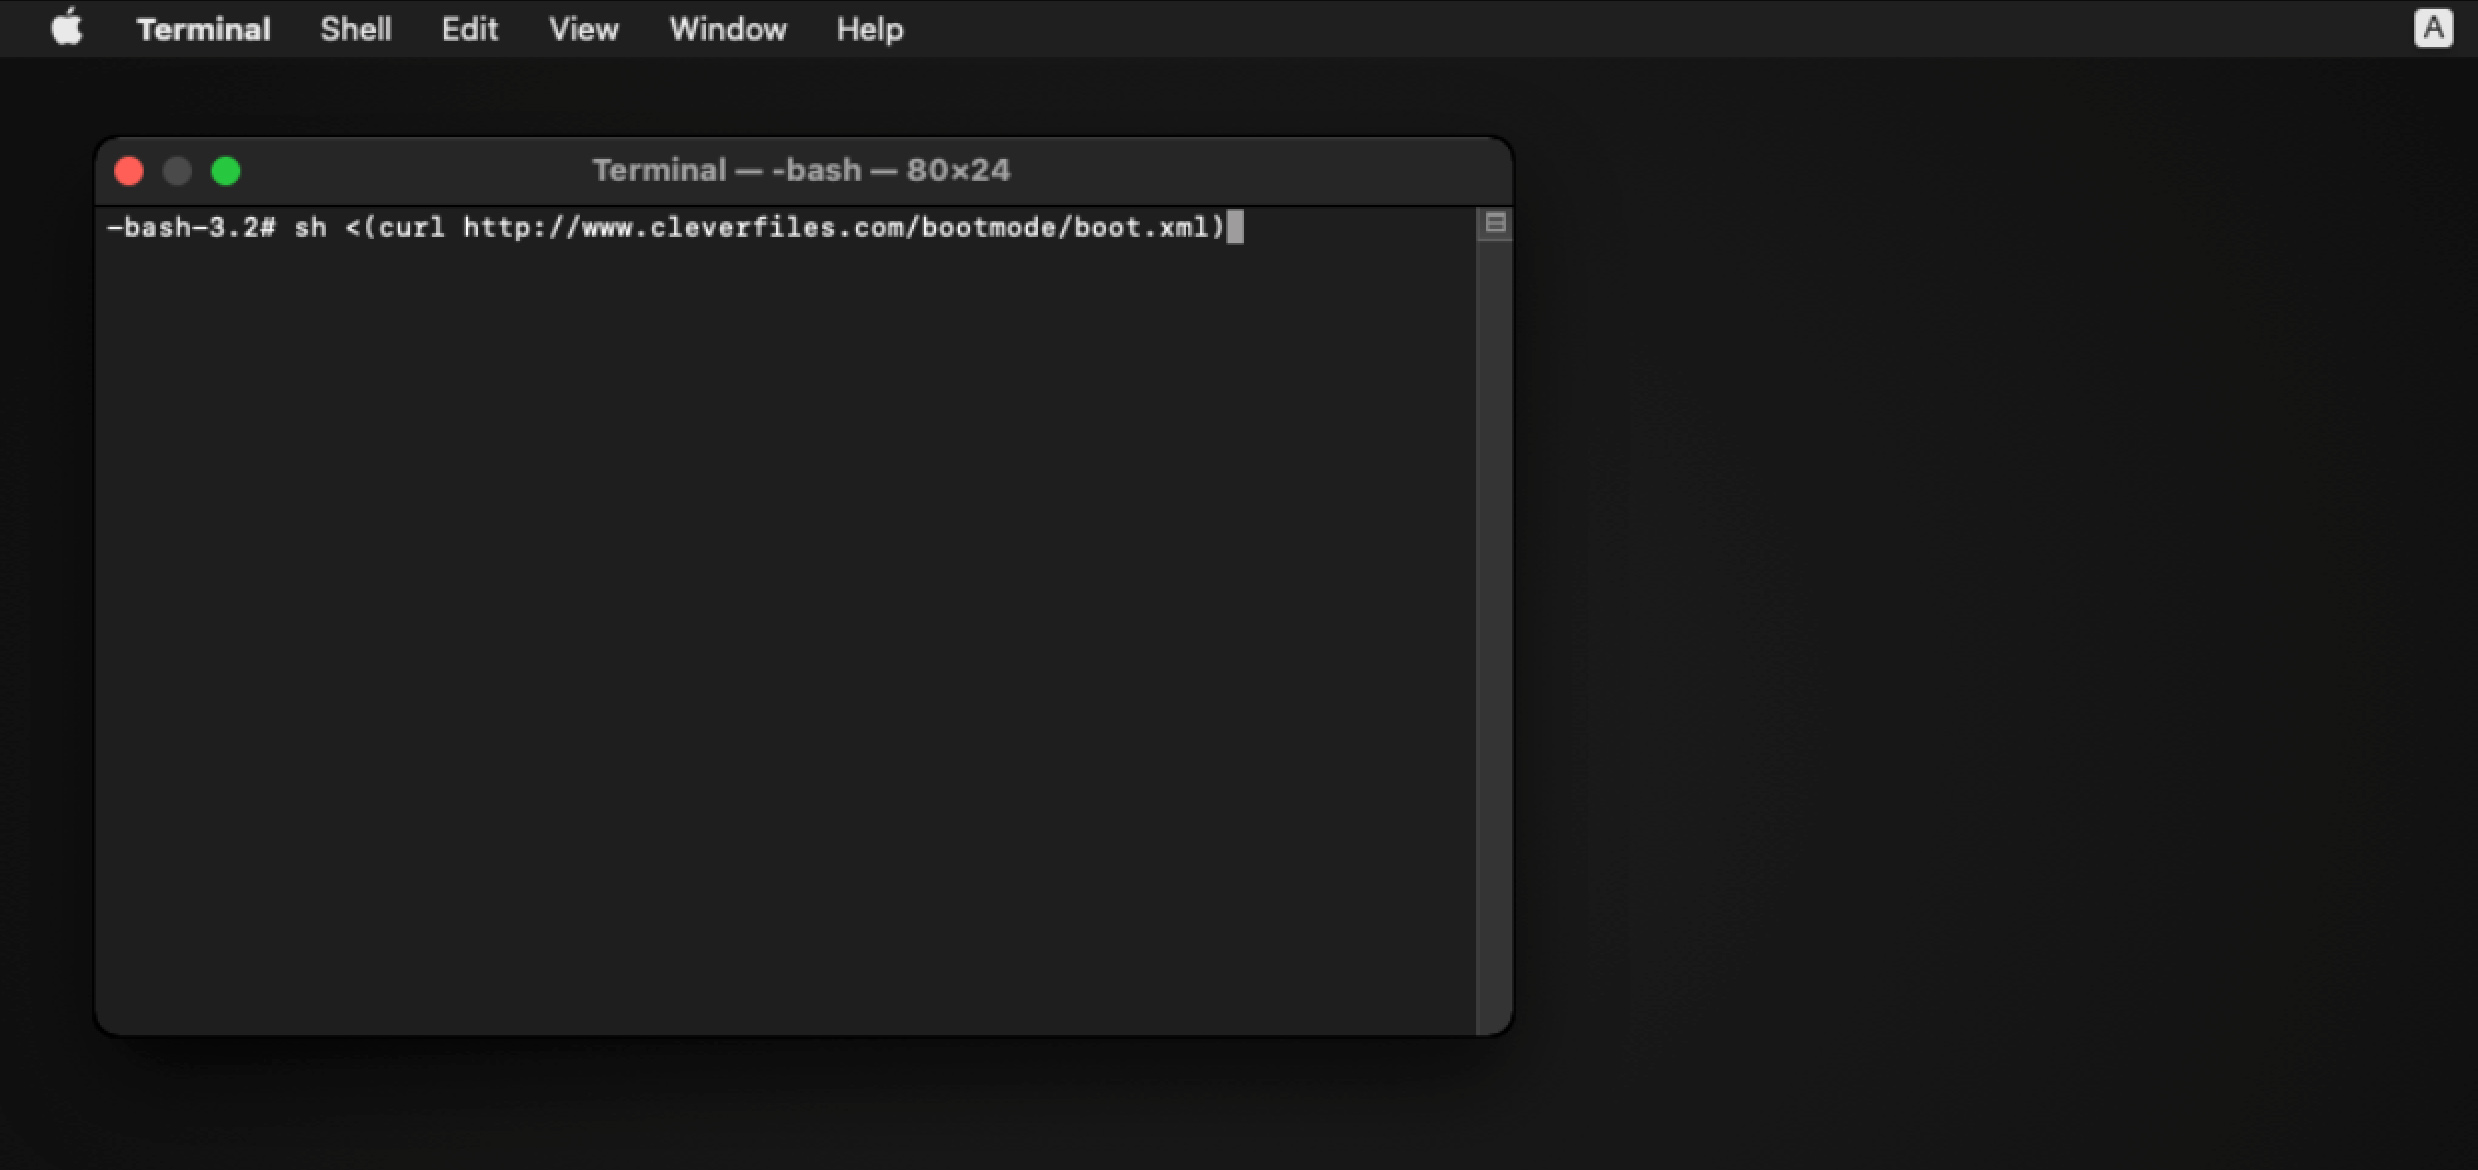
- Press Return.
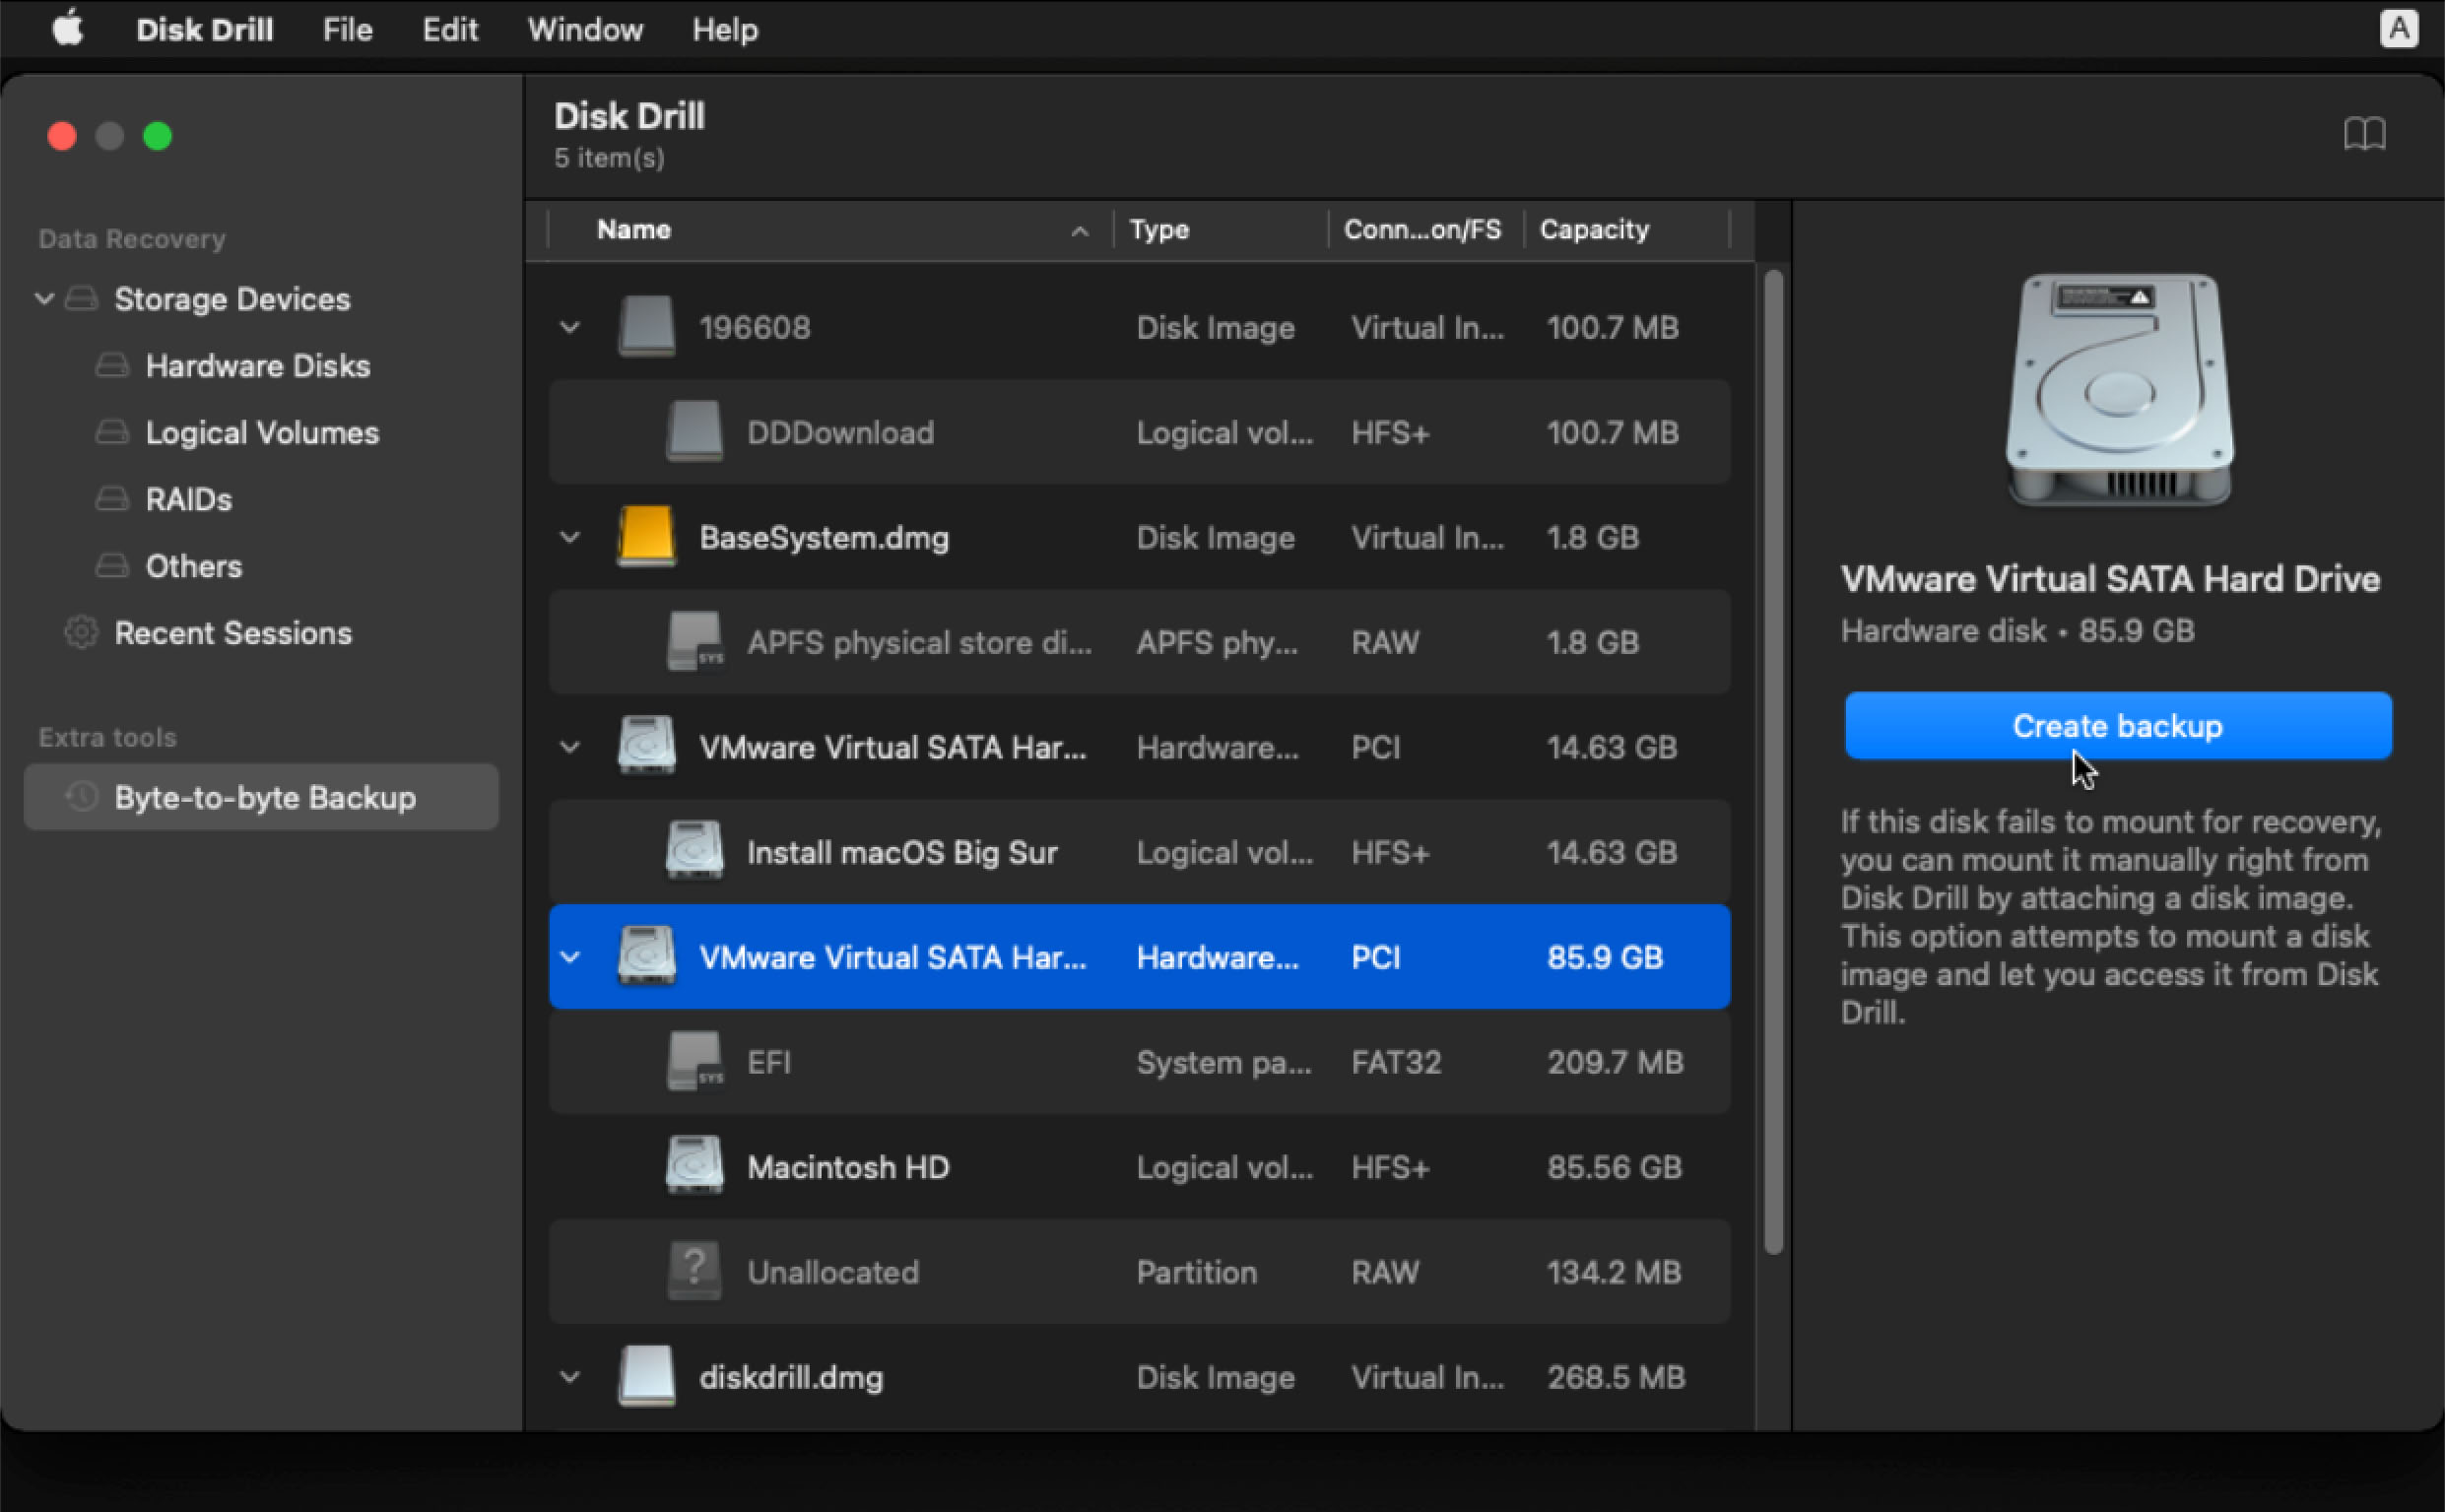
- Choose Byte-to-byte backup from the sidebar to begin backup creation.
- When the backup is complete, use this newly created volume to extract the files you want to retrieve from the damaged hard drive.

The creation of a byte-to-byte backup is necessary to protect your disk from additional damage as you recover its data. If the disk is not damaged, you can use data recovery software’s standard capabilities to recover your files from the Mac hard drive or SSD.
Once you have created the byte-to-byte backup, you can use the following procedure to perform a targeted recovery of a specific folder.
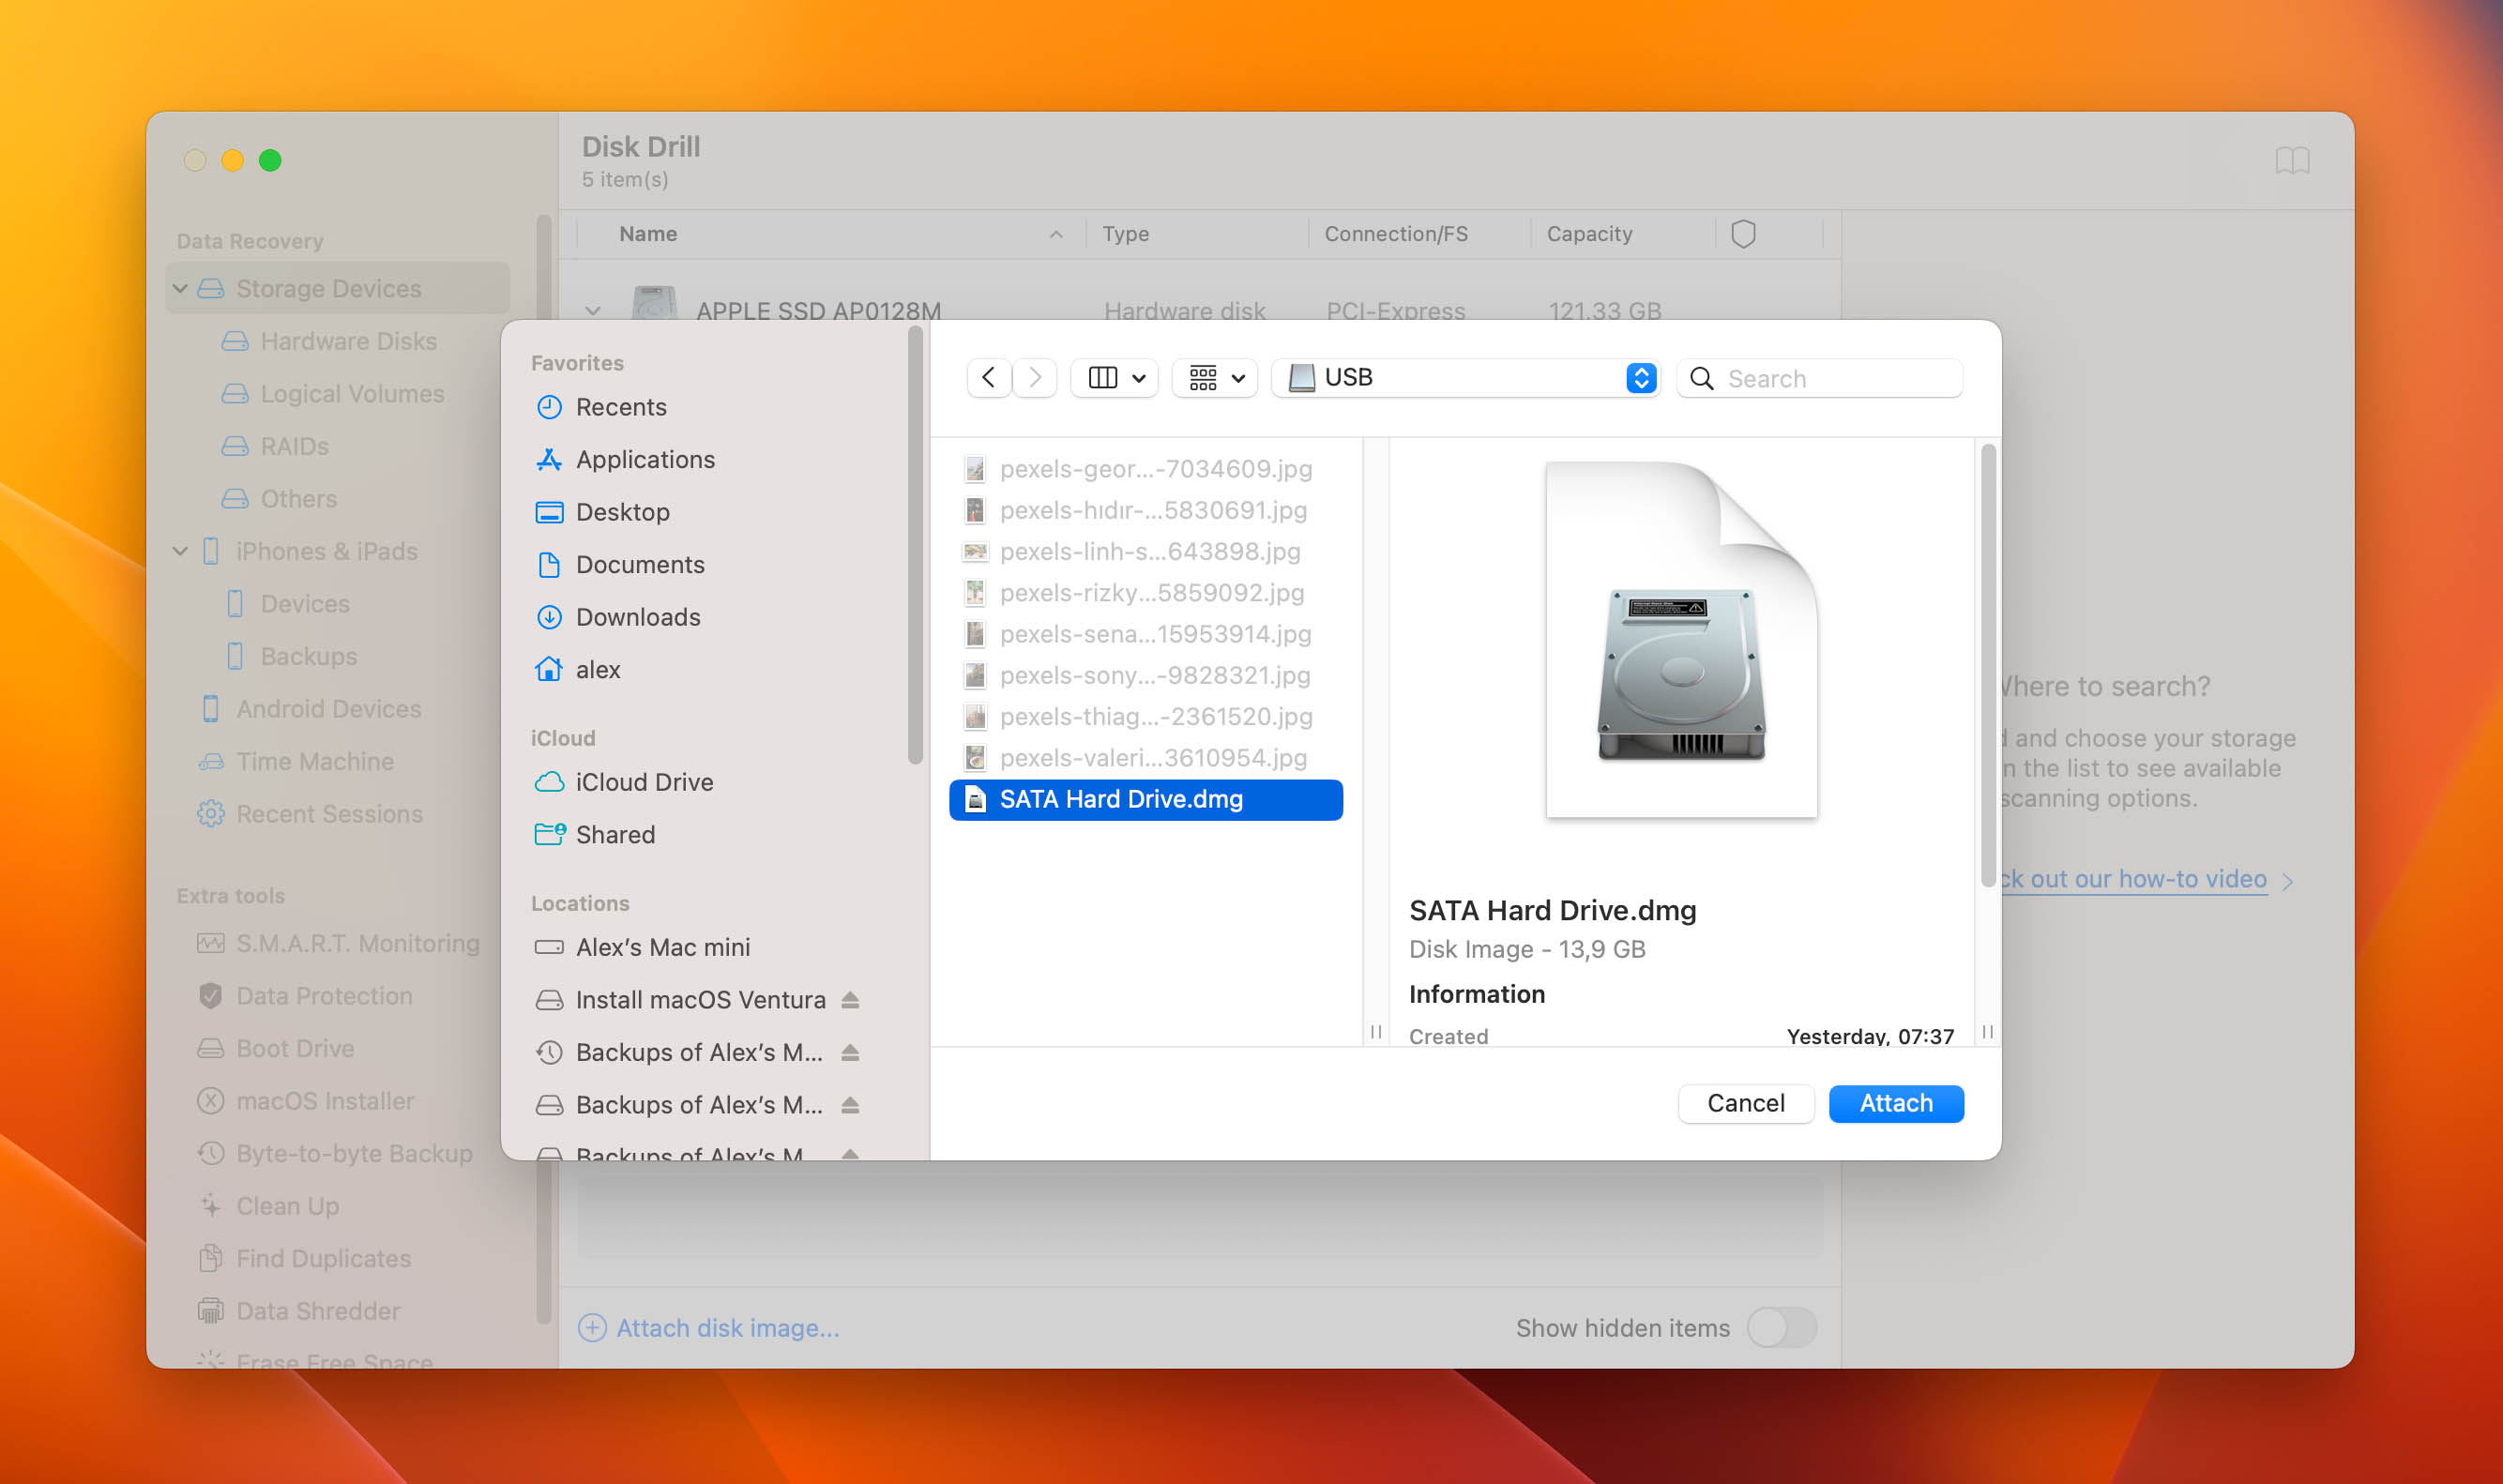
- Connect the media containing the byte-to-byte backup to your Mac.
- Launch Disk Drill, then select Attach disk image… option and select disk image.
- Click the Search for lost data button to scan the disk image for recoverable data.
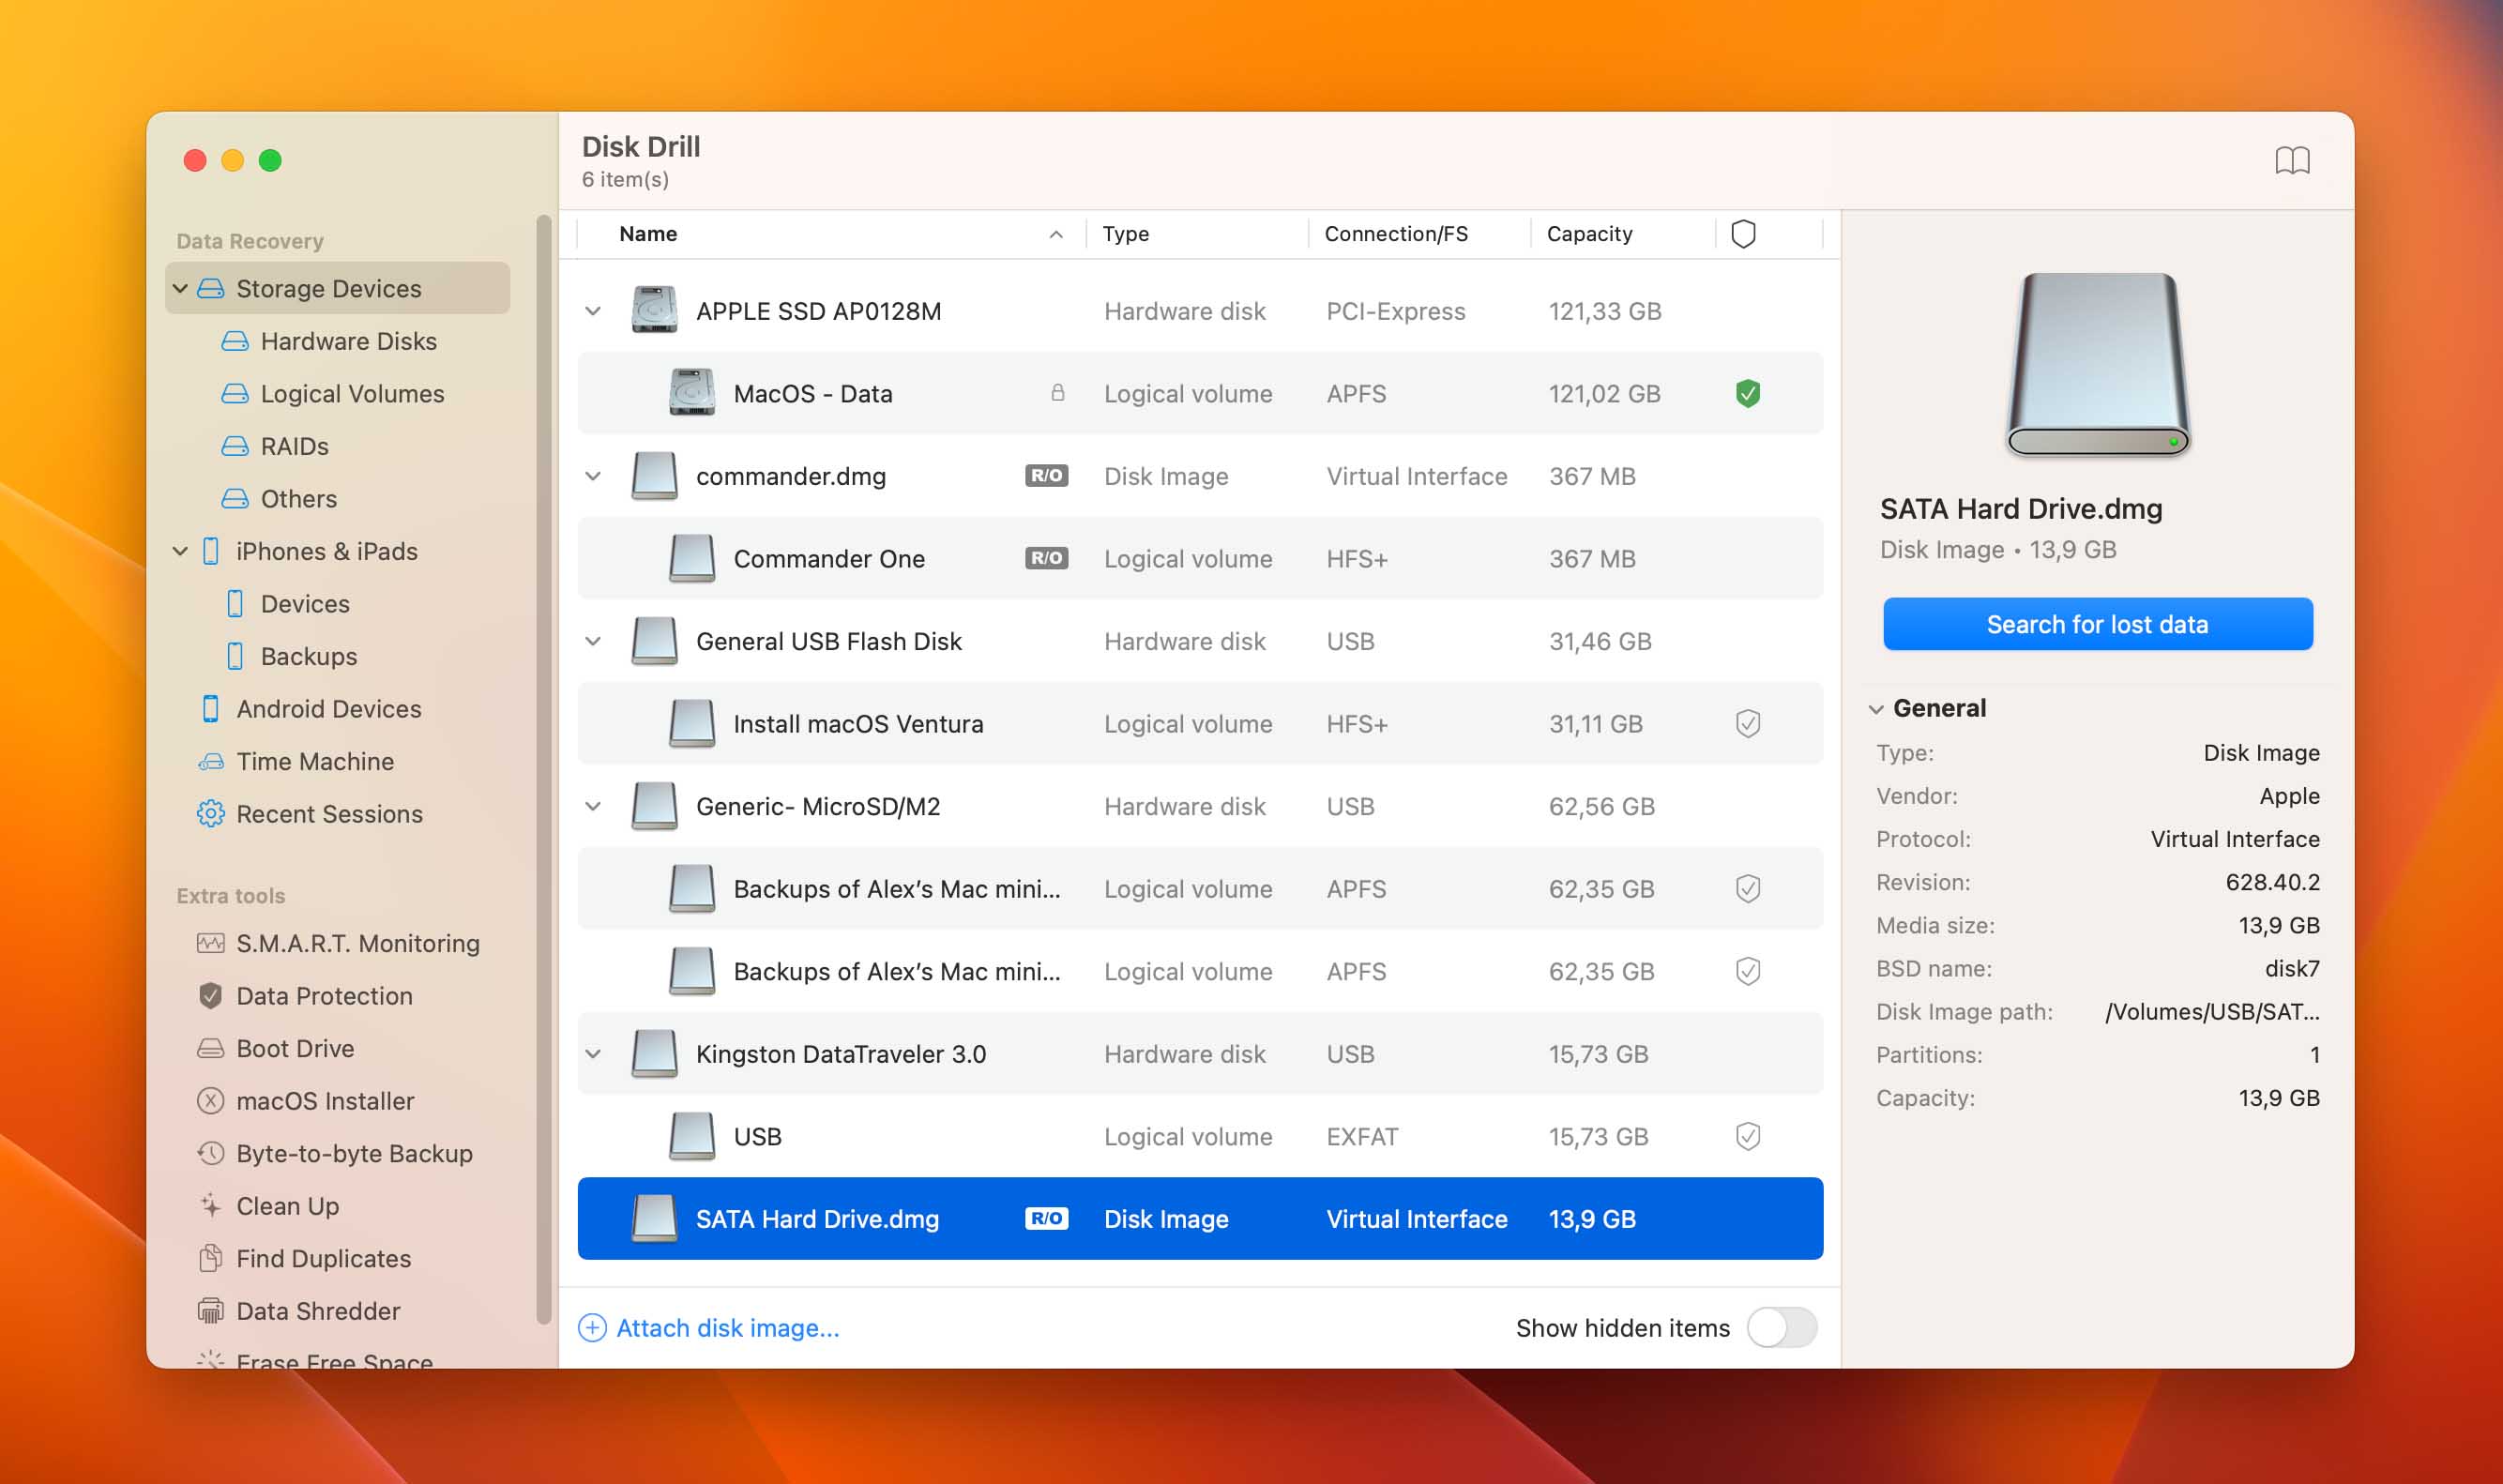
- Review the found files and select those you want to recover.
- Click the Recover button and select a safe location for the recovered files.

- Click OK to complete the process. Allow the recovery to finish and then access your files.
Note: This method will not work on Macs with security chips such as the M1, M2, and T2 chips.
Disk Drill is a comprehensive MacBook data recovery tool that supports recovering data from virtually any disk-based storage device. It can identify and recover hundreds of file formats with its advanced scanning algorithms. The tool also offers free data management and protection features such as byte-to-byte copies and Recovery Vault which enables quick restoration of essential files. You can read more in our review.
How to Get Files Off a Dead/Crashed Mac or MacBook Without Software
Now let’s look at some techniques that enable you to get files off a dead MacBook Pro or Mac without using recovery software. In some cases, these methods require that the user has taken proactive measures such as backing up their machine. Creating backups is a best practice that all Mac users should employ to protect their valuable data.
Method 1: Recover Data From Backup
If you have been backing up your Mac using Time Machine, you can use the backup to recover a crashed Mac hard drive using the following procedure.
- Start your machine in macOS Recovery mode based on your processor type.
- If your machine has an Apple silicon processor like a MacBook Air M1/M2, choose the Apple menu and then Shut Down. Press and hold the power button until you see the Loading startup options message. Click Continue and follow the onscreen instruction.
- On an Intel-based Mac, select the Apple menu > Restart. Press and hold the Command (⌘) – R keys until the startup screen appears. Follow the onscreen instructions.
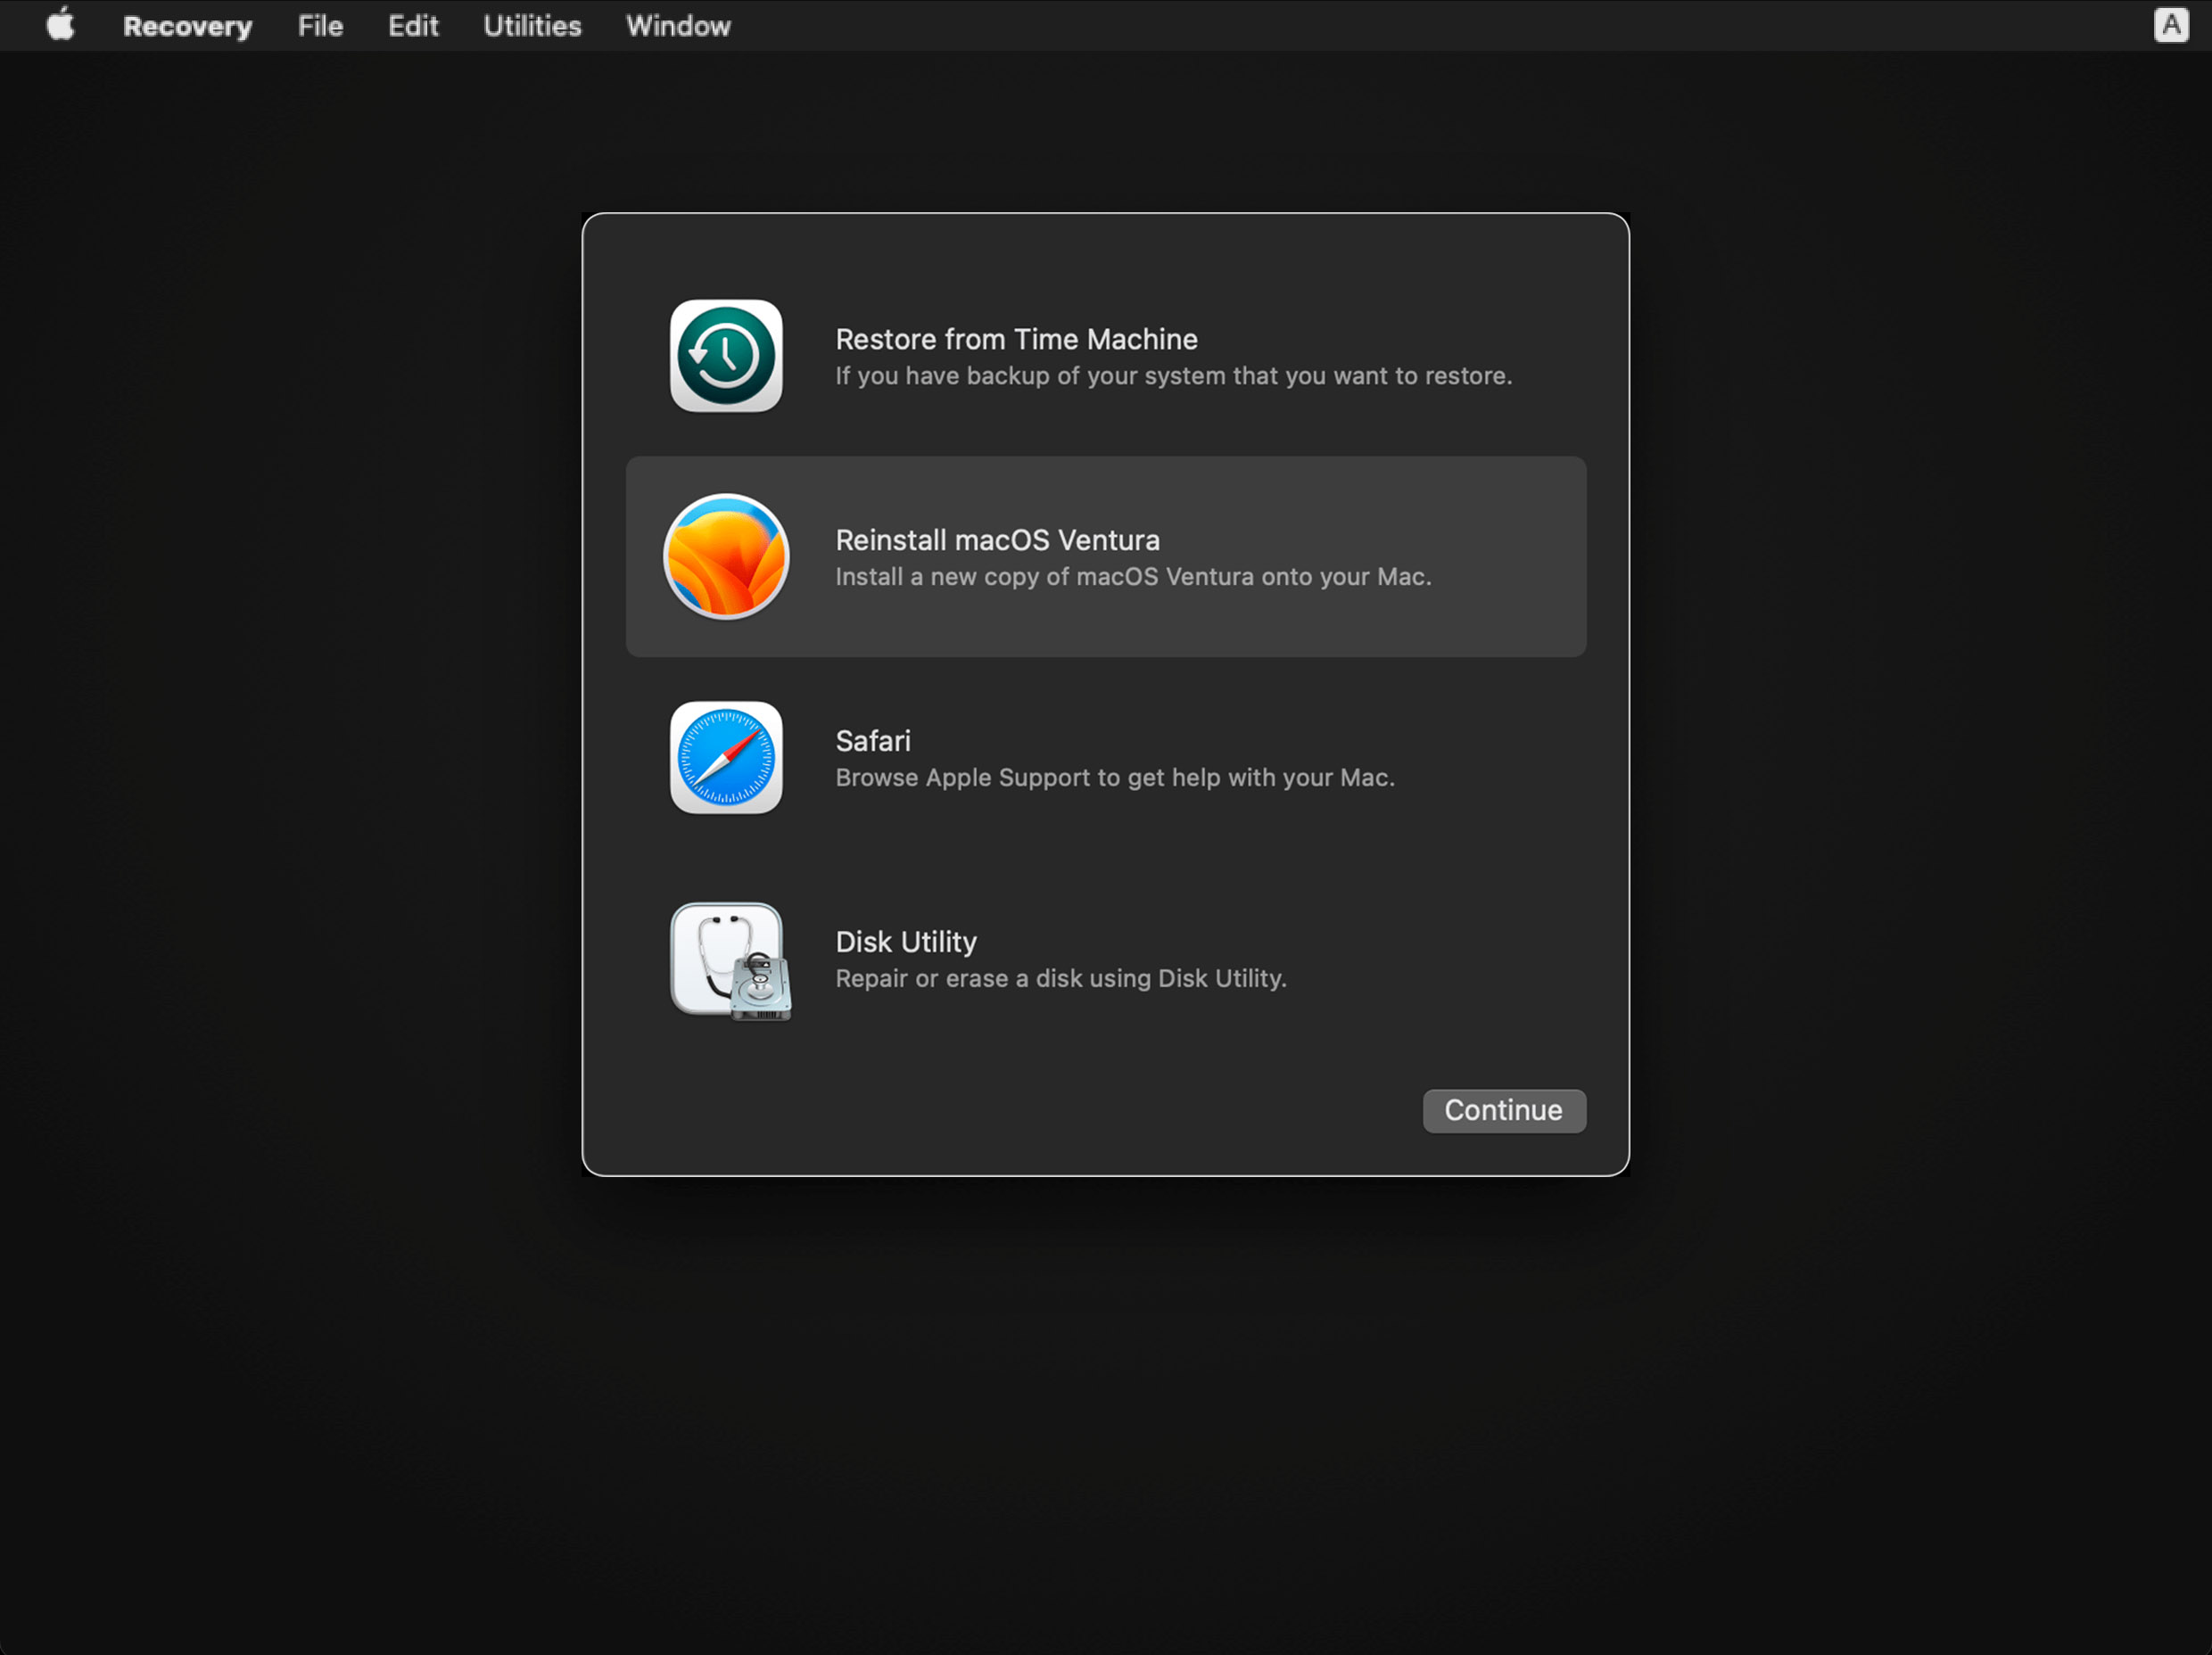
- Reinstall the version of macOS that is stored on your machine’s recovery disk including any updates by selecting Reinstall macOS and then clicking Continue.
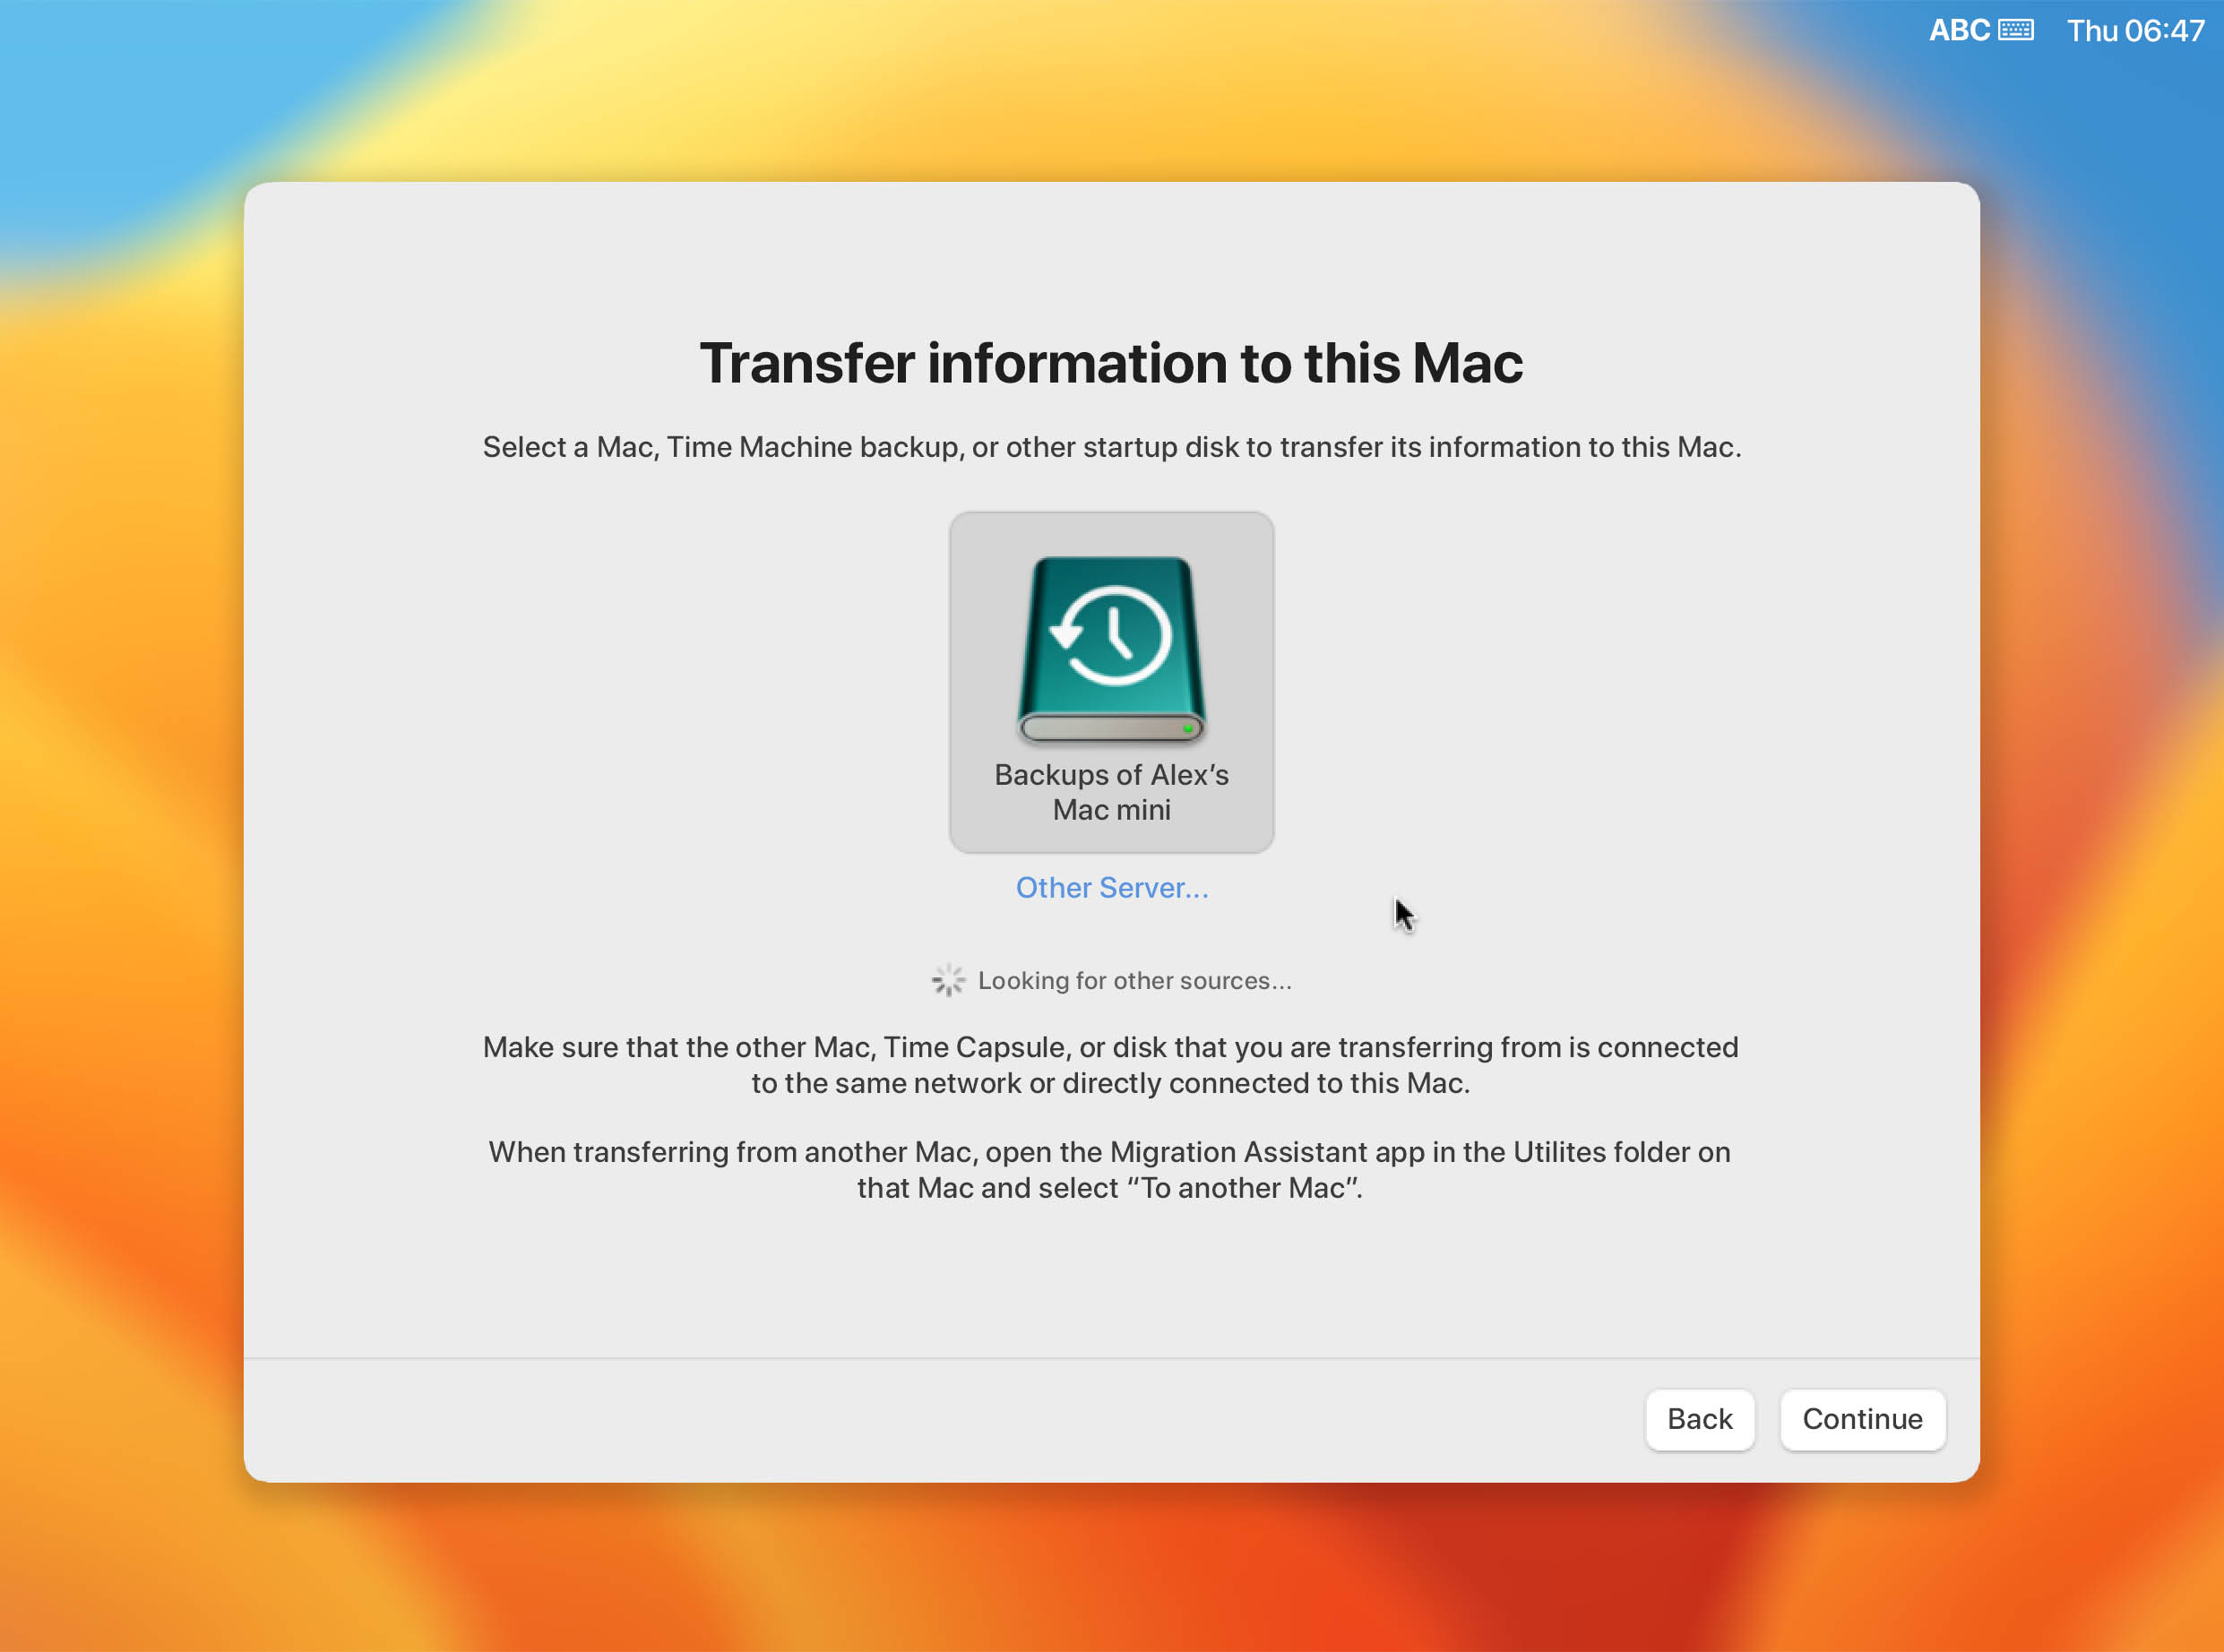
- After the operating system is installed, Migration Assistant will ask if you want to transfer information from another Mac or a Time Machine Backup. Chose Transfer from a Time Machine Backup and then click Continue. If the backup is password protected, enter the necessary information to access the data.
- Select the data and time of the backup you want to restore and follow the onscreen prompts.
Method 2: Retrieve Files Using Target Disk Mode
If you have a second Mac available, you can use Target Disk Mode to transfer data from a dead MacBook Pro or another type of Mac. Use the following procedure.
- Connect the two computers with a USB, USB-C, or Thunderbolt cable. If either machine has macOS 11 or later installed, you need to use a Thunderbolt cable and may need an adapter for computers without a Thunderbolt port.
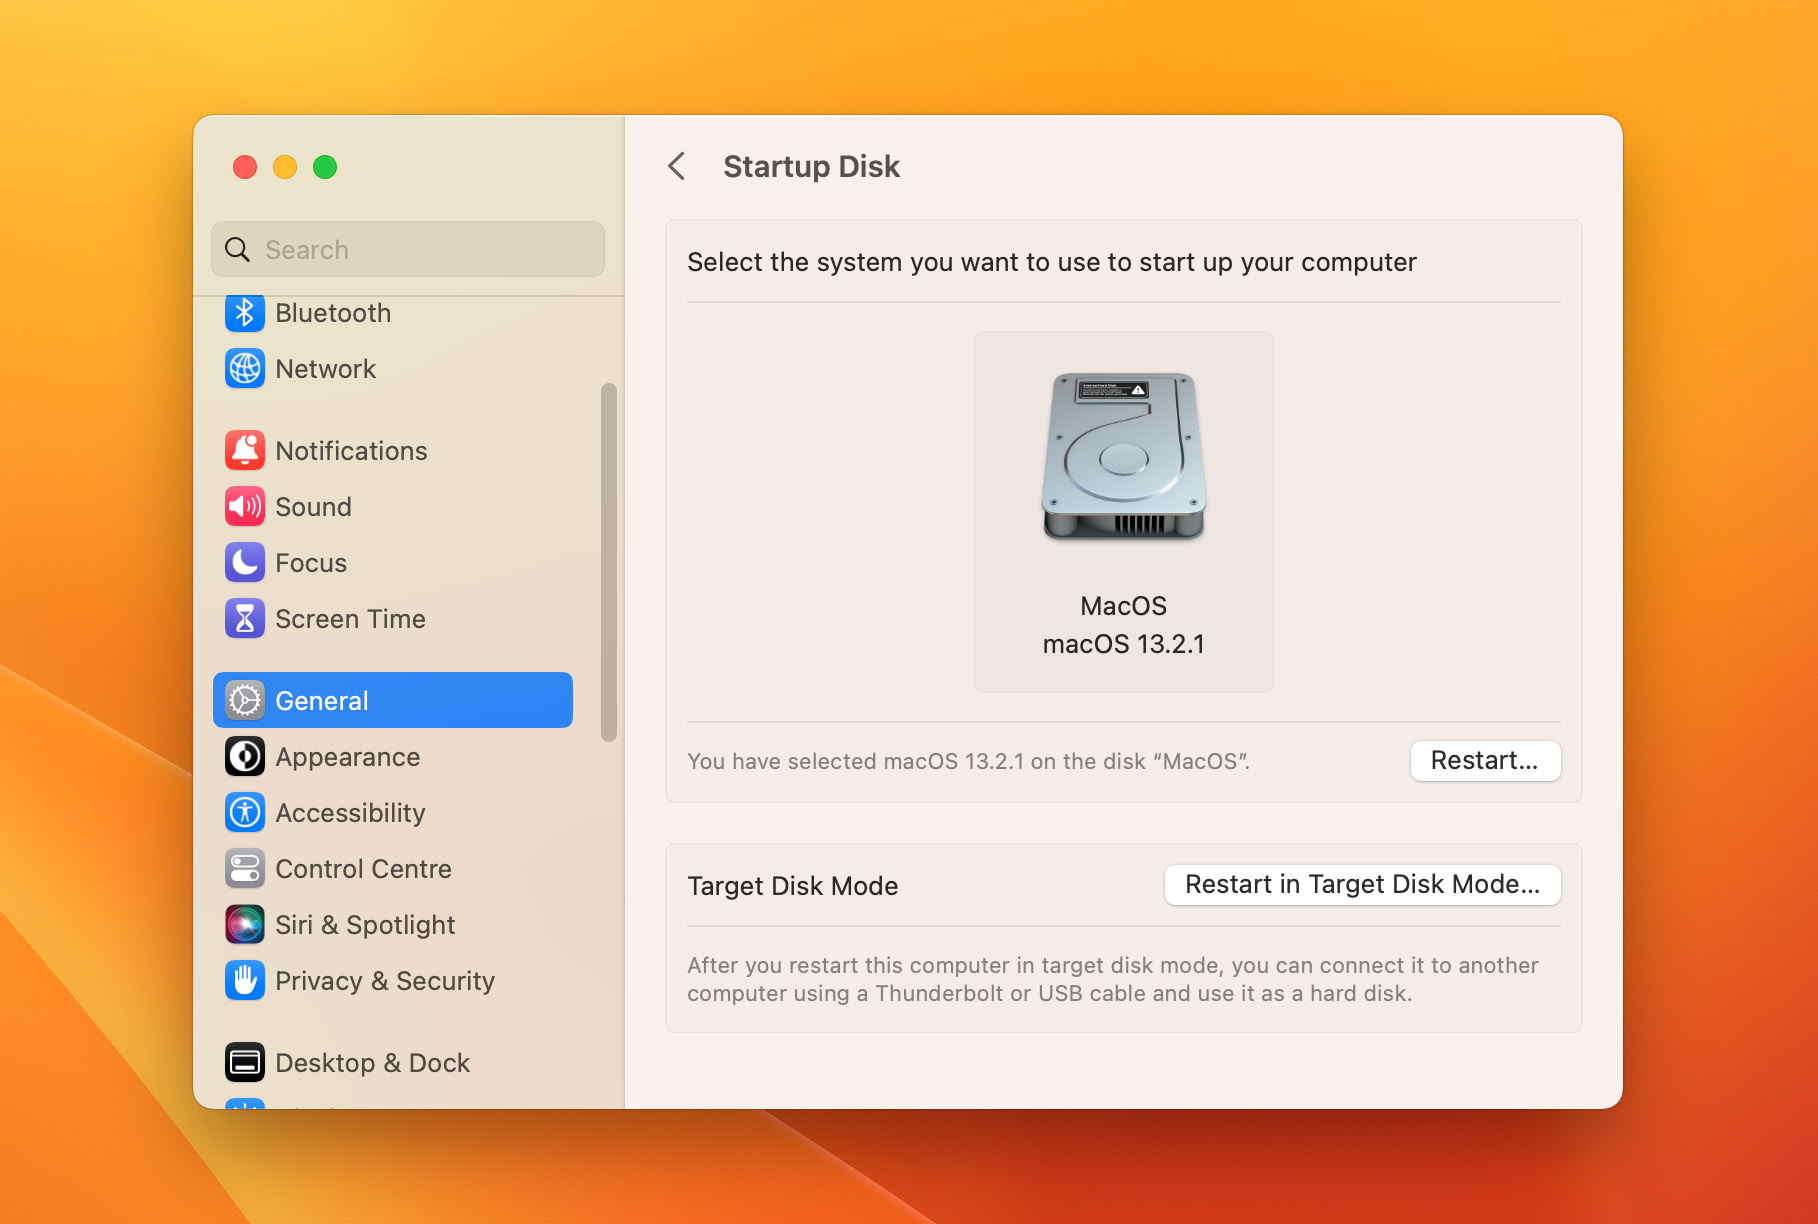
- On the Mac that will be used as the target, start it while pressing and holding the T key. If the machine is already turned on, Choose the Apple Menu > System Settings. Click General in the sidebar. Then click Startup Disk > Restart in Target disk Mode. A disk icon will appear on the other computer.
- Transfer files by dragging them to the disk.
- When finished, eject the disk by dragging the icon to the Trash.
- Push the power button on the Mac you used as a disk to shut it down.
- Disconnect the connecting cable.
Method 3: Use a Bootable MacOS Installer
If you have previously created a bootable macOS installer, you can use it to recover your operating system and regain access to your data. Use the appropriate procedure based on the type of processor in your Mac.
Apple silicon
- Plug the bootable installer into a Mac that is connected to the Internet and compatible with the version of macOS you’re installing.
- Turn on the Mac and continue to hold the power button until you see the startup options window, which shows your bootable volumes.
- Select the volume containing the bootable installer, then click Continue.
- When the macOS installer opens, follow the onscreen installation instructions.
Intel processor
- Plug the bootable installer into a Mac that is connected to the Internet and compatible with the version of macOS you’re installing.
- Turn on your Mac, then immediately press and hold the Option (Alt) key.
- Release the Option key when you see a dark screen showing your bootable volumes.
- Select the volume containing the bootable installer. Then click the onscreen arrow or press Return.
- Choose your language, if prompted.
- Select Install macOS (or Install OS X) from the Utilities window, then click Continue and follow the onscreen instructions.
What to Do In Case Mac/MacBook Won’t Turn On
You may be faced with attempting to recover data from a MacBook or Mac that won’t turn on at all. This eliminates the previous recovery methods, all of which require your machine to be minimally functional. In all probability, you will not be able to recover any data yourself.
Instead, you should look to engage a professional data recovery service to try to get your data back. They employ advanced hardware and software solutions to clone the disk from the damaged machine so the data can be extracted. Reputable recovery services will only charge you if they can recover your data.
FAQ
Can I recover data from a water-damaged MacBook Pro?
Unless you have a backup of your water-damaged MacBook Pro, you probably will not be able to do much regarding receiving data by yourself. You may want to contact a professional data recovery service to see if there is anything they can do to help you. Unfortunately, MacBooks are not intended to get wet.
How do I recover data from a dead MacBook Pro?
Use this procedure to recover data from a dead MacBook Pro.
- Connect an external disk to your Mac.
- Create a byte-to-byte copy of the damaged disk with Disk Drill.
- Connect the backup to a Mac.
- Launch Disk Drill and select Search for lost data to scan the backup for recoverable files.
- Select your files and click Recover.
How can I get files off the Mac with a broken screen?
To get files off a Mac with a broken screen you can use Migration Assistant via the following procedure.
- Connect an external display to the damaged Mac.
- Launch Migration Assistant on both computers.
- On the new machine, choose the From a Mac, Time Machine backup, or Startup disk option.
- On the damaged Mac, select the To another Mac option.
- On the new Mac, select the damaged Mac as the source.
- Choose the contents you want to transfer and click Continue.
- Wait until the process is complete.
Conclusion
We’ve shown you several methods with which to recover data from a crashed or dead hard drive. These methods work whether you have the newest Macbook or some older model like the MacBook Pro 2019 with a 14” screen or a desktop Mac machine. We suggest that you start backing up your Mac using Time Machine or another method to protect your valuable information. You should also consider downloading a reliable recovery tool like Disk Drill for use in all of your data loss situations.
This article was written by Robert Agar, a Staff Writer at Handy Recovery Advisor. It was also verified for technical accuracy by Andrey Vasilyev, our editorial advisor.
Curious about our content creation process? Take a look at our Editor Guidelines.