Lost some important data from your laptop? If there’s physical damage to the storage drive, contact a professional data recovery service. In all other cases, DIY data recovery methods can help you recover data for a fraction of the cost (and sometimes, for free).
However, DIY laptop data recovery comes with its challenges—a malfunctioning, or dead laptop, logical corruption, bad sectors, TRIM (on SSDs), a malfunctioning hard drive, and trouble finding compatible data recovery software, to name a few. We’ve taken these challenges into account while creating this guide.
Want to skip the theory aspects and jump straight to the recovery part? Click here.
Is It Possible to Recover Data From a Laptop Hard Drive?
Yes. However, numerous factors—overwritten files, logical corruption, the quality of data recovery software, and more—influence the extent of data recovery.
A dead, or malfunctioning laptop slightly complicates the data recovery process—you need to connect the laptop’s internal HDD/SSD to a working computer. Once data recovery is complete, it’s worth diagnosing what caused your laptop to malfunction, or not boot up. A few common reasons include a dead battery, damaged power adapter and charging port, operating system corruption, and malware.
On laptops with SSDs, the TRIM feature can significantly reduce your chances of data recovery. Here’s why—on traditional hard drives, deleted files are technically still there on the drive, but the data blocks they occupied are marked as available for use (they’re eventually overwritten with new files). On SSDs, the TRIM feature actively clears data from unused data blocks—this improves performance and increases the SSD’s longevity, but obliterates any chances of recovering the deleted files from those data blocks.
Always disable the TRIM command before attempting data recovery from SSDs. Here’s how to do this on Windows:
- Search for “cmd” in Windows Search (Windows Key + S).
- Right-click on Command Prompt > Run as administrator.
- Type fsutil behavior set DisableDeleteNotify 1 and press Enter to disable the TRIM command.
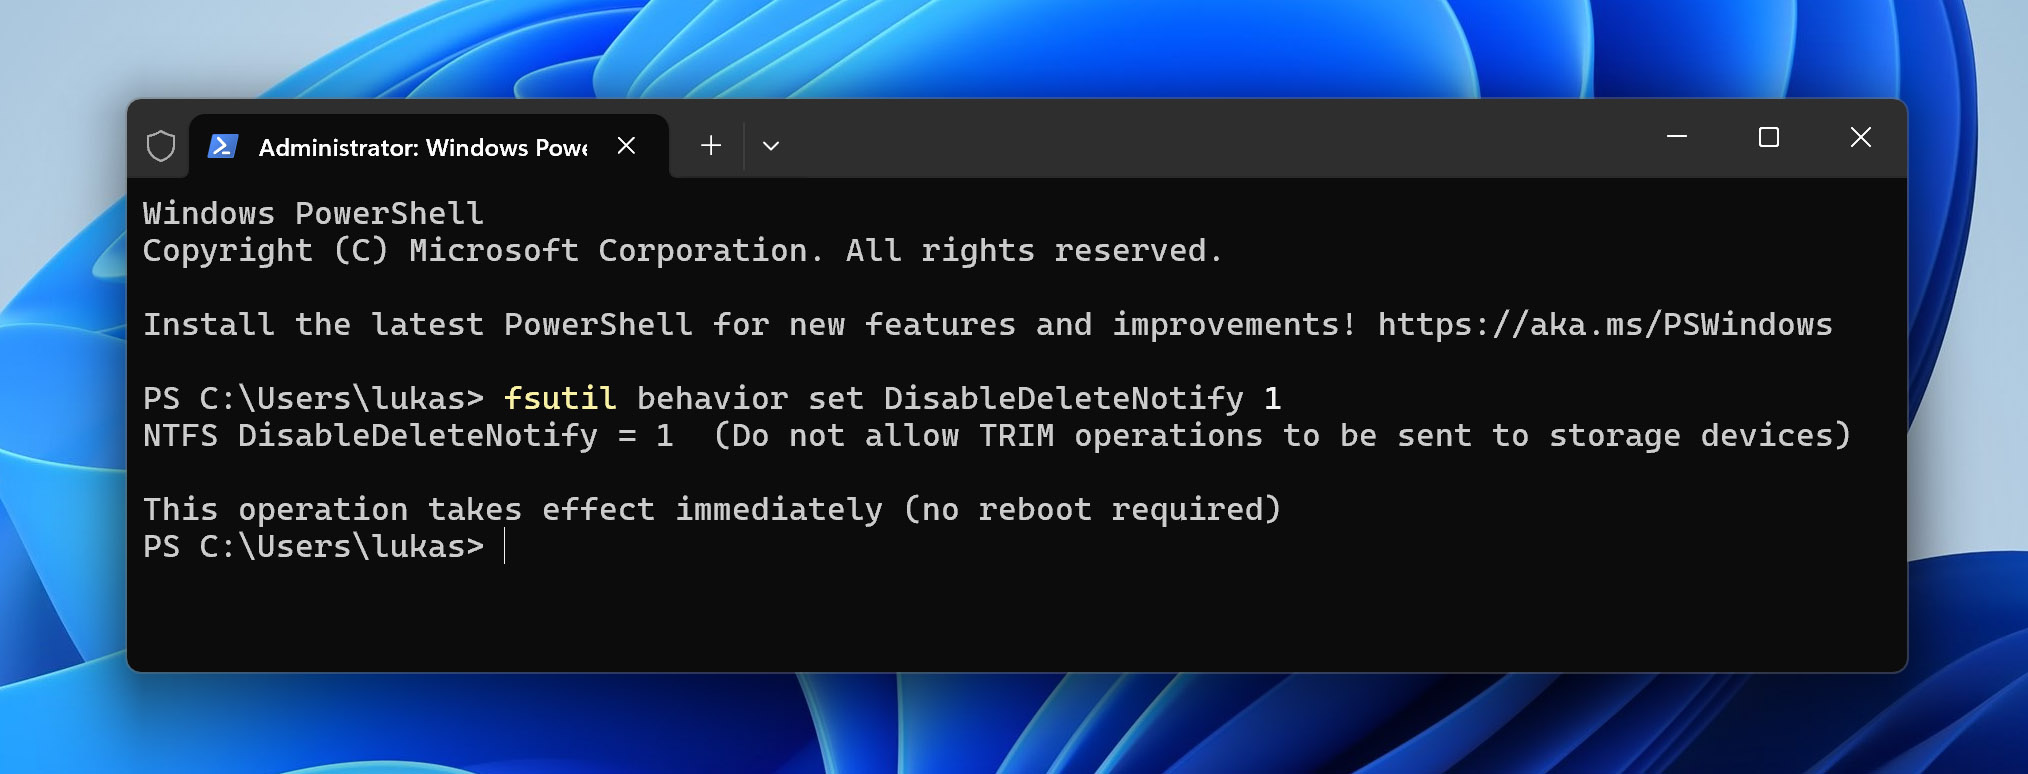
Don’t forget to enable TRIM after data recovery is complete—type fsutil behavior set DisableDeleteNotify 0 in Command Prompt and press Enter.
Important: Try not to copy or create new files on the affected laptop hard drive. This is essential if you want to maximize your chances of recovering the lost data.
Laptop Data Loss Scenarios Explained
It is important to understand laptop data loss scenarios since the fixes depend on what caused the data loss. Once you recognize the symptoms of different data loss scenarios, you can easily choose the method that is best suited to recover your lost data.
🔨 Physical Data Loss
As is evident by its name, physical data loss occurs when there is a mechanical failure in your laptop’s hard drive. HDDs are prone to this because they have a lot of moving parts, all of which have a negligible margin for physical error.
Mechanical hard drive failures can be caused by water damage, electrical damage, or physical shock (dropping your laptop).
The telltale signs of physical HDD failure include buzzing or grinding noises from your laptop. Another audible sign is clicking noises. Additionally, your laptop may not boot beyond the manufacturer’s logo or even detect the OS. In most cases of physical damage, the HDD will not be functional enough to recover data using software-based methods.
Due to a lack of moving parts, SSDs are not as susceptible to physical damage as HDDs. However, they can still be damaged due to water, power surges, and overheating. Additionally, SSDs don’t make any grinding, or whirring sounds when they’re physically damaged. Look for other signs like deleted data, slow read-write speeds, and the SSD becoming undetectable.
💿 Logical Data Loss
Simply put, logical data loss occurs when your storage device is physically in perfect working condition, but you’re still unable to access some of your files. Naturally, this kind of data loss is completely software-driven, and there are no clicking or whirring sounds like in the case of mechanical hard drive failure.
The most common causes of logical data loss include malware infections, a damaged file system, sudden power surges or outages, and human errors such as accidental data deletion or formatting. Other reasons behind logical data loss include controller failures, power outages, driver errors, and unexpected system crashes. The hard drive can become completely unreadable in some cases.
Similar to physical data loss, your laptop may have booting problems due to logical data loss. However, this is rare. In most cases, you will simply be unable to access the missing or corrupt files. Logical data loss is the best candidate for DIY laptop data recovery.
How to Recover Data From a Malfunctioning Laptop Hard Disk Drive
Recovering data from a malfunctioning laptop hard drive involves determining if the hard drive is faulty, or if the problem lies with some other component of the laptop. You can confirm this by connecting the laptop’s hard drive as an external HDD to another PC. If the drive shows up, you can proceed with data recovery on the other PC.
Hard drives that don’t show up on other computers are likely damaged. It’s best to avoid DIY recovery in such cases, and contact a professional data recovery service instead.
When performing data recovery on SSDs:
- Disconnect the SSD from the laptop (if possible).
- Connect it to another PC.
- Disable TRIM on the computer.
- Perform data recovery.
Here’s how to recover data from your laptop’s hard drive:
Step 1: Verify If the Laptop’s Hard Drive Is Indeed Malfunctioning
Many times, other common laptop issues are mistaken for a hard drive failure. As a rule of thumb, if your laptop’s screen is not lighting up at all, and there are no unusual noises coming from the laptop, it is most likely NOT a hard drive related problem.
Additionally, try booting your laptop with the A/C power adapter connected. If it boots up as usual, you’re looking at a battery issue, not a hard drive one. If you get a missing OS error message, then it could possibly be a malfunctioning hard drive.
All in all, the most common signs of a malfunctioning hard drive are a clicking sound or loud noises from your laptop. Before proceeding to the next section, simply reseat your laptop’s hard drive and then try again. If the laptop doesn’t boot up, it’s most likely a failing hard drive.
SSDs don’t make clicking or grinding noises. Instead, they’ll be undetectable, experience data loss, or show up as RAW.
Step 2: Use the Laptop’s Hard Drive as An External HDD
If the laptop that is housing the hard drive isn’t booting, you can try converting the HDD into an external hard drive. It’s one of the best ways to recover data from a hard drive that won’t boot. This step has two main advantages: it can help you confirm whether the fault lies in the hard disk drive itself, and if your other computer detects the HDD, you can easily assess the amount of data loss that has occurred.
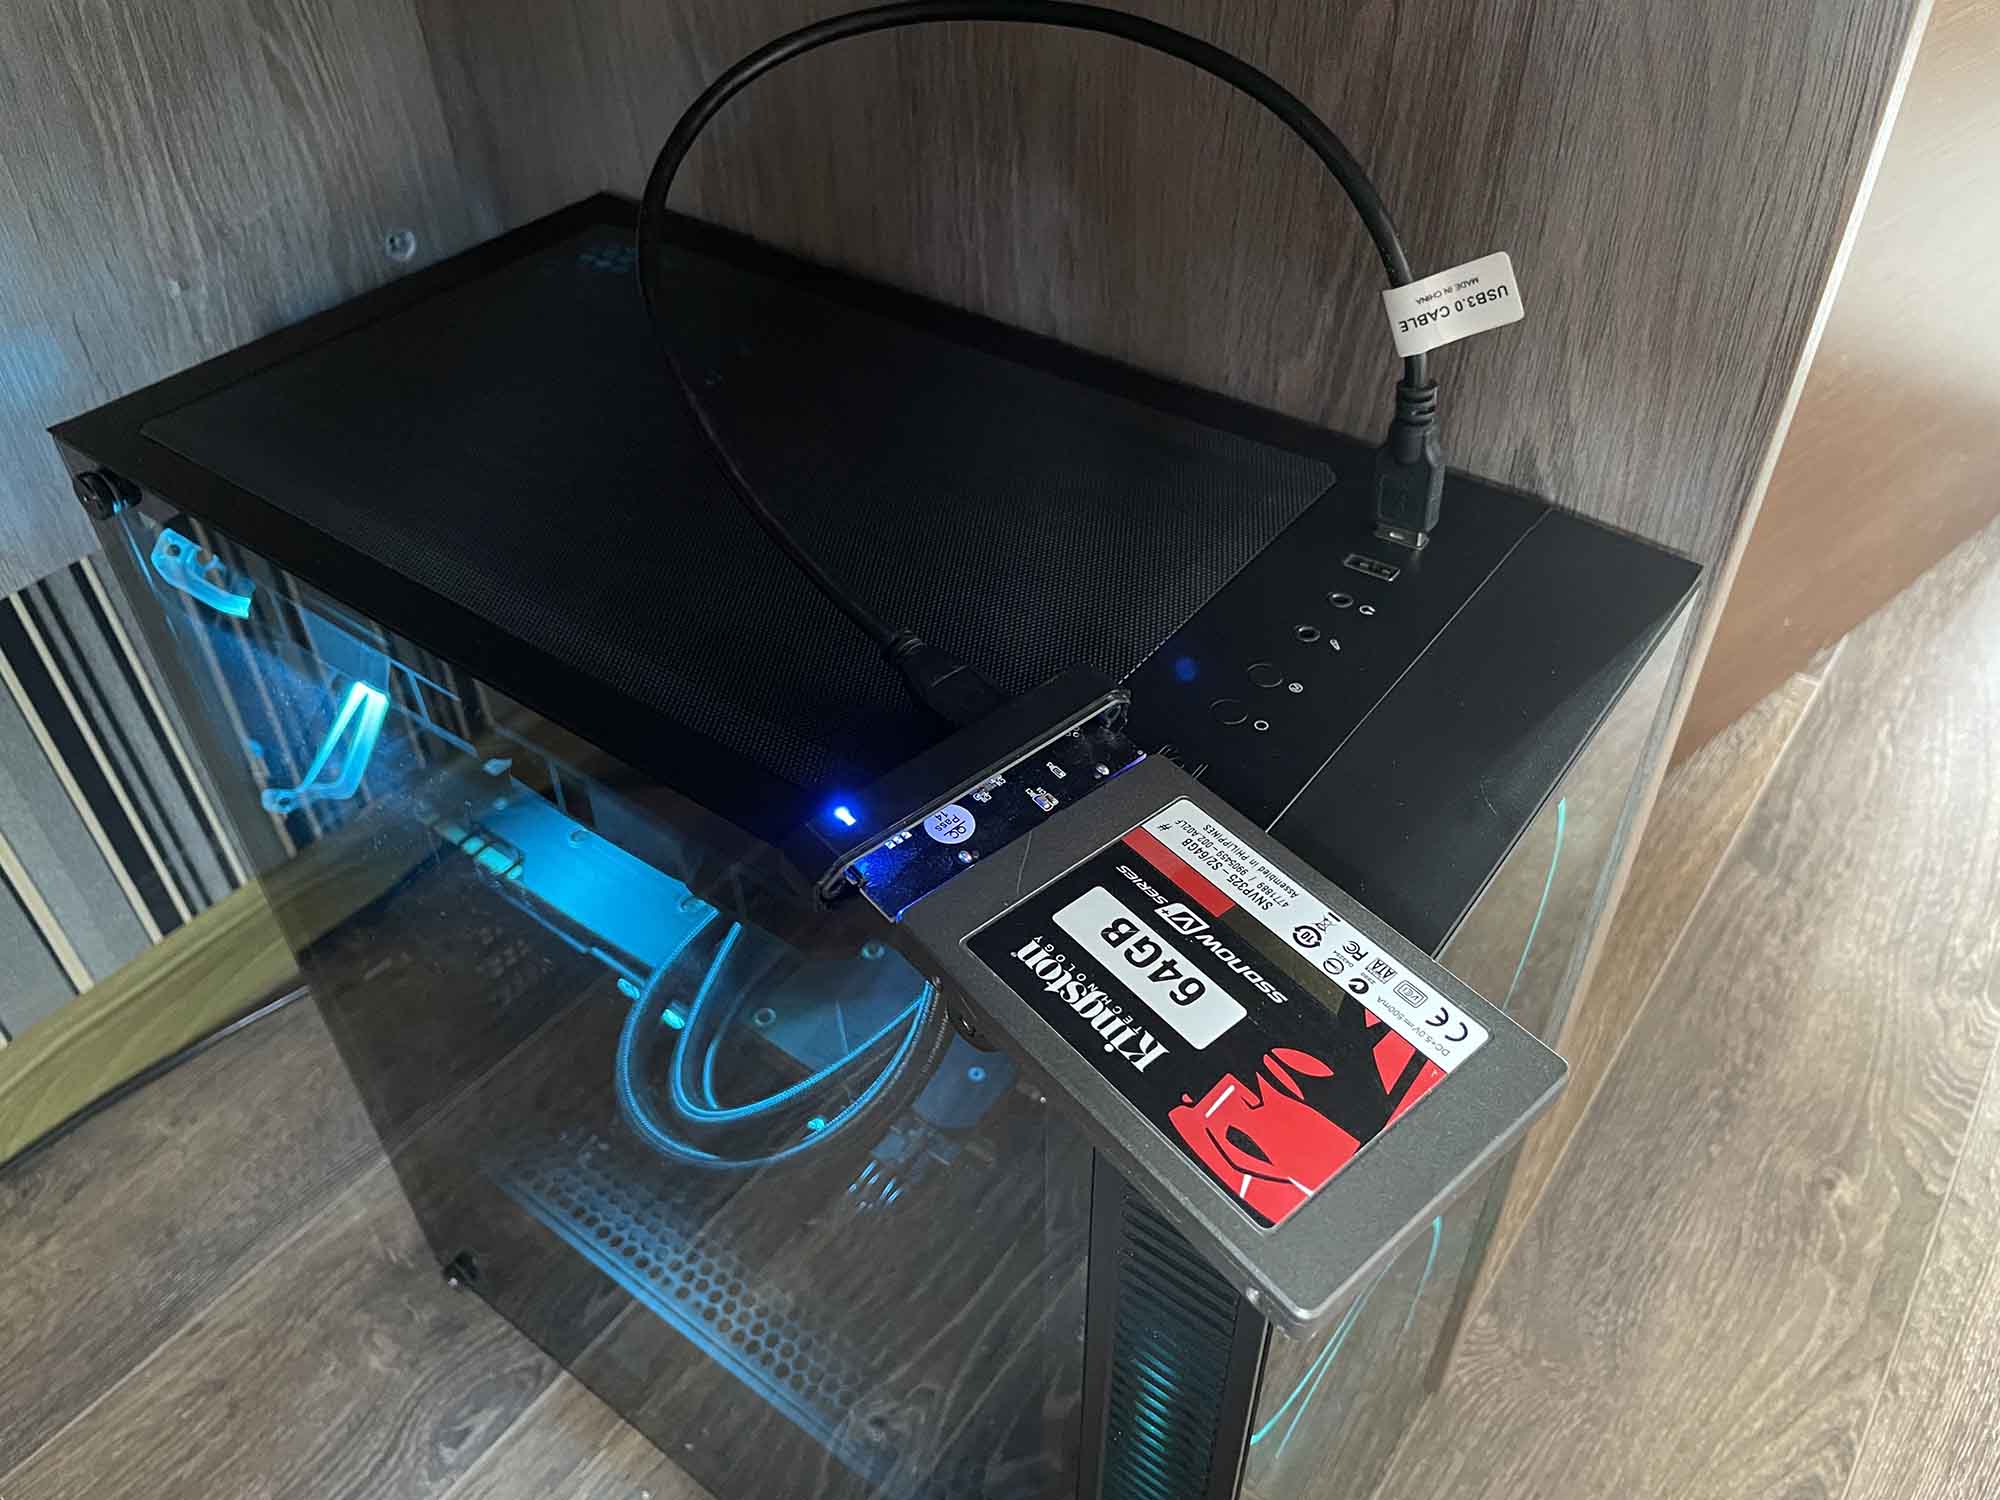
To use your laptop’s hard disk drive as an external HDD, go through the following steps:
- Purchase a laptop hard disk drive enclosure if required. You can easily find them on popular online shopping sites at a cheap price. Double-check the compatibility before purchasing.
- Remove the internal hard disk from your laptop.
- Place the hard drive into the laptop hard disk drive enclosure.
- Connect one end of the bundled USB cable to the enclosure and the other end to a working computer.
If the computer detects the hard drive, copy all the important data to the computer’s internal drive. If some data is missing, try recovering it using a third-party data recovery software tool such as Disk Drill. Upon non-detection of the hard drive, try connecting the USB to a different port, which is one of the methods to fix an external hard drive not showing up.
Step 3: Connect the Laptop’s Hard Drive to a Desktop Computer
Most laptop hard drives use a 2.5” SATA cable to communicate with the motherboard. Thanks to this, you can use it as an internal HDD on a desktop computer. This can help you gauge the extent of data loss that has occurred while allowing you to confirm whether the HDD is indeed malfunctioning, or is there a fault in the laptop itself.
In the case of an SSD, use a SATA cable to connect it to your PC—desktop and laptop SSDs use the same connectors, despite having different form factors. Some laptops have SSDs soldered onto the motherboard—you cannot disconnect them.
When working with M.2 and PCIe SSDs, it may be tricky to connect them to a PC (unless it has the required slots). However, you can find PCIe /M.2 to USB adapters online to overcome this hurdle.
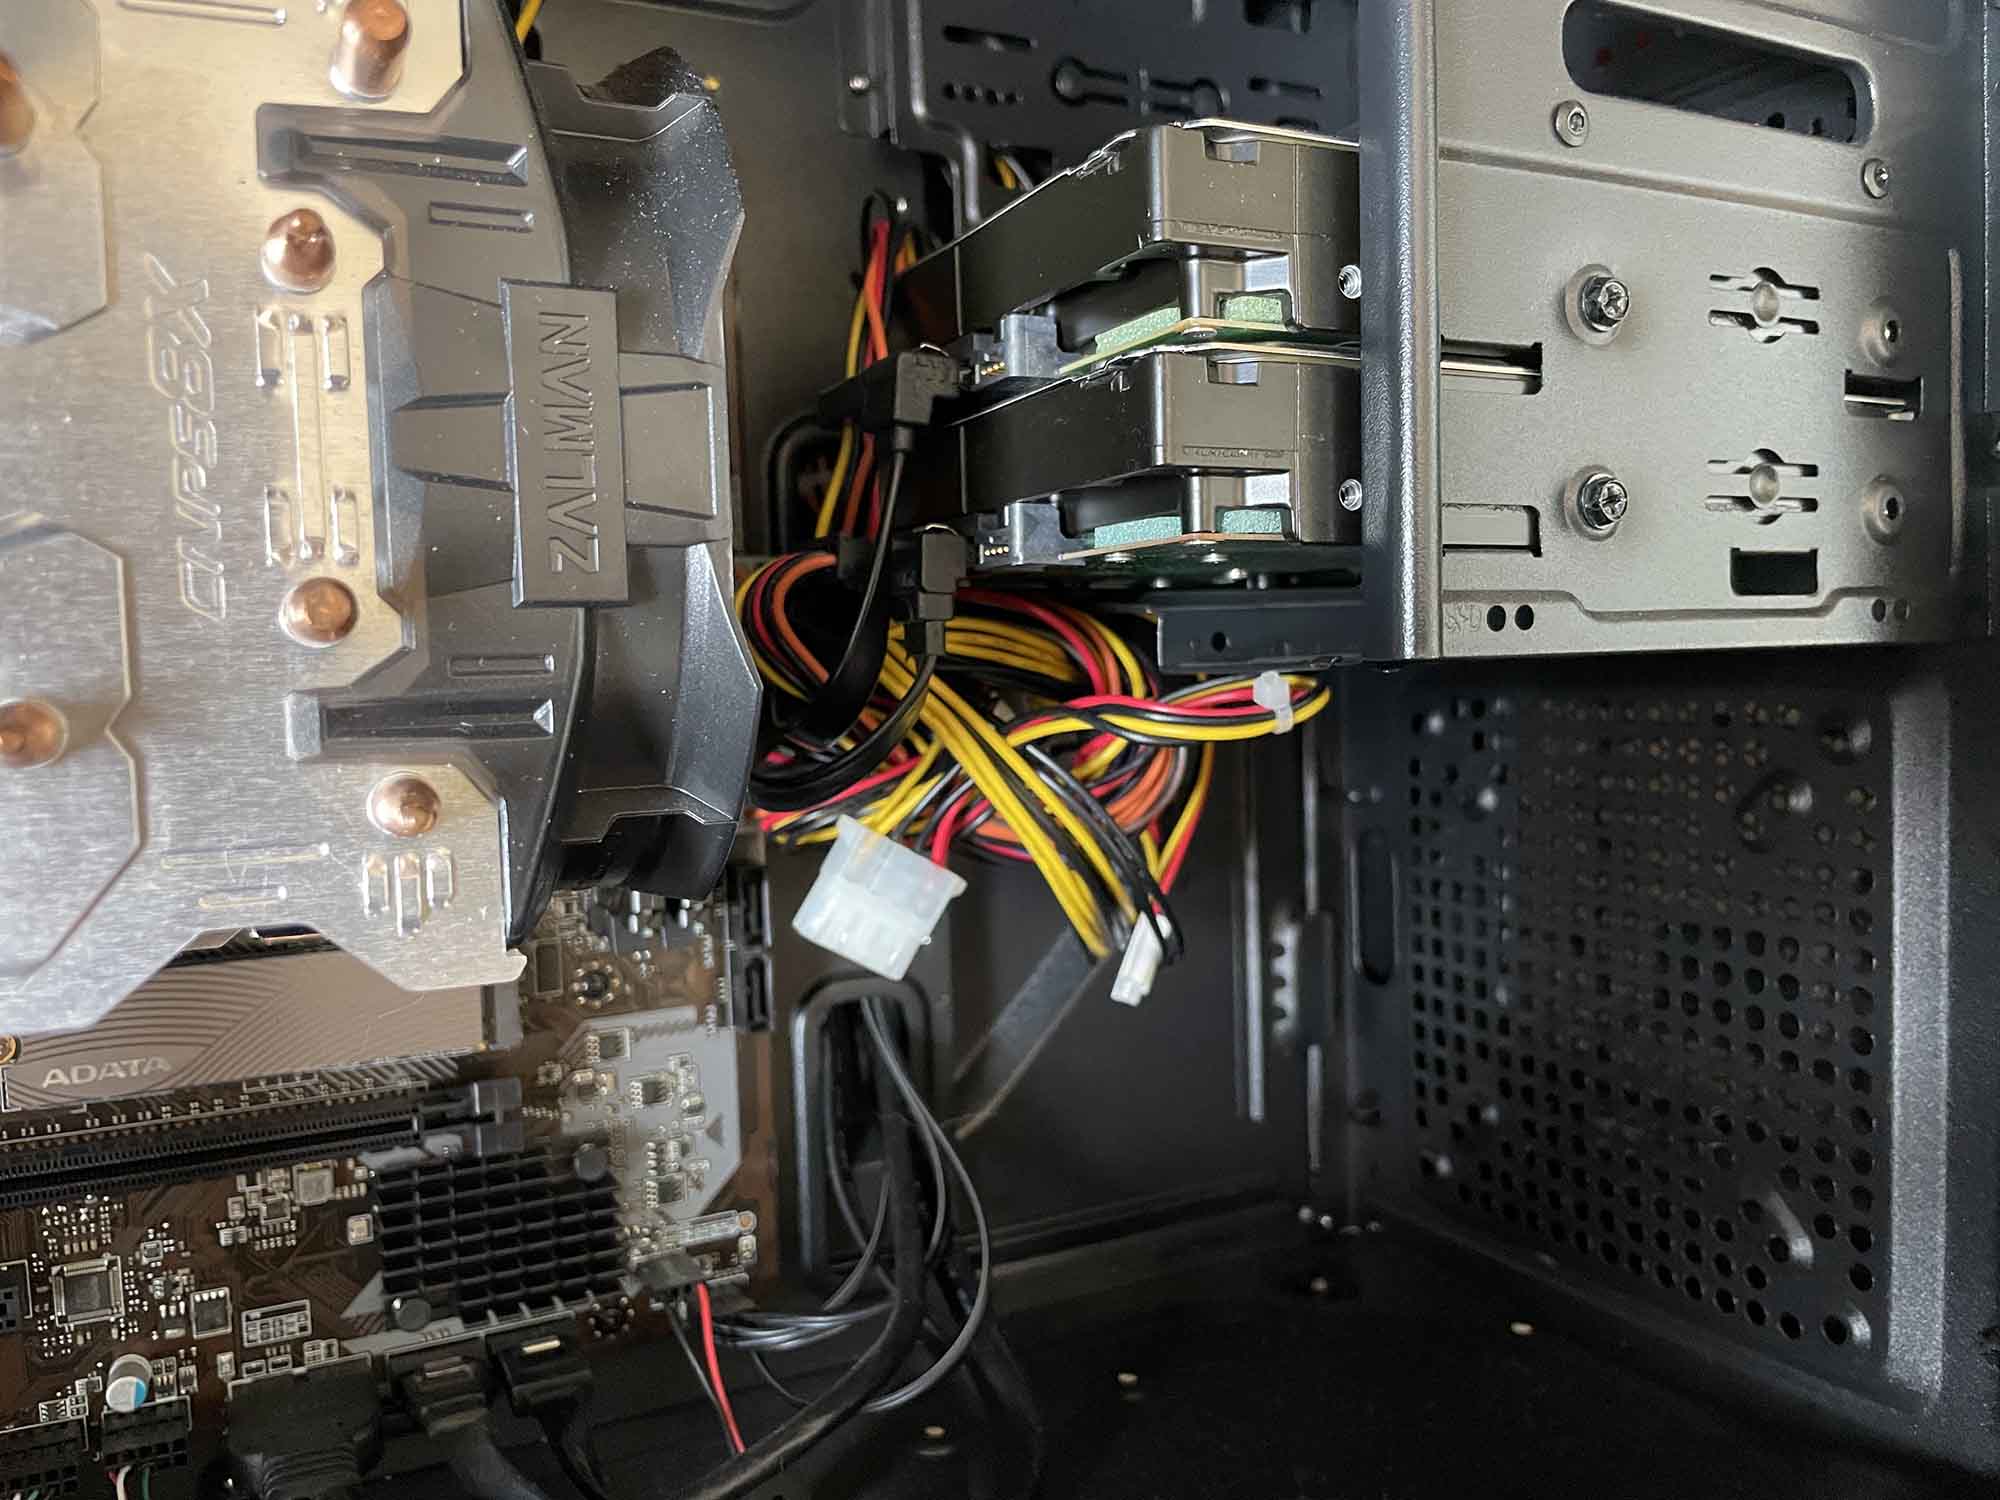
To recover data from your laptop’s hard drive by connecting it to a desktop computer, follow these steps:
- Disconnect the hard drive, or SSD from your laptop.
- Remove the side cover from the desktop computer’s case.
- Connect a SATA power cable from the desktop’s PSU to the laptop’s hard disk drive, or SSD. Make sure your computer is powered off and disconnected from the power socket when you perform these steps.
- Connect one end of a 2.5” SATA cable to the hard drive, or SSD, and the other end to the PC’s motherboard.
- Boot the desktop PC.
- Check whether the BIOS is properly configured to detect the new hard disk drive, or SSD.
- Copy important data to the other, properly working HDD/SSD on the desktop.
You should also take note that some laptops ship with hard drives that use a single connector that transmits both power and data. In such cases, you will have to purchase the relevant adaptor in order to connect the laptop hard disk drive to your desktop PC.
Step 4: Recover Lost Data from a Laptop Hard Drive Using a Recovery Tool
Third-party data recovery tools are a user-friendly way of recovering data from your laptop’s hard drive. Regardless of what caused data loss—accidental deletion, corruption, a damaged file system, or a malware infection—a good data recovery program can help you out. The only exception is data loss because of physical damage, or severe logical corruption (the drive not showing up in Windows Disk Management).
Here are two tools you can use to recover data from your laptop’s hard drive:
Option A: Disk Drill
Disk Drill is a favorite when it comes to data recovery programs, and for good reason. It ticks almost all the boxes of a good data recovery tool—it has an advanced data recovery algorithm, an easy-to-use UI, a free trial, and a proven track-record. Disk Drill’s versatility ensures you can recover both deleted data, as well as files that are inaccessible due to logical corruption and other issues.
Here’s how to use Disk Drill to recover data from your laptop’s hard drive:
- Download Disk Drill and install it.
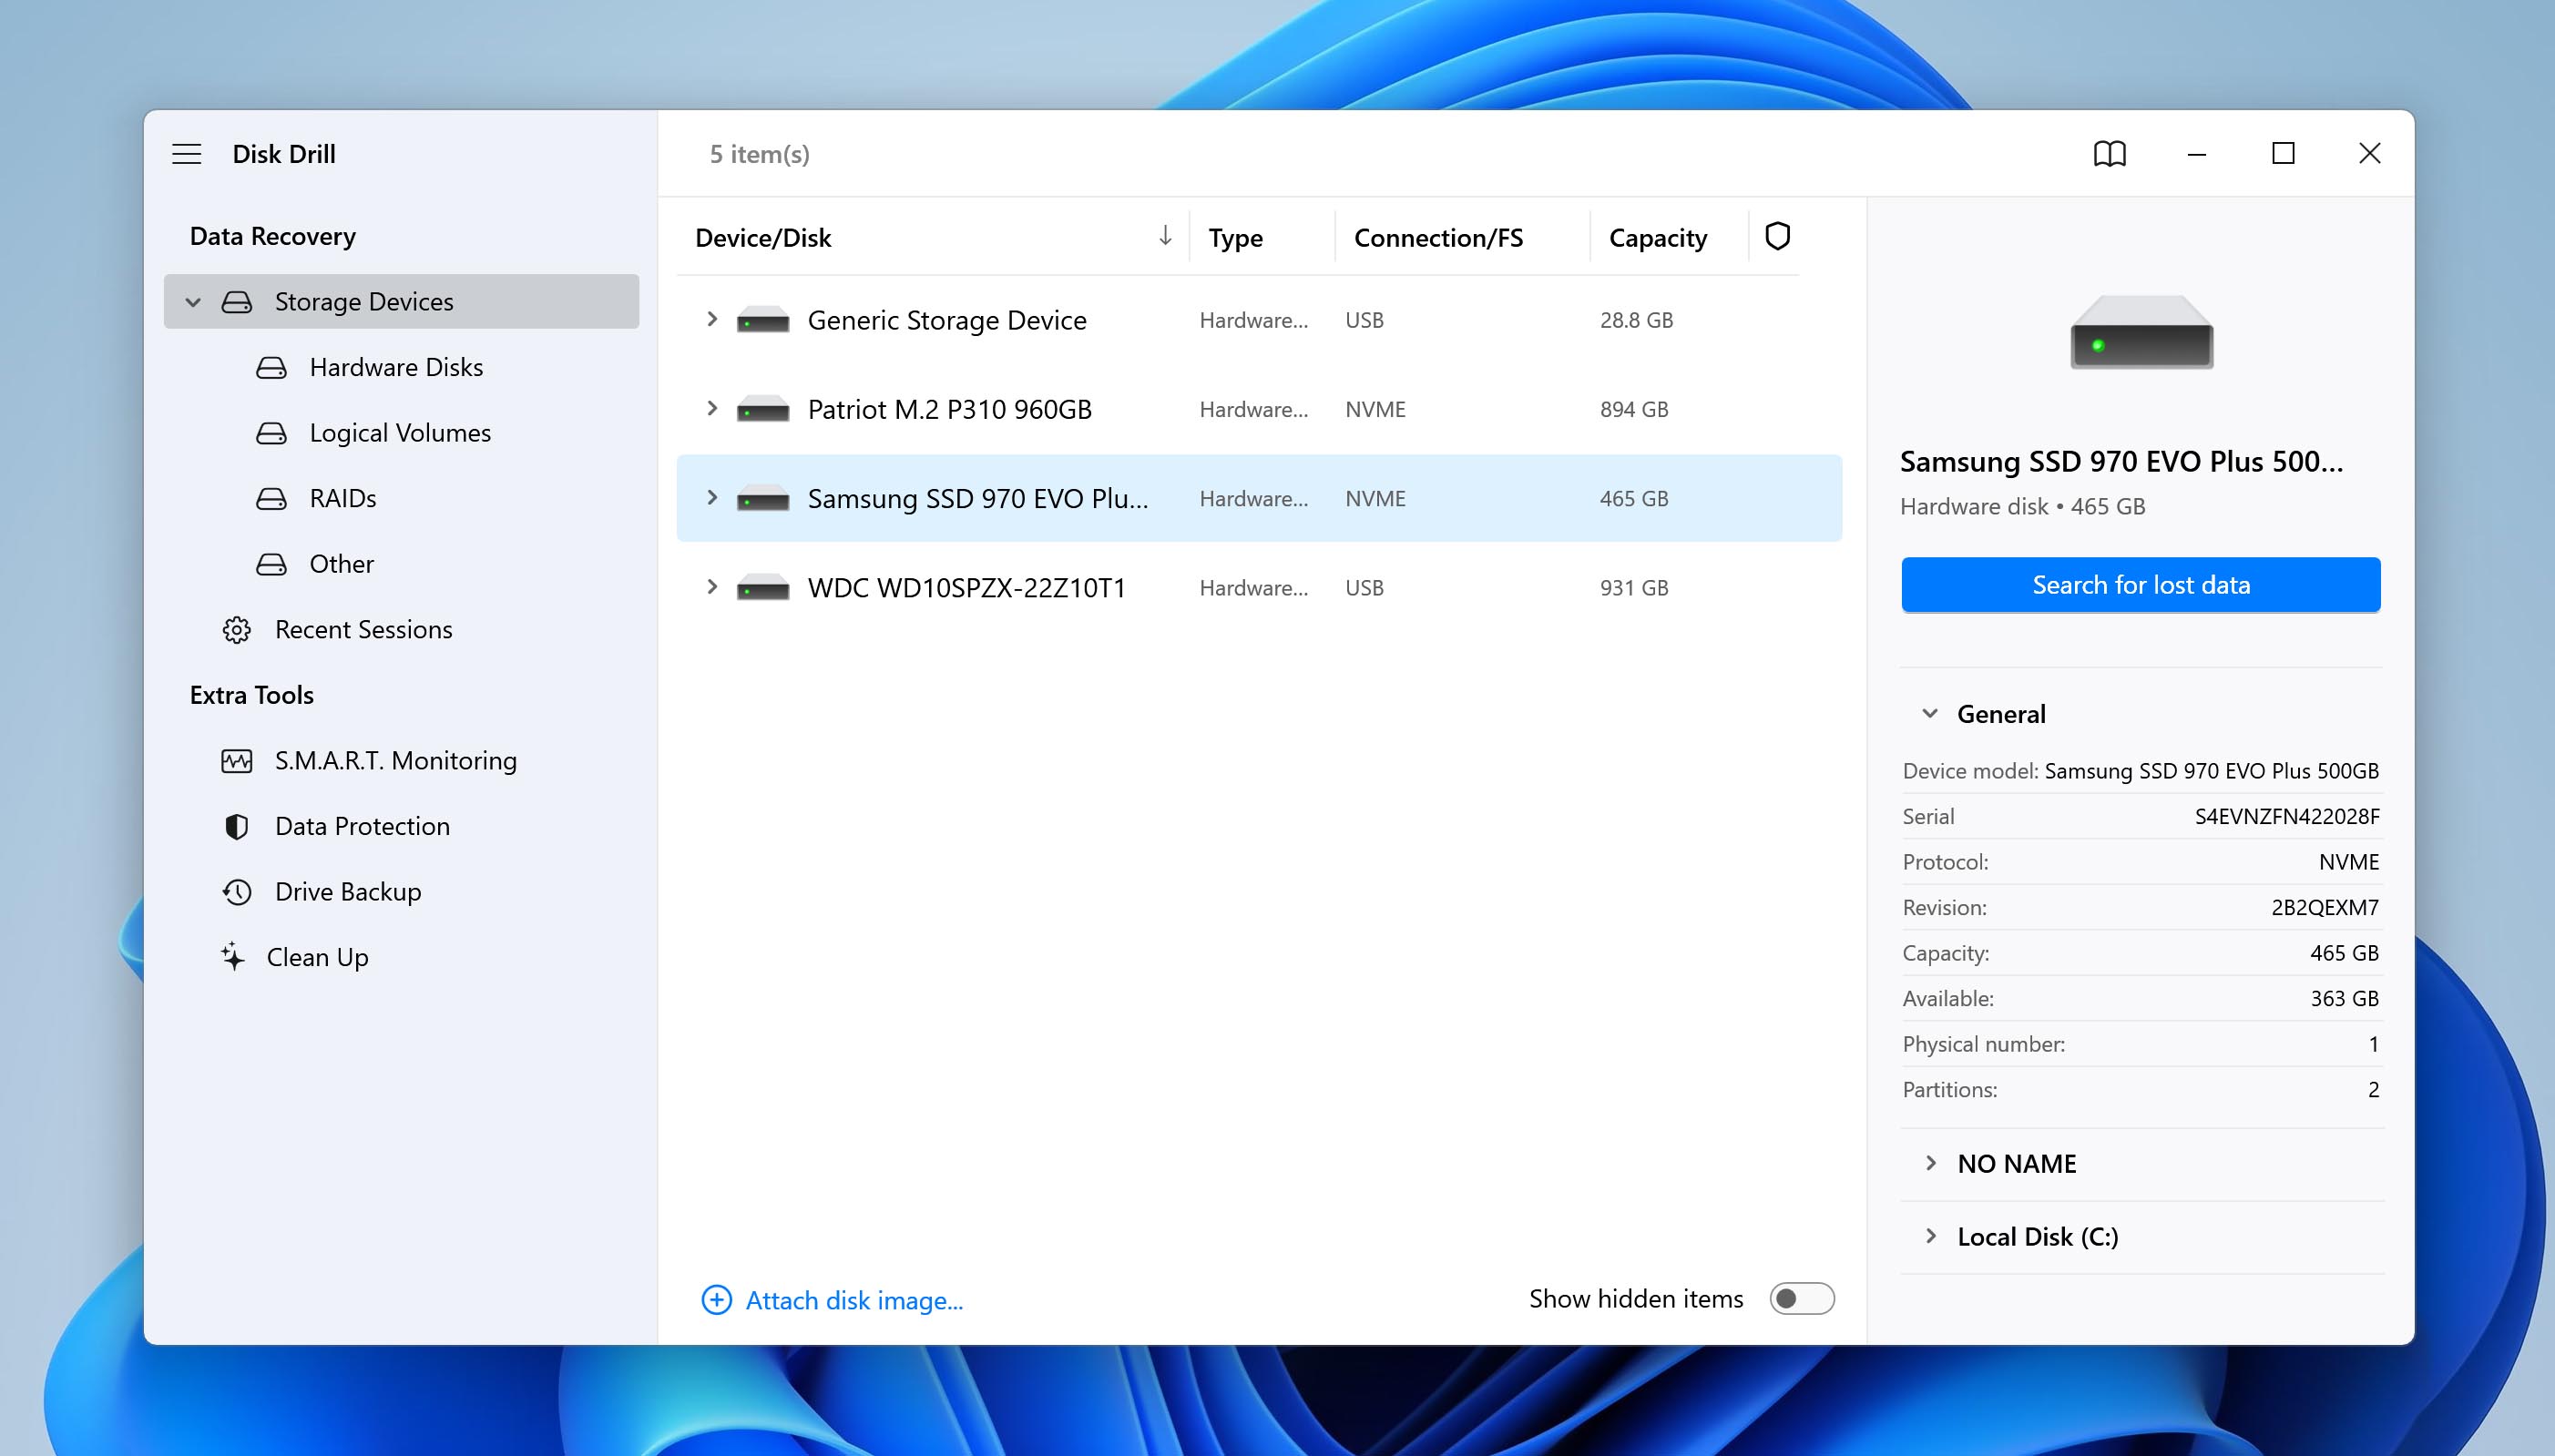
- Open Disk Drill, select your laptop’s hard drive, and click Search for lost data.
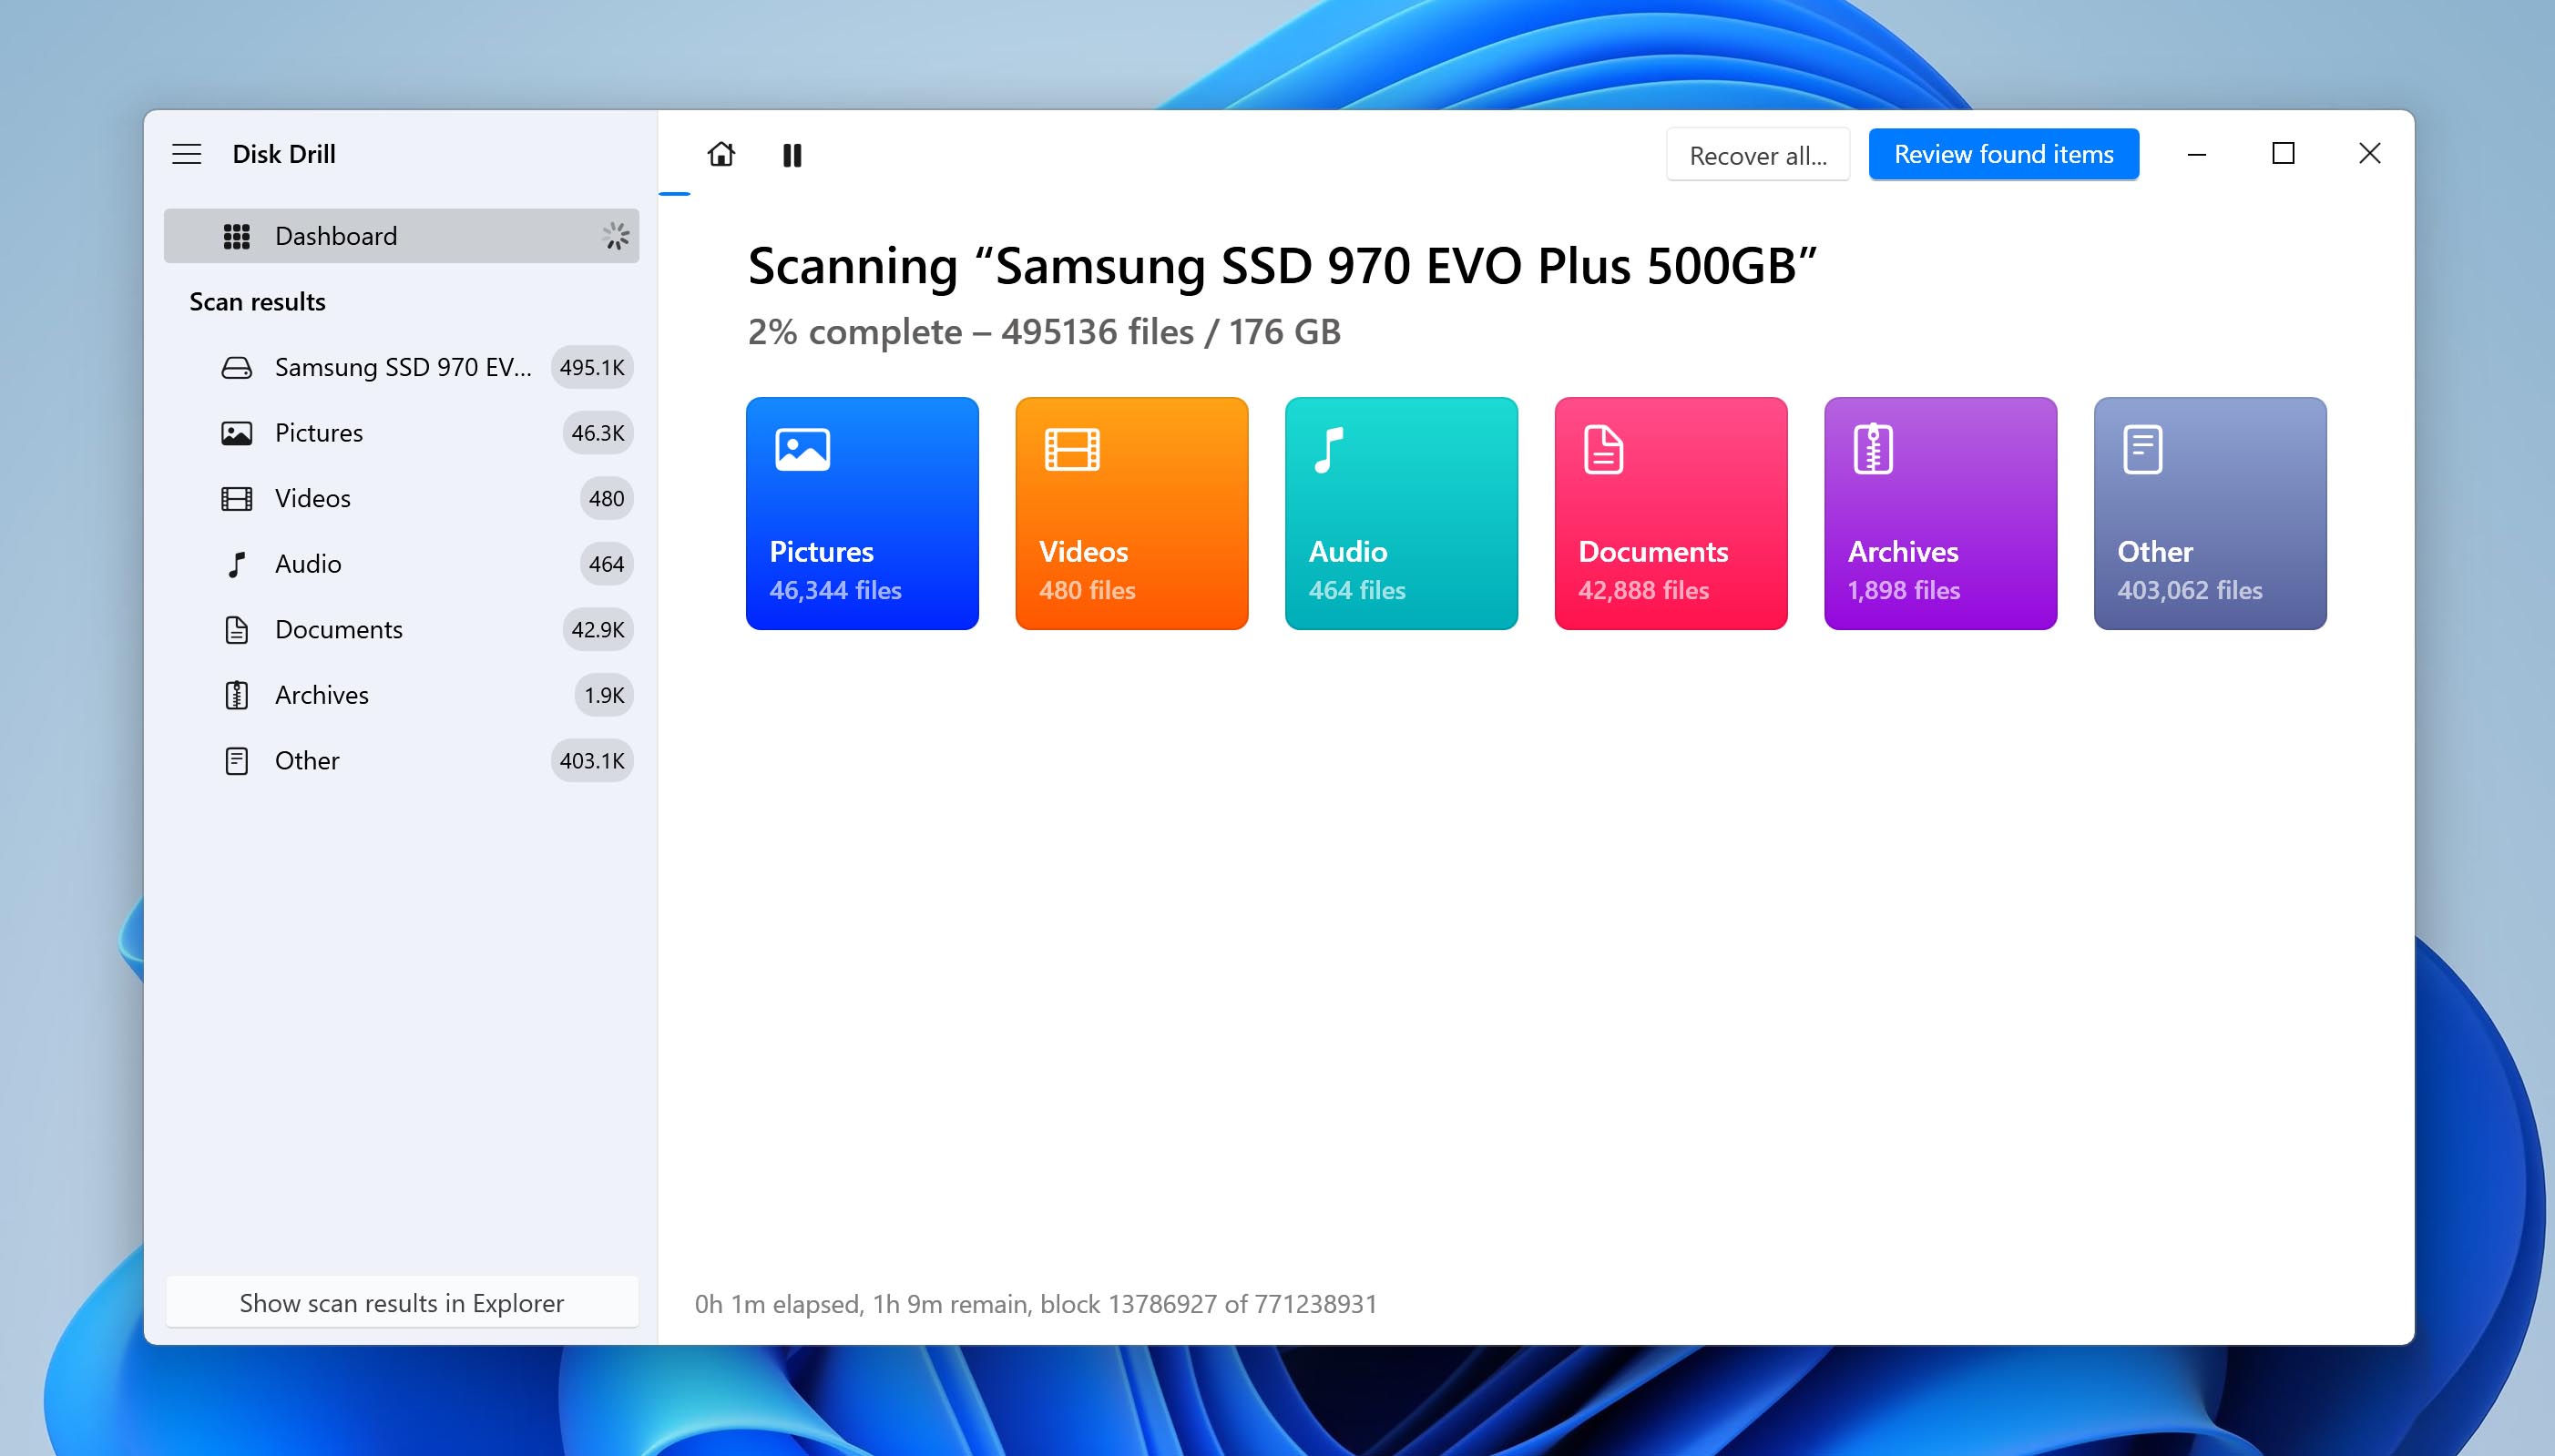
- Click on Review found items. If you wish to see specific file types, click on the relevant file type tile instead (Pictures, Videos, Audio, Documents, Archives, and Other).
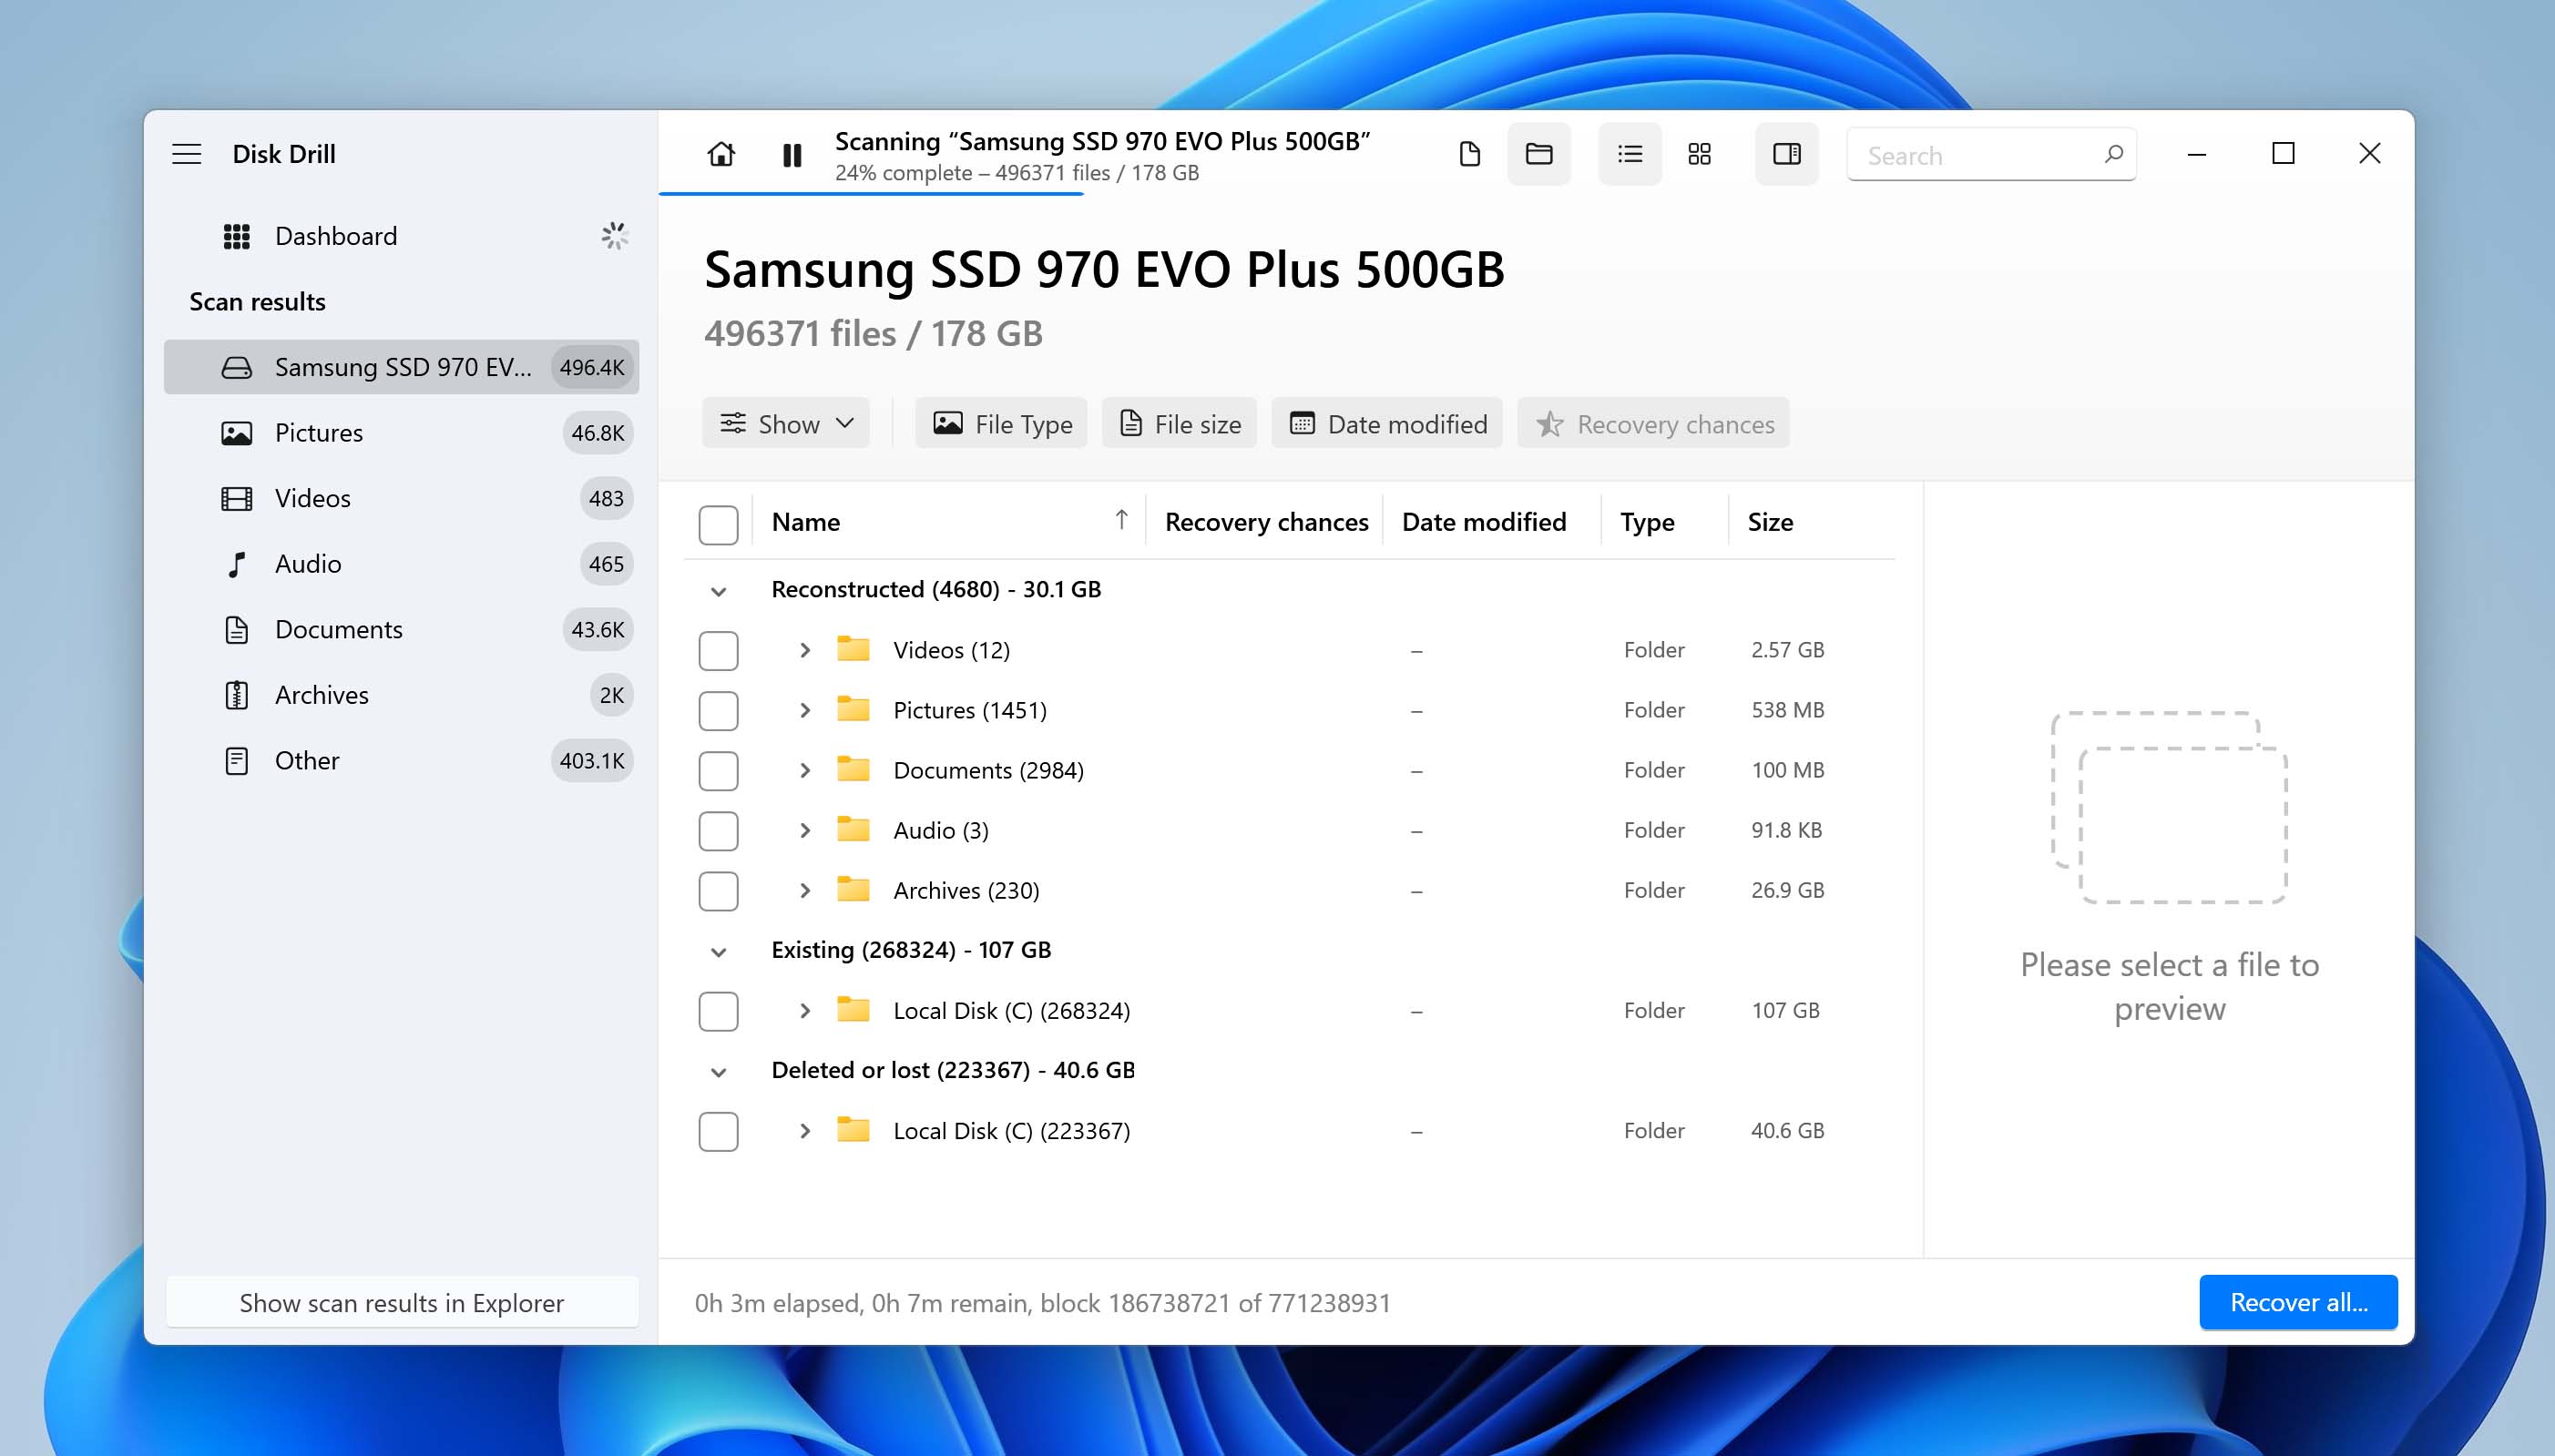
- Expand the Deleted or lost and Reconstructed sections to view deleted files that can be recovered. To view existing files on the drive, expand the Existing section.
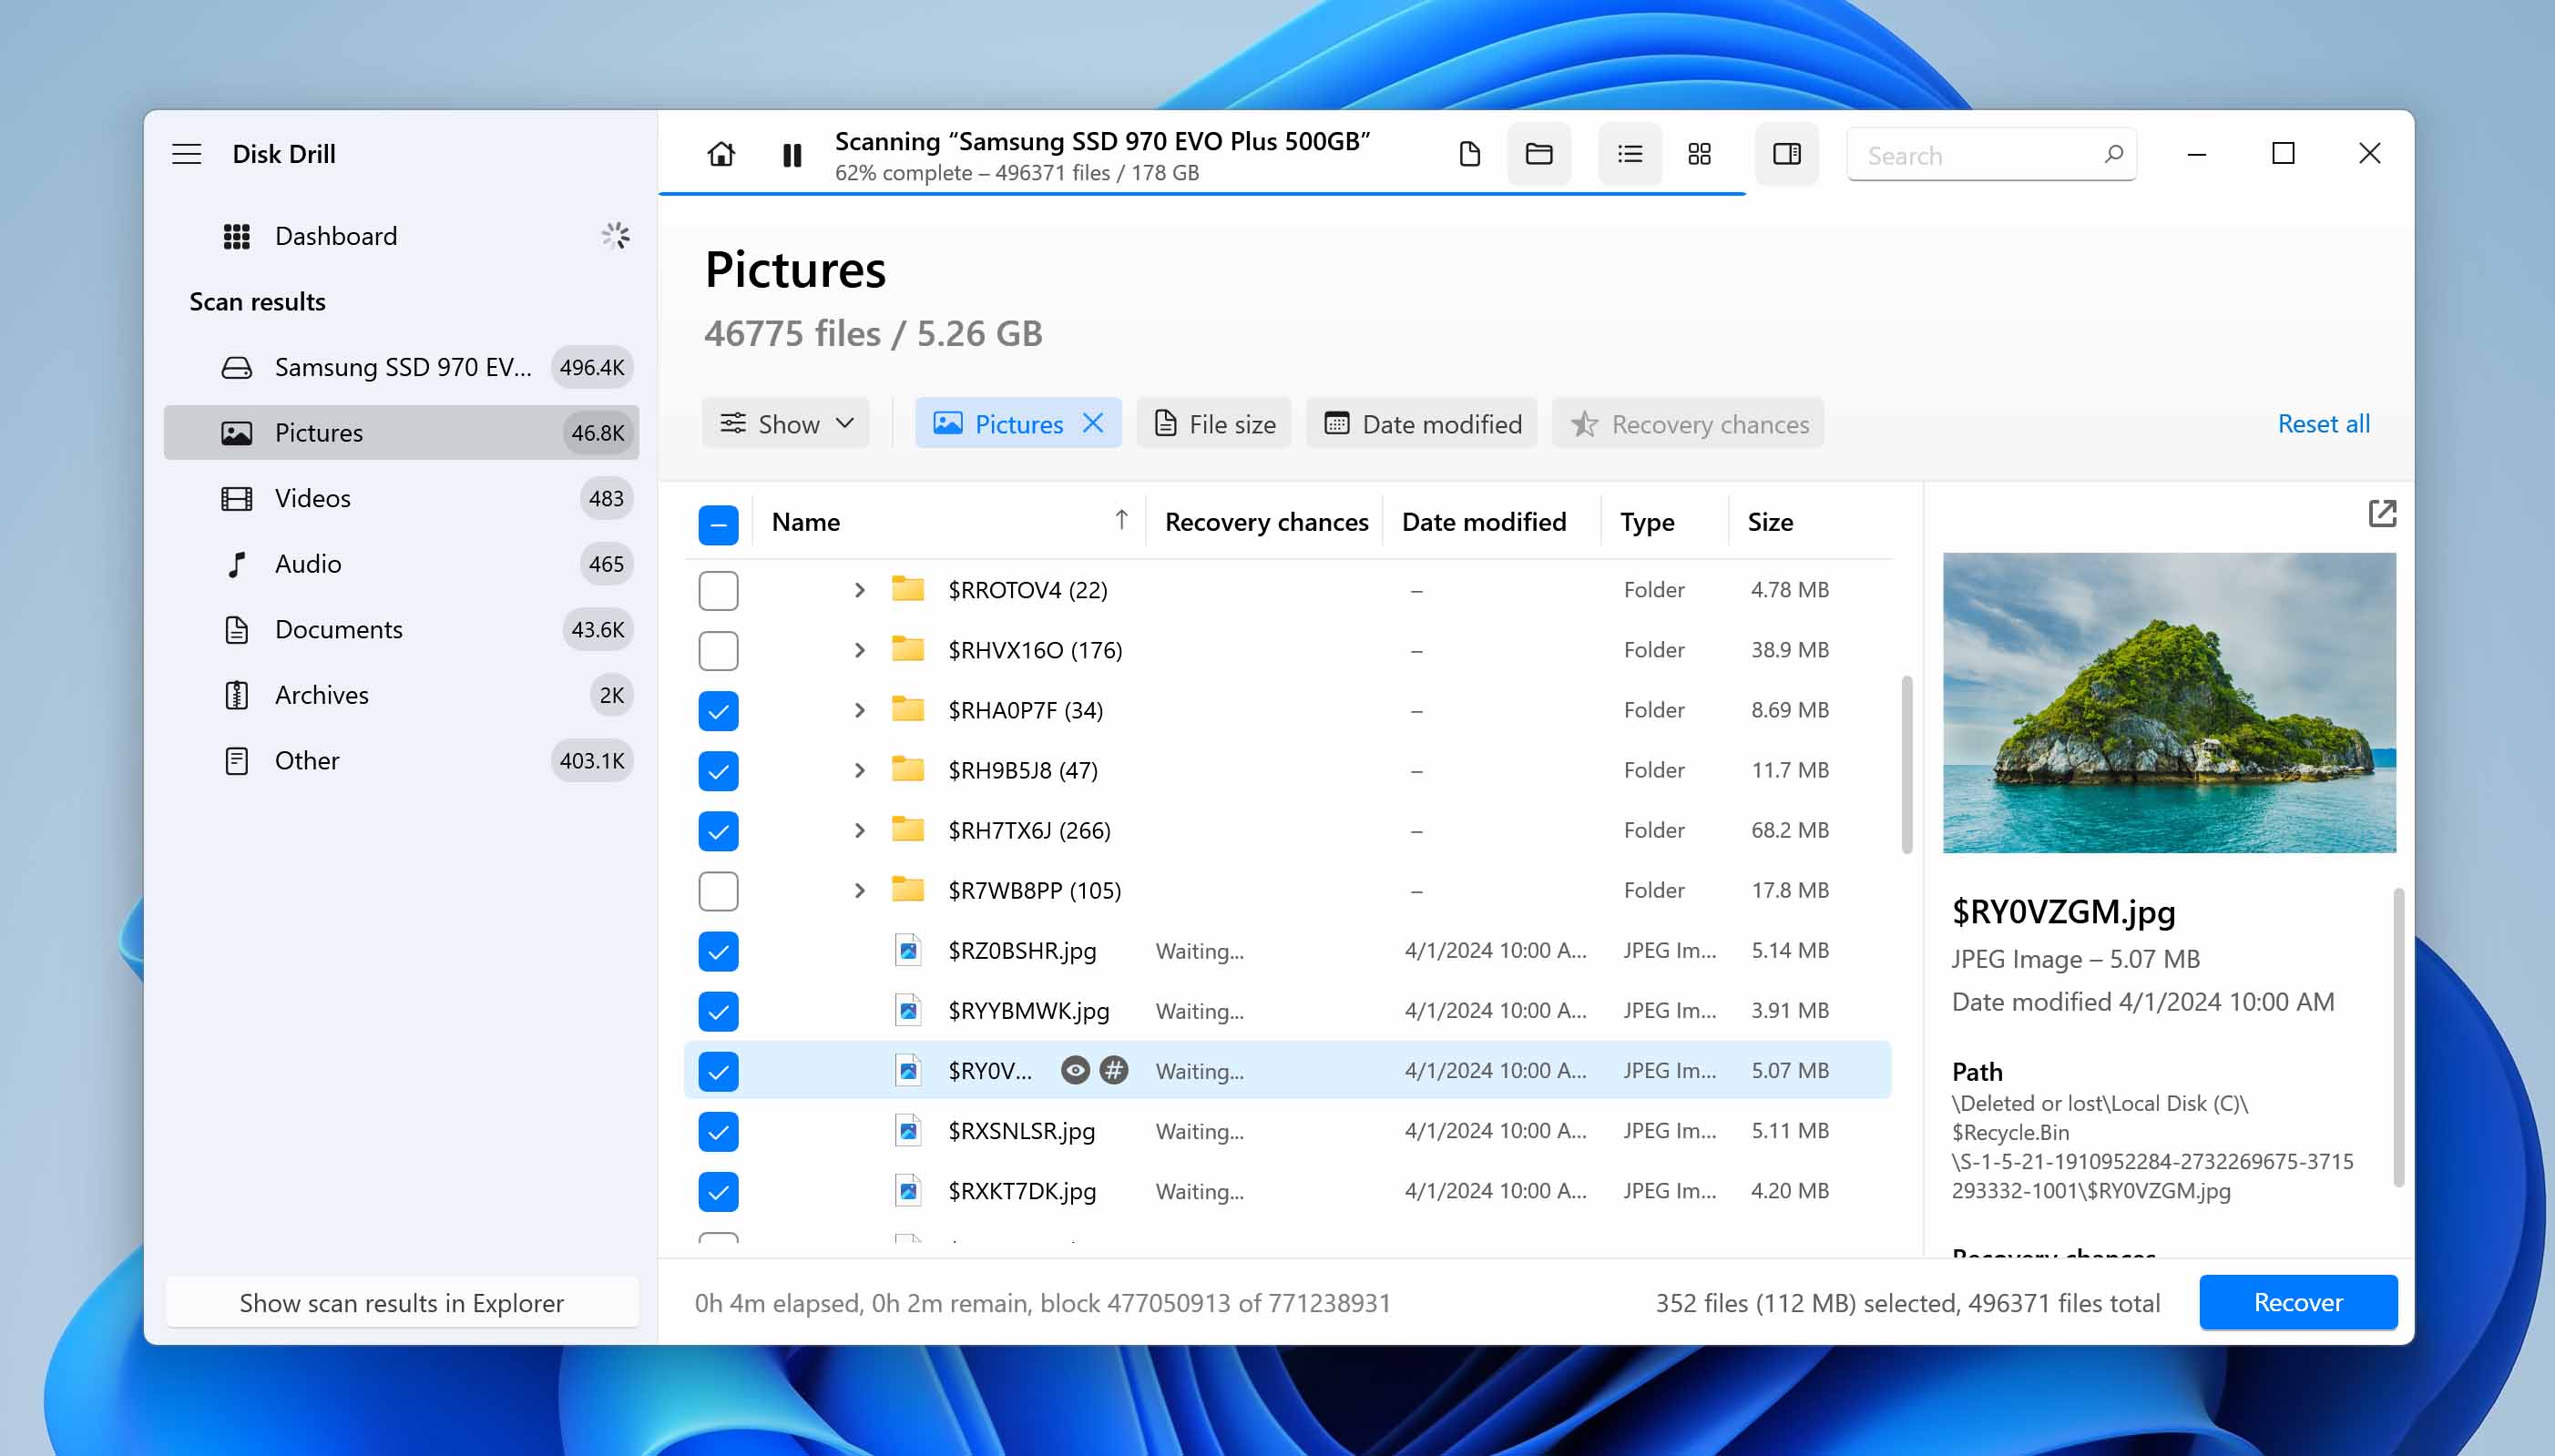
- Select the files you wish to recover. Disk Drill displays a preview of the selected file on the right side of the screen. Click on Recover once you’ve selected the files.
- Choose where you’d like to save the files and click Next. Don’t save the recovered files on the affected hard drive.
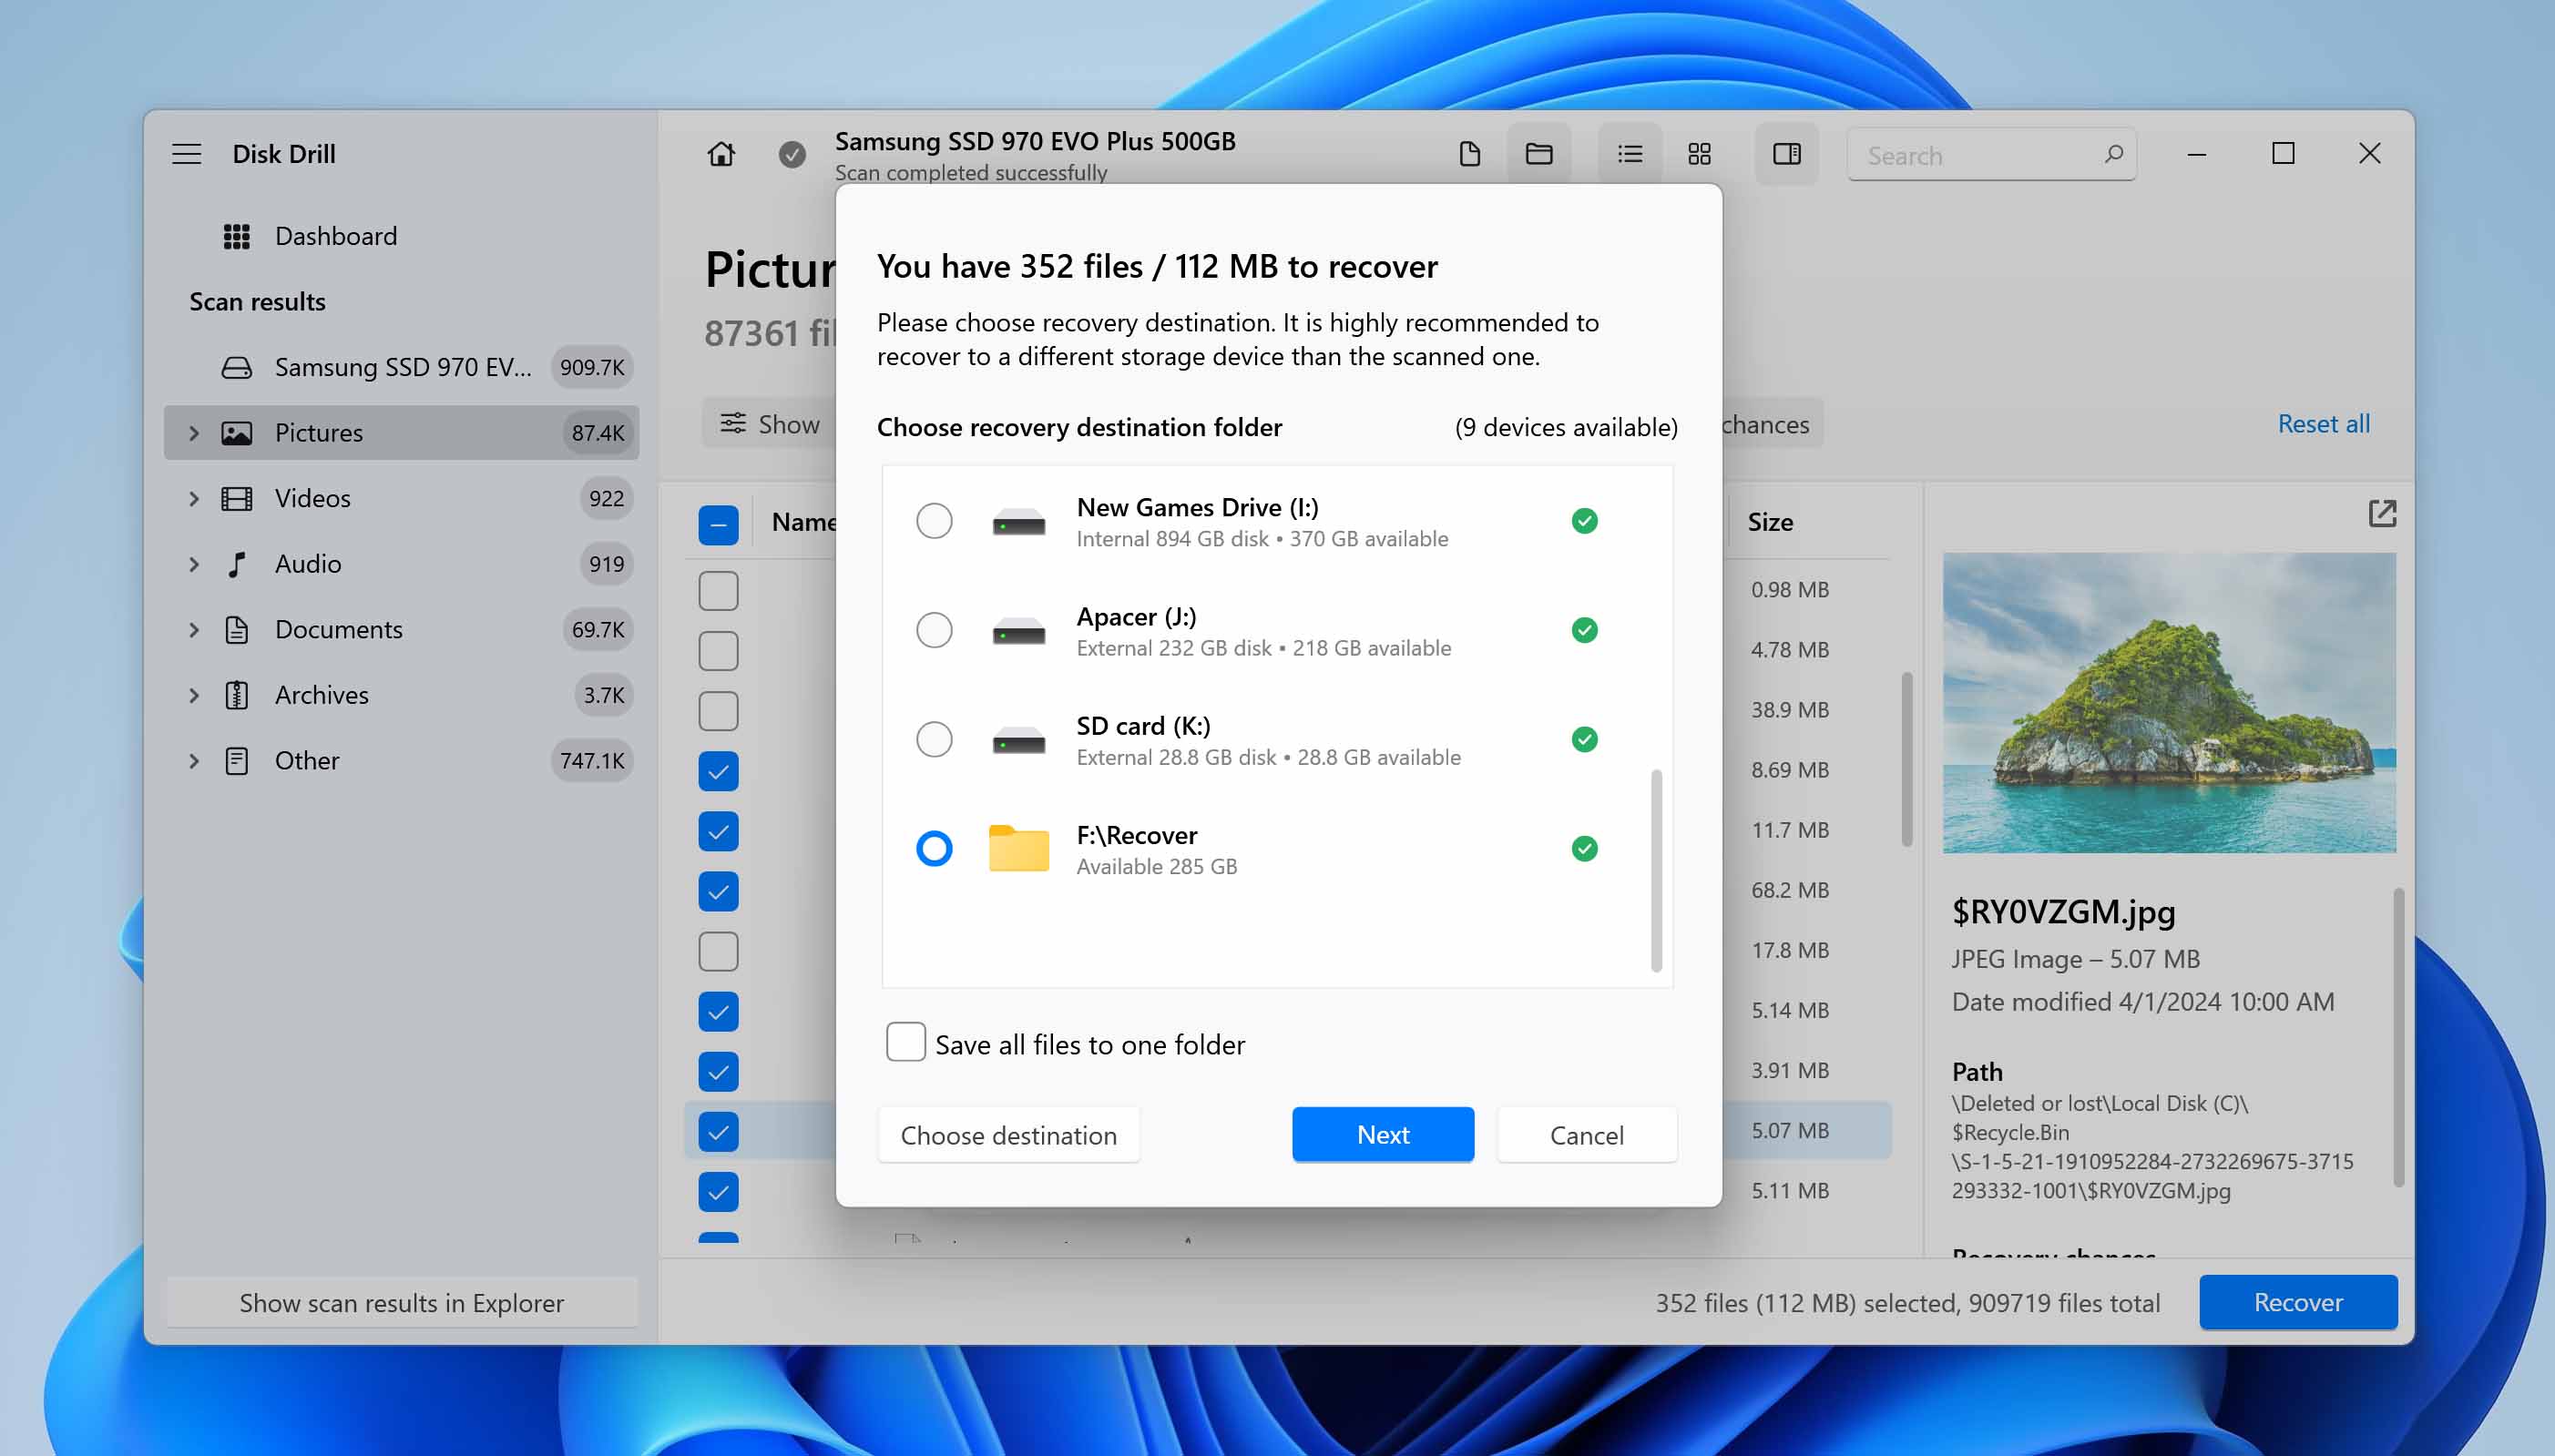
- Disk Drill will recover your files.
Option B: Windows File Recovery Tool
![]() Microsoft also has its own in house data recovery tool. It can be put to use to recover data from your laptop’s hard disk drive. However, it is more suited for seasoned users as it is a command-line utility, and doesn’t have a graphical user interface (GUI). Additionally, it is functional on Windows 10 (with the July 2020 update and above), and Windows 11.
Microsoft also has its own in house data recovery tool. It can be put to use to recover data from your laptop’s hard disk drive. However, it is more suited for seasoned users as it is a command-line utility, and doesn’t have a graphical user interface (GUI). Additionally, it is functional on Windows 10 (with the July 2020 update and above), and Windows 11.
To recover data from your laptop’s hard drive using the Windows File Recovery tool, follow these steps:
- Download the Windows File Recovery tool from the Microsoft Store.
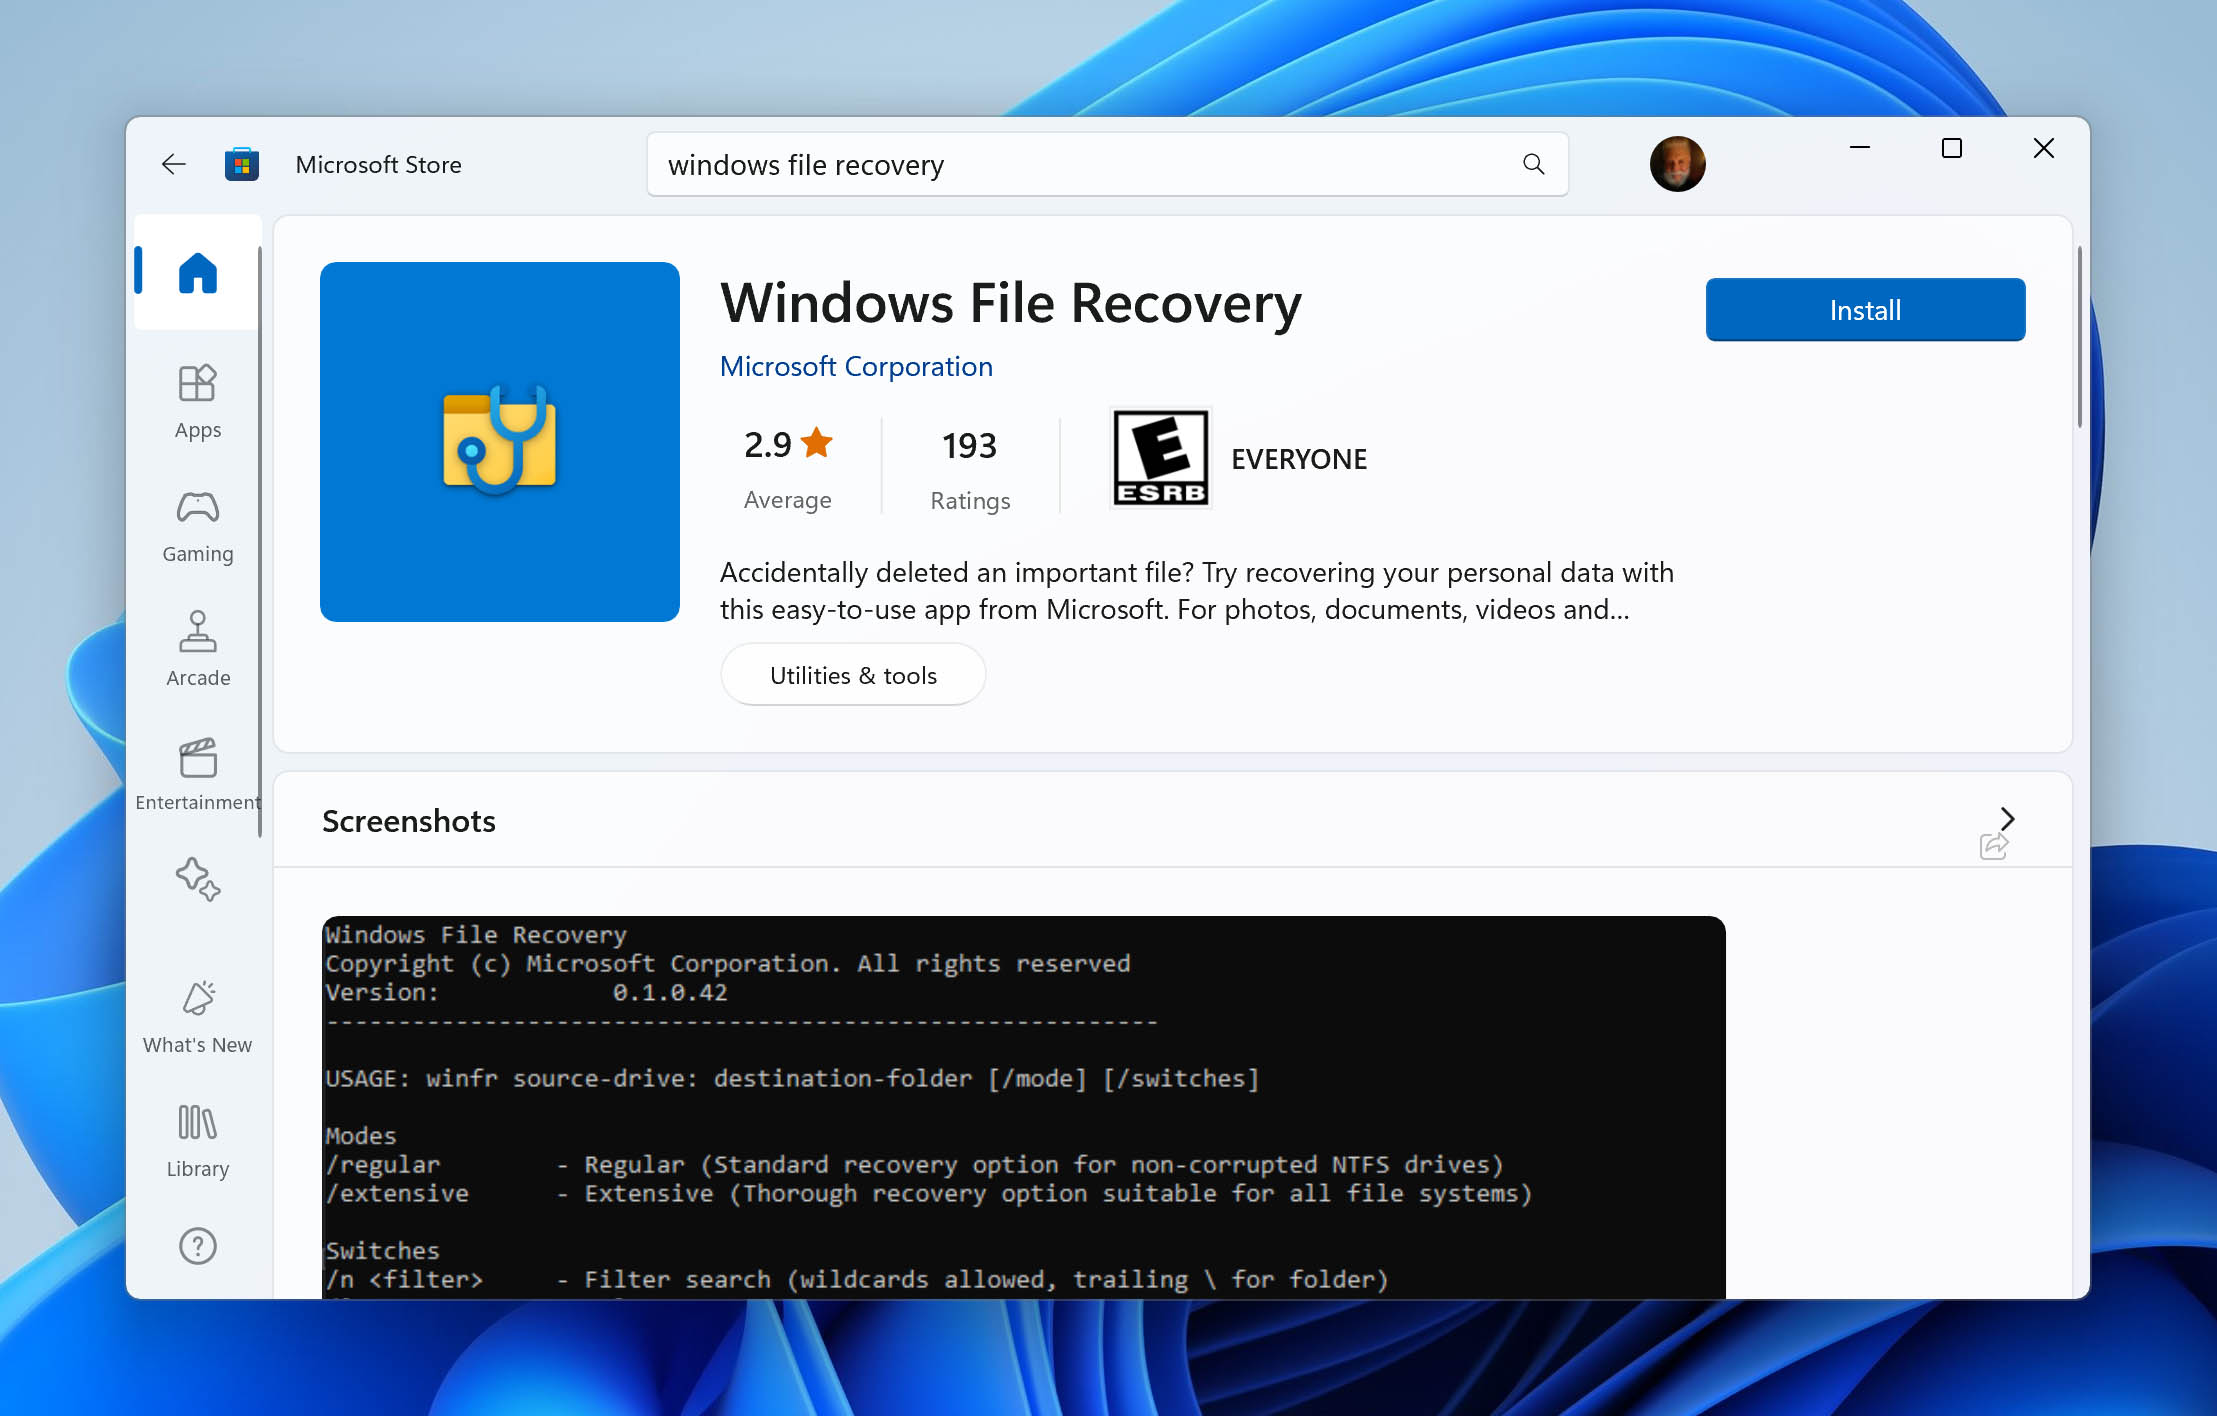
- Click on the Launch button once the download is complete.
Now, depending on the type of file system and your personal preferences, Windows File Recover offers two modes you can use to recover deleted files from your laptop’s hard drive. Regardless of the method you choose, the basic syntax will be winfr source-drive: destination-drive: [/mode] [/switches].
Regular Mode
The Regular Mode in the tool is suitable for drives using the NTFS file system. Use this mode if you want to recover a recently deleted file from your laptop’s hard disk drive. The exact process is as follows:
- Type winfr source-drive: destination-drive: /regular and press Enter. If you’d like to add filters, visit the Windows File Recovery help page for more information on how to use them.
- Press Y when prompted to continue.

- Press Y on the prompt to view recovered files.
Extensive Mode
If the hard drive uses any other file system besides NTFS, Extensive Mode can be used to recover the lost data. Additionally, it is recommended you use this mode if you deleted the relevant files a long time ago, you formatted the disk, or if the hard disk is corrupted. To use Extensive Mode, simply go through these steps:
- Type winfr source-drive: destination-drive: /extensive, and press Enter. Use filters if needed.
- Press Y once you see the Continue prompt.
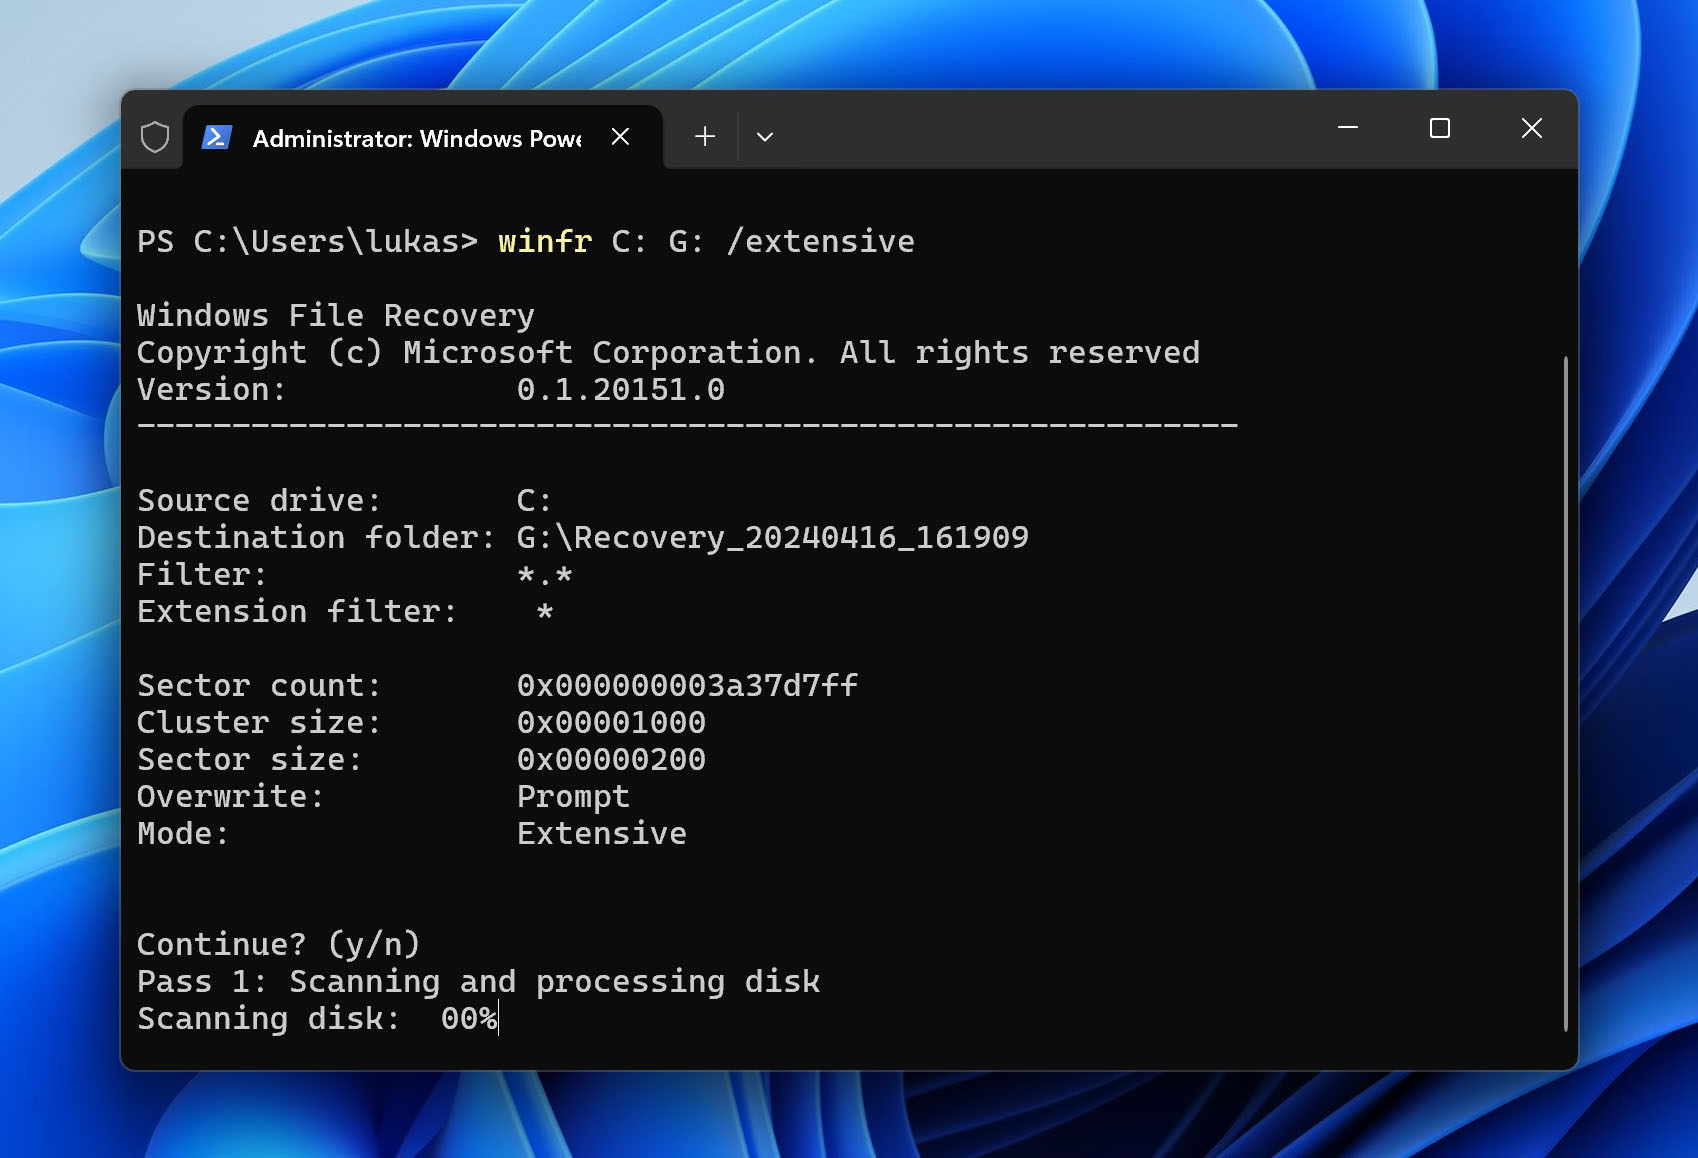
- Press Y on the view recovered files prompt.
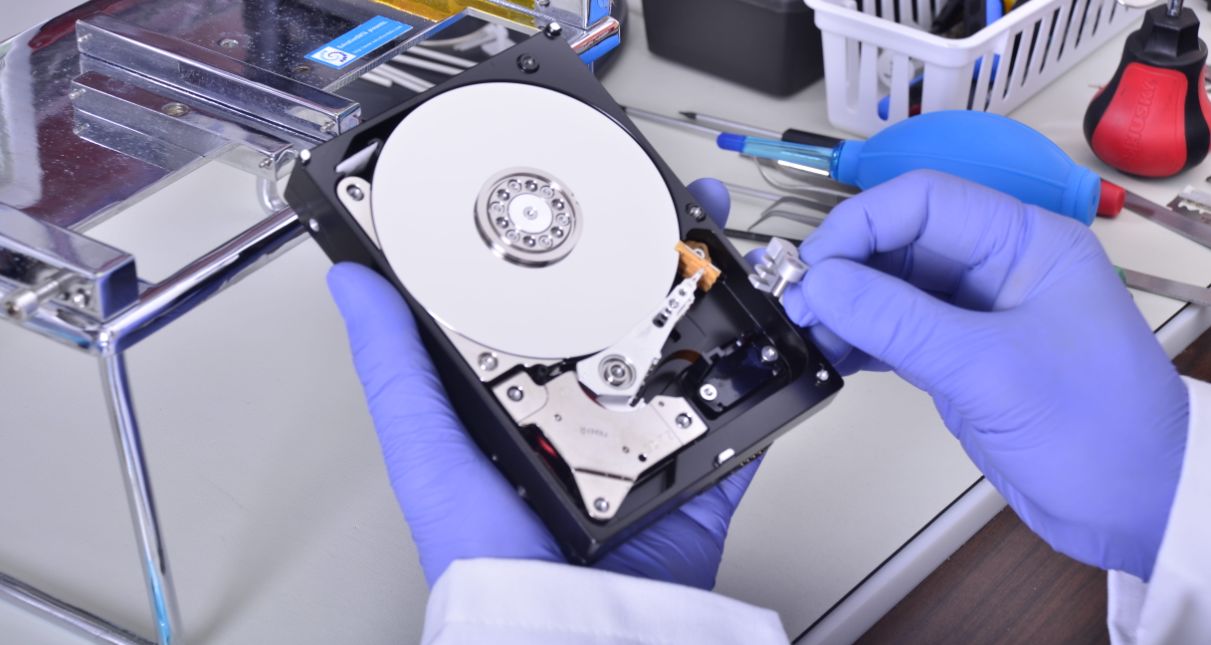
Step 5: Contact a Specialized Data Recovery Service to Recover Data From the Laptop’s Hard Drive
Inexperienced users will have a hard time working with a laptop hard drive, due to the drive’s small form factor and abundance of moving parts. You may unwittingly further damage the drive, making data recovery impossible—if the hard drive is physically damaged, always send it to a professional data recovery service to salvage it. These services may be expensive, but they have the highest success rate in recovering lost data.
Additionally, the lack of necessary adapters, and connectors (especially in the case of NVMe SSDs) can complicate the data recovery process further. Data recovery services may be a more convenient option here.
The process involved in recovering data from your laptop’s hard disk drive using professional data recovery services is as follows:
- Contact the data recovery service using their contact information.
- Send the damaged hard drive to the service using courier services or submit it at a drop-off point. Most companies offer a free evaluation to determine the extent of damage, and also provide you with a quote once the evaluation is complete.
The recovery times vary across different professional data recovery services. Some companies can recover your data in less than 24 hours at an added cost. Most companies, however, take a couple of days at least. It is also recommended that you ponder over whether the data you wish to recover is worth the financial commitment that most professional data recovery services require.
FAQ
What is the best data recovery software?
Currently, one of the best data recovery software is Disk Drill. This is primarily due to its ease of use, speed, recovery success rate, and free recovery limit of 500 MB in the Windows version. In addition to this, there are several other recovery programs available. These include EaseUS data recovery, PhotoRec, and Recuva.
How much does an average laptop data recovery cost?
The cost of laptop data recovery depends on the severity of the damage, as well as the amount of data to be recovered. Most services will provide you with a quote after examining the laptop’s hard drive.
Depending on the damage, you can expect to pay $300 to $1000 for logical data loss and $700 to $3000 for data recovery from mechanically damaged laptop hard disk drives. The cost will increase if you opt for services such as emergency data recovery. Price also goes up if you include shipping costs and evaluation costs.
How can I recover data from a laptop hard drive that won’t turn on?
It is usually best to contact a professional data recovery service if the laptop hard drive won’t boot. However, you could also try connecting it to another computer in the form of an external hard disk drive, or use a SATA cable to directly connect it to a desktop PC.
In either case, time is of the essence when trying to recover lost data from a laptop hard disk drive.
How to transfer files from a broken laptop to another laptop?
The easiest way to transfer files from a dead laptop to another one is to use a hard disk drive enclosure. Using that, you can connect the internal HDD of the dead laptop to the working one, in the form of an external hard disk drive, via a USB cable. Subsequently, just copy the required files to the laptop.
Conclusion
As is evident from this article, there are plenty of ways to recover data from a laptop. But, it is advisable you take action swiftly. The faster you take action, the more data you’ll be able to recover. If you’re a beginner, your best bet is to use third-party recovery software such as Disk Drill or contact a professional data recovery service.
This article was written by Manuviraj Godara, a Staff Writer at Handy Recovery Advisor. It was also verified for technical accuracy by Andrey Vasilyev, our editorial advisor.
Curious about our content creation process? Take a look at our Editor Guidelines.