Iomega was founded in 1980 and released a volley of storage solutions until its eventual acquisition by EMC and Lenovo. Even though the company is defunct, many users still own old Iomega external hard drives. Iomega drives last long because of their rugged design and durability, but this doesn’t mean the drives are immune to data loss. The guide below will help you perform Iomega external hard drive recovery, safely and without hassle.
How to Fix an Iomega Hard Drive That Is Not Showing Up
To recover data from an Iomega external hard drive, it needs to show up in Windows Disk Management, so that data recovery software can detect and scan the external hard drive. If your drive is not showing up, you will need to fix it.
Given below is a table that lists various reasons why your Iomega external HDD is not showing up in Windows and what you can do to fix it:
Reason |
Solution |
Physical or Logical Hard Drive Malfunction |
A physical hard drive malfunction is best dealt with by professionals because using the drive can further damage it. A logically damaged hard drive may not be usable, but it will likely be visible in Windows Disk Management. Thus, the drive will be scannable by data recovery tools. You can also fix it using utilities like CHKDSK and TestDisk. To know about the tool and its recovery procedure, read through our TestDisk review. |
Improper Connection |
Depending on the Iomega external hard drive model, it may only draw enough power from a USB 3.0 port or two USB ports. Ensure you’ve connected the drive to the required USB port, ideally one that is directly on the motherboard. Don’t connect the drive to a USB hub. |
Damaged Cable, USB Port, or Hard Drive Connectors |
It’s common for cables to get damaged after repeated use. Ensure you’re using a good cable, and your drive is connected to a working USB port on your motherboard |
Broken Power Adapter |
Some Iomega external hard drives, such as the Iomega LDHD-UP, come with a power adapter that is susceptible to damage. Ensure that it’s in working condition and use another one if possible. |
How to Recover Data From Iomega External Hard Disk Drives
The best way to retrieve files from an Iomega external hard drive is to use a third-party data recovery program. Your first data recovery attempt will typically be the most successful. Therefore, it’s important to choose only the best data recovery apps to perform Iomega external hard drive data recovery.
Before proceeding with data recovery, here are some tips to keep in mind:
- ❌ Don’t write new files to the Iomega external hard drive.
- ⌛ Attempt data recovery as soon as you can.
- ⚠️ If the drive is making clicking or grinding noises, stop using it immediately and have it examined by a data recovery service.
In this tutorial, we have chosen Disk Drill as our pick for the best Iomega data recovery tool. The software is excellent at external hard drive data recovery, thanks to its advanced data recovery algorithm. Disk Drill is easy to use, and even novice PC users will have no trouble navigating the UI. It is compatible with both Windows (ranging from Windows XP to Windows 10/11) and macOS.
Our Disk Drill review takes a comprehensive look at the program, including info about additional features and pricing plans.
Instructions on how to recover data from an Iomega external hard drive using Disk Drill:
- Download Disk Drill and install the software.
- Connect the Iomega external hard drive to your computer.
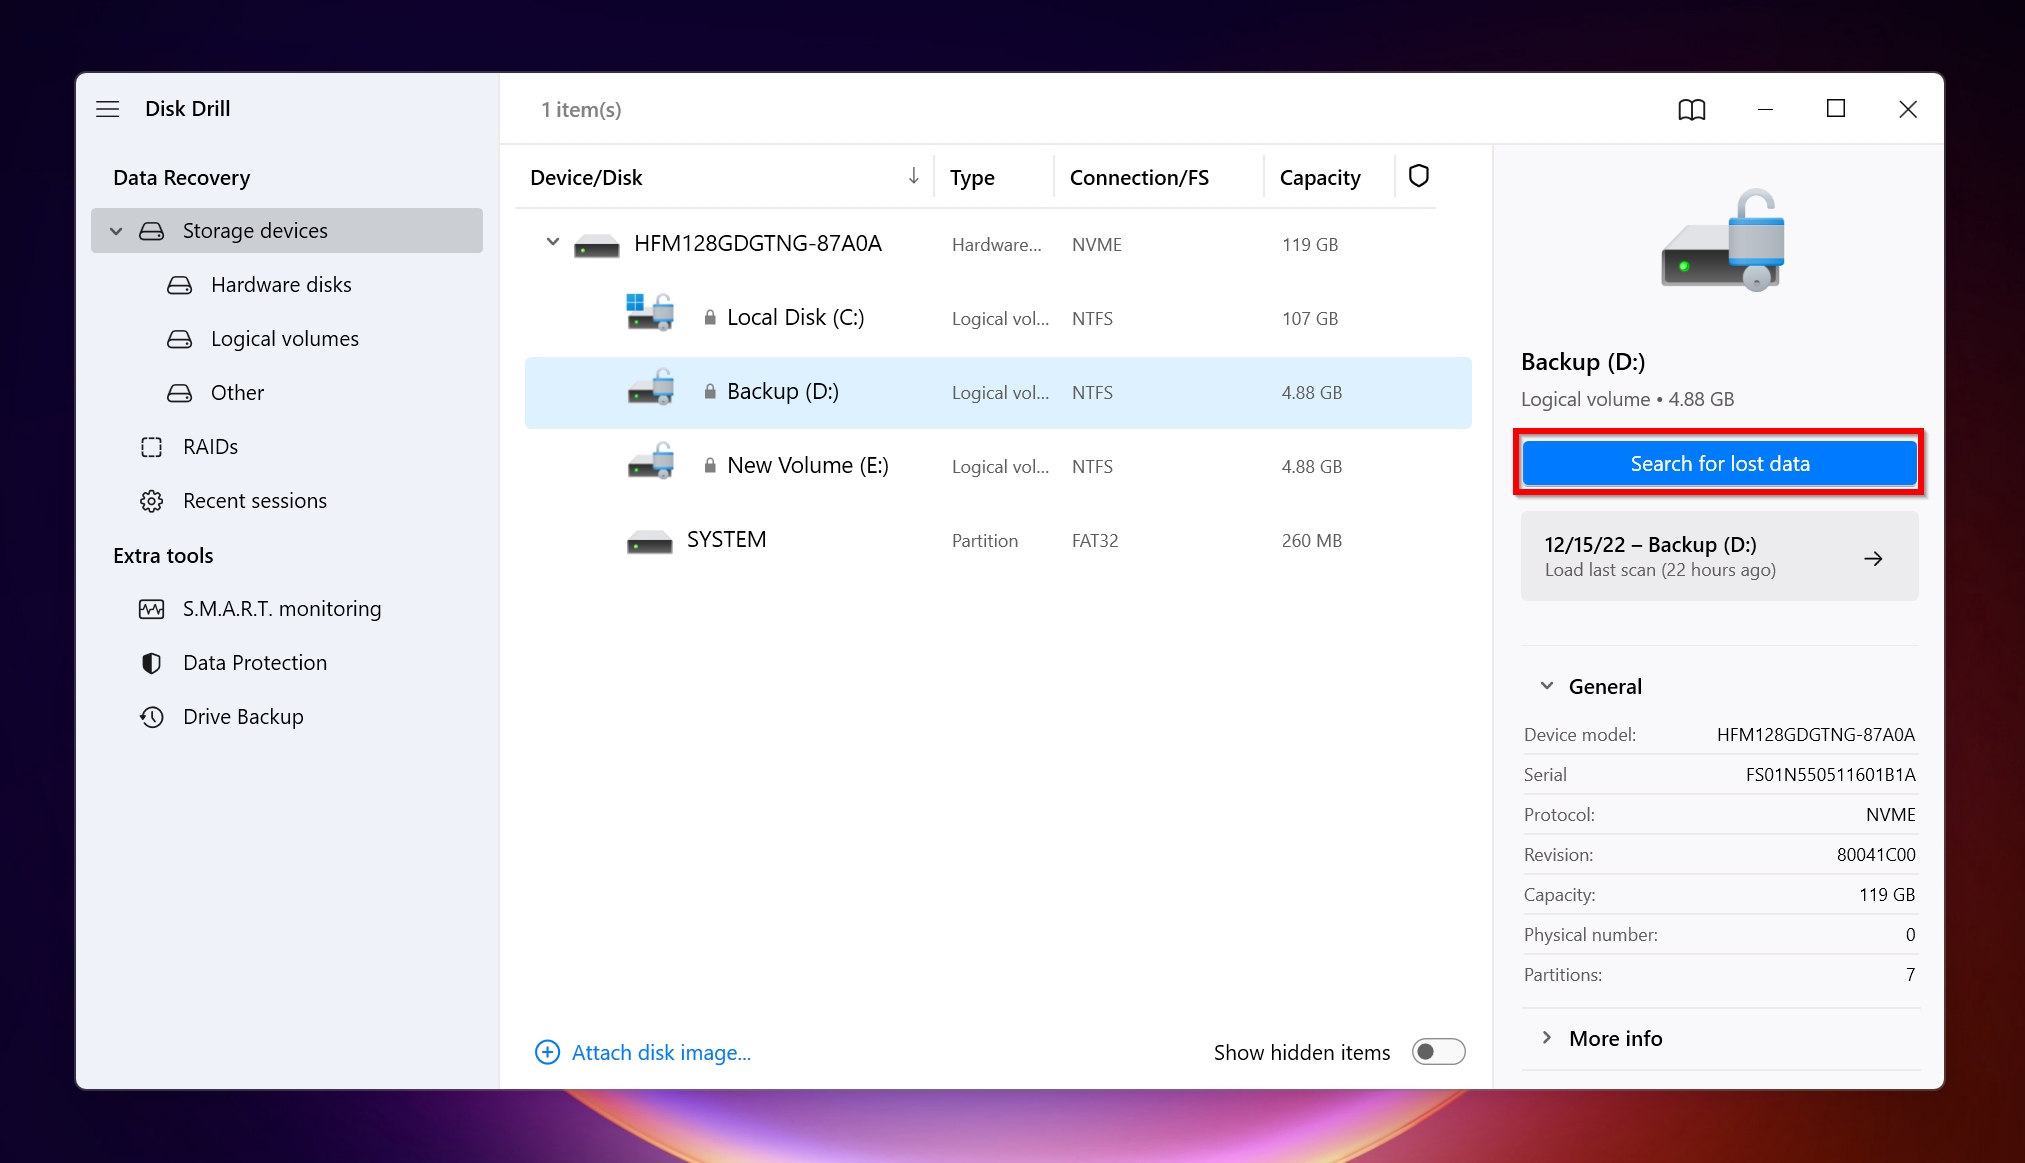
- Launch Disk Drill, choose the Iomega HDD from the list, and click Search for lost data.
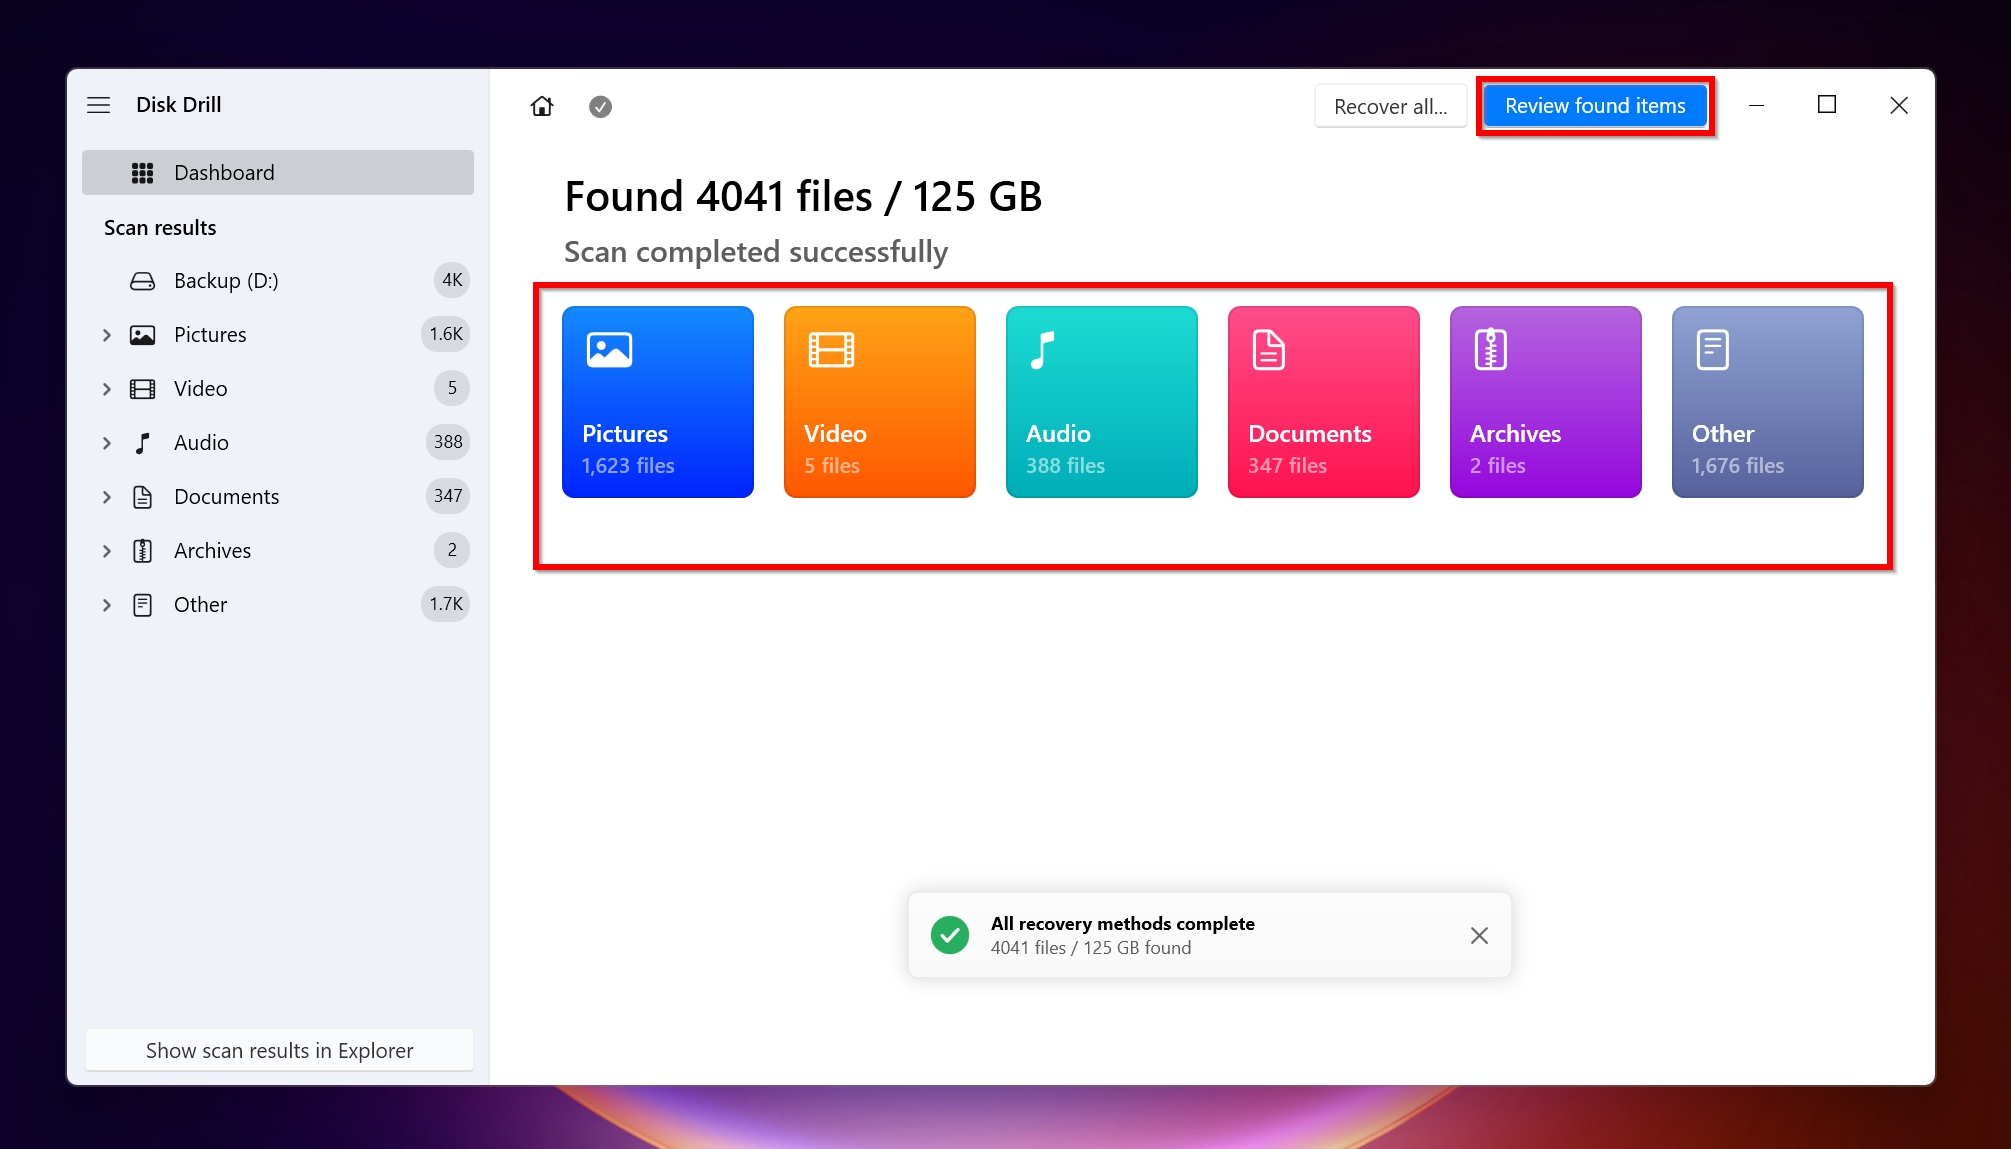
- Click Review found items to view the recoverable data that Disk Drill has discovered. If you want to retrieve specific file types such as Video, Pictures, Audio, Documents, Archives, and Other, simply click on the relevant option on this screen.
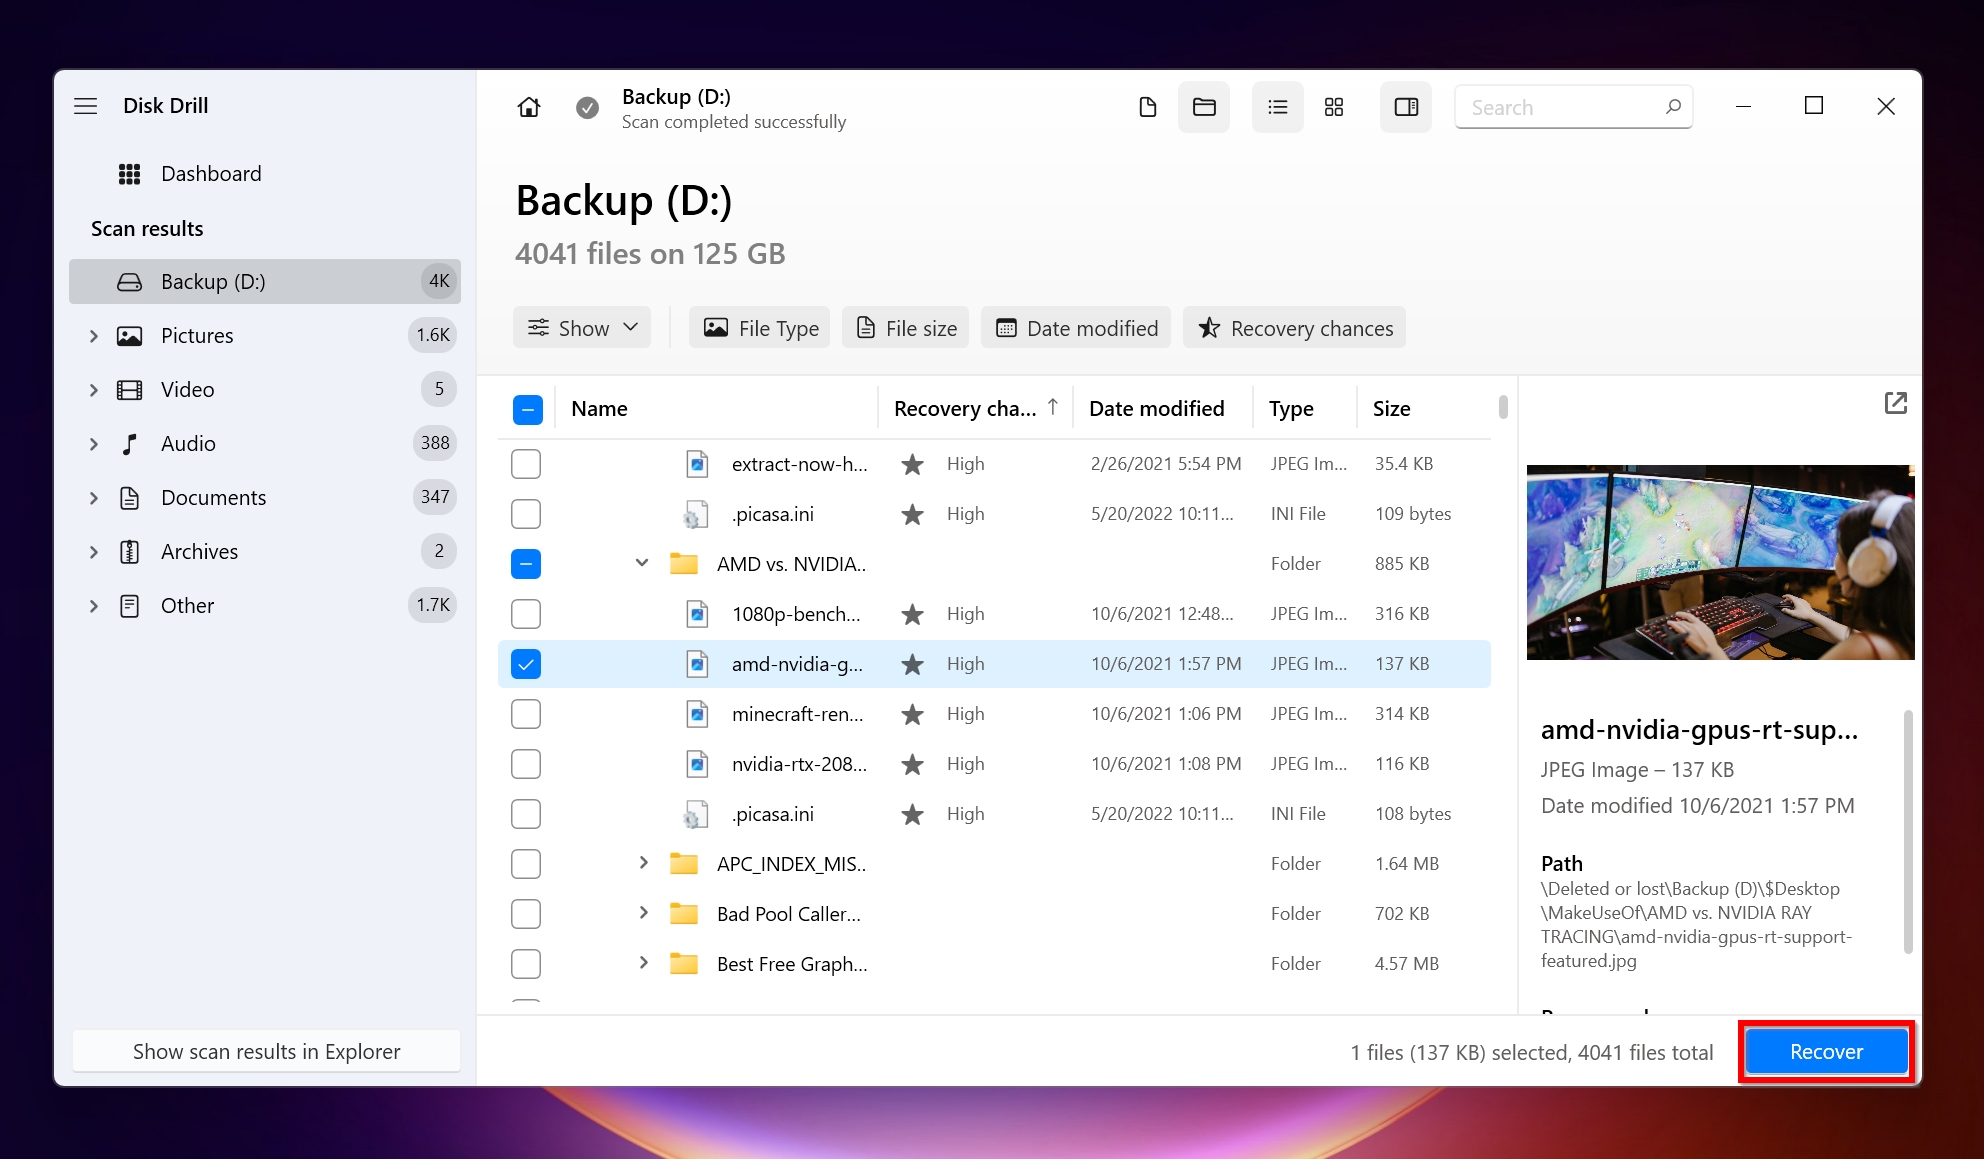
- Tick the files you want to recover, by clicking the checkbox next to them. Disk Drill also displays a preview of the files. Once confirmed, click on Recover. Remember, Windows users can recover up to 500 MB of data at no cost as part of Disk Drill’s free trial.
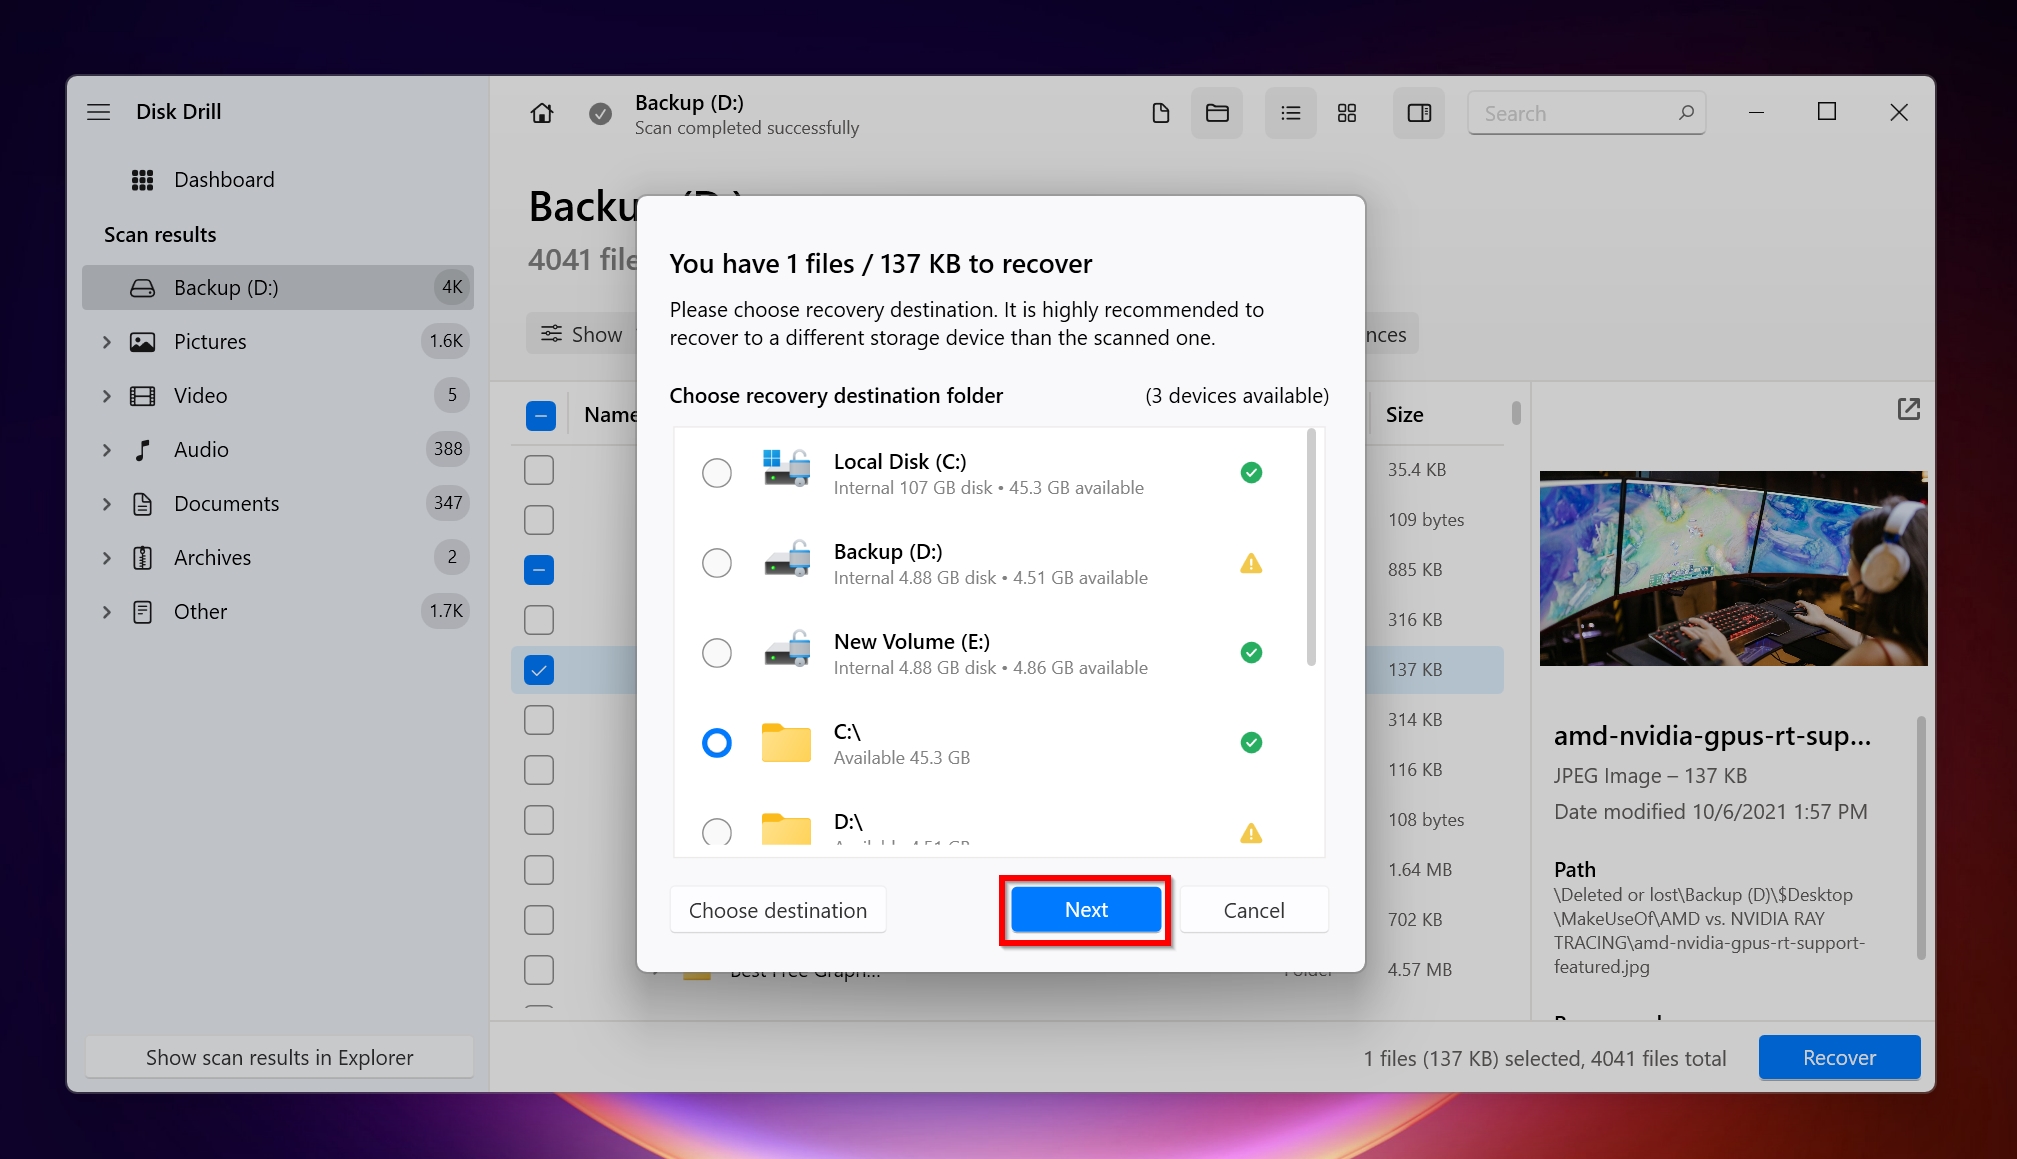
- Choose a recovery destination in the prompt that appears. It’s recommended that you save the files on a drive, other than the Iomega one. Click on Next.
- Disk Drill will recover the files.
FAQ
Is Iomega still in business?
No, Iomega is no longer in business. The company was bought by EMC in 2008, who entered into a joint venture with Lenovo in 2013. At this point, Iomega was rebranded to LenovoEMC.
How do I revive an old external hard drive?
To revive an old external hard drive, you first need to determine whether it is recognized at all by the system. If the BIOS itself is not detecting the drive–try connecting the drive to a different USB port, using different USB cables, and connecting it to a different PC.
If the drive is detected by the BIOS and Windows, but is inaccessible, here are some ways to fix it:
- Run the CHKDSK utility in Windows.
- Try to repair the partition using TestDisk.
- Update the USB drivers.
How do I recover data from my Iomega external hard drive?
Here is an easy, step-by-step guide to recovering data from your Iomega external hard drive:
- Download and install Disk Drill.
- Open Disk Drill, select the Iomega drive and click Search for lost data.
- Click Review found items.
- Choose the files you want, and click Recover.
- Select a recovery destination and click Next.
How to fix Iomega external hard drive not recognized on Mac?
Here are some steps you can take to fix an Iomega external hard drive that is not recognized on Mac:
- Format the drive to a macOS-recognized format.
- Edit your preferences and ensure that hard drives/external hard drives are checked.
- Ensure that the hard drive cables are not damaged and the USB ports are working correctly.
- Use macOS’ Disk Utility.
Conclusion
Iomega external hard drive recovery is not difficult due to data recovery software like Disk Drill. But, it’s still recommended that you regularly back up important data in multiple locations so that it’s easier to recover. It will also help in data loss scenarios that occurred due to physical damage and other cases of irreversible data loss.
This article was written by Manuviraj Godara, a Staff Writer at Handy Recovery Advisor. It was also verified for technical accuracy by Andrey Vasilyev, our editorial advisor.
Curious about our content creation process? Take a look at our Editor Guidelines.