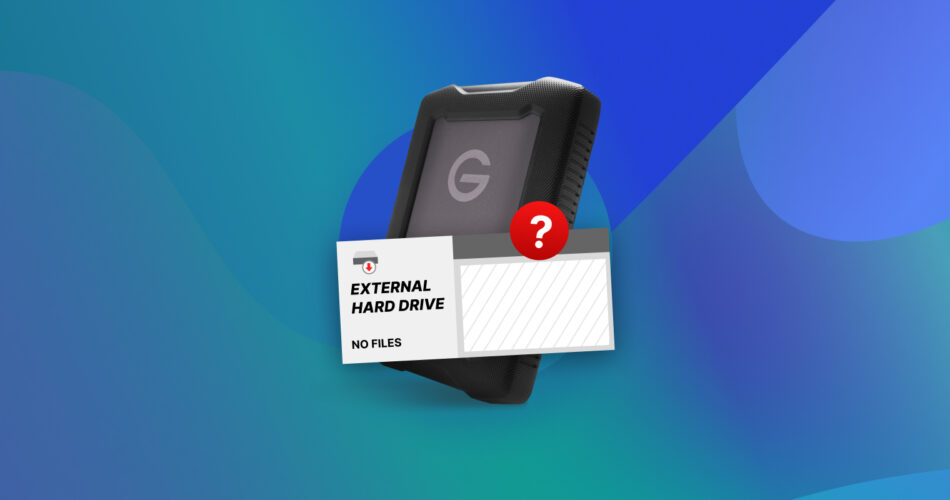
Plugged in your external hard drive and found that some of your files are missing, even though you’re certain they were there? Your confusion is valid. Data on your external hard drive can become hidden, corrupted, or even deleted in an instant. Thankfully, this problem has been solved 1000 times over, so we’ll explain why a hard drive is not showing files even though they exist, and how to get those files back.
This article is focused on troubleshooting external hard drives, but several of the methods discussed may work for an internal hard drive not showing files, even though they still exist. That said, internal drive recovery is often more nuanced and complex. Therefore, certain solutions may not be relevant. To avoid any mistakes, be sure to read every fix carefully before taking any action.
Already tried searching for your files with no luck? Checked hidden files and found nothing of importance? It’s time to scan your disk with a data recovery tool, which will reveal everything on your drive, existing or otherwise. Jump ahead to the recovery section.
Protect the Data on Your Hard Drive from Permanent Loss
If your hard drive is reading the same size despite some of the data being missing, you may chalk this up to the data being hidden. However, this could be indicative of something worse, in which case your data is at risk of permanent deletion either due to overwriting or the nature of some fixes we will present. Right now, it’s imperative that you create a byte-to-byte backup.
A byte-to-byte backup preserves the state of your disk, including the deleted data. This way, even if the data does get permanently deleted in the process of using certain recovery methods, it can be restored from the backup. However, most of the time, internal backup tools are incapable of performing this type of backup. For example, File History only backs up specific folders on internal hard drives and does not back up each sector. Instead, we prefer Disk Drill, as it allows you to create a byte-to-byte backup as well as recover data from it, and its updated drive backup feature also alerts you to bad sectors.
A byte-to-byte backup will require a separate drive that’s of equal size or bigger than the source drive. However, we recommend one that’s 5-10% bigger for safety and flexibility.
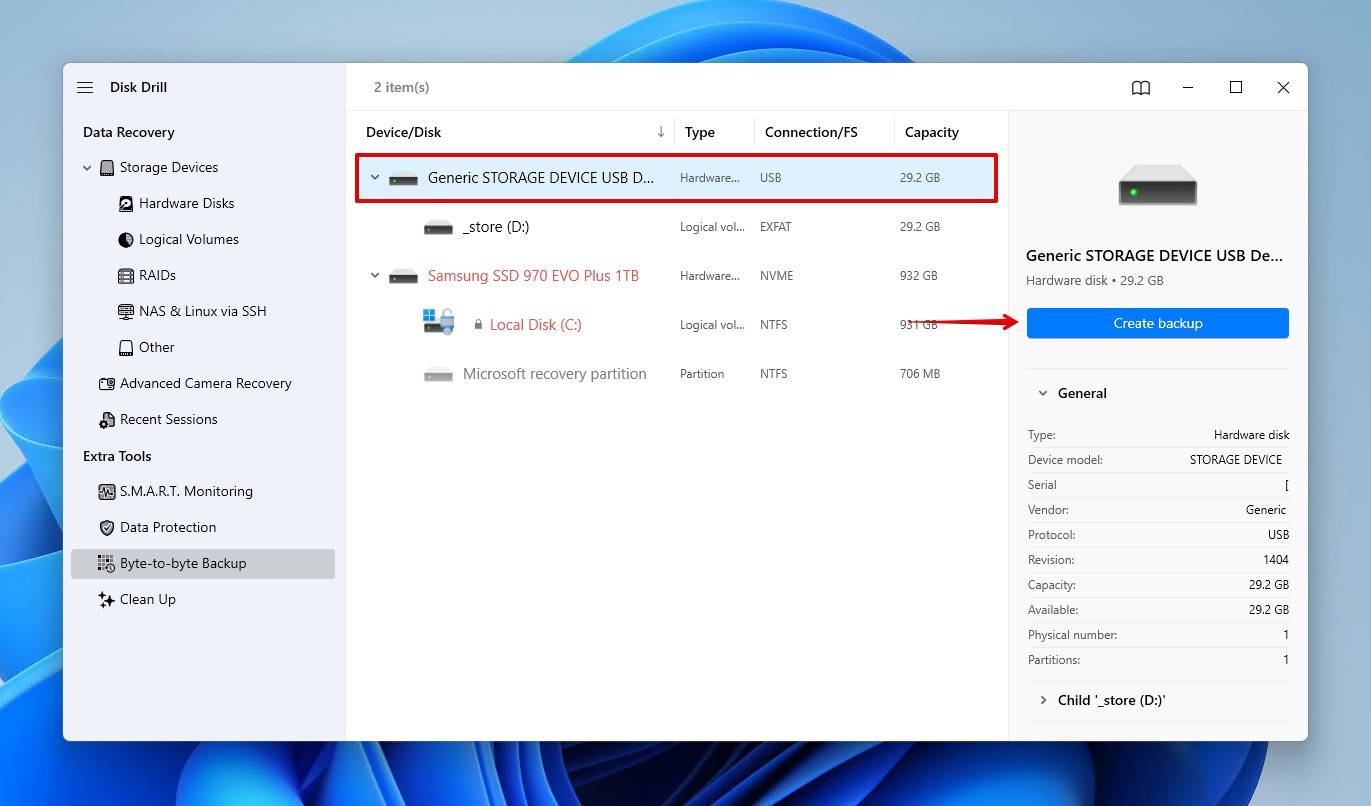
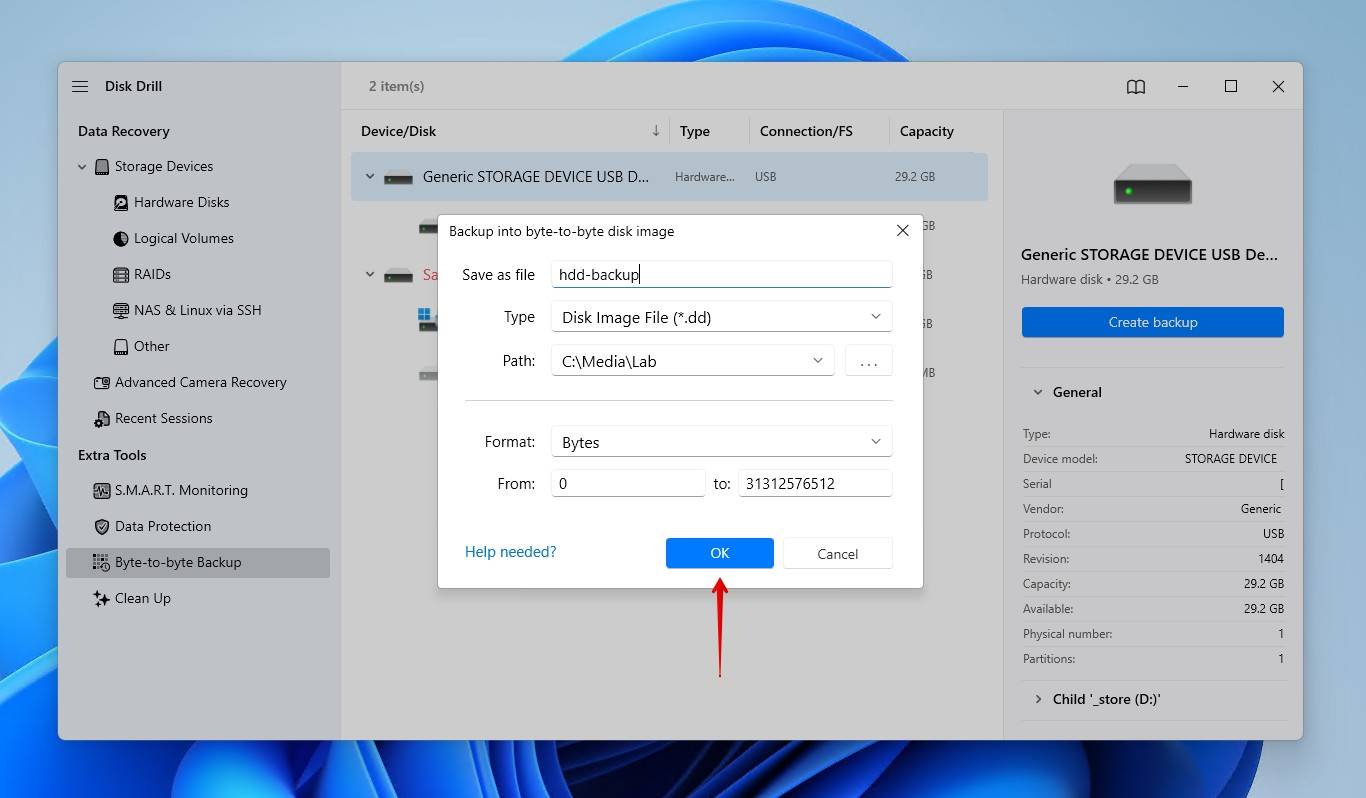
This is how you create a byte-to-byte backup with Disk Drill 6:
- Download, install, and open Disk Drill.
- Click Byte-to-byte Backup.
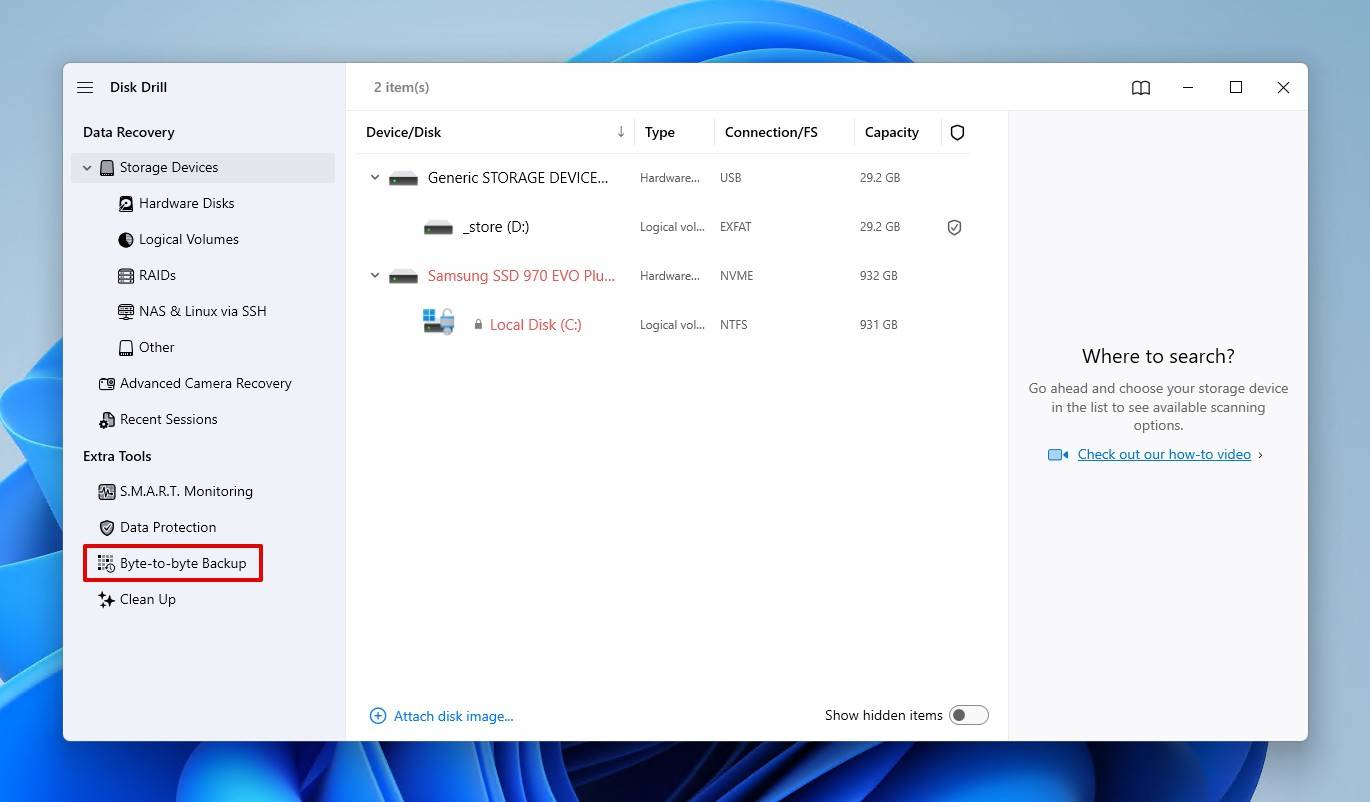
- Select your external HDD, then click Create backup.
- Name the backup, select a path, then click OK.
Later, we will show you how to explore and recover data from the disk image. Keep in mind that the free version of Disk Drill will still only be able to recover up to 500 MB of data before asking you to upgrade. Of course, you can always scan the disk itself or load the image into other software for recovery, but the recovery limitations will still apply.
How to Fix Hard Drive Not Showing Files Though They Still Exist
Let’s look at some proven ways to fix a hard drive that is not showing existing files. Be reminded that some of these methods (particularly 4 and 5) can and will permanently delete the lost data, so a byte-to-byte image is recommended.
Method 1: Use File Search on the Hard Drive
Risk of data loss: Low | Difficulty level: Easy
For those with gigabytes (GB), if not terabytes (TB), of data on their external hard drive, it can be easy to lose track of everything, which presents an opportunity for mistakes. For instance, you may misplace files by accidentally moving them from one folder to another. Utilizing the search function of File Explorer may yield the results you need by finding the misplaced files.
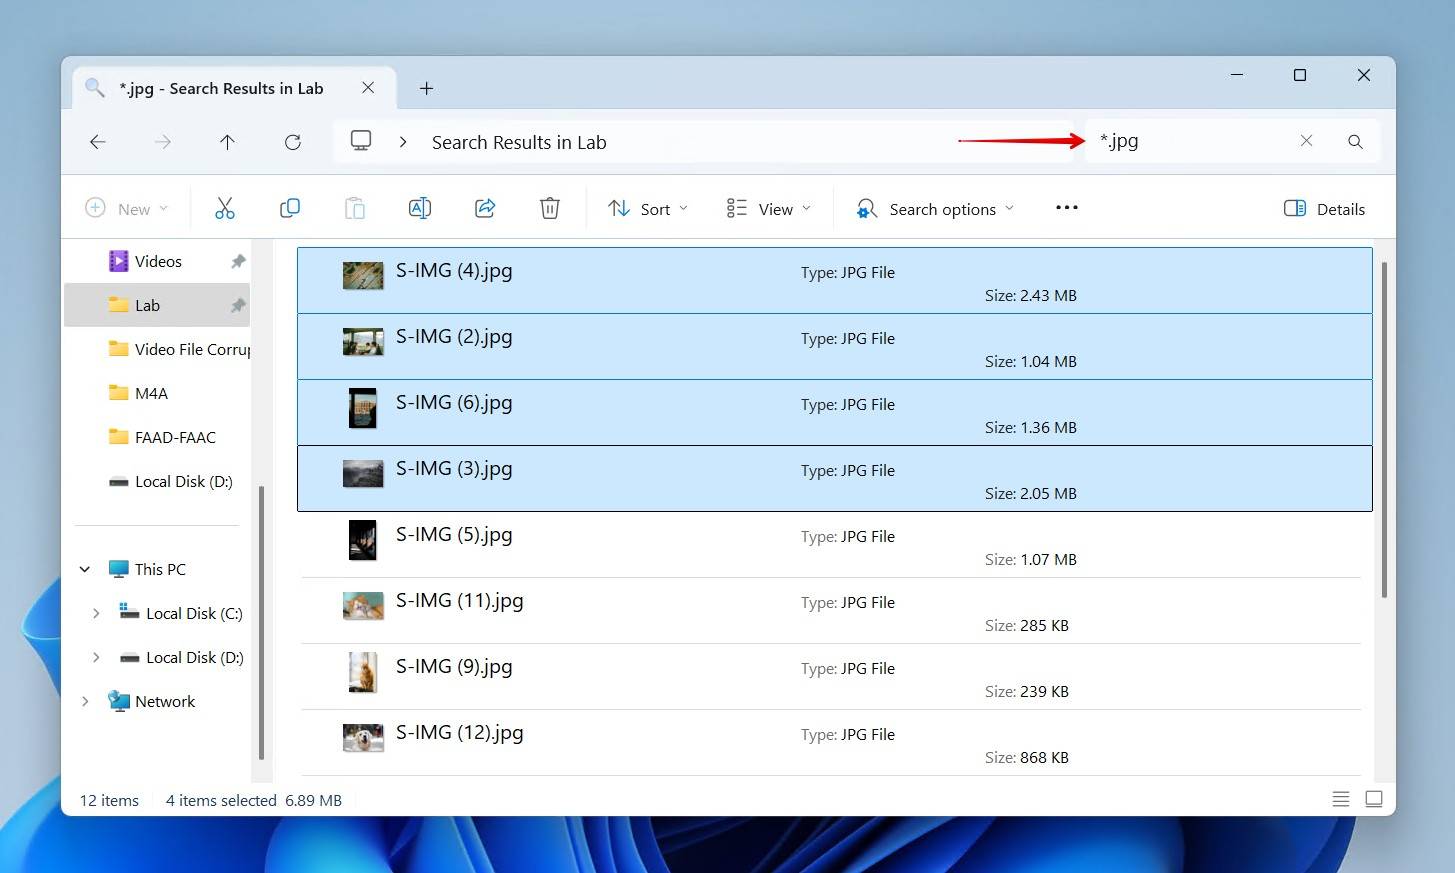
This is how you use File Explorer to find data on an external hard drive:
- Open File Explorer.
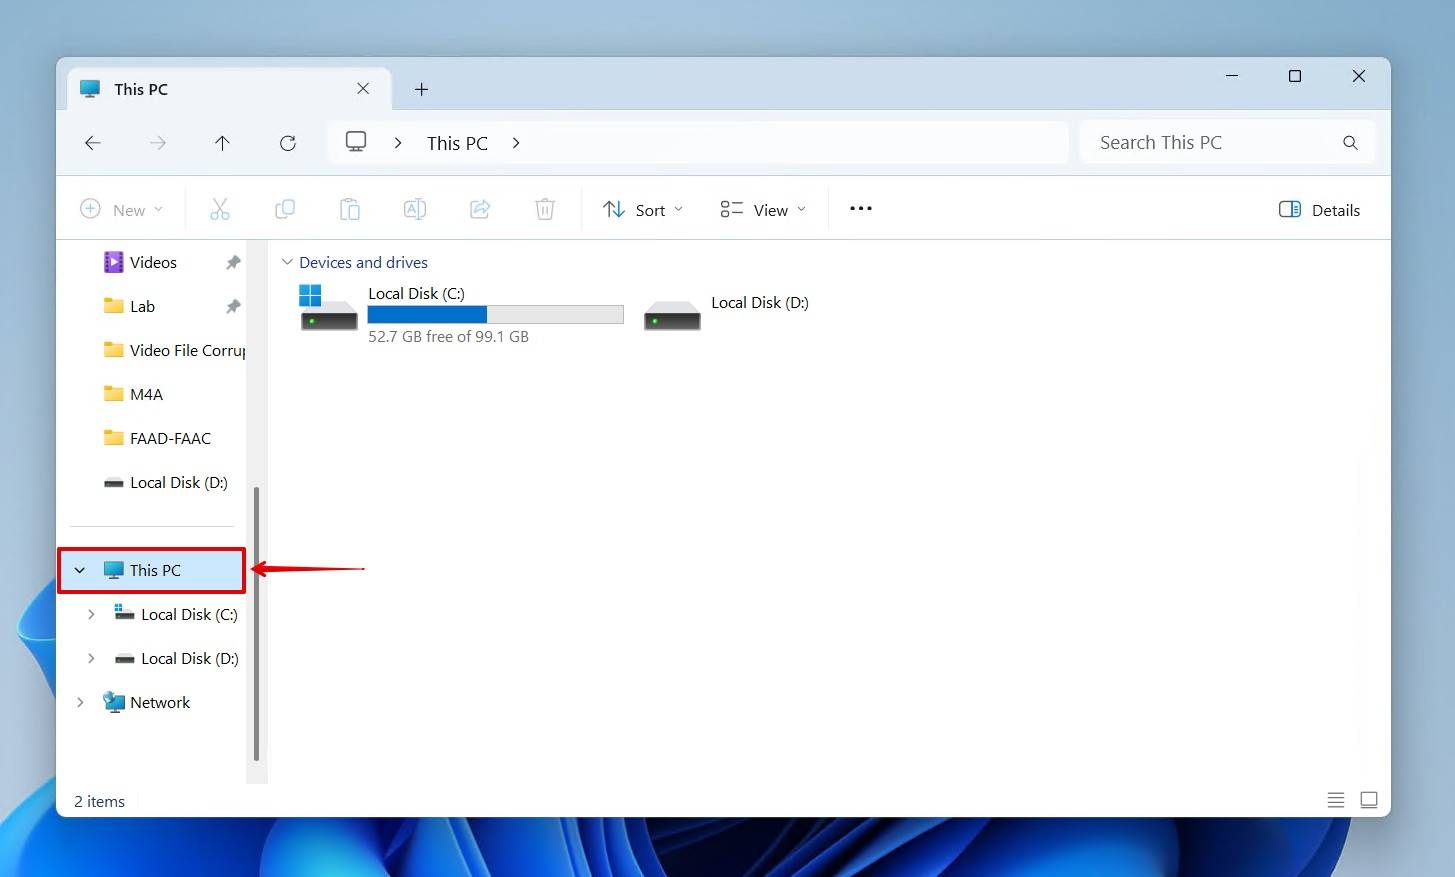
- Go to This PC. We will be starting our search from here, as searching from the topmost folder level will search your entire drive.
- Enter the filename in the top-right search box and press Enter. If you only know the file type, input an asterisk, followed by the file extension. For example, to only search for JPG images, type *.jpg.
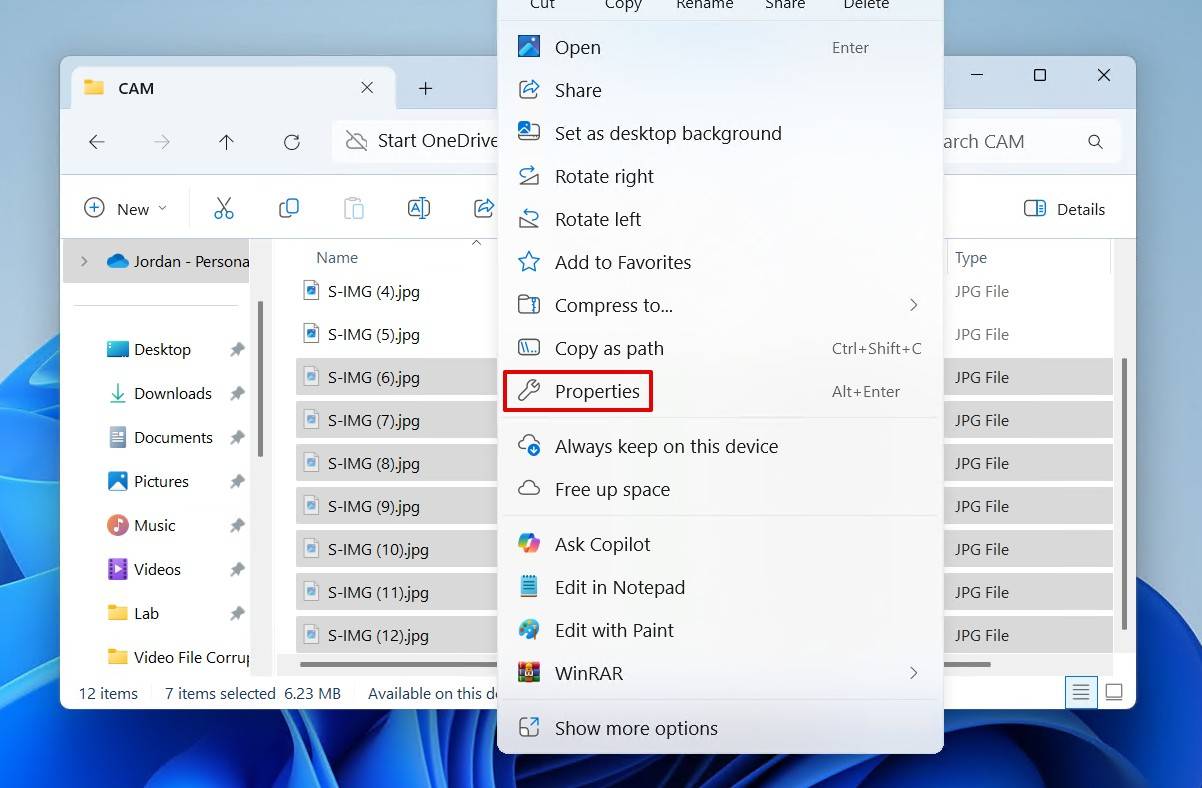
If you find a lost file, you can figure out its exact location by right-clicking it, clicking Show more options, and then clicking Open folder location. The free third-party tool Everything can also be used, and is arguably better in terms of speed and results.
Method 2: Show Hidden Files in Hard Drive
Risk of data loss: Low | Difficulty level: Easy
If File Explorer doesn’t find your files, they could be hidden. If the data is not hidden by accident, many times it can be done by malware that is trying to evade detection. Files with the ‘hidden’ attribute will be invisible unless you specifically choose to show hidden files in File Explorer.
Thankfully, this is easy to do, and we’ll also show you how to remove the ‘hidden’ attribute. Be warned that this will also unhide many system files, so be careful not to delete or move any of them.
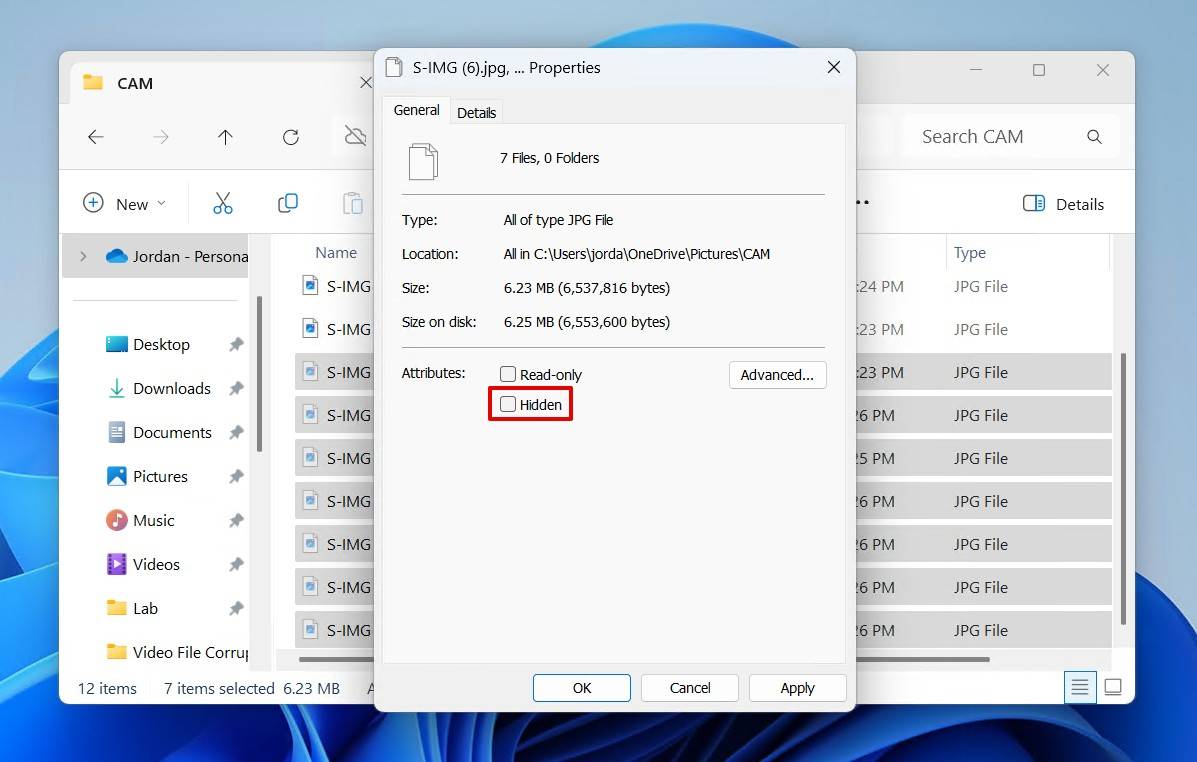
How to show hidden files on Windows and remove the ‘hidden’ attribute:
- Open File Explorer.
- Click View, hover over Show, then click Hidden items.

- Files marked as hidden will now appear with a transparent file icon. Select the files you want to unhide, then right-click and click Properties.
- Untick the Hidden checkbox, then click Apply and OK.
Method 3: Scan the Hard Drive for Viruses and Malware
Risk of data loss: Low | Difficulty level: Easy
Malware comes in many forms (viruses, ransomware, etc.) and can cause a number of problems. In minor cases, they can hide your files. In more extreme ones, they can encrypt all your files, rendering them unusable.
Before recovering anything, your priority should be to get it removed. After all, what use is recovering data and then putting it back on an infected system? For this, Windows includes Windows Defender, which is a free and, in recent years, very capable antimalware solution. You can use it to remove any malware on your system, and then use data recovery software (or any other working method) to get the data back.
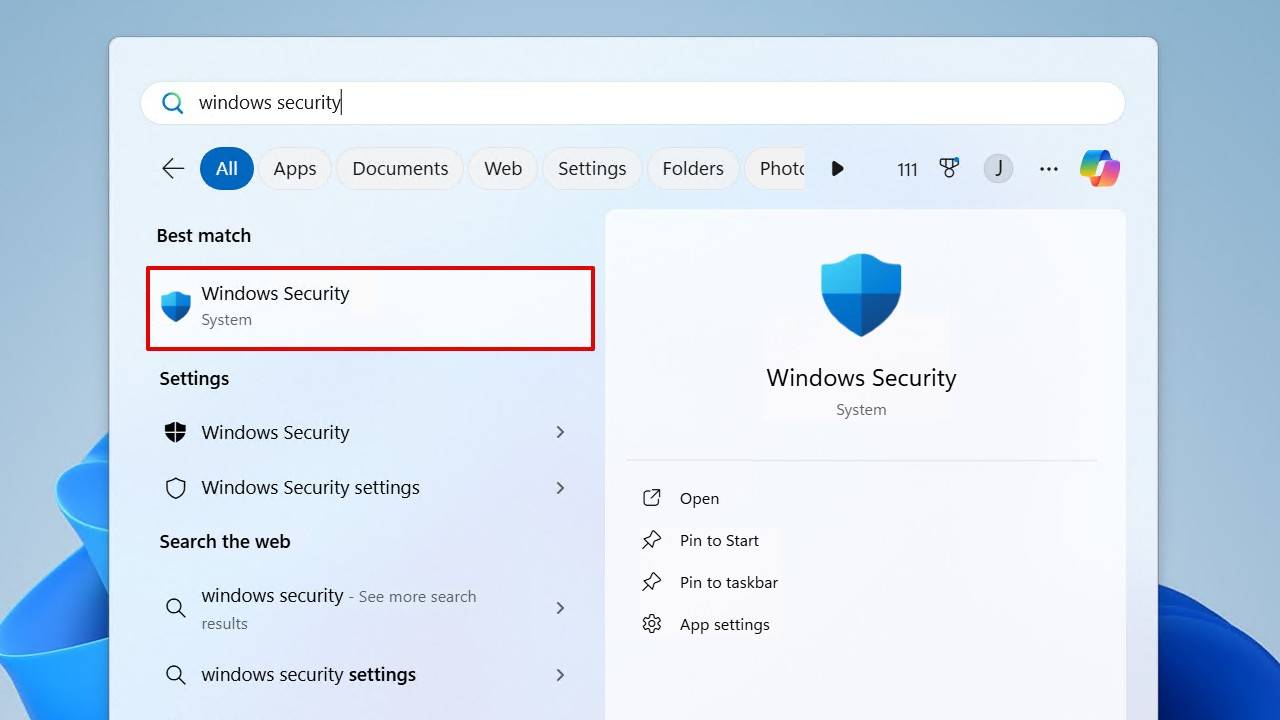
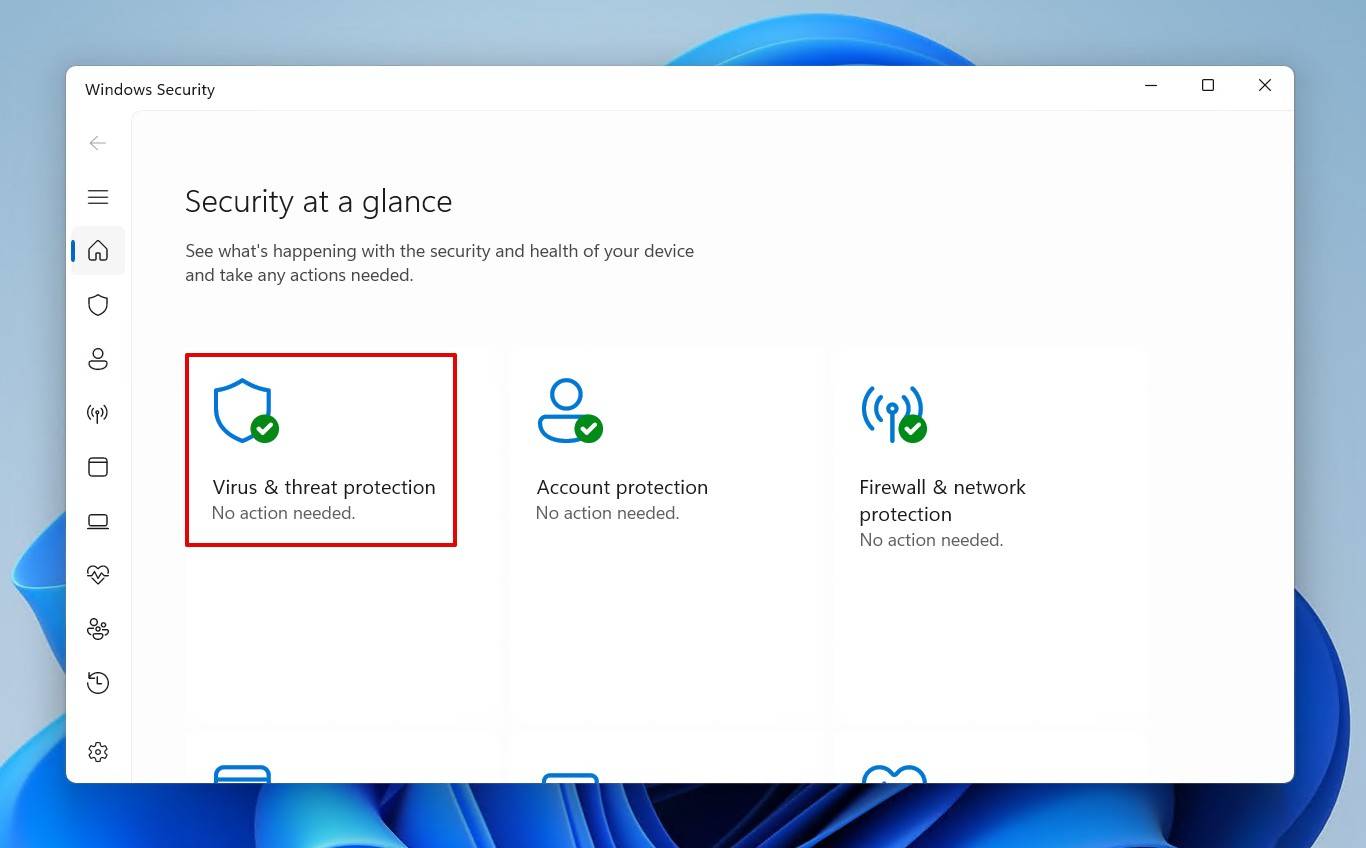
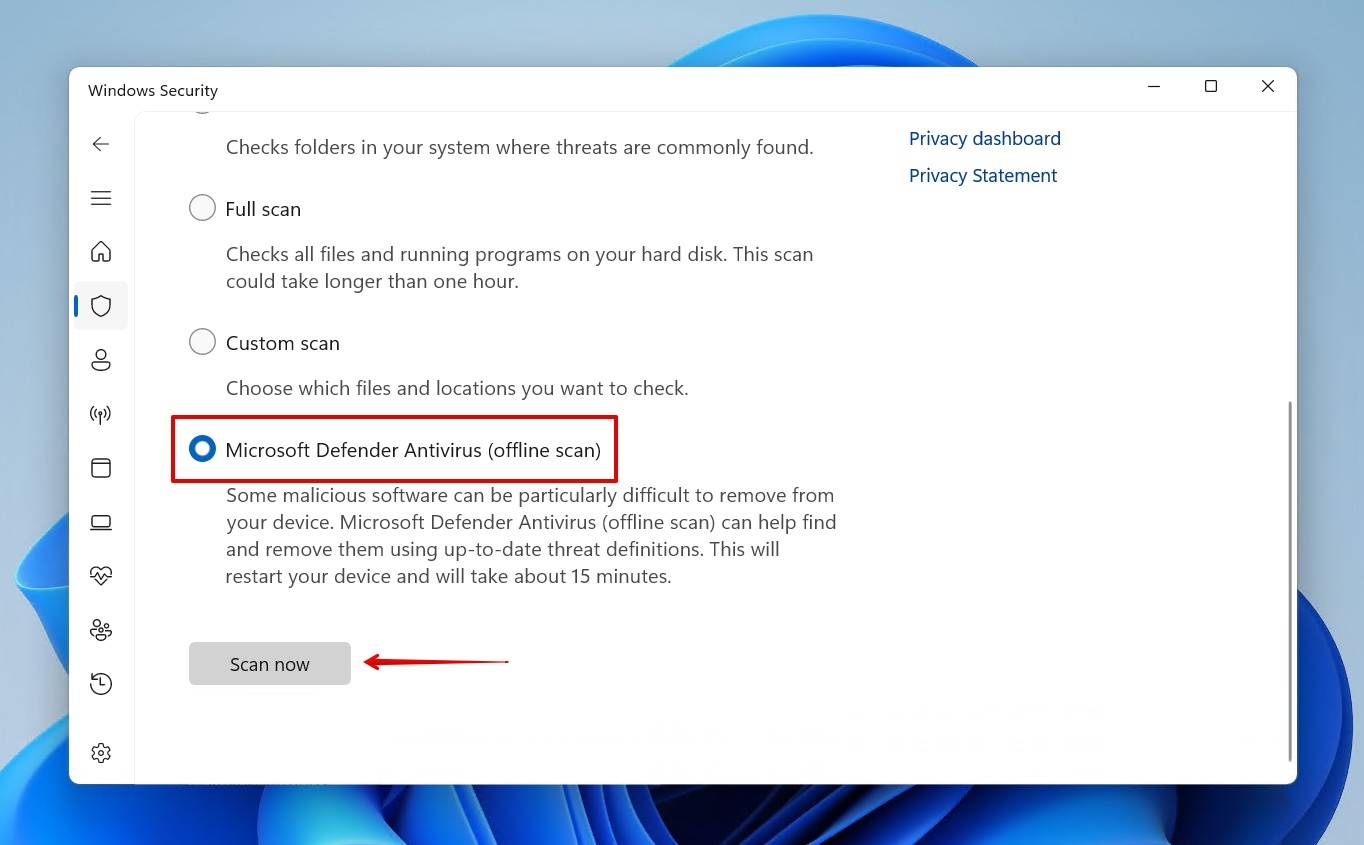
We’ll show you how to scan for malware with Windows Defender:
- Open Start, search “Windows Security” and open the best match.
- Click Virus & threat protection.
- Click Scan options.
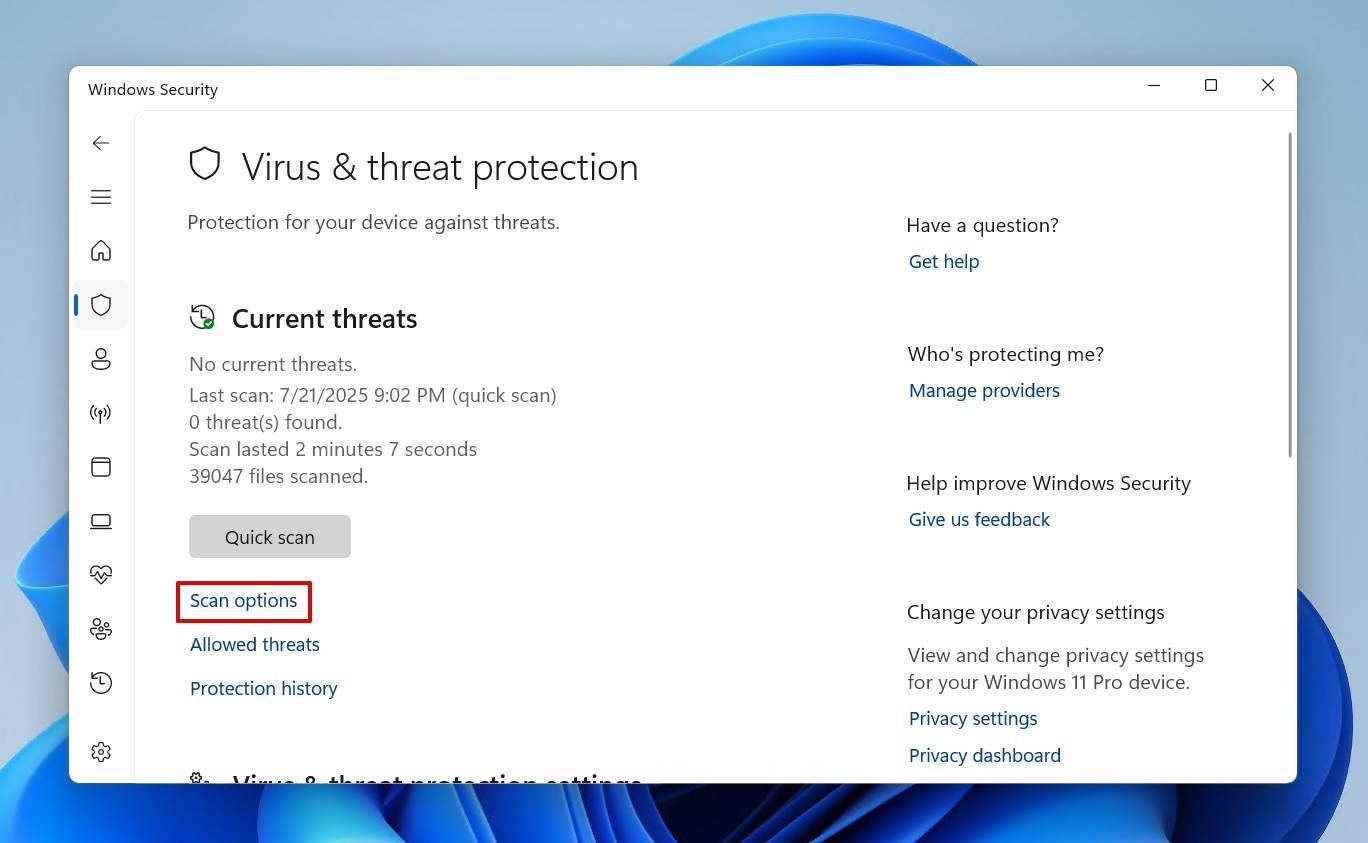
- Select the Microsoft Defender Antivirus (offline scan), then click Scan now.
If you have a preference for third-party antivirus software, that is perfectly fine. At the end of the day, the goal is to remove whatever caused your files to disappear and then recover them. If malware isn’t the issue, the problem may lie deeper within the drive’s file system, which we’ll look at next.
Method 4: Check the Hard Drive for Errors
Risk of data loss: Medium | Difficulty level: Moderate
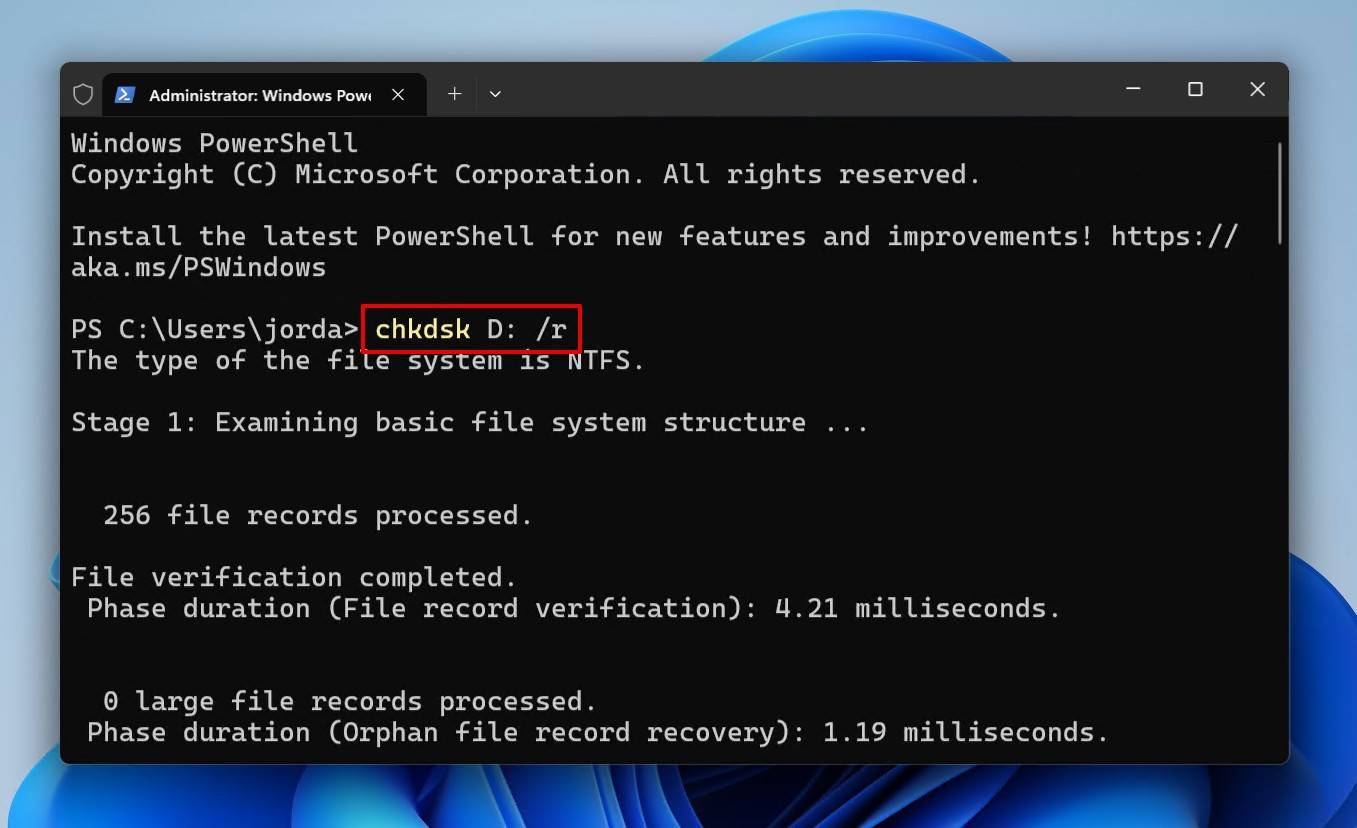
CHKDSK is a Windows tool that specializes in the repair and management of the file system and any soft or hard bad sectors that appear. In the event that logical corruption is causing the files to become inaccessible, CHKDSK can repair the damage and restore access to the data. Be warned, however, that running this command may lead to data loss if some of the repaired sectors contain data. There’s still a chance for recovery if CHKDSK deleted files, but it’s much safer to create a byte-to-byte backup of the hard drive first.
In the instructions below, we will be using the /r parameter. This includes the functionality of /f, which is safer, but also allows for the detection of bad sectors via surface scan, making it much more effective. However, it can take a while on large drives, and it can easily look like it gets stuck. However, be patient, as interrupting the scan can cause issues. However, if you feel that the scan is truly stuck, press CTRL + C to stop it and check the drive’s health with software like CrystalDiskInfo.
This is how you scan the external hard drive with CHKDSK:
- Right-click Start and select Terminal (Admin).
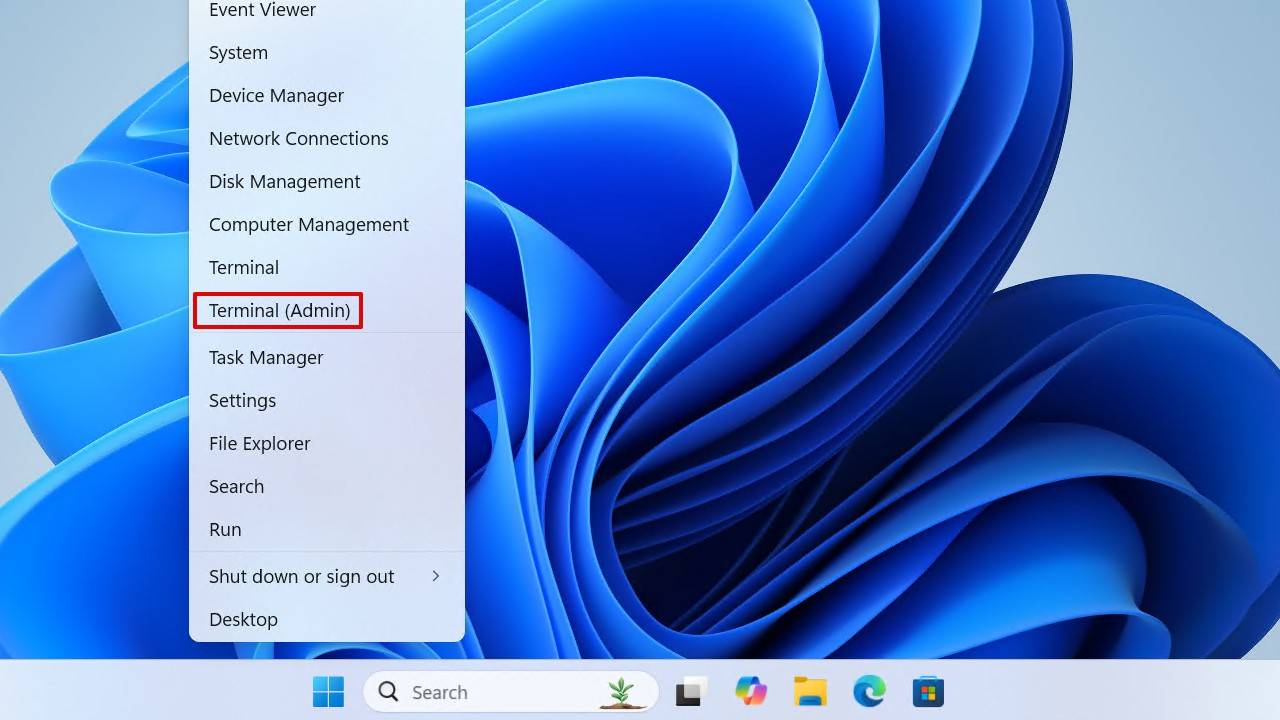
- Type CHKDSK *: /r. Replace * with your drive letter. Press Enter.
Method 5: Reformat the Hard Drive
Risk of data loss: Guaranteed | Difficulty level: Moderate
Reformatting isn’t a solution for getting the data back. Rather, it’s used to fix potential issues that are causing the files to go missing. Formatting involves writing a fresh, new file system to the partition, effectively restoring it to default.
Because a format will delete all data on the drive, creating a byte-to-byte backup is necessary if you still want to recover your data. Once your data is backed up, you can format the drive without worry.
We will show you how to perform a quick format, which is much faster and gives you a chance to recover the data (if you did not make a backup). Avoid performing a full format, because (1) it’s time-consuming, as it needs to write zeros to each sector, (2) it will erase any chance of data recovery, and (3) it’s largely unnecessary unless you need to securely erase the disk for disposal or sale.
This is how you format a drive using File Explorer:
- Open File Explorer.
- Right-click the drive you wish to format, then click Format.
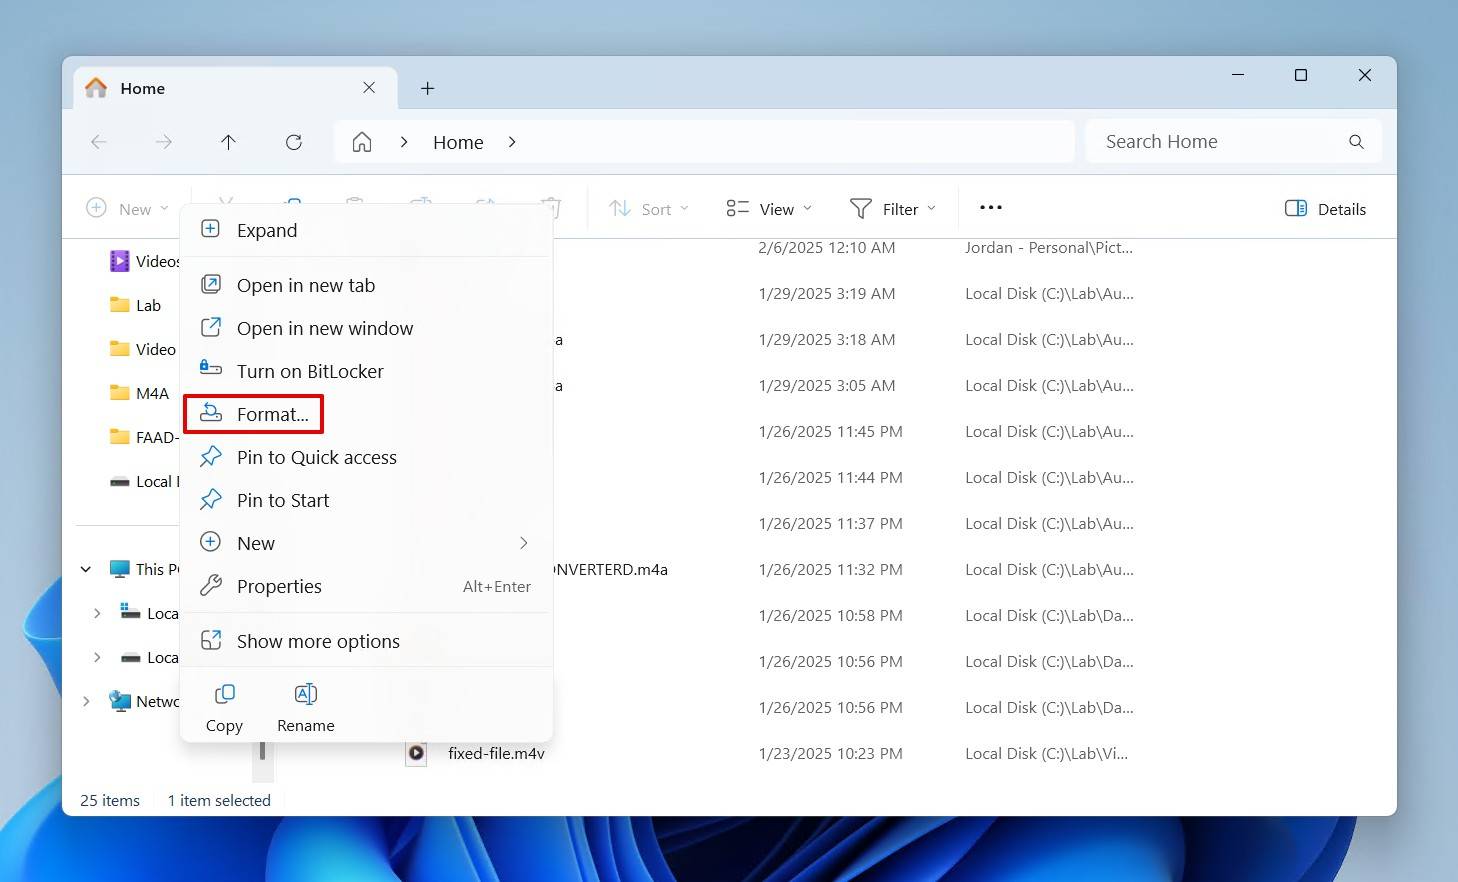
- Choose a file system, specify a volume label, and make sure Quick Format is ticked. Then, click Start.
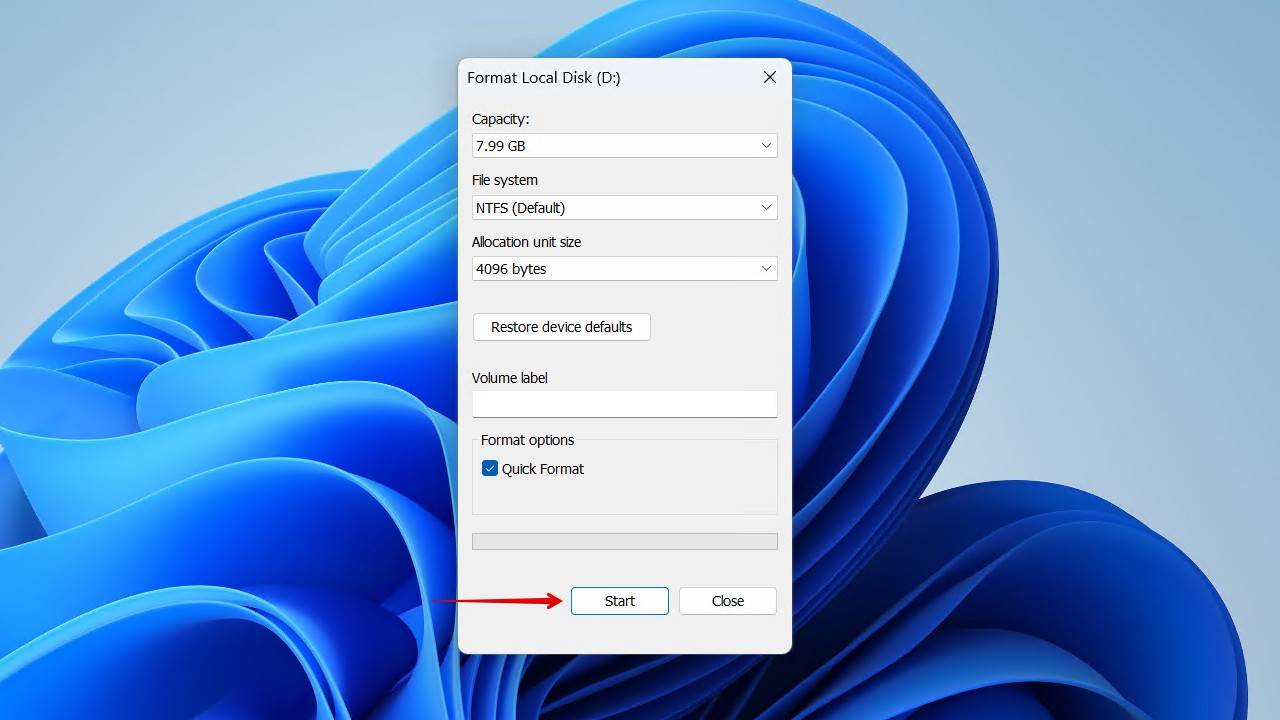
- Click OK to confirm.
Recover Your Data from the Hard Drive Backup You Created
If you backed up your files using the steps we mentioned earlier, now you’ll get a chance to recover them from the byte-to-byte copy. Or, if you didn’t back them up and still need to recover them, you can scan the drive directly. For those who have already recovered their data, you can ignore this section.
This is how you recover data from the image of an external hard drive that’s not showing files, though they exist:
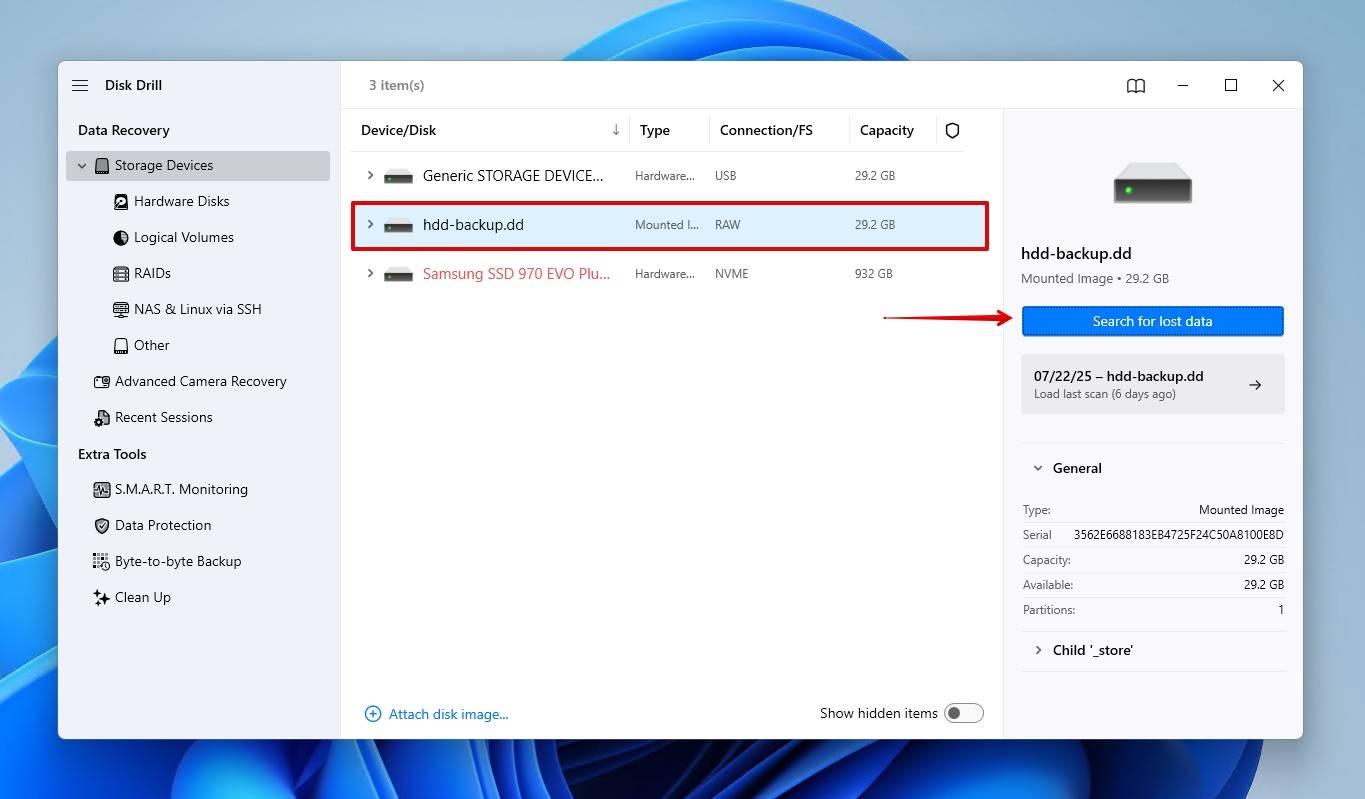
- Launch Disk Drill.
- Click Attach disk image, and select the byte-to-byte backup you created earlier if you created one. Or, if you didn’t create a backup, select the drive in the next step instead.

- Select the disk image, then click Search for lost data. When prompted, click Universal Scan.
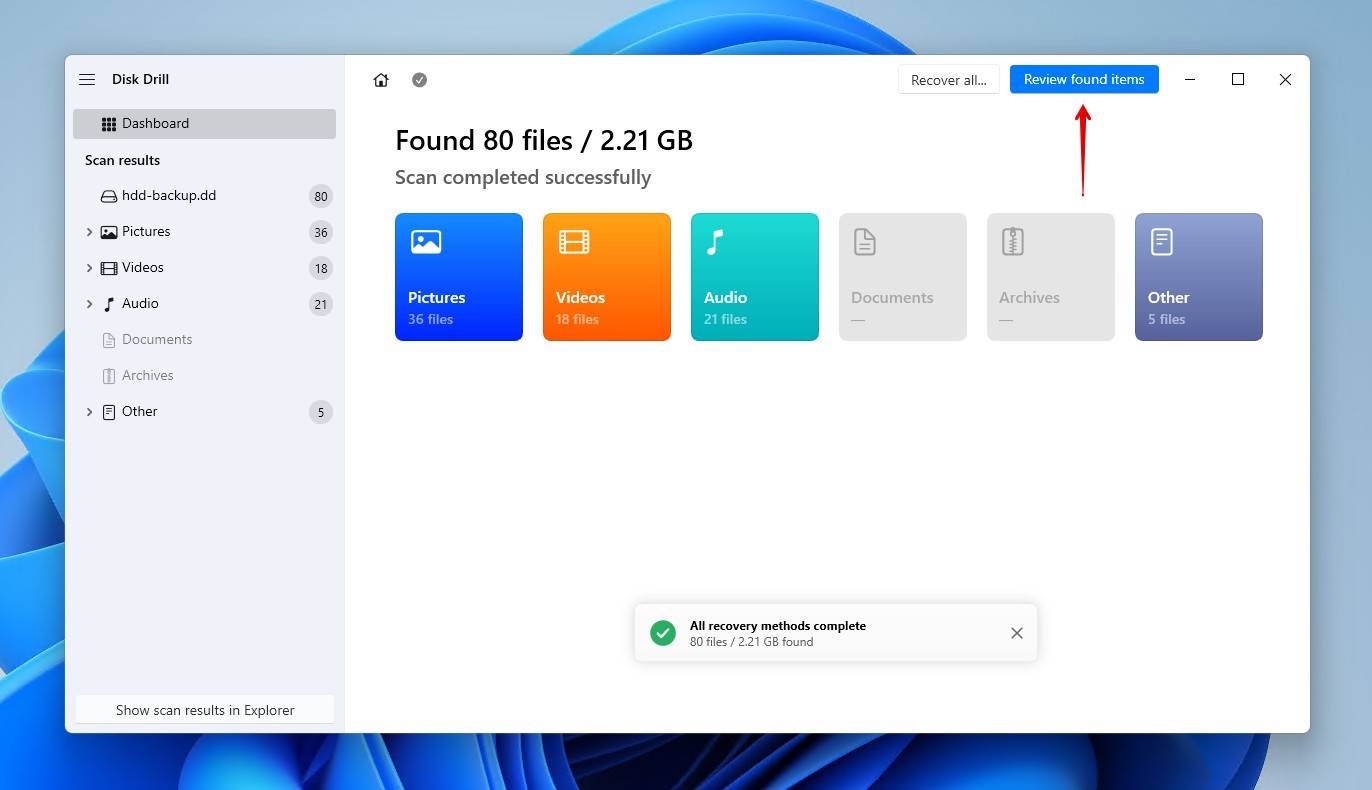
- Click Review found items to explore the found data. Alternatively, if everything on your external HDD was lost, you can click Recover all to copy everything Disk Drill found.
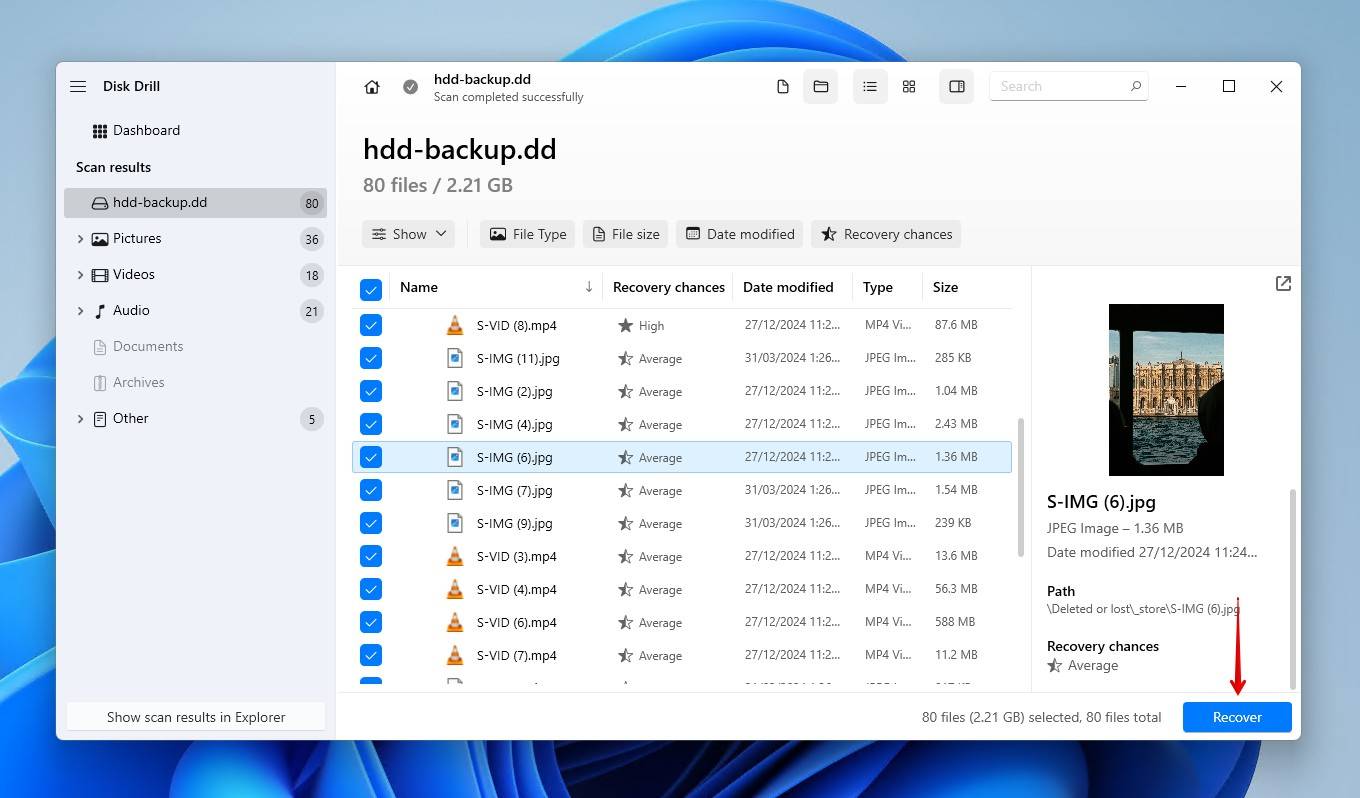
- Preview and select the files you wish to restore. Previewing the data is important to confirm it’s intact for recovery. If you find the amount of data overwhelming, use the filtering options to help refine your search. When ready, click Recover.
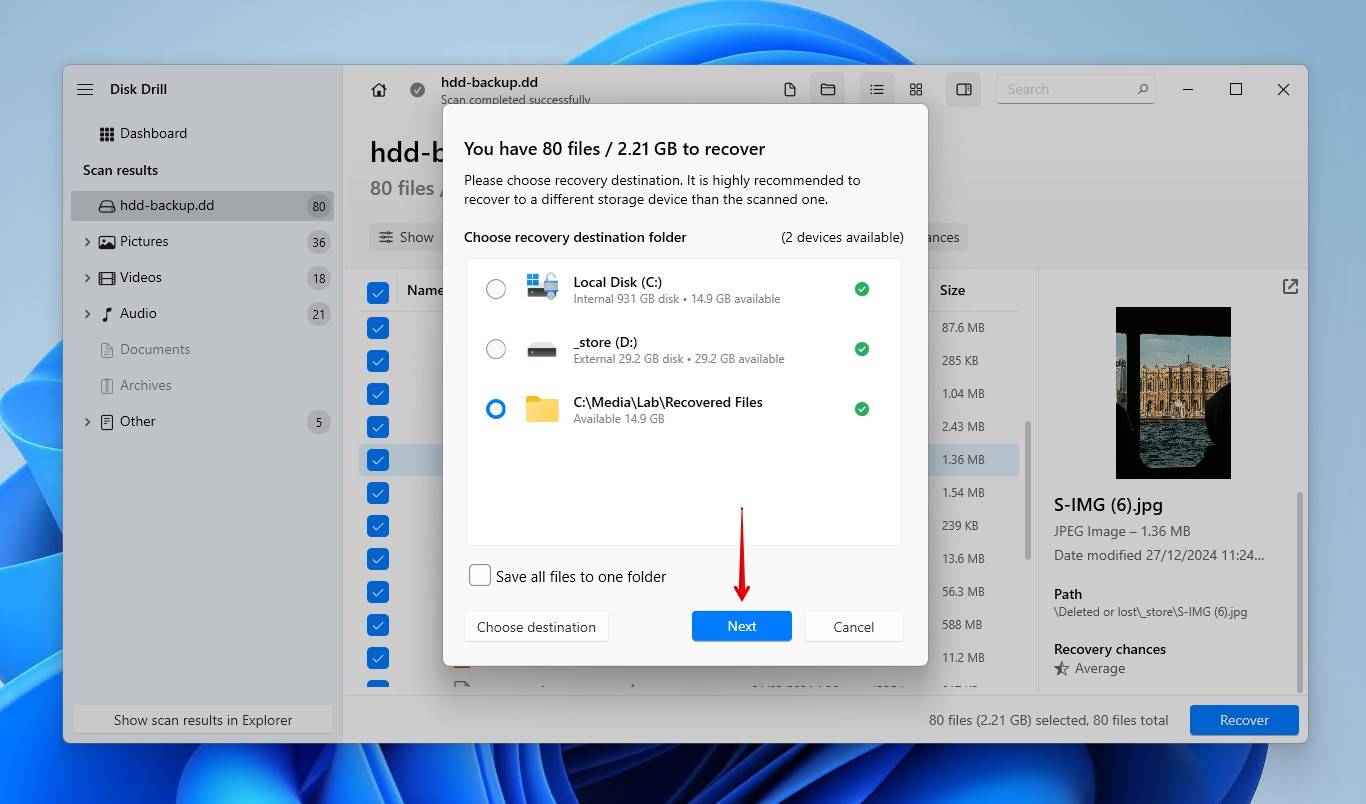
- Choose a recovery location on a separate, healthy drive. Click Next to finish recovery.
You will be able to recover up to 500 MB of data for free. Anything more will require Disk Drill PRO.
Once recovery is done, be sure to check that all data was recovered intact. You can learn more about the software in our Disk Drill review, where we break down its recovery efficiency, safety, features, and more.
What to Do If You Couldn’t Recover Your Files Yet
While the methods outlined in this article have been proven to work in solving some problems, not every data loss scenario is the same. You may find none of them worked, or perhaps some of the methods appear too technical to perform yourself. Either way, help is available. The subreddit r/DataRecoveryHelp is a great place to ask for further help directly from professionals. You can also visit our own online community, where members of our team and frequenters of our site can offer tips and personalized guidance.
If you want to avoid DIY methods entirely, either because the disk is physically damaged or you feel it’s simply beyond your scope, you can always turn to a data recovery service. This involves sending your external hard drive to a recovery professional, who will perform high-level recovery to get as much as back as possible and return it to you on a healthy storage device. While this does offer the best odds of success, it is costly, so it’s best to consider your options carefully.
FAQ
Why is my hard drive disk space full when I have nothing?
Your disk space is the total of every file on your computer. Personal files, system files, and application files make up the vast majority. You should start by showing hidden files and exploring folders to see if some of your data has been marked as invisible. Otherwise, TreeSize Free is a free tool that will help you pinpoint exactly where your space is going.
How can I tell if the files are hidden and not deleted from the hard drive?
You need to enable File Explorer to see files marked with the “hidden” attribute. This is how you do that:
- Open File Explorer.
- Click the View dropdown menu.
- Hover over Show, then click Hidden items.
Hidden files are denoted with a transparent file icon, and can be made visible by removing the hidden attribute from each file’s properties.
Does formatting permanently delete files that were not showing up on the hard drive?
Formatting will delete all the files that weren’t showing up on the hard drive, but this isn’t always permanent. It depends on which format you choose. A full format will erase all of the data, leaving virtually no chance of recovery. However, if you performed a quick format, and you’re recovering the data close to when it was lost, you have pretty good odds of getting that data back.
What should I do if files on an external hard drive don’t show up on one computer only?
Start by troubleshooting the computer’s USB ports to make sure a proper connection is established. You should then make sure you have permission to access the drive, as NTFS Access Control Lists (ACL) carry over. Finally, confirm the file system is compatible with the operating system.
How do I fix the issue of a hard drive not showing files, though they still exist on the Mac?
A hard drive not showing files, even though they still exist on a Mac, could be because the files are hidden. You need to manually enable the viewing of hidden files on your drive. Alternatively, you can use software like Disk Drill for Mac or other data recovery software for macOS, which will scan and display all files, hidden or otherwise.
This is how you show hidden files on macOS:
- Access Finder.
- Press Command + Shift + . to show hidden files.
This article was written by Jordan Jamieson-Mane, a Staff Writer at Handy Recovery Advisor. It was also verified for technical accuracy by Andrey Vasilyev, our editorial advisor.
Curious about our content creation process? Take a look at our Editor Guidelines.