
Whether you’ve imported photos from your computer or received them via email, they can quickly accumulate and take up valuable storage space.
In this article, we’ll guide you through the steps to delete imported photos on your iPhone. Regardless of whether you’re using the latest iPhone 15 or an older but still relevant model like the iPhone 7, these methods will help efficiently manage your imported photos and clear iPhone storage.
How to Remove Imported Photos from an iPhone
Removing imported photos from your iPhone is usually a painless process. In this section, we’ve compiled a collection of methods that will let you efficiently remove imported photos from your iPhone. This thorough guide covers the most common sources of imported photos on iPhones and the best methods to get rid of them without reappearing.
Method 1: Delete Imported Photos on an iPhone Using a Mac
Depending on the version of macOS you use, you can employ either iTunes or Finder to delete imported photos from your iPhone. If the photos were accidentally imported using the sync option, unchecking photos and resynchronizing the Mac with the iPhone will effectively remove them. Here’s how to do it:
For macOS Catalina (10.15) and later using Finder:
- Connect your iPhone to your Mac using a USB cable.
- Open Finder on your Mac. Your connected iPhone will appear in the Finder sidebar. Select your iPhone to open its management window.
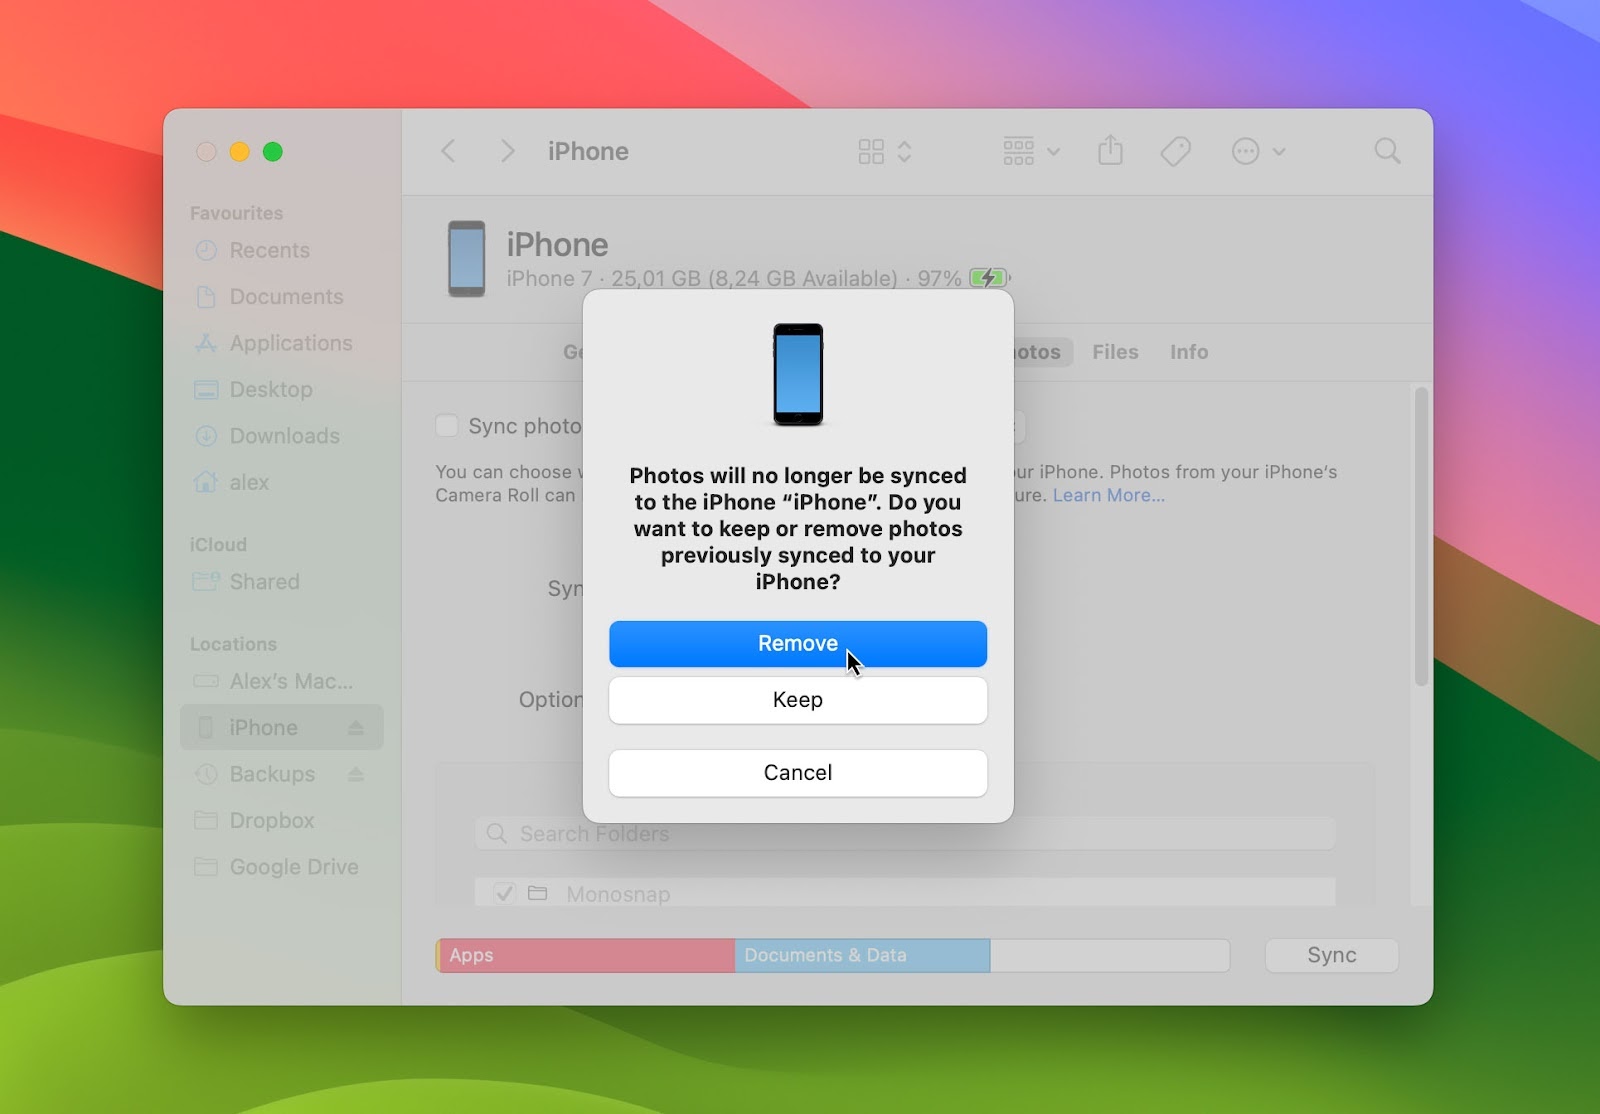
- Click on “Photos” in the bar at the top.
- Uncheck the “Sync photos to your device” option. This will prevent the selected photos from being synced with your iPhone. Confirm your choice by clicking “Apply“.

- A prompt will appear warning you about removing the synced photos. Click on “Remove“. This will remove the photos and prevent them from being synced in the future.
For macOS Mojave (10.14) and earlier using iTunes:
- Connect your iPhone to your Mac using a USB cable.
- Open iTunes on your Mac. Click on the device icon that appears in the iTunes window.
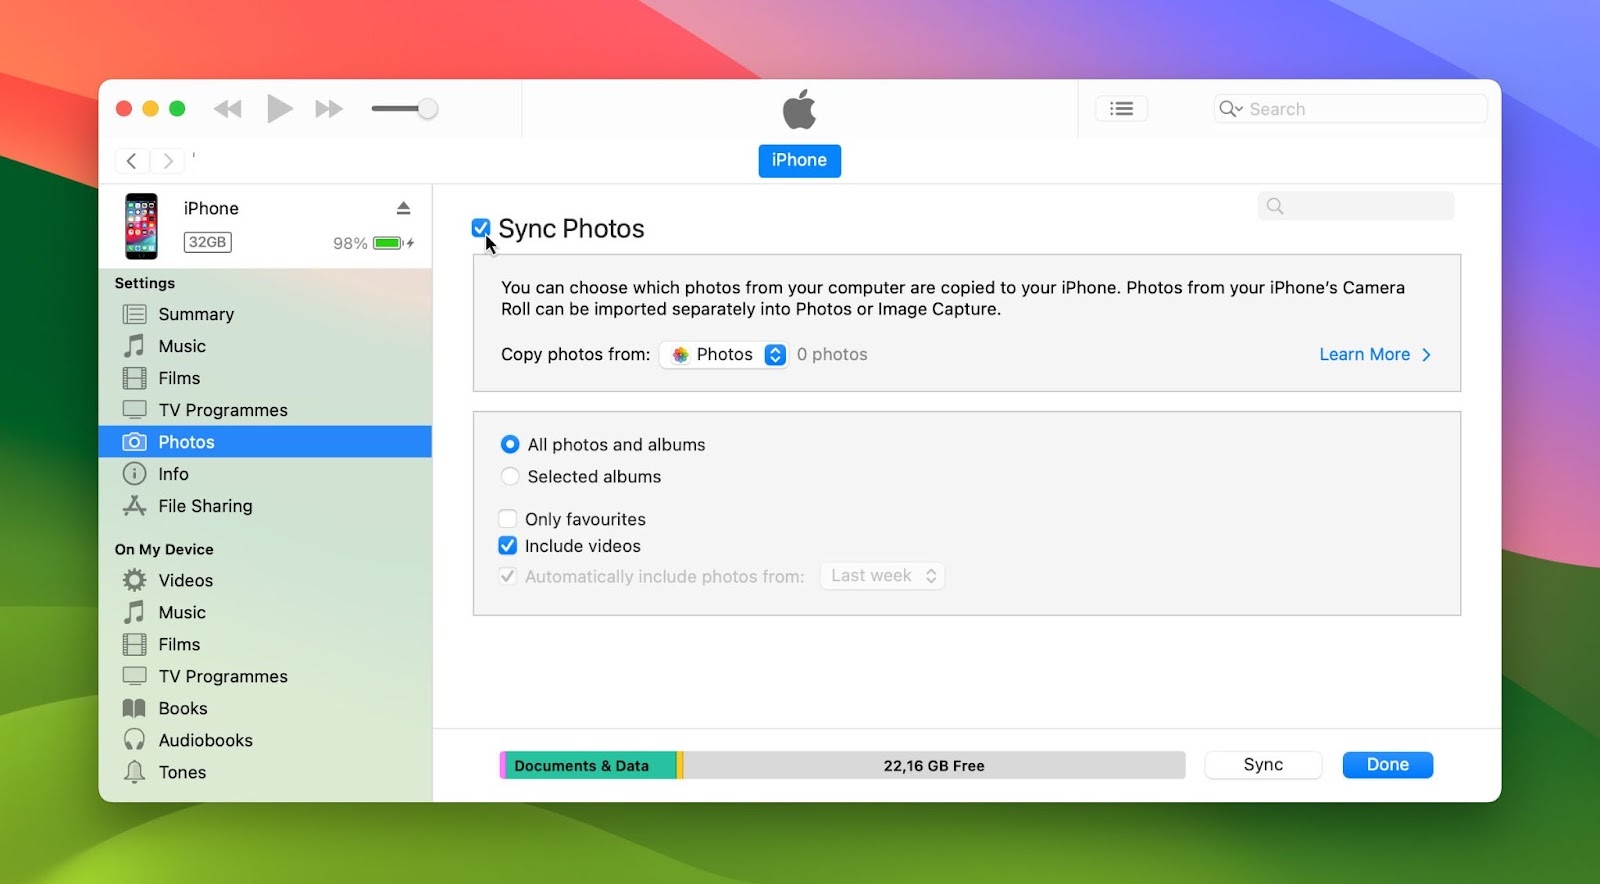
- In the left sidebar, select “Photos.”
- Uncheck the “Sync Photos” option.
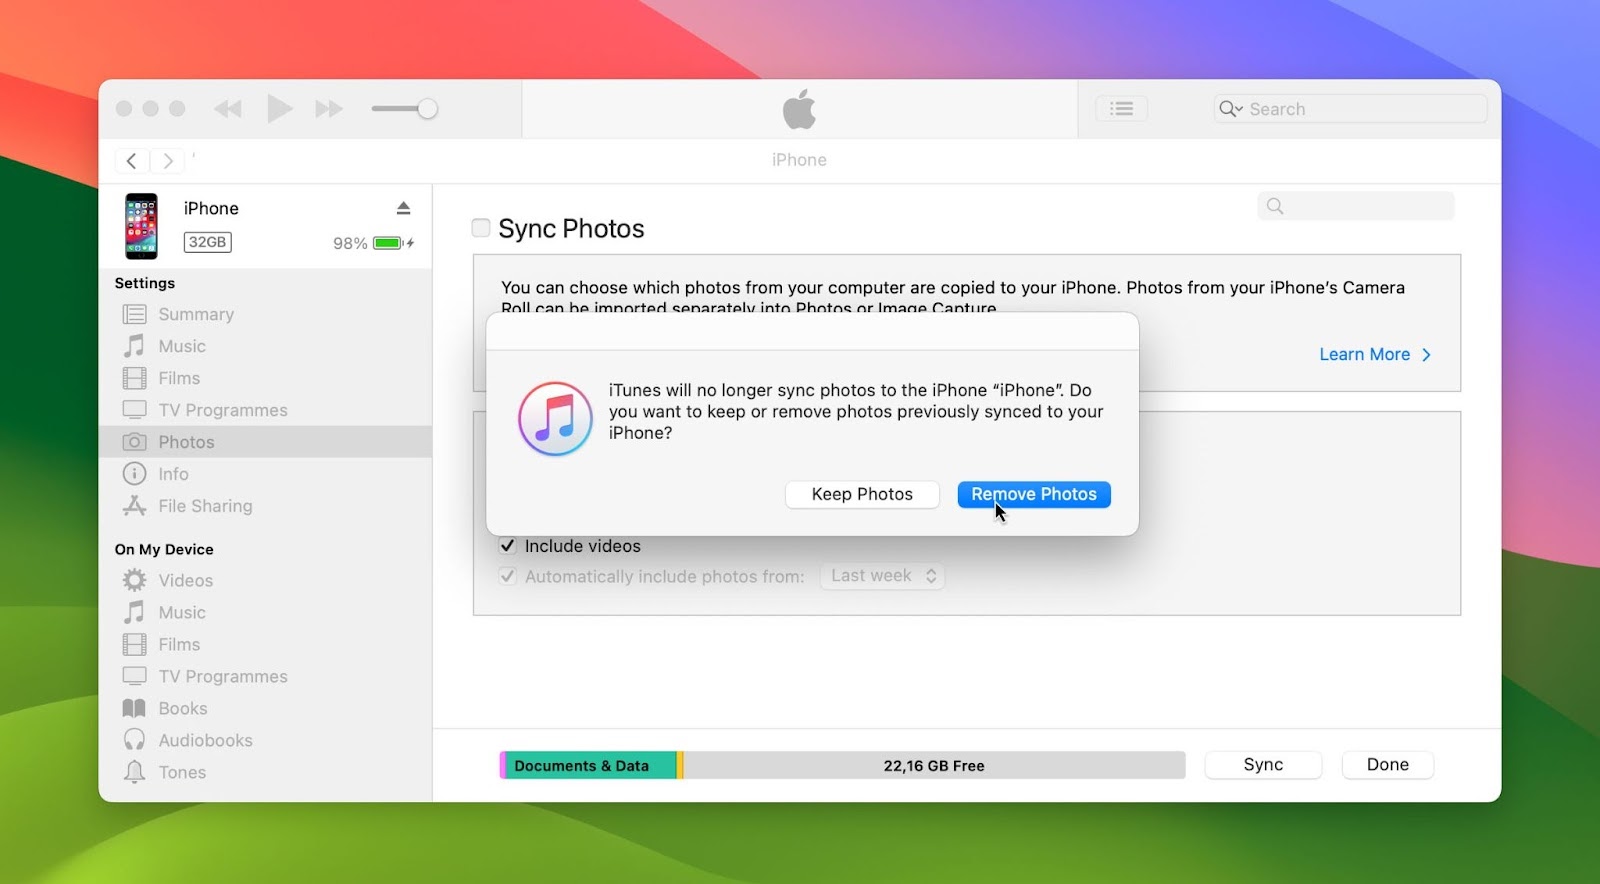
- Choose “Remove photos” when prompted. Then click “Apply”.
Method 2: Remove Photos from the ‘Recents’ Album
Recently uploaded photos typically appear in the ‘Recents’ album on your iPhone. This album serves as a quick way to access and view the most recently added photos, making it convenient for users to find their latest captures.
To remove imported photos from your iPhone, deleting them from the ‘Recents’ album is the most straightforward method. Here’s how to do it:
- Open the Photos app on your iPhone, then tap on the “Albums” tab at the bottom of the screen.
- Scroll down and tap on the “Recents” album. Inside, you’ll see the photos that were most recently added to your iPhone.

- Browse through the album and tap on the photos you want to remove. Selected photos will be highlighted.
- Once you’ve selected the unwanted photos, tap the trash can icon located at the bottom-right corner of the screen. Confirm the deletion when prompted.

- The selected photos will now be removed from the ‘Recents’ album and your iPhone.
Method 3: Delete Photos that are Duplicated
It’s not uncommon for duplicate imported photos to accumulate on your iPhone. To efficiently clear iPhone storage and manage these imported duplicates, consider the use of third-party apps. These apps offer effective solutions to identify and delete duplicate iPhone photos, helping you maintain an organized photo library.
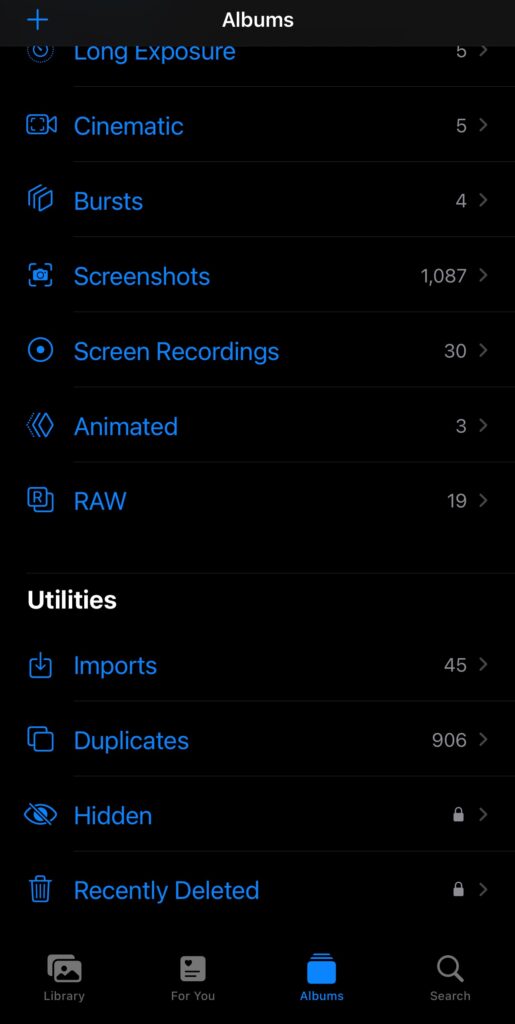
Otherwise, you can consider checking the “Duplicates” album, especially if you suspect that identical imported photos exist on your device. Keep in mind that this feature is only available in iOS 16 and higher versions. Here’s how to do it:
- Open the Photos app on your iPhone and tap on the “Albums” tab at the bottom of the screen.
- Scroll down and tap on the “Duplicates” album. This album automatically groups duplicate photos together, and you’ll find pairs or groups of repeating pictures. Your iPhone identifies these as duplicates based on similar content.
- Browse through the album and review your duplicate photos. Next, select the duplicate photos you want to delete by tapping on them. They will be highlighted.
- Once you’ve selected the duplicates, tap the trash can icon at the bottom-right corner of the screen. Confirm the deletion when prompted.
Method 4: Delete Photos After Import Using a Third-party Tool
Utilizing third-party tools to manage and delete photos after import can offer several advantages over native methods. These tools provide you with special tools for enhanced control in organizing your photo library. Here are some benefits of using third-party tools:
- 🔍 Advanced filtering and sorting: Third-party tools often offer more robust features for filtering and sorting photos. You can organize your photos by date, size, location, and other criteria, making it easier to identify and manage imported photos.
- 📋 Duplicate detection: Many third-party apps are equipped with powerful duplicate detection algorithms. They can identify and help you remove duplicate imported photos, preventing unnecessary redundancy in your photo library.
- 📱Intuitive interface: These apps often provide an intuitive interface that simplifies the process of deleting iPhone photos after import, providing a user-friendly experience.
- 🗂️ Batch actions: Third-party apps offer batch actions like moving multiple imported photos to different albums or deleting entire albums in one go.
Here are some third-party tools we recommend to help delete photos from iPhone after import:
Option A: Slidebox

Slidebox is an efficient photo management app known for its intuitive swipe-based sorting and organization. It allows you to quickly review and delete imported photos with ease.
Option B: Photo Cleaner
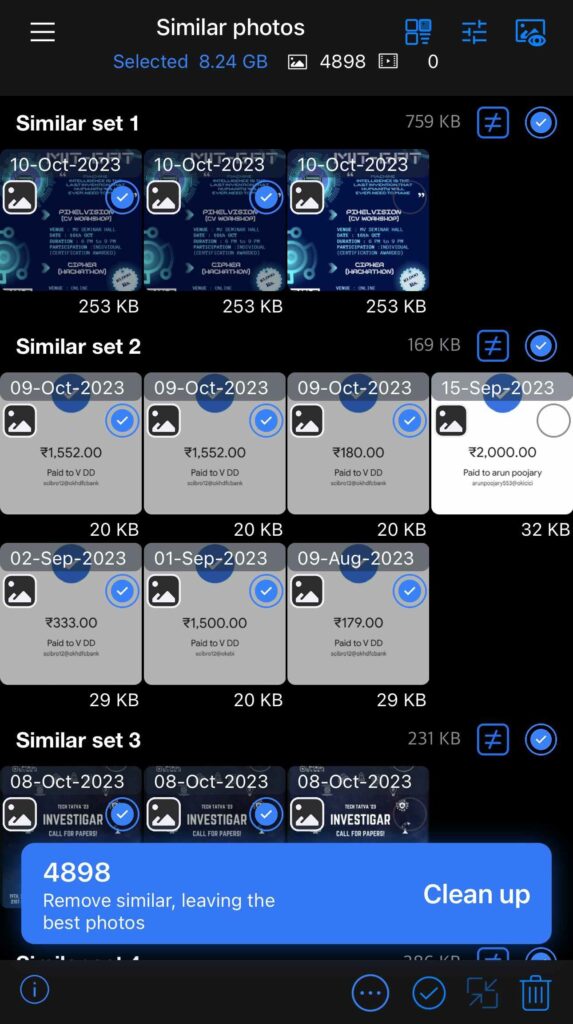
Photo Cleaner specializes in helping you identify and remove duplicate photos, similar images, and clutter from your photo library. Its customizable filters make the process of managing imported photos more precise.
By using third-party tools like Slidebox and Photo Cleaner, you gain the ability to streamline photo management, filter and sort your imported photos effectively, and eliminate duplicates. This ensures a more organized and clutter-free iPhone photo library.
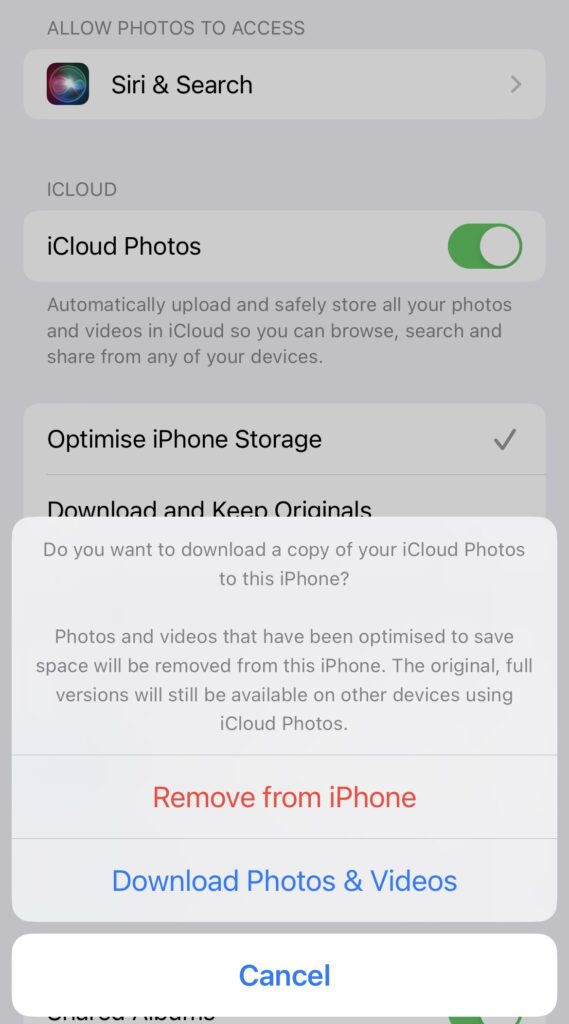
Method 5: Clear Your iCloud Photos
If your photos are synchronized across all devices using iCloud storage, it’s crucial to ensure that any deletions made using your iPhone or Mac device are also synchronized with iCloud. Here’s a step-by-step guide on how to clear iCloud photos:
Using Your iPhone:
- Open the Settings app on your iPhone, then scroll down and tap on “Photos.”
- Under the “iCloud Photos” section, turn off the toggle switch. This will pause iCloud Photo Library syncing.
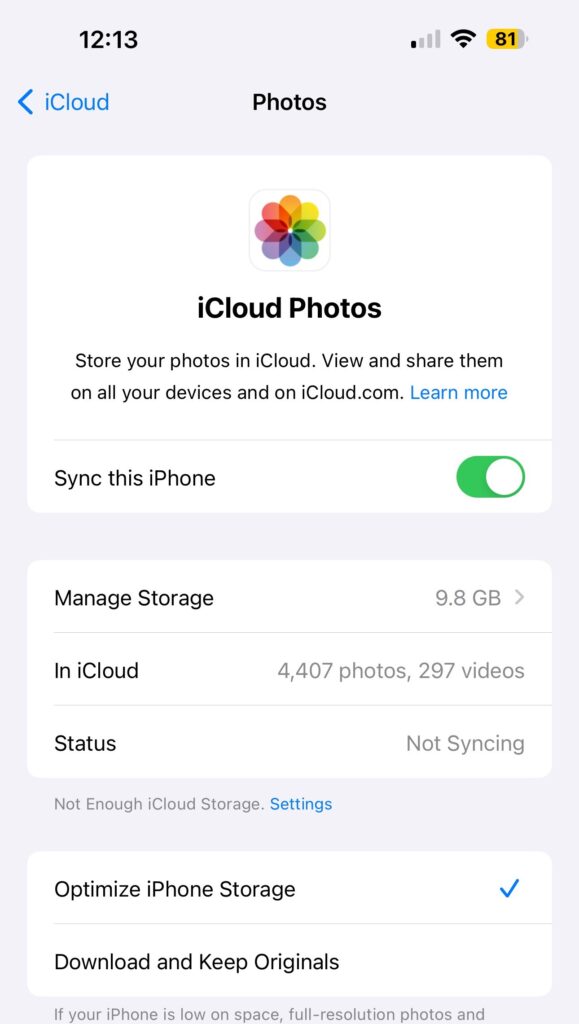
- You’ll be prompted to “Download Photos & Videos” to your iPhone or “Remove from iPhone.” Choose the “Remove from iPhone” option. This will delete all iCloud photos stored on your iPhone.
Using Your Mac:
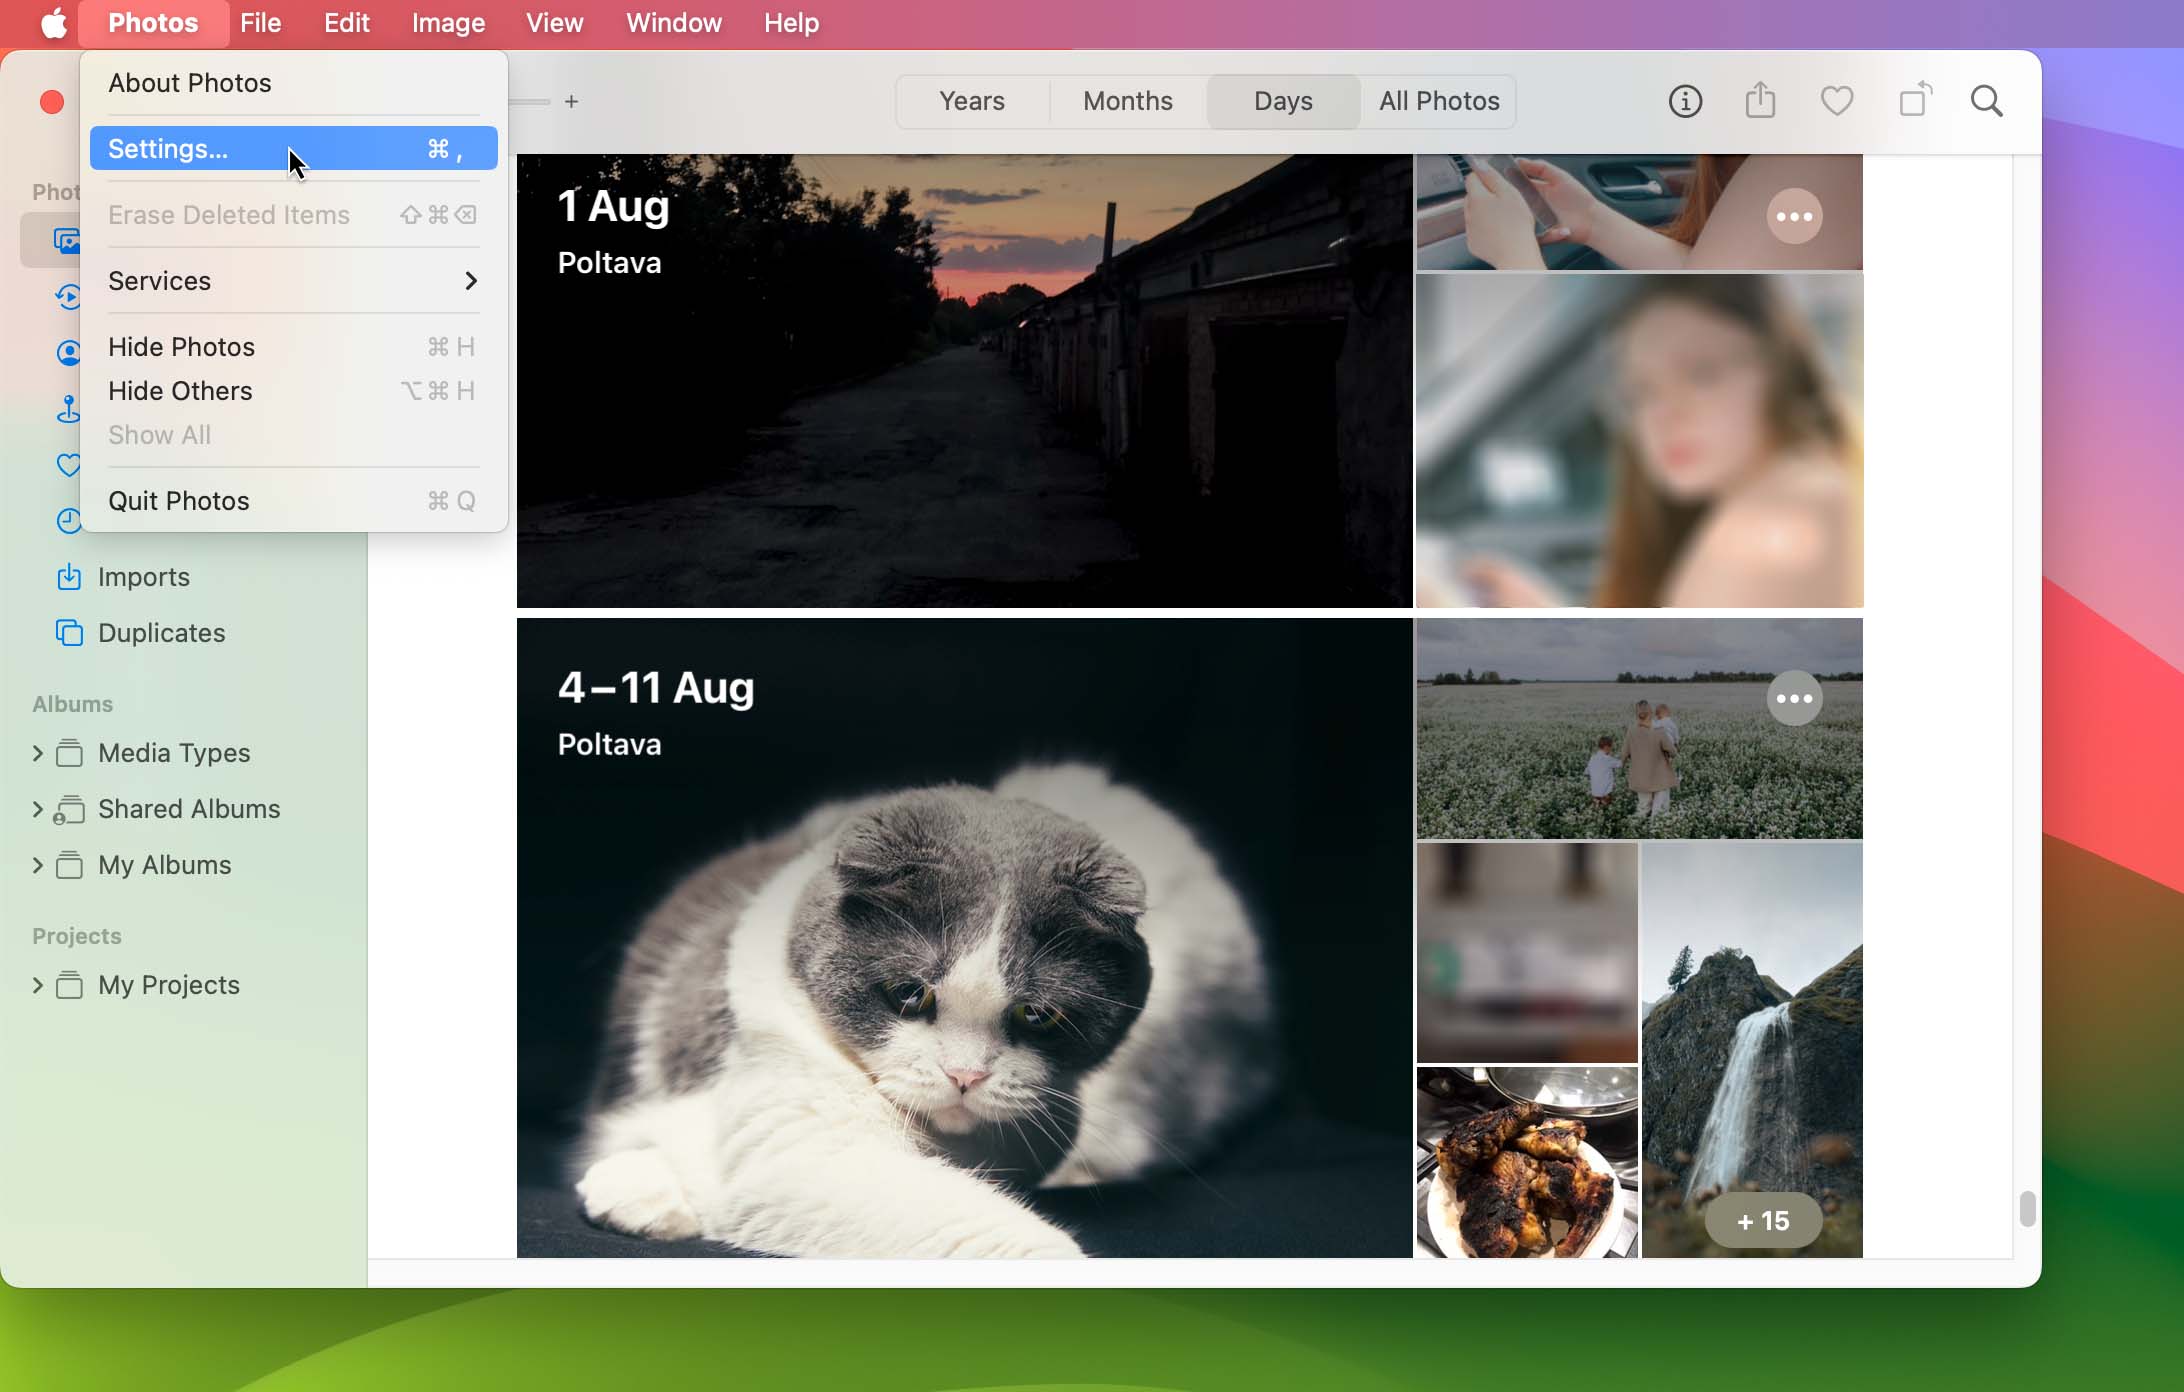
- Open the “Photos” app on your Mac.
- In the top menu, click on “Photos” and select “Settings“.
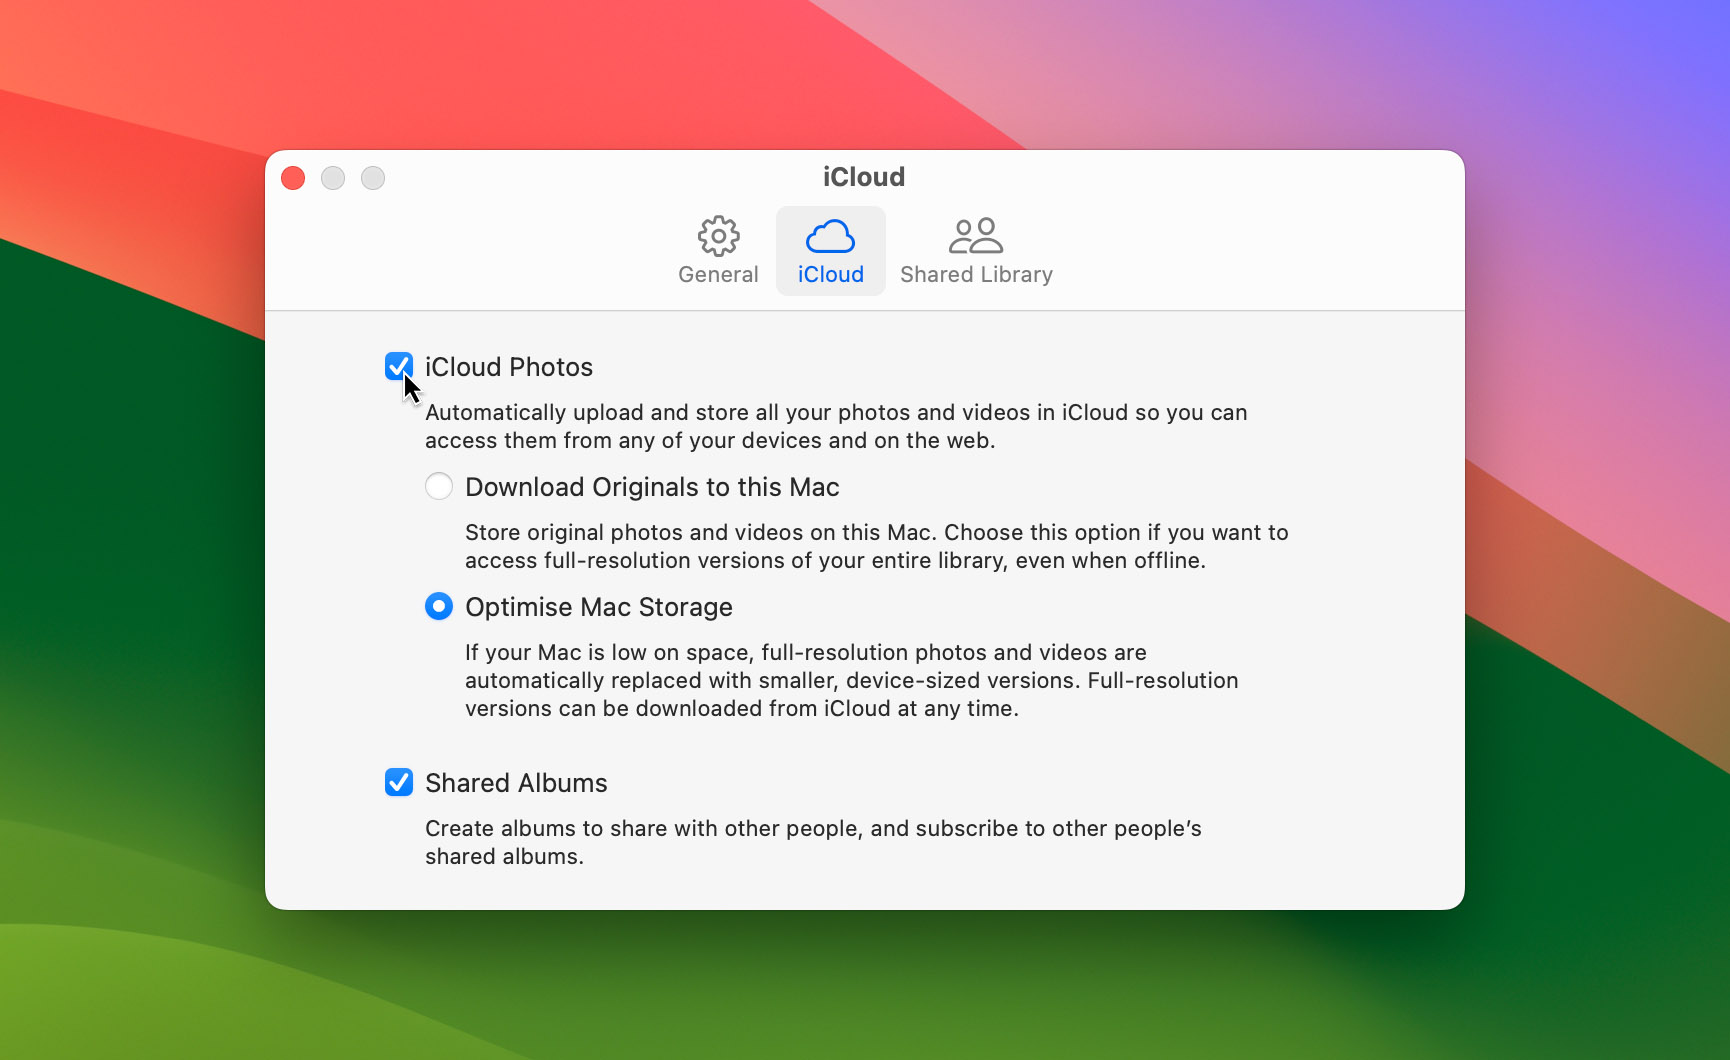
- Now go to the “iCloud” tab, and under the “iCloud Photos” section, uncheck the “iCloud Photos” option. This will stop your Mac from downloading iCloud photos.
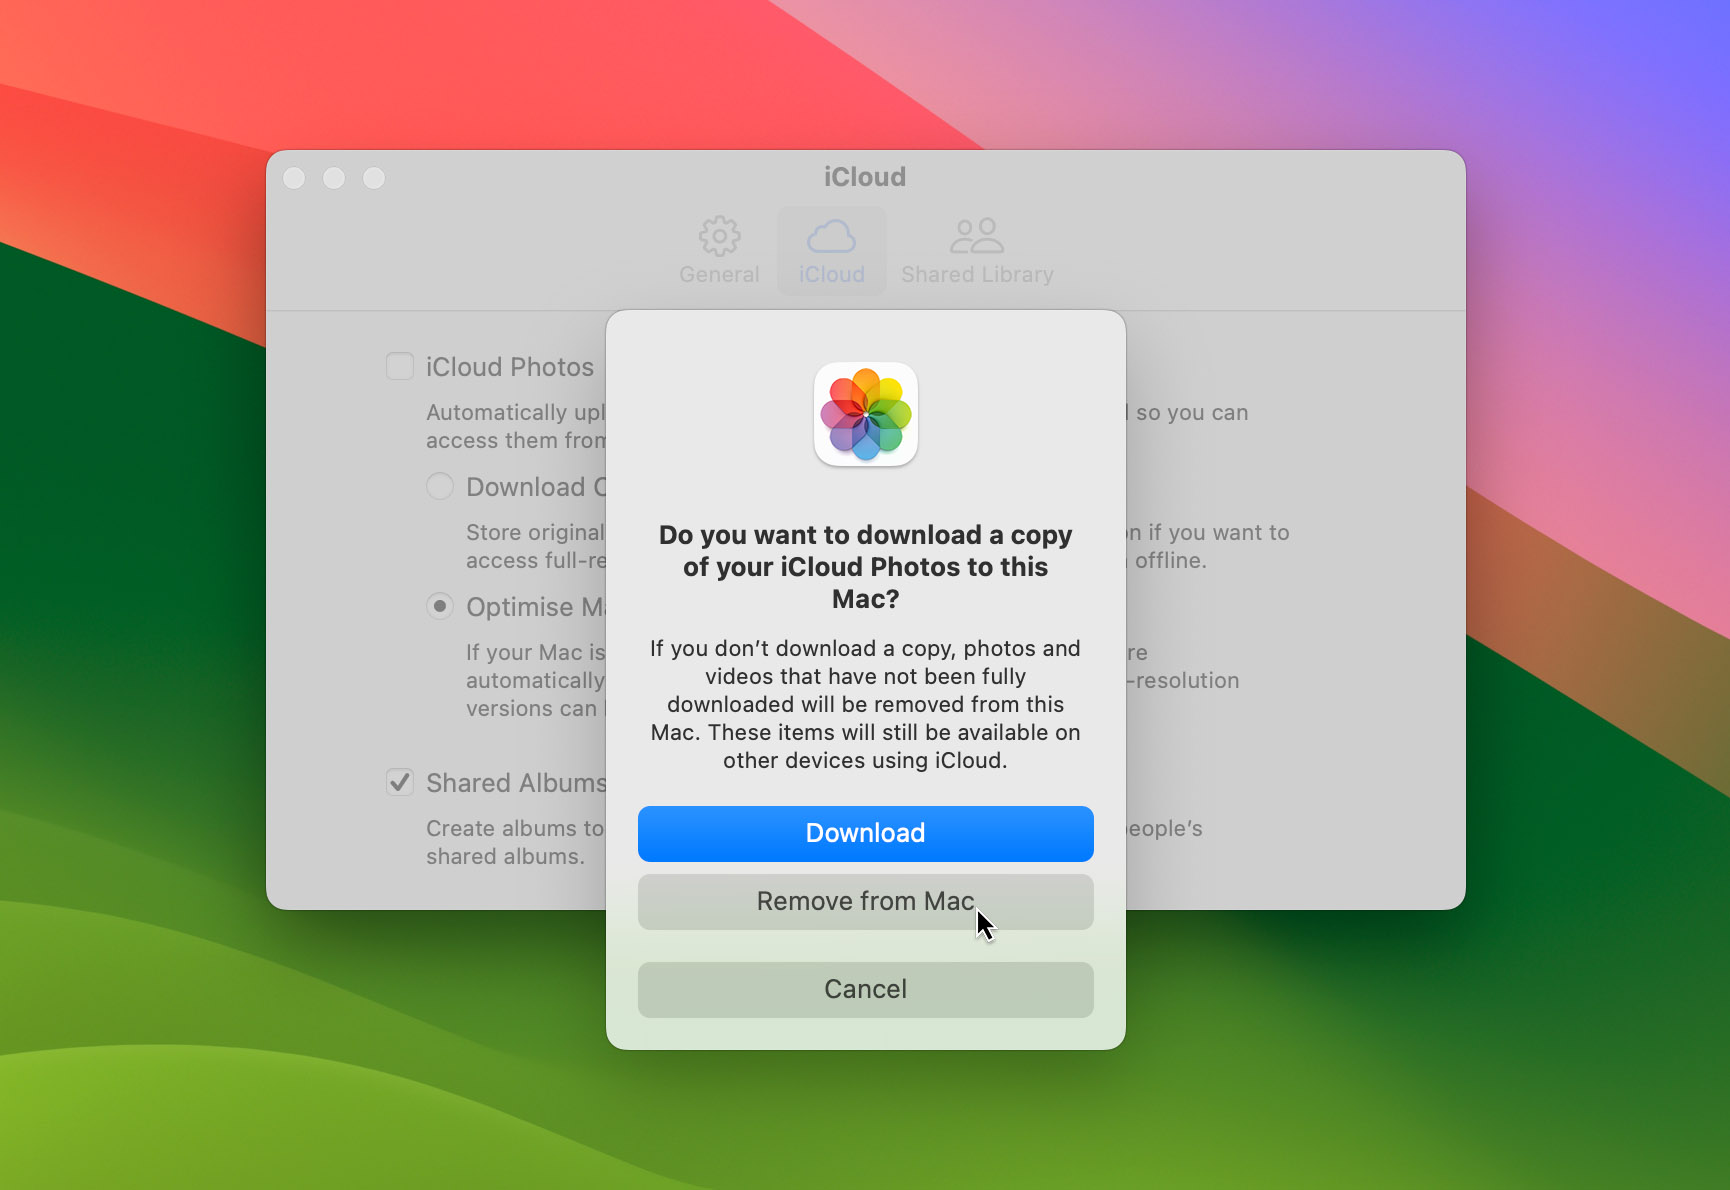
- Confirm the action when prompted by clicking “Remove from Mac“.
Deleting Photos Directly from iCloud (through a Web browser):
- Open a web browser and go to the iCloud website.
- Sign in with your Apple ID and password.
- Click on “Photos” to access your iCloud Photo Library. Select the photos you want to delete. You can use Shift or Command on Mac or Ctrl on Windows to select multiple photos.
- Click the trash can icon to delete the selected photos.
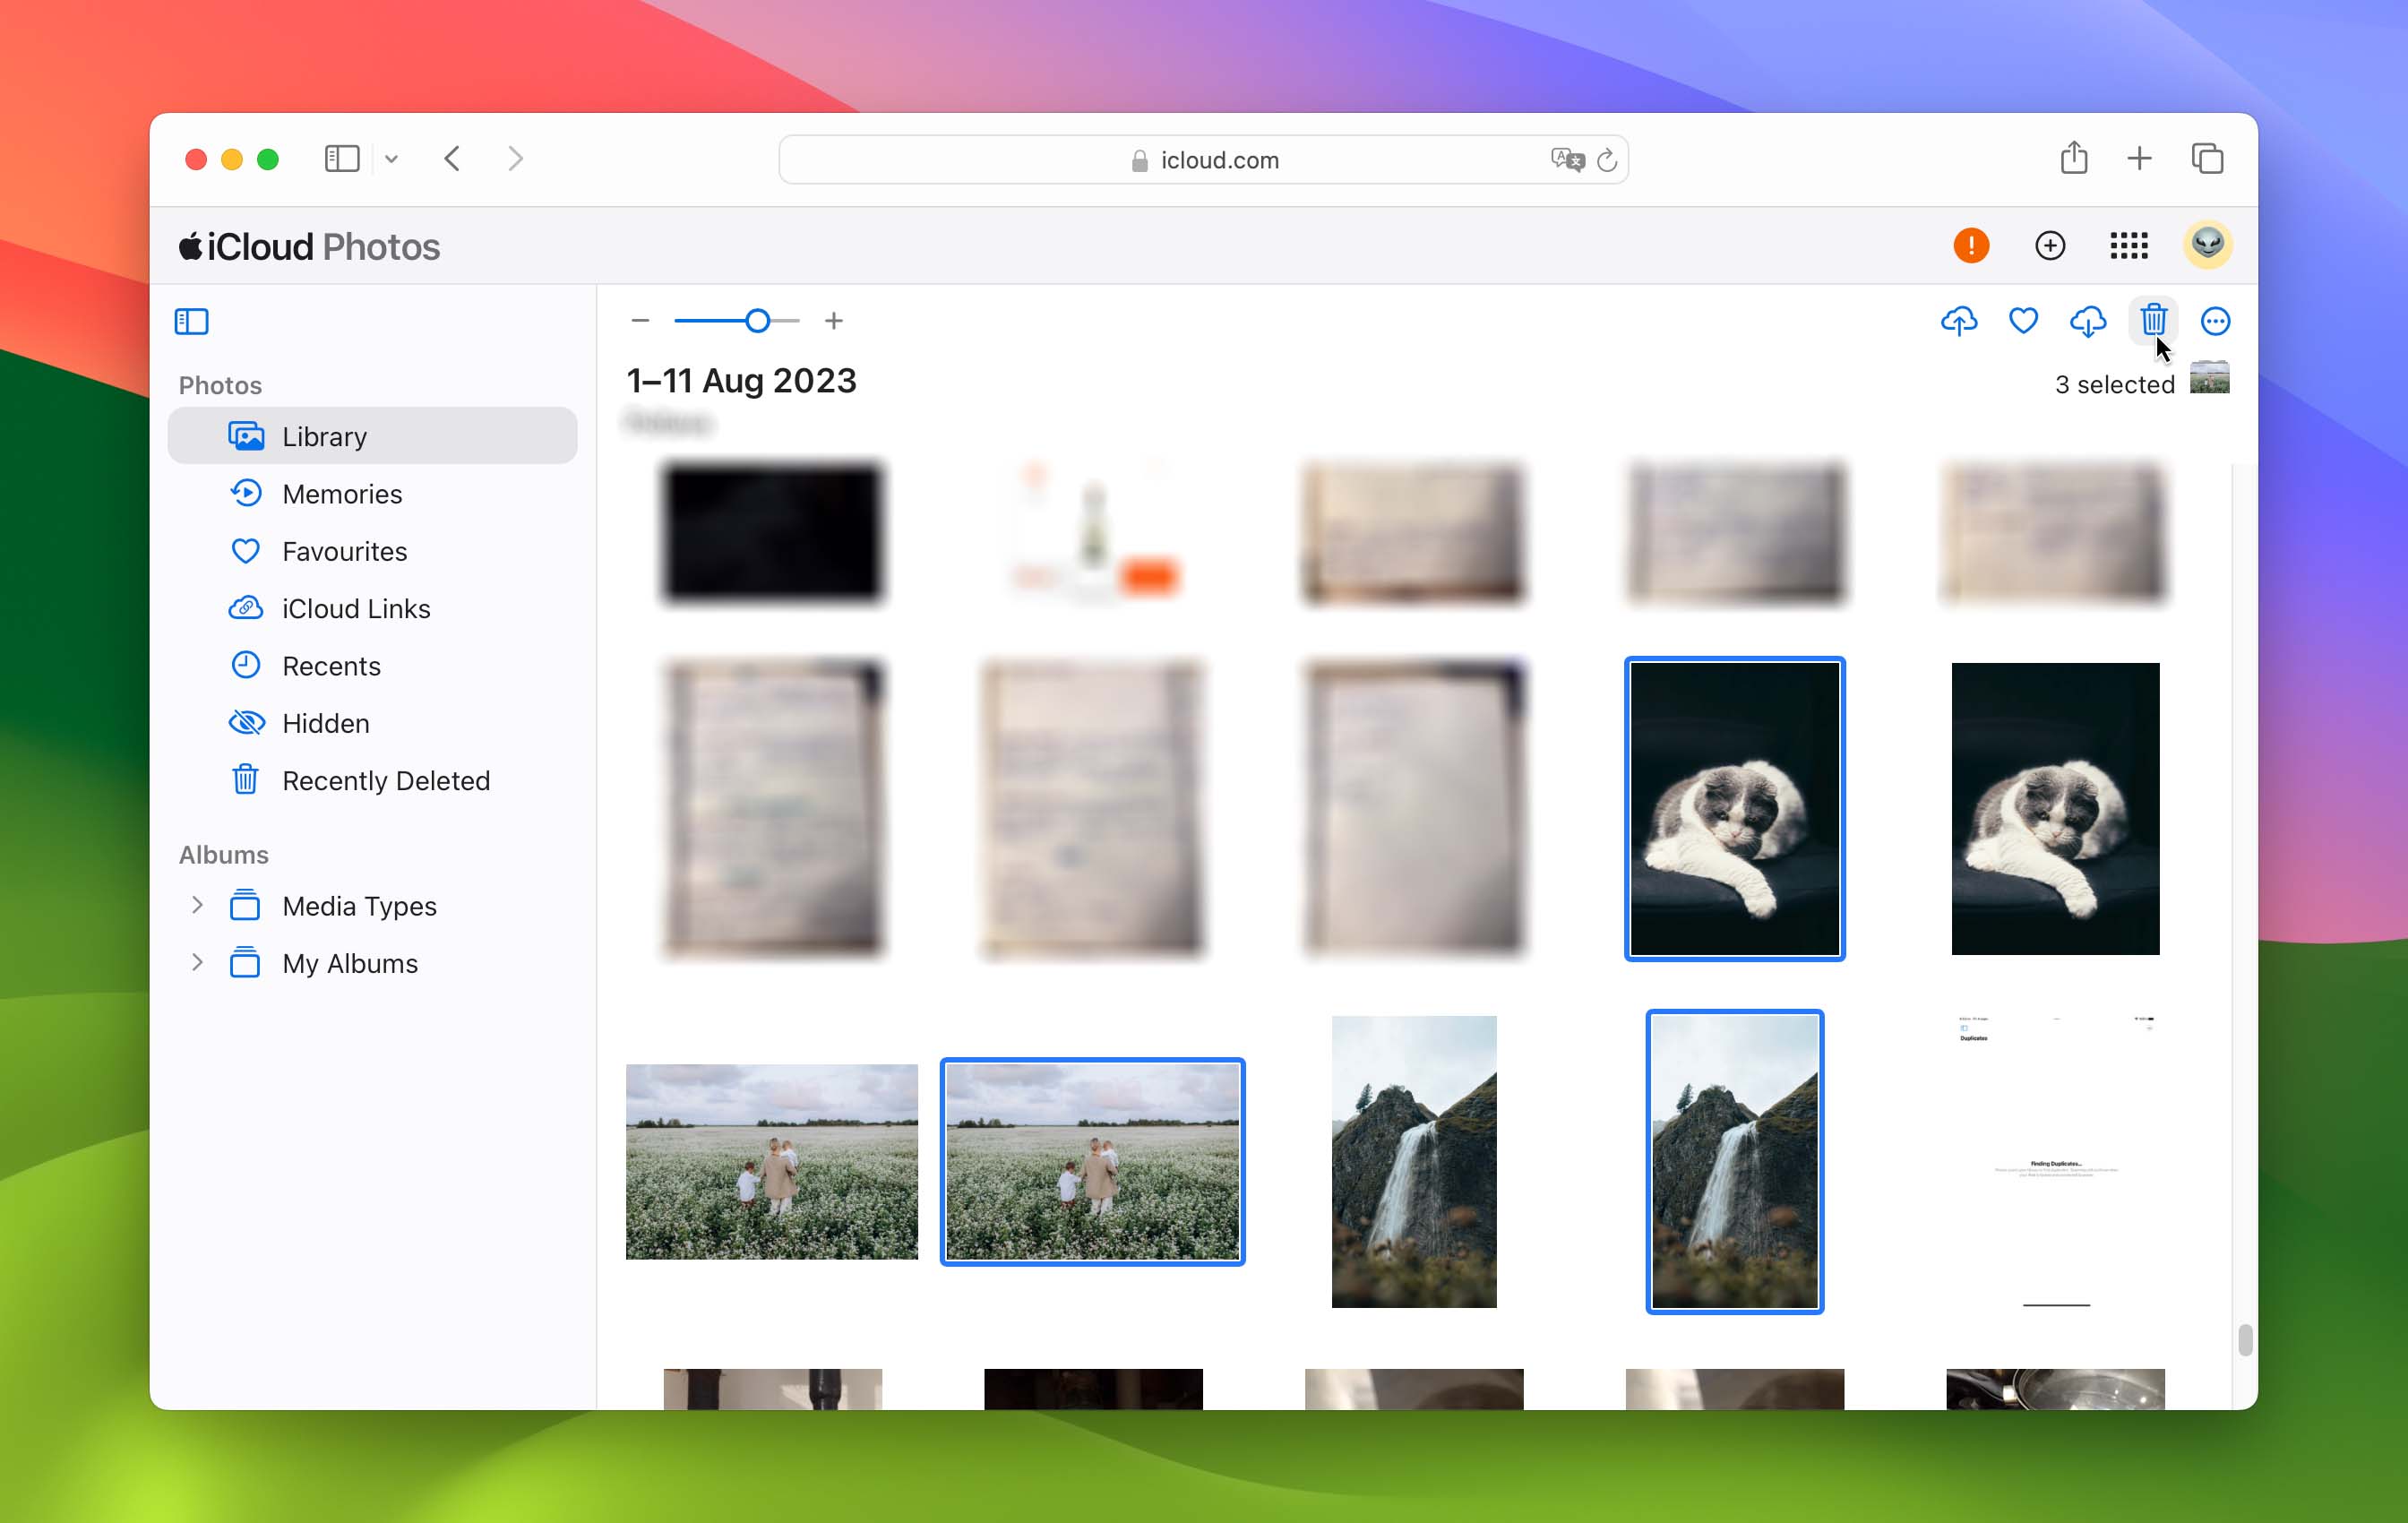
- Confirm the deletion when prompted.

FAQ
Why can't I delete imported photos from my iPhone?
If you’re unable to delete imported photos from your iPhone, it could be due to several reasons. One common cause is that the imported photos are synced with your computer or iCloud storage, preventing you from deleting them directly on your iPhone. To delete such photos, you will need to access your iCloud account and remove them from there. Additionally, some imported photos may be part of albums or collections, and removing them might require adjustments in your Photos app.
Why do imported photos reappear on the iPhone after deletion?
Imported photos might reappear on your iPhone if they are part of a synced folder or album linked to your computer or iCloud storage. When your iPhone syncs with these sources, it can cause deleted photos to reappear. To prevent this, ensure that you’ve removed the photos from the source and disabled any automatic syncing or backup features that may be restoring them.
How to delete imported photos on iPhone from Mac?
To delete imported photos from your iPhone using a Mac, follow these steps:
- Connect your iPhone to your Mac using a USB cable.
- Open the Photos app on your Mac and select your iPhone from the sidebar.
- Browse and select the imported photos you want to delete.
- Press the “Delete” key on your keyboard or right-click and choose “Delete [number] Photos.”
- Confirm the deletion when prompted.
How to delete all photos from the iPhone that are already imported?
To delete all photos from your iPhone that have been imported, follow these steps:
- Open the Photos app on your iPhone.
- Tap on “Photos” at the bottom of the screen to view your entire photo library. Tap “Select” in the top-right corner.
- Hold down on any photo and then select “Select All” to choose all photos.
- Tap the trash can icon to delete all selected photos.
- Confirm the deletion when prompted.
This will delete all photos, including imported ones, from your iPhone. Be sure to back up any important photos before doing this.
Conclusion
Managing imported photos on your iPhone is an essential part of keeping your device organized and getting more storage space. Whether you encountered difficulties with imported photos or simply needed to clear some space, the methods outlined in this article will help you declutter your device and take control of your iPhone’s photo library.
Make sure to check your iCloud settings and take regular backups to prevent data loss.
Remember that the specific steps may vary depending on your iPhone model or the source of the imported pictures. But whether you have the latest iOS 17 or are running an older yet relevant version like iOS 14/15, these steps will be helpful.
This article was written by Vihaan Jain, a Staff Writer at Handy Recovery Advisor.
Curious about our content creation process? Take a look at our Editor Guidelines.