We’ve all been there—you’re about to snap that perfect photo, only to be interrupted by the dreaded “Storage Almost Full” warning. But before you hit “delete,” hold on. This article will show you how to free up storage on your iPhone without sacrificing your treasured photos or other important files.
Is It Possible to Make Space on iPhone Without Deleting Anything?
No, it’s not possible to free up space on an iPhone without deleting anything. Does it mean that the title of this article is an empty clickbait? Also no! Confused? Let me explain. While it’s technically true that some old data will need to be removed from your device to make room for new data, it doesn’t mean you have to permanently delete valuable photos, apps, or files.
By optimizing storage settings, managing cached data, offloading apps you don’t currently need, and more, you can indeed free up storage without losing anything you’d regret. And let’s face it—most iPhones are teeming with redundant or useless data that you won’t even miss. Here are some examples of types of data you can safely clear to make space on your iPhone:
- Cached files from music streaming services you’ve long forgotten about.
- Old podcasts and audiobooks you’ve already listened to and don’t plan on revisiting.
- Redundant application data from games or utilities you rarely open.
- Files you’ve downloaded from the internet but don’t need anymore.
- Exact or partial duplicates of your photos.
So yes, some data gets removed, but it’s the stuff you didn’t need in the first place.
How to Free Up Storage on iPhone Without Deleting Anything (Important)
Alright, we’ve established that it’s possible to clear storage on an iPhone without deleting anything crucial. But how do you go about doing this, especially when every byte seems precious? Whether you’re using an iPhone 11 or the latest iPhone 14, running iOS 13 or 16, there are reliable methods you can use to optimize your phone’s storage.
Method 1: Optimize Photo & Video Storage
Photos and videos can devour a big chunk of your iPhone’s storage, especially if you’re the kind who loves capturing moments in high resolution. But did you know you can free up storage on an iPhone without deleting your cherished memories?
Thanks to iCloud, Apple’s cloud storage service, and the Optimize iPhone Storage feature, it’s possible to automatically offload full-resolution photos and videos to the cloud, keeping only smaller, lightweight versions on your device.
To optimize your photo & video storage, you need to:
- Open the Settings app.
- Tap your name and go to > iCloud > Photos.
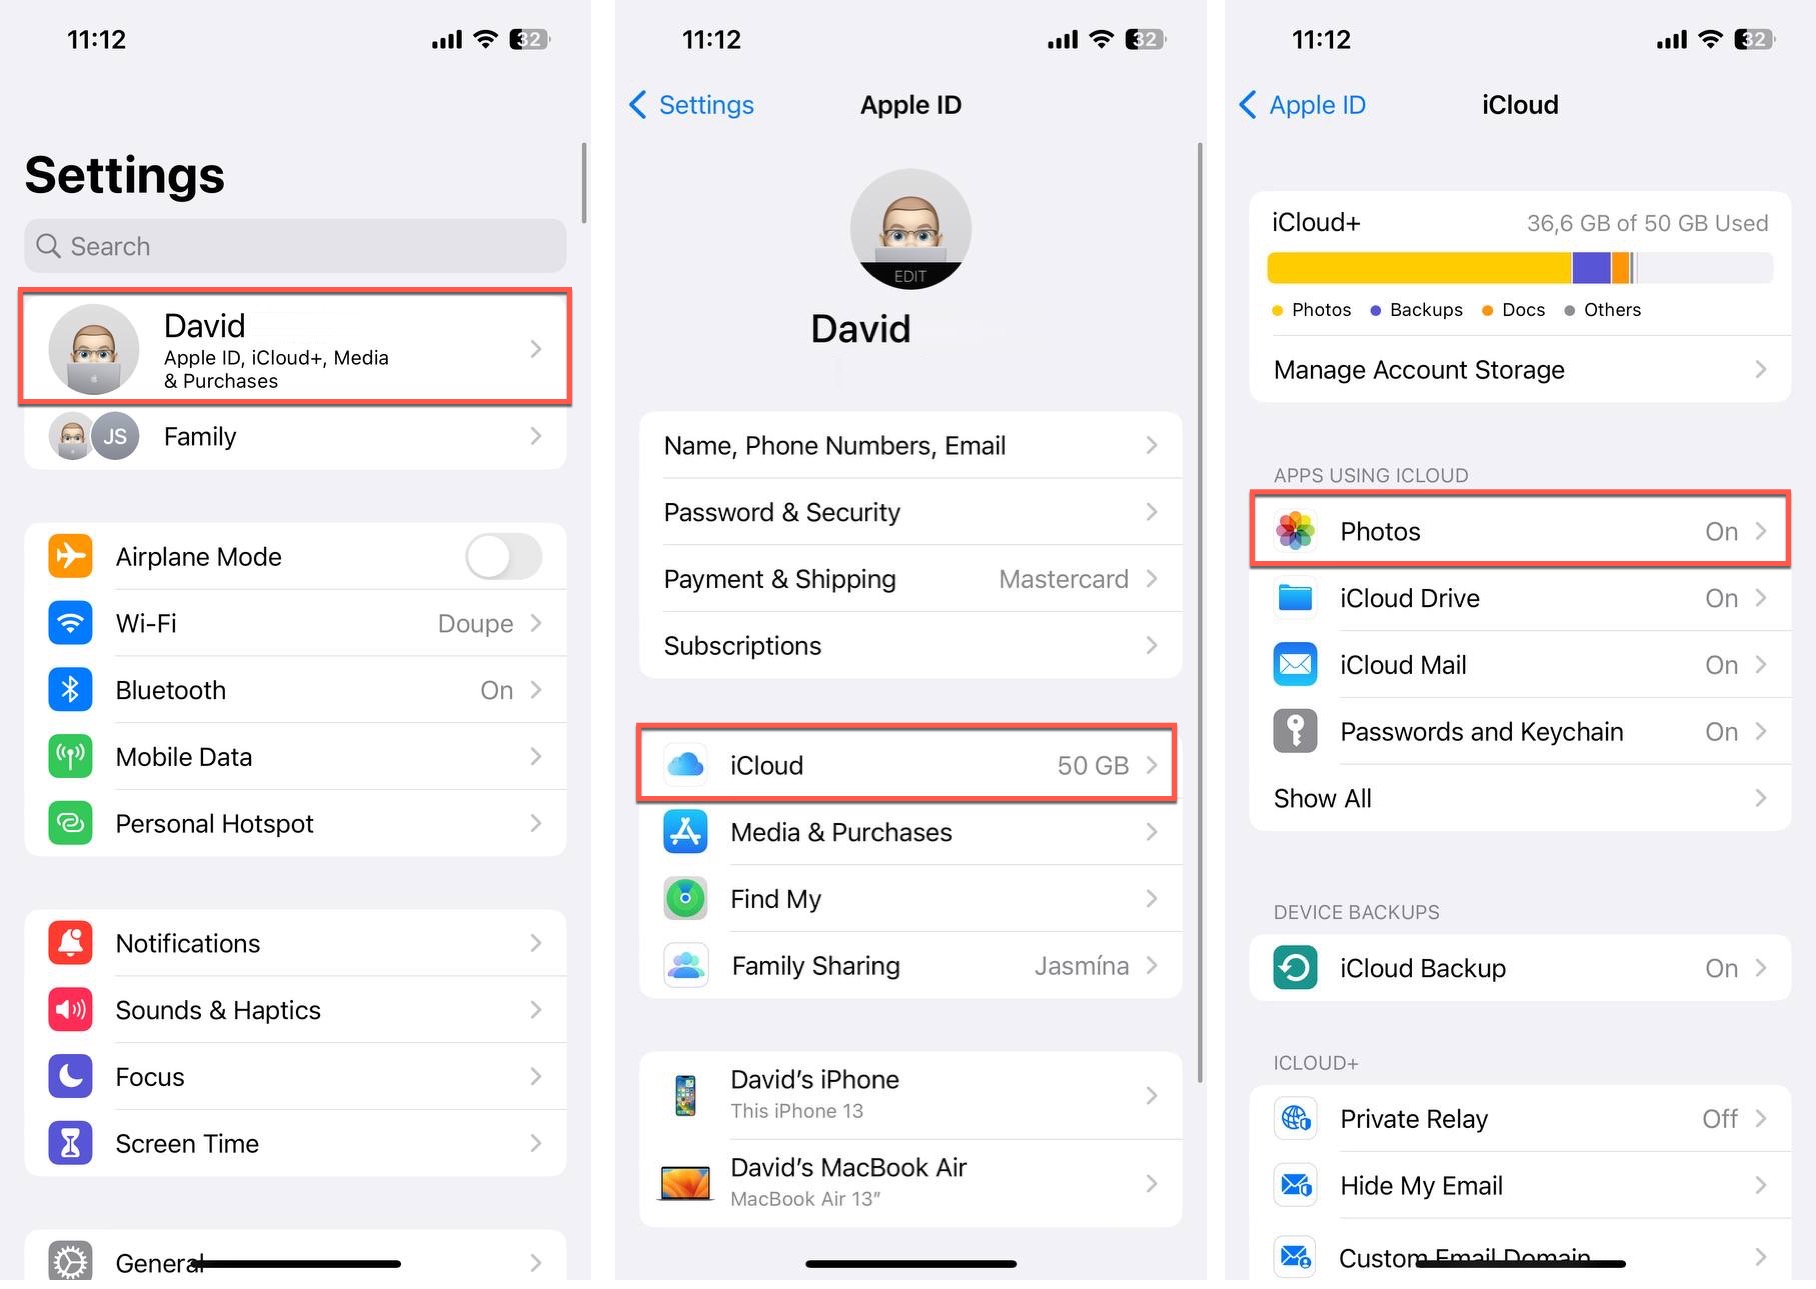
- Make sure the Sync this iPhone option is enabled.
- Activate the Optimize iPhone Storage feature.
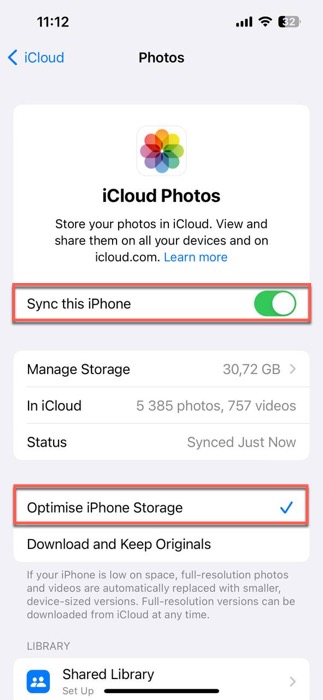
- Wait until your full-res photos and videos are uploaded to iCloud and removed from your device.
Method 2: Remove Cached Data
iCloud takes care of your photos and videos, but what about the other clutter clogging up your iPhone? Well, cached data is responsible for a sizable portion of that unwanted baggage.
Basically, cached data is a collection of temporary files (or just temp files for short) that apps store on your device to speed up their performance or decrease the amount of data they download from the internet. While useful, these files can accumulate over time and hog your valuable storage space even when they’re no longer needed.
In Browser
When it comes to cache-generating apps, there’s no bigger offender than your web browser. Safari (on which all other iOS web browsers are based) likes to store bits of websites you visit to make future visits faster. However, these files can pile up quickly, especially if you’re an avid internet surfer.
To clear out Safari’s cache, follow these steps:
- Launch the Settings app.
- Scroll down and select the Safari category.
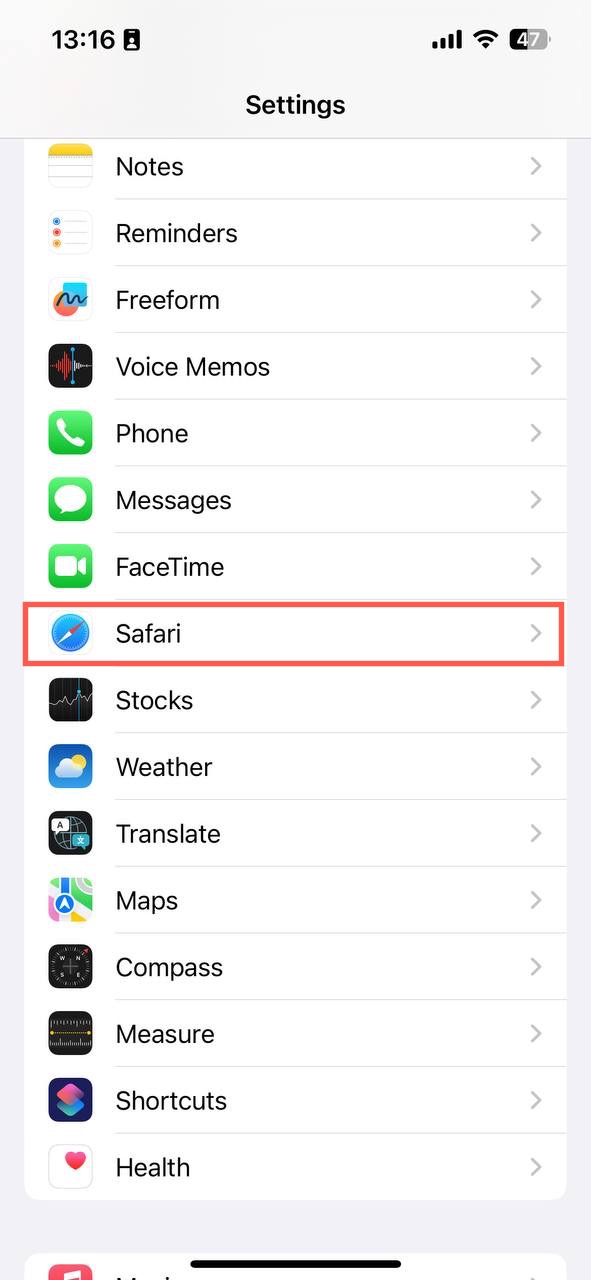
- Scroll down again and tap the Clear History and Website Data option.
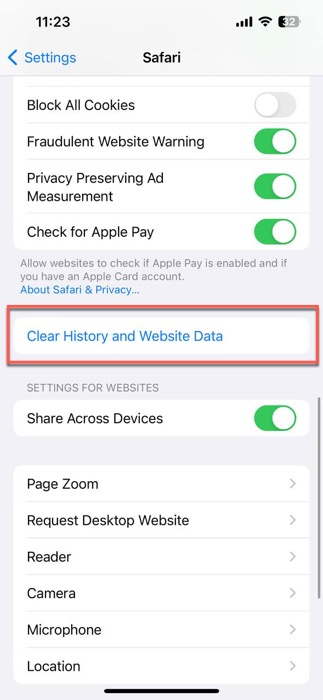
- Confirm your decision to clear history and data.
- Exit the Settings app and enjoy the freed-up storage space.
In Apps
When it comes to apps, some of the biggest culprits are social media platforms, instant messengers, and streaming services. Take Viber, for example, which is notorious for gobbling up storage with cached images, videos, and other media. Fortunately, you can clean app data with ease.
Here’s what you need to do to clean app-specific caches:
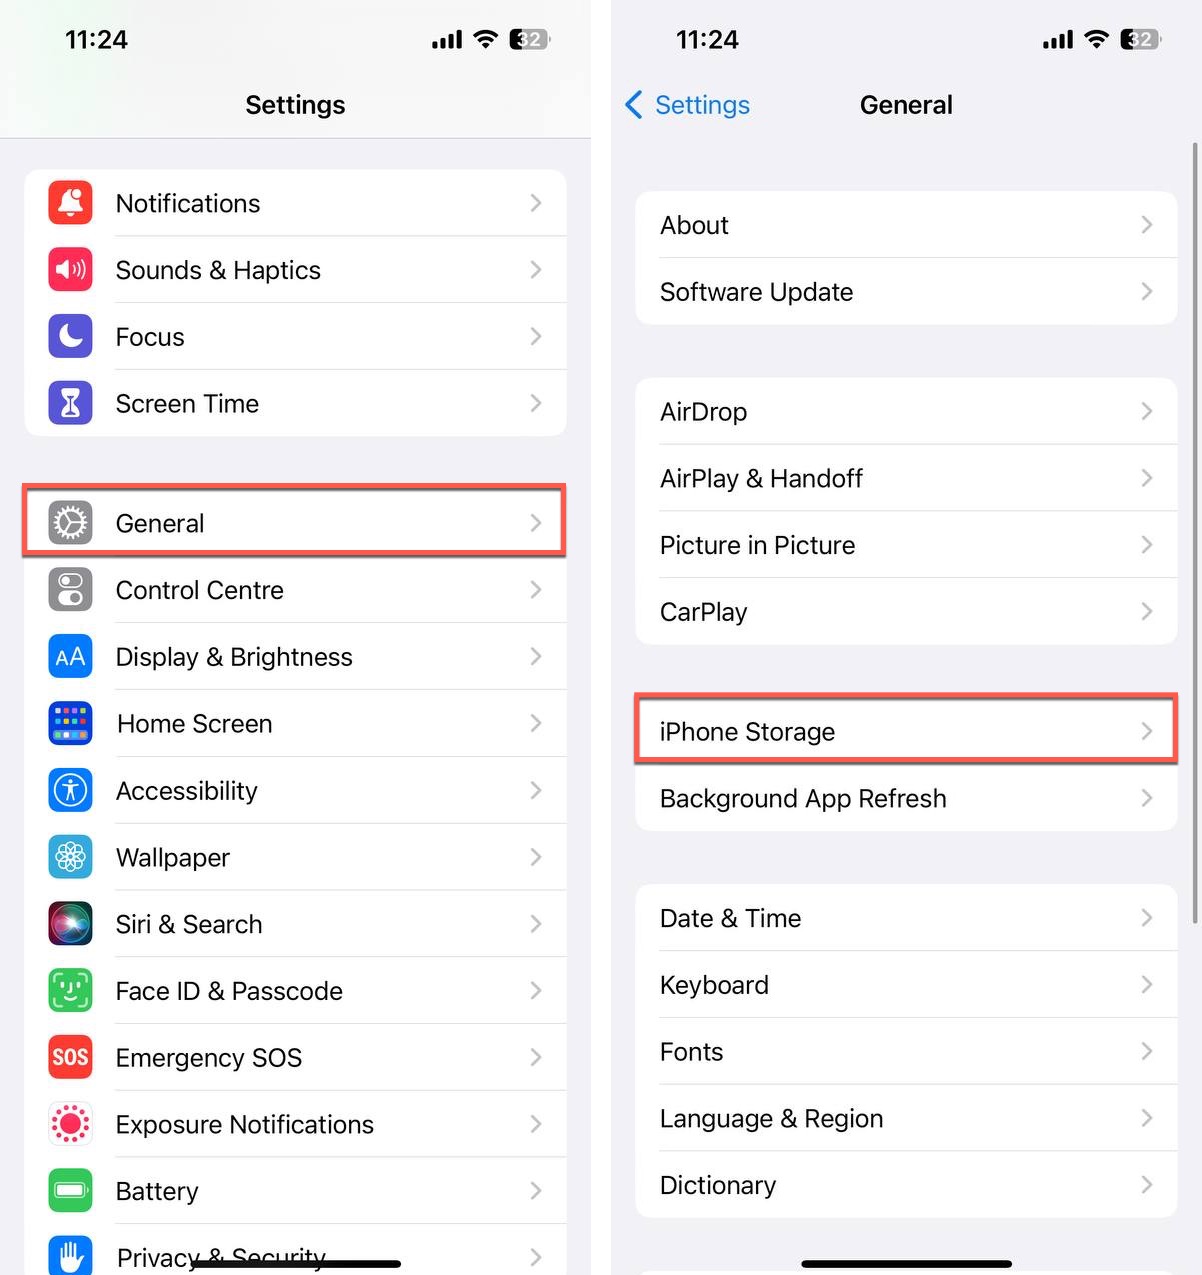
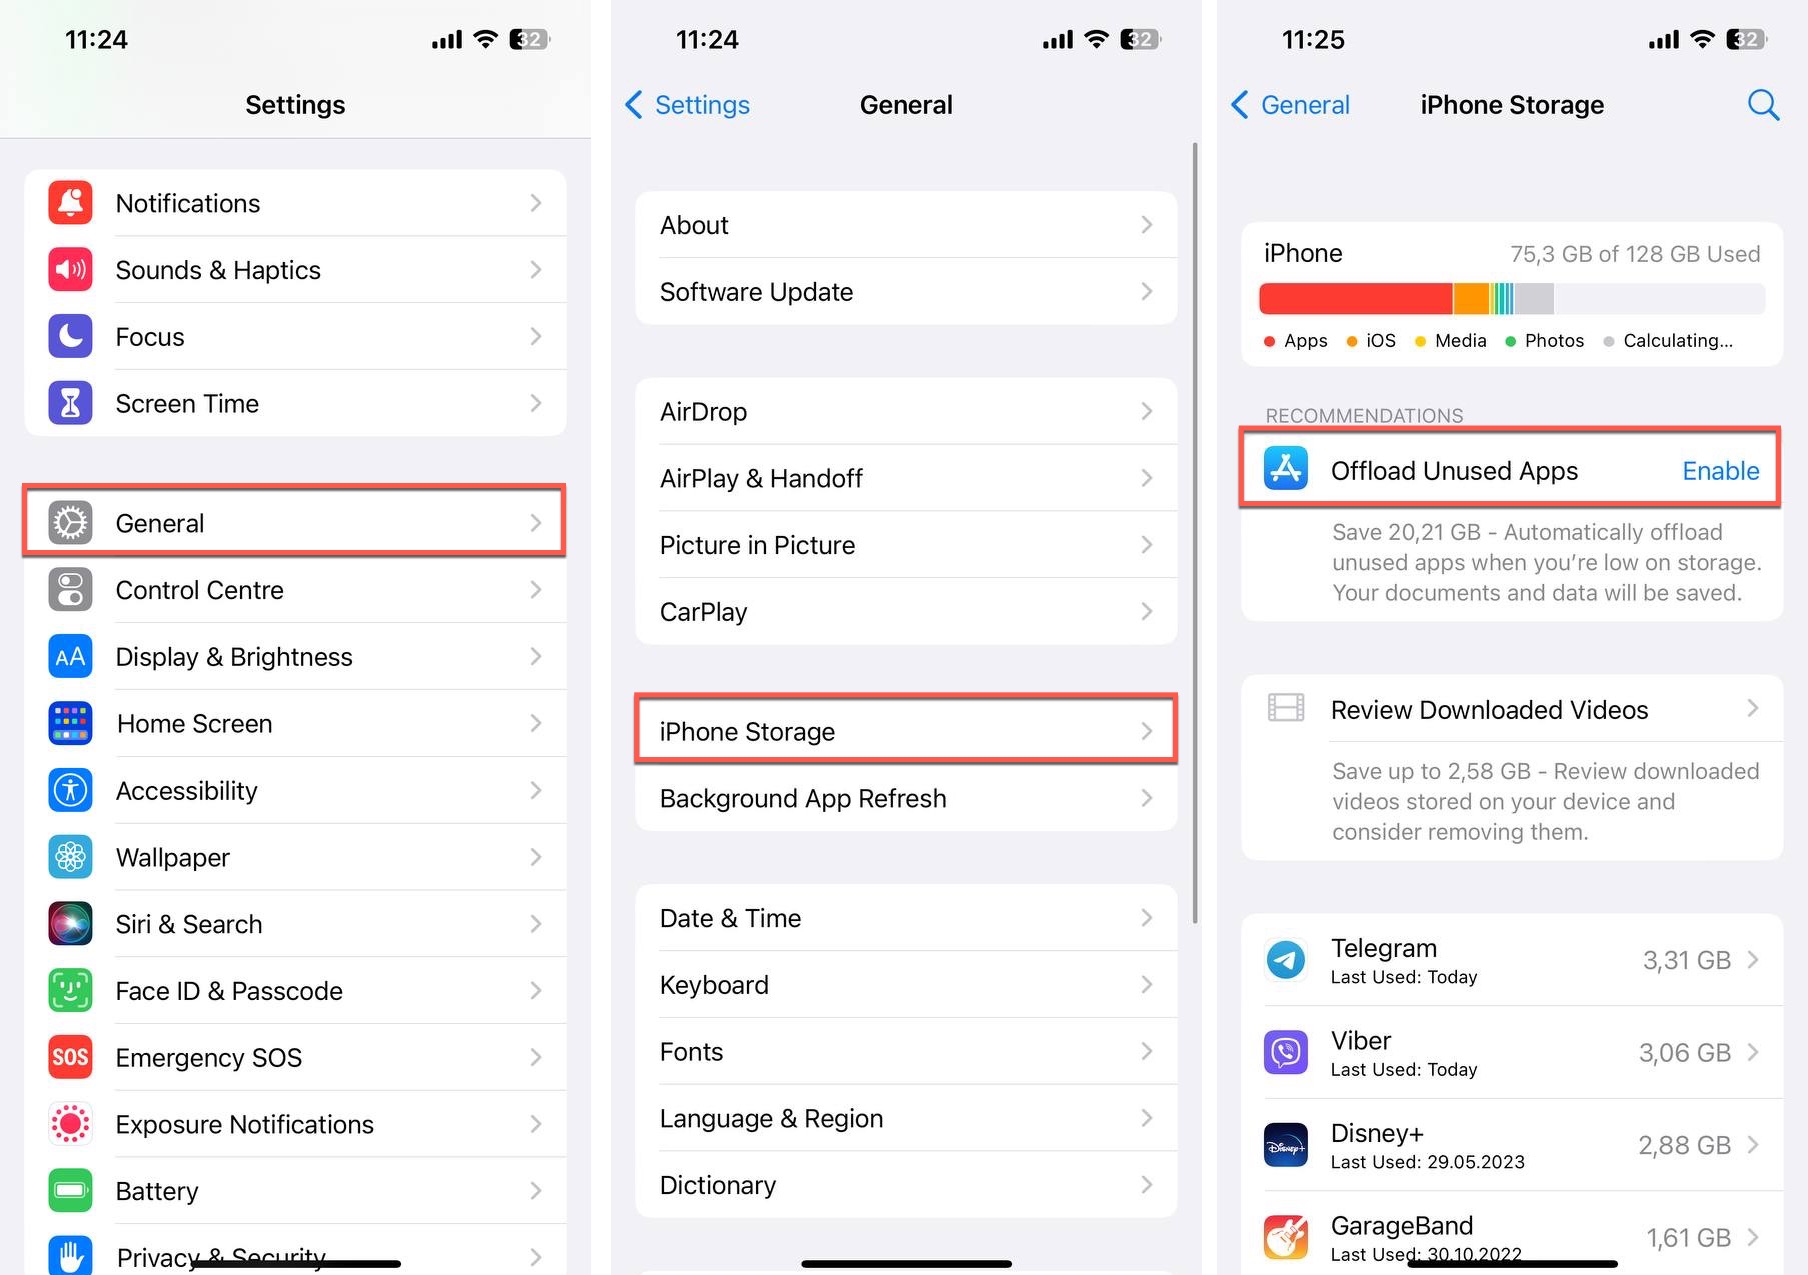
- Launch the Settings app.
- Navigate to General > iPhone Storage. The largest apps are conveniently listed first.
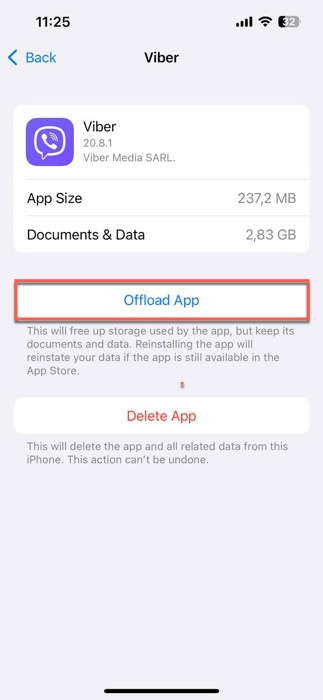
- Select the app whose cache you want to clean (Viber, in our case).
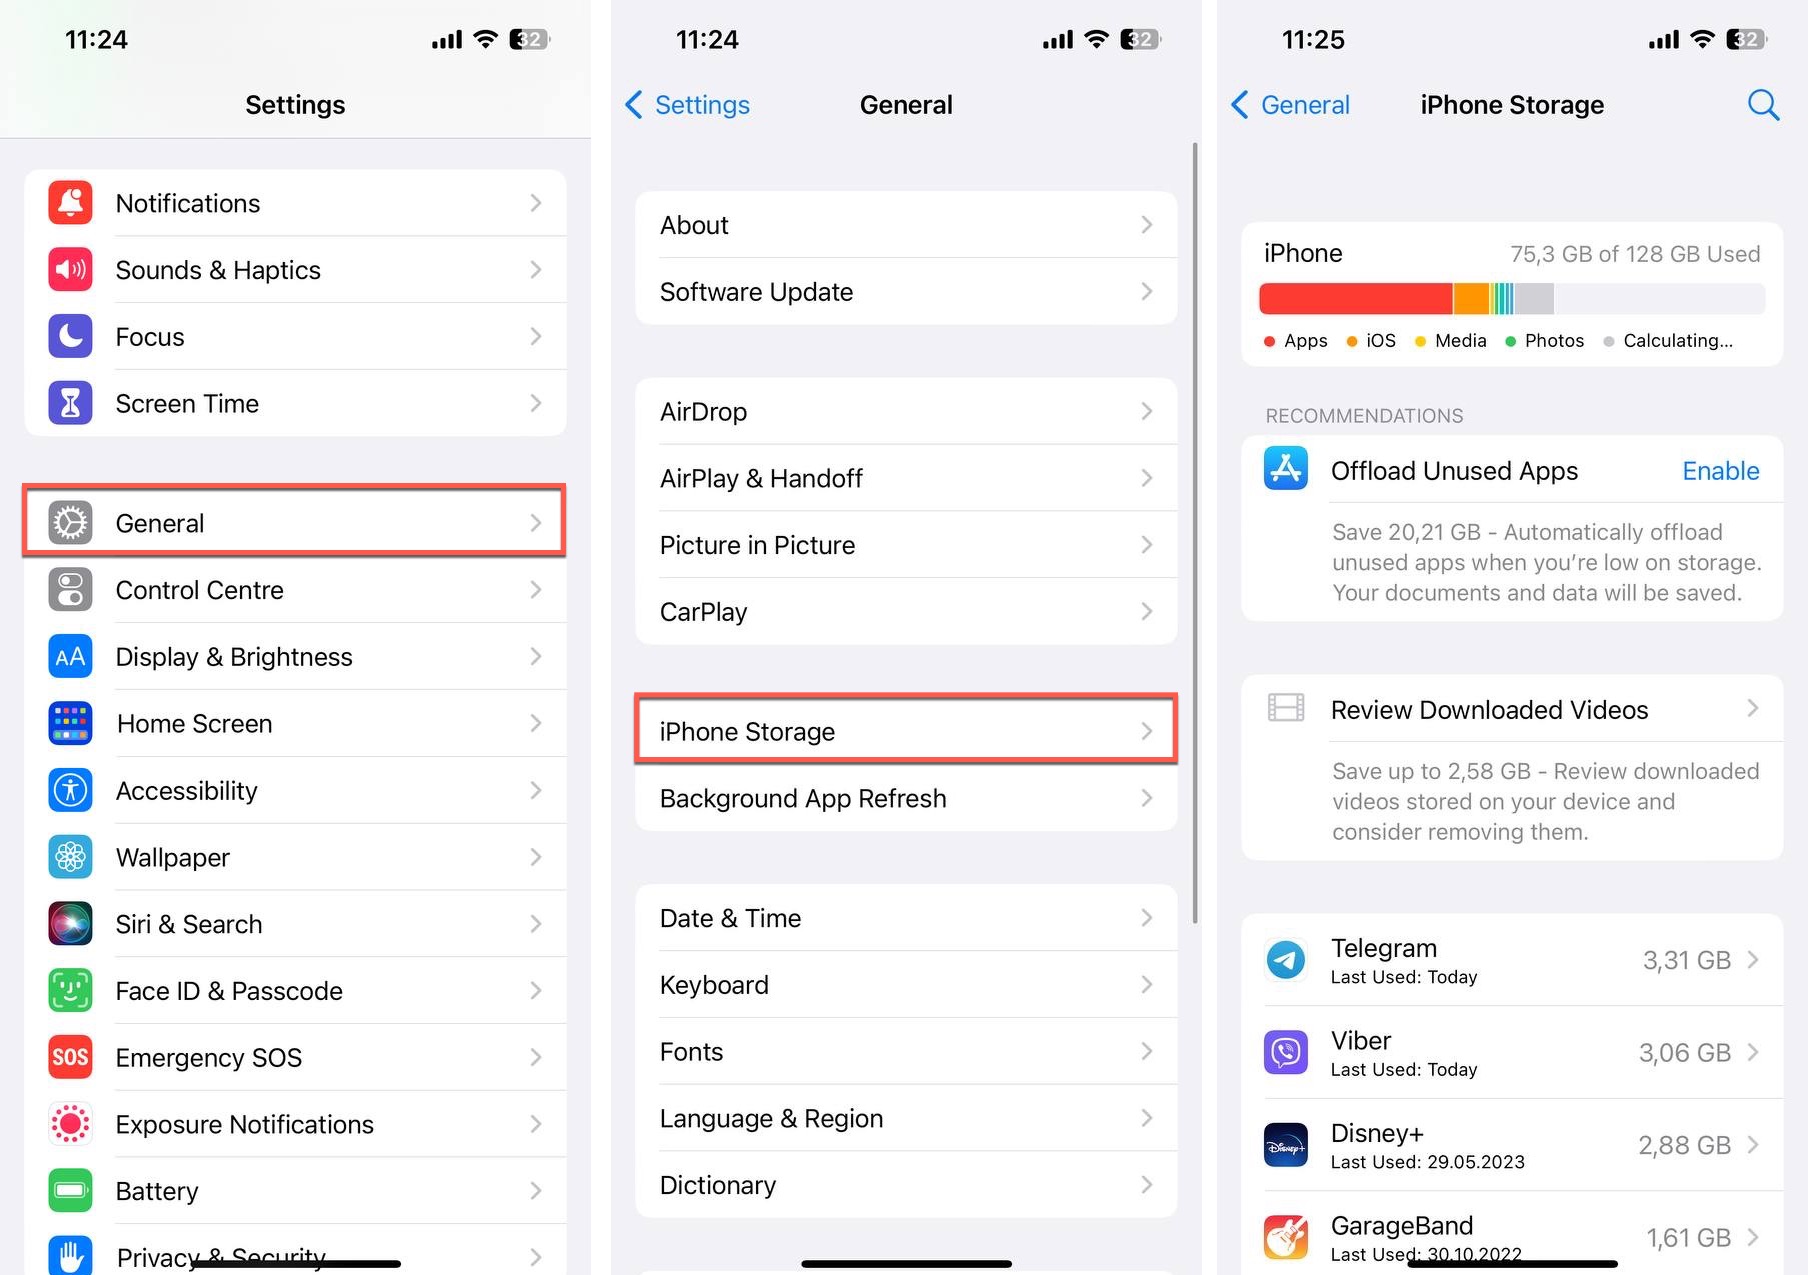
- Check how much of its total size is attributed to Documents & Data. If this number is large, it’s an indication that the app’s cache might be clogging up your storage.
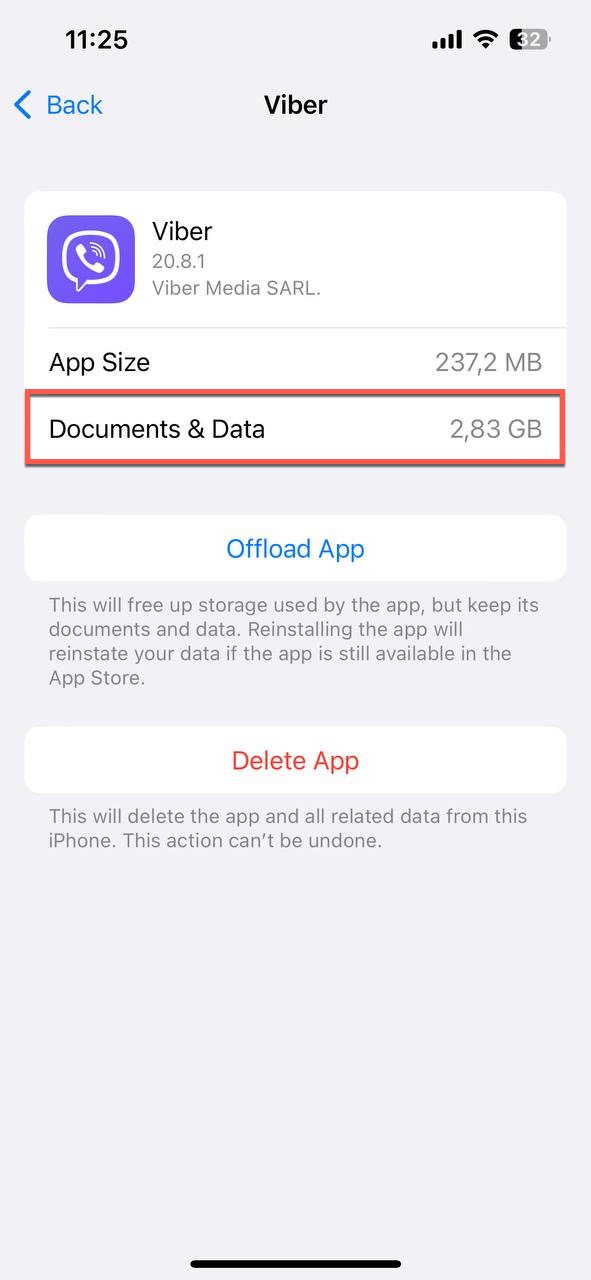
- Tap the Delete App button to delete the app with its cached data. Unfortunately, iOS doesn’t offer a straightforward Clear Cache button for third-party apps like Facebook. That’s why you have to delete the app and then reinstall it to achieve the same result.
- Go to the App Store and reinstall the app.
Method 3: Get Rid of Duplicates
Duplicate files, and especially duplicate photos, can steal valuable iPhone storage space without you even realizing it. These often go unnoticed because they’re usually created when you press the shutter button multiple times in a row, accidentally download the same file twice, hit Duplicate instead of Delete, and so on.
By identifying and removing these duplicates, you can make space on your iPhone for photos without deleting anything that’s actually important to you. Let’s explore two effective methods for duplicate file removal.
Using Duplicates Album
The Photos app that comes pre-installed on every iOS device is smart enough to detect duplicate photos and videos, allowing you to merge them one by one or all in one go so that only one copy remains on your device.
This is how to get rid of duplicates using the Duplicates album:
- Open the Photos app on your iPhone.
- Navigate to the Albums tab at the bottom.
- Scroll down until you see the Duplicates album and select it.
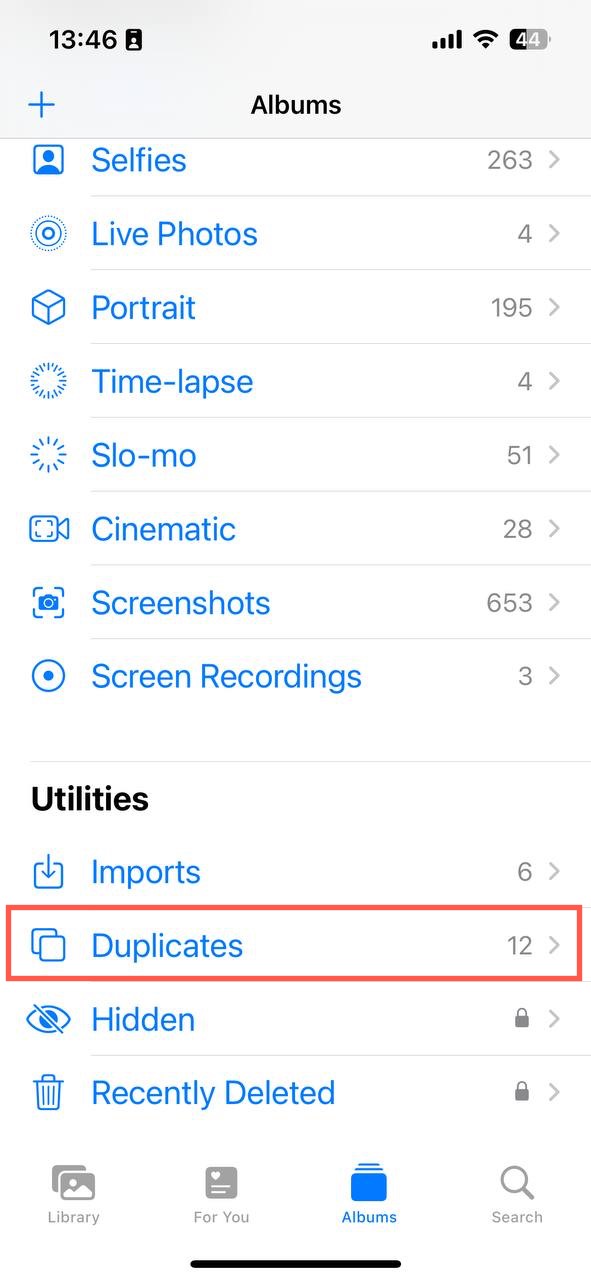
- Go through the list of duplicates.
- Tap the Merge button next to each pair of duplicates that you want to merge.

Alternatively, you can tap the Select button in the top-right corner, choose the Select All option, and then merge all found duplicates with a single tap on the Marge button.
Using Third-party Tool
As useful as the Duplicates album in the Photos app is, its capabilities are fairly limited. For those wanting a more comprehensive solution, third-party tools like Remo Duplicate Photos Remover offer a robust alternative.
Here’s how to increase iPhone storage without deleting anything important with the help of a third-party duplicate file finder tool:
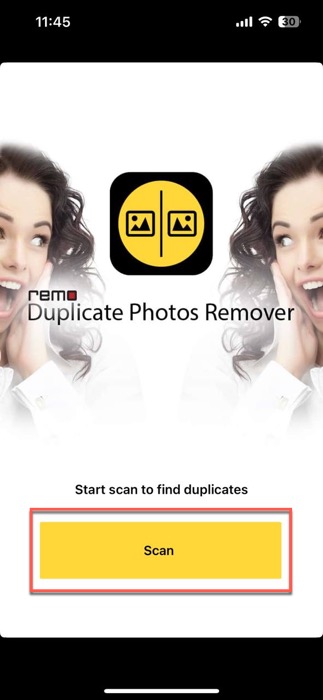
- Download and install Remo Duplicate Photos Remover from the App Store.
- Launch the app and give it the permissions it needs to scan your photo library.
- Tap the Scan button and wait until Remove Duplicate Photos Remover is done scanning your photos. This can take a while depending on how many photos there are on your devices, but you can minimize the app and come back to it later.
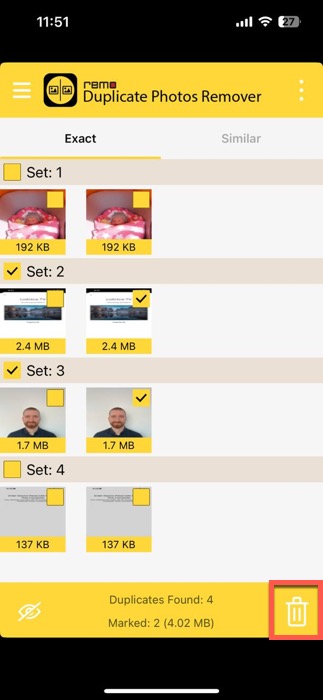
- Select the duplicates you want to delete. Remove Duplicate Photos Remover can detect both exact and partial duplicates.
- Tap the Trash icon to delete the selected duplicates and instantly declutter your device.
Method 4: Offload Unused Apps
You probably have a few apps on your iPhone that you downloaded a long time ago but haven’t touched in months. While some unused apps are easy to delete because you clearly have no use for them, other apps may carry some potential utility for the future.
Good news—you don’t have to make the hard decision to delete them. Instead, you can offload them, freeing up storage space without losing any of your data.
To manually offload a single app so that only its data remain on your device but the app itself is automatically downloaded from the App Store the next time you need it:
- Launch the Settings app.
- Navigate to General > iPhone Storage.
- Select the app you want to offload.
- Tap the Offload App button.
- Confirm your decision to offload the app.
Alternatively, you can tell your iPhone to offload apps automatically when it determines that you’re not using them enough:
- Launch the Settings app.
- Navigate to General > iPhone Storage.
- Tap Enable next to the Offload Unused Apps recommendation.
Method 5: Manage Your Conversations
Text messages don’t take much space at all, but text alone isn’t how most people these days communicate. No, we’re living in the era of multimedia messaging, where photos, videos, and even voice notes pepper our conversations. These attachments might make chats more engaging, but they also eat up a surprising amount of storage over time.
If you’re trying to get more storage on an iPhone without deleting anything important, then those old attachments you’ve received in the Messages app should be your next target.
Here’s what you need to do:
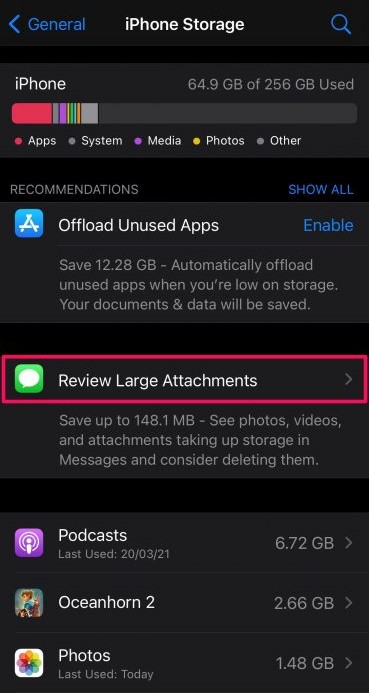
- Launch the Settings app.
- Navigate to General > iPhone Storage.
- Select the Review Large Attachments recommendation.
- Tap the Edit button and select the attachments you want to delete.
- Tap the Trash icon in the top-right corner to delete all selected attachments.
Tip: To quickly delete a single attachment, you can swipe left over it and then tap the Delete option.
Method 6: Utilize Your iCloud Storage
If you’ve tried all the methods we’ve talked about to free up storage on your iPhone without deleting photos or other precious data but you still find yourself running low on space, then you should look to the clouds.
What we actually mean is that you should utilize your iCloud storage space to its full extent. As you may know, many apps, such as Photos, Mail, and Notes, can store their data in iCloud. What surprisingly many iPhone users don’t know, however, is that it’s possible to store any files in iCloud directly.
To move a file from your local iPhone storage to iCloud, you need to:
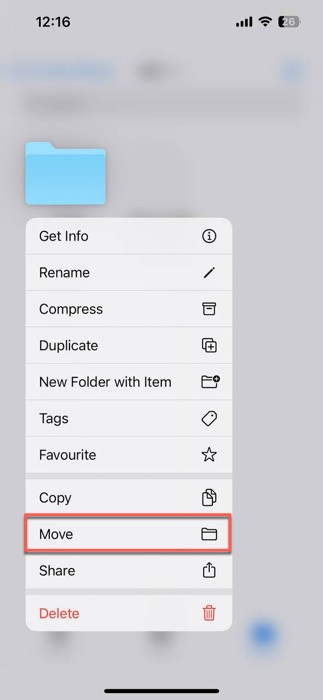
- Launch the Files app.
- Navigate to the Browse tab and locate the file you want to move.
- Long-press the file and select the Move option.
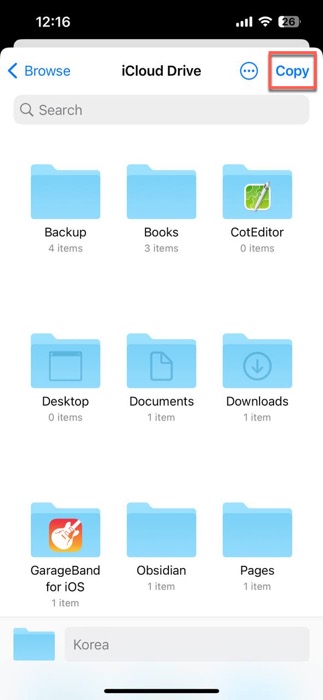
- Keep tapping the navigation button in the top-left corner until you see the main Browse screen, with all main storage locations nearly listed in one place.
- Tap iCloud Drive and select a suitable location for the file you’re moving.
- Tap the Copy button in the top-right corner to move the file.
Because the file now resides on Apple’s servers, you can conveniently retrieve it later from any device, such as your iPad or MacBook.
FAQ
How to free up iPhone storage without deleting apps or photos?
You can free up iPhone storage without deleting apps or photos by enabling the Optimize iPhone Storage feature in iCloud settings, offloading unused apps to retain their data while removing the app itself, or regularly clearing cached data from your browser and review large attachments in your Messages app to make space, just to give a few examples.
How do I free up space on my iCloud without deleting photos?
To free up iCloud storage space without deleting any photos, you can check for duplicates, move some files to other cloud services, such as Google Drive or Dropbox, or you can upgrade your iCloud plan so that you have more space to work with.
Where can I store my photos to free up space on my iPhone?
You can store your photos in various cloud storage services like iCloud, Google Photos, Microsoft OneDrive, or Dropbox to free up space on your iPhone. If you prefer local storage, transferring photos to your computer or an external hard drive is also a good option.
Conclusion
As we’ve demonstrated in this article, there are many ways to free up space on an iPhone without deleting anything important. For the best results, we recommend you combine multiple methods since each of them can take you one or more steps in the right direction.
This article was written by David Morelo, a Staff Writer at Handy Recovery Advisor.
Curious about our content creation process? Take a look at our Editor Guidelines.