Your iPad’s storage is classified into various categories that provide details on the type of data being stored. For instance, you typically have storage from Apps, iPadOS, and Photos when you display your iPad’s storage. You will also see a category labeled “Other” or “System” on newer versions of iPadOS.
You can wind up with a lot of data in this category which may result in a storage shortage on the device. We will look at several methods to clear “Other” storage on your iPad and return valuable space for new apps, documents, videos, and anything else you need to store.
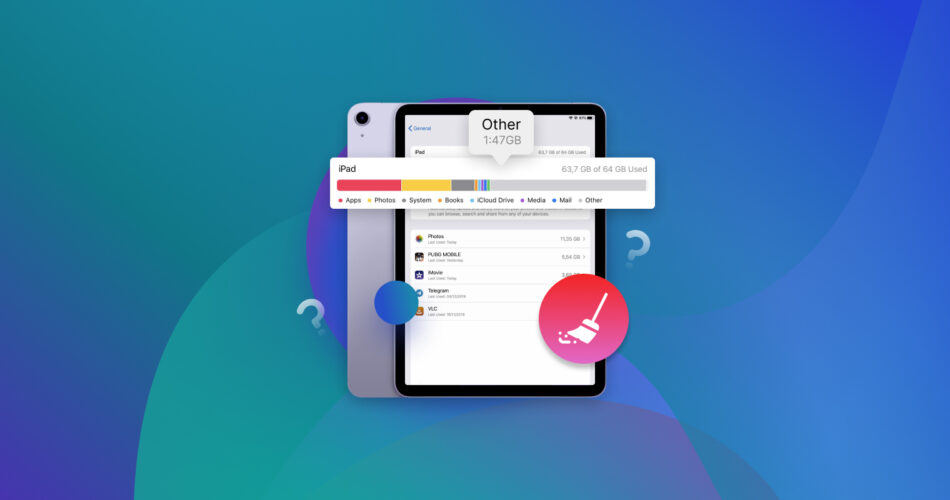
What Is “Other” Storage on iPad?
Your iPad storage is divided into multiple categories useful when investigating usage and understanding what apps or functions are taking up space on your device. Easily identifiable categories include Apps, Photos, Mail, and Apple Books. You can be certain about what is taking up space in those categories.
There is also a category designated as “Other” on older versions of iPadOS and “System” for versions 15 and above. The storage in this category consists of space taken by your operating system and will differ based on your device model. This space is also used for multiple other functions by the operating system.
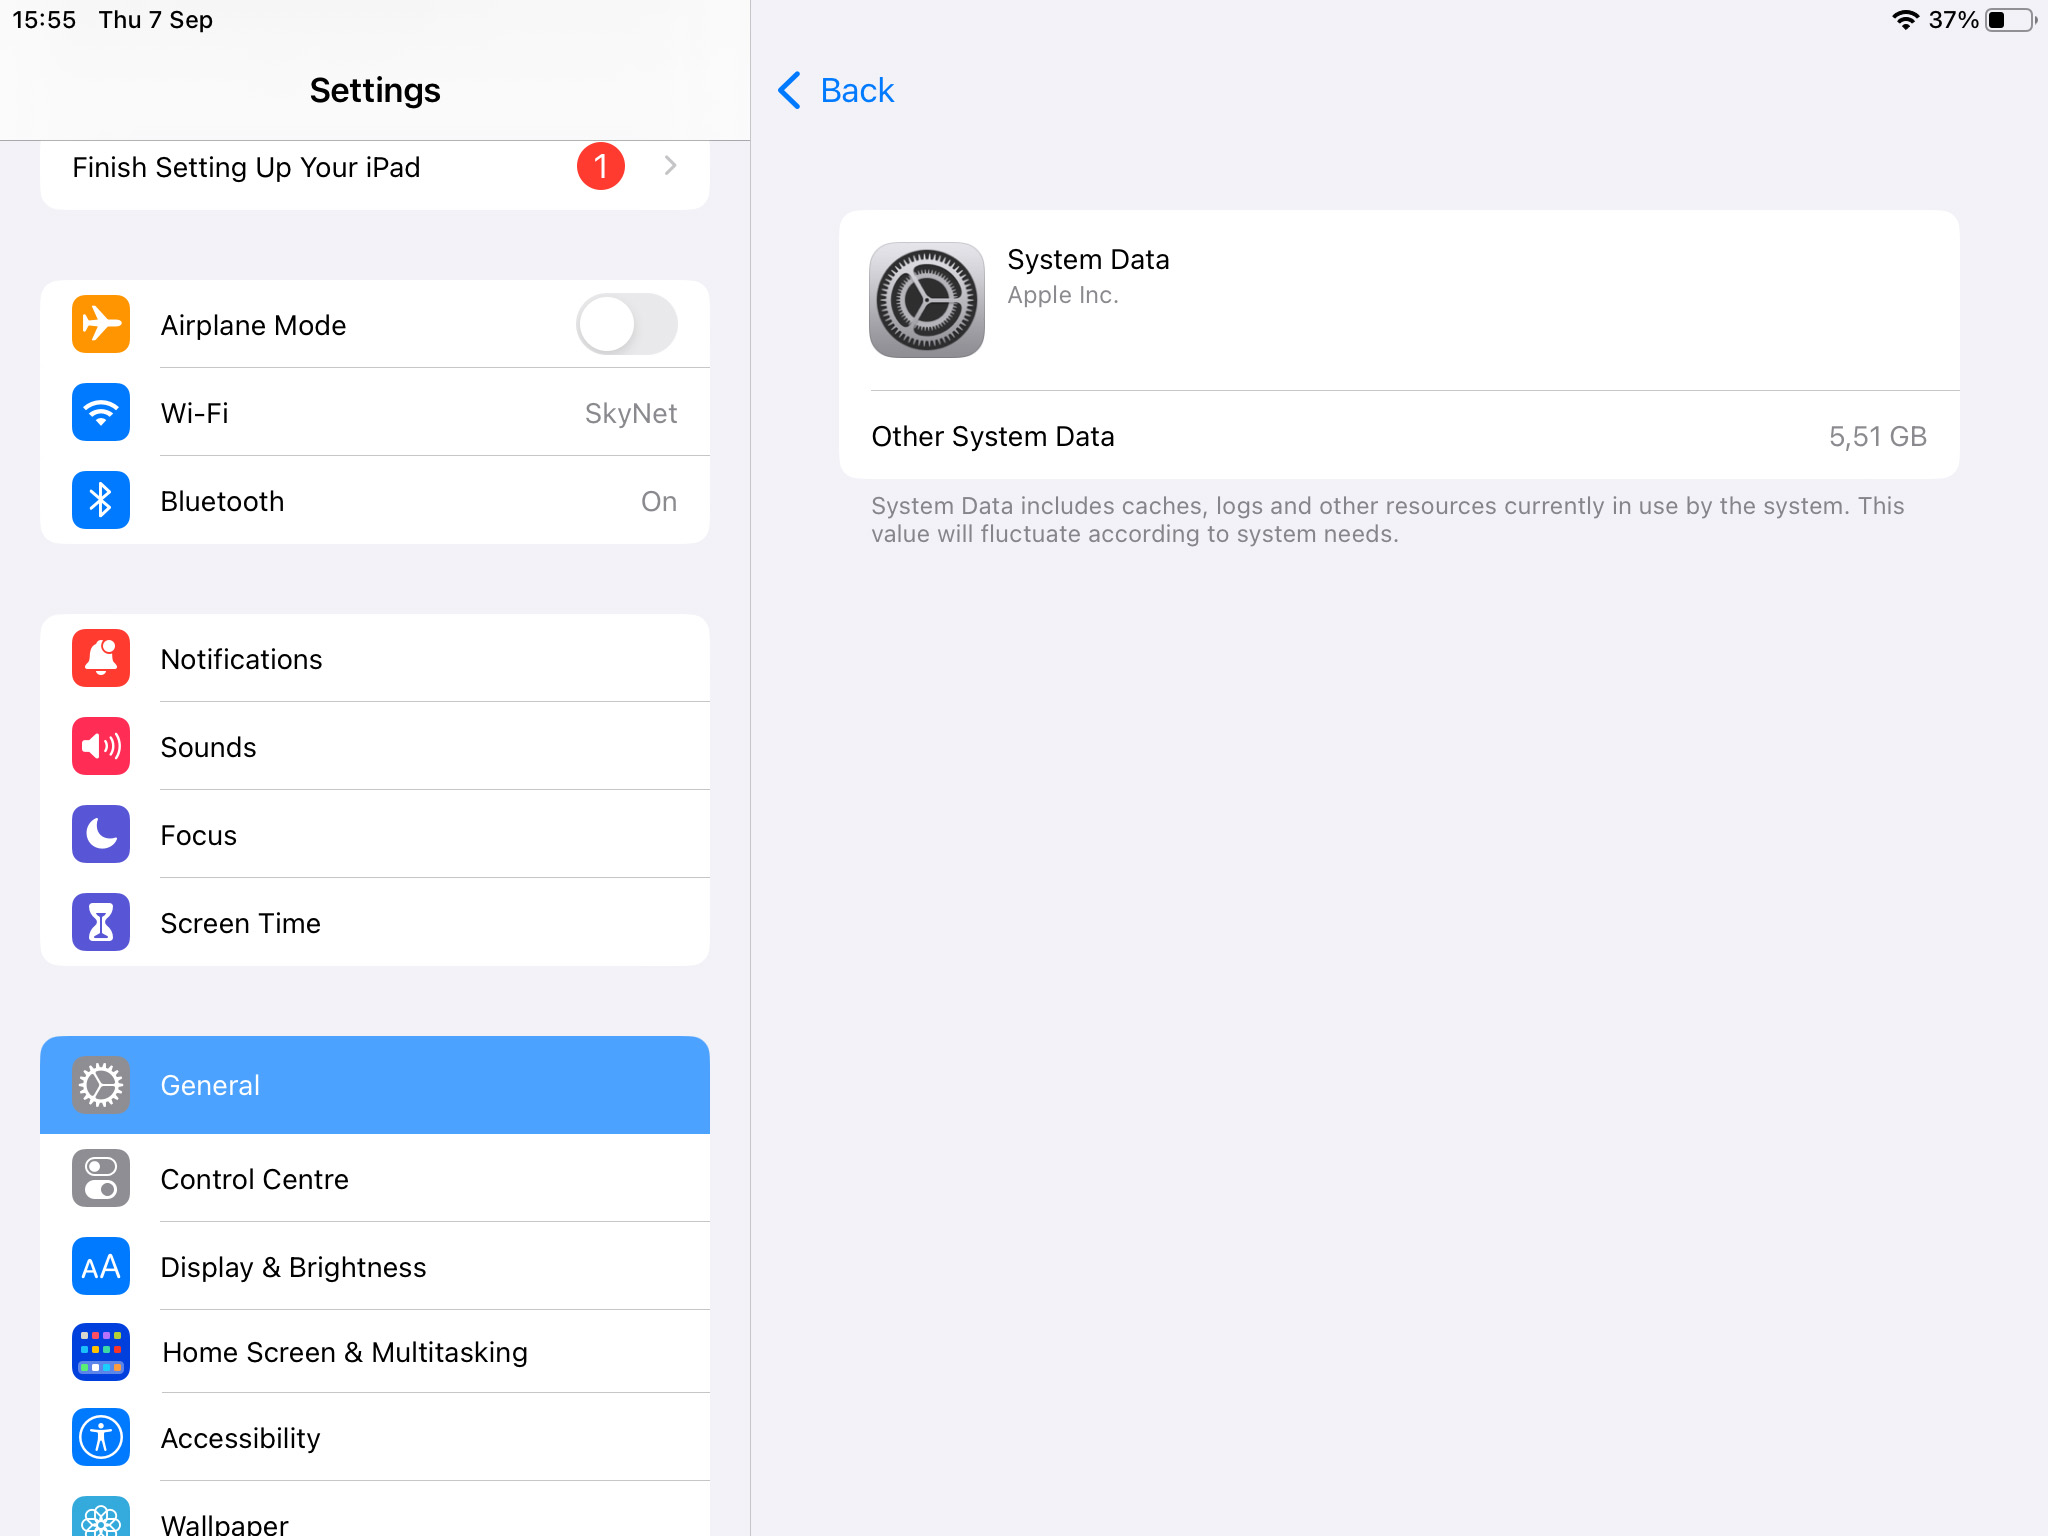
Items stored under the “Other” or “System” categories may include things like Siri voices, the Spotlight index, non-removable logs, and cache files. It may also contain system files like the Keychain and CloudKit Database. The cached files are not deleted by the system to clear storage space.
How to Delete “Other” Storage on iPad
Reducing “Other” storage on iPad can be just what you need if you are running out of space on your device. Let’s look at some techniques you can use to clear “Other” data on an iPad. These methods will work for devices running iPadOS 13/14/15/16 like your iPad Pro, Air, and Mini.
Step 1: Browse Through Frequently Used Apps
The first thing you can do to clear “Other” data on your iPad storage is to browse through your apps and see which ones are using the most space. Use the following steps to view the storage on your iPad.
- Open Settings.
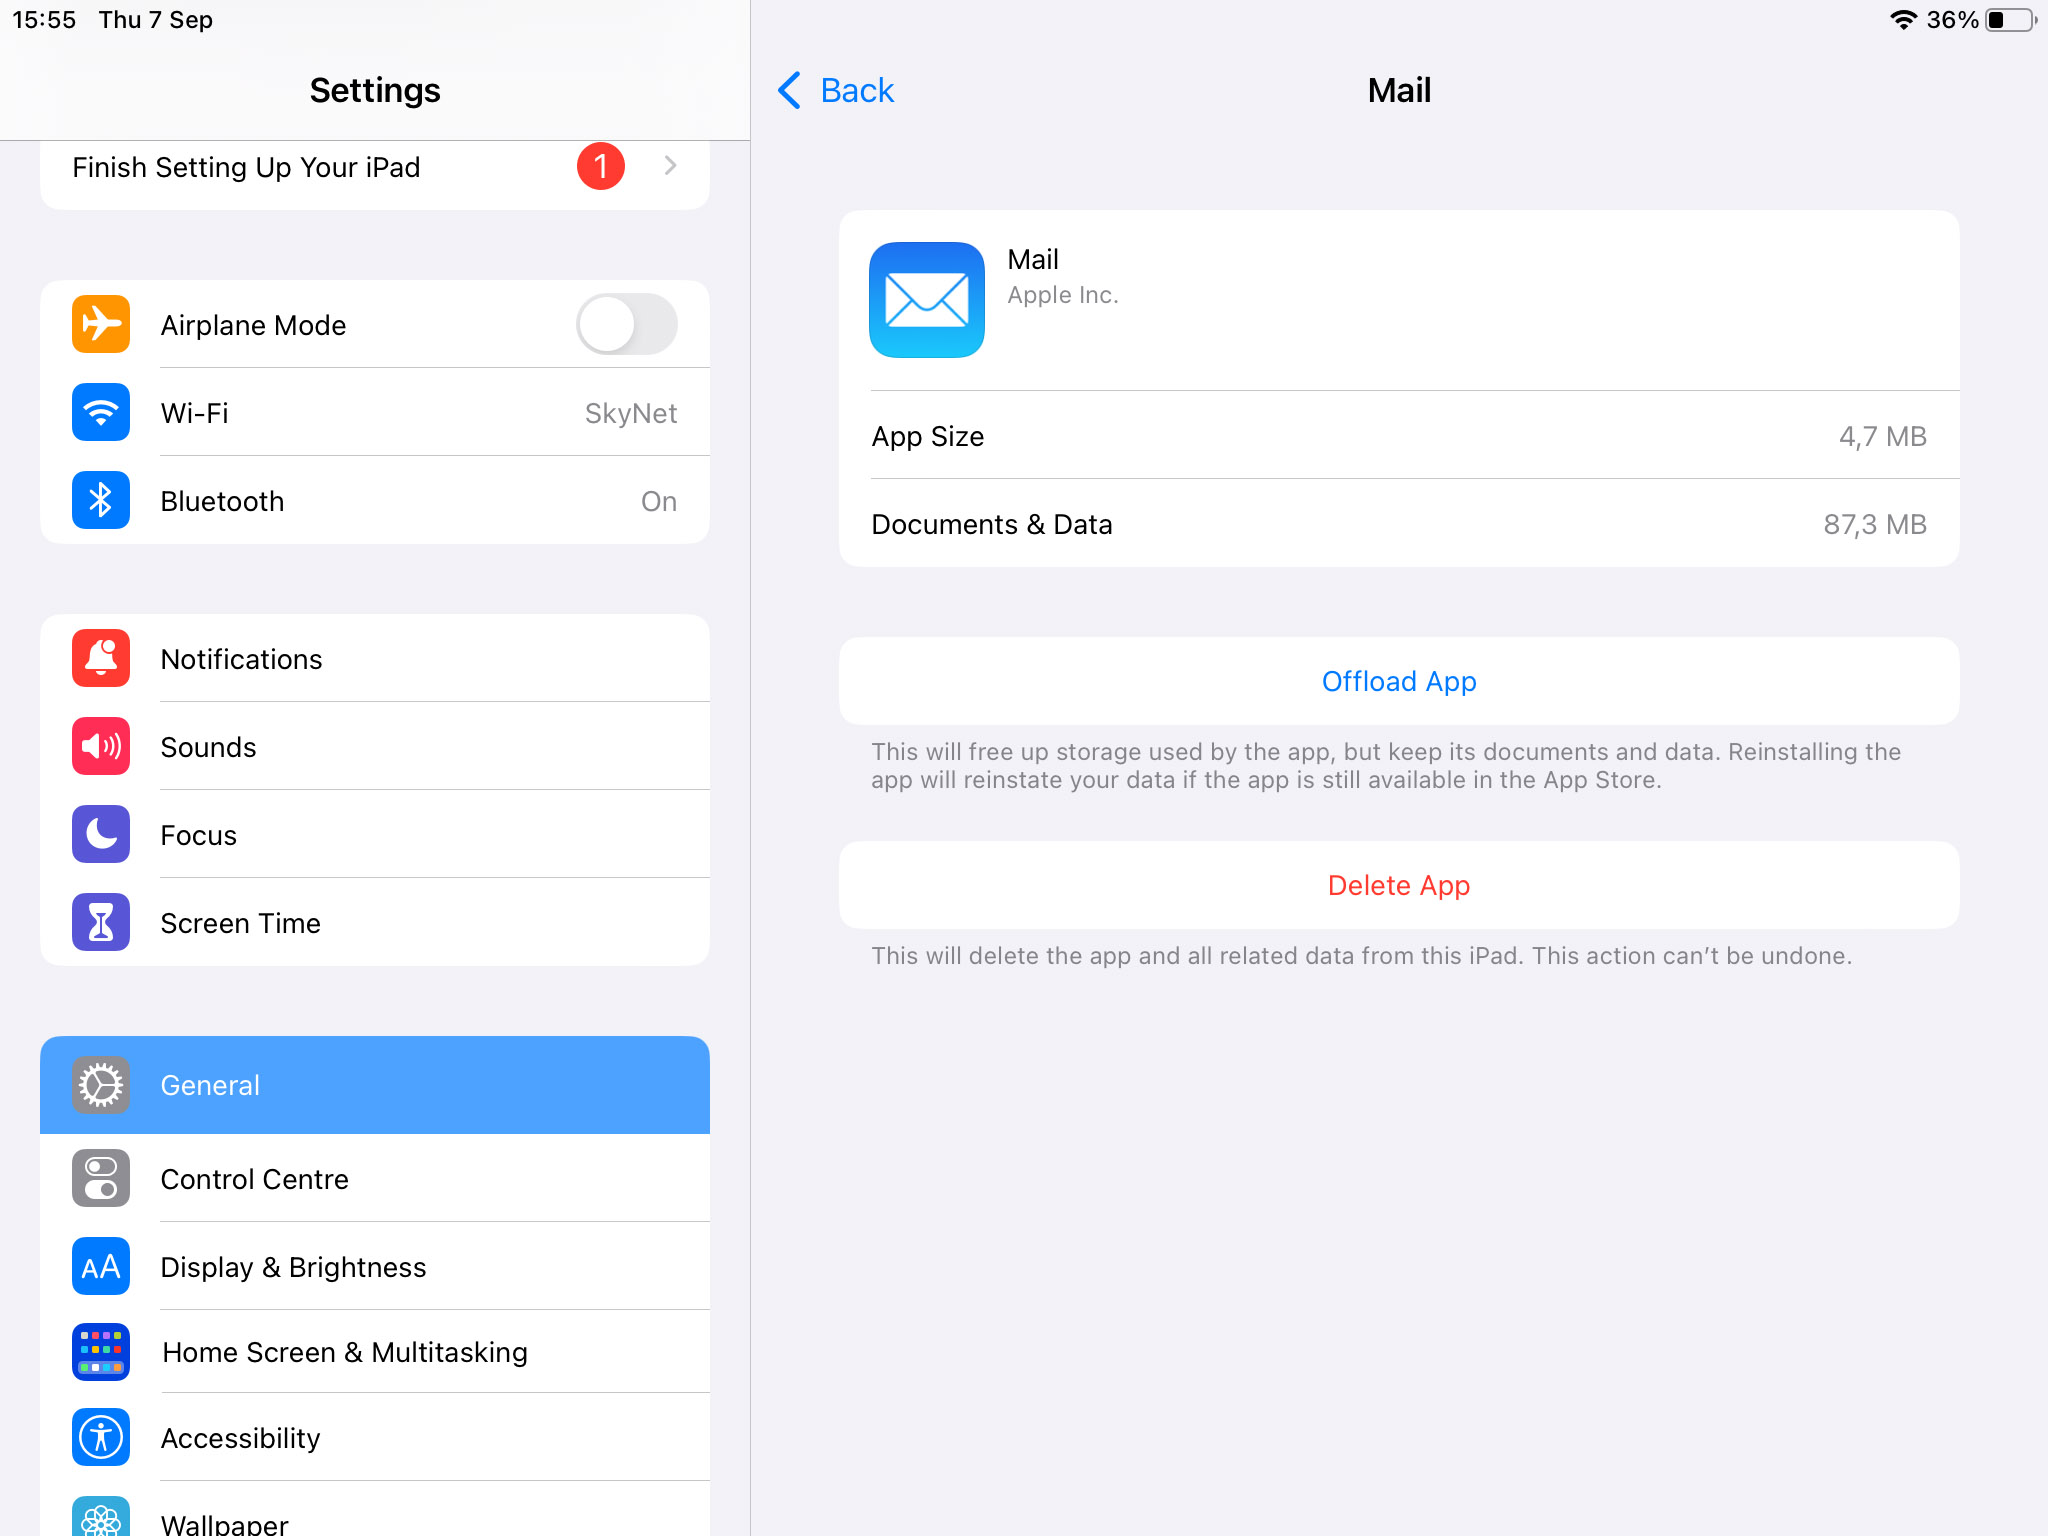
- Tap on General and then tap iPad Storage.
- Tap on an app to view the space it takes up on your iPad. This space is divided into App Size and Documents & Data.
Very often, the apps taking up the most storage are storing cached data including music and podcasts that cannot easily be removed using operating system functionality. Streaming services like Apple Music and Netflix create cache files as do social media apps like Instagram and Facebook. These cache files can become very large over time.
Identifying the apps that are taking up the majority of storage space sets you up for the next step, which is to delete any cached data and temp files from your apps. Target the apps using the most storage space first to obtain the best results when attempting to clear cached data.
Step 2: Delete Cached Data from Your Apps
You can start to address the problem of cached data once you have identified the apps that you suspect are contributing to the excessive “Other” storage on your iPad. Depending on the app, you may have two methods available to free up “Other” space on your iPad by deleting cache files from an application. We will show you how to use both techniques.
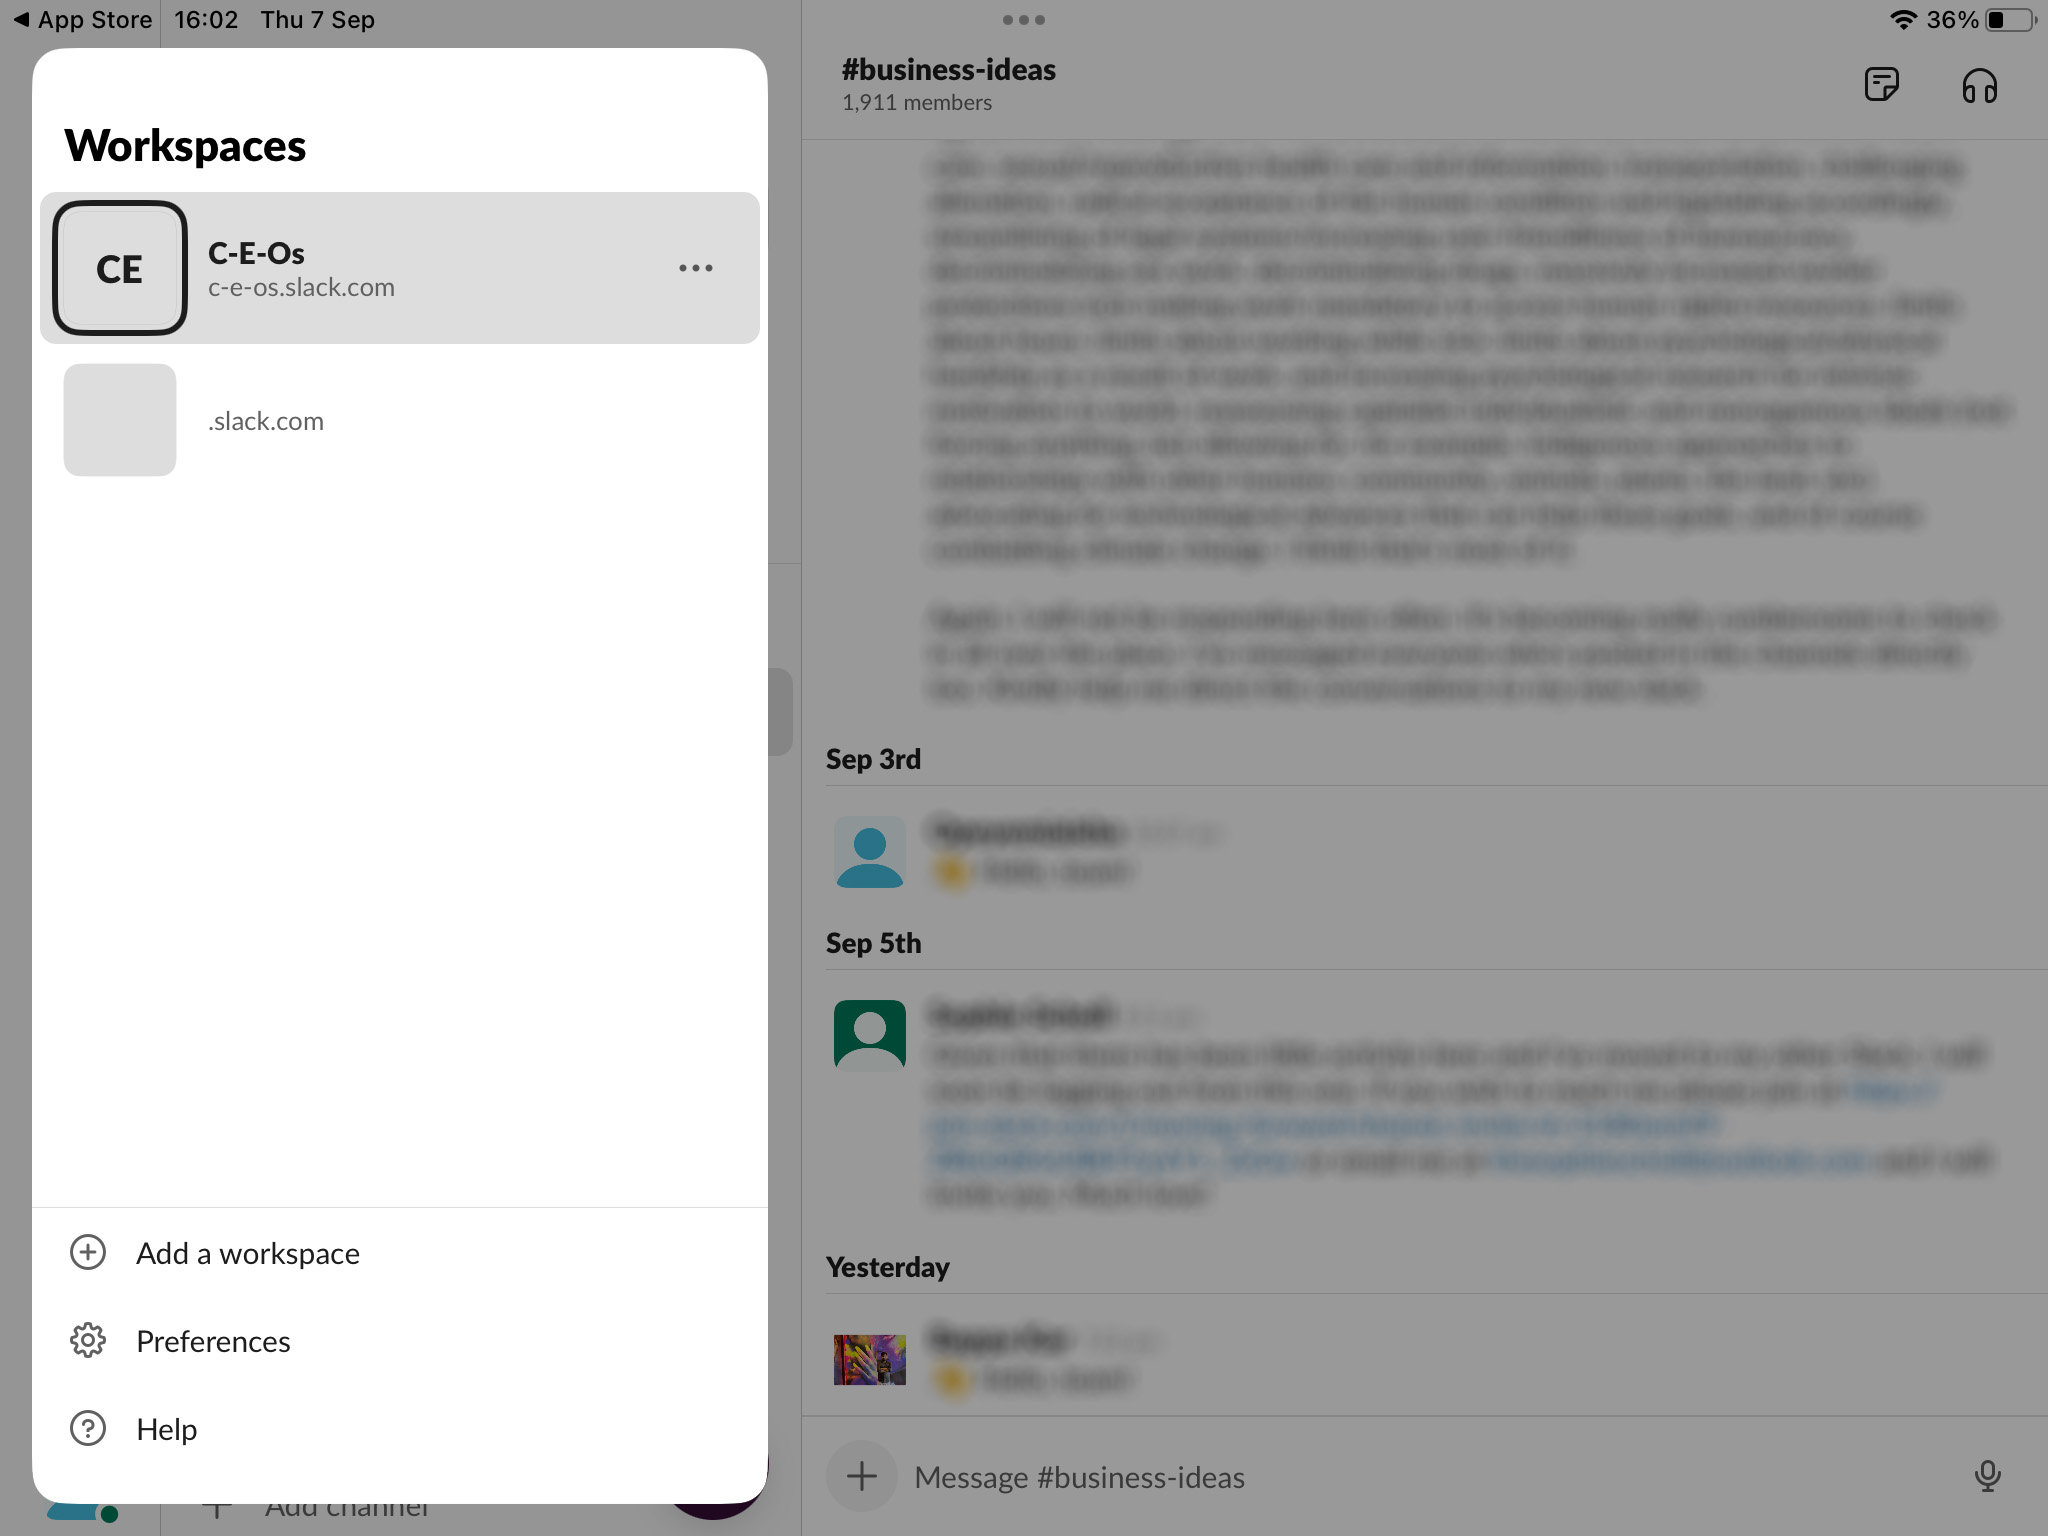
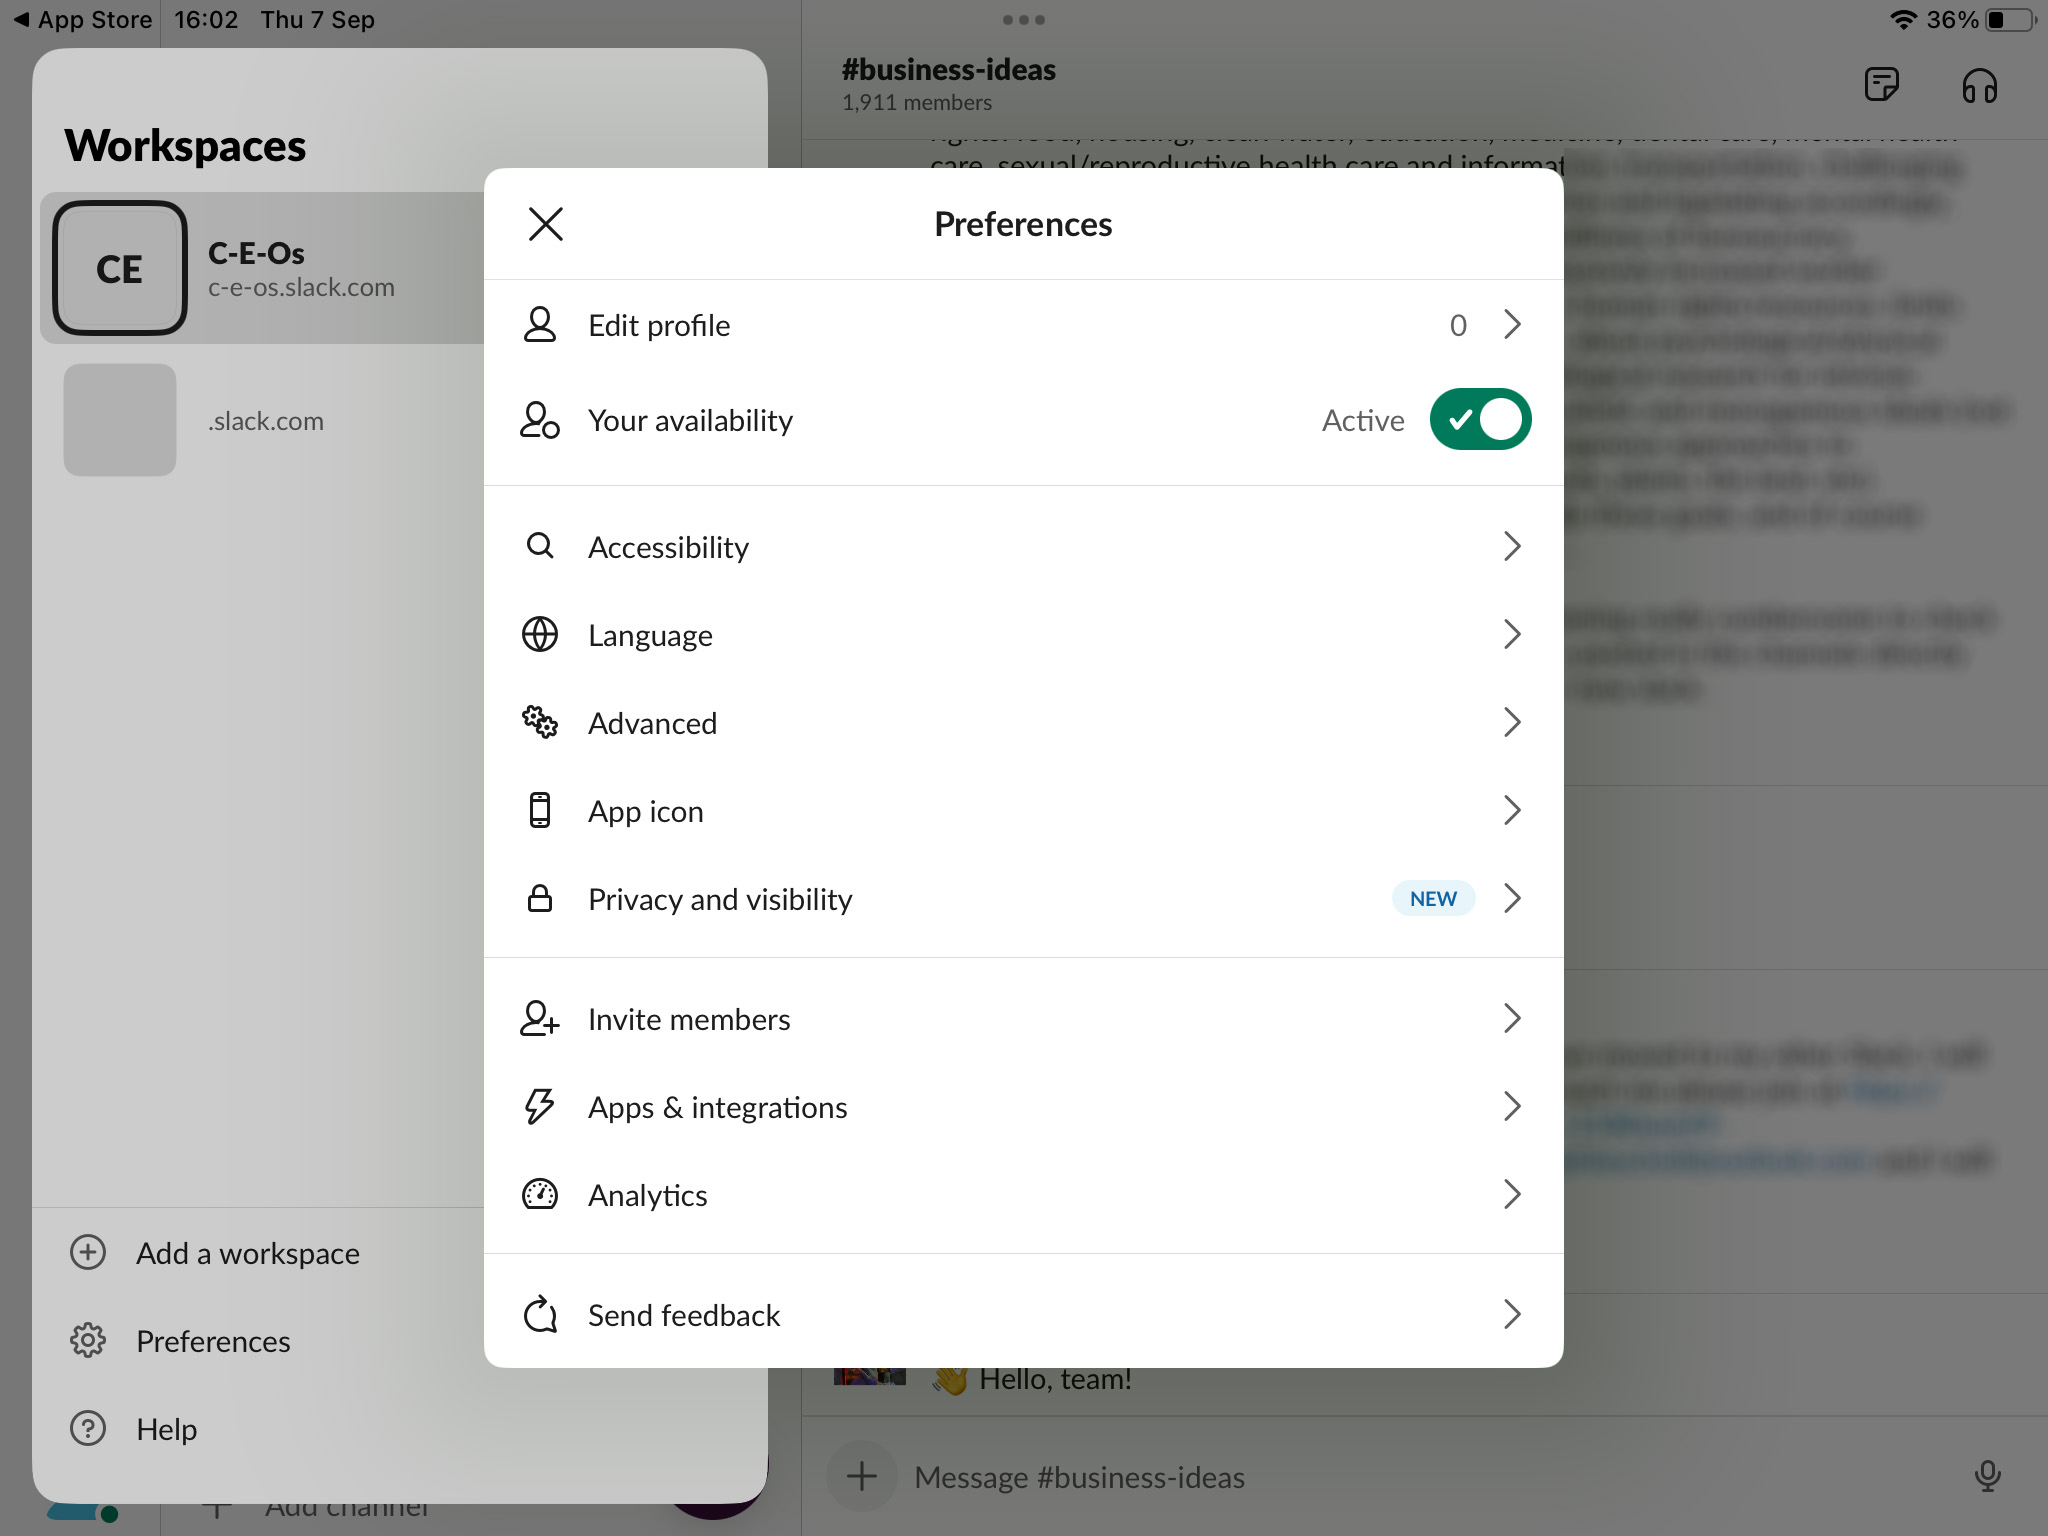
The first technique is performed from within the app. Many, but not all, apps that create cache files provide a way for the user to clear or reset the cache to free up space. We will use the popular collaborative software app Slack as our example of how to use this method to clear “Other” from your iPad storage. The following steps will differ slightly depending on which app’s cache you are trying to clear.
- Open the Slack app by tapping on it.
- Tap the Workspaces icon in the upper left of the screen.
- Tap Preferences in the lower left.
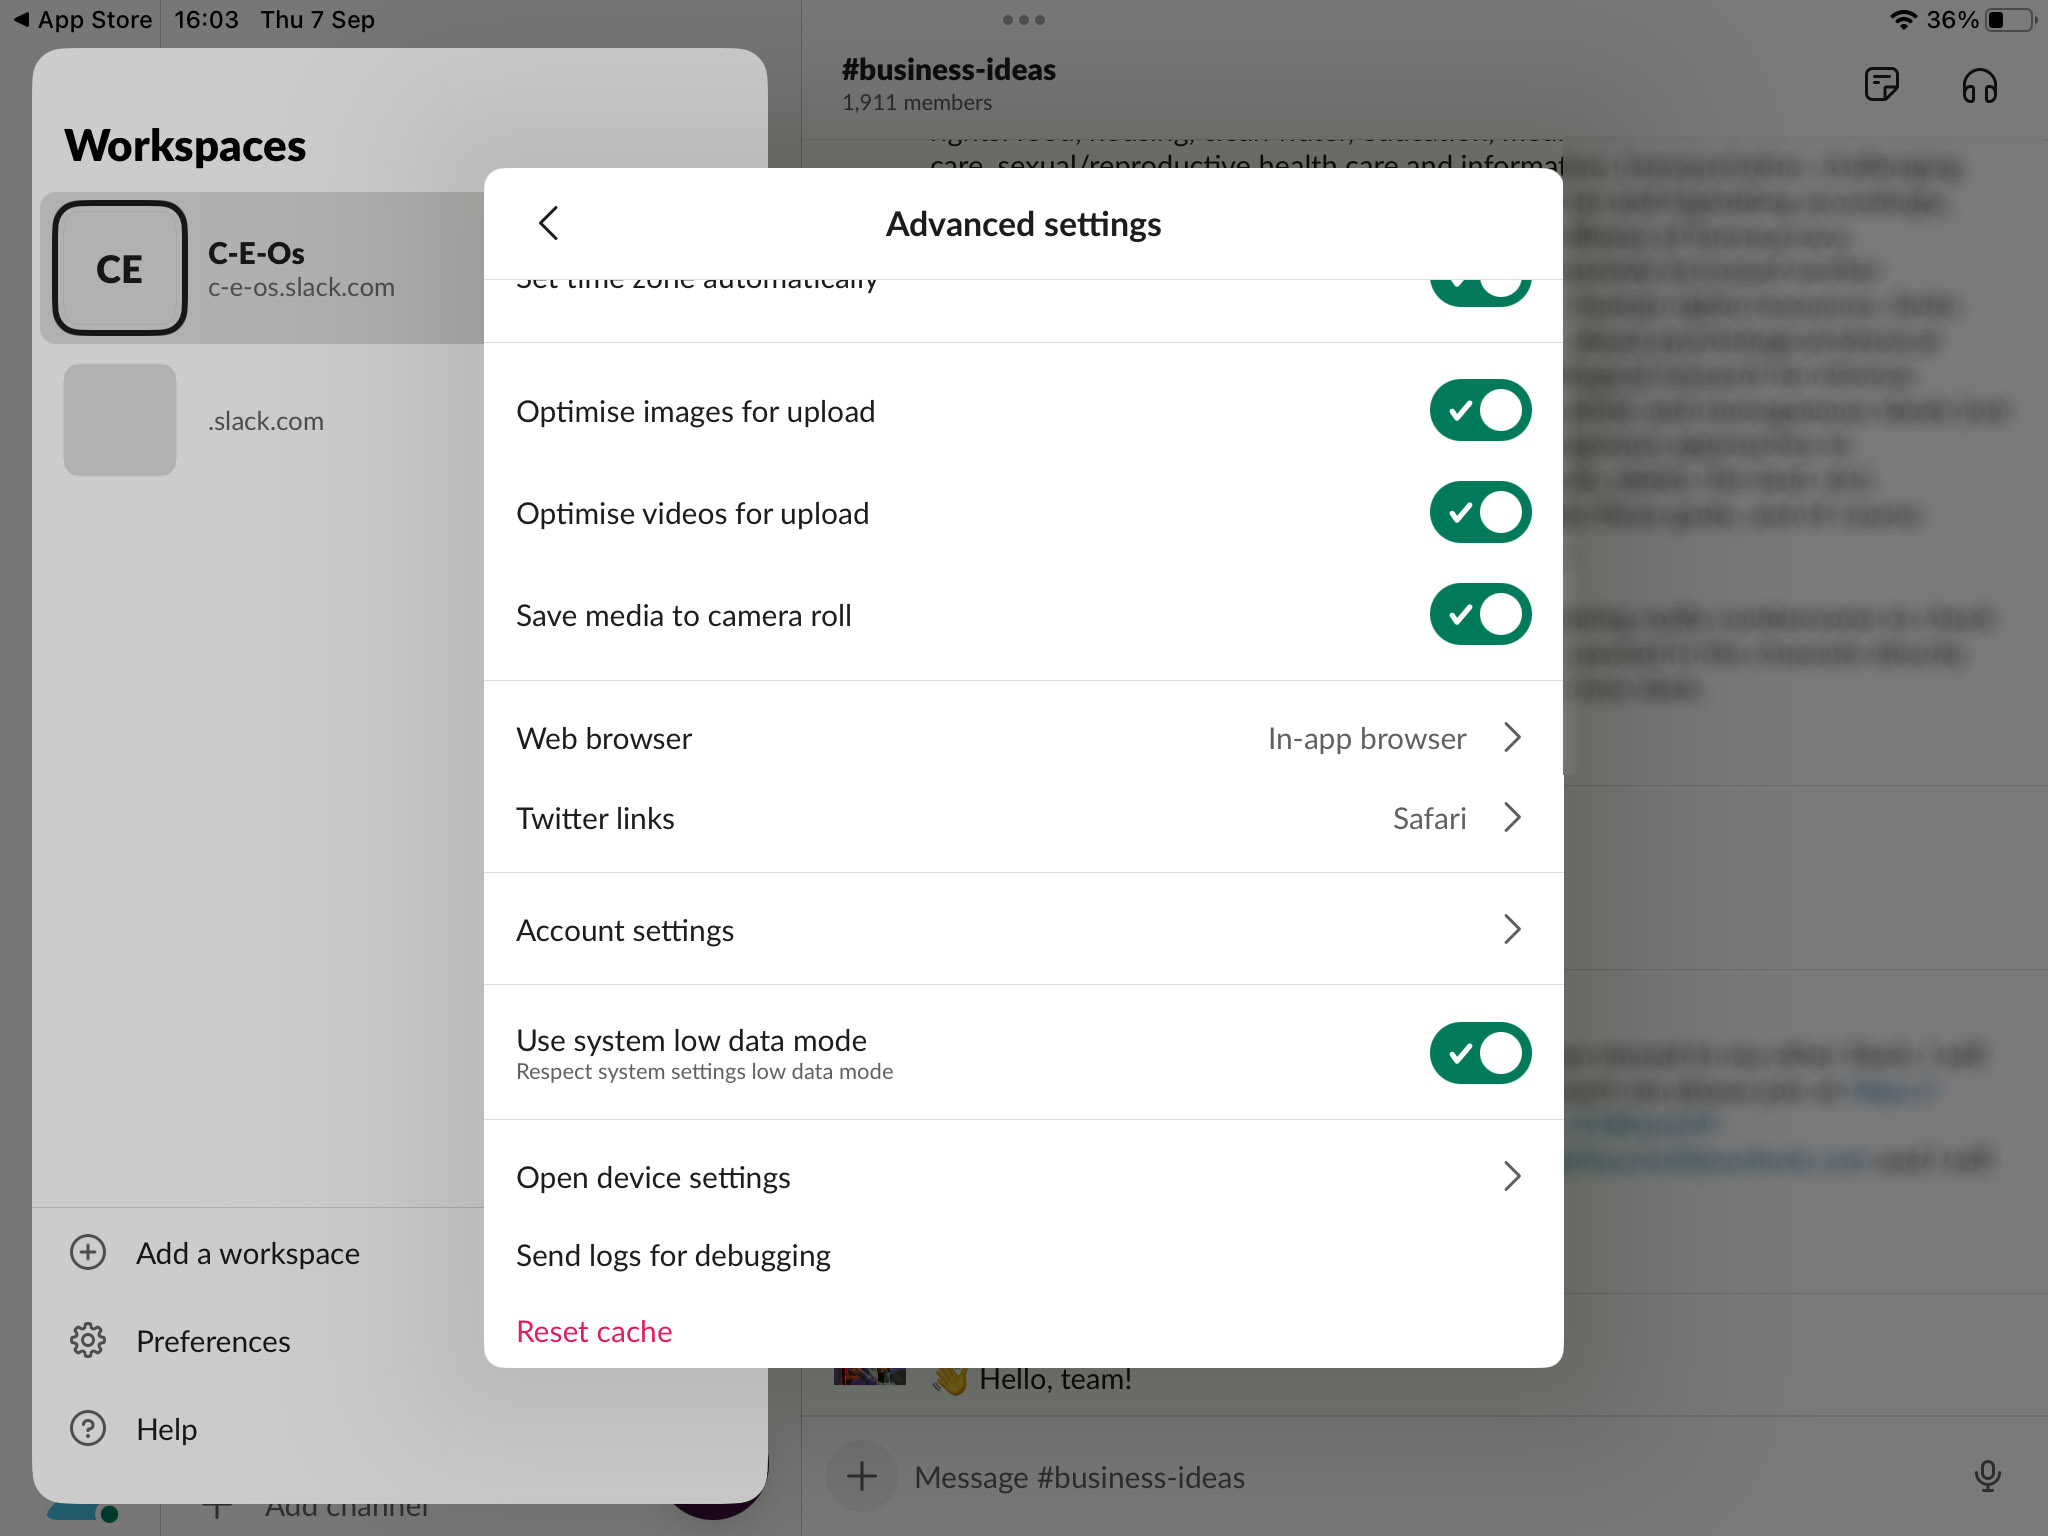
- Tap the Advanced option.
- Scroll down to the bottom of the page.
- Tap the Reset Cache option to clear cache data from your iPad’s storage.
The second method is useful in situations where the app does not provide internal cache-clearing capabilities. It can also be used if you don’t want to take the time to open the app and navigate its interface. Use the following procedure to remove and reinstall an app to clear any “Other” data it puts in your iPad storage.
- Open Settings.
- Tap on iPad Storage.
- Tap on the app you want to delete and reinstall.
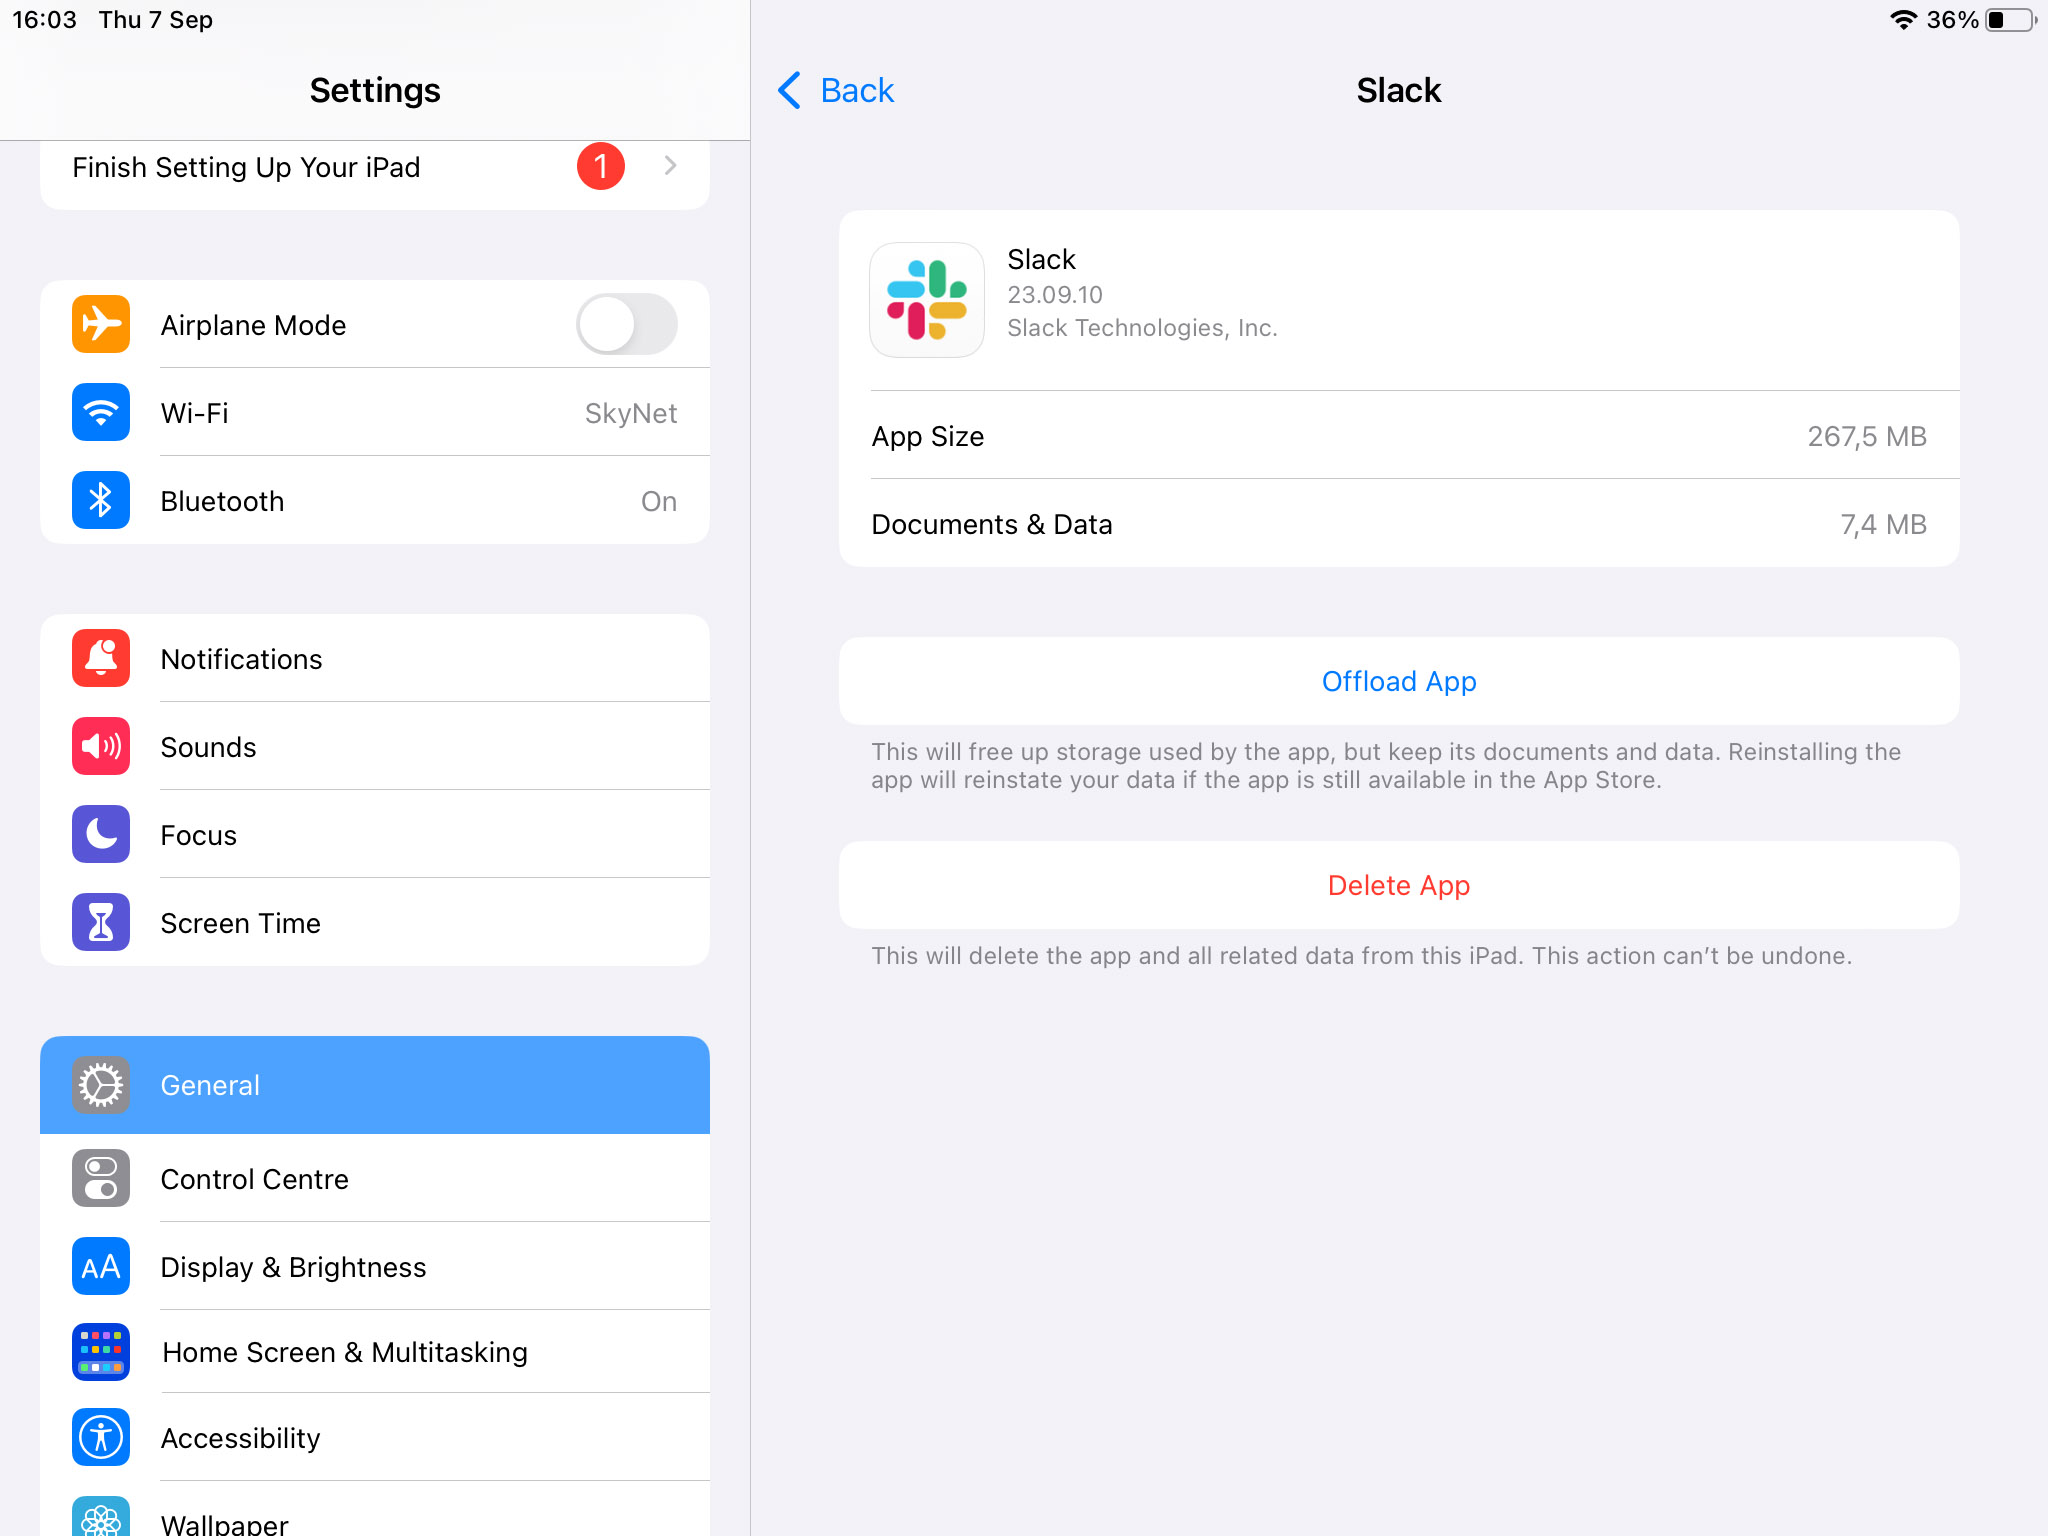
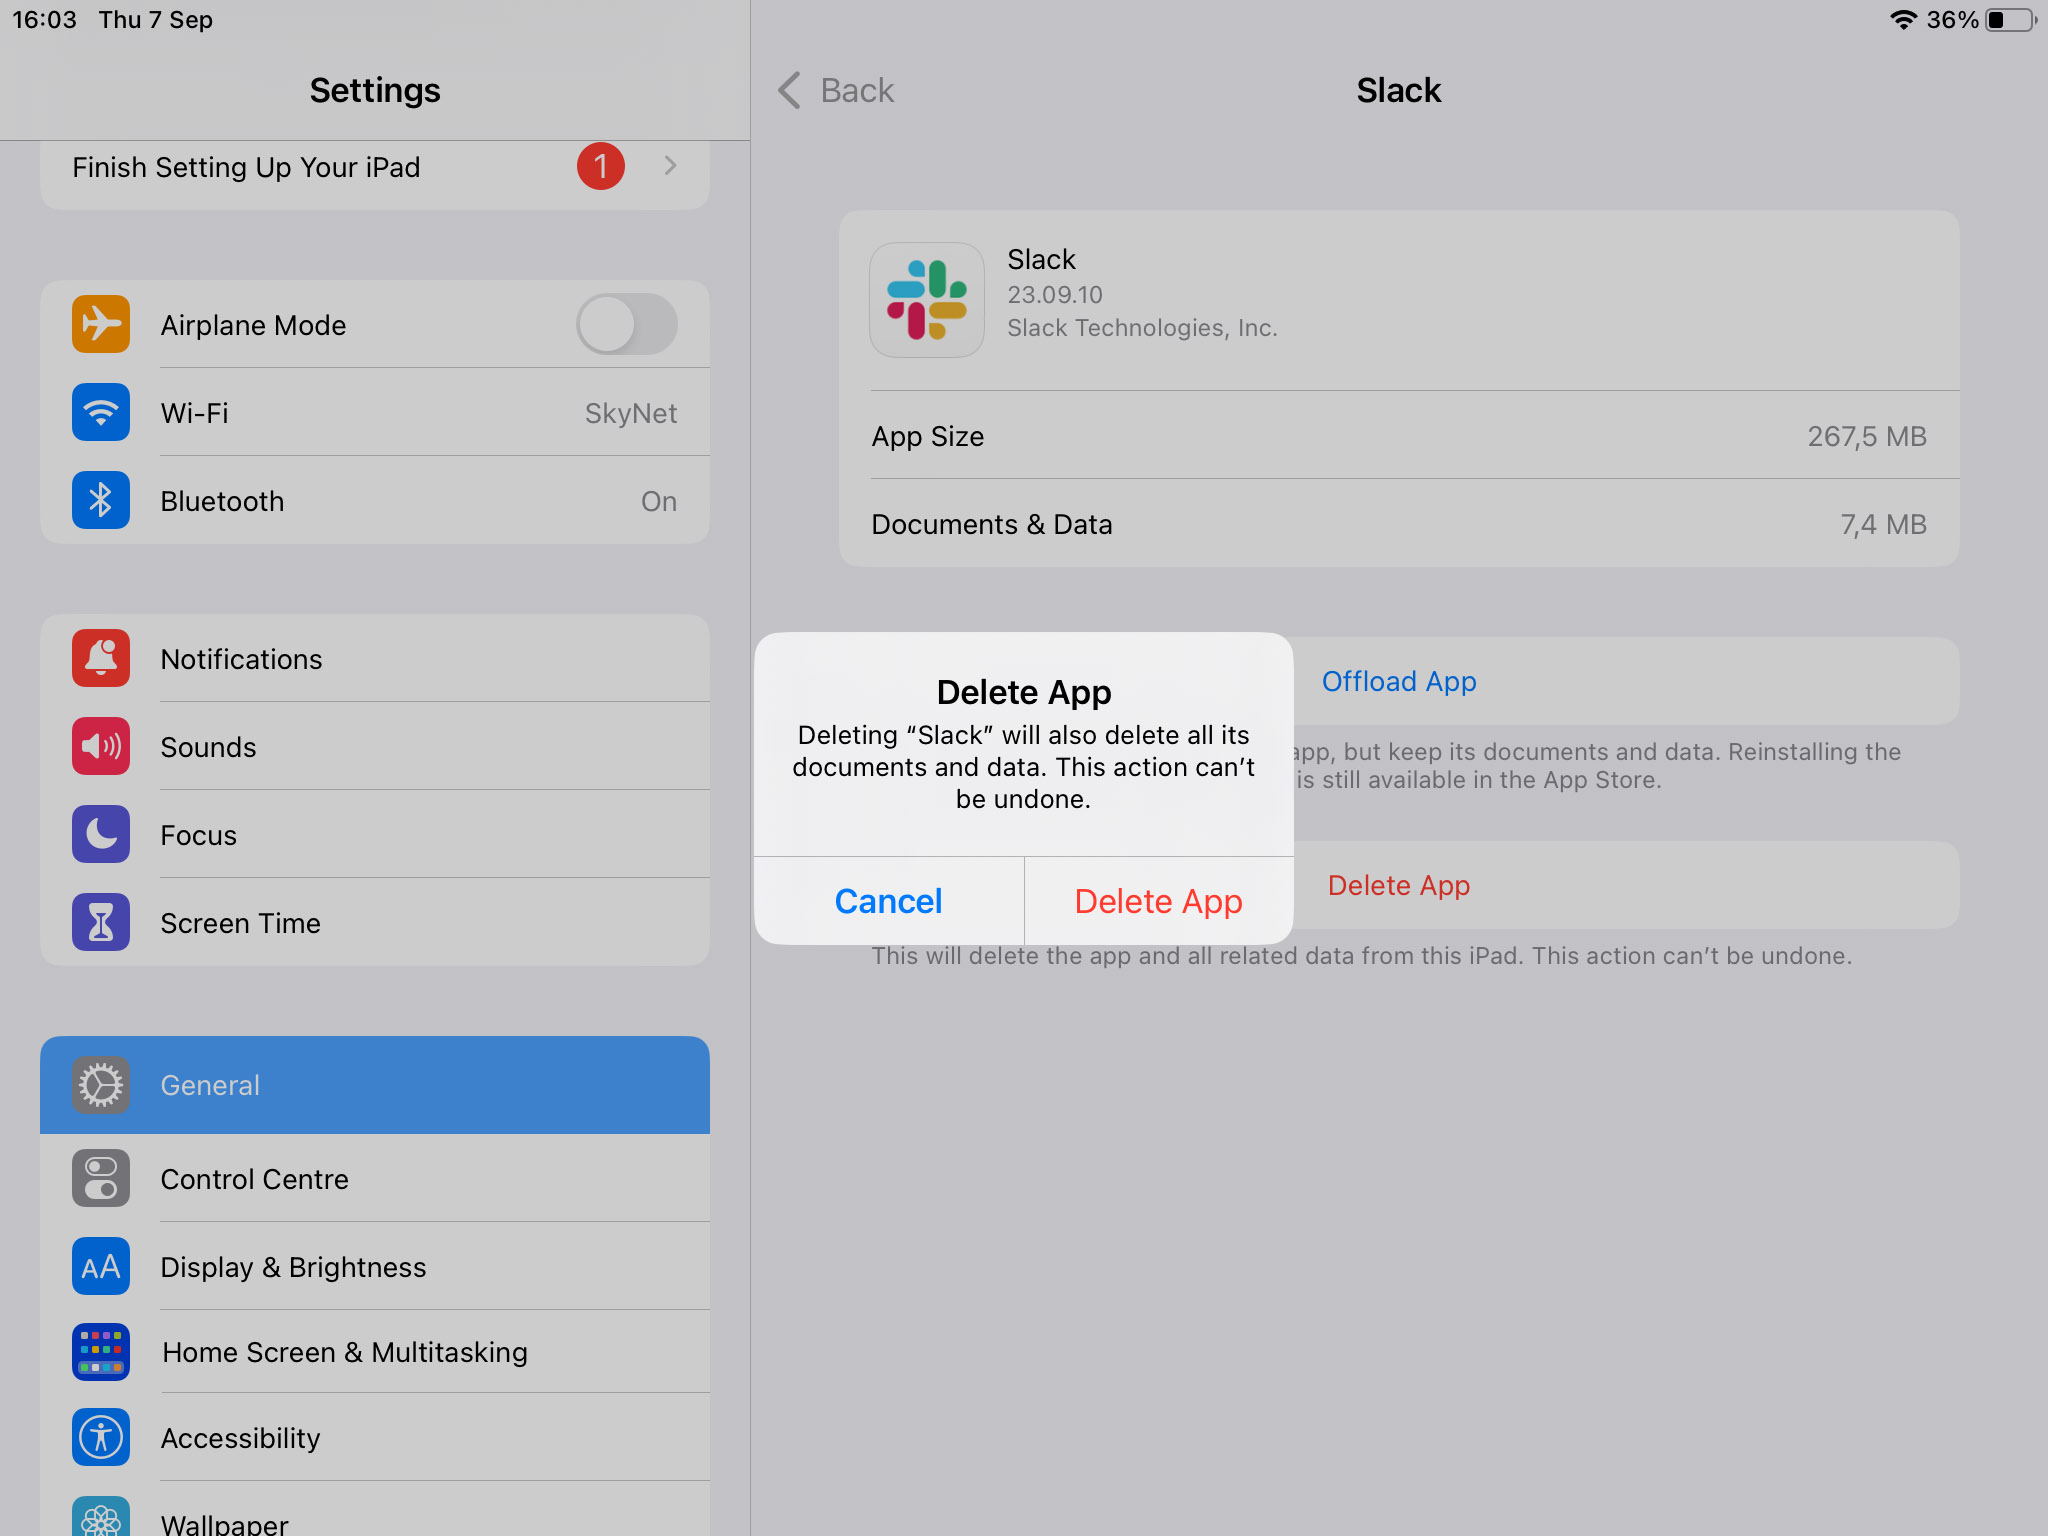
- You can choose the Delete App option which deletes the app and all related data from the device.
- You can choose the Offload App option to free up storage used by the app, including temp and cache files, but it will retain the documents and data you have created with the app.
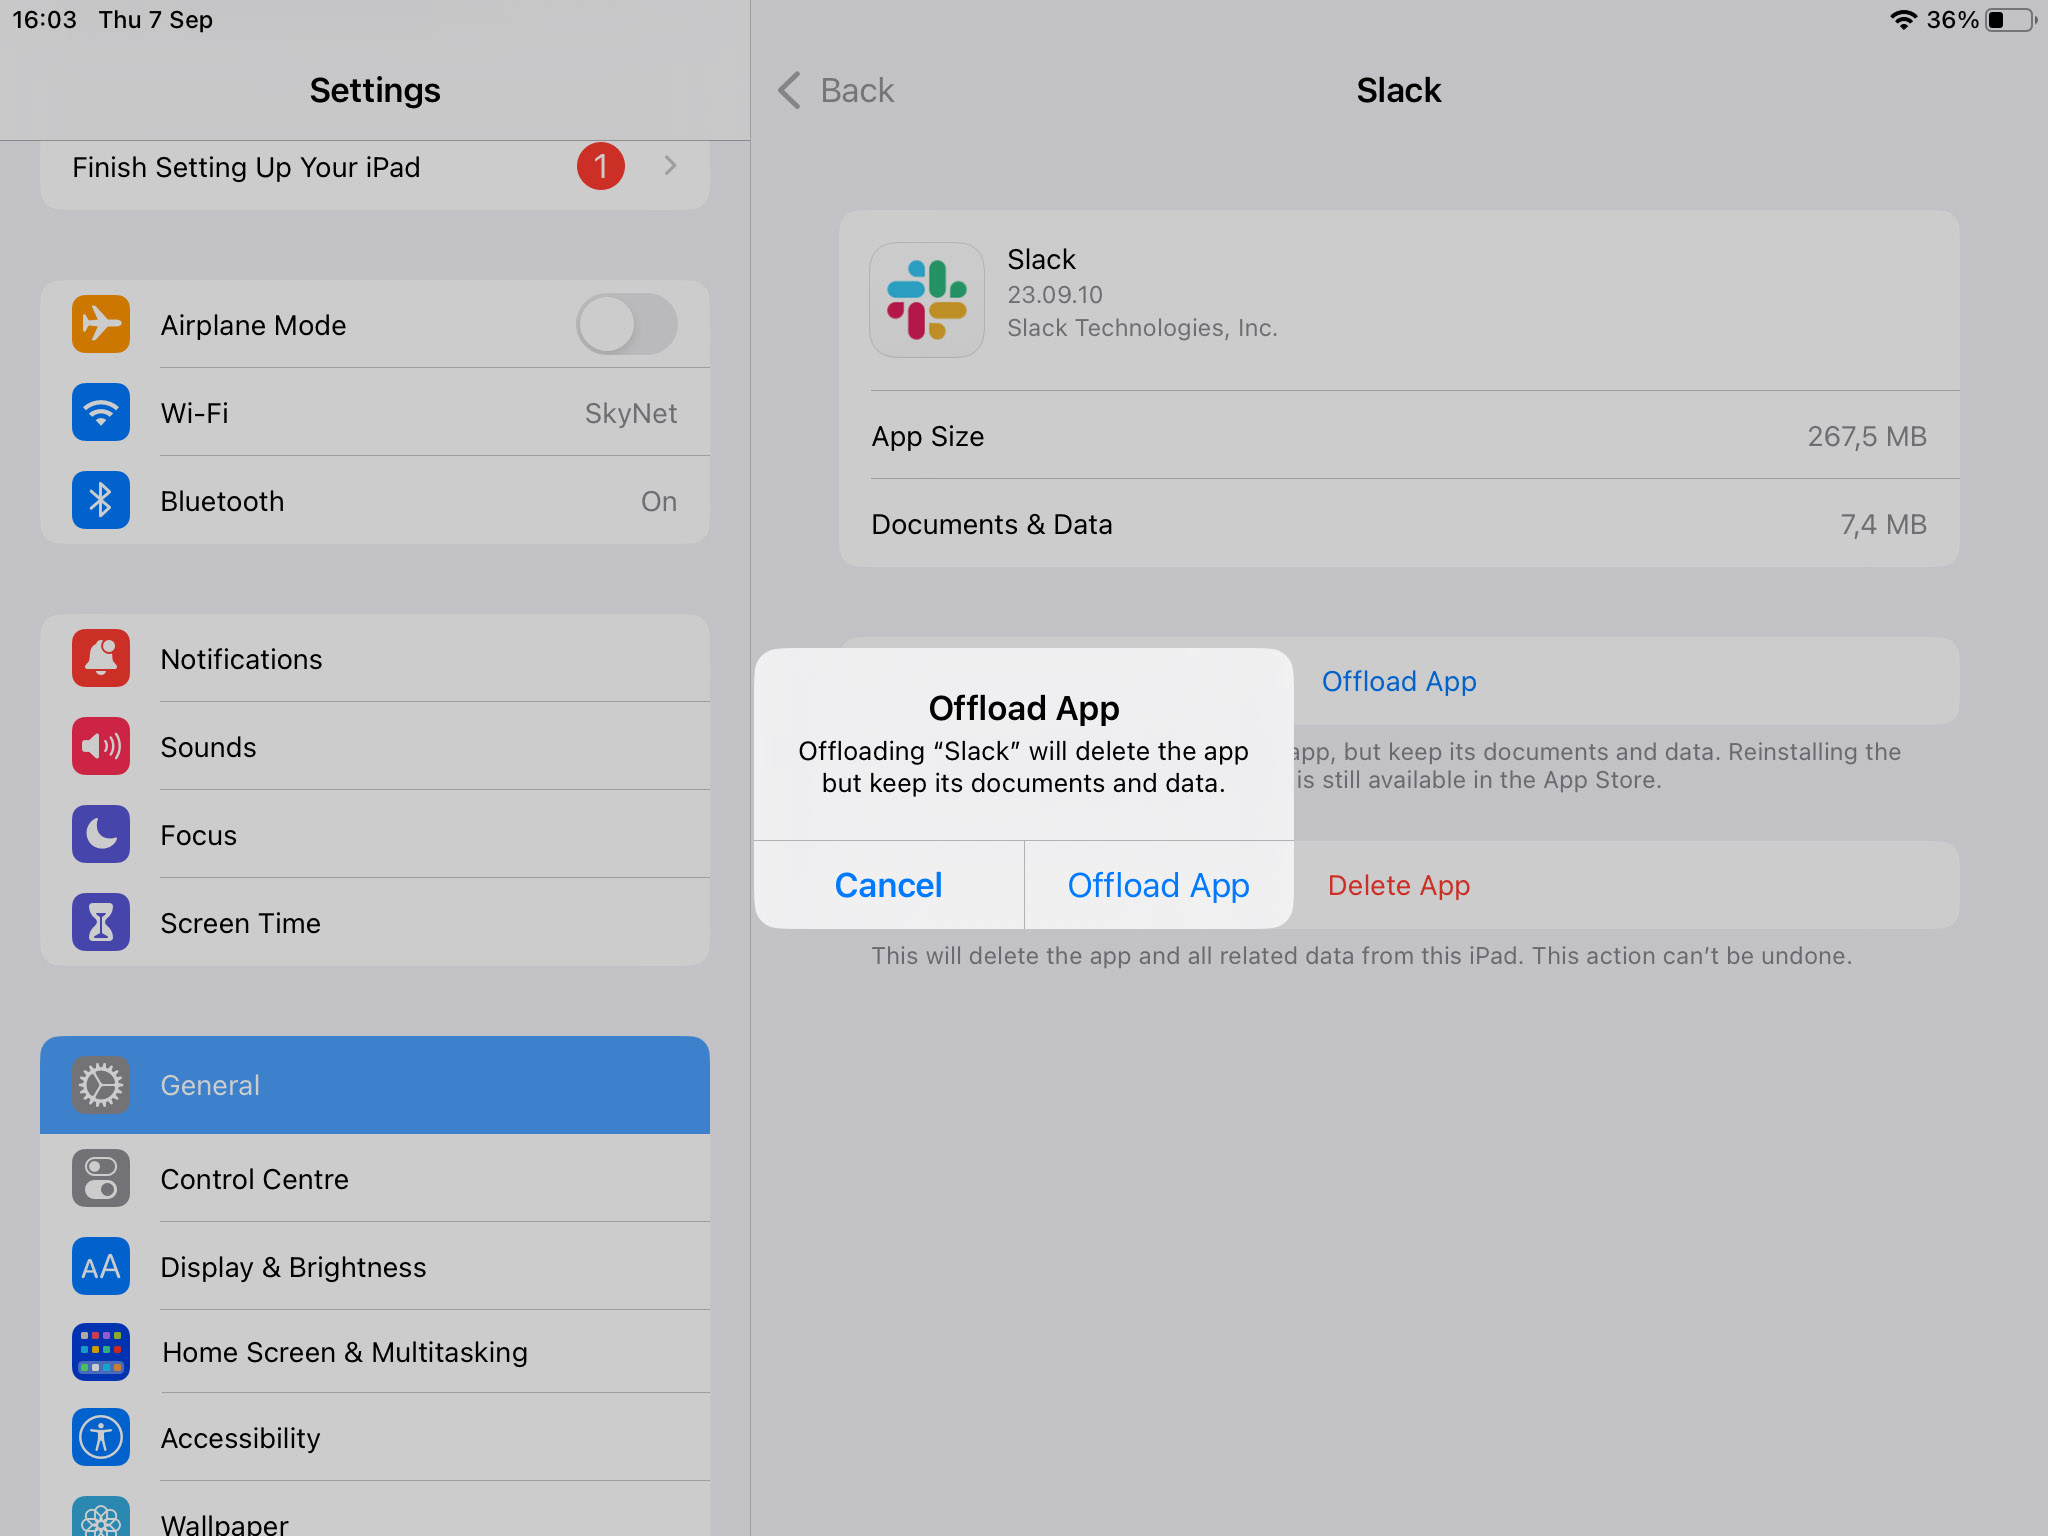
- After deleting the app, you can reinstall it if it is still available in the app store.
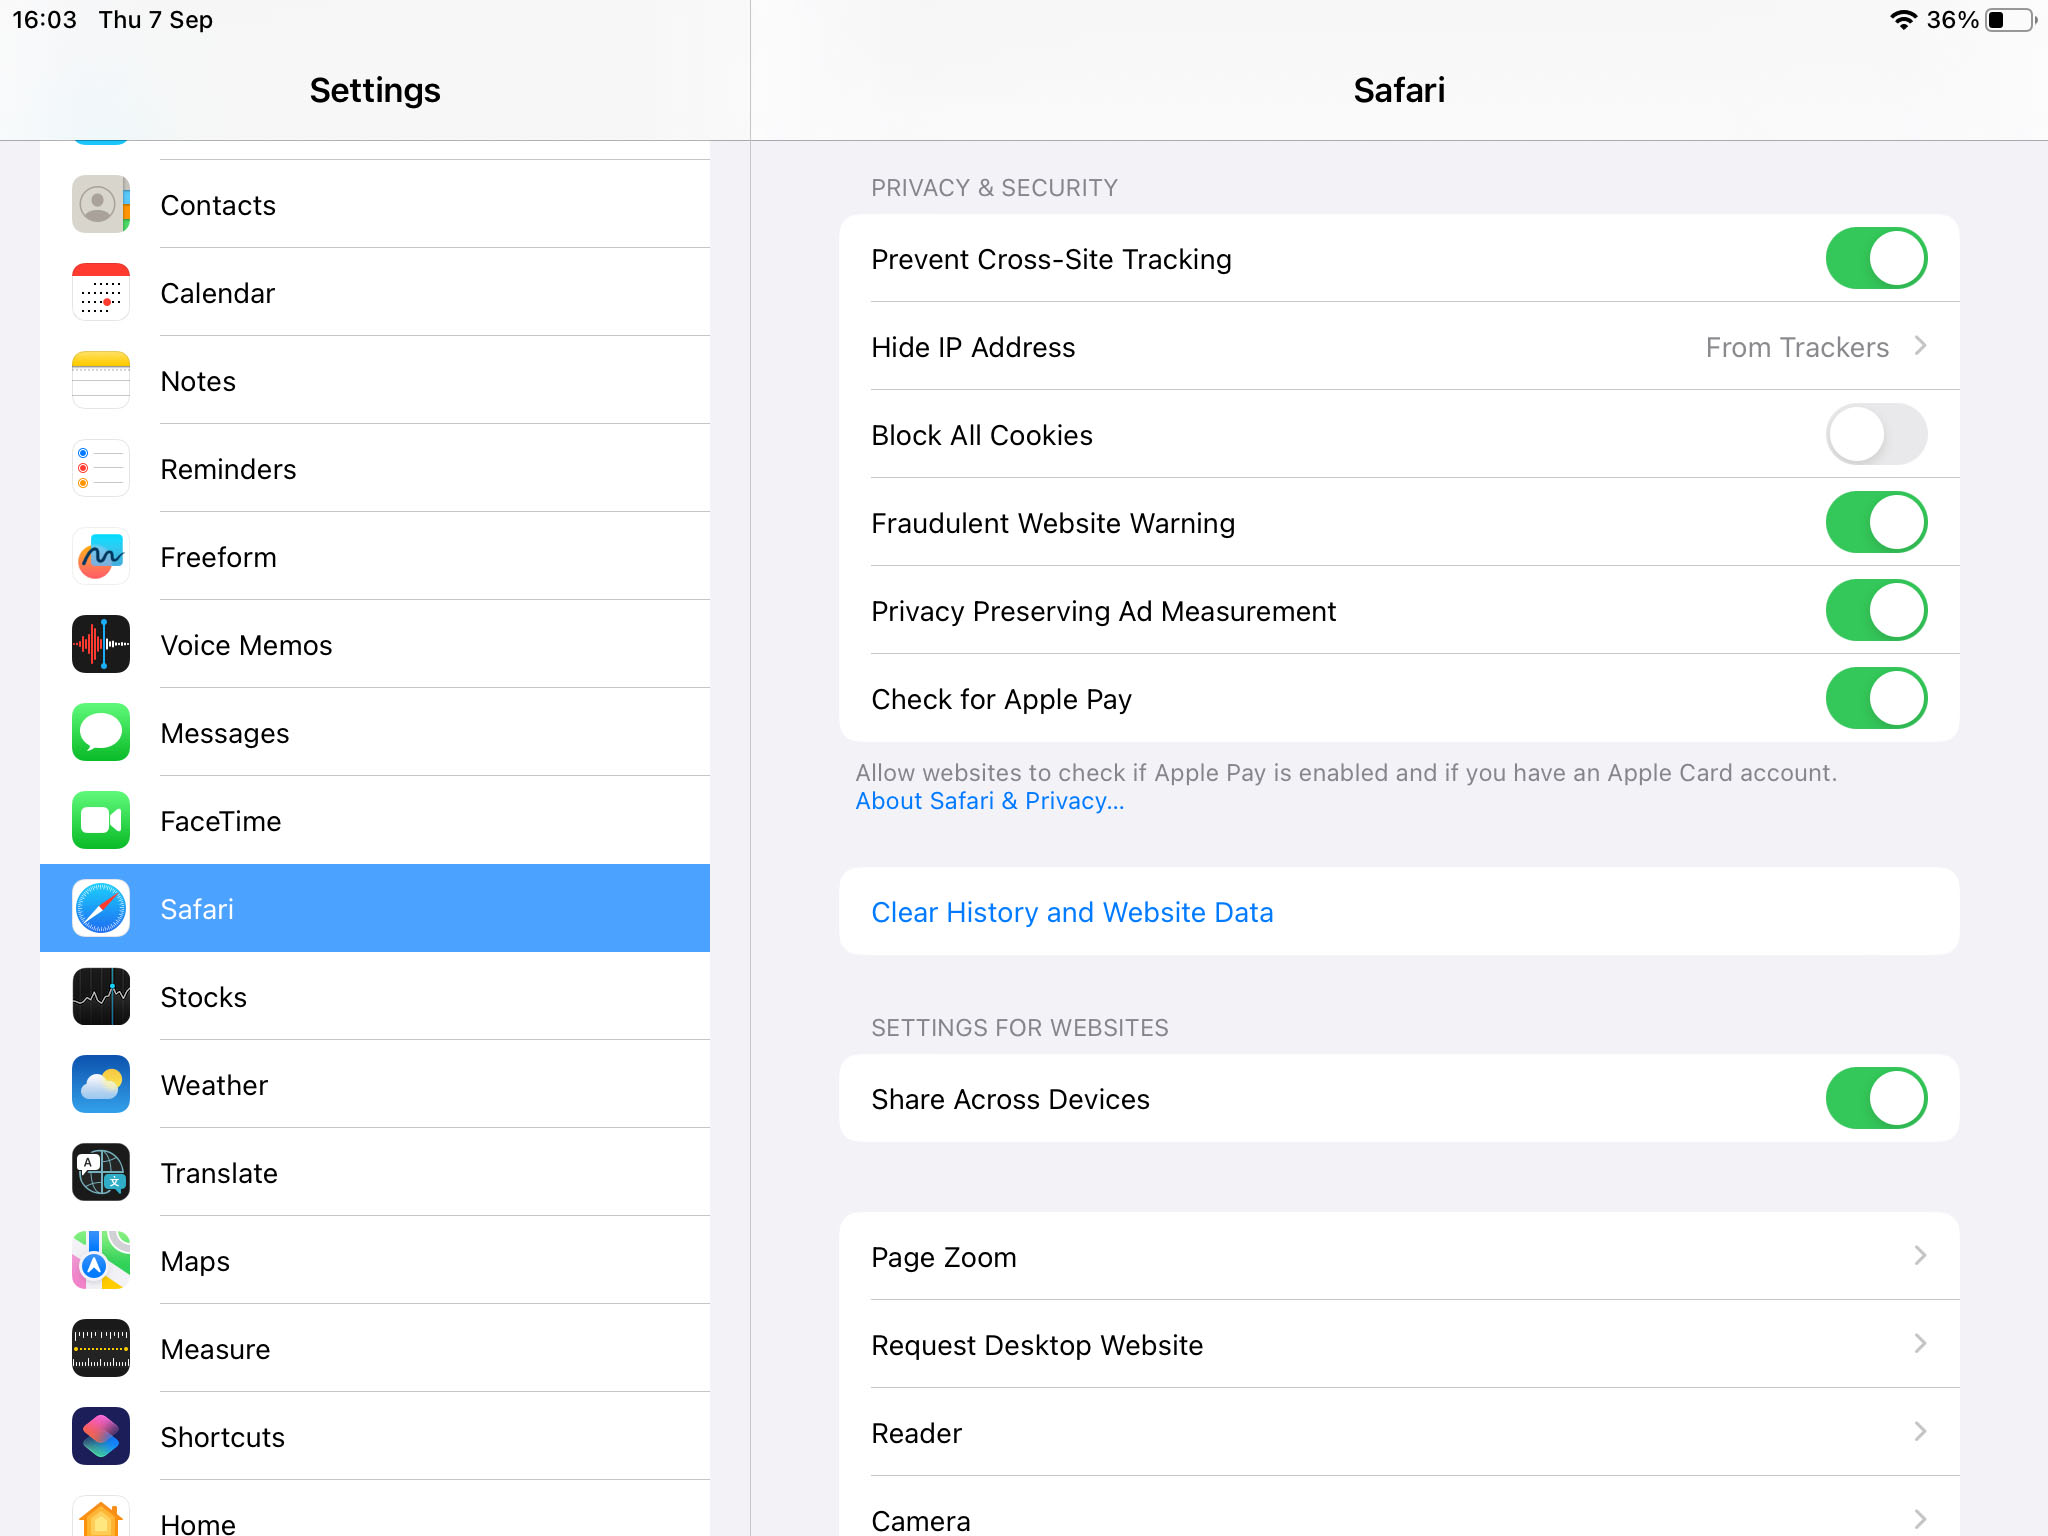
Step 3: Clear Your Browser Data
Your web browser can be responsible for cache files, cookies, and other temporary data that take up valuable space. We are going to look at how to clear browser data using Apple’s Safari application. Similar procedures can be used for other browsers like Firefox or Chrome.
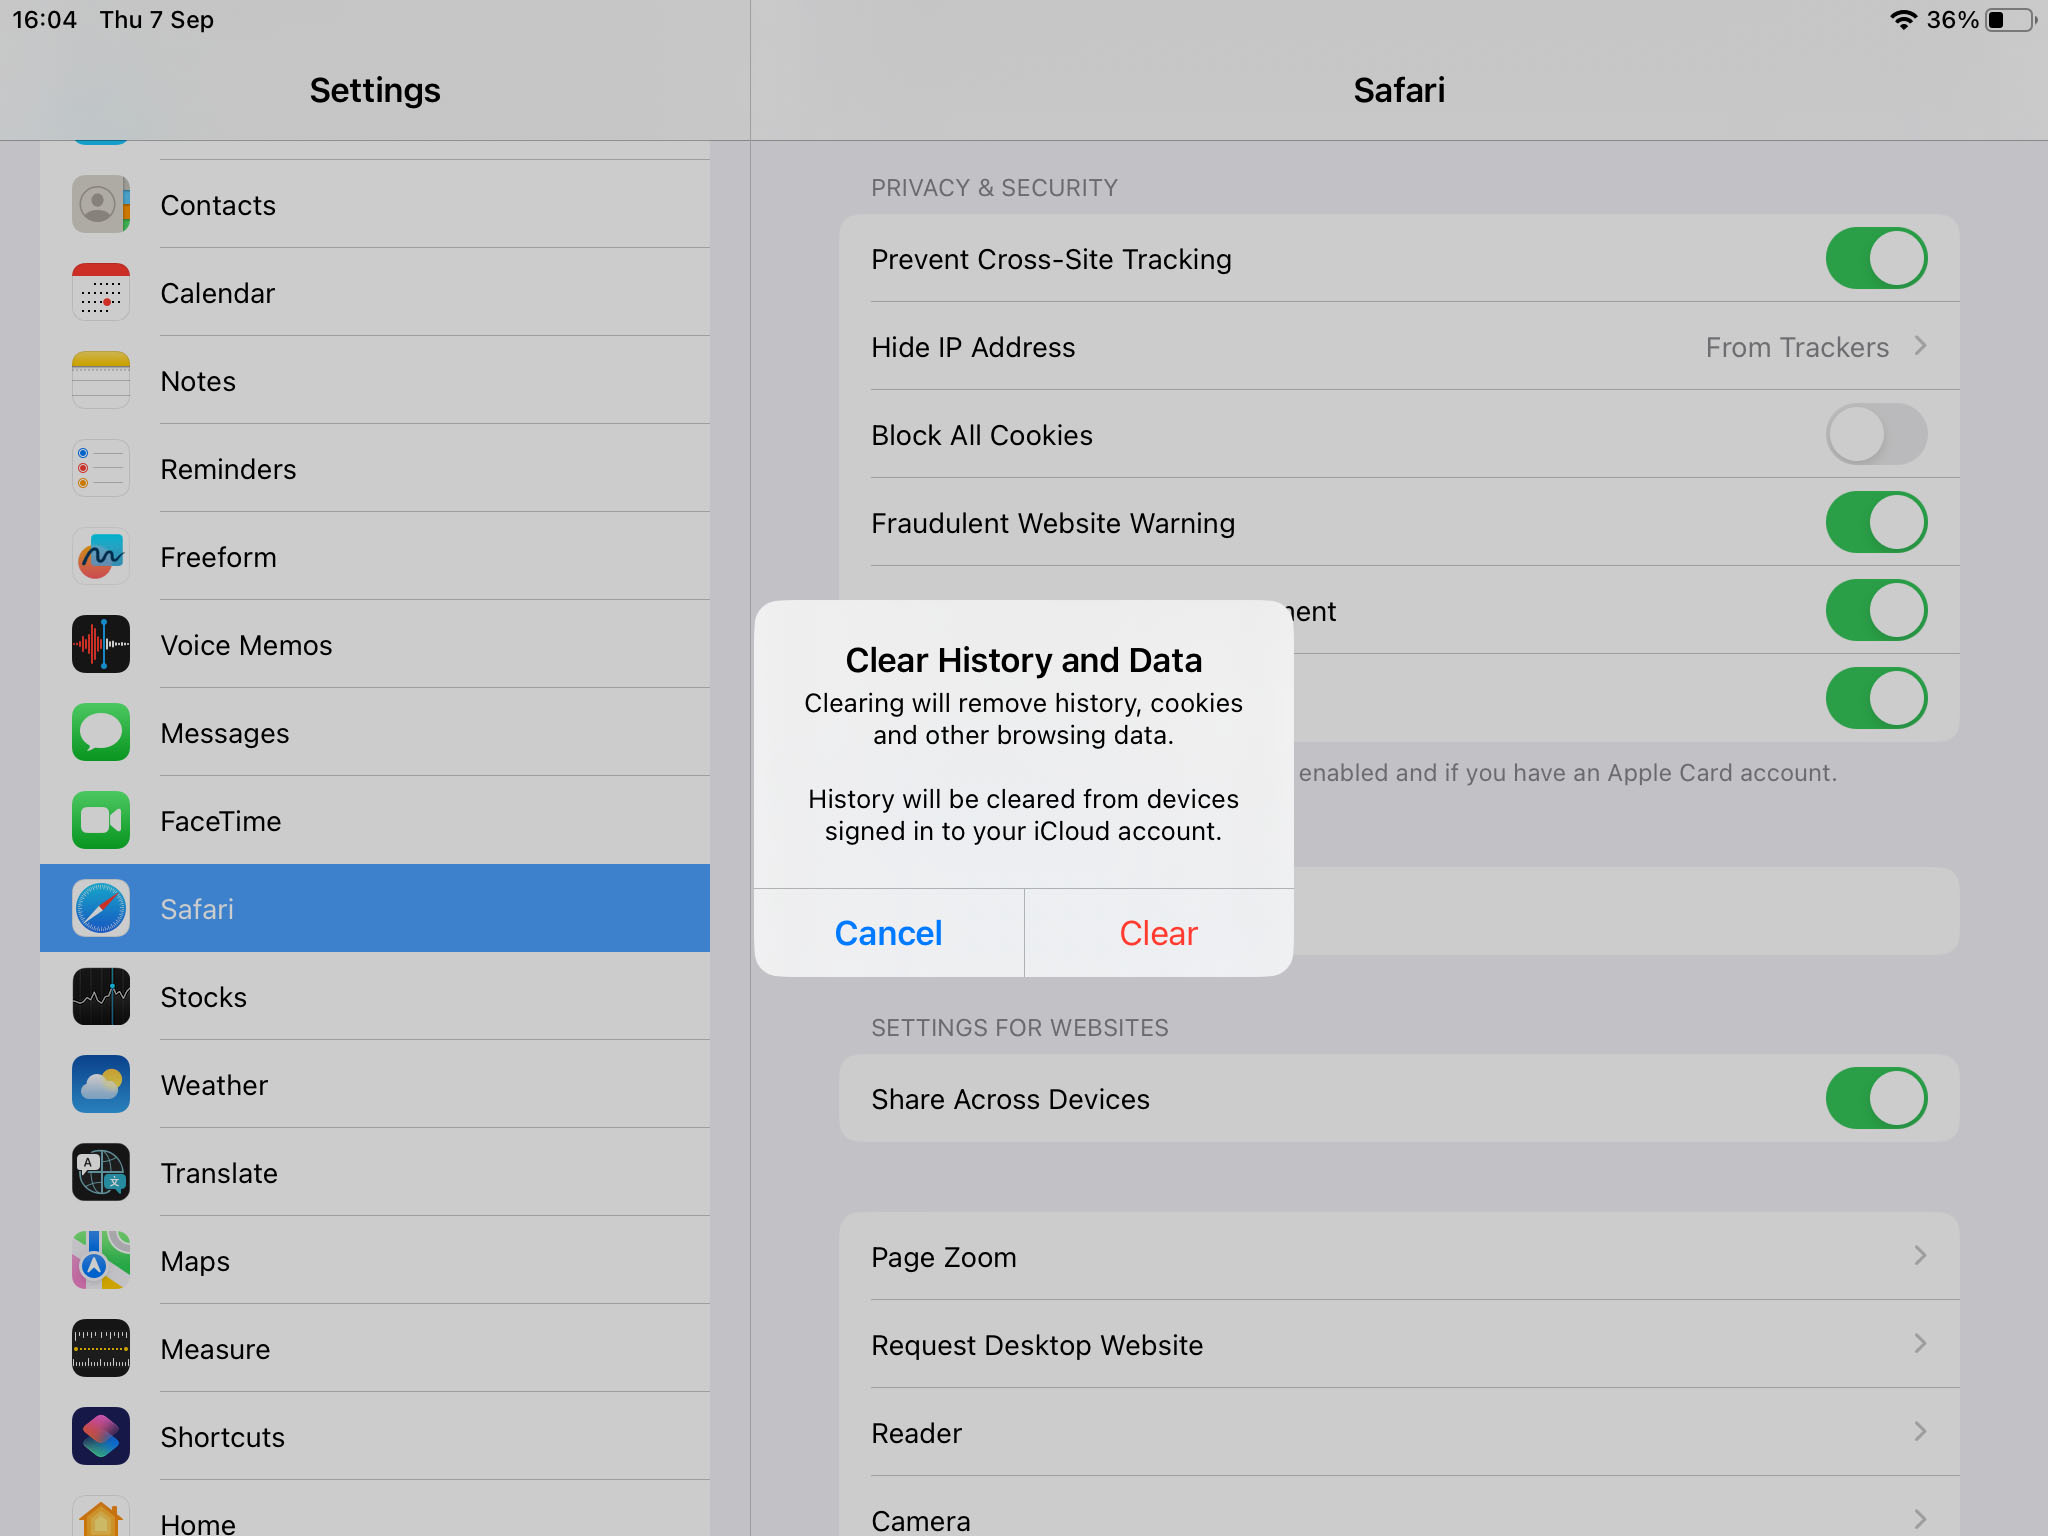
Get Rid of History and Data
Use these steps to clear Safari history and website data.
- Open Settings on your iPad.
- Scroll down to Safari in the left-hand panel.
- Tap on Safari.
- Scroll down in the right panel and tap on Clear History and Website Data.
- Tap Clear to confirm the action.
Remove Downloaded Files
The following steps can be used to remove downloaded files.
- Open Settings on your iPad.
- Scroll down to Safari in the left-hand panel.
- Tap on Safari.
- Tap Downloads in the right panel.
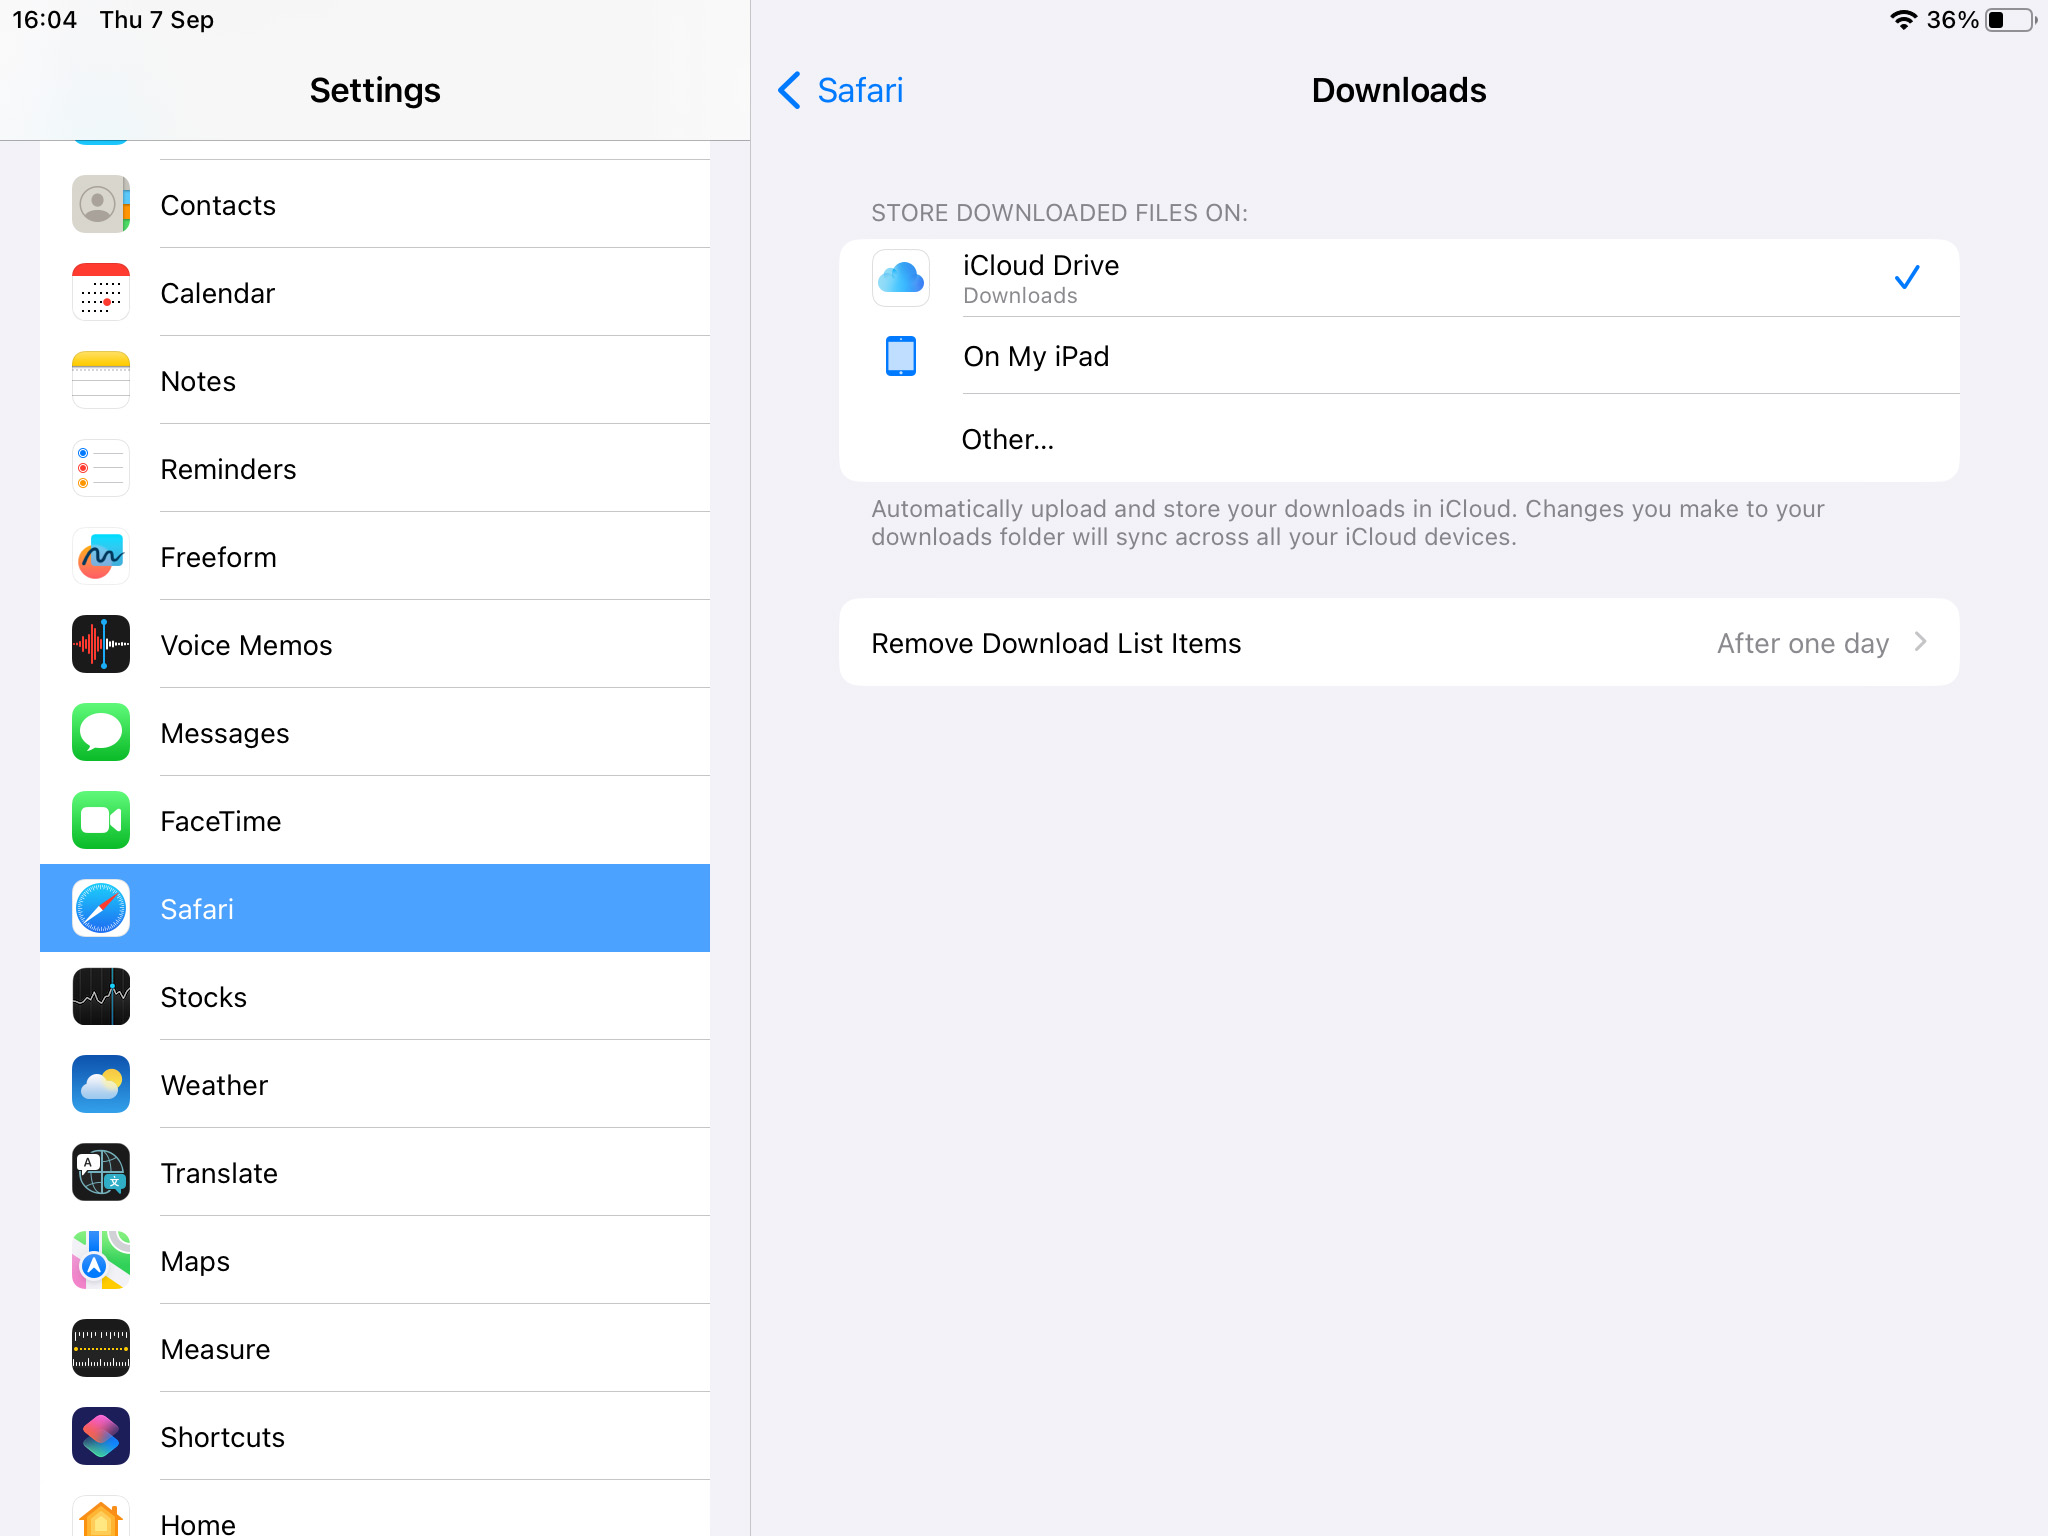
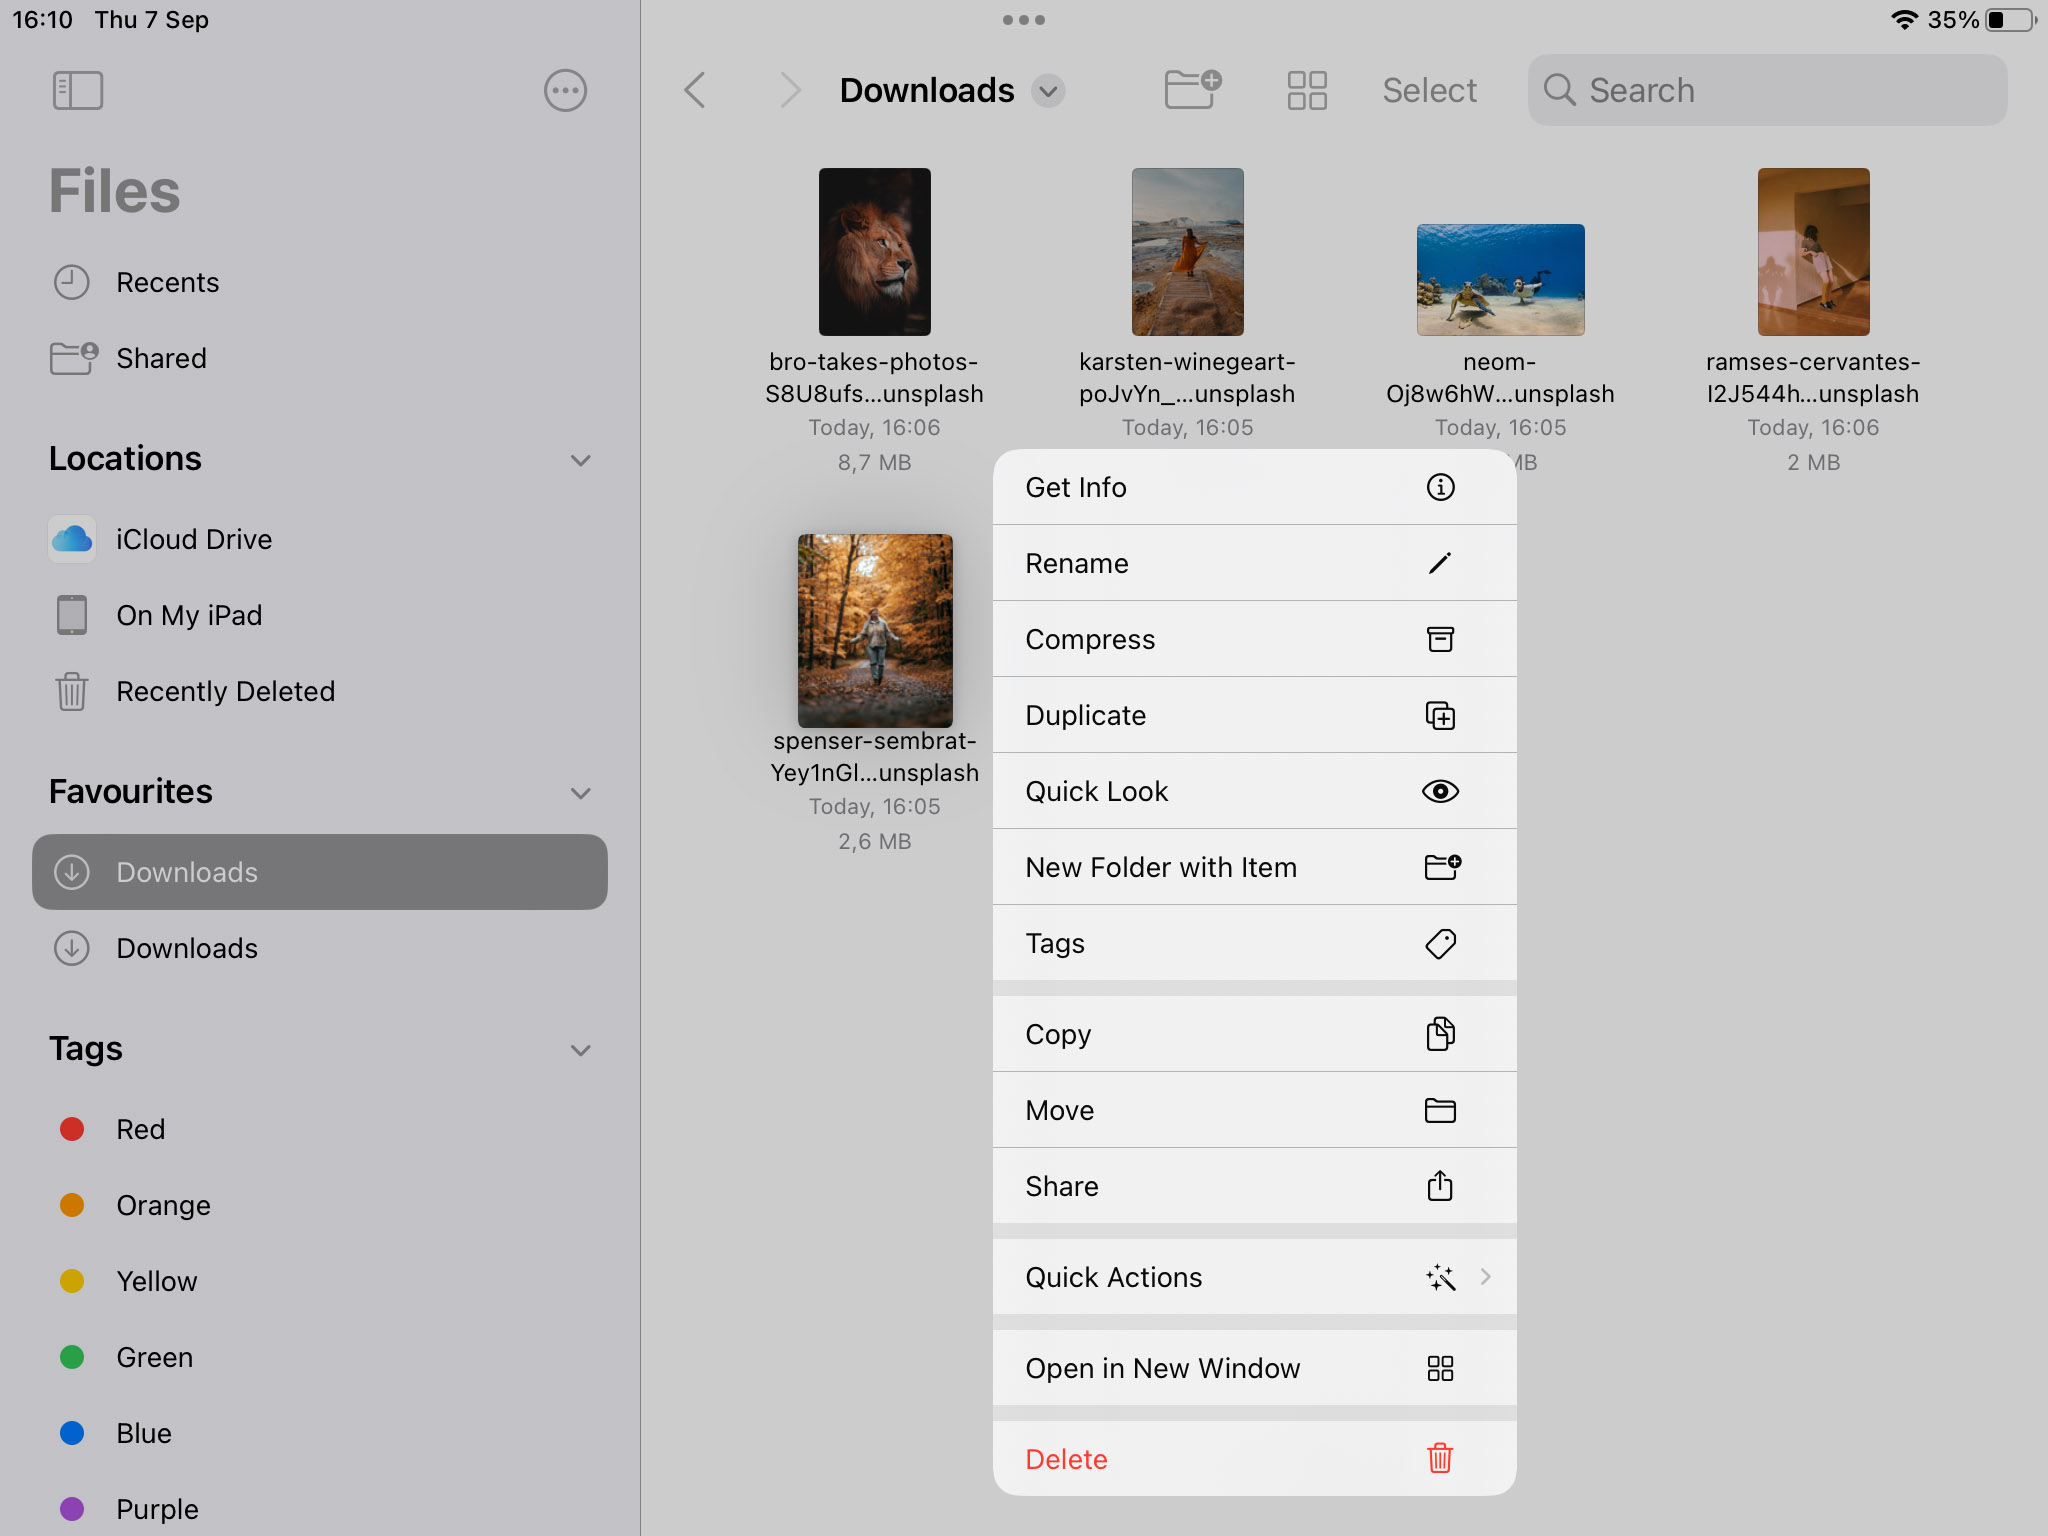
- Notice where downloads are stored. If they are stored on your iPad, you can delete them with the Files app. If they are stored in iCloud, deleting them will not recover storage on your iPad.
- Click on Files and then Downloads in the left panel.
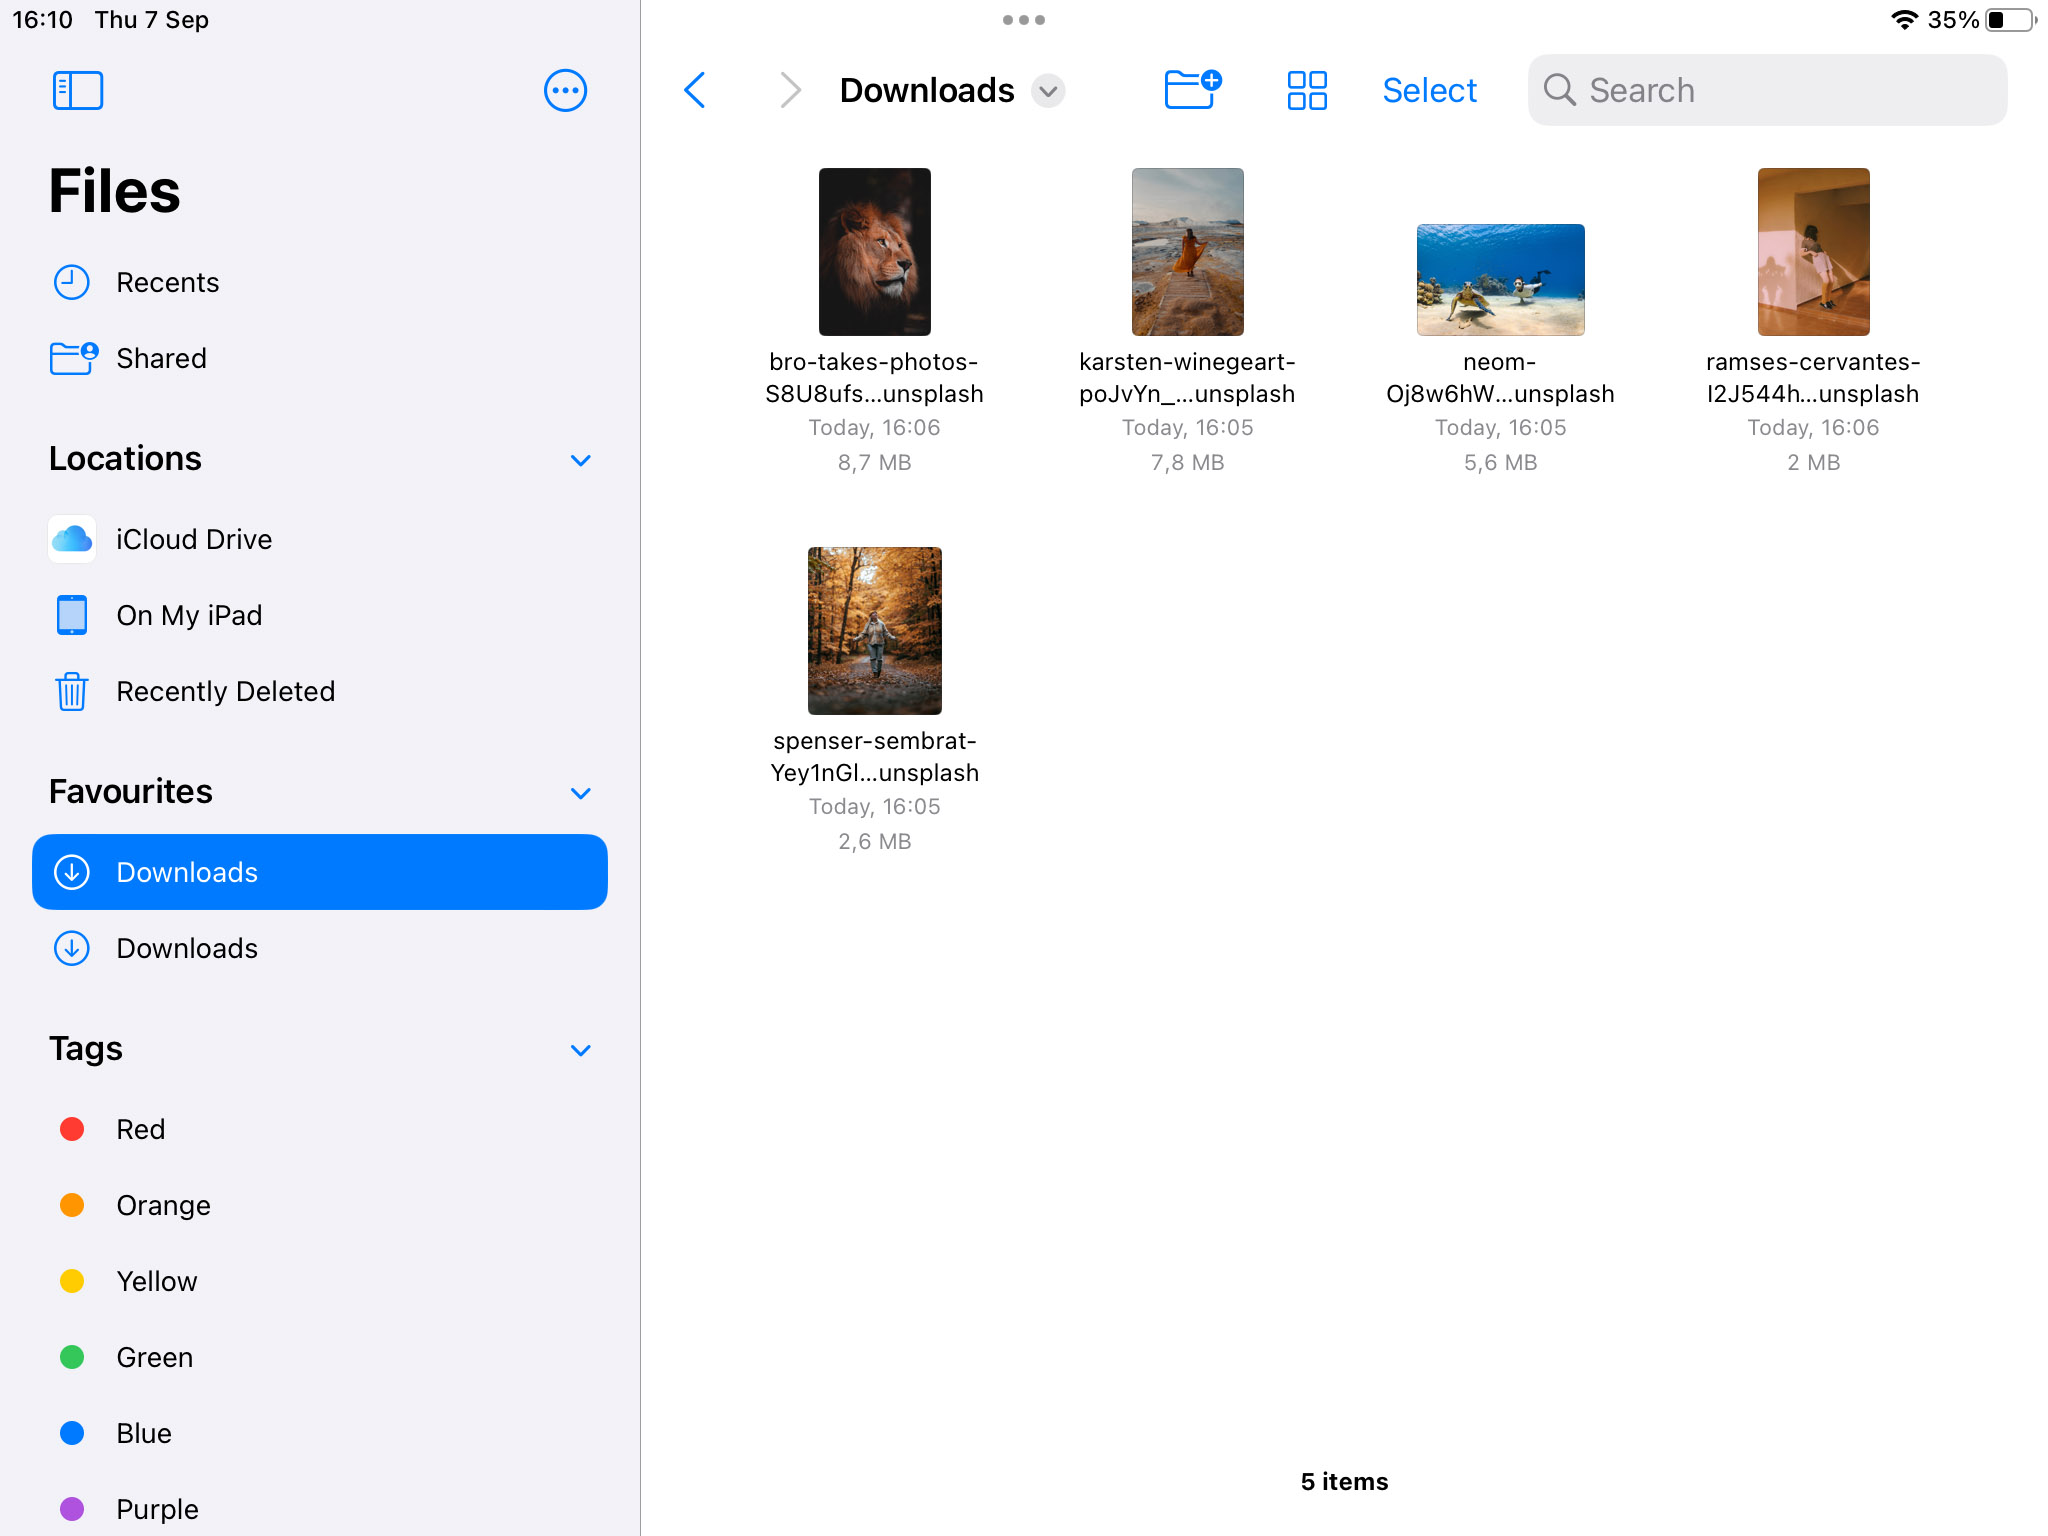
- Tap and hold an item and choose Delete to remove it from iPad storage.
Step 4: Delete and Manage Your Message History
The iPad’s Messages app can use up a lot of storage space in two ways. One way it takes up a lot of storage is by saving your conversations and message history. The other is by storing large attachments that you sent or were sent to you in an iMessage. Use the following procedures to clear this storage.
Delete Your Message History
- Open Messages.
- Go to Top Conversations to identify the message streams taking up the most space.
- Left-swipe on the selected conversation and delete it by selecting the Trash icon.
- Repeat as necessary to delete as many conversations as you wish.
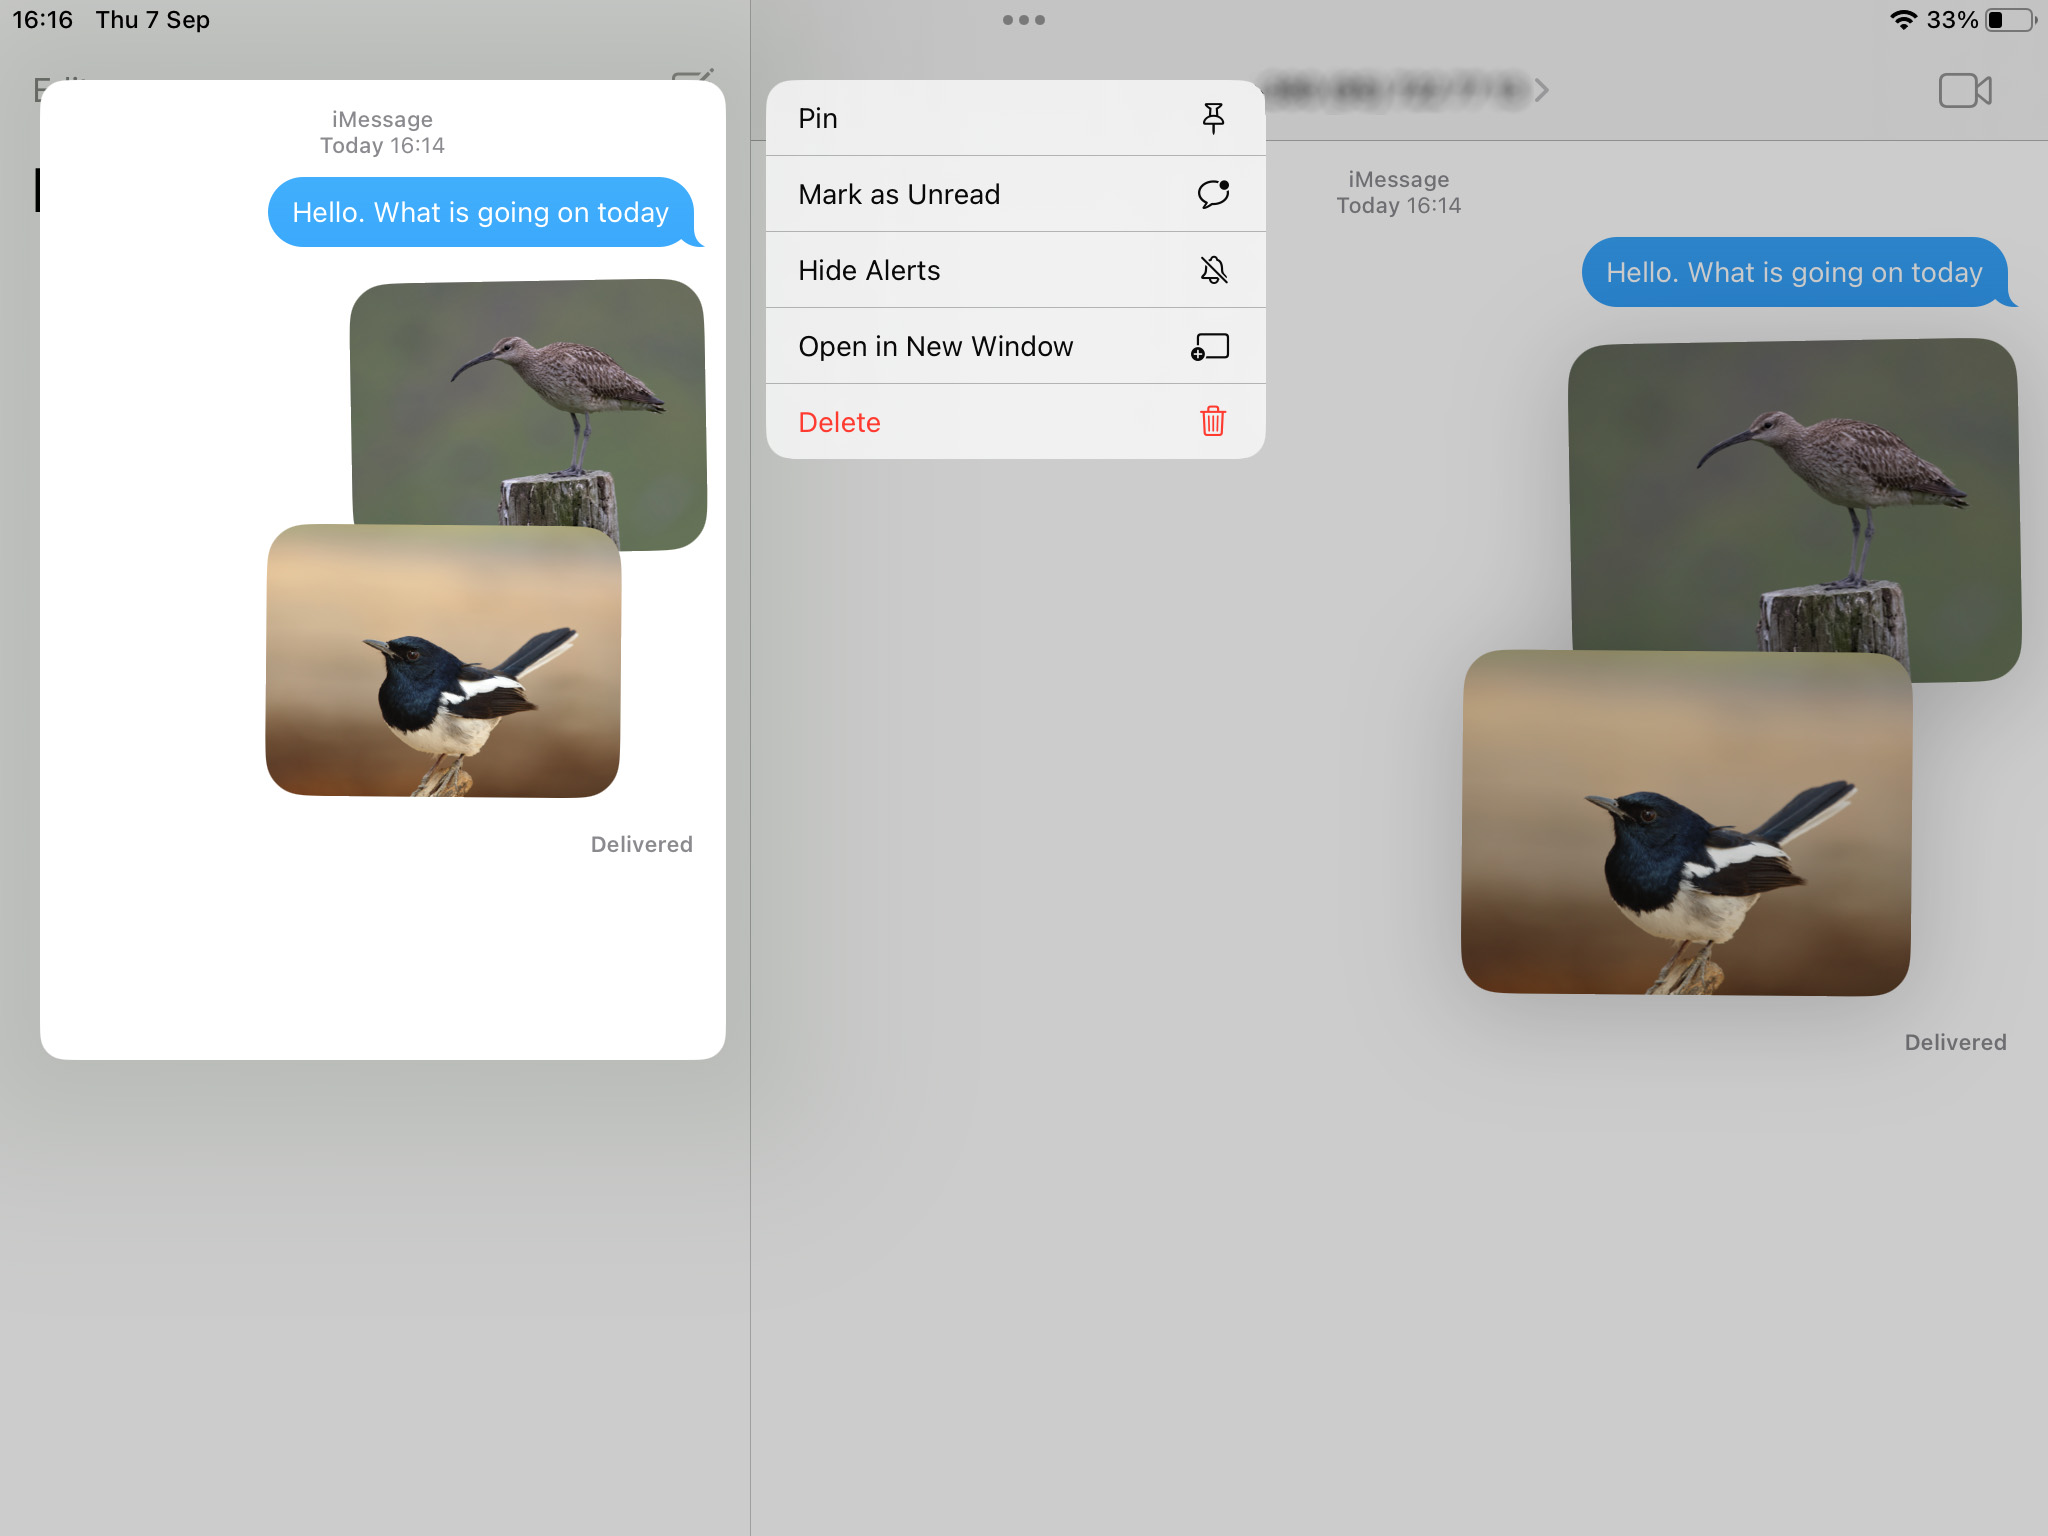
Delete Large Attachments
- Open Messages.
- In the Documents section of the window, select the type of attachments you want to delete. Based on usage, you may have Photos, Videos, or other types of documents available that can be deleted.
- Left-swipe on the item you want to delete and choose the Trash icon.
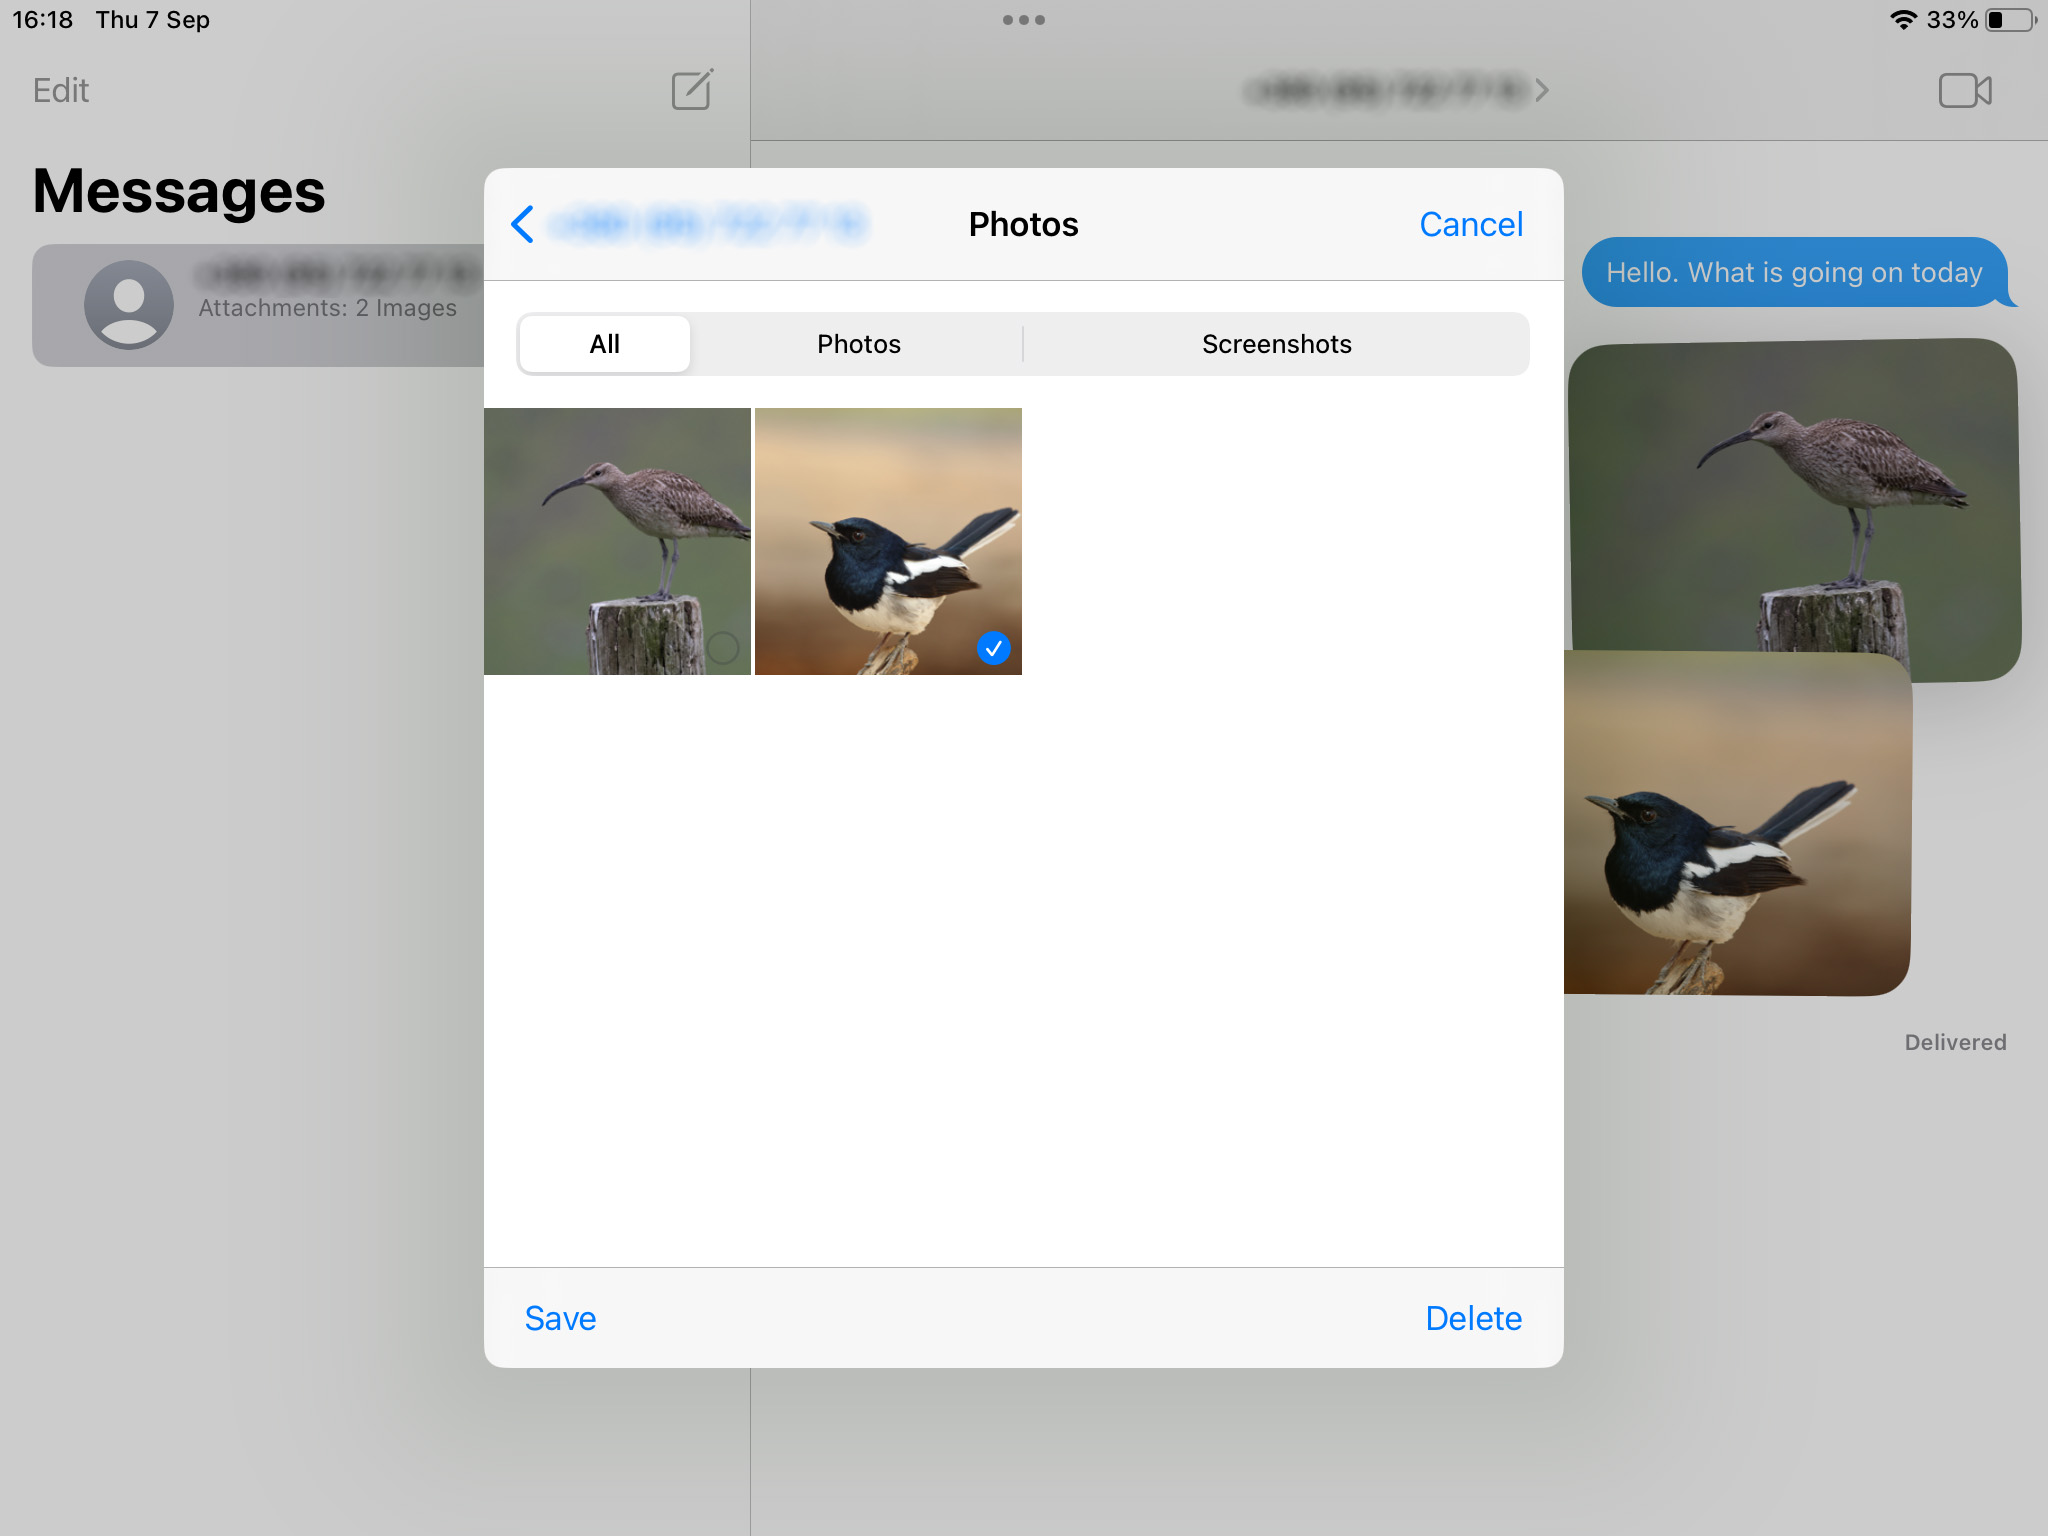
- Repeat as necessary to delete as many attachments as you like.
Step 5: Backup and Restore All Data from the iPad (If Other Steps Fail)
You can easily delete the “Other” storage on your iPad by creating an iCloud backup and restoring its data to your device. You can select the data that will be backed up, eliminating the “Other” storage from the backup. Then, you simply restore your iPad from the backup and everything not included in the backup will be deleted, freeing up the space it previously occupied.
You will need to have an iCloud account to use the following procedure to backup and restore your iPad.
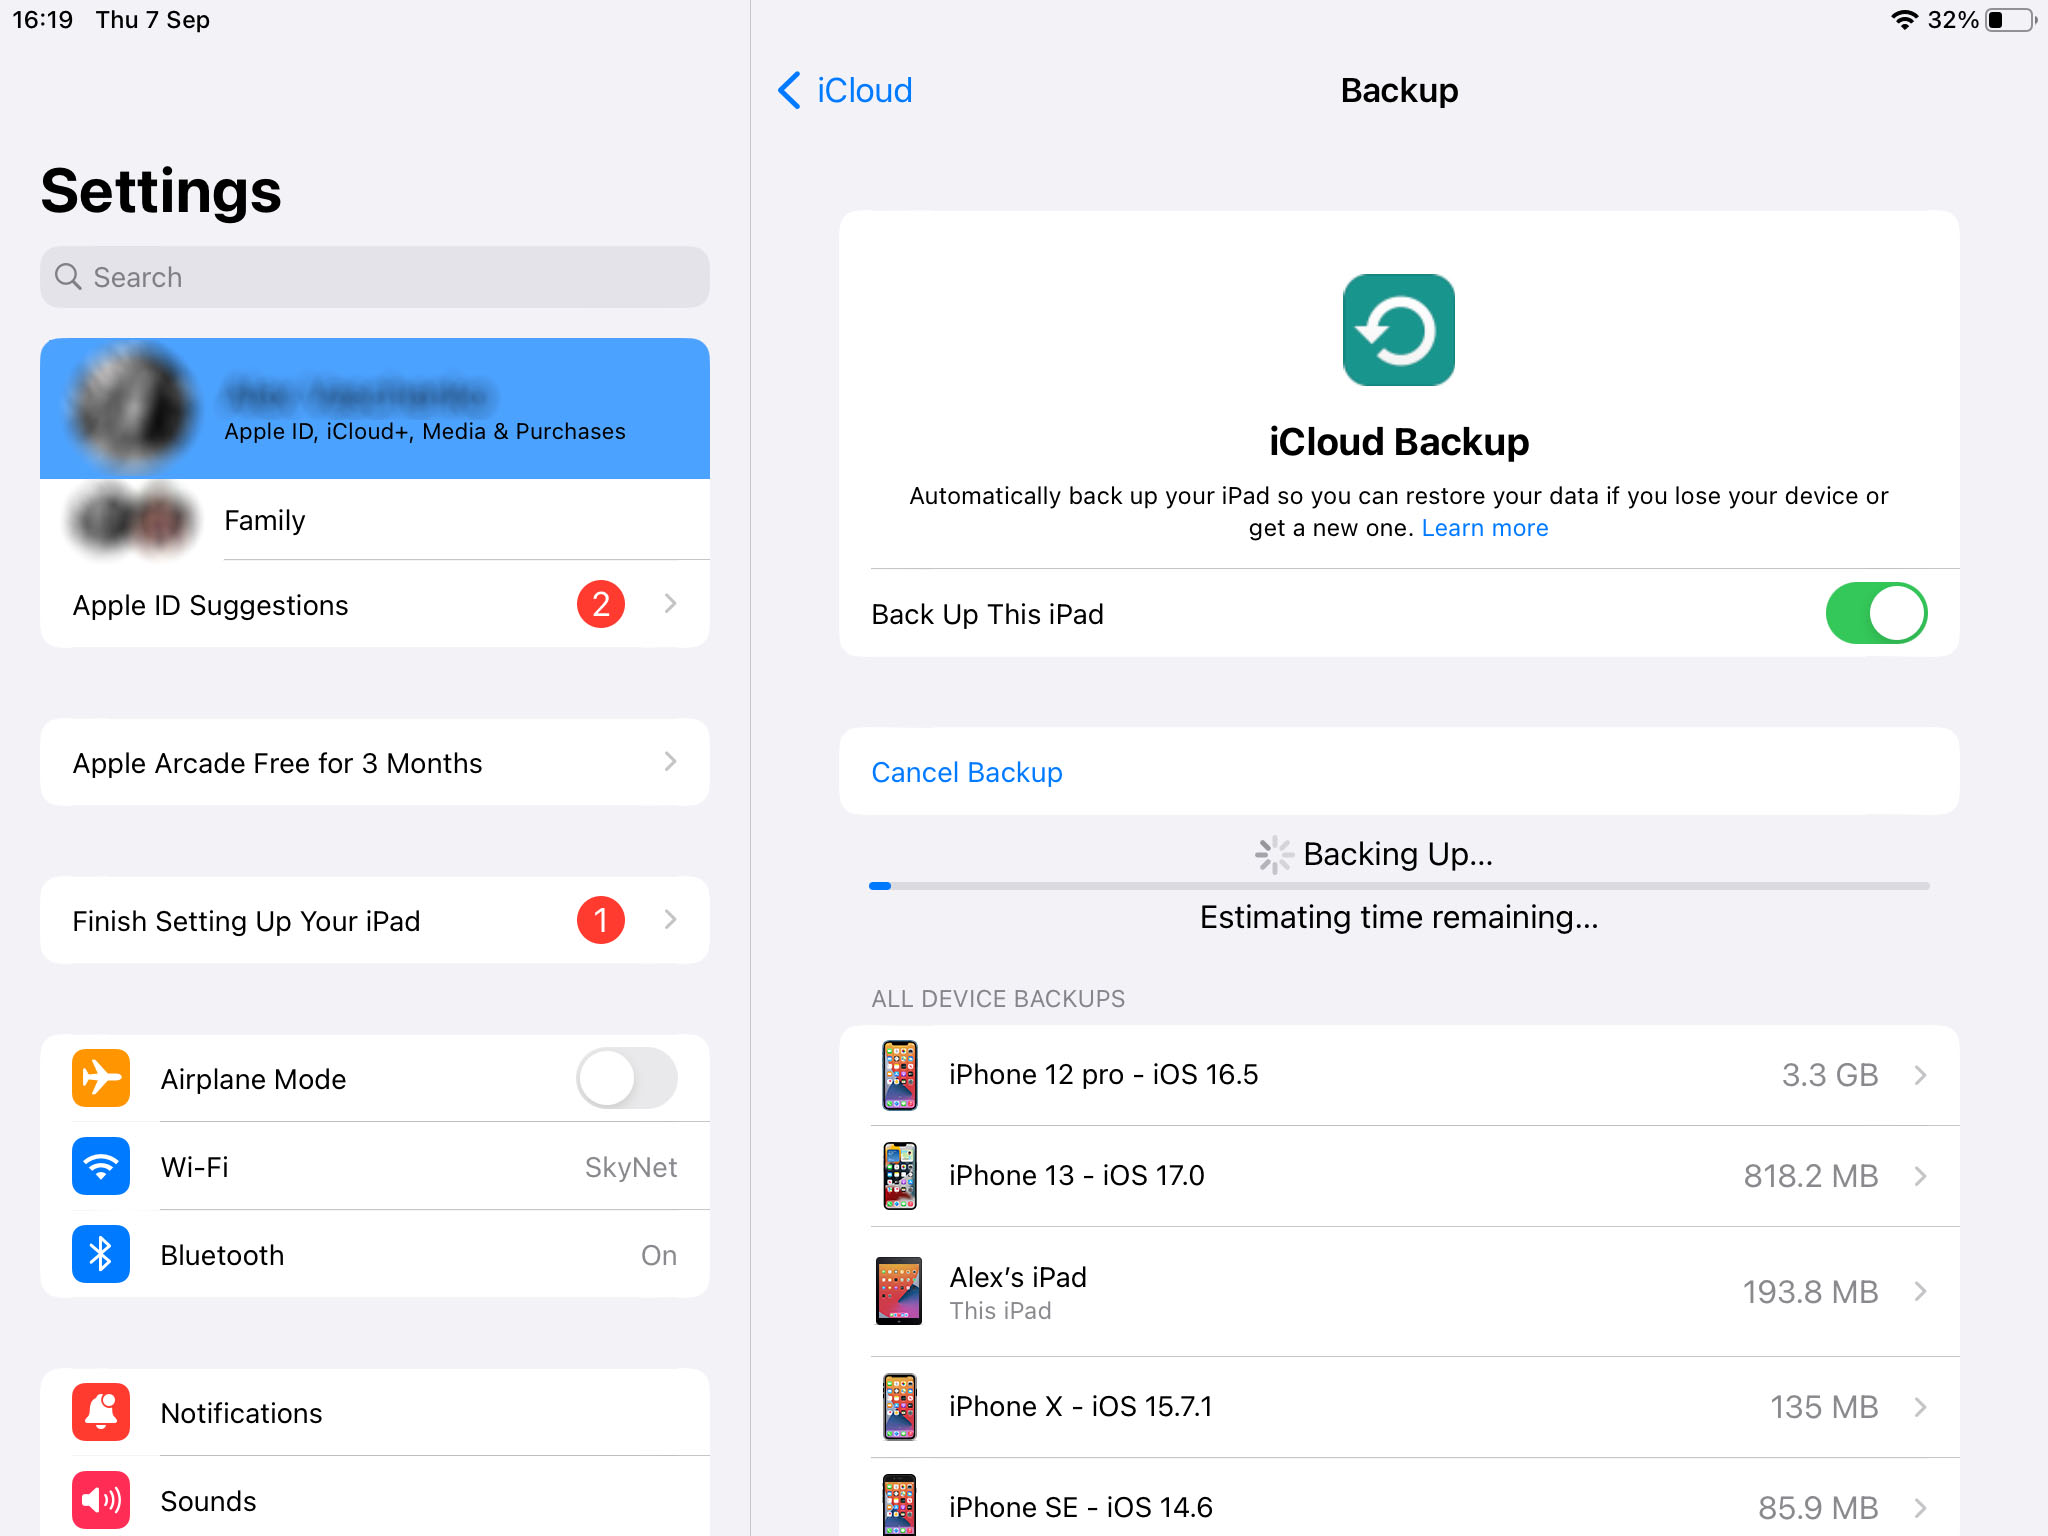
Back up your iPad using the following steps:
- Connect your device to a WiFi network.
- Open Settings and tap on Your Name and then tap iCloud.
- Tap iCloud Backup.
- Tap Back Up Now. You need to stay connected to the WiFi network until the backup is completed.
Restore your iPad using the following procedures:
The backups you create with iCloud do not contain the majority of data found in the “Other” storage category. Therefore, when you restore the backup, that data is overwritten and will no longer be taking up storage space on the iPad.
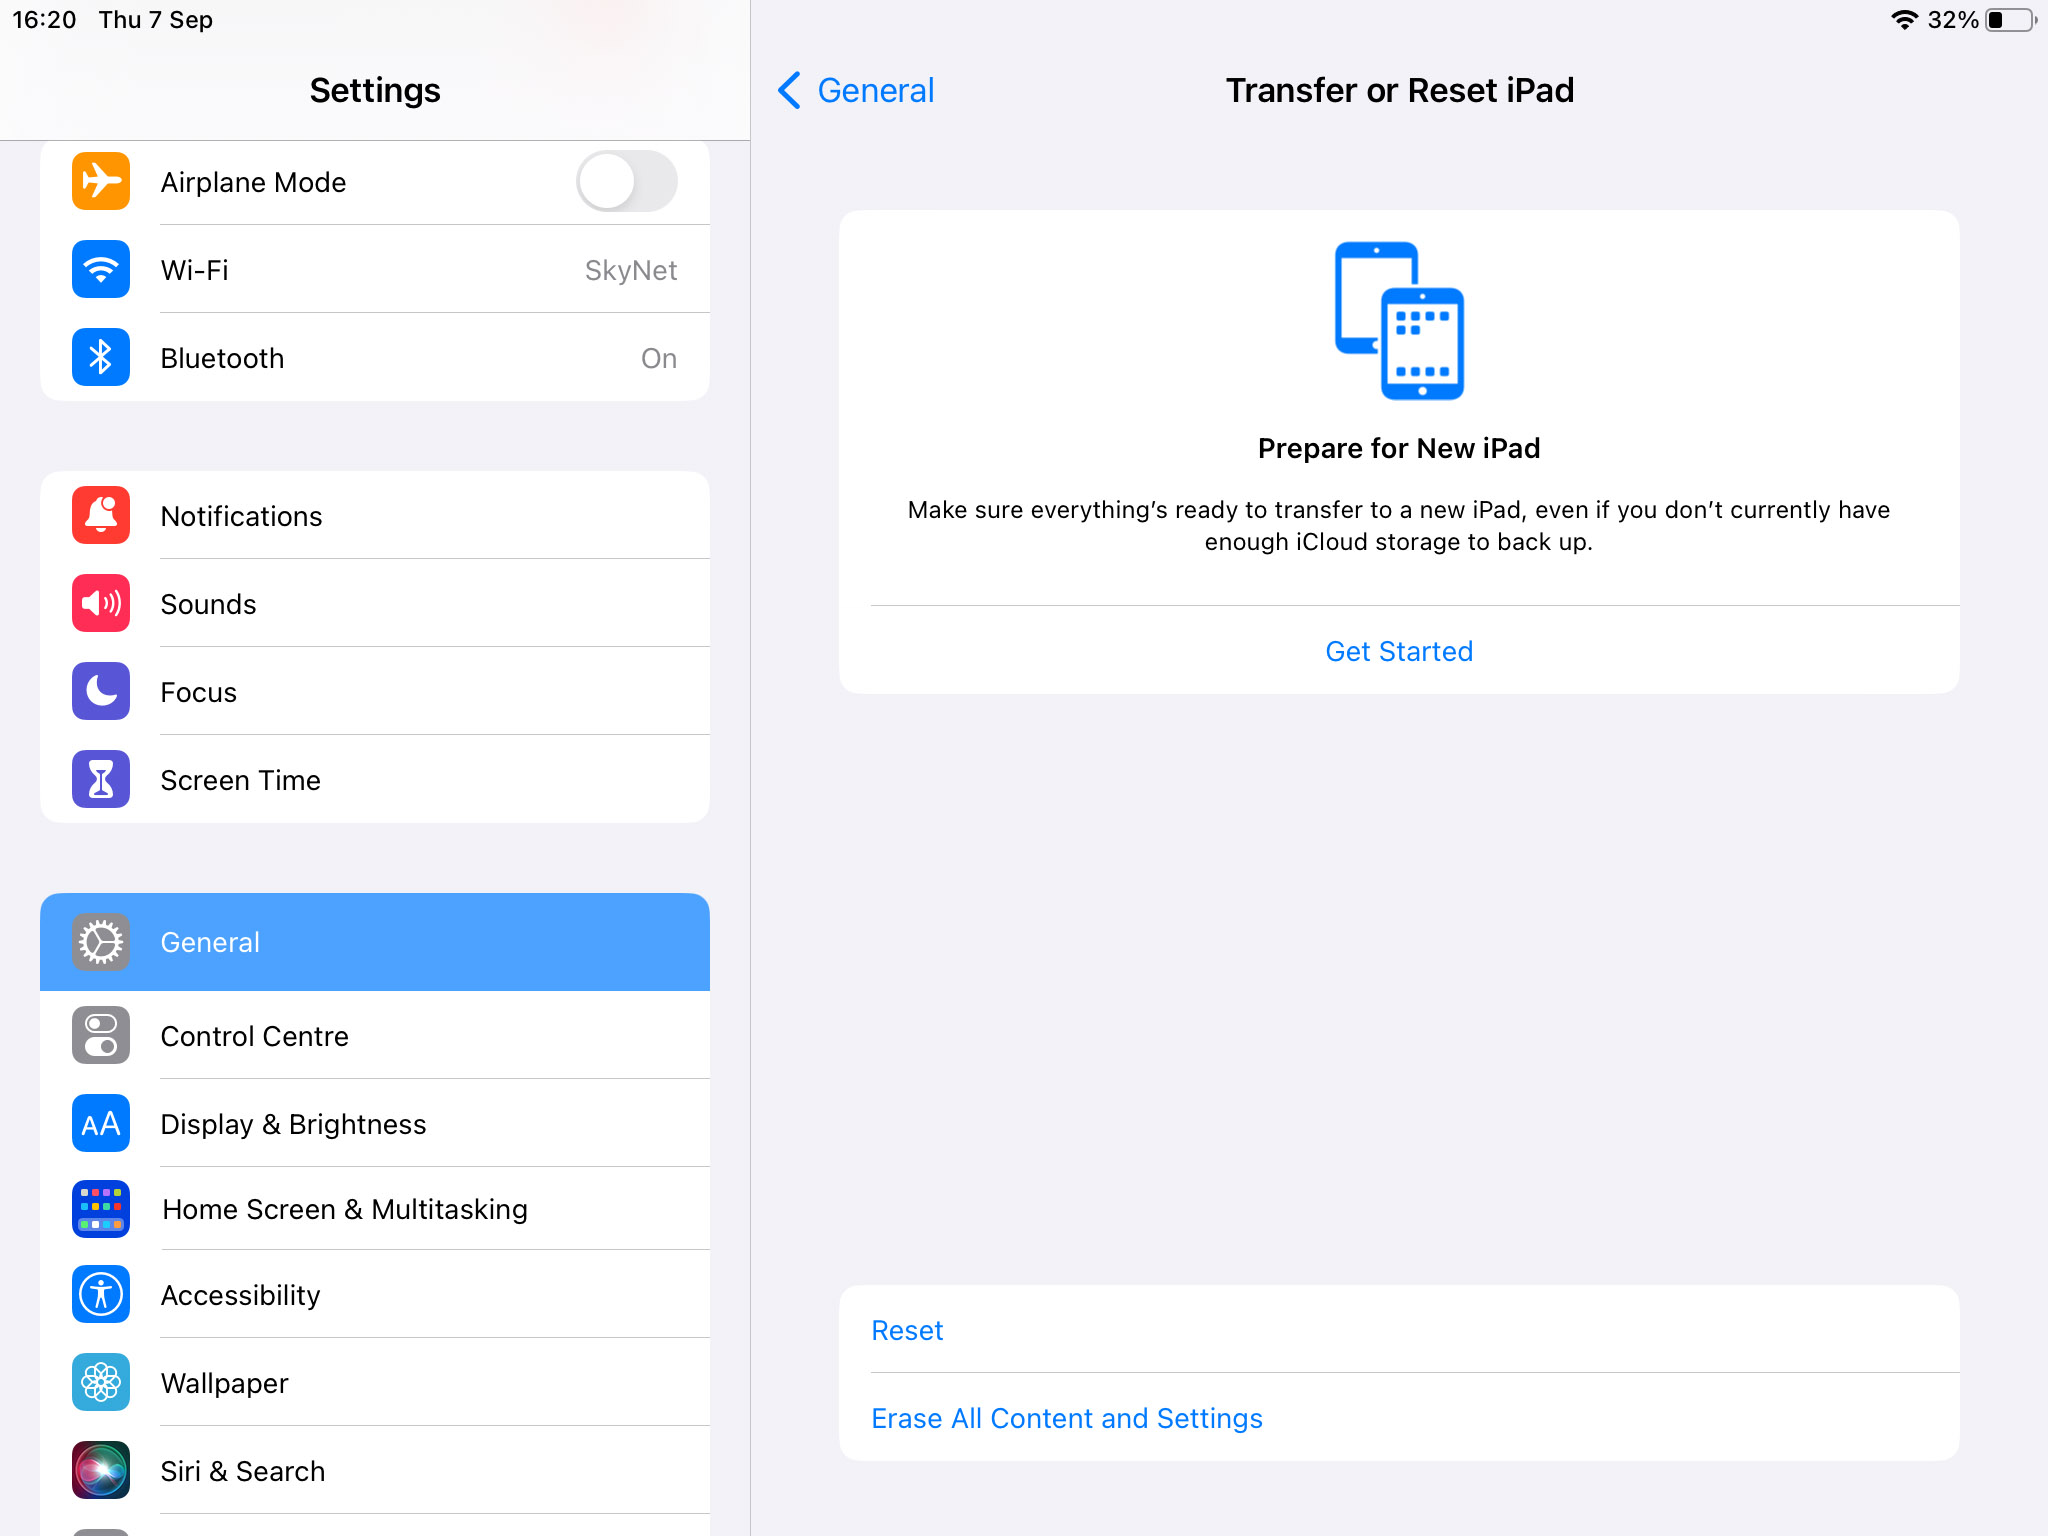
Before you can restore from the backup you need to reset your iPad to factory settings with the following procedure.
- Back up your iPad.
- Tap Settings > General > Transfer or Reset iPad.
- Tap Erase all Content and Settings.
- Enter your Apple ID and password when prompted.
- Confirm that you want to erase the iPad.
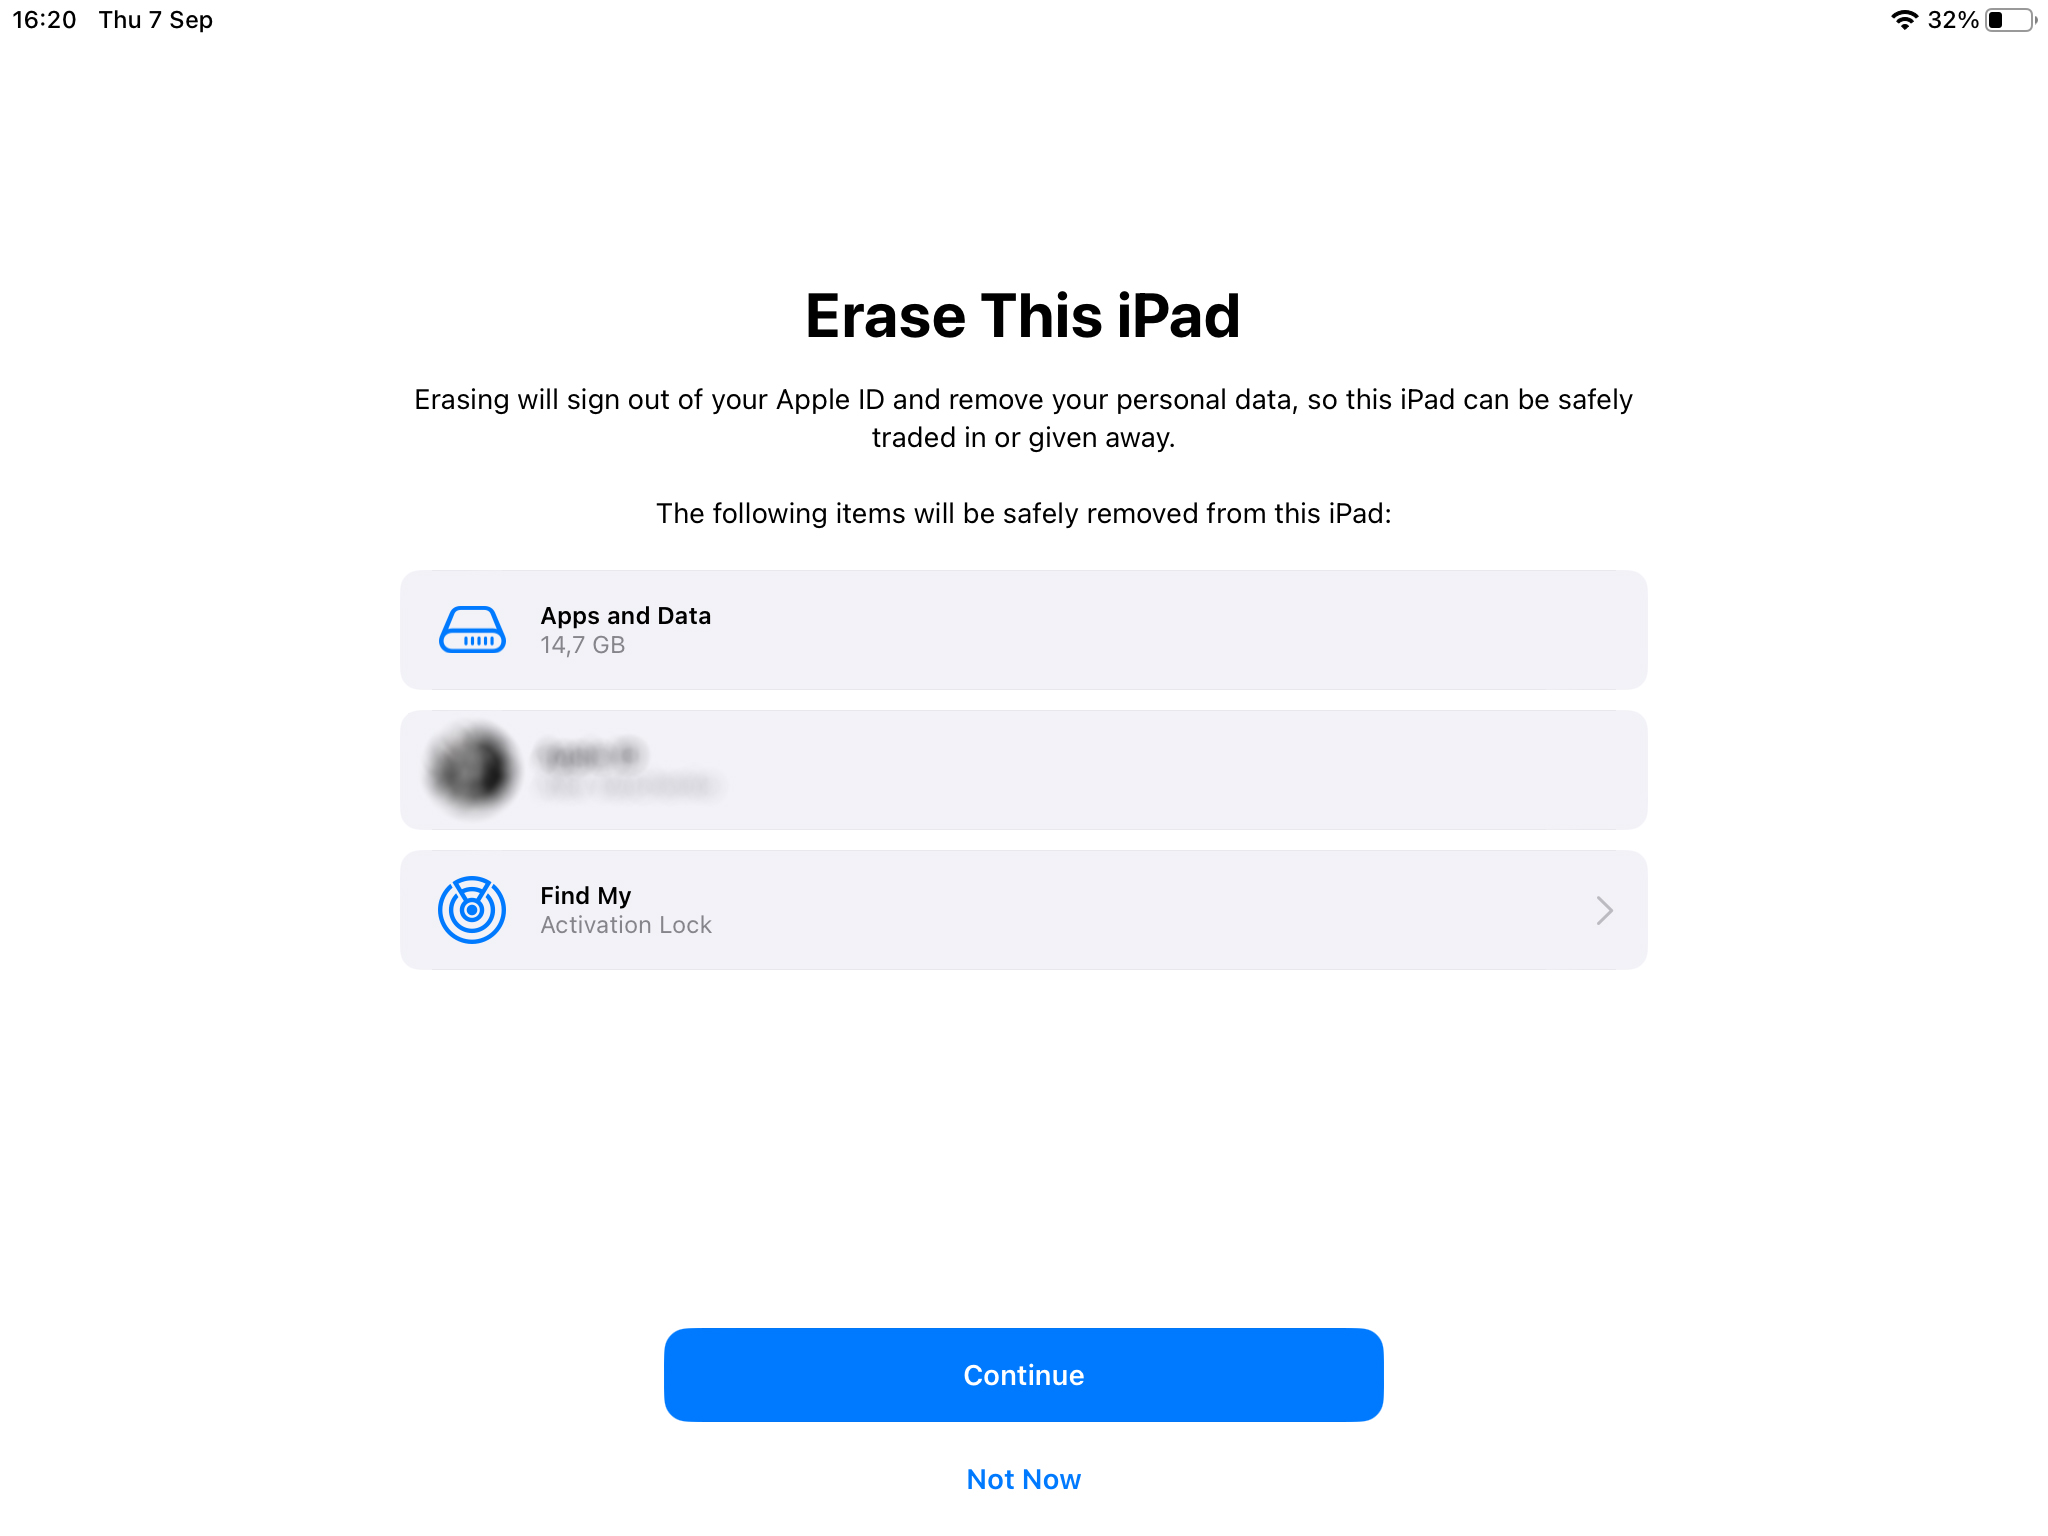
- Wait for the process to complete.
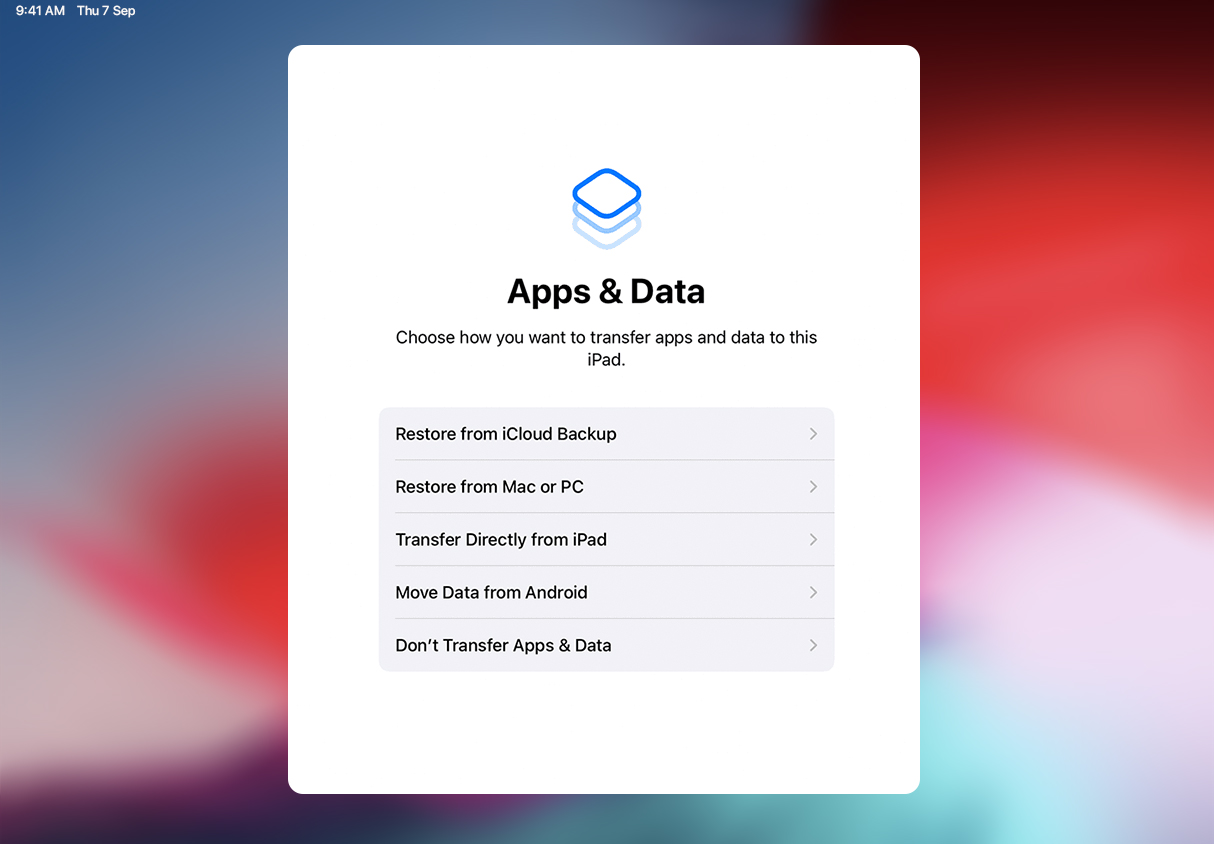
Use the following steps to restore your iPad from an iCloud backup:
- Turn on your iPad after erasing all of its contents.
- Follow the onscreen setup steps until you get to the Apps & Data screen.
- Tap Restore from iCloud Backup.
FAQ
What is “Other” on iPad storage and how do I delete it?
“Other” storage on your iPad, which is called “System” storage in newer iPadOS versions, is a catchall category that is made up of a wide variety of data. You delete this data by deleting cached data from individual apps, reinstalling some apps, or restoring your iPad from an iCloud backup.
Why is my iPad's “Other” storage huge?
Your iPad’s “Other” storage is huge because it is a repository for many different types of data that accumulate on your device over time. Cache files, temporary data, and iMessage history are just some of the items that are stored in this category and cause it to grow over time and use up valuable space.
How can I delete “Other” storage on an iPad without resetting it?
You can delete “Other” storage on your iPad without resetting the device by clearing the cache and temporary files of streaming services and social media apps. You should also delete unnecessary Safari downloads and iMessage attachments that you no longer need.
Conclusion
Over time, your iPad is most likely going to get filled up with junk, caches, and temporary files that eat up your valuable storage space. This data is often stored in the iPad’s “Other” or “System” storage category which can get to be very large. You may need to delete this “Other” data on your iPad to recapture important space for new apps or information.
We have shown you several methods that should help you control the “Other” storage on your iPad. Using these techniques when you are running short on space will typically result in deleting “Other” data that you no longer need. If you reduce the “Other” storage on your iPad you’ll be able to use the device more efficiently. Give these methods a shot next time your iPad is running short on storage space.
This article was written by Robert Agar, a Staff Writer at Handy Recovery Advisor.
Curious about our content creation process? Take a look at our Editor Guidelines.