Today’s computers are so powerful that they can run multiple operating systems at the same time using virtualization software like VirtualBox and VMware.
As practical as it can be to create a dedicated virtual machine for a specific task, such as for testing or software development, keeping all eggs in one virtual basket can be risky because a single mistake may result in the complete loss of all data.
Well, it may, but it doesn’t have to. There are different techniques and solutions that you can use to perform virtual machine data recovery and recover files from deleted or otherwise lost virtual machine image files.
Common Virtual Machine Data Loss Scenarios
Before we take a close look at several virtual disk recovery techniques and solutions, we should first explore the scenarios when they are applicable.
Scenario |
Description |
Solution |
I’ve deleted the virtual disk image file itself. |
The deletion of an entire virtual disk image results in the loss of all data contained within the virtual disk image, so it’s important to start virtual machine data recovery while the image is still present on the hard drive. |
Check Your Backups or Scan Your File Storage for a Lost Virtual Disk Image |
My virtual disk image has become corrupted. |
A virtual disk image that has become corrupted and impossible to open using virtualization software still contains recoverable data that can be salvaged if VM data recovery is started soon enough. |
Check Your Backups or Directly Scan Your Disk Image with Disk Drill (VMDK) or Mount Your Virtual Disk Image in Windows Disk Management & Then Scan It (VHD) |
The storage device where the virtual disk image was stored is not working correctly. |
A single virtual disk image can easily take up an entire storage device, so any storage device damage can instantly affect it. Depending on its type (logical or physical) and degree, it might be necessary to leave its recovery to professionals. |
Check Your Backups or Contact Your Local Data Recovery Service Center |
I want to recover files from a healthy virtual disk image. |
Virtual disk images are essentially digital storage devices, so you can recover both deleted and existing files from them the same way you would from any physical storage device. |
Directly Scan Your Disk Image with Disk Drill (VMDK) or Mount Your Virtual Disk Image in Windows Disk Management & Then Scan It (VHD) |
I want to mount a virtual disk image in Windows Disk Management and then scan it. |
The Windows Disk Management tool can create and mount Virtual Hard Disks (VHD images). Once mounted, the images can be scanned using readily available virtual disk recovery software applications. |
Mount Your Virtual Disk Image in Windows Disk Management & Then Scan It (VHD) |
I want to install and use data recovery software within my virtual machine environment. |
Data recovery software can be installed not only on the host computer but also inside guest computers running a compatible operating system. In some cases, such as when recovering encrypted virtual drive images, running data recovery software inside the virtual machine is the best way to obtain the desired results. |
Install the Data Recovery Software Inside the Guest Operating System |
5 Best Methods to Recover Data from a Virtual Machine Disk
Using the methods below, you can effectively address most cases of virtual machine disk data loss.
Method 1: Check Your Backups
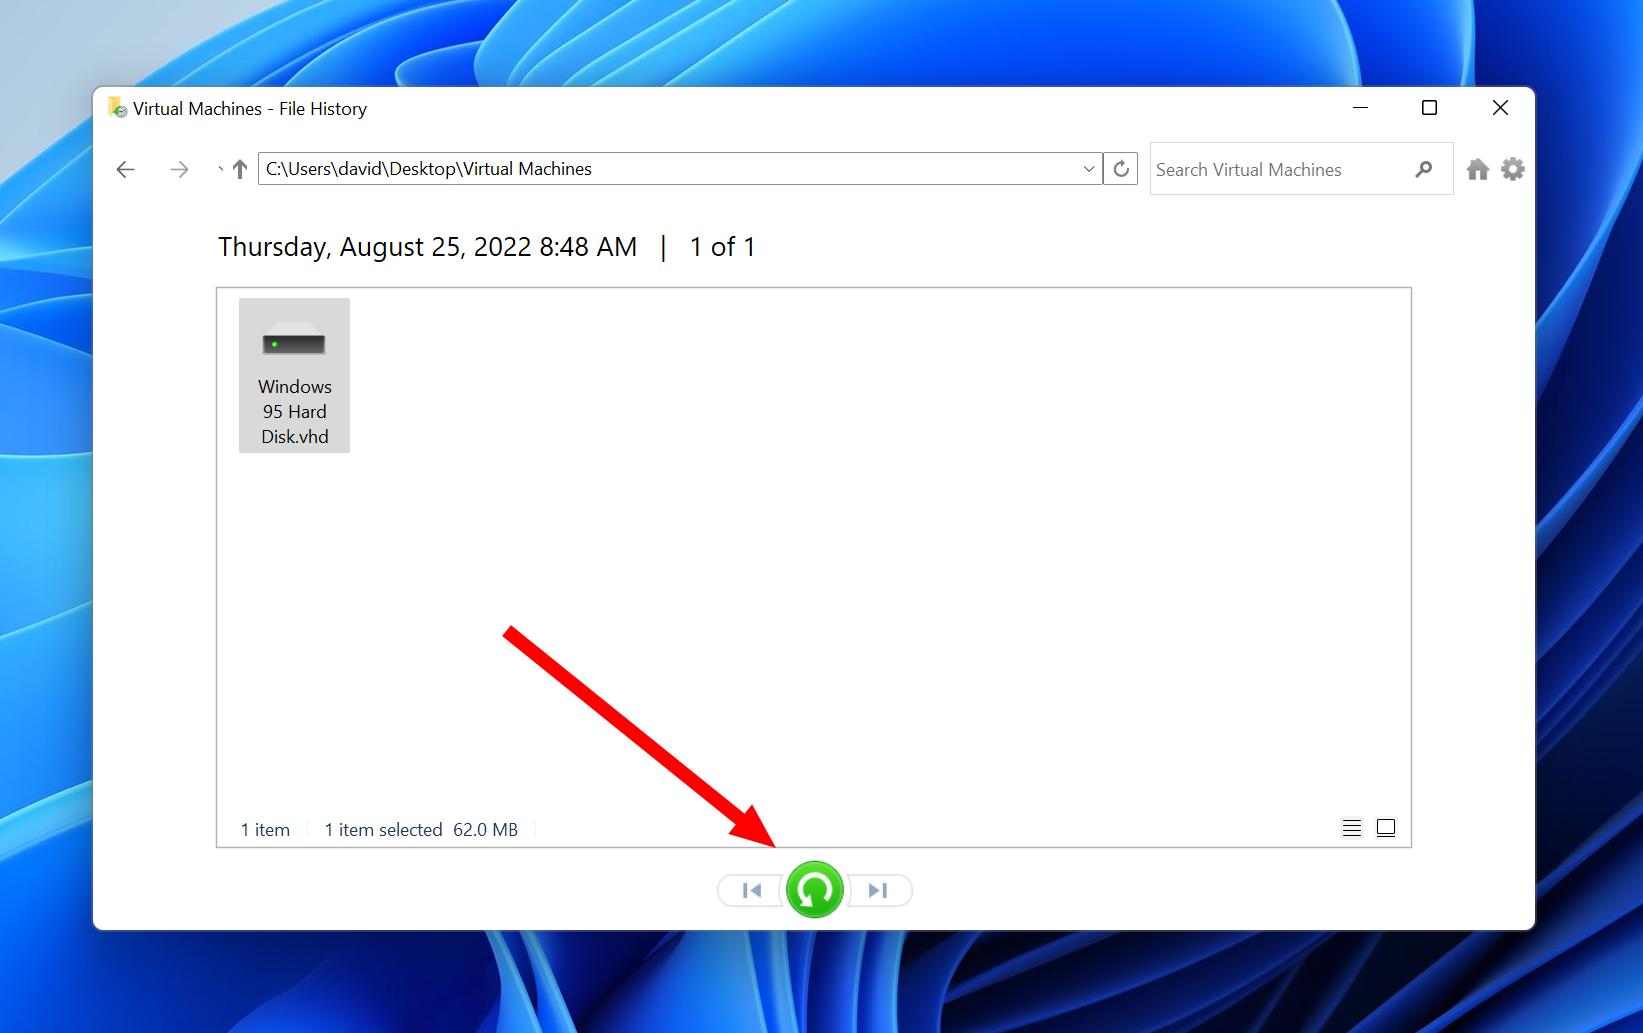
Because of how easy it is for virtual machines to become lost or damaged, it’s a good practice to back them up on a regular basis. If the virtual machine disk image you’re trying to recover was stored in a location that’s included in your File History backup, then it’s very likely that you’ll be able to retrieve it intact by following these steps:
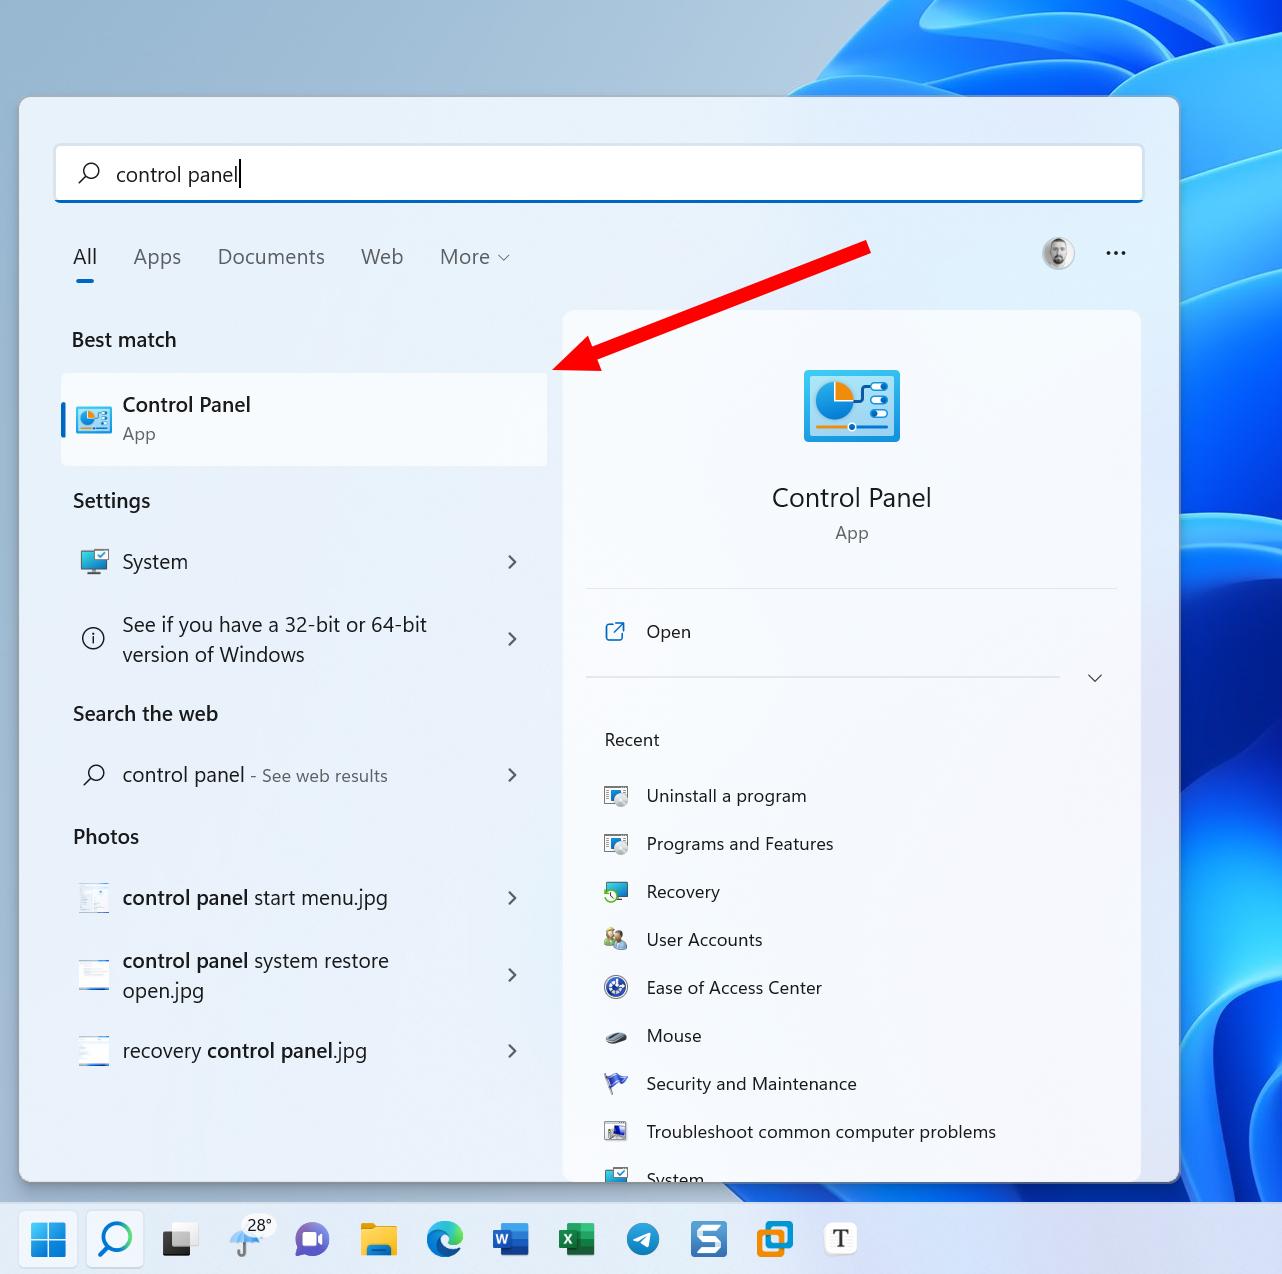
- Open the Start menu.
- Type “control panel” and launch the Control Panel app.
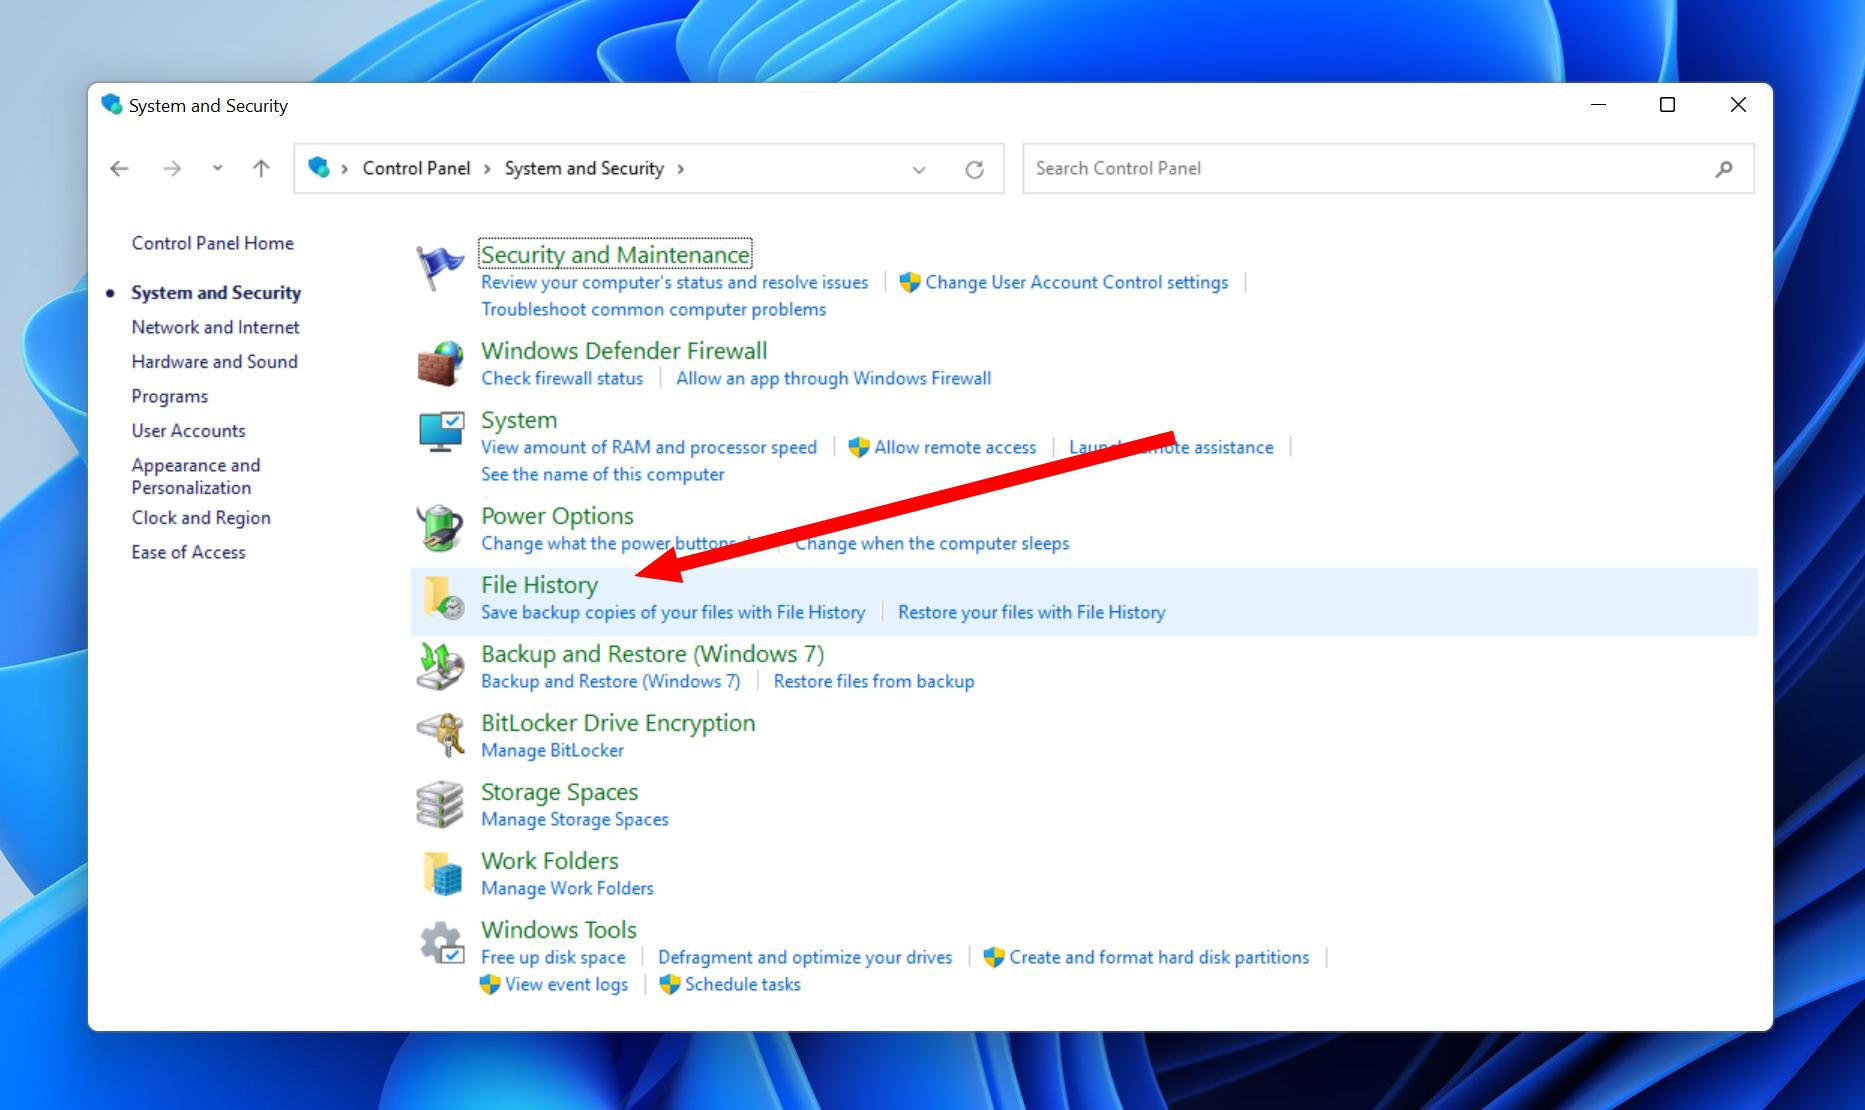
- Navigate to System and Security > File History.
- Click Restore personal files.
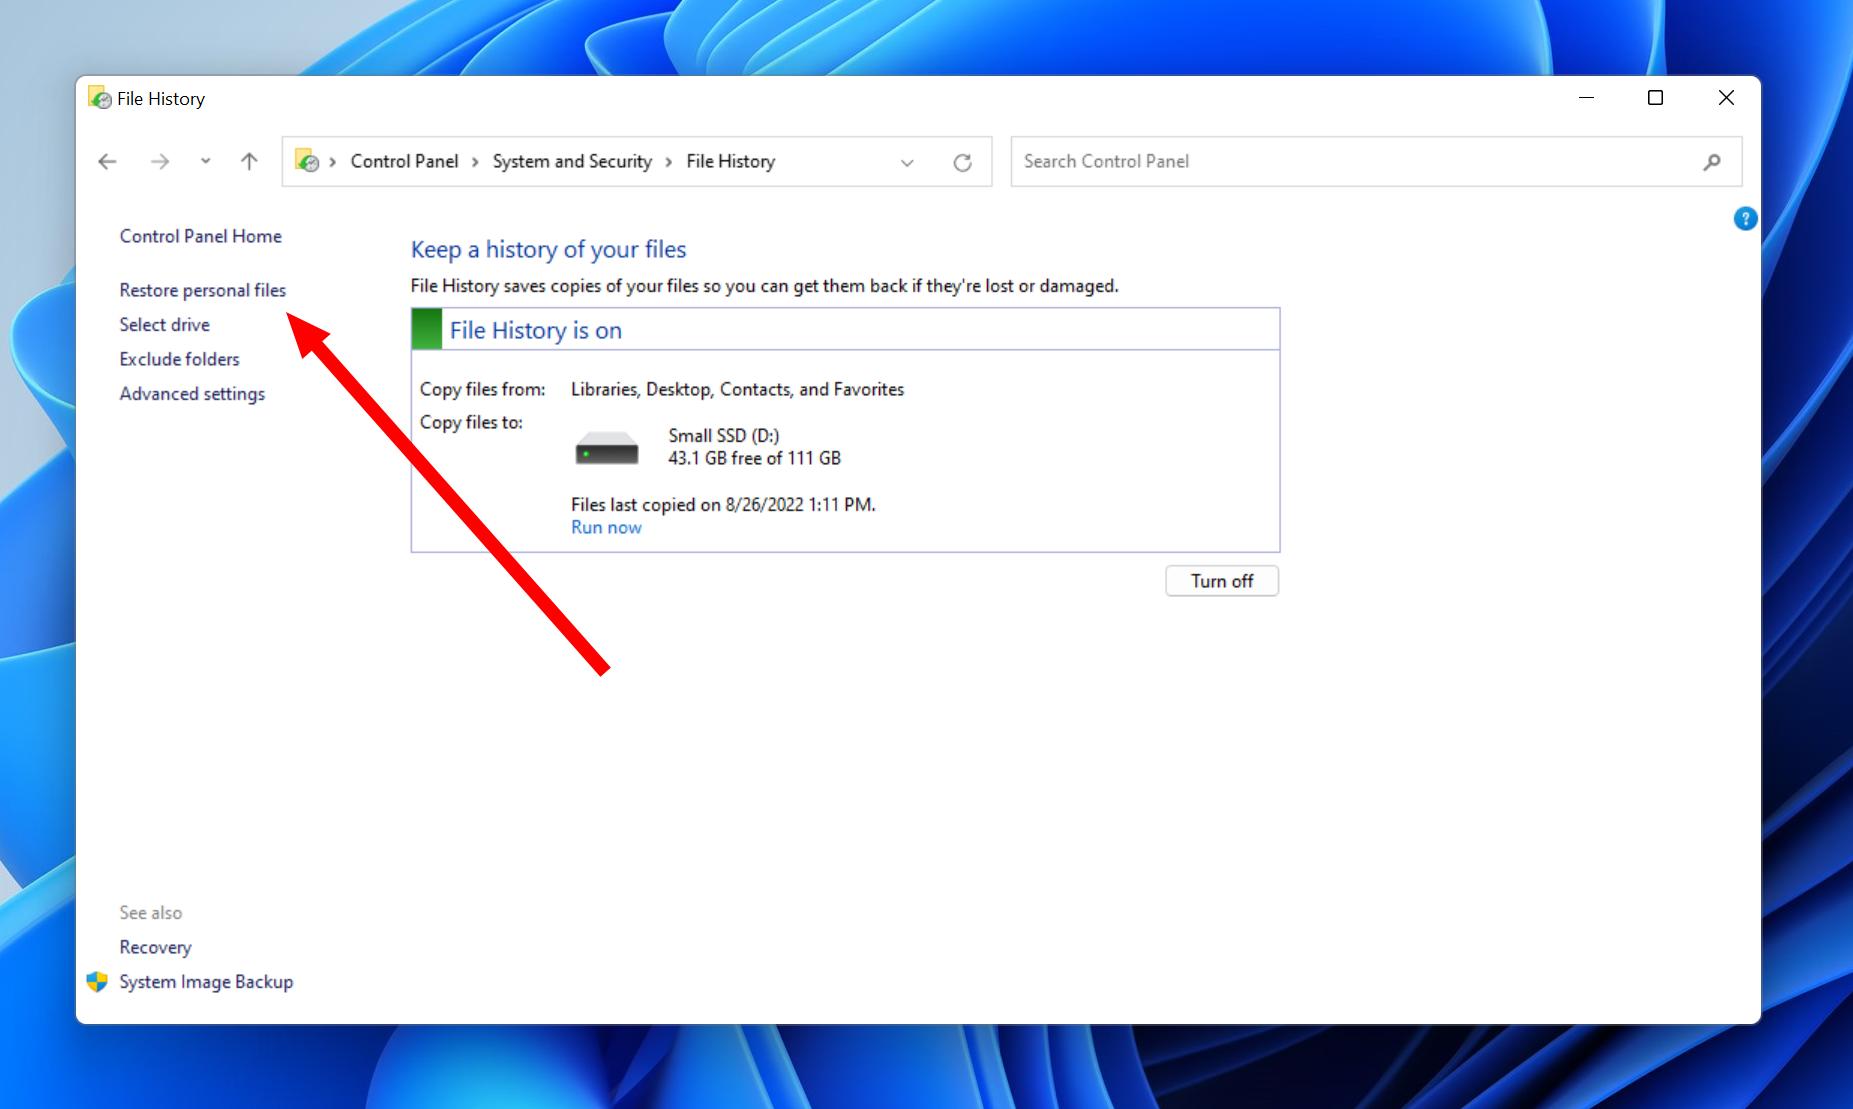
- Navigate to the folder where the virtual machine disk image was stored.
- Select a previous version of the folder.
- Click Restore.
By default, File History is configured to back up your Libraries, Desktop, Contacts, and Favorites.
Method 2: Scan Your File Storage for a Lost Virtual Disk Image
If you’ve deleted an entire virtual disk image, then you need to get it back using a data recovery tool with support for VHD recovery (Windows virtual machine disk format), VMDK file recovery (VMware virtual machine disk format), or any other virtual drive file format you may need to recover.
One data recovery tool that can reliably recover most virtual drive file formats is Disk Drill Data Recovery. Thanks to its streamlined recovery process, Disk Drill can deliver results in a few simple steps, and the free version can restore up to 500 MB of data, so you might be able to recover a smaller virtual machine disk image without paying any money.
Here’s what you need to do to scan your file storage for a lost virtual disk image using Disk Drill:
- Download Disk Drill for Windows from its official website.
- Install and launch the application.
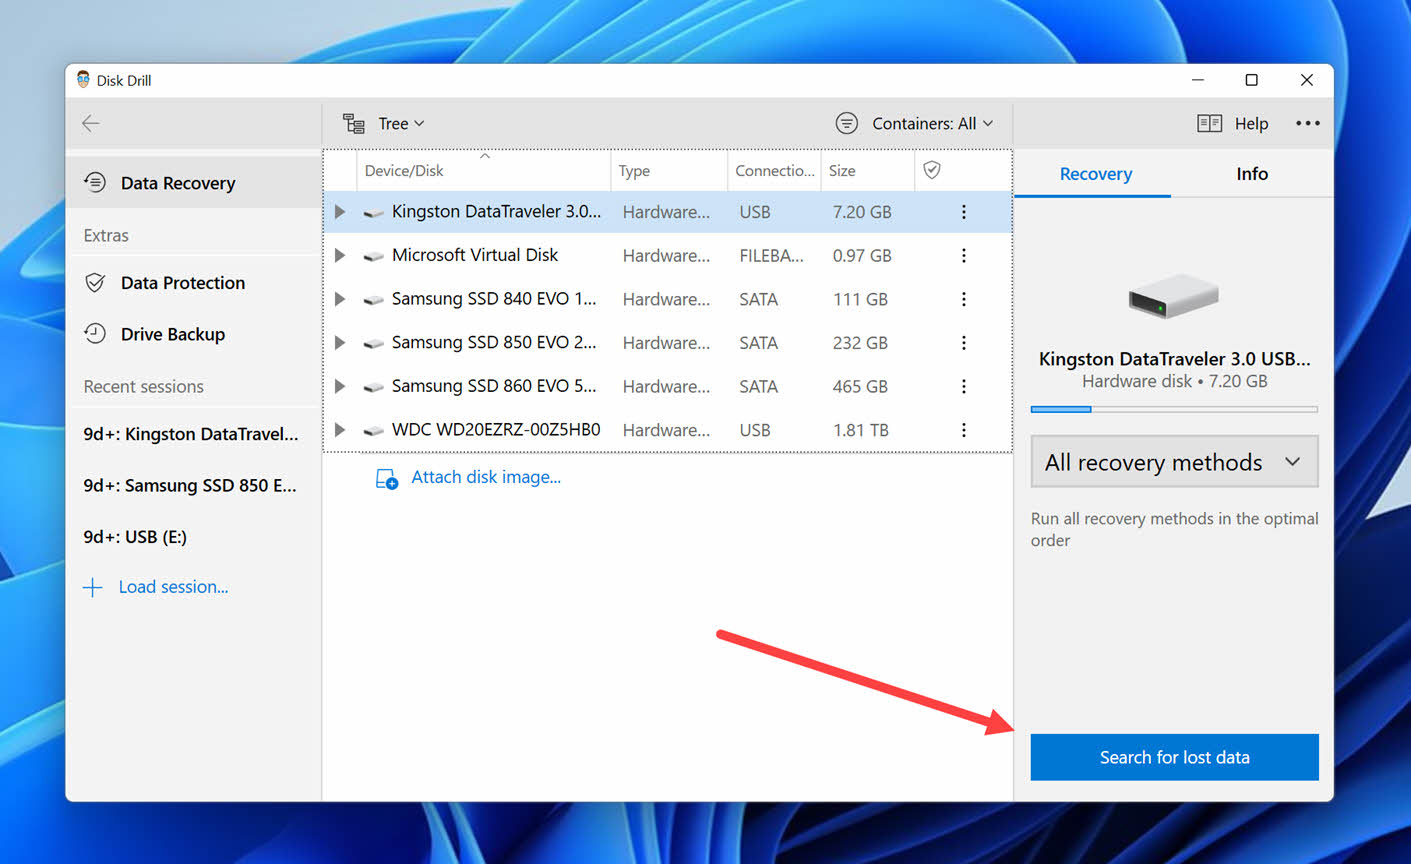
- Select the storage device where your virtual disk image was stored.
- Click the Search for lost data button to initiate a scan.
- Analyze the scan results and look for the missing virtual disk image.
- Select the image and click the Recover button.
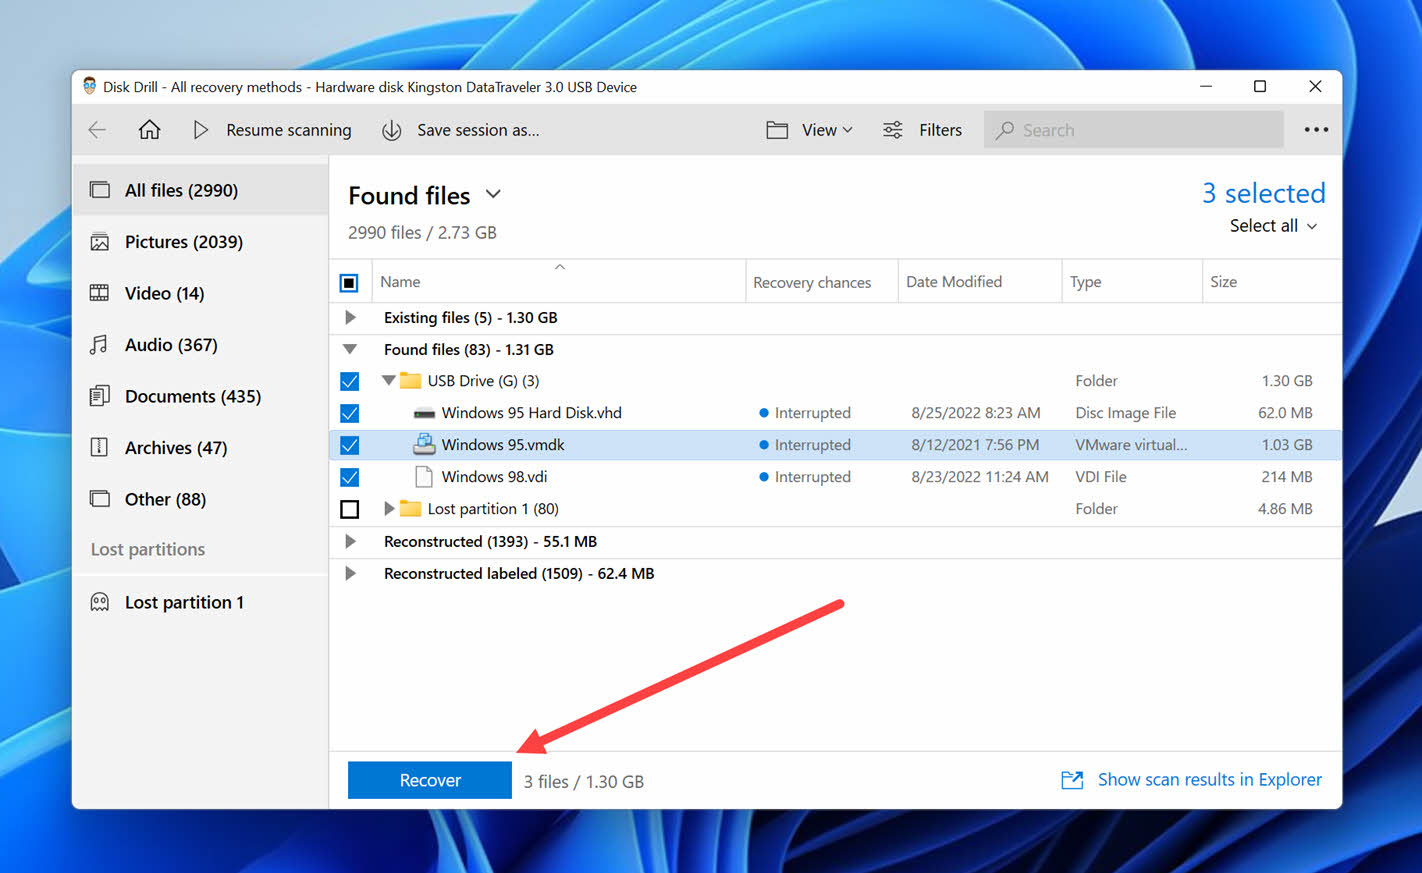
- Pick a suitable recovery destination for the image and click OK.
Depending on the size of the virtual disk image, it might take Disk Drill some time to recover it to the selected destination (especially if you select a slower hard drive or a USB flash drive connected to a USB 2.0 port).
For more information about Disk Drill, you can read our full review here.
Method 3: Mount and Scan Your Disk Image Using Specialized Software
Do you want to recover files from a healthy virtual disk image or perhaps a corrupted one that can no longer be opened by your virtualization software? In that case, you should scan the disk image directly using the best data recovery apps with support for VMDK and VHD file formats.
Option A: Directly Scan Your Disk Image with Disk Drill
Disk Drill can mount and scan a number of different disk image file formats, including:
- Apple disk images (*.dmg)
- Raw disk images (*raw)
- Forensic DD images (*dd)
- Sector-by-sector disk images (* img)
- Uncompressed disk images (*iso)
- Byte-to-byte disk images (*.dsk)
- Generic disk images (*.bin)
- Legacy binary disk images (*dat)
- Virtual VMware disks (*vmdk)
- Virtual Disk files (* vhd)
- Virtual Disk files (*vhdx)
This is how it works:
- Download Disk Drill for Windows from its official website.
- Install and launch the application.
- Click the Attach disk image option.
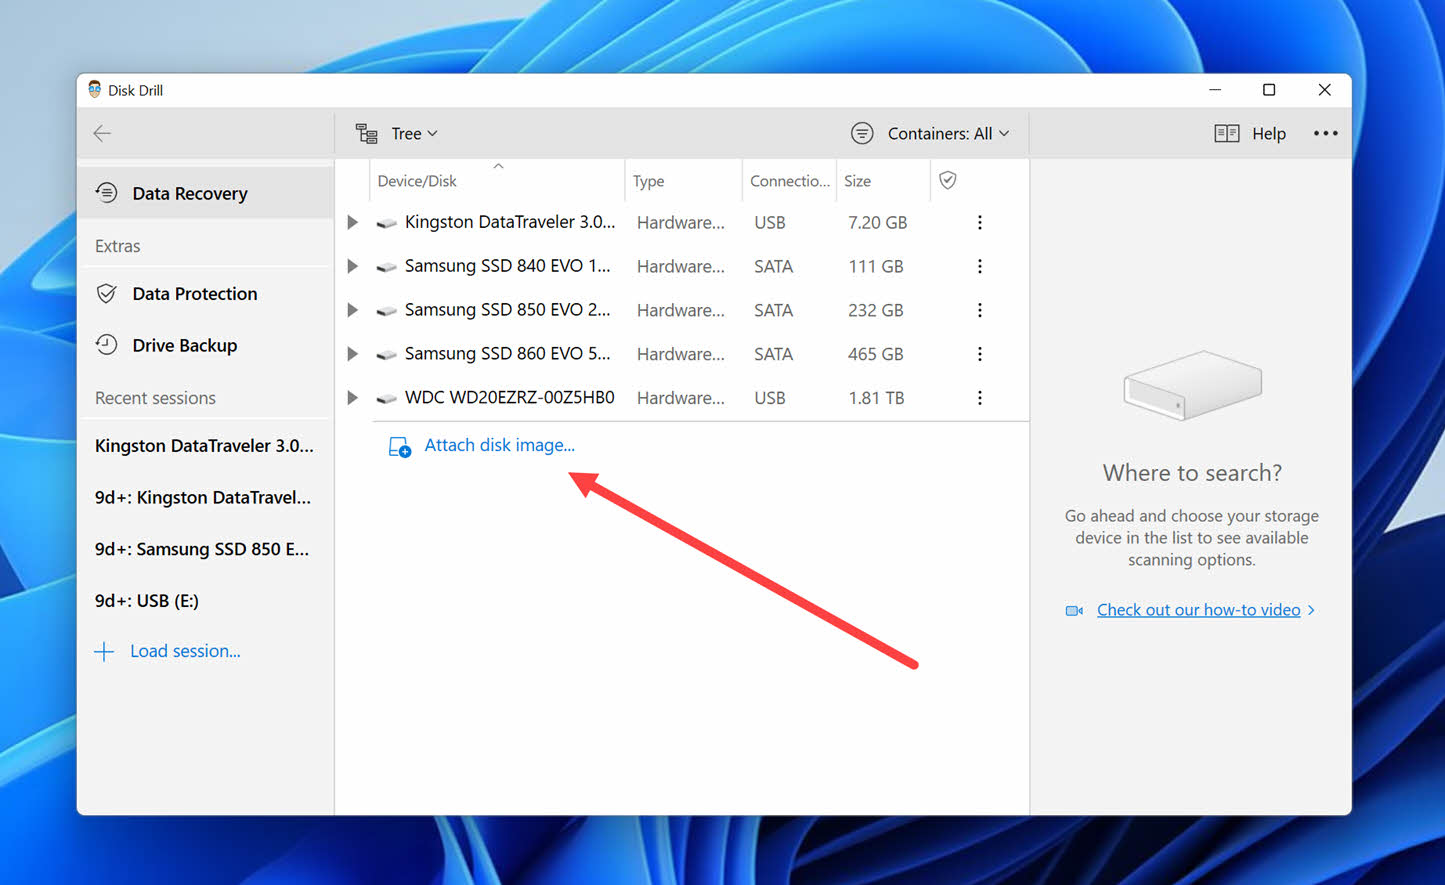
- Select the disk image you want to scan. The image will be added to the list of available storage devices.
- Select the added image and click Search for lost data.
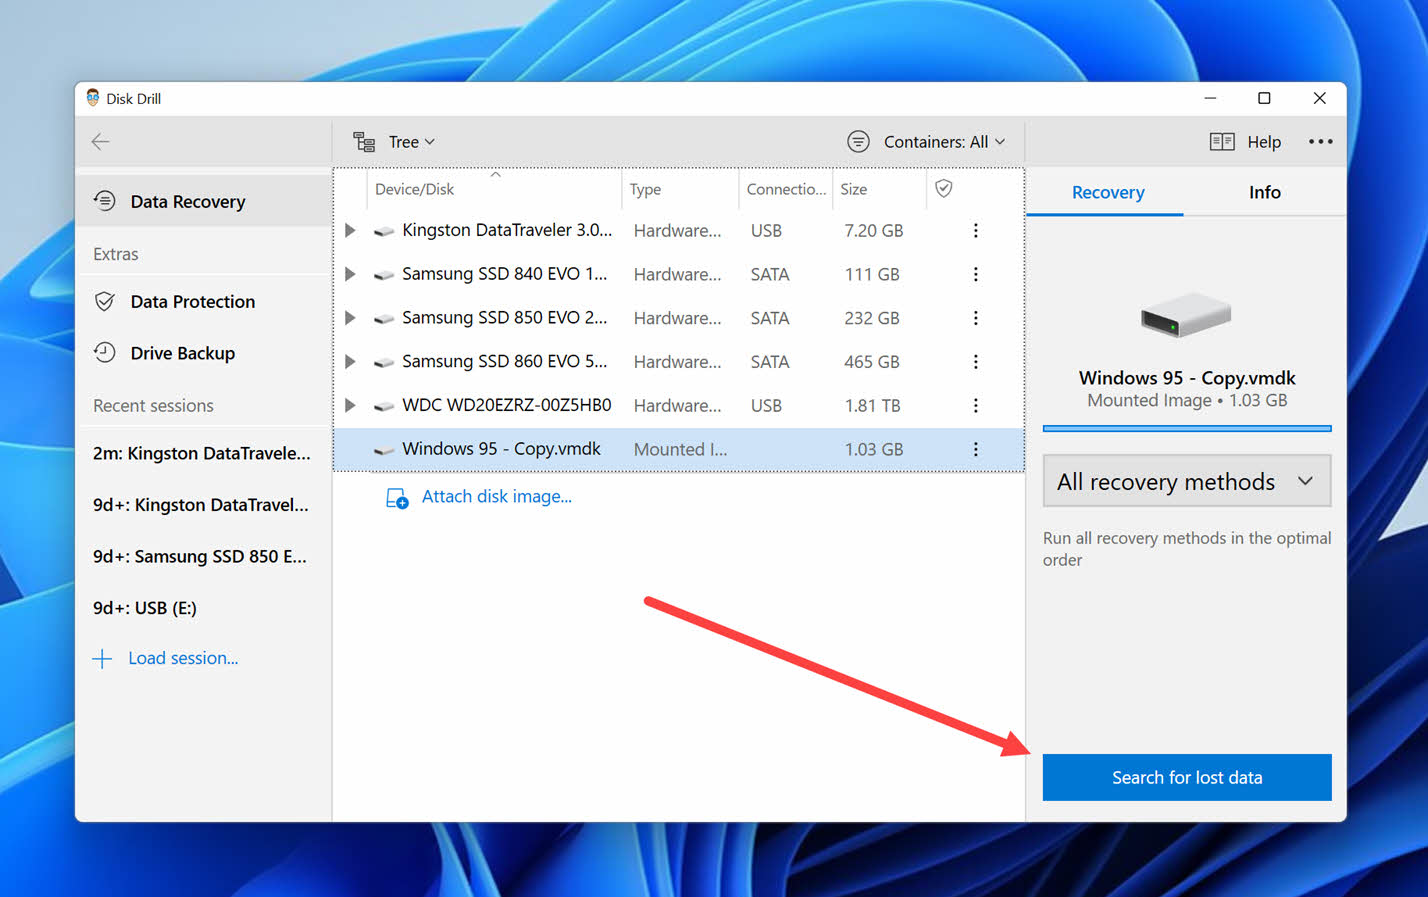
- Select any files you want to recover and click the Recover button.
- Pick a suitable recovery destination for the selected files and click OK.
If you’re looking for a specific type of data, then you can use Disk Drill’s file type filters to narrow down the scan results.
Option B: Mount Your Virtual Disk Image in Windows Disk Management & Then Scan It (VHD)
Disk images in the Windows virtual machine disk format (VHD) can be mounted using the Windows Disk Management tool, which is included in all recent versions of Windows. You can then scan them using Disk Drill just like you would when recovering files from a formatted hard drive or a formatted partition.
Follow the steps below to mount a virtual disk image in Windows Disk Management:
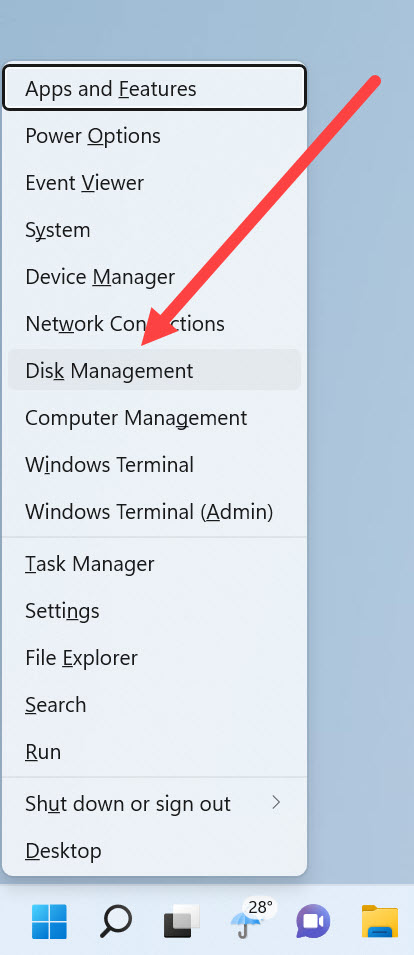
- Press Win + X and select Disk Management.
- Open the Action menu and select the Attach VHD option.
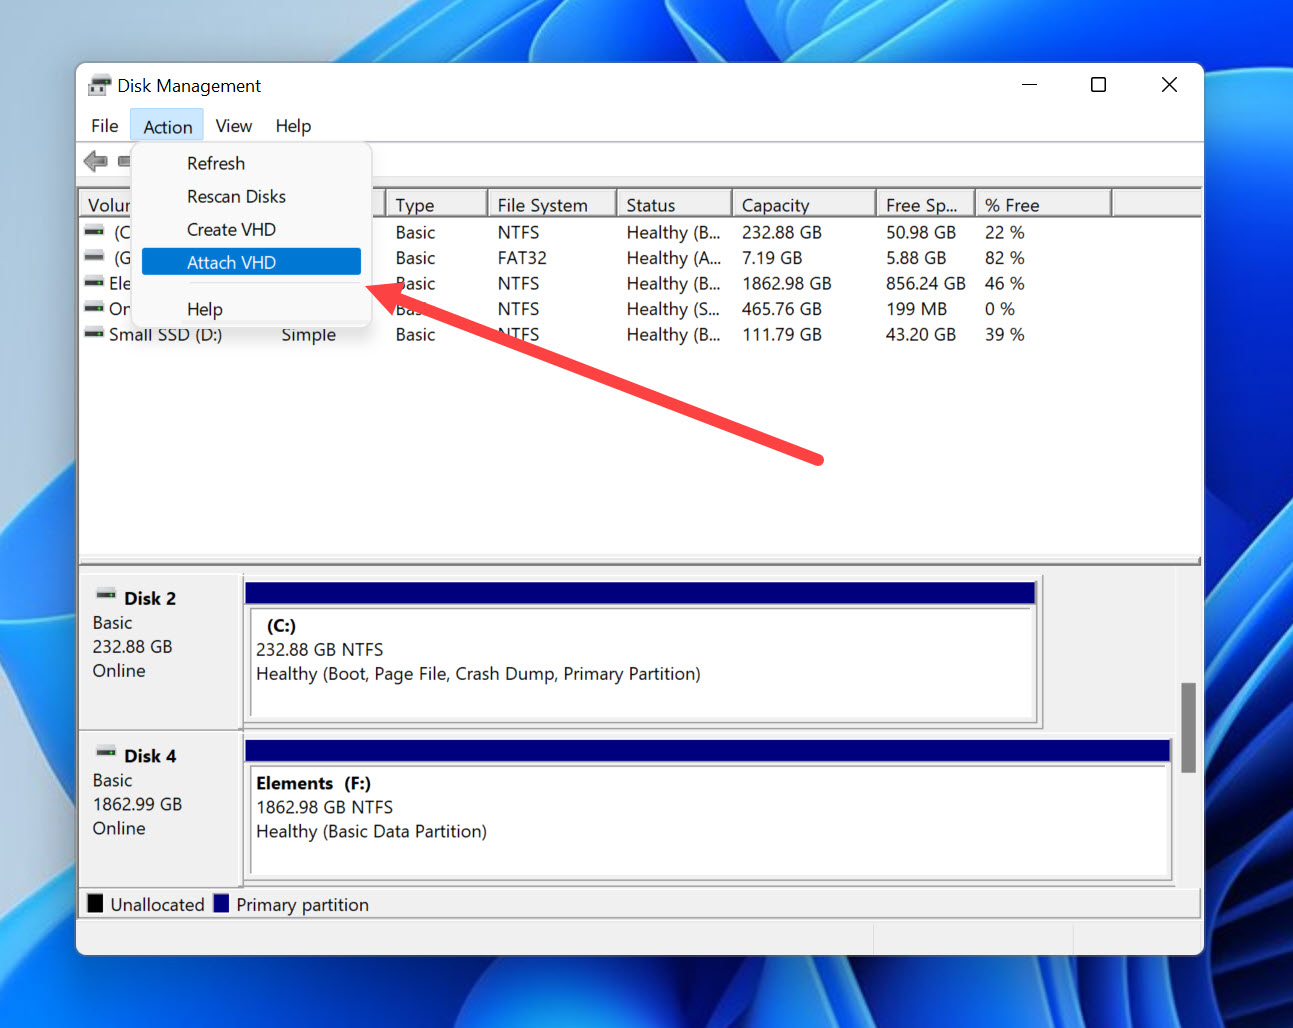
- Select your virtual disk image file.
The Windows Disk Management tool will mount the selected image file and automatically assign a drive letter to it. You can simply open Disk Drill and scan the newly available storage device.
Option C: Scan Your Disk Image with R-Studio
Disk Drill isn’t the only virtual disk recovery software solution out there. There’s also R-Studio, a feature-packed application with many useful features geared toward data recovery professionals.
If you don’t let its complexity intimidate you, then R-Studio can help you recover files from virtual machine images that are not supported by Disk Drill. To use it:
- Download R-Studio for Windows from its official website.
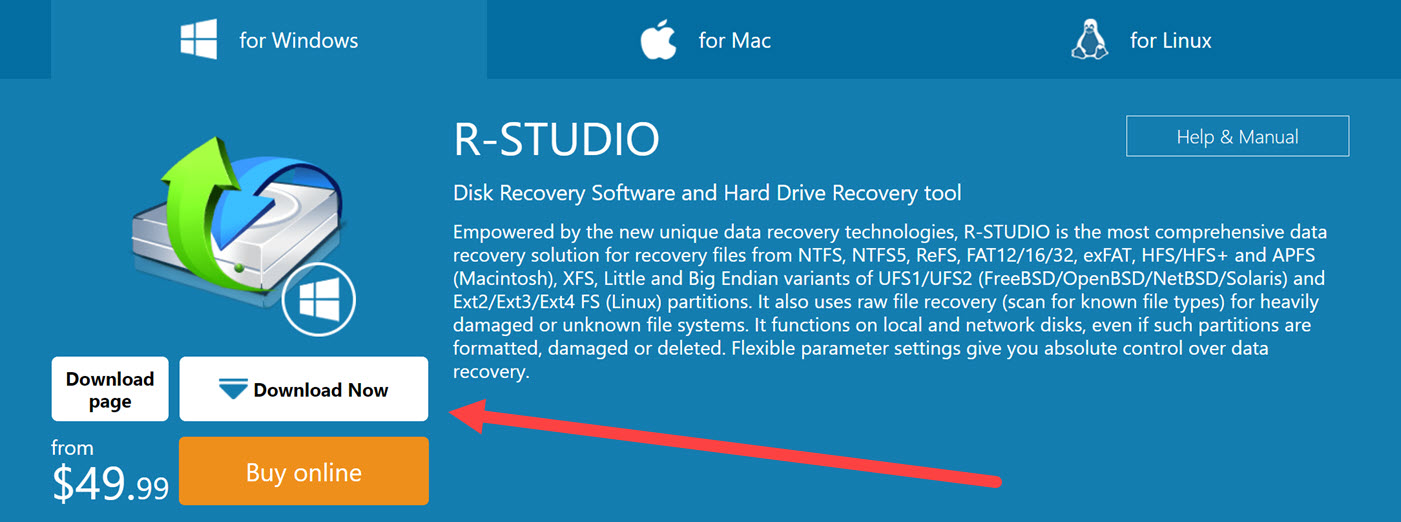
- Install and launch the application.
- Open the Drive menu and click Open Image.
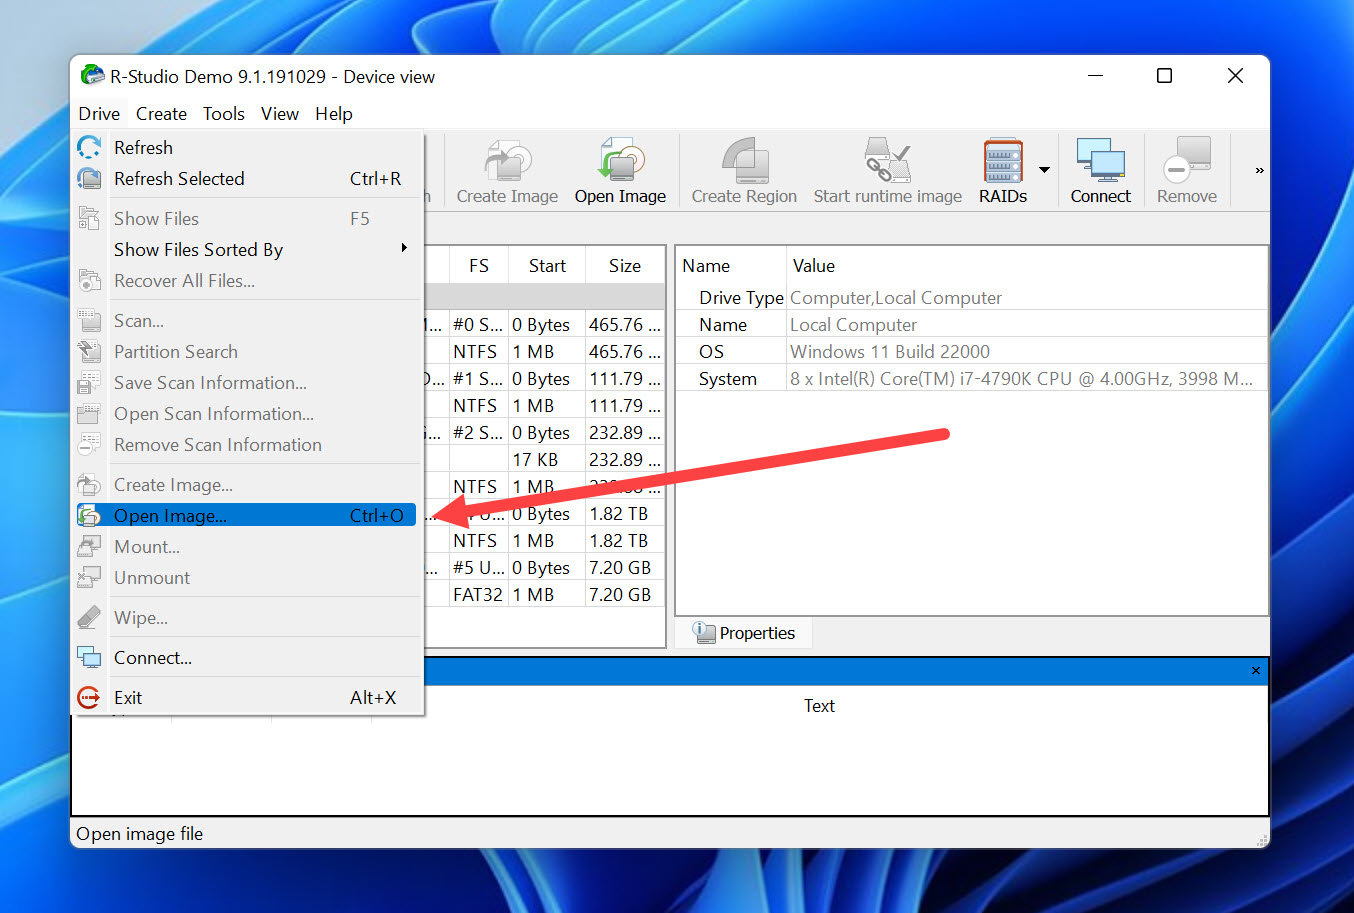
- Select the virtual disk image file you want to open.
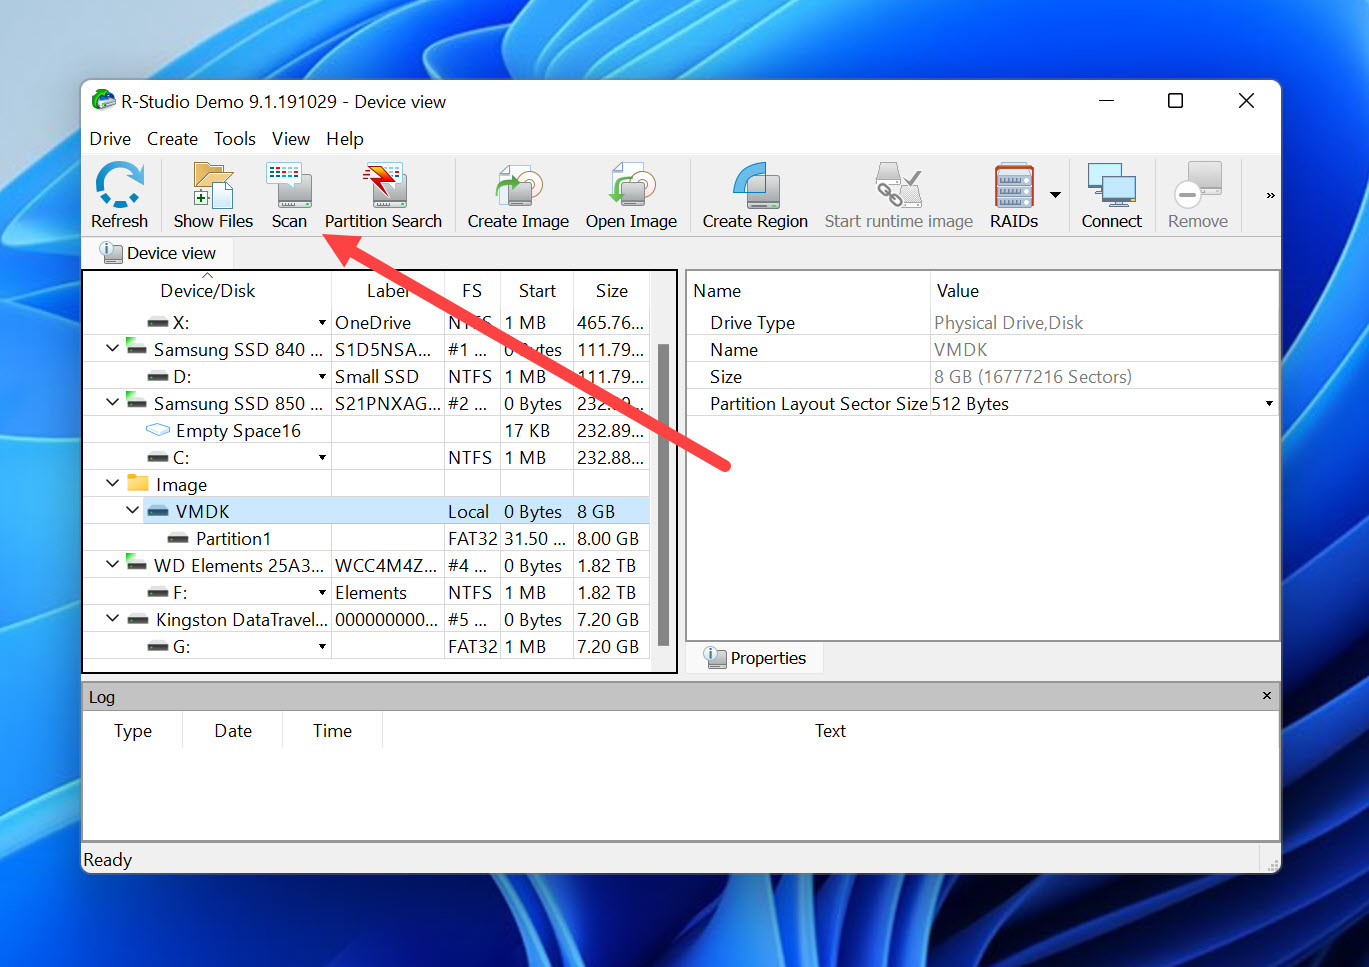
- Highlight the newly opened image file and click Scan.
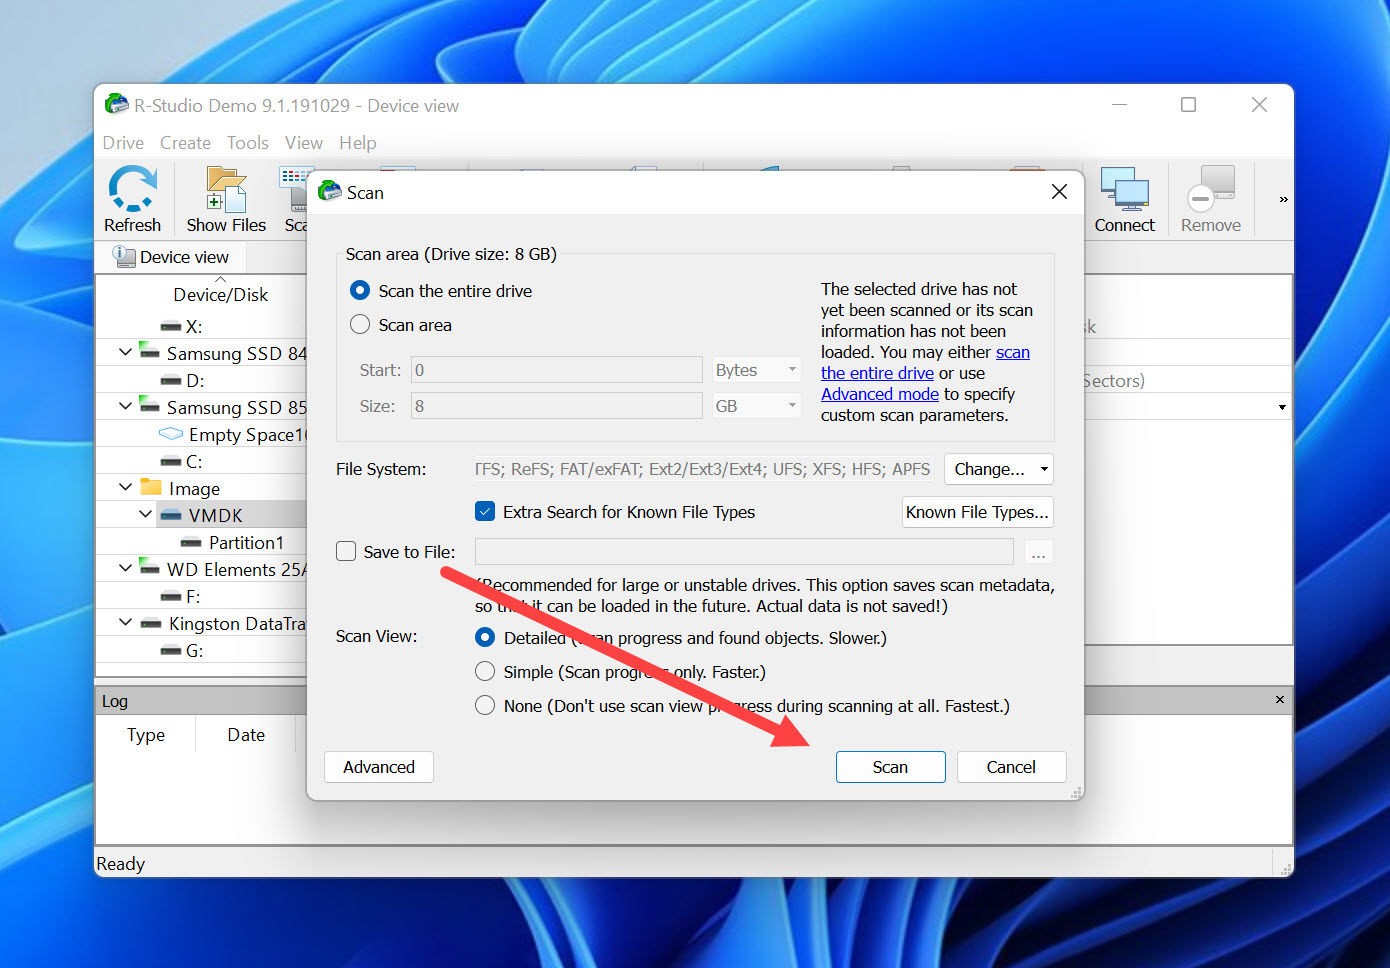
- Customize the scan options if you want to and click Scan again to proceed.
- Wait until R-Studio finishes scanning.
- Open the recovered files in R-Studio’s file browser.
- Select all files you want to recover from the image file.
- Click Recover Marked and specify the desired output folder.
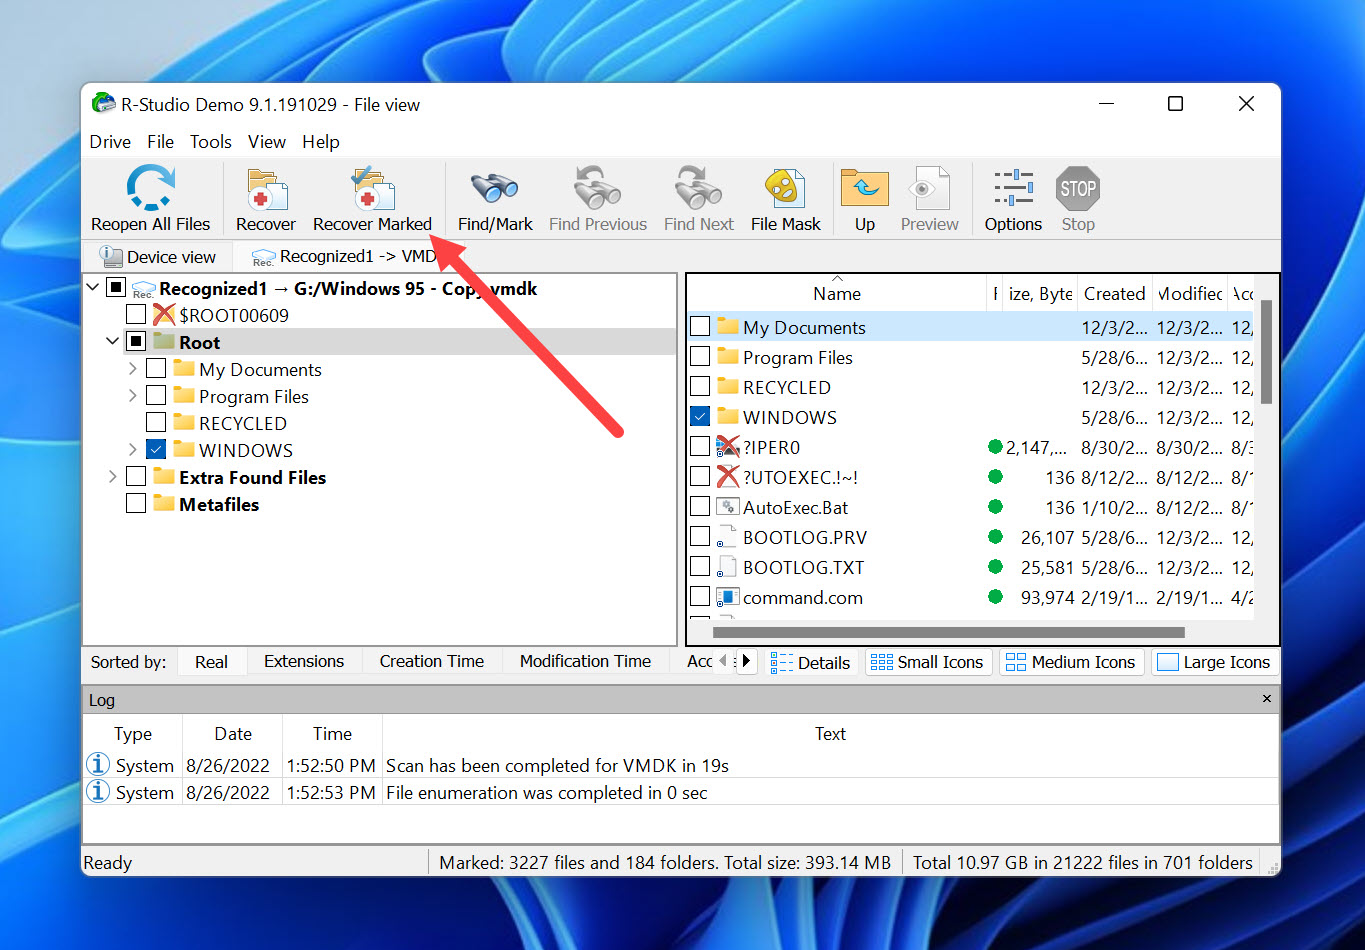
- Confirm by clicking OK.
The free version of R-Studio can recover files that are up to 256 KB large. To recover large files, you need to purchase a license.
Read our full review for more information about R-Studio.
Method 4: Install the Data Recovery Software Inside the Guest Operating System
In many ways, virtual drive images are like libraries, and it’s much easier to find a specific book when you’re actually inside the library than when you’re looking from the outside through a window. In some cases, such as when all windows are fully opaque, it’s completely impossible to find any book at all from the outside, and that’s exactly the problem you’ll encounter when you attempt to recover an encrypted image.
The solution? Run your recovery software of choice directly from the guest operating system just like you would normally.
If you suspect that the virtual image has become corrupted, then you can attempt to fix it the same way you would fix a corrupted hard drive: using the CHKDSK tool.
To fix a corrupted virtual image before recovering data from it by running data recovery software inside the guest operating system:
- Launch the guest operating system.
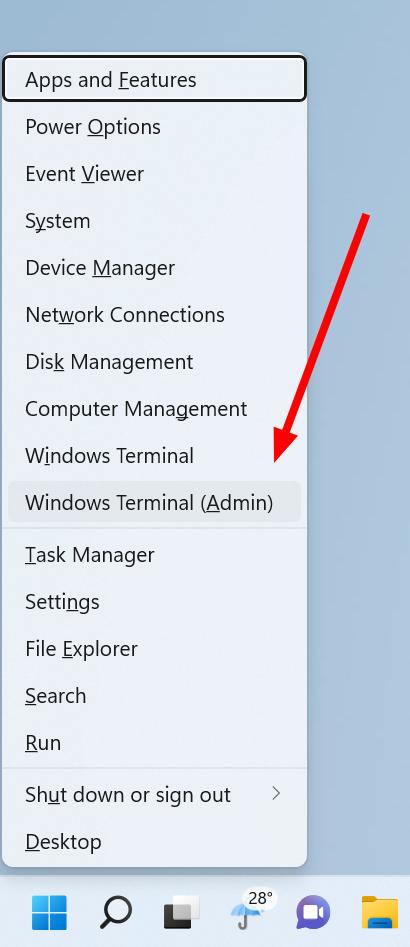
- Press Win + X and launch Windows Terminal (Admin).
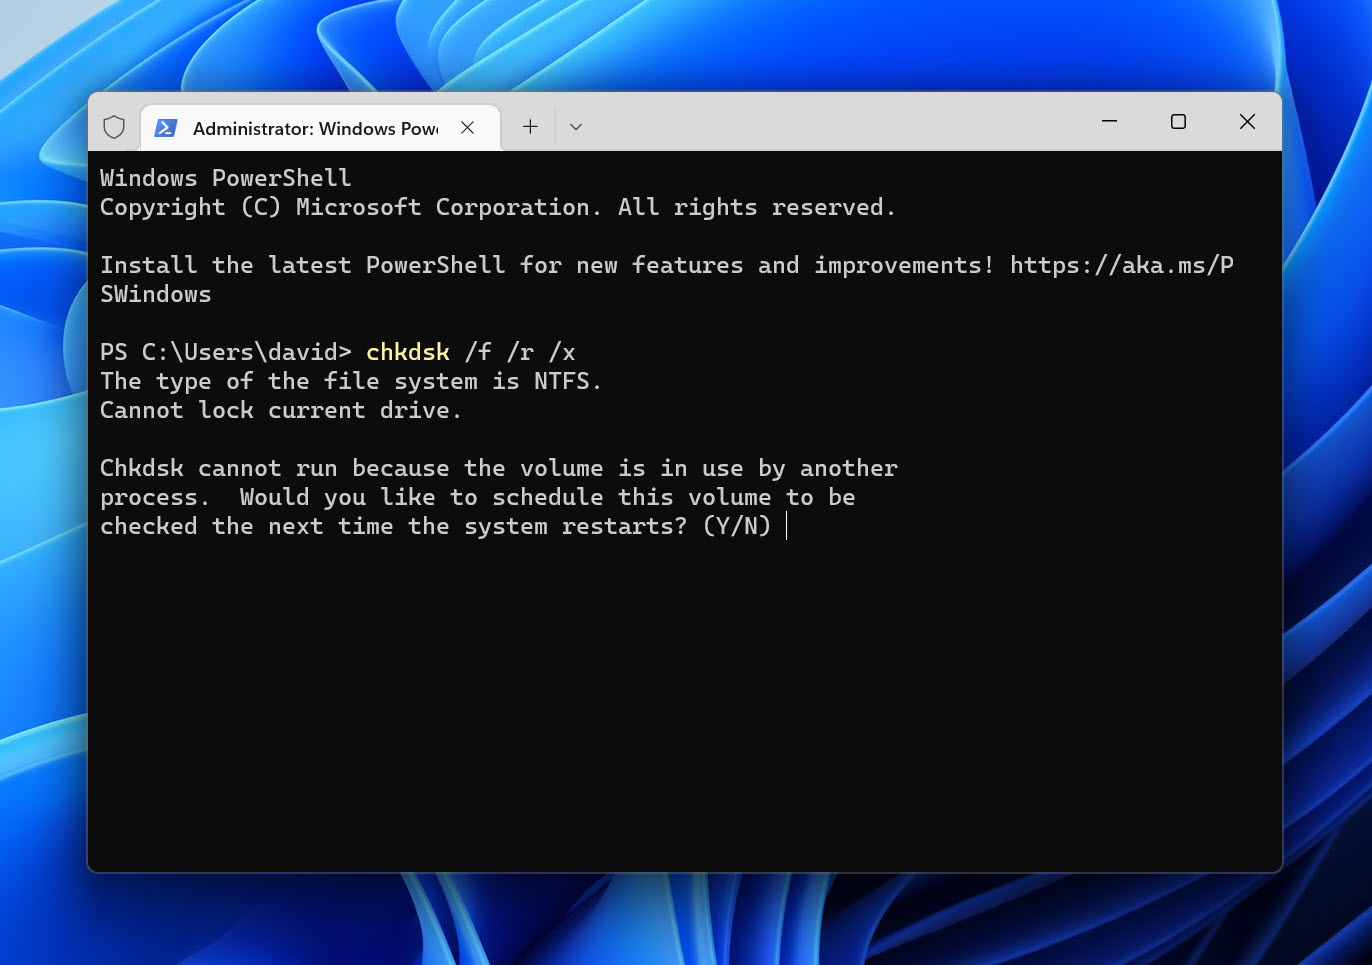
- Enter the following command to scan and fix the system drive: chkdsk /f /r /x
- You will be asked to schedule a scan the next time the system restarts, and you need to press Y to confirm.
- Restart your guest operating system and wait for CHKDSK to finish.
You can then launch a virtual disk recovery software application like Disk Drill inside the guest operating system and use it to scan the system drive for recoverable files.
Method 5: Contact Your Local Data Recovery Service Center

While it’s true that many cases of data loss related to virtual disk drives can be solved at home using the techniques and solutions we’ve described so far, sometimes it’s best to take advantage of the best data recovery services in your area.
Companies like SalvageData have the equipment and expertise necessary to recover data even from dead hard drives that have been physically damaged to such an extent that the operating system can no longer recognize them. They’re also deeply familiar with specific challenges associated with the recovery of virtual drives, so they’re more likely to succeed than an inexperienced home user equipped with a free software tool.
To get a free data recovery quote, you need to:
- Find the nearest SalvageData recovery service center.
- Take or ship your storage device to the service center.
- Wait a short while for your quote.
If you decide that the price to have your virtual drive professionally recovered is reasonable, then you can give SalvageData your approval to begin the data recovery process. It won’t take long before you receive all restored data on a new device or in the form of a download link.
You can track every step via the SalvageData Case Tracker or its mobile app.
FAQ
Can virtual machine data be recovered?
Yes, virtual machine data can be recovered as long as it’s still physically present on the storage device.
How do I restore a virtual drive?
You can restore a virtual drive using virtual machine recovery software like Disk Drill:
- Download and install Disk Drill.
- Use the application to scan the drive where the virtual machine image was stored.
- Recover the missing image.
How do I fix a corrupted virtual hard disk?
Some virtualization software applications can repair corrupted virtual hard disks using built-in tools, and you can always use CHKDSK to scan and fix the storage device where your corrupted image is stored.
How do I recover VHD files?
VHD (Virtual Hard Disk) files that have been deleted can be recovered using virtual disk recovery software like Disk Drill. They can then be mounted in Windows Disk Management.
How do I recover a VMDK file?
VMDK files created by virtualization software like VMware Workstation or VirtualBox can be scanned directly using Disk Drill, which makes it possible to extract any files contained within them.
Conclusion
Anyone who relies on virtual drives should familiarize themselves with the virtual data recovery techniques and solutions described in this article to gain the ability to restore files from virtual machines as soon as data loss occurs. Of course, backups still provide the most reliable prevention against data loss, so you shouldn’t stop creating them just because you now know how to perform virtual drive recovery using popular data recovery tools.
This article was written by David Morelo, a Staff Writer at Handy Recovery Advisor. It was also verified for technical accuracy by Andrey Vasilyev, our editorial advisor.
Curious about our content creation process? Take a look at our Editor Guidelines.