Though discontinued, the AirPort Time Capsule (and AirPort Extreme) is an excellent tool for Time Machine backups and even regular storage. However, it’s not immune to data loss like any other storage system. Virus infections, accidental deletion, and different types of logical damage are still possible.
Fortunately, with a little preparation, you can recover data from a Time Capsule hard drive. You’ll need to act fast though, as you’ll have a higher success rate the earlier you do it. Read on!
If you suspect that your drive has been physically damaged, we suggest sending it to a professional data recovery service to avoid permanent data loss.
How to Access AirPort Time Capsule Hard Drive
The AirPort Time Capsule makes it easy for users to access the connected hard drive over WiFi or ethernet cable. Once you’ve set up your Time Capsule using the AirPort Utility (Finder > Applications > Utilities), do the following:
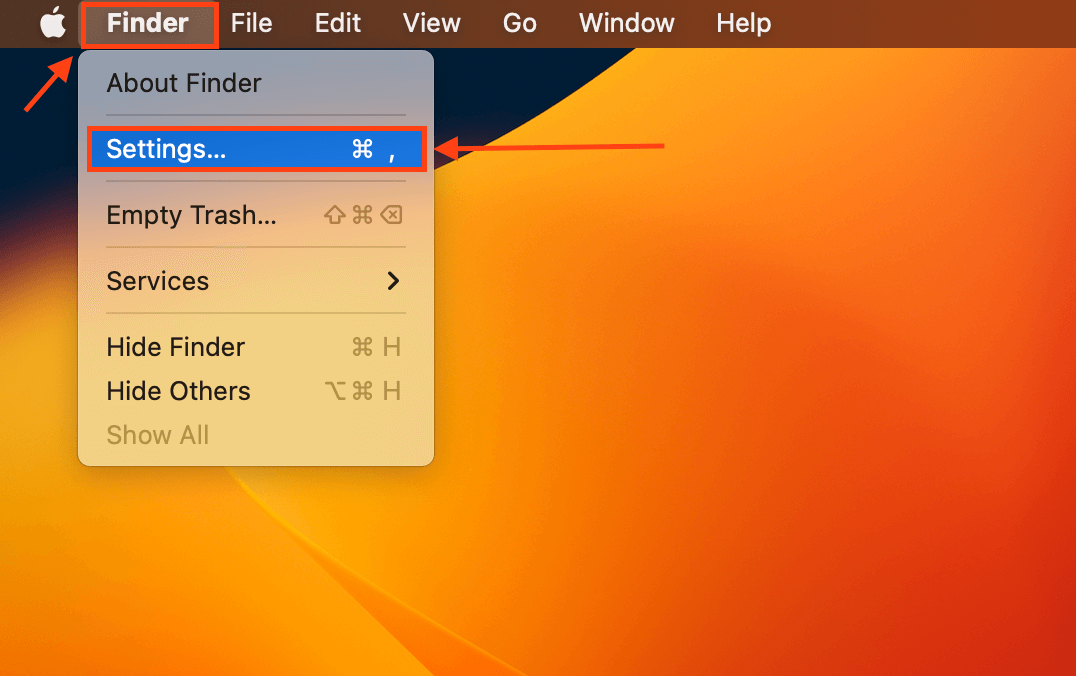
- With Finder open, click Finder > Settings…
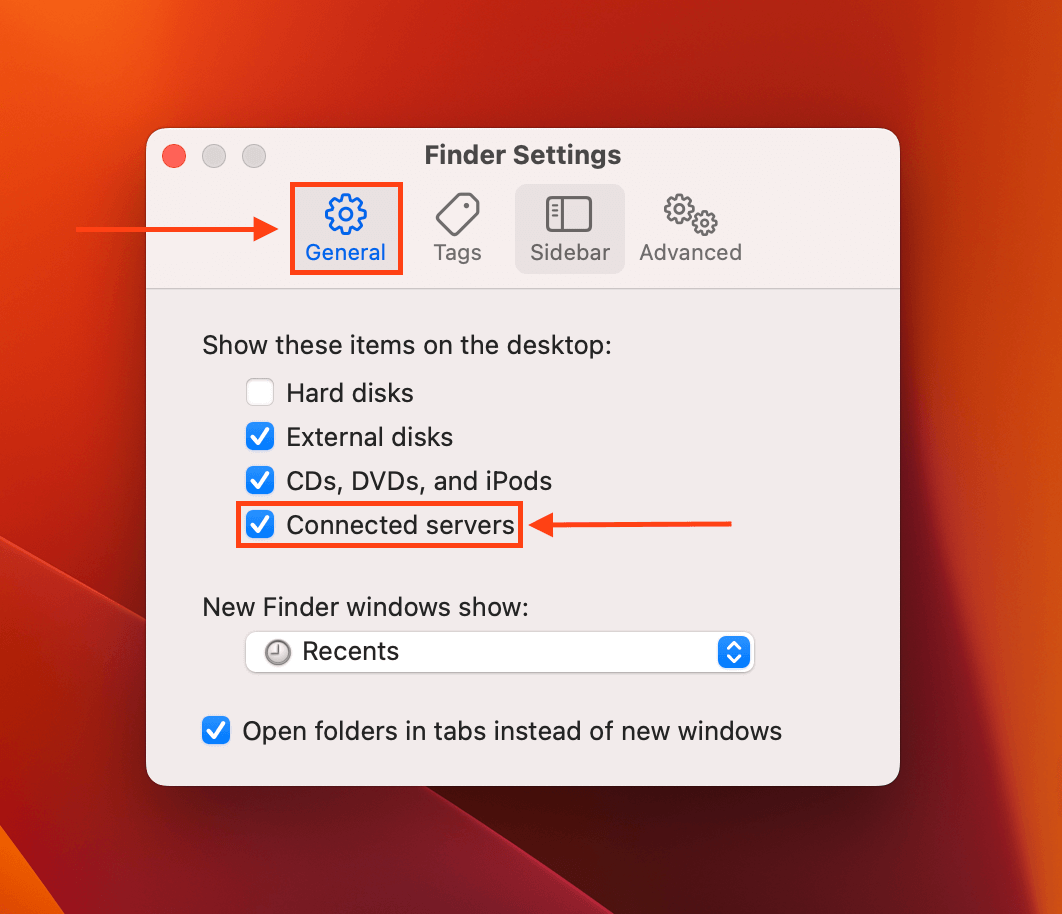
- Navigate to the General tab and ensure that Connected servers is checked.
- Next, navigate to the Sidebar tab and make sure that Connected servers is checked.
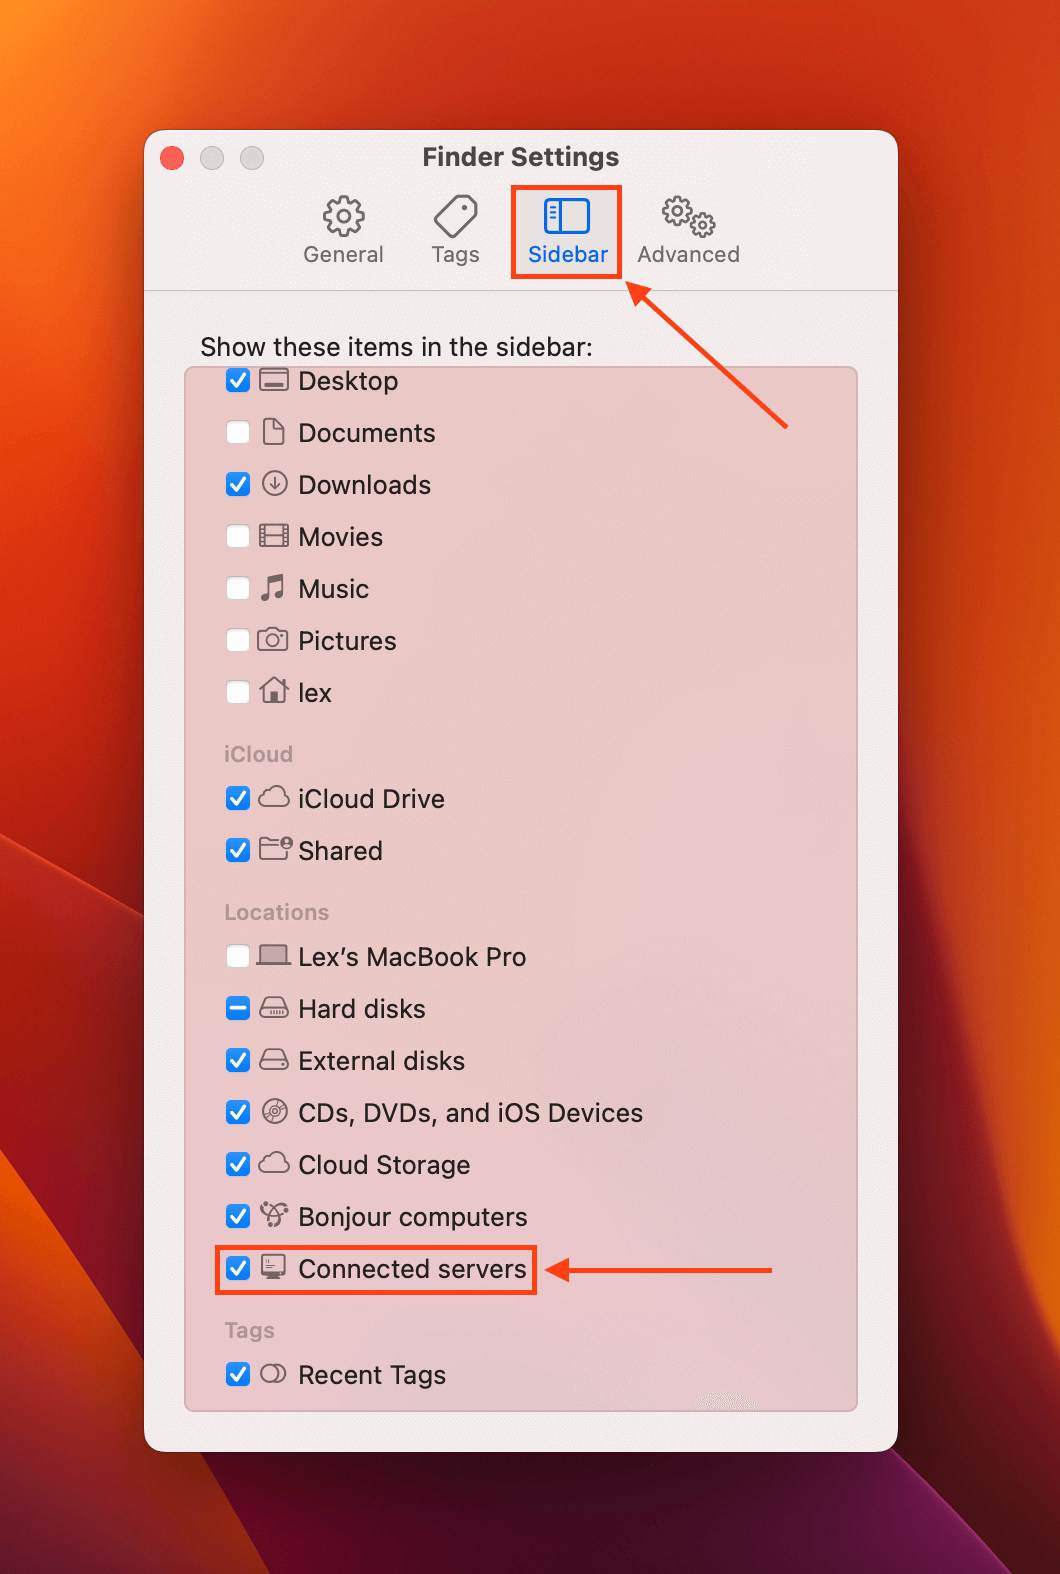
- With both settings enabled, you should find the network folder on your Mac desktop or in the left sidebar of Finder under the Locations section.
If you want to restore data from a Time Machine backup on your Time Capsule, simply launch Time Machine with Finder open and click on your Time Capsule in the left sidebar under the Locations section.
How to Recover Data from Time Capsule Hard Drive
The AirPort Time Capsule actually contains an internal hard drive, which we can recover using the proper tools. However, it’s still susceptible to issues and limitations of internal hard drives. For this process to work, you must meet these 2 conditions:
(1) Mac must recognize your Time Capsule’s drive. If you’re experiencing connection issues, troubleshoot your drive that isn’t showing up on Mac. (2) Because Time Capsule uses an internal hard drive, you can’t connect it directly to your Mac. You need to disassemble your Time Capsule and retrieve the drive, which you then connect to your Mac using a Thunderbolt to SATA cable or a Mac-ready enclosure.
Once your Time Capsule’s internal drive is successfully connected to your Mac as an external hard drive, we can use data recovery software to restore your files. For this article, we’ll be using Disk Drill.
You can use any tool you want for Apple Time Capsule data recovery and the instructions below will work. We chose Disk Drill because it provides excellent support for Mac file systems and it can recognize over 400 file signatures.
- Download and install Disk Drill.
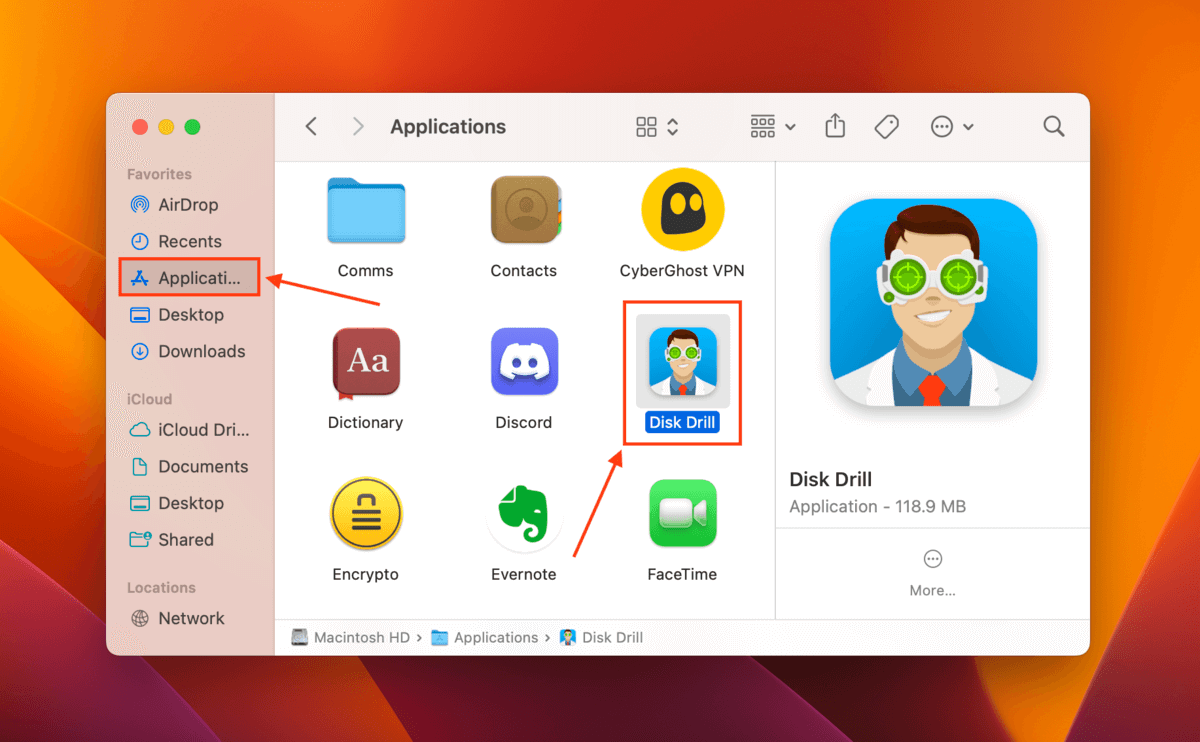
- Launch Disk Drill (Finder > Applications).
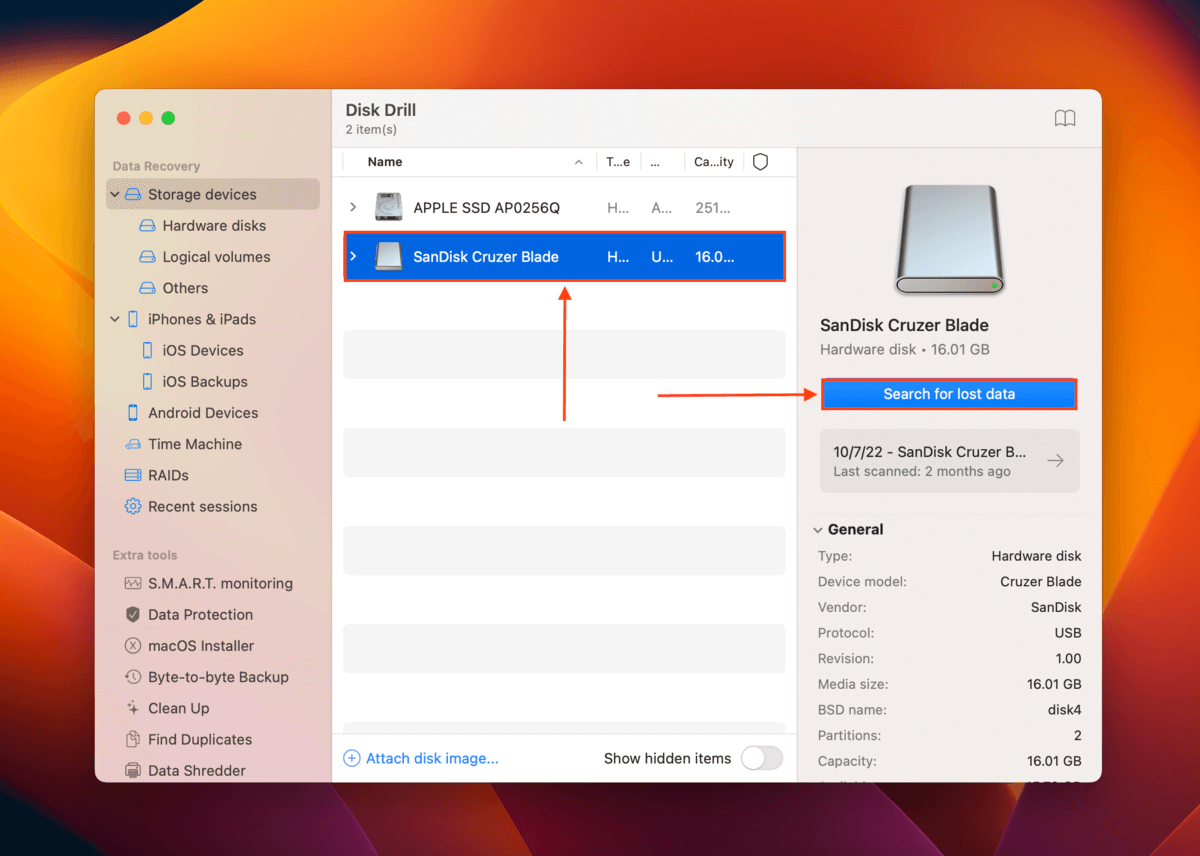
- Select the drive you retrieved from your Time Capsule and connected to your Mac. Then, click Search for lost data.
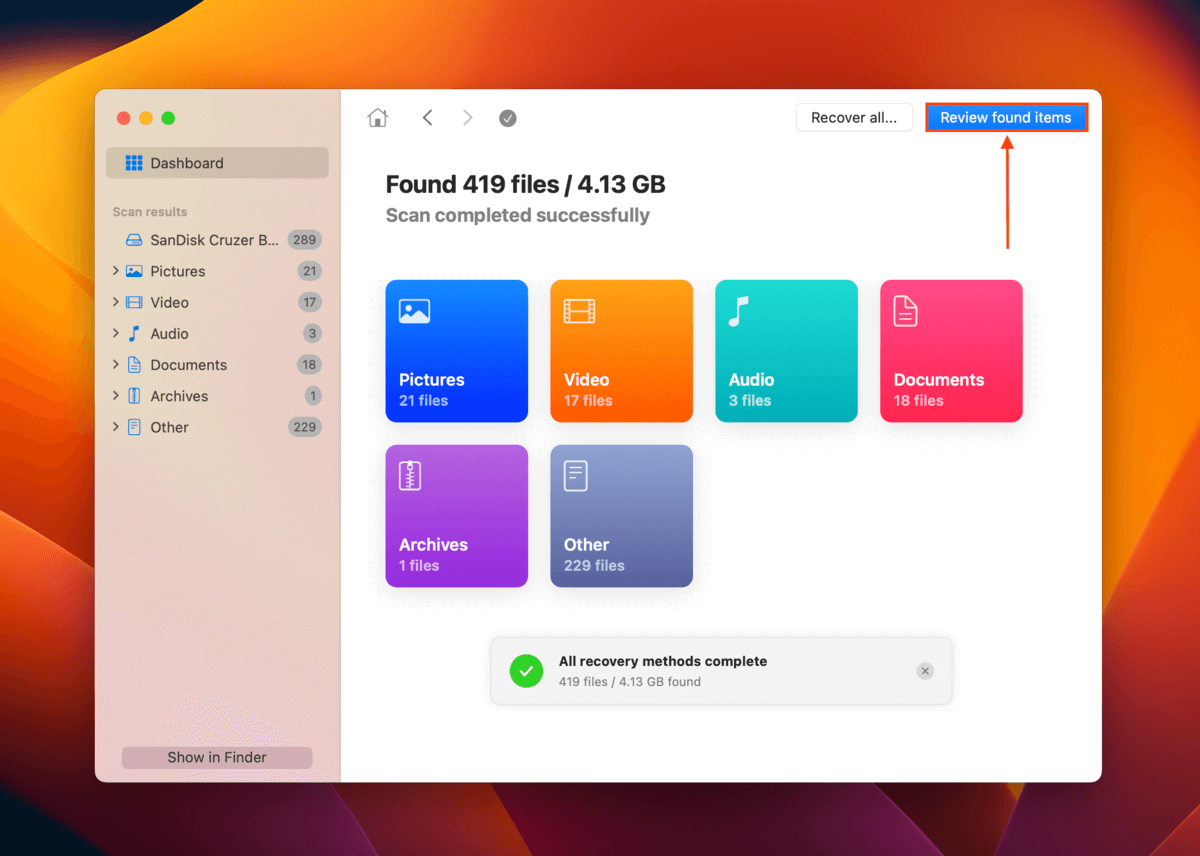
- Wait for the scanning process to complete and click Review found items.
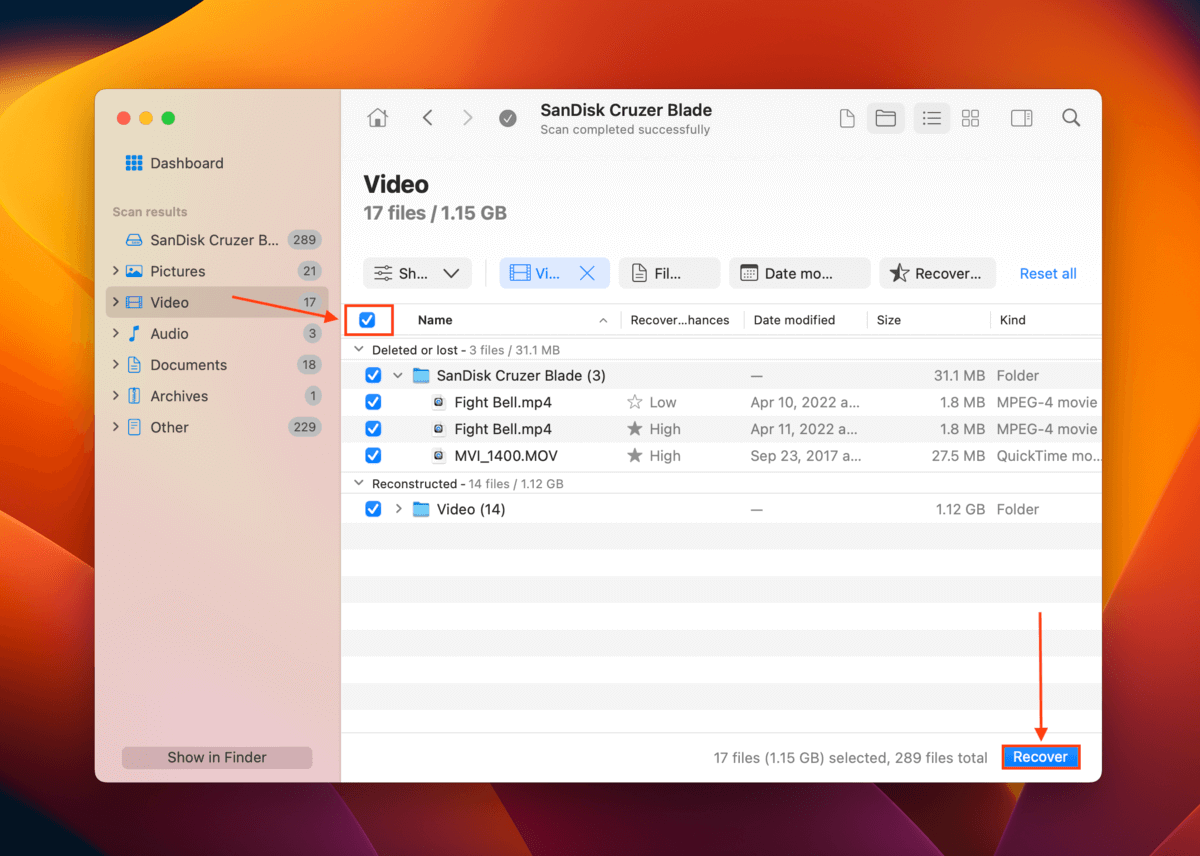
- Expand the Deleted or lost tab or the Reconstructed tab if you want to retrieve files from Time Capsule that has been accidentally deleted or corrupted. You can also filter results using the sidebar or locate specific files on the drive. To preview files, hover your mouse pointer beside their file names and click the eye button that appears.

- Use the boxes in the leftmost column to select the files you want to restore. Alternatively, tick the box in the column header to select all files that are onscreen. Then, click Recover.
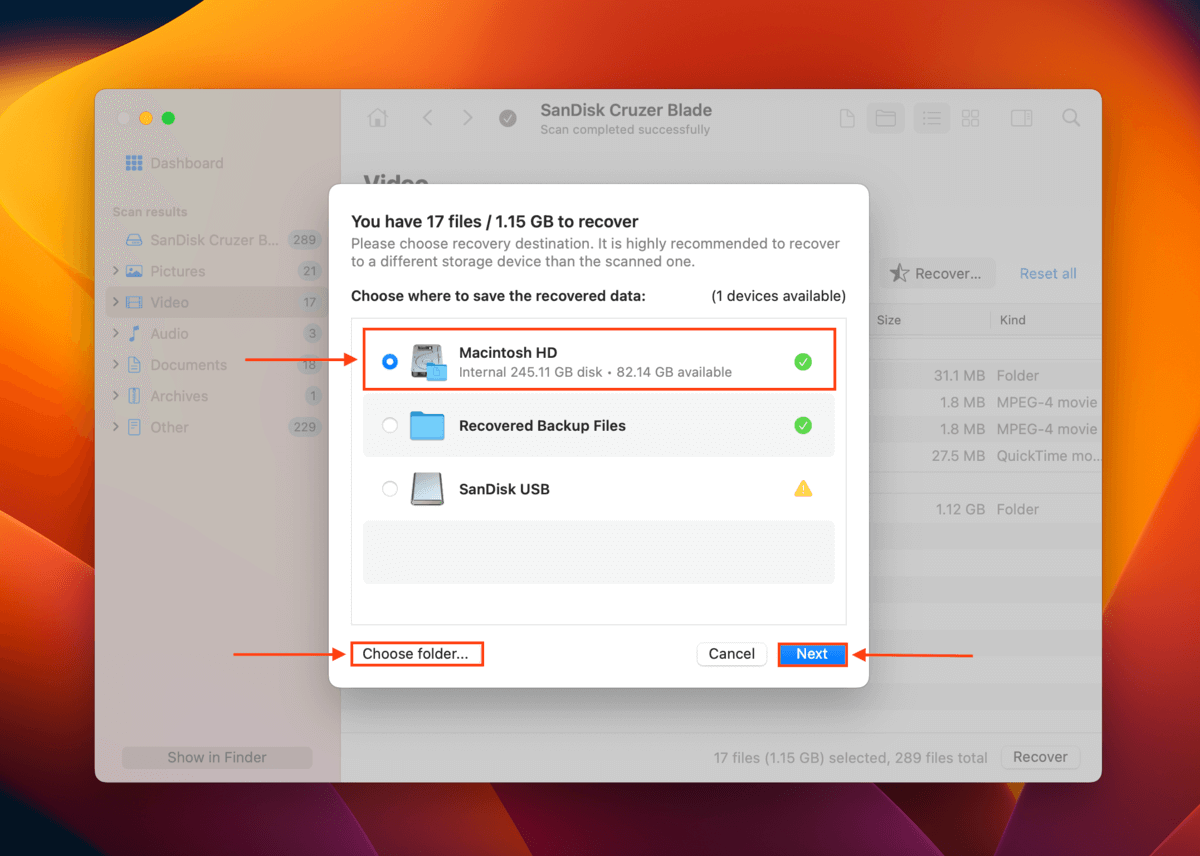
- Select a location on your Mac where you want Disk Drill to save the restored files. Finally, click Next to recover files from your Time Capsule hard drive.
Disk Drill Basic for Mac doesn’t offer free recovery, but you can scan and preview your data – this will tell you if your files are recoverable. We do vouch for Disk Drill’s ability to recover data from an external hard drive. However, if you want to know more about the app before installing it on your computer, read our in-depth Disk Drill review.
FAQ
Can the Time Capsule hard drive data be recovered?
Yes, you can retrieve data from Time Capsule using data recovery software. However, you can’t connect your Time Capsule directly to your Mac, so you’ll have to disassemble it and retrieve the hard drive. Then, connect it to your Mac using a Thunderbolt to SATA cable or a Mac-ready enclosure.
How to recover files from Time Capsule?
To recover files from Time Capsule, you can either use Time Machine for backups or do the following for stored files:
- Disassemble your Time Capsule, retrieve the drive, and connect it to your Mac using cables or an enclosure.
- Download, install, and launch Disk Drill.
- Scan the Time Capsule drive.
- Select the files you want to restore and click Recover.
- Save to Mac.
How to restore items backed up with Time Machine on Time Capsule Hard Drive?
To restore Time Machine backup files from your Time Capsule, launch Time Machine while Finder is open and navigate to your Time Capsule in the left sidebar. Browse through your backup versions and select the files and folders you want to restore.
Can you set up Time Capsule as an external hard drive?
Yes, you can use Time Capsule as an external hard drive (that you access through your network). Set up your Time Capsule normally with AirPort Utility and open it in Finder. You can drag and drop files to and from its folder like a regular storage device.
This article was written by Alejandro Santos, a Staff Writer at Handy Recovery Advisor. It was also verified for technical accuracy by Andrey Vasilyev, our editorial advisor.
Curious about our content creation process? Take a look at our Editor Guidelines.