Whether it’s a relic from a past computer or a long-retired storage device, old hard drives often contain important documents and files. However, for those unfamiliar with data recovery, retrieving data from old hard drives can feel like a daunting task.
But don’t worry, we have you covered. In this guide, we’ll go in-depth into old hard drive recovery. We’ve put together five simple steps to help you recover data from old hard drives.
How to Recover Data from an Old Hard Drive Not in a Working Computer
Your old hard drive may be contained within an older laptop or PC that no longer works or exists simply as an external drive. Retrieving data from these devices is not very straightforward since you can’t simply access the drive and copy-paste your files onto a new location. Follow these five simple steps to recover files from old hard drives inside a non-working computer:
Step 1. Identify the Hard Drive Type
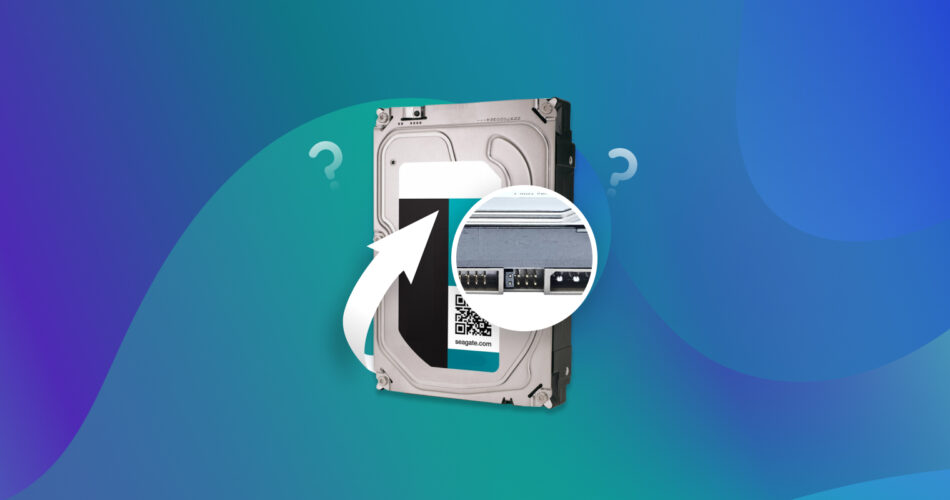
Determining the type of hard drive you’re dealing with will be the first step in your data recovery process. Hard drives come in two primary types: older IDE (Integrated Drive Electronics) drives and newer SATA (Serial Advanced Technology Attachment) drives.
IDE drives were commonly used in computers built before the mid-2000s, so if you have a fossil of a system from that era, you can safely bet on your drive type being an IDE. They feature a wide ribbon-like cable for data transfer and typically have jumper pins for configuring settings. On the other hand, SATA drives have become the standard for modern computer systems. They use a thinner, more efficient cable for data transfer and can be identified by their smaller, L-shaped connector wires.
To determine the type of hard drive you’re working with, you can visually inspect the drive and its connector cables. IDE drives will have a wide ribbon cable and typically use a 40-pin connector, while SATA drives will have a smaller, L-shaped connector with fewer pins. If all the above sounds like complex tech jargon to you, don’t worry! We found a concise YouTube video that explains how to differentiate between IDE and SATA.
If you’re still unsure about the type of hard drive you have, you can try checking the specifications of your computer or consult the documentation that came with the device. Additionally, if you can access the original computer from which the hard drive was removed, you can inspect the motherboard to see what type of connectors it supports.
Step 2. Get a Suitable Enclosure or Adapter
Once you’ve identified the type of hard drive you’re working with, the next step is to acquire a suitable enclosure or adapter. These accessories will allow you to connect the old hard drive to a working computer via USB, making it accessible for data recovery.
For IDE drives, you’ll need an IDE to USB adapter or enclosure. IDE to USB adapters typically come with a cable that connects to the drive’s 40-pin IDE connector and a USB cable for connecting to your computer. Likewise, for SATA drives, a SATA to USB adapter is required. SATA to USB enclosures typically feature a slot or bay where you can insert the SATA drive and a USB cable.
The simple difference between an enclosure and an adapter is how you connect the drive. An adapter uses cables to connect the drive externally, while an enclosure can be opened, and your drive can be inserted into the bay. Here’s the Amazon page for IDE/SATA to USB adapters. We found the average price to be around $20-$30, and most of them seem to be compatible with both hard drive types.
Step 3. Connect the Hard Drive
The next step to extract data from your old hard drive is to connect the hard drive using the adapter/enclosure to a working computer system. If you’re using an enclosure, open it up and insert the old hard drive into the designated slot or bay. If you’re using an adapter, connect the appropriate cables to both the adapter and the hard drive.
We recommend double-checking to ensure all the connecting wires are working correctly and all connections are secure. This will ensure a smooth data transfer without unnecessary trouble.
Step 4. Power Up
Next, you need to plug the USB cable from the enclosure or adapter into an available USB port on your working computer. Some enclosures require external power, so make sure to plug that into a power source and turn it on. You can read about how to use your particular adapter/enclosure online by searching the model name or any provided documentation the product came with.
Once your hard drive is connected to your system and powered on, your computer should automatically detect it. Otherwise, look for the drive in your File Explorer under “This PC”. If everything is working well and you can see your device, you should now be able to proceed to the next and final step for completing the data transfer.
Step 5. Access the Drive on a Computer and Transfer Data
You can now access the drive on your working computer, but one last obstacle may hinder your recovery- problems with the old hard drive. Let’s explore how to proceed in both scenarios:
✅ For Healthy Hard Drives
If your hard drive is in working condition, the process is pretty straightforward! You should simply be able to open the file explorer on your computer to locate the connected hard drive and double-click it to access its contents. You can choose the files you want to copy and drag and drop them or use keyboard shortcuts like Ctrl+V and Ctrl+C to copy and paste them to your desired location. We recommend saving them to your computer’s local storage or another external device (preferably an SSD since they are supposedly safer and last longer than HDDs.)
❌ For Corrupted Hard Drives or Those That Have Faced Data Loss
This scenario is a bit trickier; we first have to diagnose what exactly went wrong with your old hard drive. You may notice files that you could have sworn were on the drive have disappeared! You may even receive weird error messages. Here’s a small table we put together to give you a better idea of what could have gone wrong:
Problem |
Description |
Symptoms |
🤖 Logical failure |
Logical failure (such as damaged partition tables or bad sectors) can lead to data loss. |
The disk may not be recognized by your computer. Possible error messages include “Windows detected a hard disk problem” when you click on the drive. |
🗂️ File system corruption |
File system corruption occurs when the data structure of the file system becomes damaged or inaccessible. This can happen due to sudden power loss, improper shutdowns, and other software errors. |
Your files may be missing from the drive, or you may get messages like “The file or directory is corrupted and unreadable.” |
🦠 Virus or malware attack |
Malicious software can corrupt your old hard drive’s files, delete data, or render them unusable. |
You may see files with strange extensions, or your antivirus software might warn you while trying to access the drive. |
😵 Physical damage or trauma |
If you’ve dropped your hard drive or it has been through other mechanical stress, its internal components may fail to work correctly. |
You might hear clicking noises or other unusual whirring sounds as the drive’s moving parts are damaged. |
🔍 Lost data |
The files you assumed were on the disk are missing. The good news is that by using good data recovery software, you can try to recover such lost data! |
Files or folders that you’re sure were there aren’t on the old hard drive anymore. |
All of the above are very real data loss scenarios, but the good news is you can use advanced data recovery software to try to recover files. In many cases, as long as the old drive is not too physically or logically damaged, data recovery is possible.
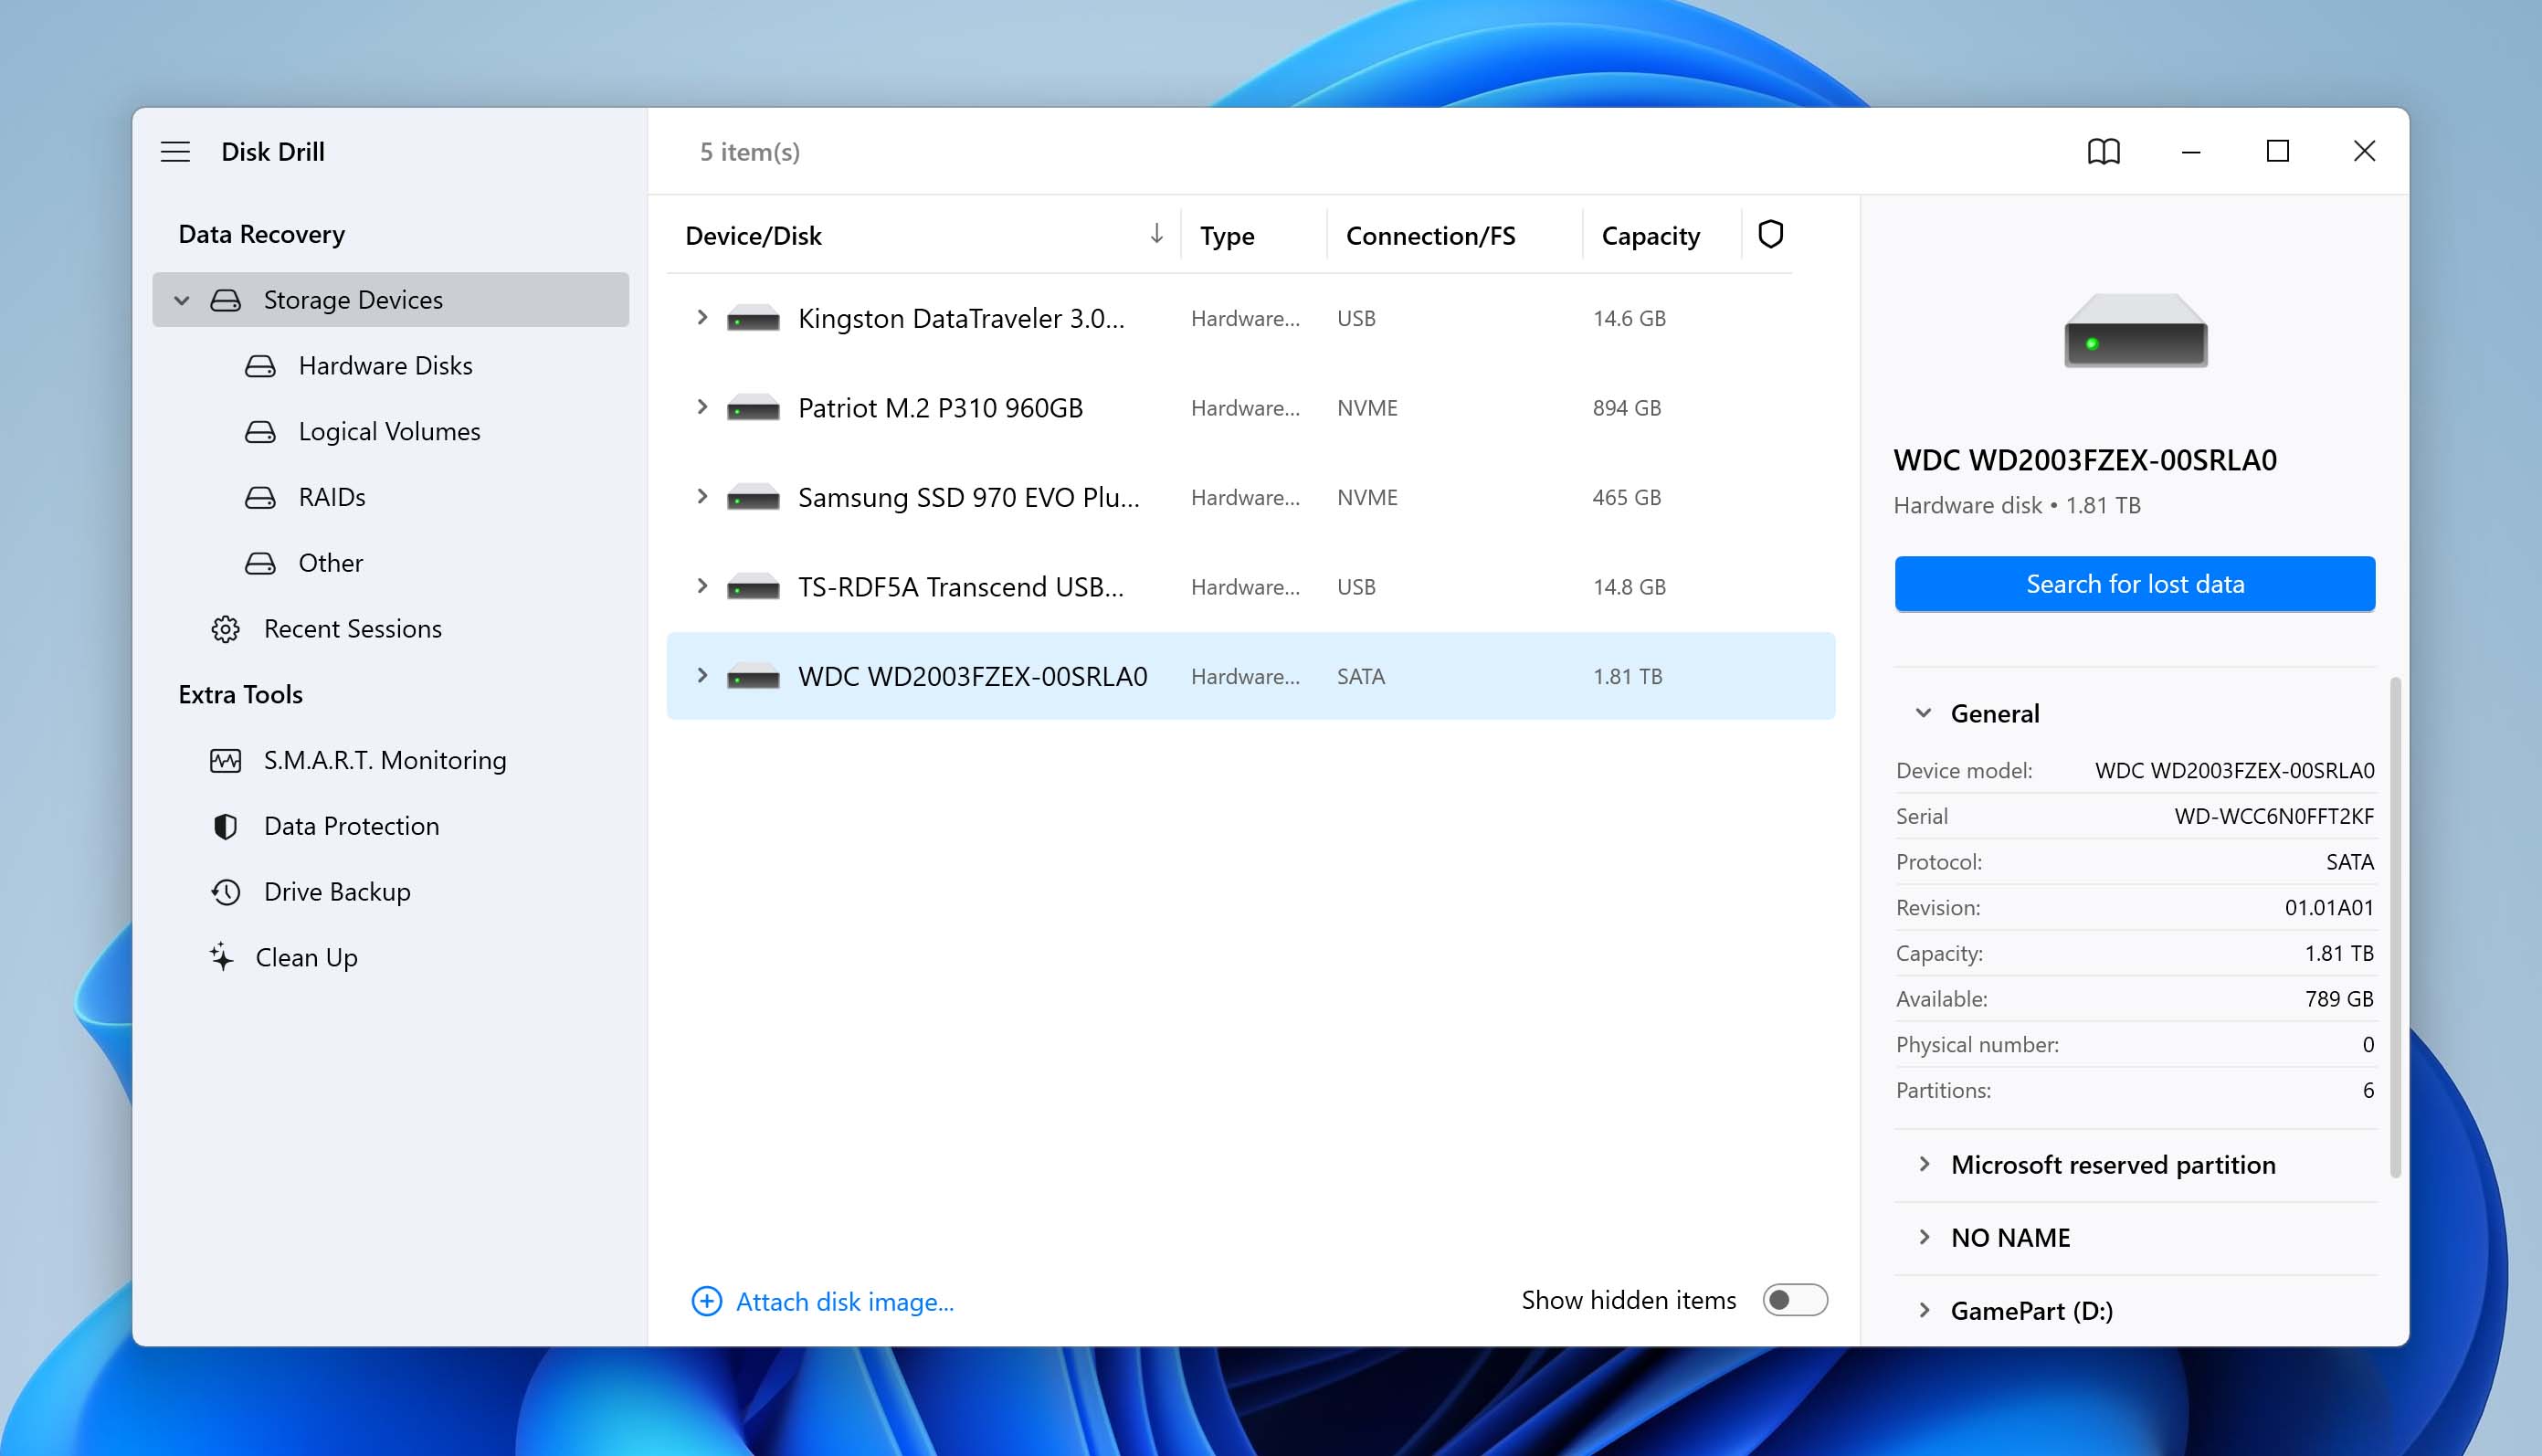
We recommend Disk Drill for Windows and macOS as it uses advanced tools that can help extract data from old hard drives. With its help, you can easily retrieve permanently deleted, formatted, or even corrupted data from aging internal and external drives. It does this by using smart algorithms that can detect corrupted drives with unreadable sectors and handle them accordingly for the best chances of recovery.
Even if you don’t remember what exactly went missing and just want to see everything on the drive, Disk Drill’s scans will uncover every last byte of data that can be recovered. It even features an intuitive interface that just about anybody can use, and the first 500MB of data recovery is absolutely free.
Here’s a simple guide to using Disk Drill on your old hard drive for data recovery:
- Download and install Disk Drill on your system.
- Connect your old hard drive using an adapter or enclosure and power it on.
- Launch Disk Drill and select the old hard drive that has missing or corrupted files. Now click on “Search for lost data”.
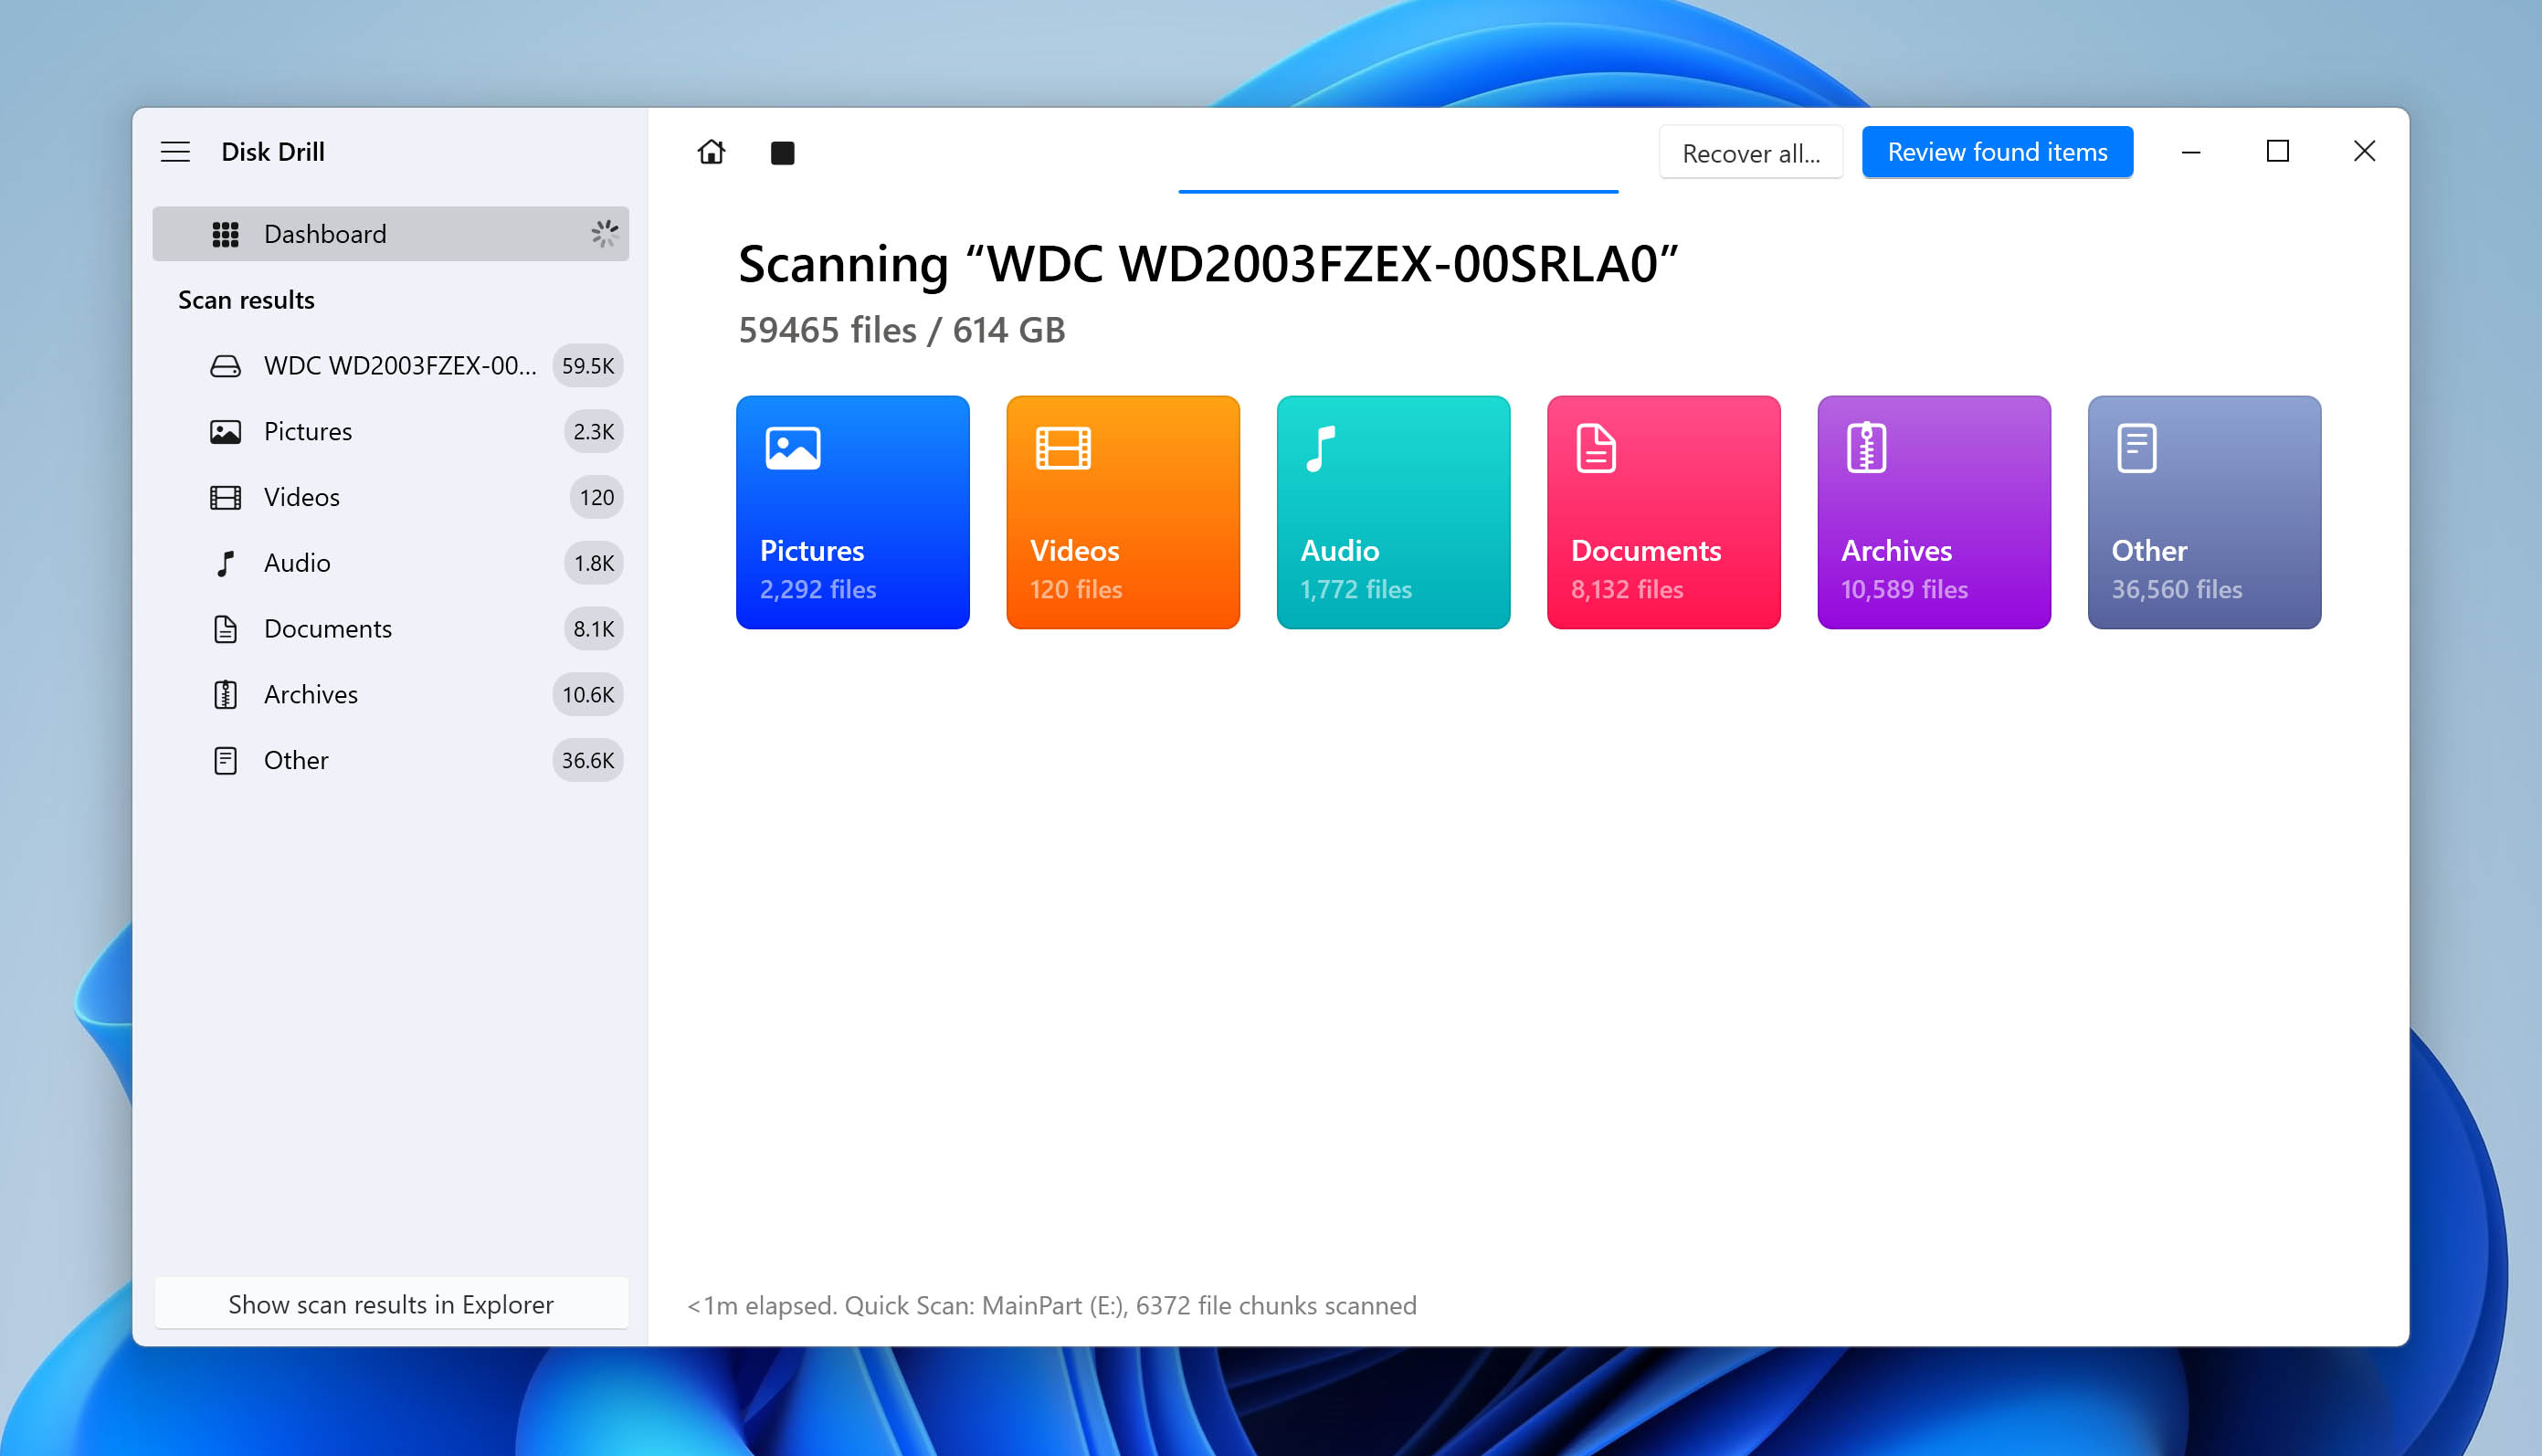
- You can wait for the scan to finish or begin previewing found files by clicking “Review found items”.
- Once you’ve selected your files, click on “Recover”. And just like that, your old hard drive’s recoverable files will get sent to your desired location.

You can read our in-depth review of Disk Drill to know more about its features.
Old Hard Drive Looks Weird, Doesn’t Show Up, or Is Making Unusual Noises?
If you plug in your old hard drive and it exhibits unusual behavior, such as not appearing in the list of devices or disk management at all, showing up as “no media,” or emitting unusual sounds, it could indicate serious issues. As discussed in the table above, these signs might suggest that the hard drive has failed, is damaged, or is experiencing mechanical issues.
You might encounter symptoms like:
- The hard drive is not recognized by the computer.
- Unusual clicking, grinding, or whirring noises are emanating from the old drive.
- The old drive is making repeated beeping sounds.
- The hard drive appears physically damaged or deformed.
- Smoke or burning smells are coming from the hard drive.
In all these cases, we advise you to stop using the hard drive immediately. Continuing to operate a malfunctioning drive could worsen the situation and further decrease the chances of successful data recovery.
In the above scenarios, you should consider seeking assistance from a professional data recovery service, particularly if the data stored on the drive is critical. These experts have the necessary tools, expertise, and facilities to address complex hard drive issues effectively. Keep in mind that while professional data recovery services may come at a cost, they offer the best chance of recovering your valuable data from a failed or damaged hard drive.
How to Retrieve Files from an Old Hard Drive Still in a Working Computer
When an old hard drive is still inside a working computer, retrieving files from it may require a different approach. Depending on whether your working system’s Operating System is booting up or not, you can try different methods. In this section, we’ll do exactly that and explore methods to access and get data off old hard drives that are still on a working computer.
Method 1: Connect the Computer to Another Computer With a USB/Network Cable
This method allows for data recovery from your old hard drive by establishing a direct connection between the two computers using either a USB or network cable. Here’s how to do it:
- Prepare the connection: Start off by making sure both the old computer with the hard drive and the newer system you’re connecting to are powered off.
- Select the cable: Next, depending on the available ports on both computers, choose either a USB cable or a network cable for the connection. USB cables are suitable for direct connections between two computers, while network cables (sometimes also called Ethernet or LAN cables) can be used to establish a network connection between them.
- Connect your computers: Connect one end of the chosen cable to the appropriate port on your old computer and the other end to the corresponding port of your second computer.
- Power on: Now turn on both computers and wait for them to boot up. (Skip Steps 5 and 6 if you’re using a USB cable).
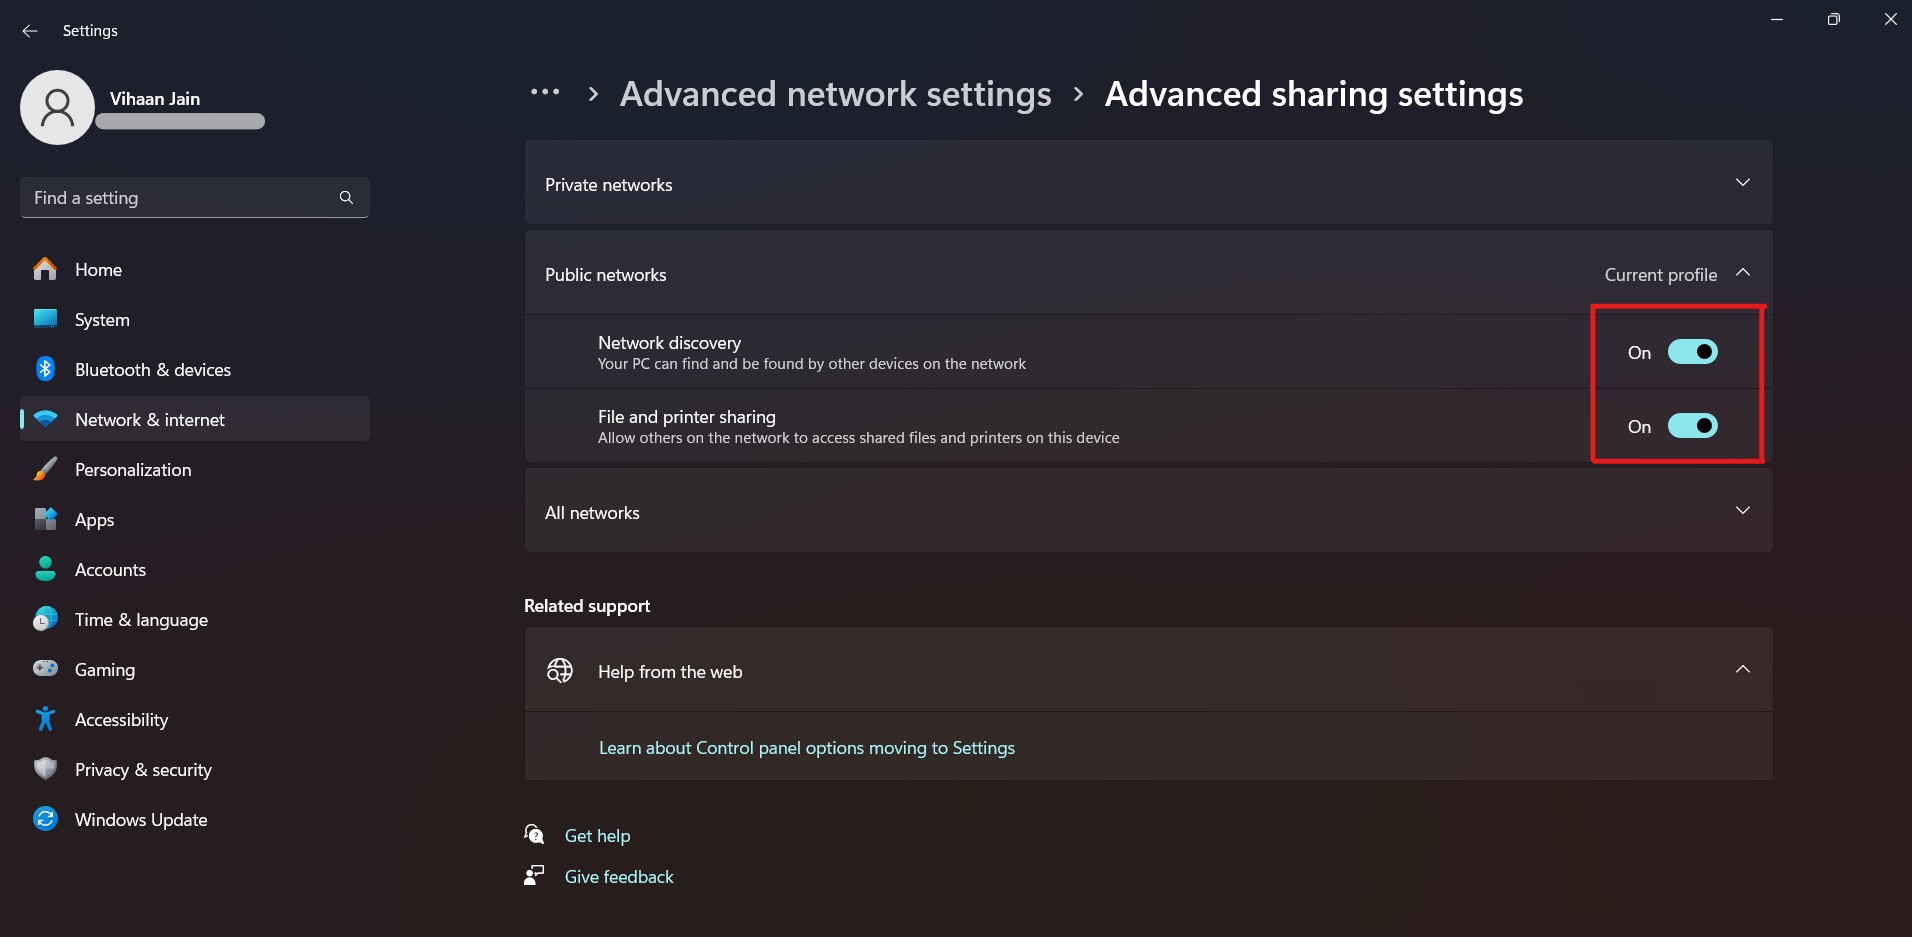
- Configure network settings: If you’re using a network cable for the connection, ensure that both computers are on the same network and configure network settings. Do this by clicking the Windows button and then navigating to the Settings page. Now go to Network and Internet>Advanced Network Settings>Advanced Sharing Settings. Ensure that your PC is discoverable and that “File and printer sharing” is turned on.
- Copy files from shared network folder: On the new computer, open the file explorer and navigate to the network or shared folders section. Here, you can locate the old computer among the list of available network devices and view the shared folders and drives.
- Transfer the files: After navigating to the old hard drive’s location on the second computer, you should be able to access the files and folders stored on it. Simply copy the files you wish to retrieve using Ctrl+C (copy) and Ctrl+V (paste) from the old hard drive and paste them onto the second computer’s storage or an external storage device.
In case some files are missing, you can try data recovery software like R-Studio Emergency for network recovery too. It’s also a good idea to disconnect the drive from your old PC, connect it to the new one, and scan it with Disk Drill, as we described above.
Method 2: Boot the Old Computer From a Bootable CD, DVD, or USB
If your old computer is still functional but the operating system is inaccessible or unreliable, you can boot it from a bootable CD or DVD (or even USB) to access the hard drive without relying on the old OS. Here’s how:
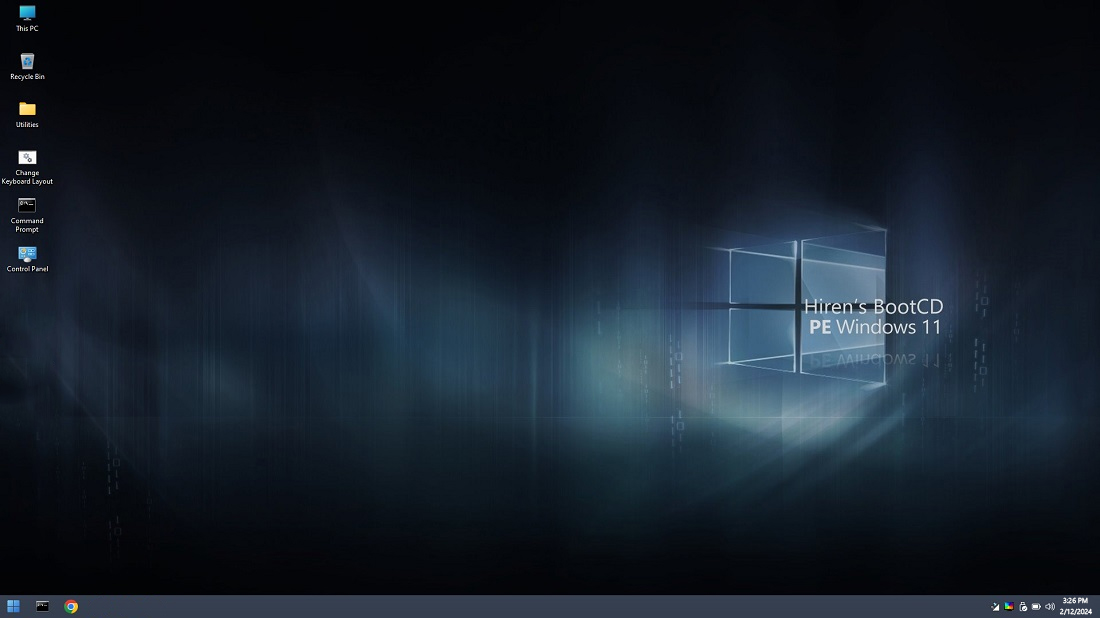
- Create a Bootable CD/DVD or USB: Obtain a blank CD/DVD or a USB drive with sufficient storage capacity. Now, download a bootable disk creation tool, such as Rufus or UNetbootin. Use the tool to create a bootable CD/DVD or USB drive. You’ll need an ISO image of a bootable operating system, such as a Linux distribution, or a diagnostic tool like Hiren’s BootCD.
- Insert the Bootable Media: Insert your bootable device into the appropriate drive on the old computer.
- Access BIOS or Boot Menu: Restart your old computer and access the BIOS settings by pressing the designated key during startup (mostly often it is F2, F10, or Del). Some computers also allow you to access the boot menu directly without entering the BIOS. Press the designated key (often F12 or Esc) to access the boot menu.
- Set Boot Priority: In the boot menu, navigate to the boot priority or boot order options. Now, set your CD/DVD drive or USB drive as the first boot device in the priority list. Save these changes and exit the BIOS settings. Your system should restart automatically.
- Boot From the Bootable Media: The computer will now boot from the inserted bootable device. Follow the on-screen instructions to boot into the operating system or diagnostic environment provided by the bootable media.
- Access the Hard Drive: And voila! Once you’ve booted into the operating system or diagnostic environment, you should be able to access the hard drive of the old computer. Navigate to the desired files and copy them to an external storage device.
Method 3: Remove the Hard Drive From the Old Computer and Install It in a New Computer
If the old computer is no longer functional, you can physically remove the old hard drive and mount it onto a new computer’s motherboard. This only works if the new system has compatible connections and space for additional drives.
Performing such an operation requires a lot of care and also a certain level of expertise, so proceed with caution. Otherwise, you can use the steps at the beginning of our guide to connect the disk externally using an adapter or enclosure.
Conclusion
In this guide, we’ve outlined simple methods that you can use to retrieve data from old hard drives, ensuring that your important data is not lost to time or hardware failure. Identifying your hard drive type and ensuring you have the connecting wires and adapters required makes the recovery process simpler.
You should be able to retrieve data from old hard drives with minimal effort and without the need for specialized expertise. But in complex cases where data loss is severe, we recommend going to a professional data recovery service.
This article was written by Vihaan Jain, a Staff Writer at Handy Recovery Advisor. It was also verified for technical accuracy by Andrey Vasilyev, our editorial advisor.
Curious about our content creation process? Take a look at our Editor Guidelines.