Picture this scenario: You boot up your laptop, and a dreaded error message suddenly pops up: “SMART failure predicted on hard disk.” The thought of losing your precious files can be scary but don’t panic.
In this comprehensive guide, we’ll walk you through the steps to diagnose this threat and fix the “SMART failure predicted on hard disk” error. We’ll also help you evaluate data recovery options to help you decide on the best course of action if your hard drive’s SMART check fails.
Diagnose the “SMART Failure Predicted” Threat
SMART, short for Self-Monitoring, Analysis, and Reporting Technology, is an in-built diagnostic tool that many modern hard drives have to detect and report various indicators of your drive’s health and performance. This technology continuously monitors your drive’s health by assessing parameters such as disk temperature, spin-up time, seek error rate, and the number of bad sectors, among others.
By analyzing these parameters, SMART technology can provide early warnings about impending disk failures, allowing you to take proactive measures before your drive fails completely.
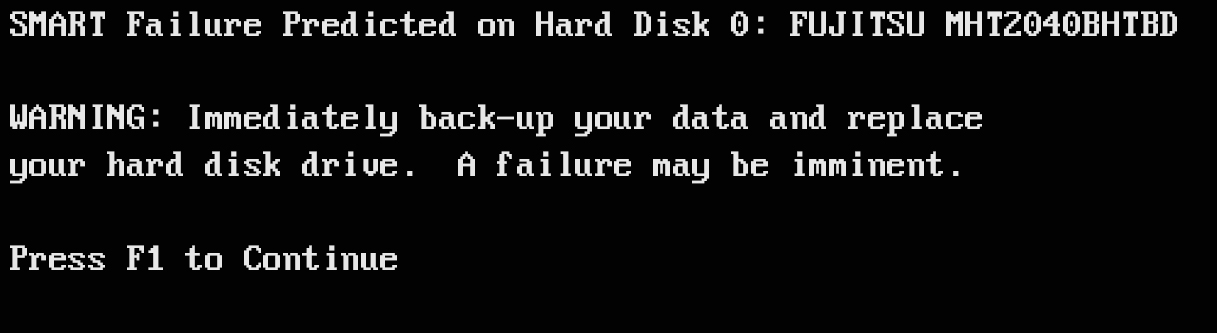
The “SMART Failure Predicted” error message pops up when you boot up your device and prompts you to back up and replace your hard drive. This indicates that your hard drive has not failed yet but is close to failing. This type of hard drive failure is inevitable for every hard drive and can result from physical damage or an accumulation of too many bad sectors (logical failure).
When your hard drive accumulates a significant number of bad sectors, it can lead to issues like data loss or corruption. In fact, if you receive this error, we recommend stopping use of the drive immediately. Even if your PC is bootable or not, continued use of the drive can potentially corrupt data further. Attempting to fix or repair the disk on your own will likely result in partial loss of data, so beware.
Step 1: Rescue Your Vital Files – Prioritize Data Backup
The first and foremost step is to prioritize and safeguard your essential files by creating data backups. Depending on whether your PC is bootable or not, here are different approaches you can try:
Warning: Even if you aren’t experiencing any issues accessing data on your drive, each read or write operation could still potentially lead to data loss. It is advisable to proceed at your own risk.
For a Bootable PC:
If your PC is booting up and you can access the Operating System, follow these steps for data backup:
- Open Windows File Explorer and select your drive. Navigate to the files and folders you want to back up.
- Select the important files, right-click, and choose “Copy” or “Cut” to move them to an external storage device such as a USB flash drive or external hard drive. You can also use Ctrl+C and Ctrl+V to copy and paste files onto your desired location.
Alternatively, consider using backup software to automate and streamline your data backup process. There are various backup solutions available, including the built-in Windows Backup. Your Windows system’s Microsoft account comes with 5GB of OneDrive cloud storage, and backing up your folders syncs them to your OneDrive account. You can use it as follows:
- Ensure you’re signed in with a Microsoft account on your system.
- Now launch Windows Backup by pressing the Windows button, typing “Windows Backup,” and selecting it from the results (or you can navigate to Start>All apps>Windows Backup).

- Click on “Folders” to drop it down, and select which of your user folders you want to back up to OneDrive. Now click on “Back up”. Your selected folders will automatically start getting backed up onto your OneDrive account.
We also read online about other third-party options like Acronis True Image, EaseUS Todo Backup, and Macrium Reflect. While we haven’t tried all these backup software for ourselves, they have positive reviews and are worth trying if they meet your specific backup needs.
Do note that you should check if your backup software can function portably and has the capability to create backups in read-only mode. According to their websites, all the mentioned software can be used portably and installed on an external drive or USB. We recommend you do this using a different PC so that you can create a ‘safe’ backup without damaging any data.
And remember, as you perform the backup, if you’re concerned about your data’s safety, it’s advisable to treat the disk with caution as if it is failing. Prioritize the most critical data first, and treat the failing hard drive carefully to minimize the risk of further damage or data loss.
For a Non-bootable PC:
On the other hand, if your PC fails to boot after the SMART test failure, there are two ways to go about it. The first way to access your files to create a data backup is to create a bootable USB with Windows and boot into a temporary operating system. Here’s how:
- Create a Bootable USB: Get a USB drive with ample storage capacity and download a bootable disk creation tool. We recommend a free tool like Rufus or UNetbootin for this.
- Get a temporary OS: Next, you’ll require an ISO image of a bootable operating system such as Linux or a diagnostic tool like Hiren’s BootCD. These will allow you to access your drive’s content without the Windows OS booting.
- Insert your Bootable Media: You can now insert your bootable USB device into your computer.
- Access Boot Menu/BIOS Settings: Next, restart your computer and access the BIOS settings by pressing F2, F10, or Del on your keyboard during startup (depending on your PC’s make). Some systems also allow accessing the boot menu directly without entering the BIOS. Most often, the designated key is F12 or Esc to access the boot menu.
- Set your Bootable USB’s Boot Priority: In the boot menu, navigate to the boot priority/boot order settings. In the priority list, set your USB drive as the first boot device. After saving changes and exiting the BIOS settings, your system should restart automatically.
- Boot From the Bootable Drive: Your system will now boot from your inserted bootable USB device. Simply follow the on-screen instructions to boot into the OS or diagnostic environment on the USB device.
- Access your Failing Hard Drive: Once you’ve booted into the operating system, you should be able to access the failing hard drive.
You can now access your disk and copy and paste your desired files onto an external location or use the third-party data backup tools we discussed in the previous section.
Your second option is to remove the disk from the non-bootable PC and connect it as an external drive to another computer. You can do this by purchasing a suitable adapter or enclosure and plugging it into your working system to use as an external drive. We found USB to hard drive adapters on Amazon for about $20-$30, and they should get the job done just fine. You can also try installing your hard drive directly onto a new working system, but this is a rather involved procedure and out of the scope of this guide.
Lastly, we think it’s worth noting that some data recovery software, such as AOMEI Backupper and Disk Drill, offer the capability to create disk images or disk clones. This feature can be particularly useful for creating comprehensive backups of your entire disk, ensuring that no data is left behind in the event of a failure after SMART disk errors.
Disk Drill especially lets you create a byte-to-byte backup. What exactly does that mean? To put it simply, once completed, a byte-to-byte backup contains all the sectors from your original drive, even the ones that are marked as empty but may still contain valuable data to be recovered. This way, data recovery software can scan and analyze a complete copy of your original failing drive that contains the same set of potentially recoverable data. This way, there are no threats to the data since even read-only operations can lead to data loss when dealing with a failing device.
Note: Data recovery software like Disk Drill essentially creates disk copies to then scan the copies rather than the disks themselves. While its main purpose is to reduce the load on the scanned disk, this approach also lets you find data on the disks- data that is still accessible (in cases of access issues), deleted or missing files whose records remain in the file system, and data that can be retrieved through their file signatures.
The default file type for such a backup by Disk Drill is the DMG format, which is primarily designed to be used with Disk Drill itself. Such a backup is created to secure all data (both existing and potentially recoverable) for cases when there are SMART errors. We don’t recommend Disk Drill as a traditional backup solution since it is not an ‘archive’ of your files but rather an image for data recovery software to use.
Restoring the files from a backup also requires a premium Disk Drill subscription, so if you’re just looking for free data backup software to avoid manual transfers, we suggest Paragon Backup & Recovery or AOMEI Backupper.
Step 2: Salvage All Data You Can – Evaluate Data Recovery
When facing a SMART predictive failure error, salvaging as much data as you can becomes your next priority. In the last step, we discussed how some of the best data recovery software on the market will let you access and scan your failing hard drive to try and find every bit of data possible (meaning not just your existing files but also deleted or missing files).
In this step, let’s explore how Disk Drill for Windows and macOS actually works. It can be installed on an external drive or be installed on a computer to which your problematic disk is connected as an external drive, among other options.
Disk Drill is designed to read data from disks with corrupted file systems, so whether your hard drive has experienced logical errors or file system corruption, Disk Drill can help. In this section, we’ll provide basic instructions on how to use Disk Drill. However, if you’ve created an image backup as we mentioned earlier, you should scan that backup instead of the problematic disk.
Disclaimer: It’s essential to exercise caution when performing any disk manipulation, even read-only operations. While Disk Drill operates in read-only mode to minimize the risk of further data loss, there’s still a possibility of unintended consequences. If you’re hesitant to try and use DIY methods or have complex data loss situations, we highly recommend seeking professional data recovery services. These centers have professionals with specialized equipment and expertise to handle data recovery with minimal risk to your disk’s integrity, ensuring the best possible outcome in case of SMART failure.
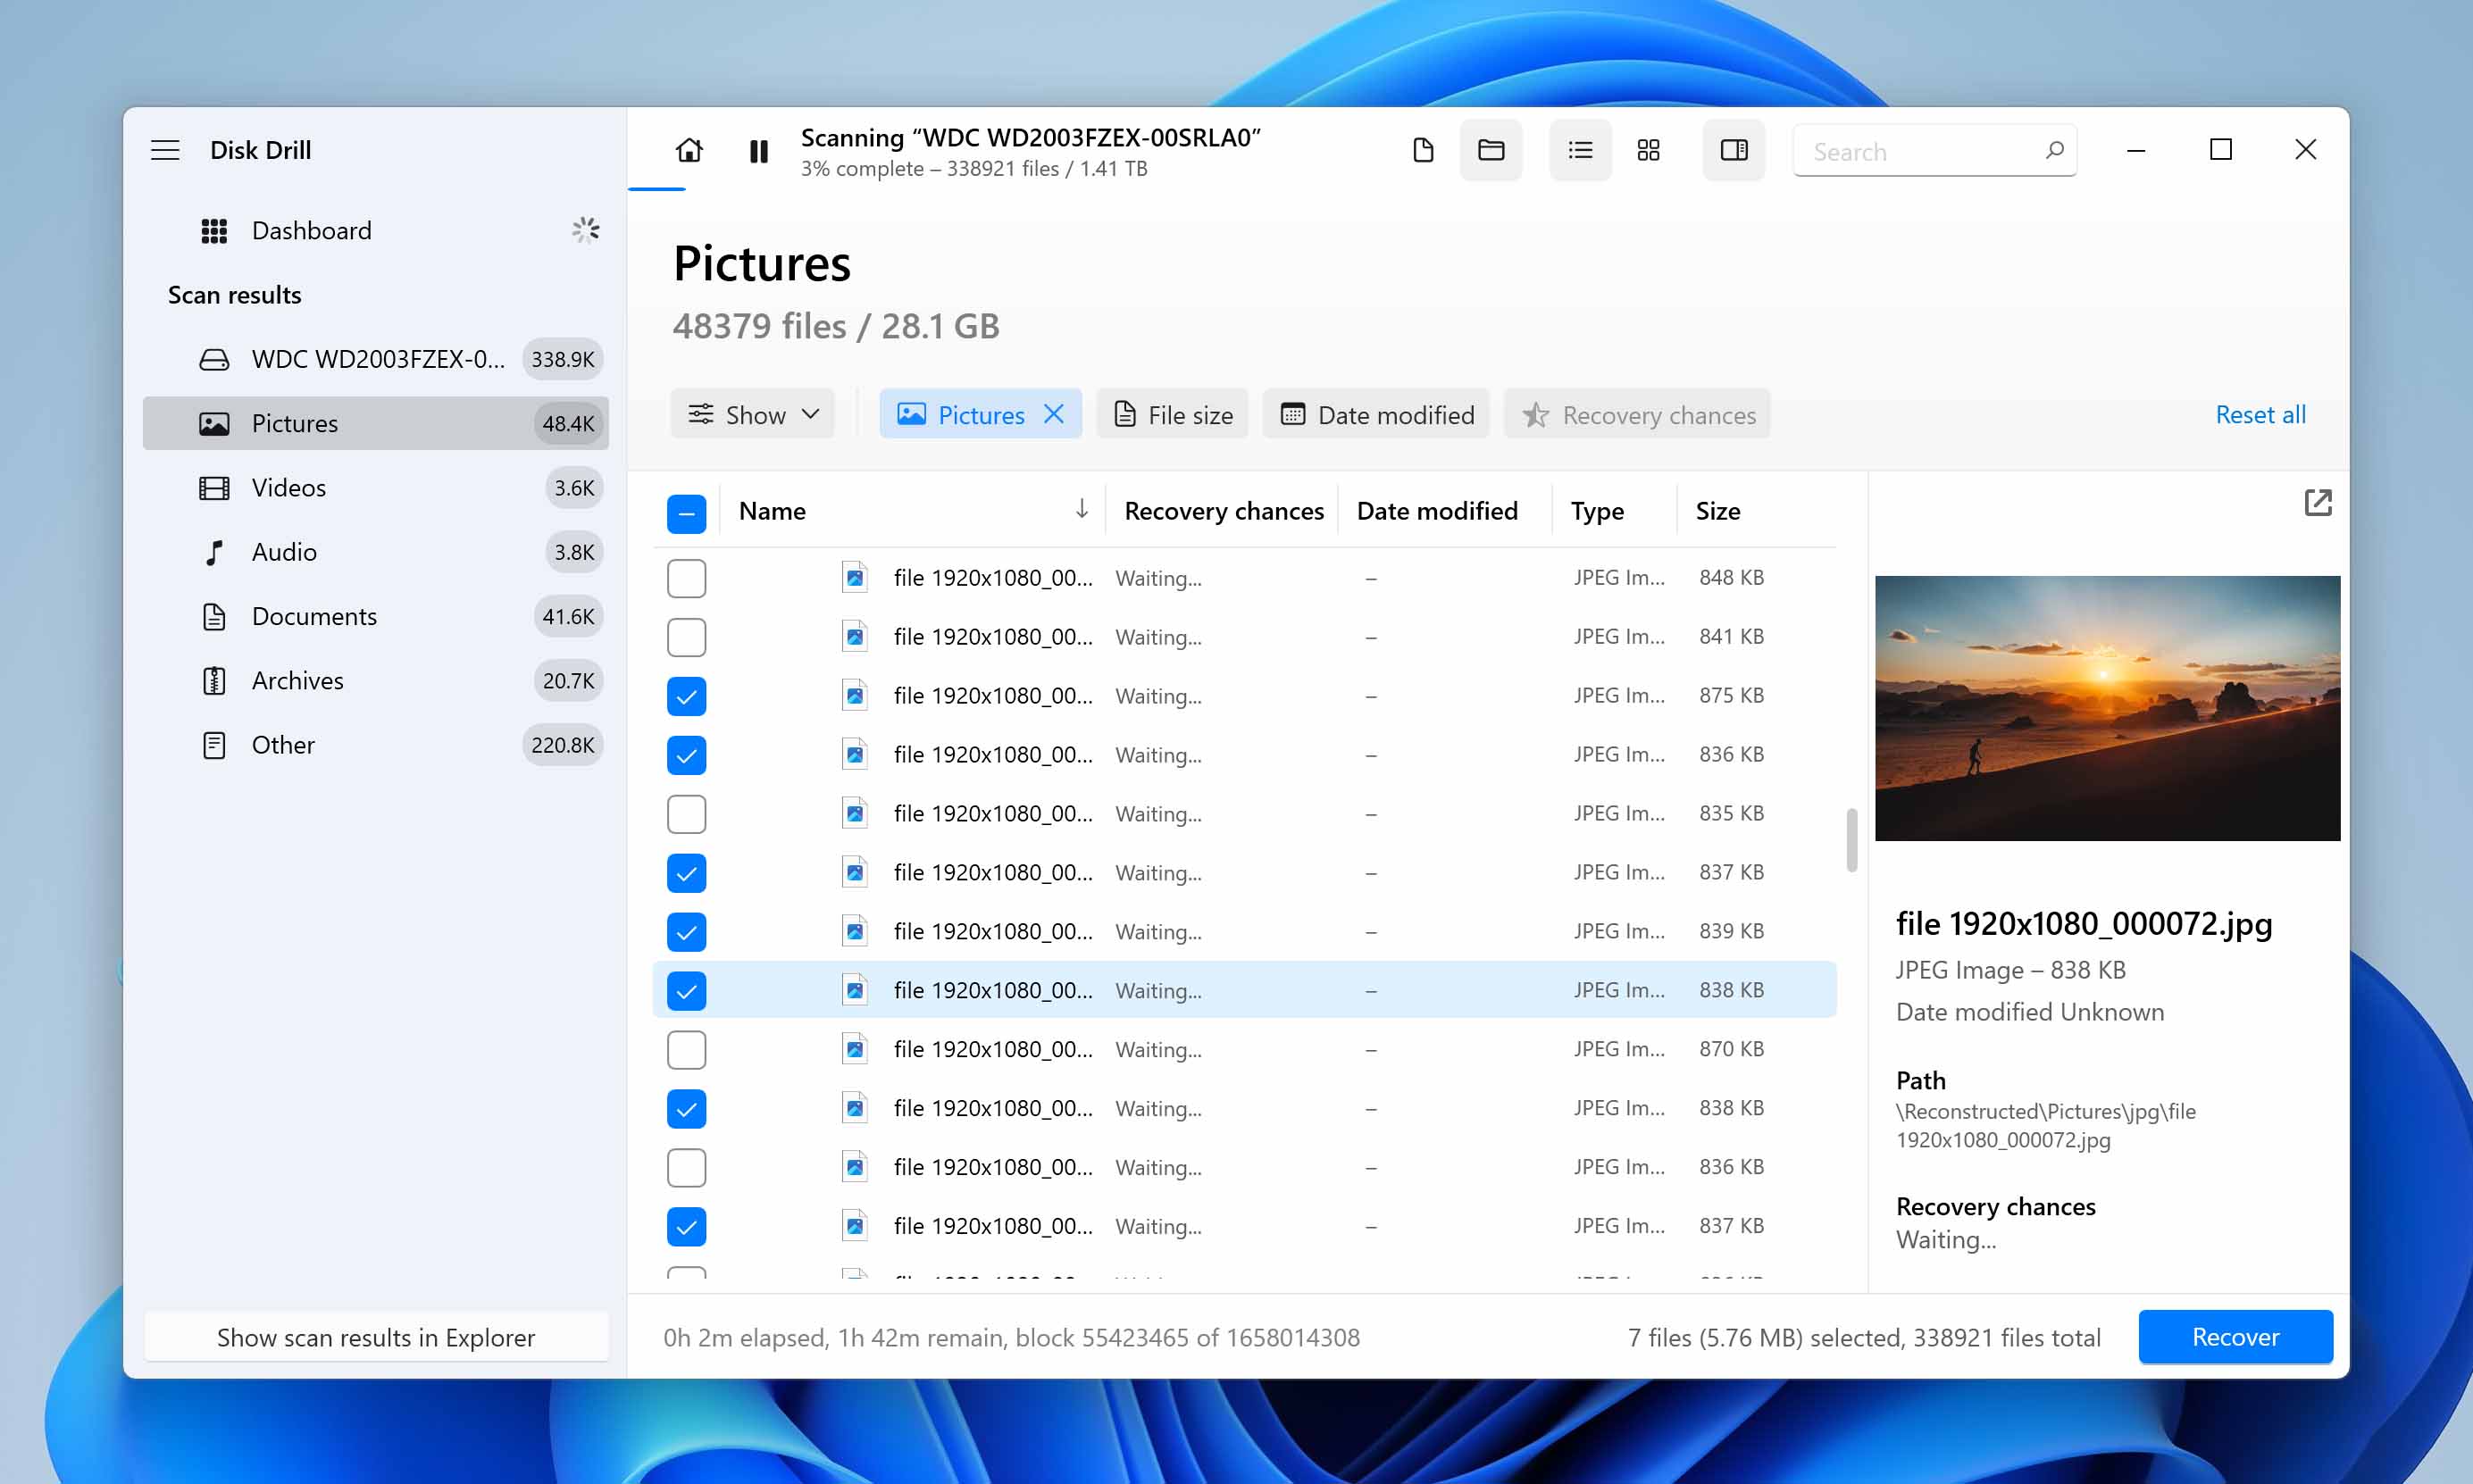
Here’s a simple guide to using Disk Drill for hard drive data recovery:
- Download and install Disk Drill on your system.
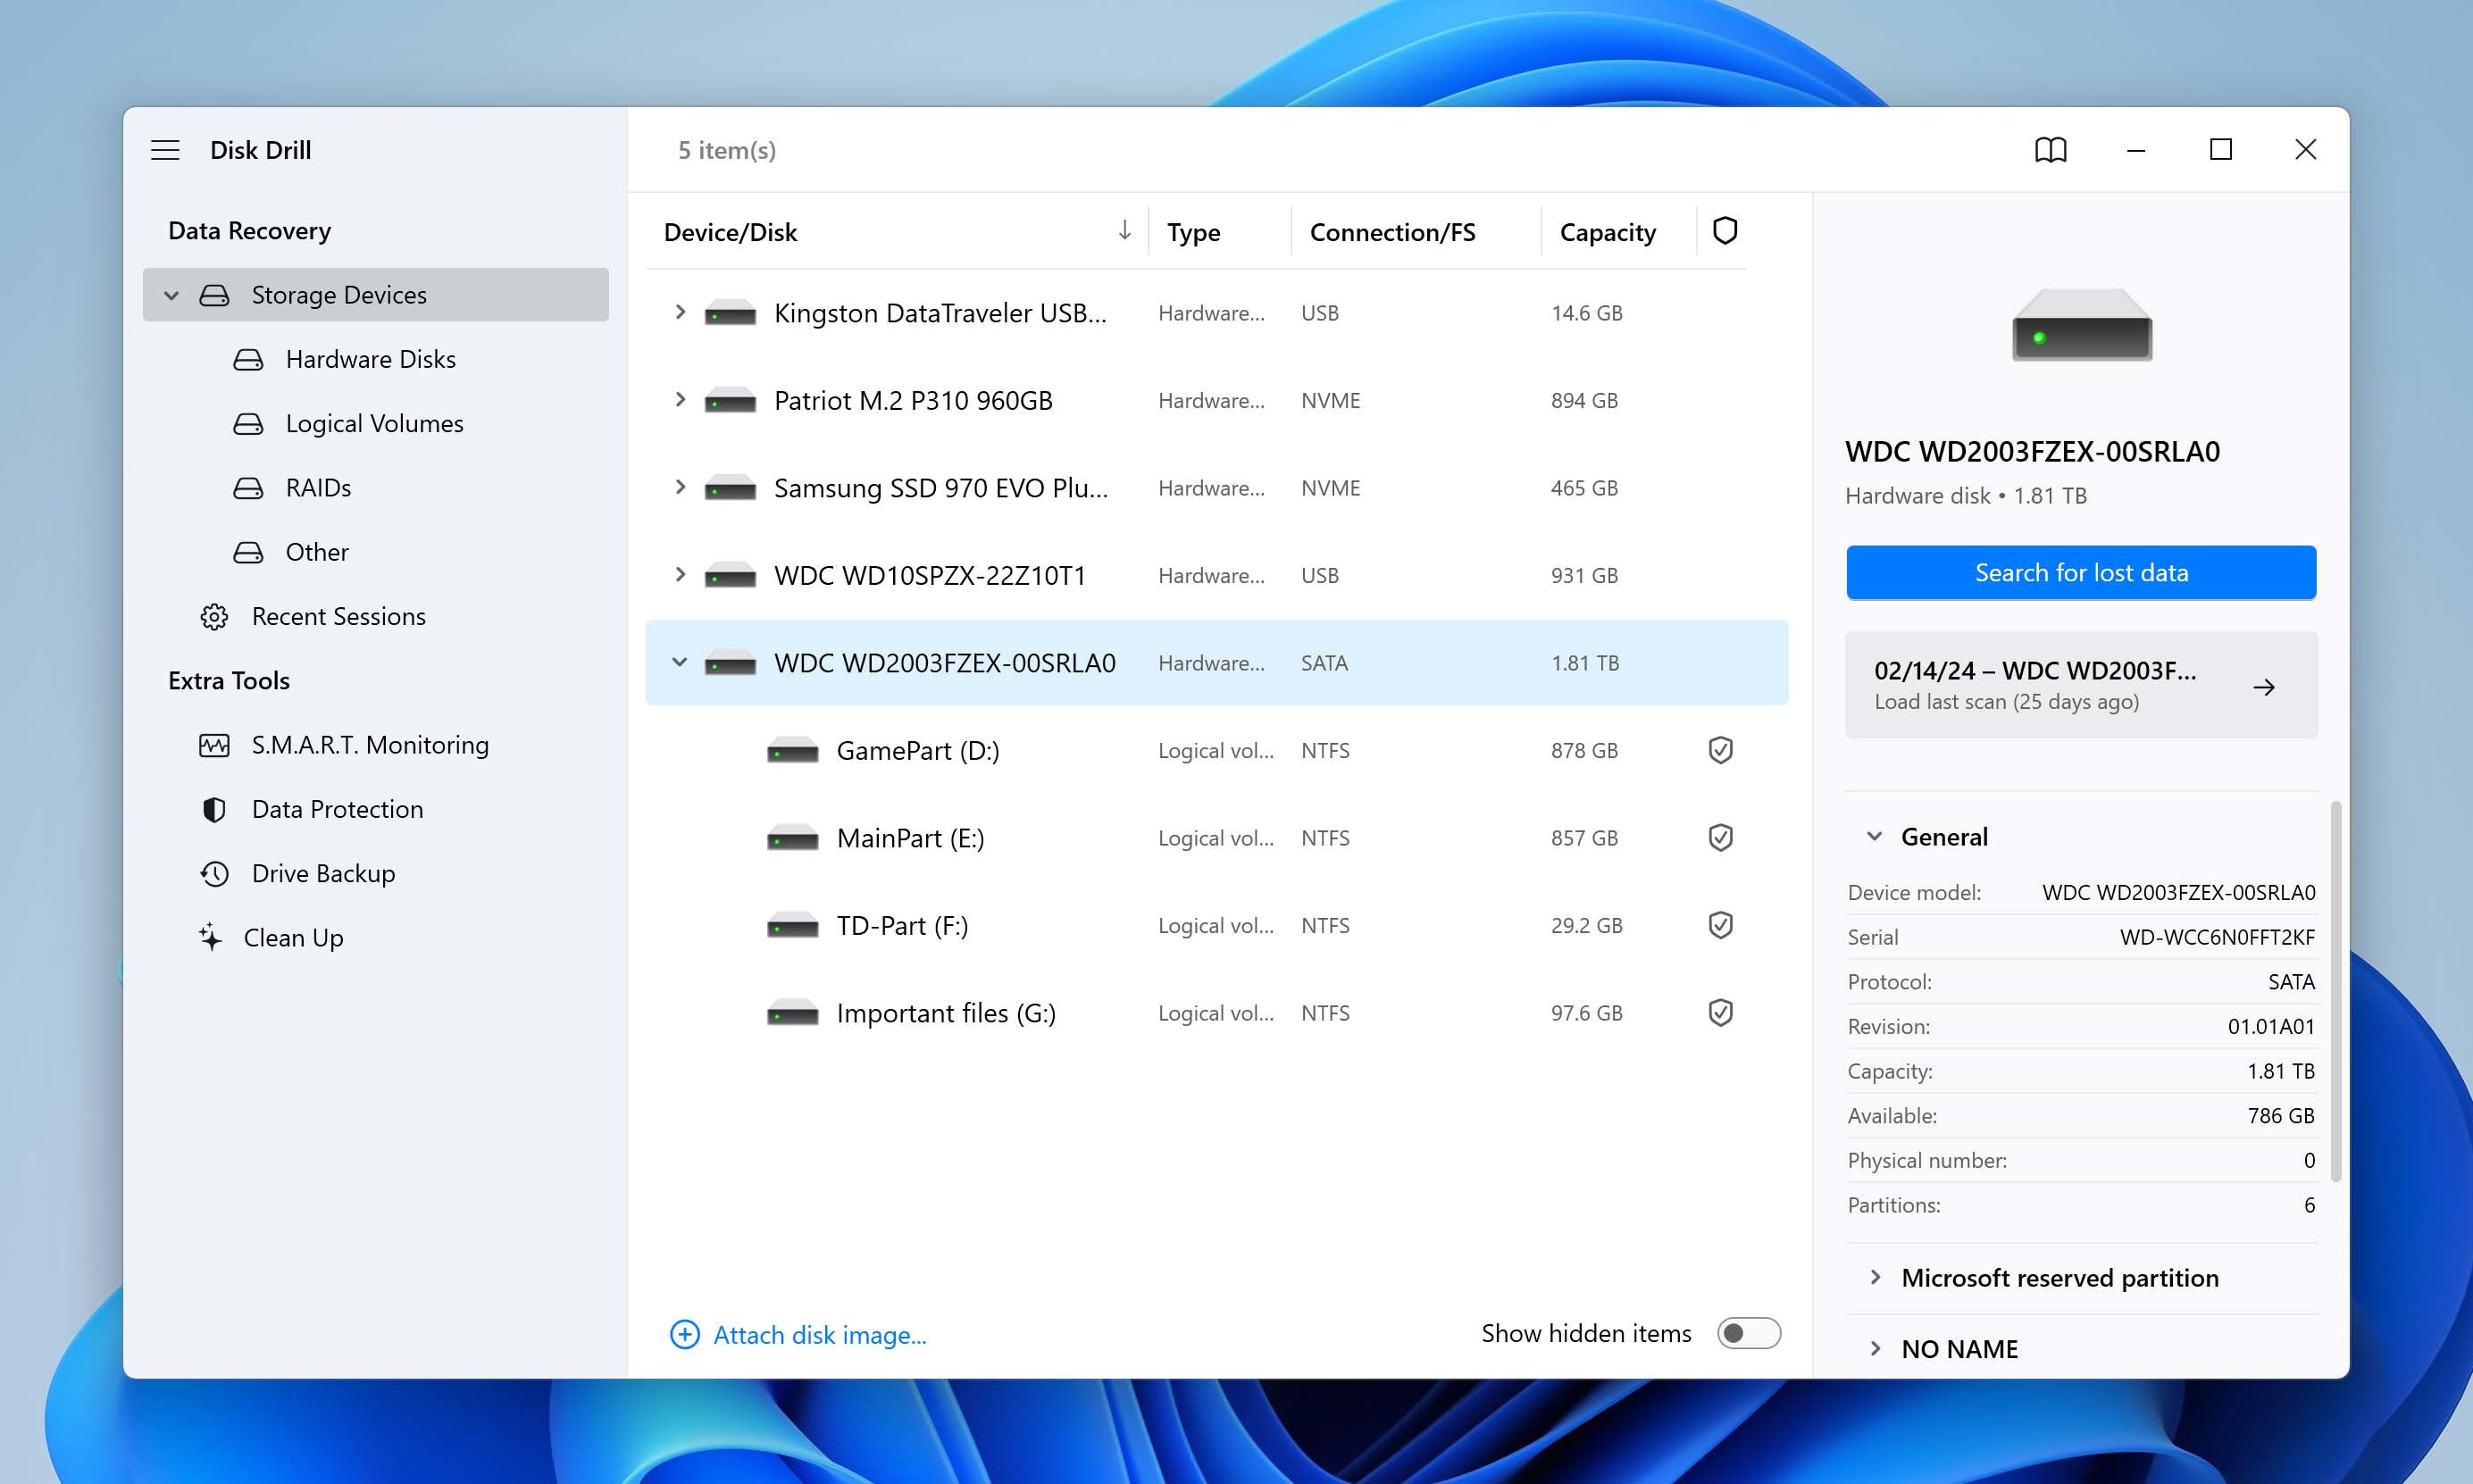
- Launch the application and select the hard drive that has SMART errors. Now click on “Search for lost data.”
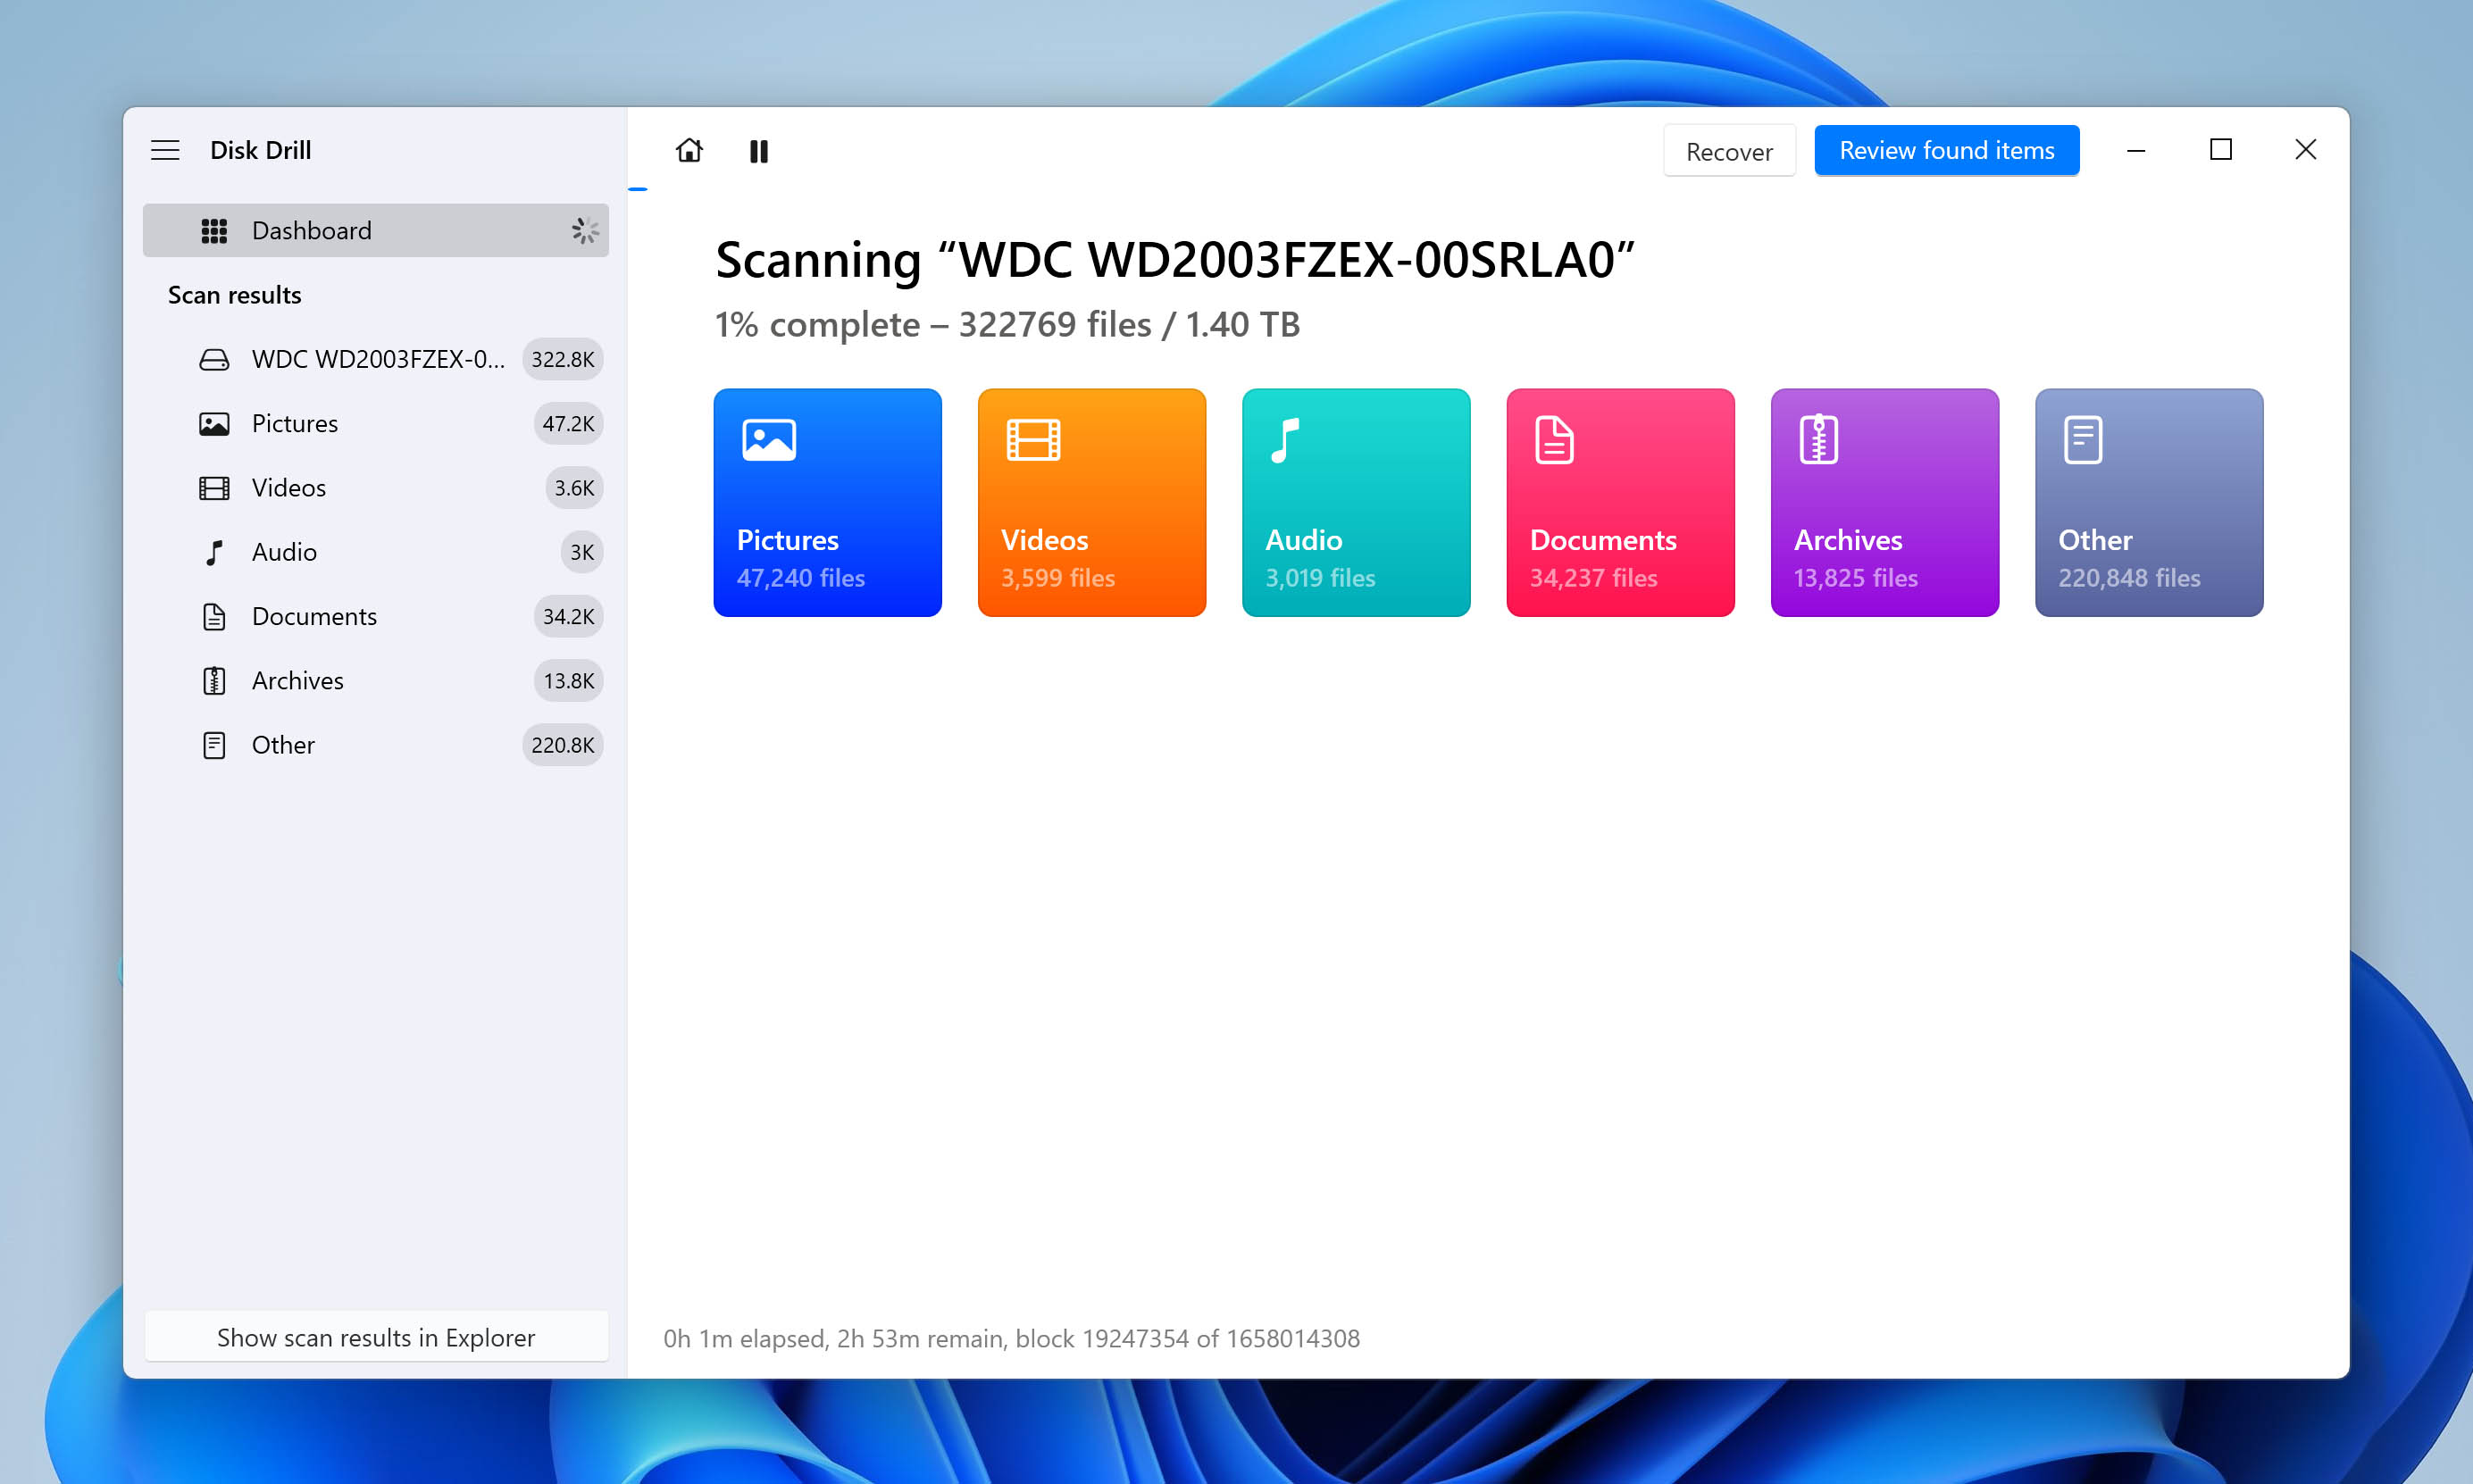
- Now wait for the scan to finish or begin previewing found files by clicking “Review found items.”
- Once you’ve selected your files, click on “Recover.” Your hard drive’s recoverable files will now get sent to your chosen location.
You can read our in-depth review of Disk Drill to know more about its features.
Step 3: Replace the Failing Drive – Move Forward with a New Companion
Now that your data is backed up and safe, you’ll need to replace the failing drive with a new one. Finding a suitable replacement drive for the failing disk will help you continue using your PC without fear of losing all your drive’s data.
Here are some things to keep in mind:
- 📊 Assess your storage needs: Before purchasing a new hard drive, evaluate your storage requirements to determine the capacity and type of drive that best suits your needs. You can consider factors such as performance, capacity, and budget constraints when making your decision.
- 💽 Select a replacement drive: Once you’ve determined your storage needs, select a replacement drive by choosing a reliable and reputable brand of hard drive known for quality storage devices to ensure your data stays safe for long. We recommend brands like Western Digital, Toshiba, Transcend, and Seagate. Most of these come with SMART monitoring to help keep an eye on your new drive’s health. Here’s an interesting article about hard drive failure rate statistics we found, and could help you choose a better drive for your needs.
- 🔄 Retrieve data from backup: After replacing the failing drive, use the backups you created using our previous steps to restore your data. Transfer all essential files, documents, and media onto the new disk.
If your original hard drive with SMART failure was the primary system disk, you’ll have to reinstall the OS on your new drive. This can be done with bootable media loaded with the OS files like a USB or DVD. Here’s a YouTube video showing how to install Windows from a USB drive.
Step 4: Attempt Drive Repair – Proceed with Caution
After your data is securely backed up, you can try attempting drive repair. It’s crucial to approach this step with caution as it carries inherent risks and may not fully resolve SMART errors.
Note: We strongly advise against relying on the “repaired” drive as a system disk or for storing any important data in the future, even if the repair appears successful. The underlying problem could still persist, leading to future failures. Moreover, there’s always a risk of data loss when attempting any repair methods, so ensure you attempt any repairs only after backing up your files. Instead, use this repaired drive as a storage vault for other not-so-important data and miscellaneous files.
With that said, here are some drive repair options you can try:
Option A: CHKDSK
CHKDSK is a command-line utility on Windows that can be used to scan and repair file system errors in your hard drive. Thankfully, it can also be run via File Explorer, and we’ll show you how in this section. This utility can potentially fix logical errors within your ailing drive. In some cases, CHKDSK may inadvertently overwrite your data, so it’s essential to proceed cautiously when using this tool.
Here’s how you can use CHKDSK to check for bad sectors and fix them:
- Open File Explorer on your Windows system.
- Click on This PC and right-click on the hard drive with the predicted SMART failure.
- Select Properties and then navigate to the Tools tab.
- Under the Error checking section, click on Check. This will start the scan and check your drive for file system errors.
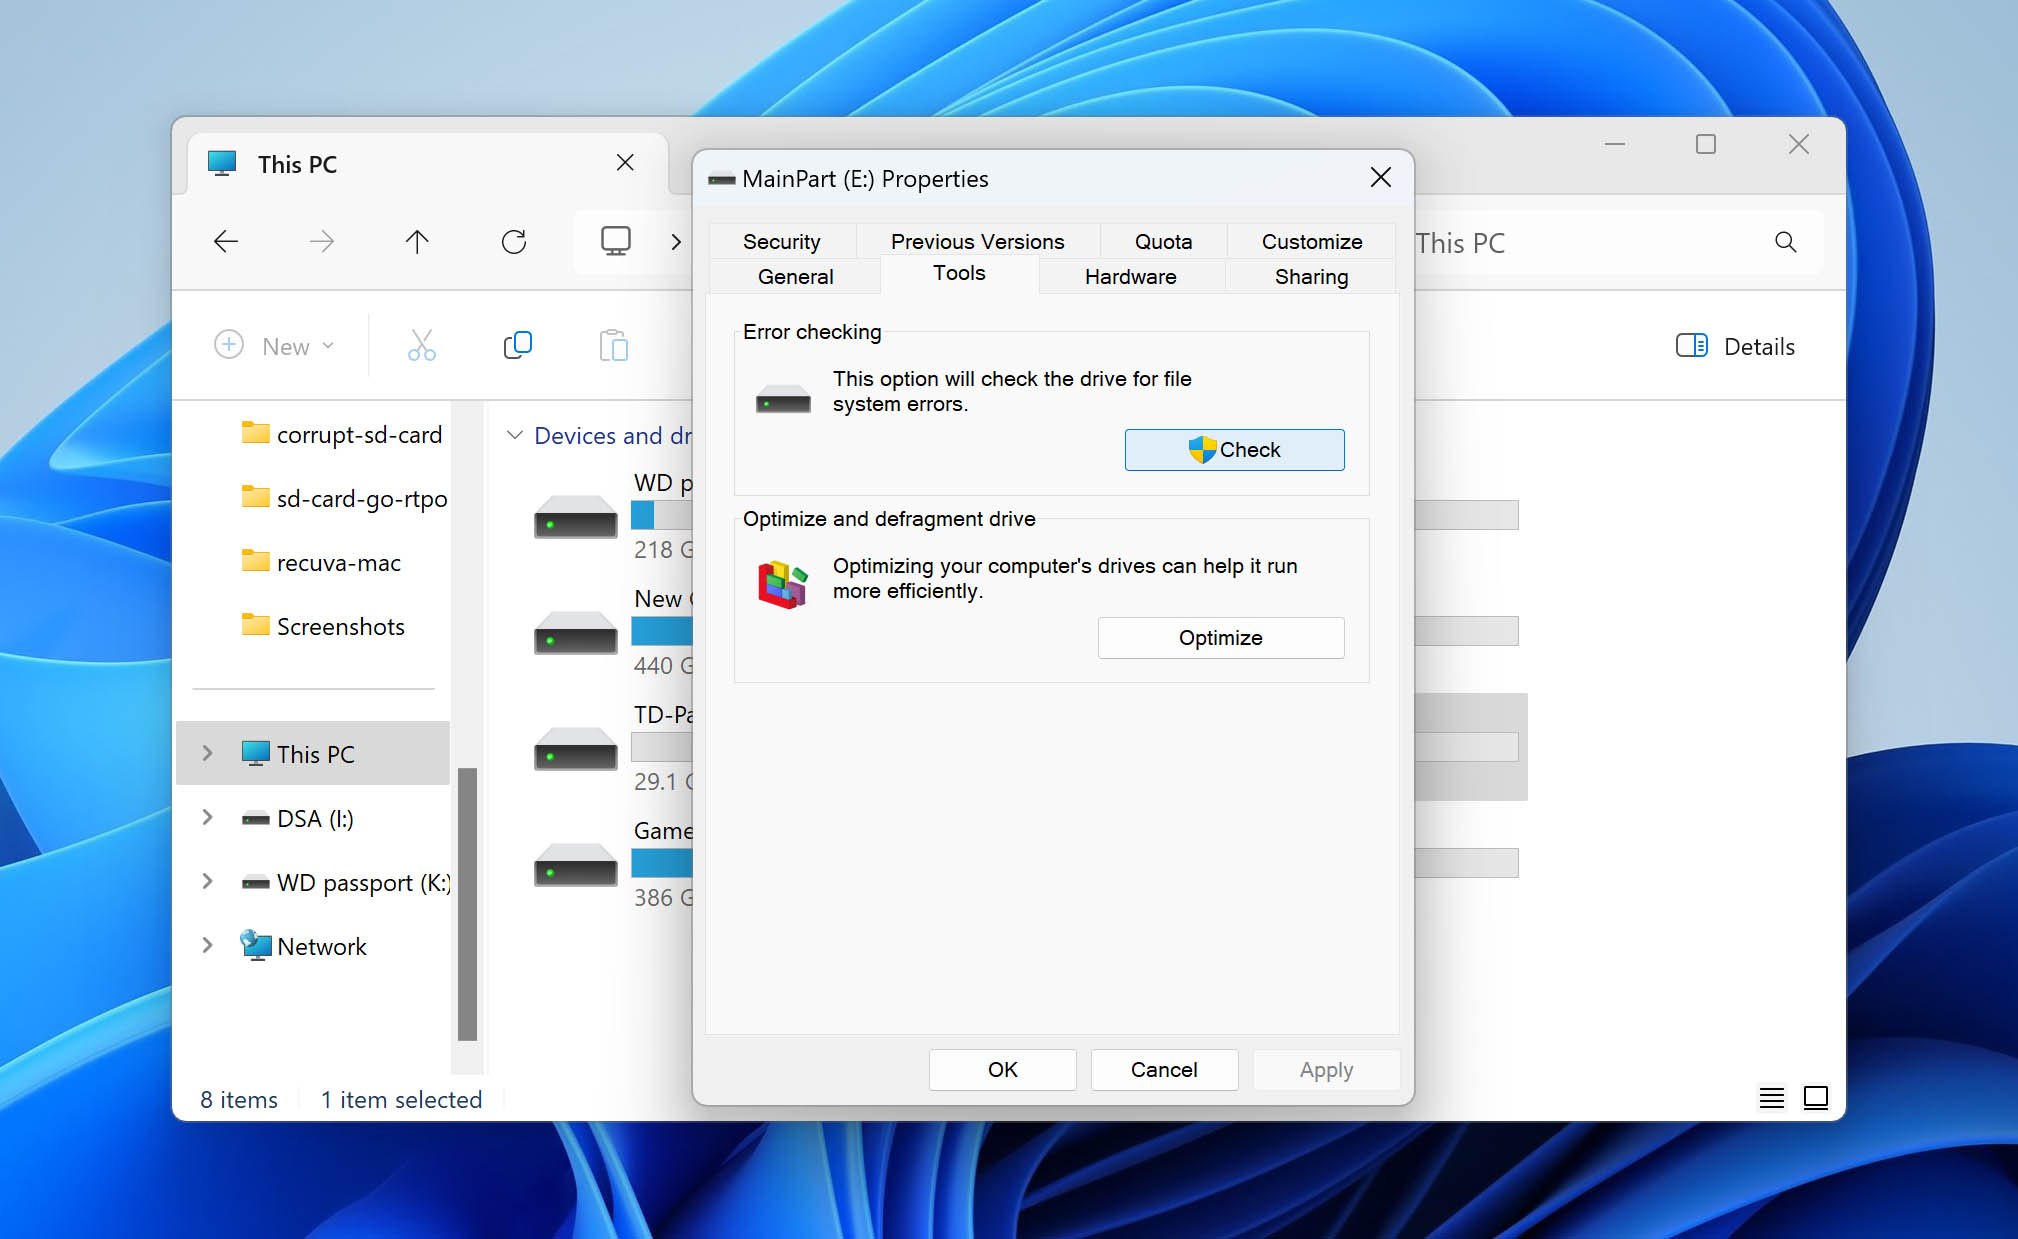
- Click Scan drive on the window that pops up. If any errors are found, you can choose to fix them.
Remember, CHKDSK can only repair soft bad sectors, where data might be written incorrectly. In the case of hard bad sectors, likely due to physical damage, CHKDSK simply marks them as unusable.
Here’s our full guide on how to use CHKDSK
Option B: Defragmentation
Defragmenting, in simple terms, rearranges file fragments to optimize file layout and improve performance. However, it does not address any physical issues your drive may have and is primarily beneficial for optimizing storage space rather than repairing disk damage or fixing SMART errors.
Here’s how to defragment your drive:
- Open the Start menu, type Defragment, and select Defragment and Optimize Drives.
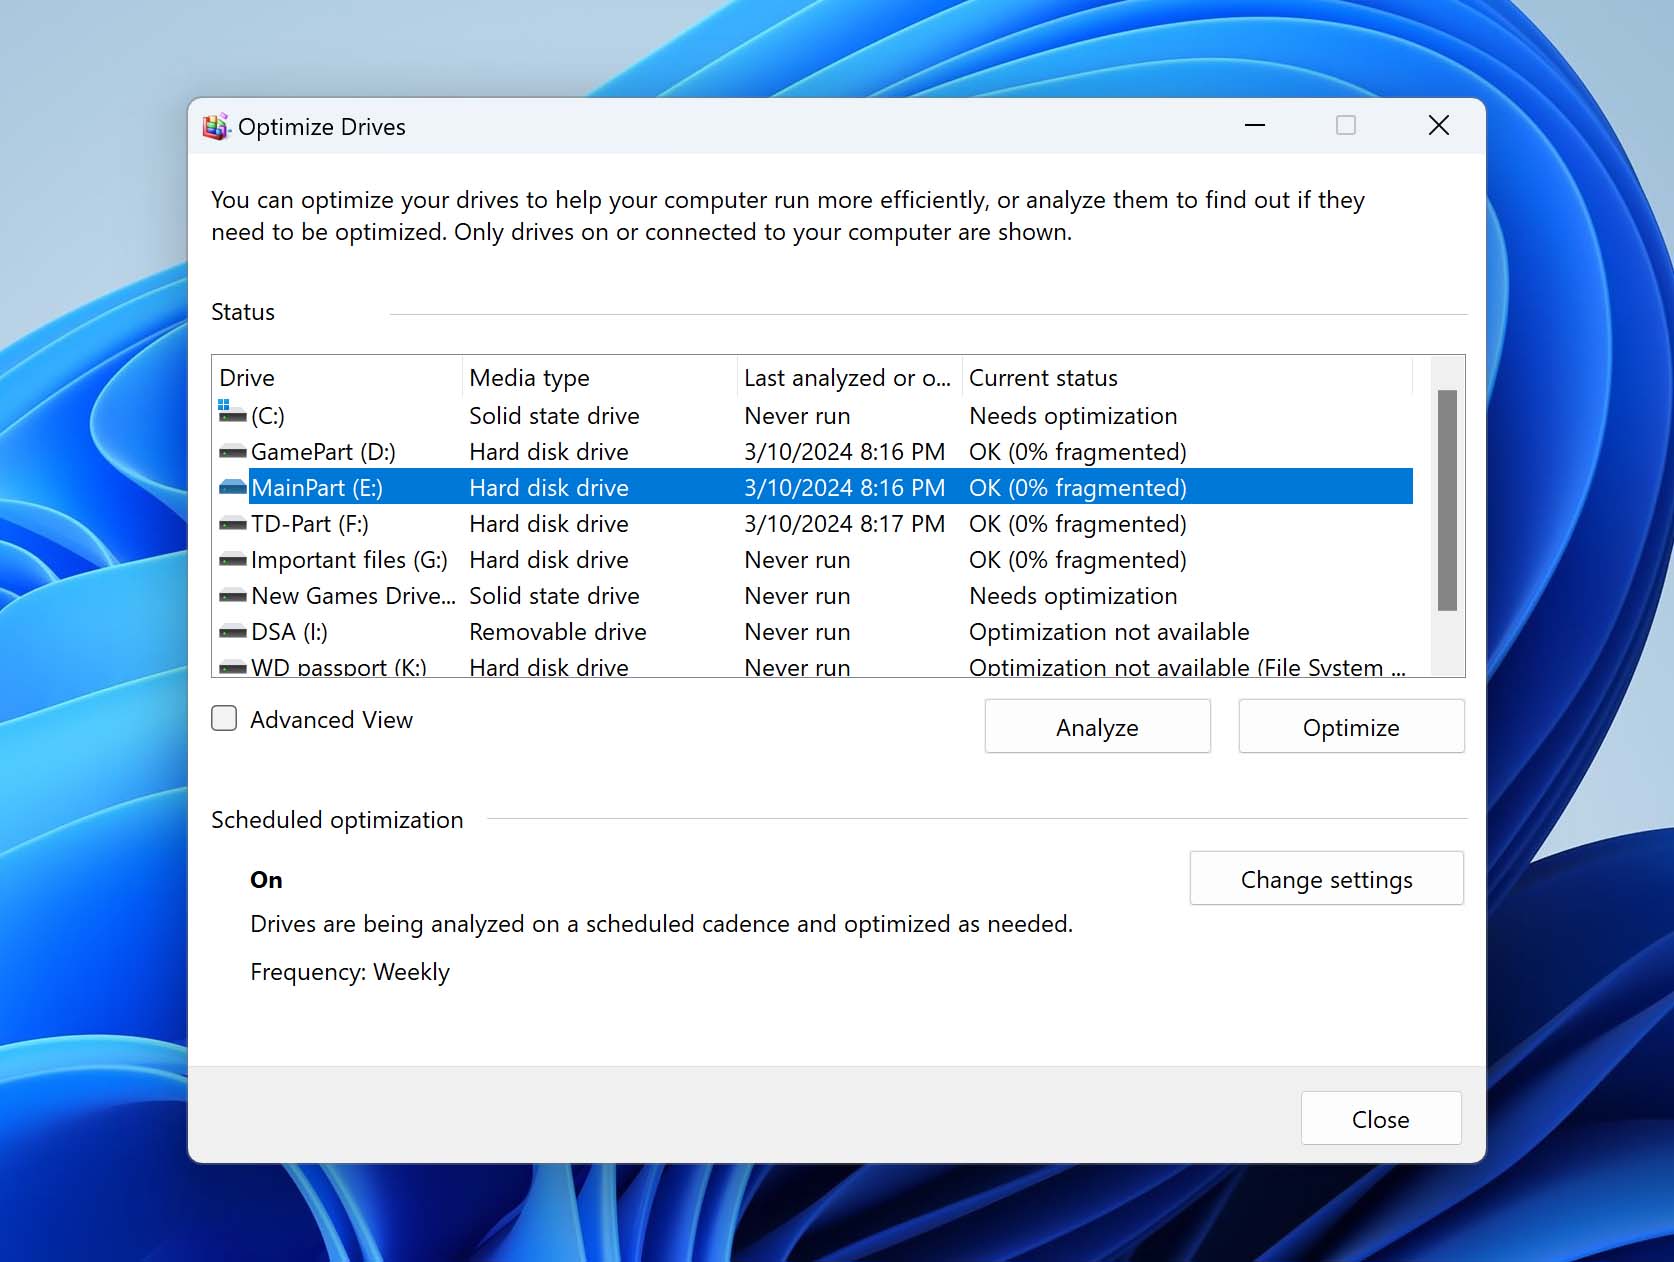
- Now select your drive with SMART failure to optimize or defragment from the list. Click on Analyze to check if the drive needs optimizing or defragmenting.
- If the analysis indicates that optimization or defragmentation is required, click on Optimize. The rest of the defragmentation process will be completed automatically but may take some time.
Option C: Victoria
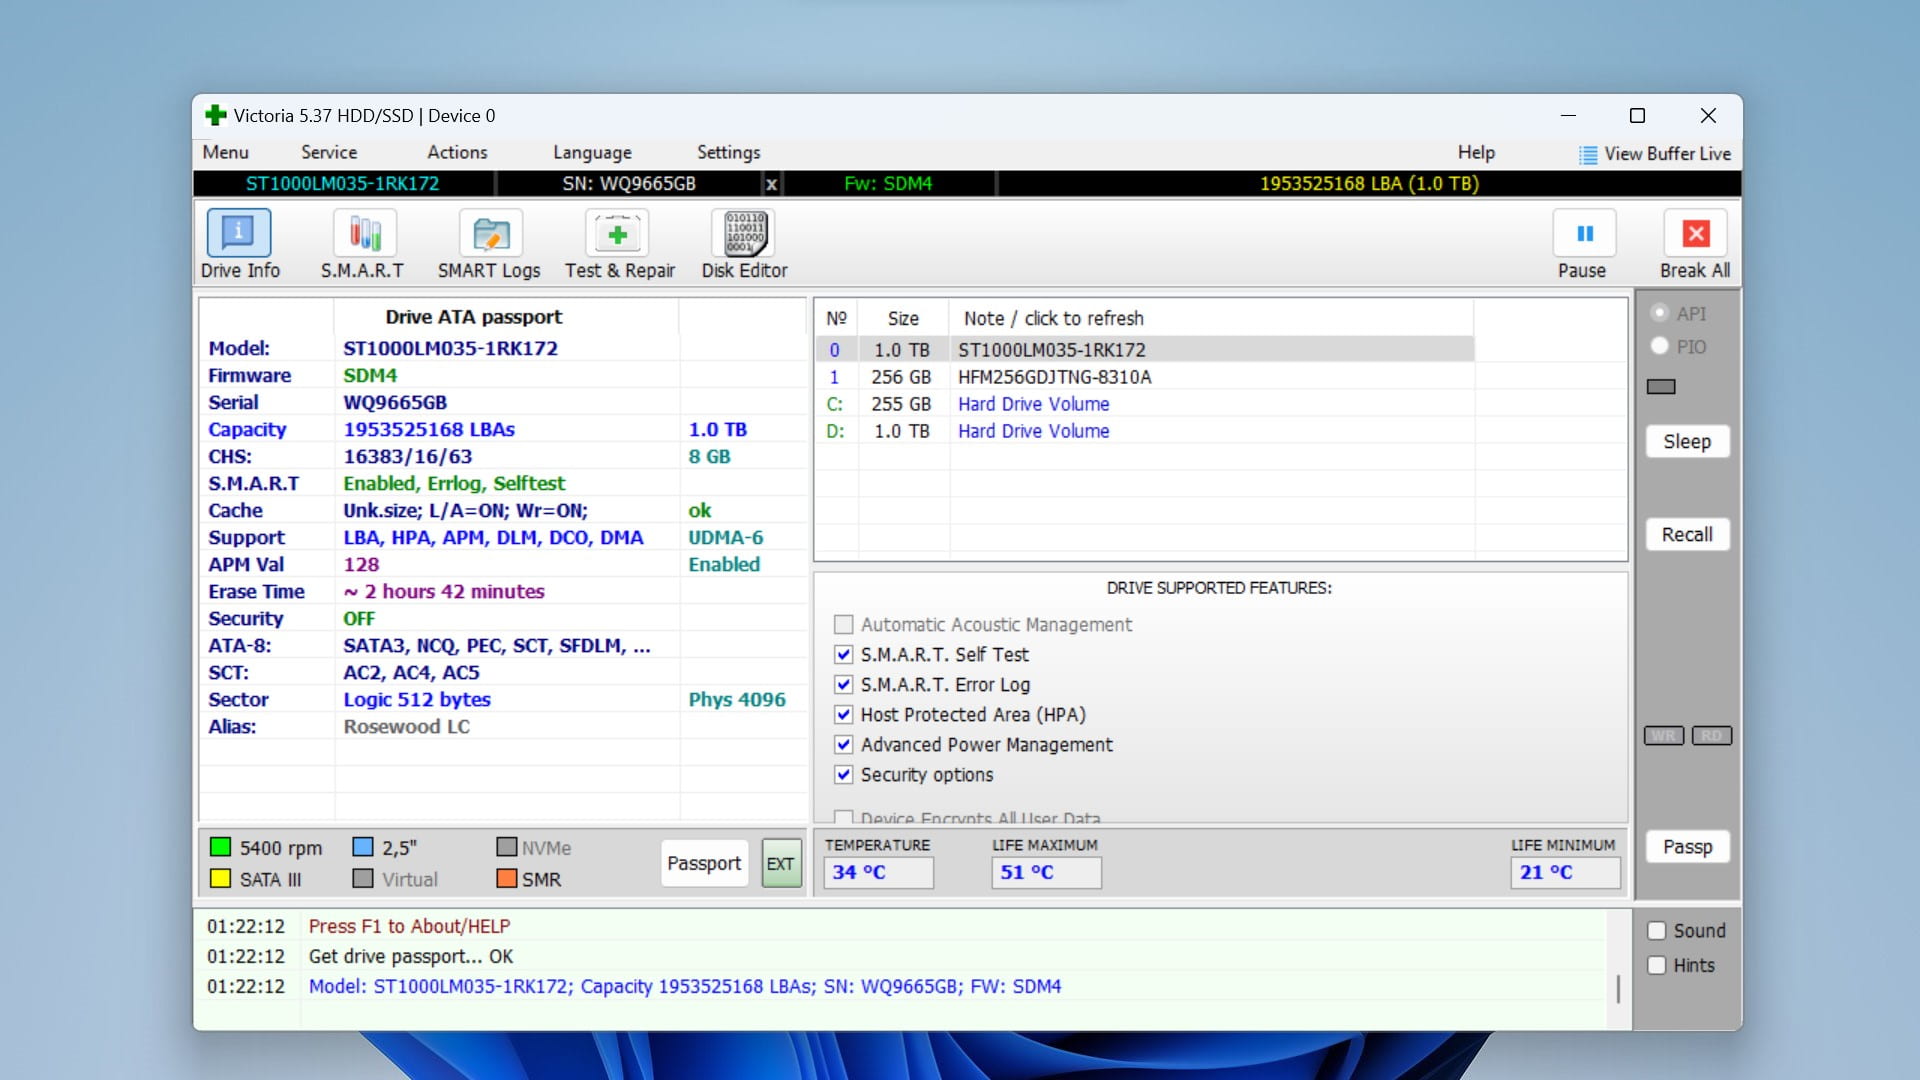
Victoria is an advanced diagnostic tool that can potentially repair your hard drive issues. This diagnostic software has tools for drive cloning, benchmarking, low-level formatting, and partition management, as well as identifying and remapping bad sectors on your drive. It can identify and mark bad sectors on your failing disk to prevent data loss, and after scanning your hard drive’s surface, it can remap, erase, and possibly restore data when errors are spotted. Do note that remapping replaces bad blocks with spare memory blocks without preserving the data.
However, it comes with a high risk of data loss if used incorrectly, and we don’t recommend it for beginners. For those of you still determined to attempt a repair using this software, here’s an informative Victoria tutorial we found on YouTube. Remember to proceed with caution and consider seeking professional assistance before using this tool.
Conclusion
“SMART errors detected” might seem like a serious concern, and it is, but navigating it isn’t impossible with the right approach. In this guide, we’ve outlined four simple but critical steps to save your valuable data in the case of hard drive SMART failure. Always proceed with caution when using a failing drive to recover or even backup data, and when in doubt, visit a professional.
This article was written by Vihaan Jain, a Staff Writer at Handy Recovery Advisor. It was also verified for technical accuracy by Andrey Vasilyev, our editorial advisor.
Curious about our content creation process? Take a look at our Editor Guidelines.