D drive suddenly missing? Act fast. A missing drive is likely a symptom of a bigger problem… You may be on your way to data loss. And the stakes are higher because drive D is usually a partition of your system drive – drive C. But first, you need the right intel.
In this article, we will look at the possible reasons why your D drive suddenly disappeared in Windows 10/11, how to fix it, and how to recover your files from a missing D drive should the worst happen. Read on.
Why Did My D Drive Suddenly Disappear
Your D drive missing could either mean that it’s not listed for one reason or another, or your computer thinks it’s an unassigned or unallocated partition. We boiled down all these scenarios to a simple explainer:
- 💻 Faulty OS update: When you update your operating system, certain configurations get modified. If mount permissions were somehow changed, this could prevent your computer from recognizing your D drive. Early releases of new OS versions might also have bugs, and we can’t really predict how it will affect your drives.
- 🔠 Unassigned drive letter: There are times when the D drive still exists somewhere in your computer but is undetected by your File Explorer. Likely, this means that the d drive is either rendered unallocated or the letter is occupied by another drive.
- ❌ Corruption: D Drive may disappear because of corruption resulting from buggy software, virus, or power outage. Fortunately, there are ways to fix a corrupted hard drive.
- ❓ Hidden partition: Your D drive may still be there, but is just hidden by your system. An update or recently installed software may hide your D drive when it attempts to increase system security or messes up the configuration or settings in the process.
- 🔥 Physical damage: Finally, a D drive may be lost as a result of physical damage due to shock, liquid infiltration, etc.
In the case of physical damage, we strongly recommend that you send your drive to a professional data recovery center. They have the tools, lab, and specialists to restore your data from a failed drive without making the data loss worse.
How to Recover Files From a Suddenly Disappeared D Drive?
Hard drive recovery is crucial before any attempt to format, repair, or restore it or any of its partitions because you might lose more files in the process. But how do we recover files from a missing drive?
Disk Drill is a data recovery software that can scan and recover drives that don’t appear on File Explorer (as long as they appear in Disk Management). While File Explorer can only detect partitions that have letters assigned to them, Disk Drill can scan drives in their entirety.
Steps 3-6 are instructions on how to use Disk Drill to create a disk image of your drive. These steps are critical for users who are dealing with problematic drives. Creating a byte-to-byte backup and using the resulting image as the recovery target allows us to interact less with the drive and avoid making things worse. This is especially important since the D drive is usually a partition of the system drive.
- Download Disk Drill for Windows and install it on a different disk than the one you’re experiencing problems with. This way, you avoid overwriting data with the installation.
- Once installed, double click on its icon to launch it.
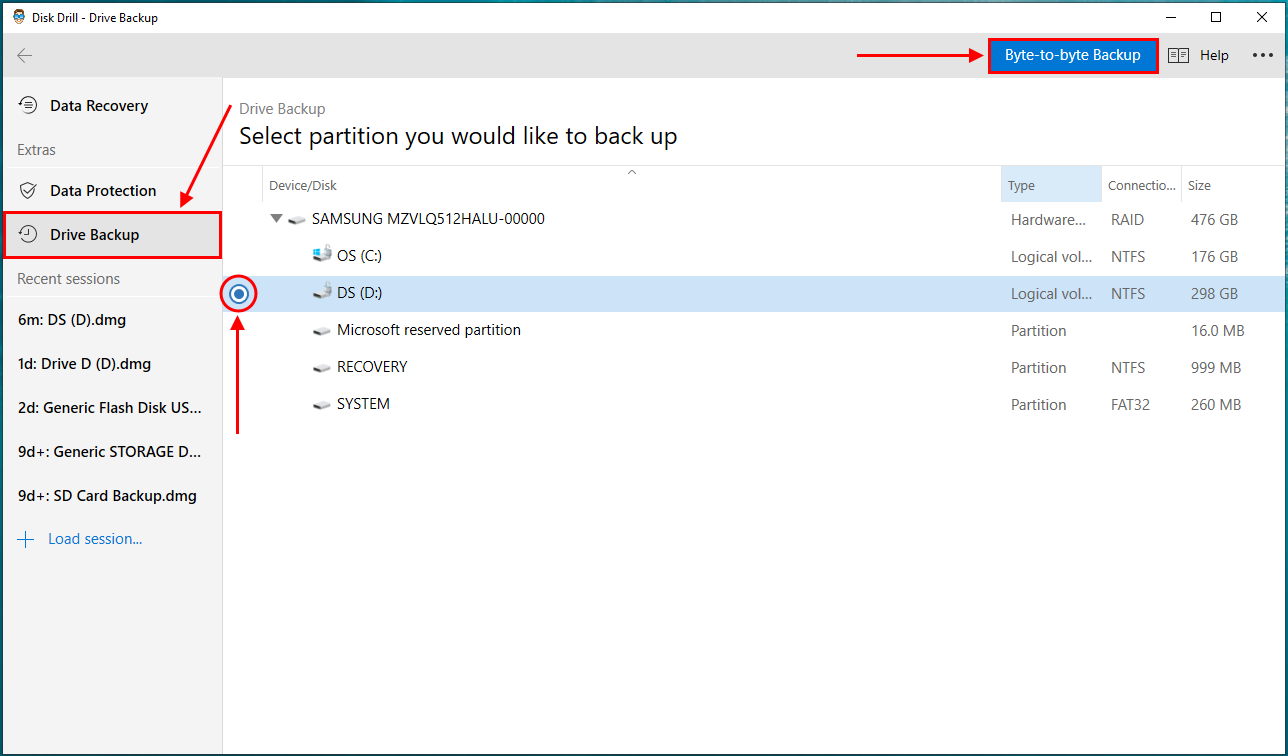
- On the left sidebar, click Drive Backup. Then, select your D drive from the list and click Byte-to-Byte Backup.
- Use the folder button to choose a location where Disk Drill will save the backup file. Then, click OK to create your backup.

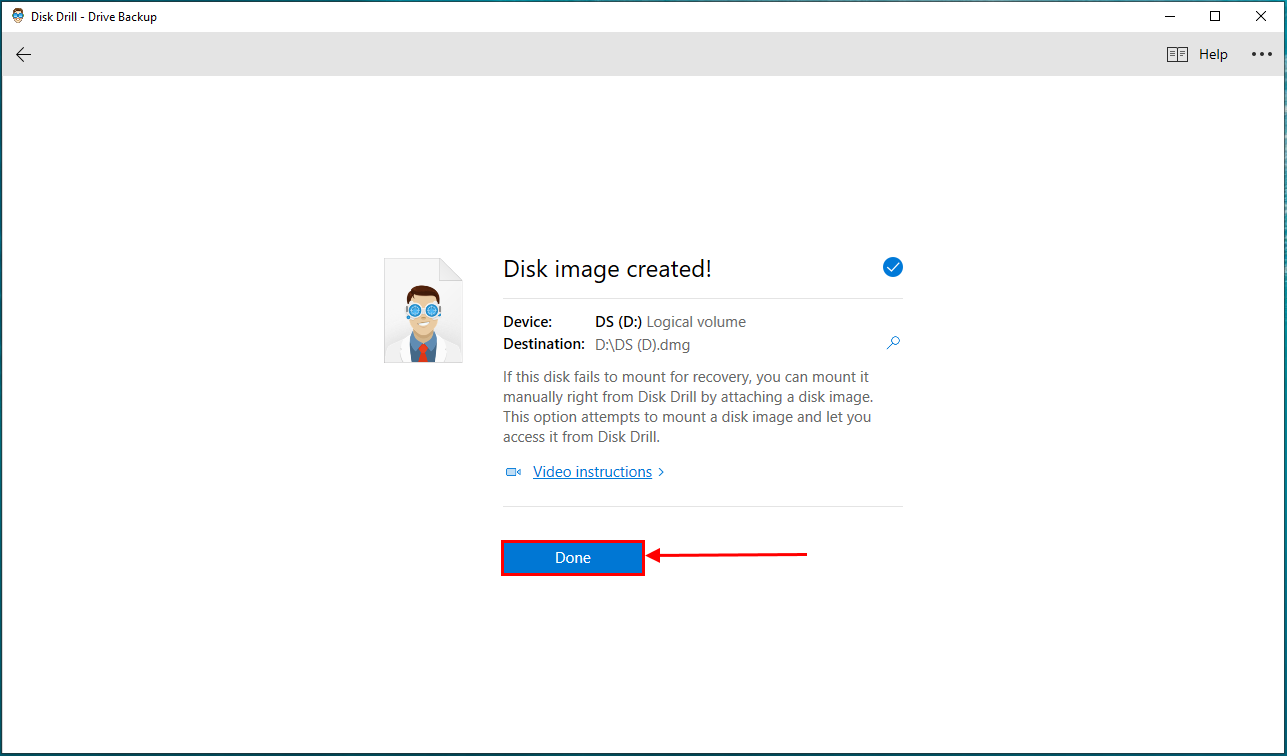
- Note the location of your disk image file so you can easily attach it in step 6. Then, click Done.
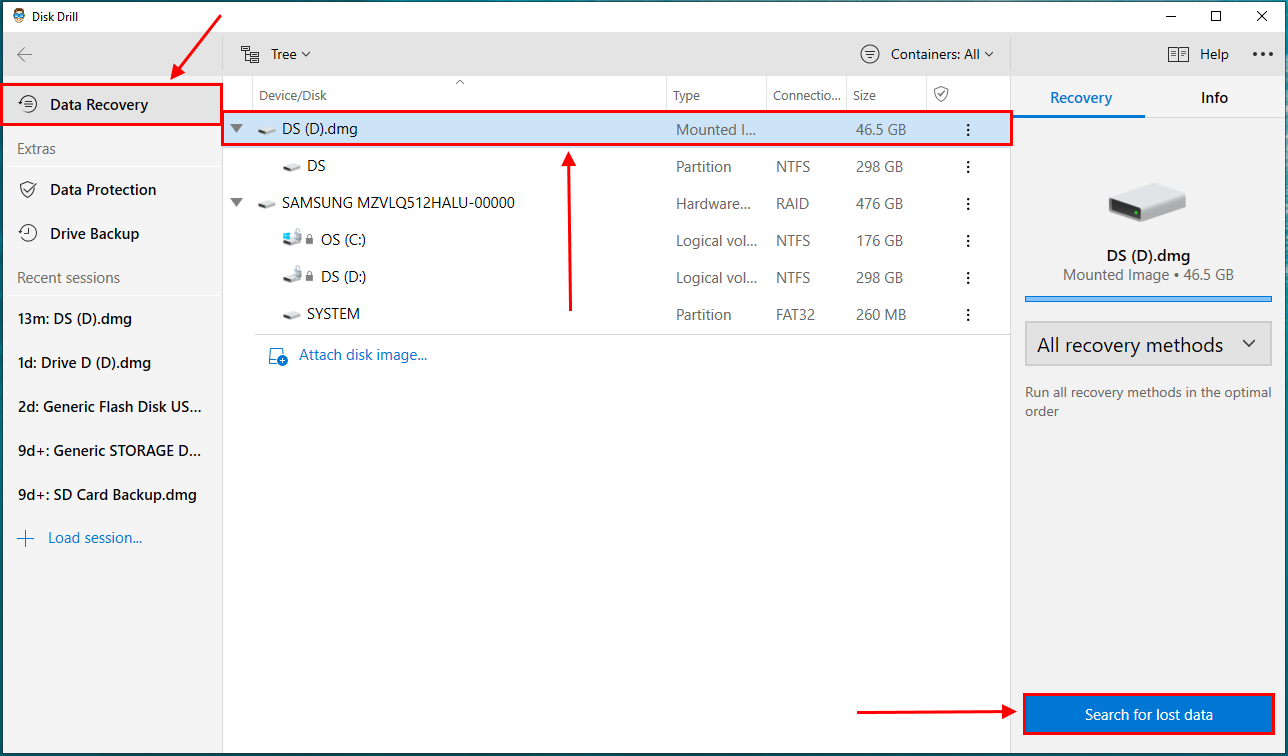
- From the middle pane, select the drive you want to recover and click Search for lost data. You can also attach your disk image file from this screen or double-click it in file explorer, so you can select it as the drive you want to recover.
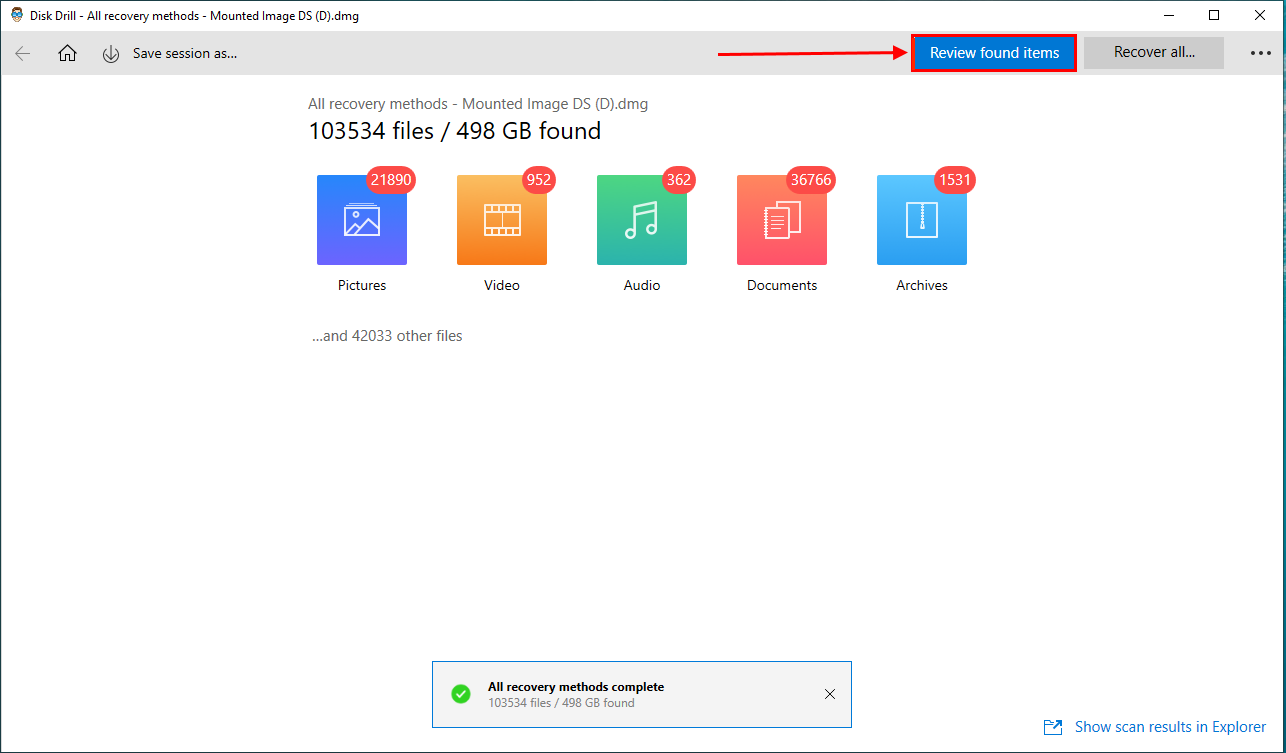
- Wait for Disk Drill to complete its scan. Then, click Review found items.
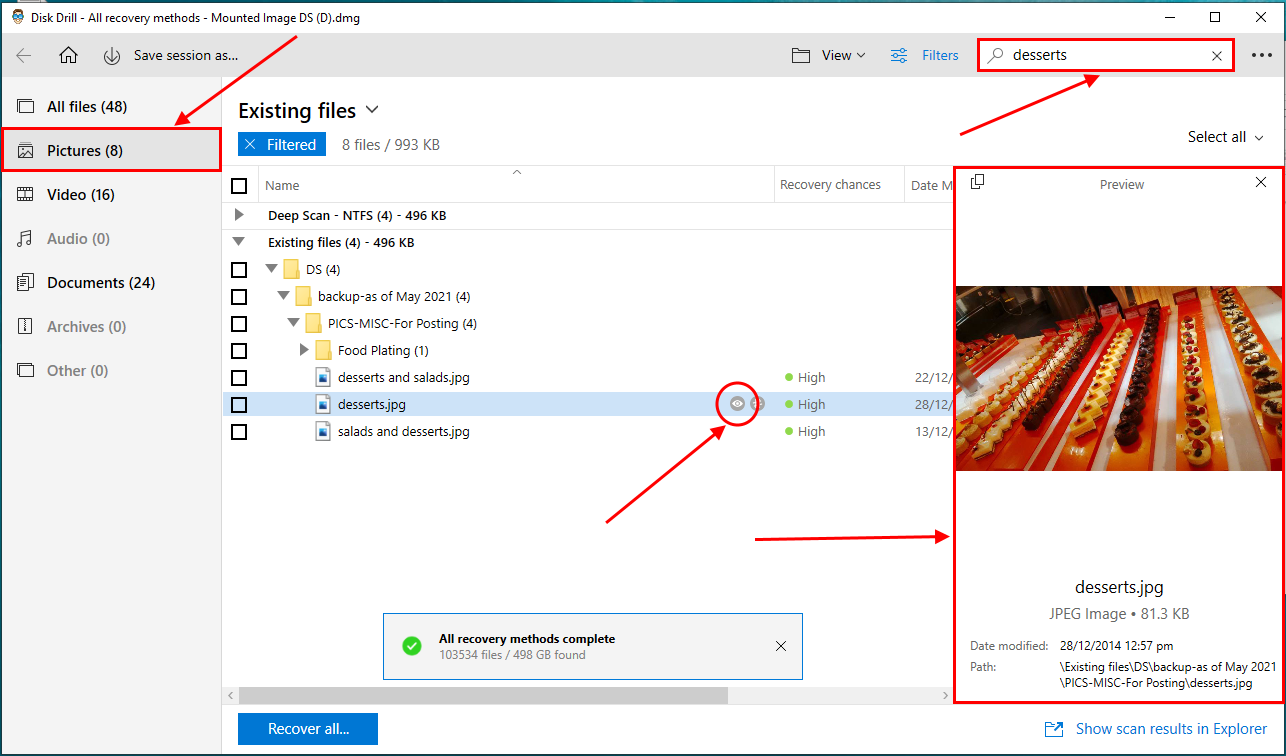
- There are a bunch of cool things you can do on this screen. Use the search bar to locate files by name or extension, or use the left sidebar to sort them by file type. Data recovery software tries its best to restore original file names, but severe corruption can make that difficult. Fortunately, you can preview files in Disk Drill. Hover your pointer to the right of any file in the list and click the eye button that appears.
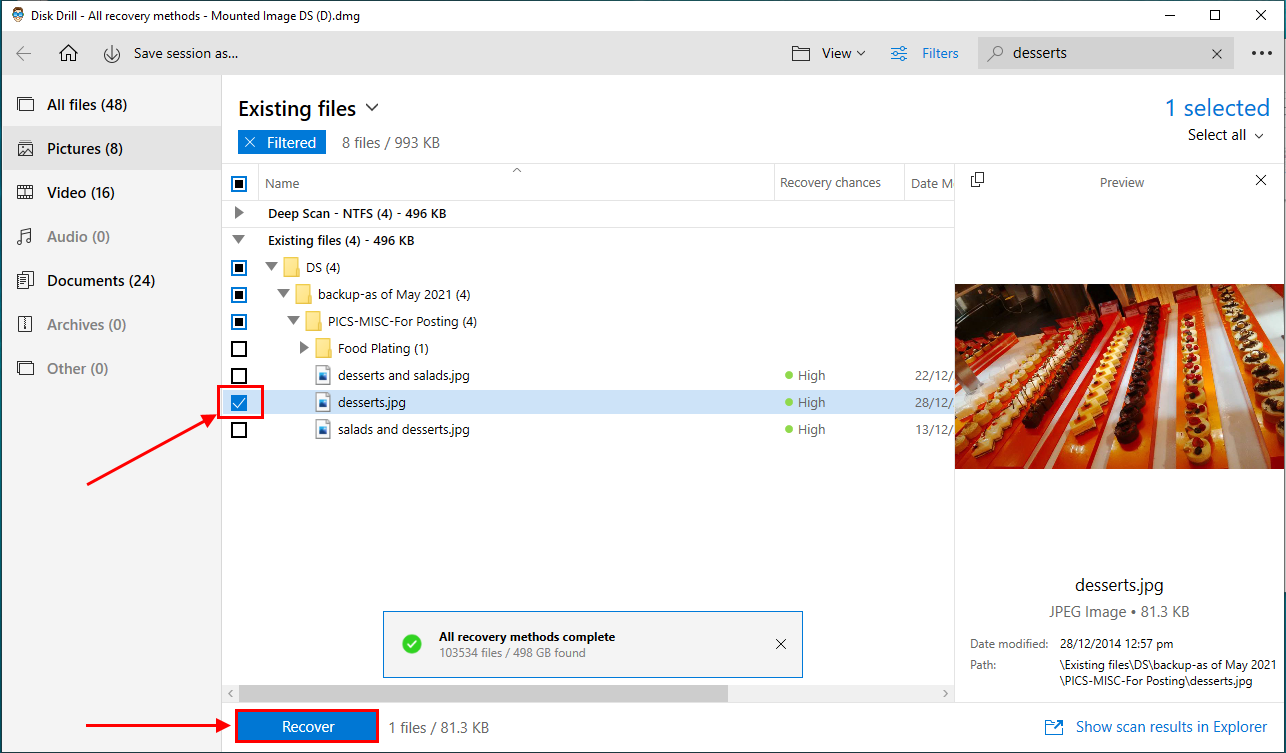
- Tick the checkboxes of the files you want to restore. Then, click Recover. Alternatively, you can leave them blank and click Recover all.
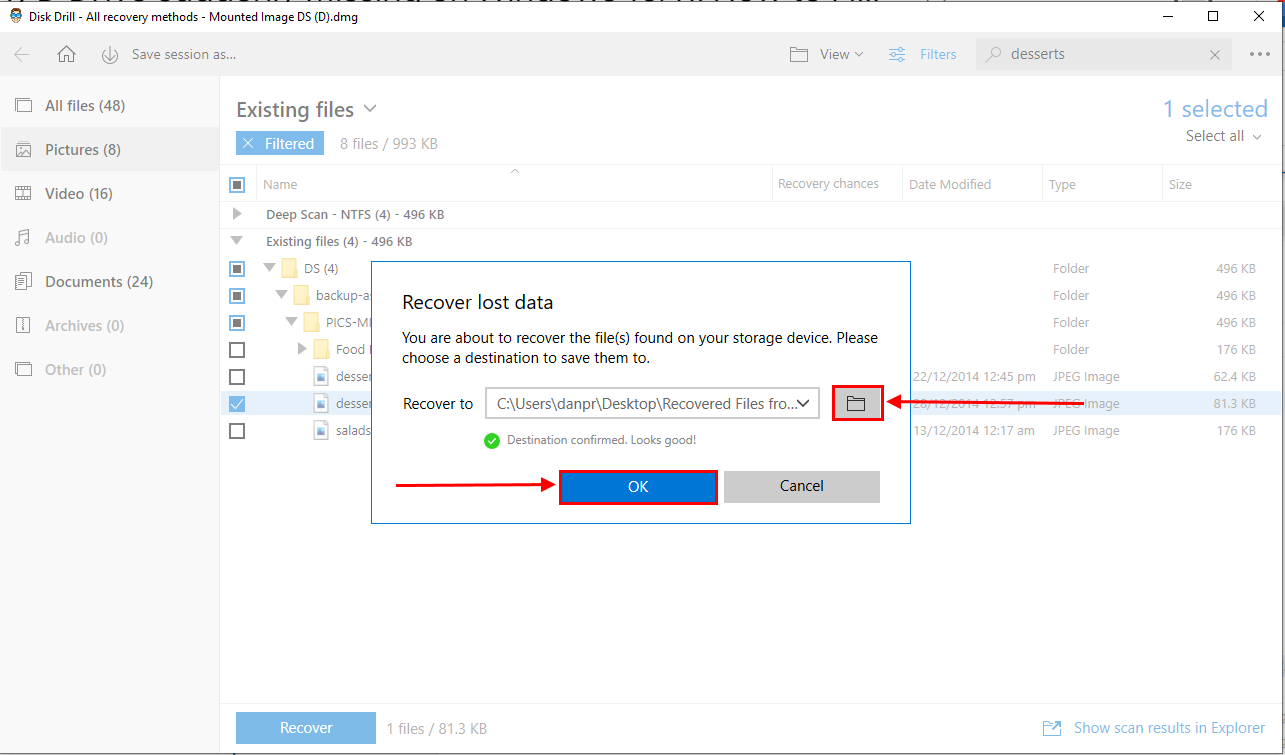
- Use the folder button to choose the location where you want your recovered files to be saved. Then, click OK.
To learn more about our experiences with this app, read our full Disk Drill review.
Best Methods to Recover Missing D Drive
Below are the different methods to recover your missing D drive. But first, we recommend that you recover and back up your data first by following the instructions in the last section. Some of the fixes below can result in data loss. Once your files are secured, you can safely try to recover your disappeared D drive using these 5 methods:
Method #1: Rescan Disks
Your computer might have gotten interrupted before it could establish a connection to your drive (for example, it ran out of resources). Try rescanning your drives manually using File Explorer. Here’s how:
Make sure to close all your programs before trying this method.
- Hit (Windows key + X) and click Disk Management.

- Select the drive you want to rescan. Then, click Action > Rescan Disks.
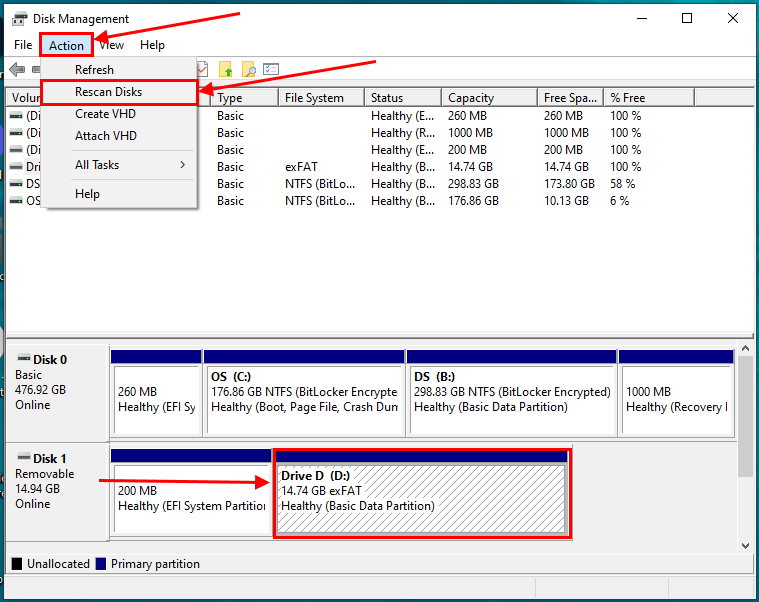
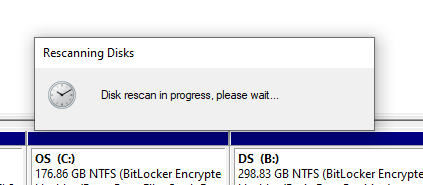
- Wait until the rescanning is complete.
Method #2: Update Your Drivers
Outdated drivers can cause drives to disappear from File Explorer. Fortunately, there are cases where they still appear in Device Manager. We can update our drivers from here. To do so, follow these steps:
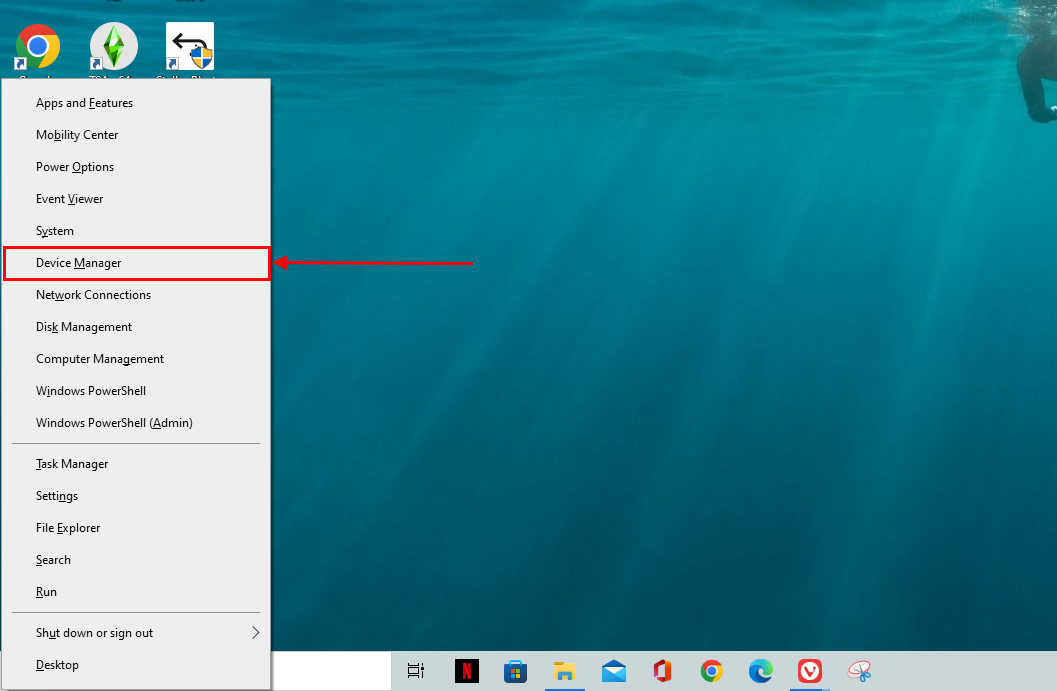
- Hit (Windows key + X) and click Device Manager.
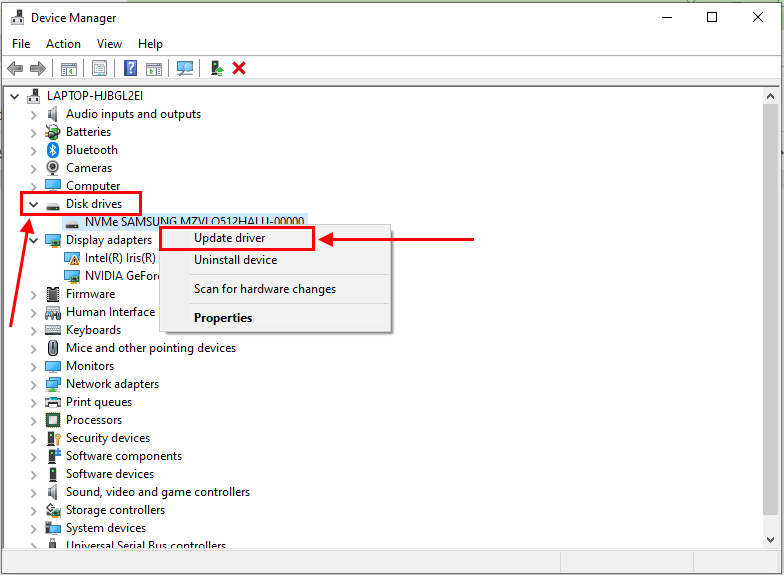
- Expand the Disk drives option and right-click your drive > Update driver.
- In the pop-up, select Search Automatically For the Drivers.
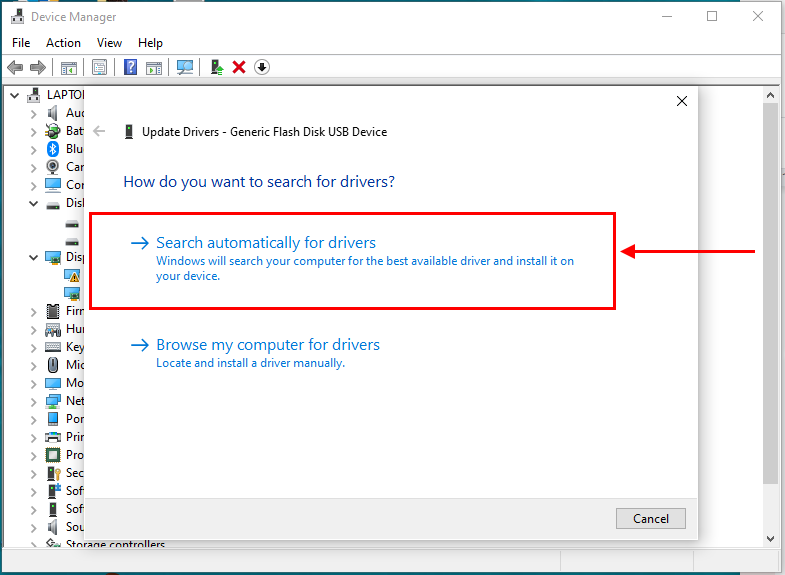
If the automatic search does not work, you’ll have to manually download the drivers from the manufacturer’s website. Then, you can use this wizard and select Browse my computer for drivers instead.
Method #3: Unhide Partition Using GPedit
Your D drive may not actually be missing – just hidden. To check, compare its disk capacity to the total capacity of its drives and partitions. If the numbers don’t add up, something’s hidden.
Unhide your D drive by using the Local Group Policy Editor. Here’s how:
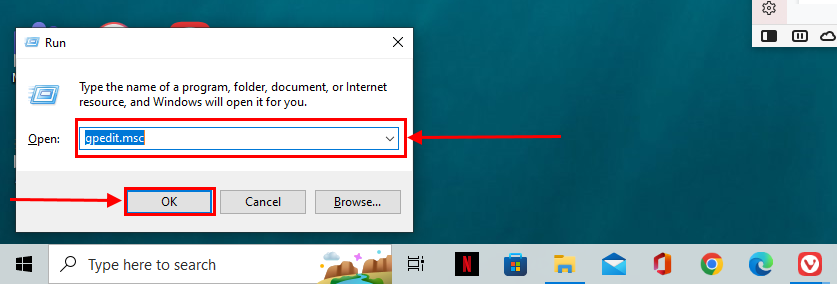
- Hit (Windows key + R).
- Type GPEDIT.MSC in the text field. Then, click OK.
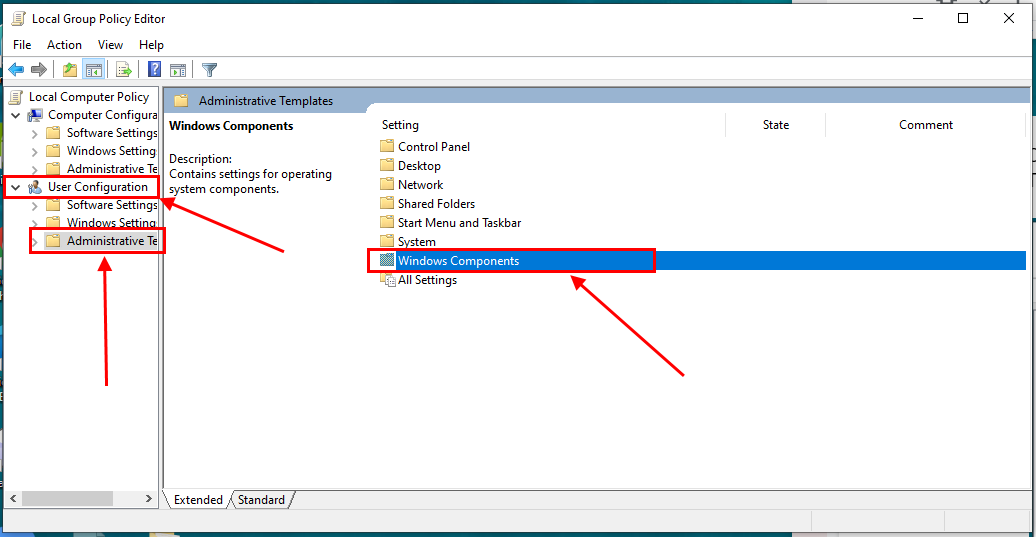
- On the left sidebar, click User configuration > Administrative Templates. Then, choose Windows Components.
- From the list, click File Explorer.
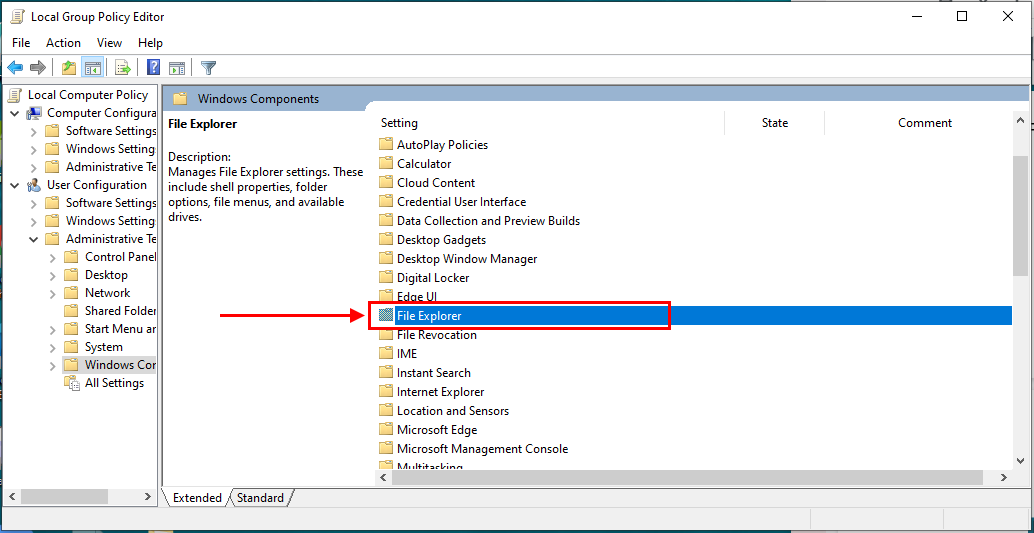
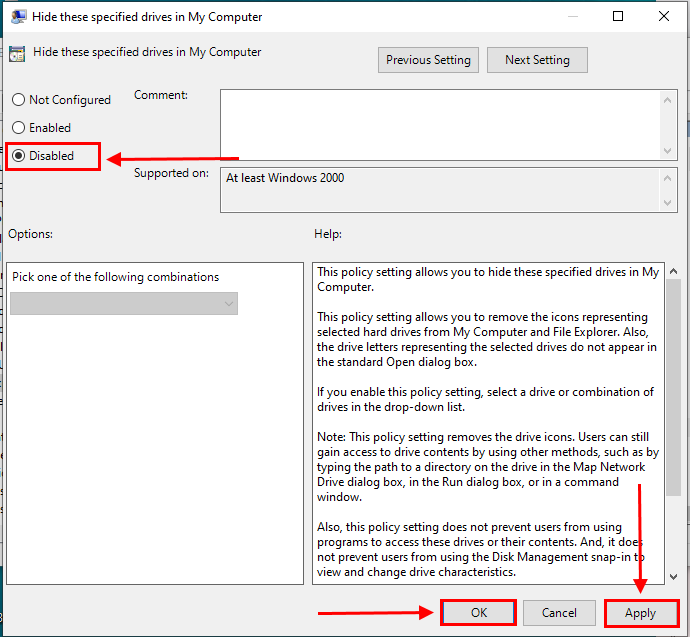
- Click Hide These Specified Drives in My Computer.
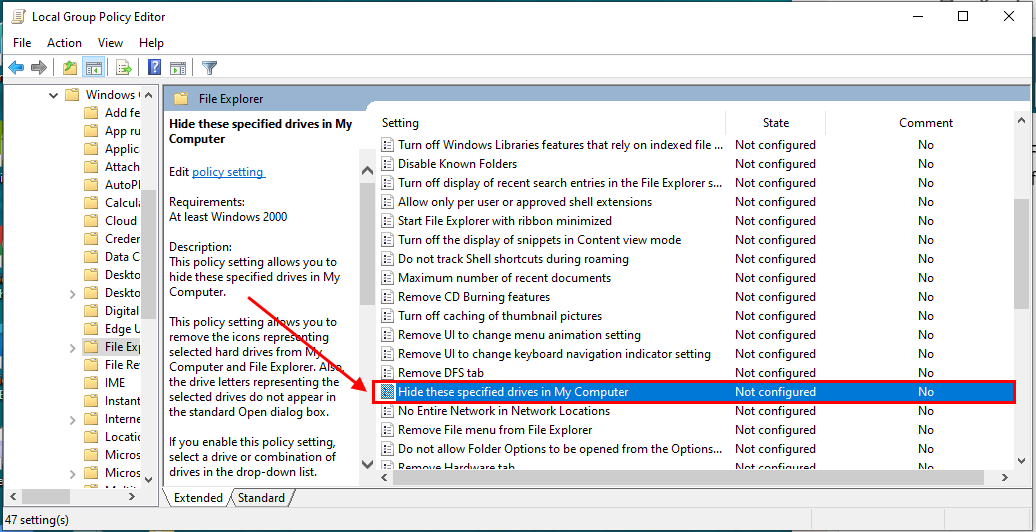
- If you find any hidden drives, select Disabled in the top-left corner of the window. Then, click Apply, then Okay.
Method #4: Change or Assign a Drive Letter
There are instances where the system or the user accidentally deleted the partition disk. Partition recovery is possible by changing or assigning a drive letter.
You can do this by doing the following steps:
- Hit (Windows key + X) and click Disk Management.
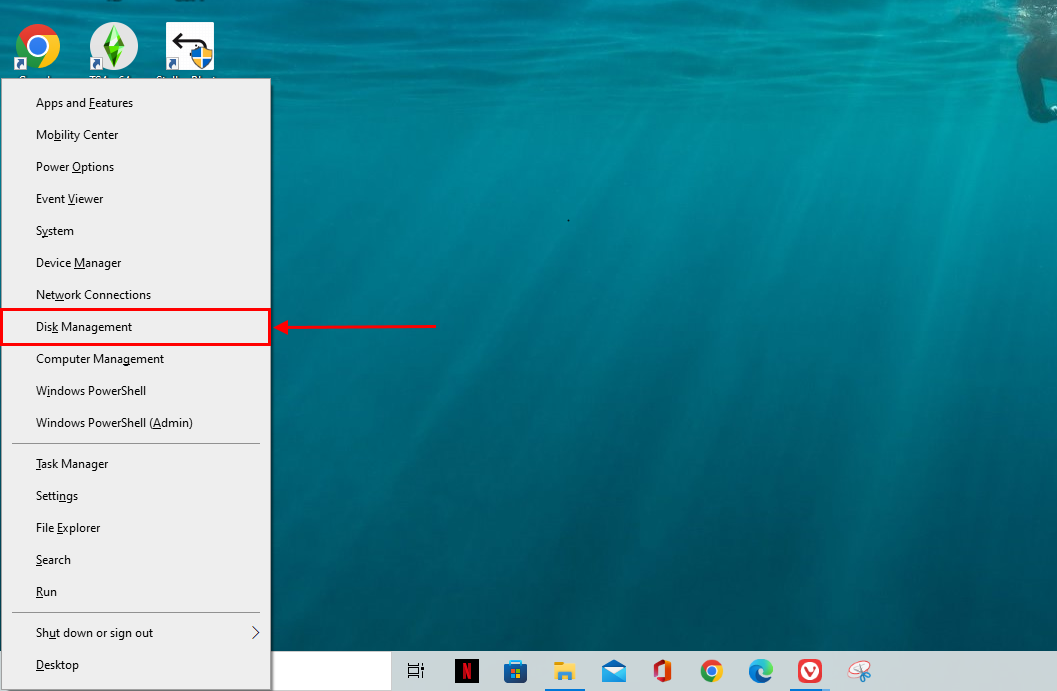
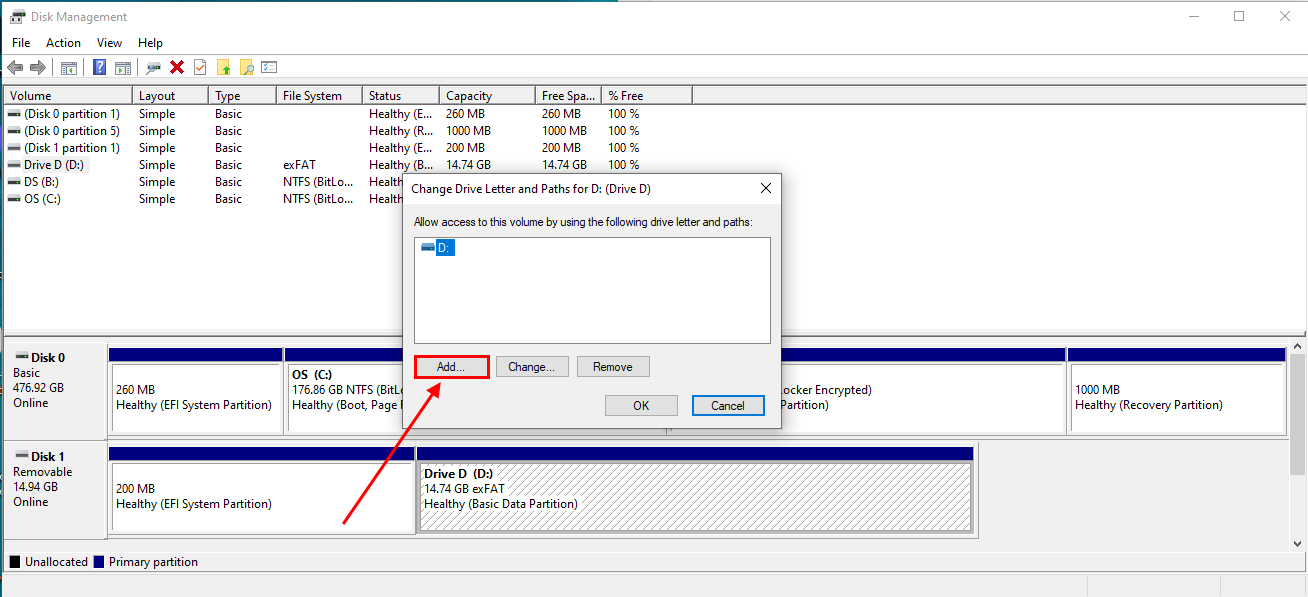
- Right click on the unassigned drive. From the drop-down list, choose Change Drive Letter and Paths.
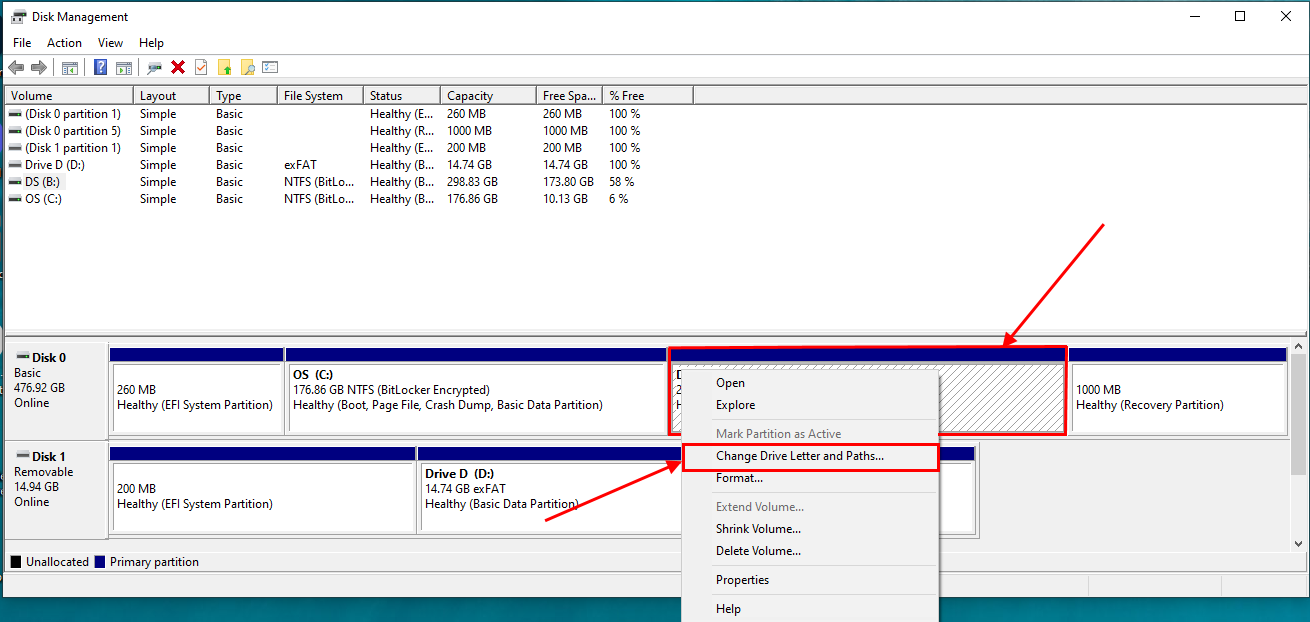
- Click Add.
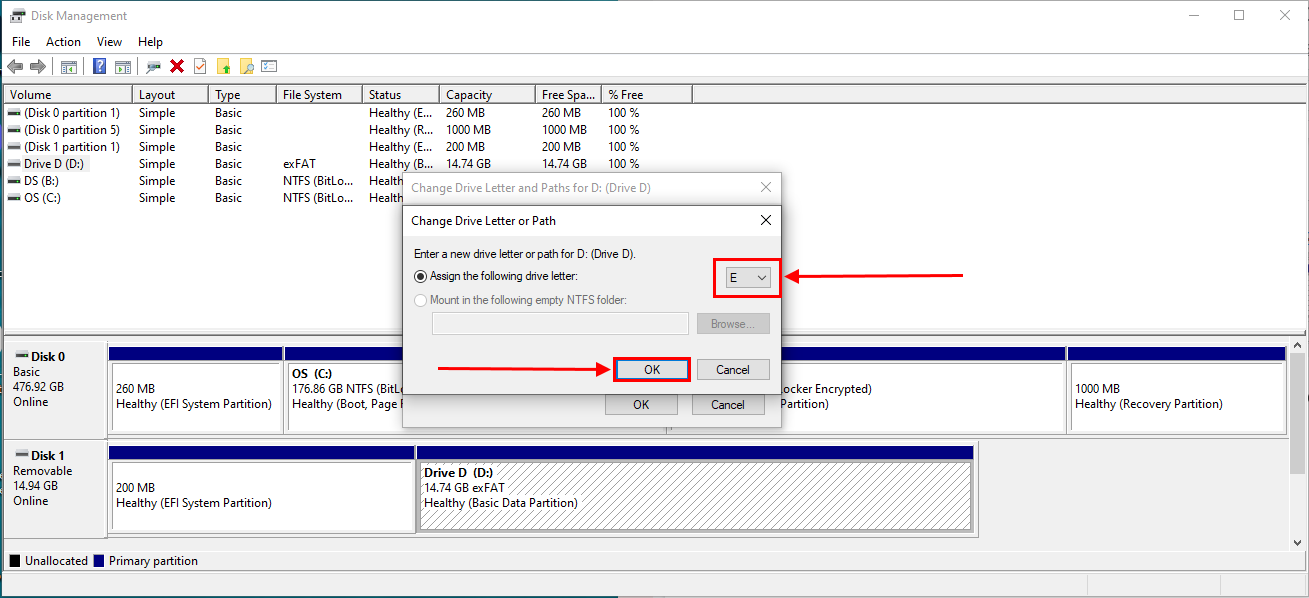
- Using the dropdown button, select the letter you want to assign to your drive. Then, click OK to apply the changes.
It’s possible that your drive may not have been assigned a letter because it’s unallocated. Before you can assign a drive letter, first right-click on the unallocated drive > click “New Simple Volume” and follow the wizard until you are prompted to assign it a letter.
Method #5: Restore System
A more drastic way to recover your files is to restore your entire system to an earlier point – specifically, to a restore point before your D drive went missing. Here’s how:
This method requires you to have set up a Restore Point before losing your file. If this isn’t the case for you, try the other methods in this article.
- Open Control Panel > System and Security.
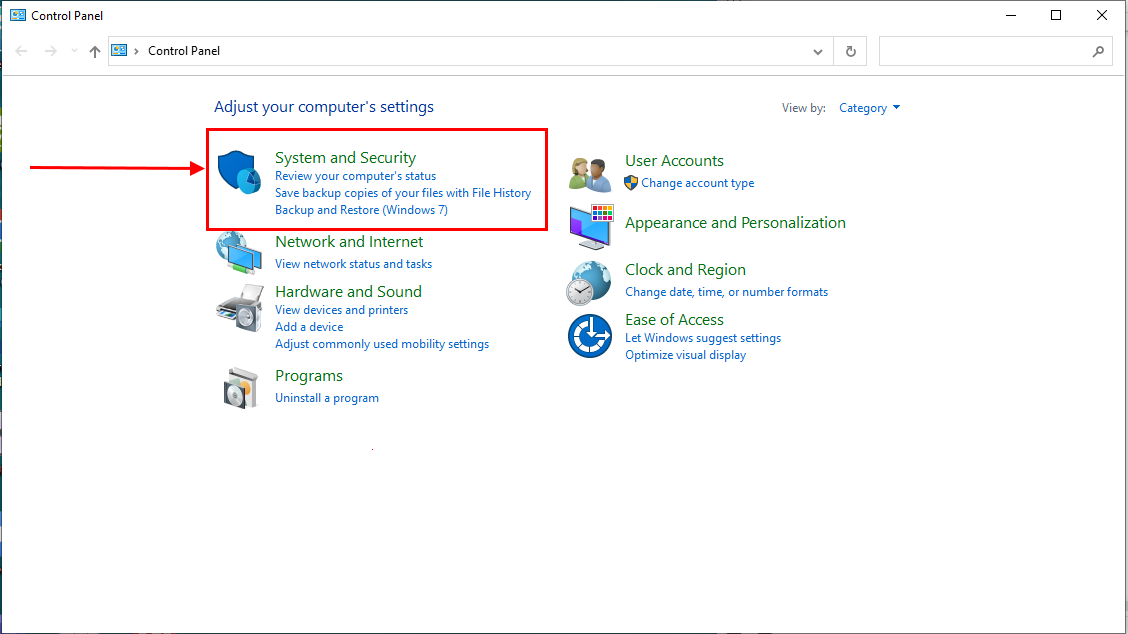
- Then, click System.
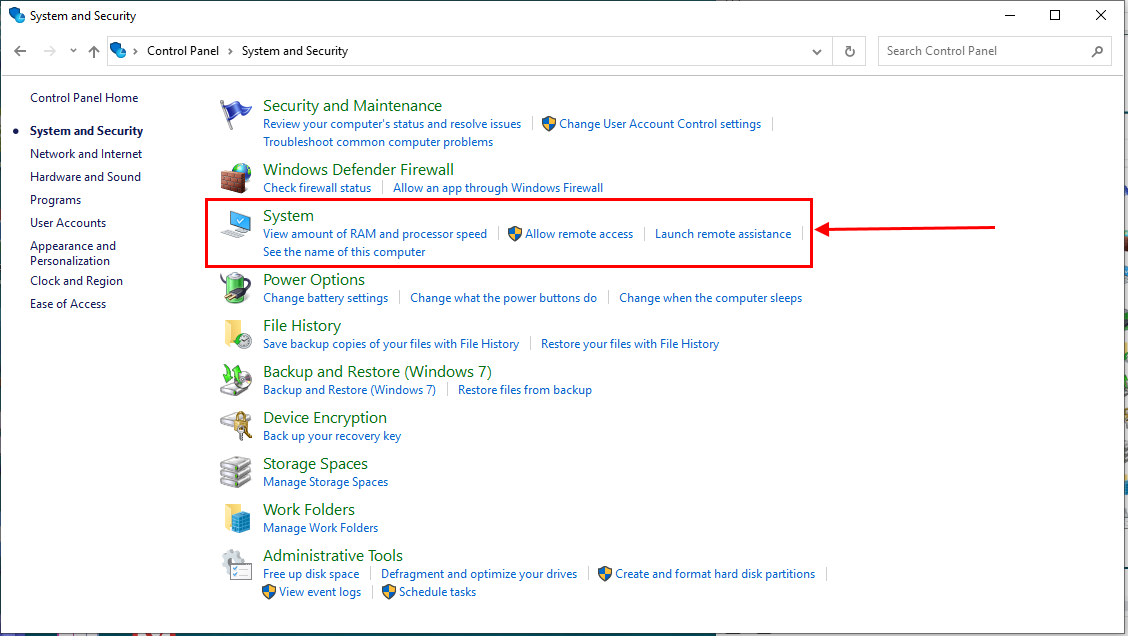
- Scroll down a bit until see Advanced System Settings under the Related settings section.
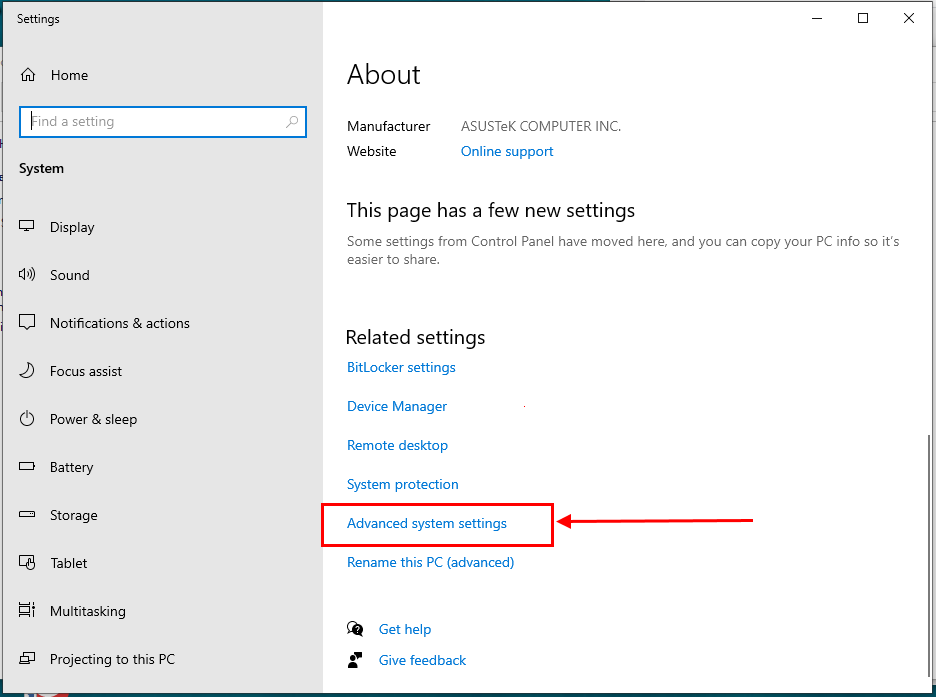
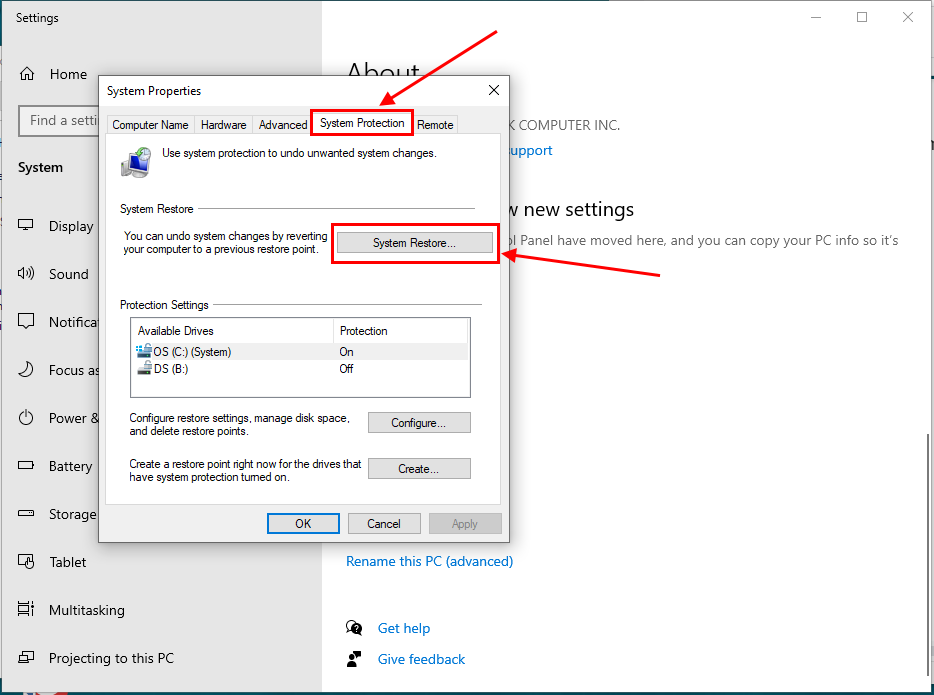
- Navigate to the System Protection tab, then click System Restore.
- From the list, choose a restore point dated before your D drive went missing. Then, click Next.
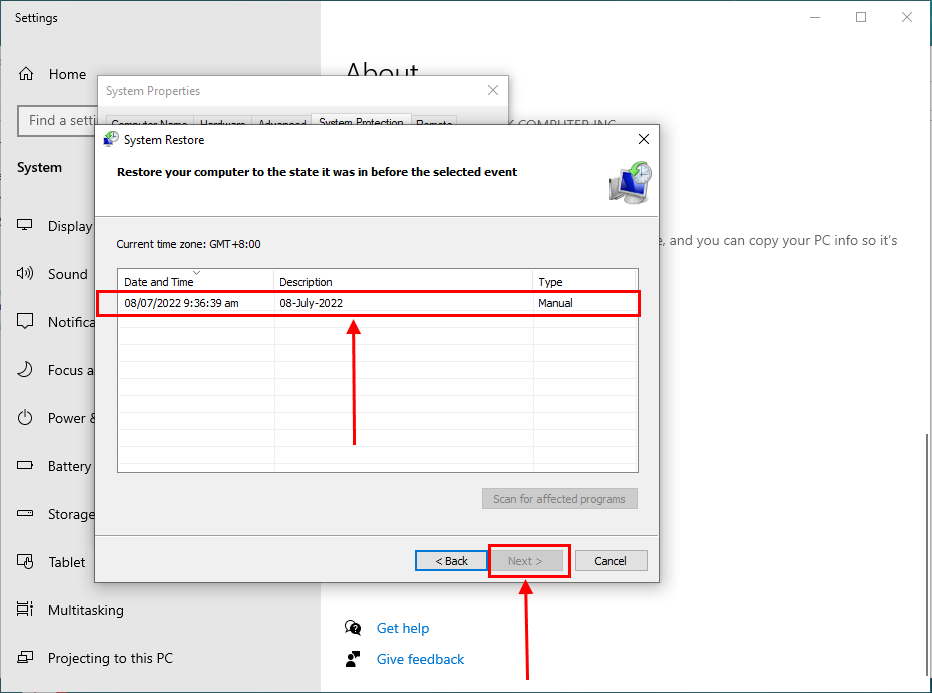 From here, follow the wizard until you are prompted to restart. You may want to click Scan for affected programs if you suspect that an app caused your D drive to go missing. Once your system is rebooted, it should be restored to the state it was when the restore point was created.
FAQ
Where did my D Drive go?
Your D drive may be missing, hidden, or unallocated due to system configurations, logical damage, or physical damage.
Is it possible that my D Drive went missing after the Windows 10/11 update?
Yes, it is possible. Updating to Windows 10 or Windows 11 reconfigures your operating system or could render drivers outdated. It’s worth noting that a missing drive is a common bug for users who install Insider builds.
How do I restore the missing D Drive?
There are a number of methods you can use to restore your missing d drive. The most common fixes are the following:
- Changing/Assigning a drive letter
- Rescanning your drives
- Checking your cables and plugs
- Restoring your computer to a certain point in the past (Restore system)
- Using your Local Group Policy Editor to unhide partition
- Updating your drivers
We suggest using reliable data recovery software to restore and backup the data from your drive first because some of the fixes above can lead to data loss.
Why do my D and E drives keep disappearing?
Below are the possible reasons why your D and E drives keep disappearing:
- Faulty OS update
- Unassigned drive letter
- Corruption
- Mechanical issue
- Physical damage
- Hidden partition
Conclusion
You shouldn’t take a missing D drive lightly, since it’s typically part of the system drive. However, don’t let that scare you out from taking action. The longer you wait, the worse your problem will get. This is true even in the case of recovering an external drive. We highly recommend using Disk Drill’s byte-to-byte backup feature for added safety.
This article was written by Alejandro Santos, a Staff Writer at Handy Recovery Advisor. It was also verified for technical accuracy by Andrey Vasilyev, our editorial advisor.
Curious about our content creation process? Take a look at our Editor Guidelines.