We all rely on our search history to keep track of our twisted internet trail. Without it, many of us would be hard-pressed to recall the sites we found in our rambling search. But if this history gets accidentally deleted, how can you get it back?
In this guide, we will explore all methods for recovering deleted history on Google Chrome. Keep reading to find out more.
Can You Recover Deleted History on Google Chrome?
In some cases, yes. Google Chrome stores browsing data in a dedicated database file on your computer. Even if this file is deleted, it may still be possible to recover it using the same methods employed to restore deleted photographs or documents. There are other ways to view your browser history too, like the sync feature or the Google Activity dashboard.
How to Recover Deleted Chrome History on PC or Laptop
From direct methods like data recovery software to indirect methods like the DNS cache, there are multiple ways of recovering your deleted Chrome history. Let’s explore them one by one.
Method 1: Check Your Google Account Activity
The History file stored on your computer is not the only place Google stores a record of your browsing activity. Your Google account itself contains a log of your online activity, including the websites you have visited and the search terms you have used.
To access your Google account activity, follow these steps:
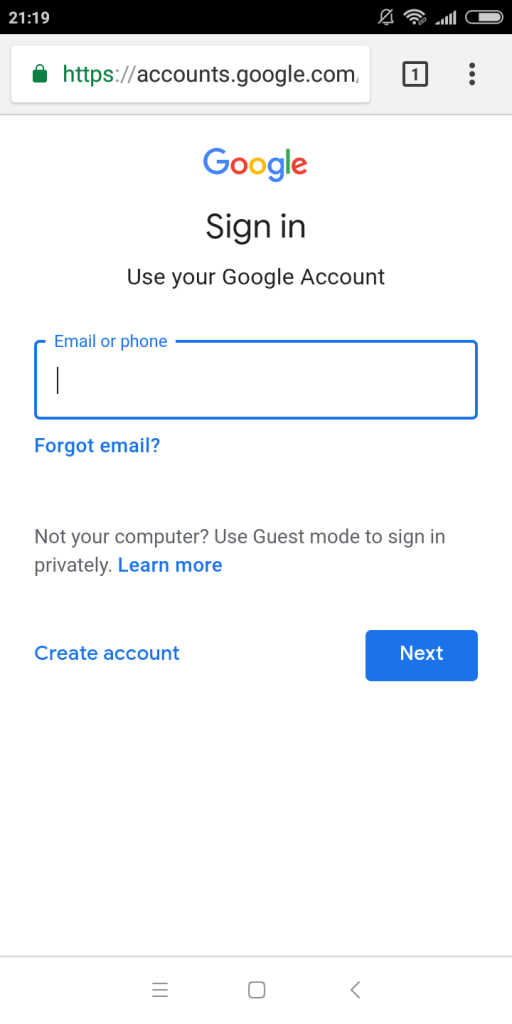
- Head to My Activity.
- If you are not signed in to your Google account, you will see something like this.

- Sign in with the account you wish to see the search history for. Chances are that you are already signed in. Then the My Activity dashboard is displayed.
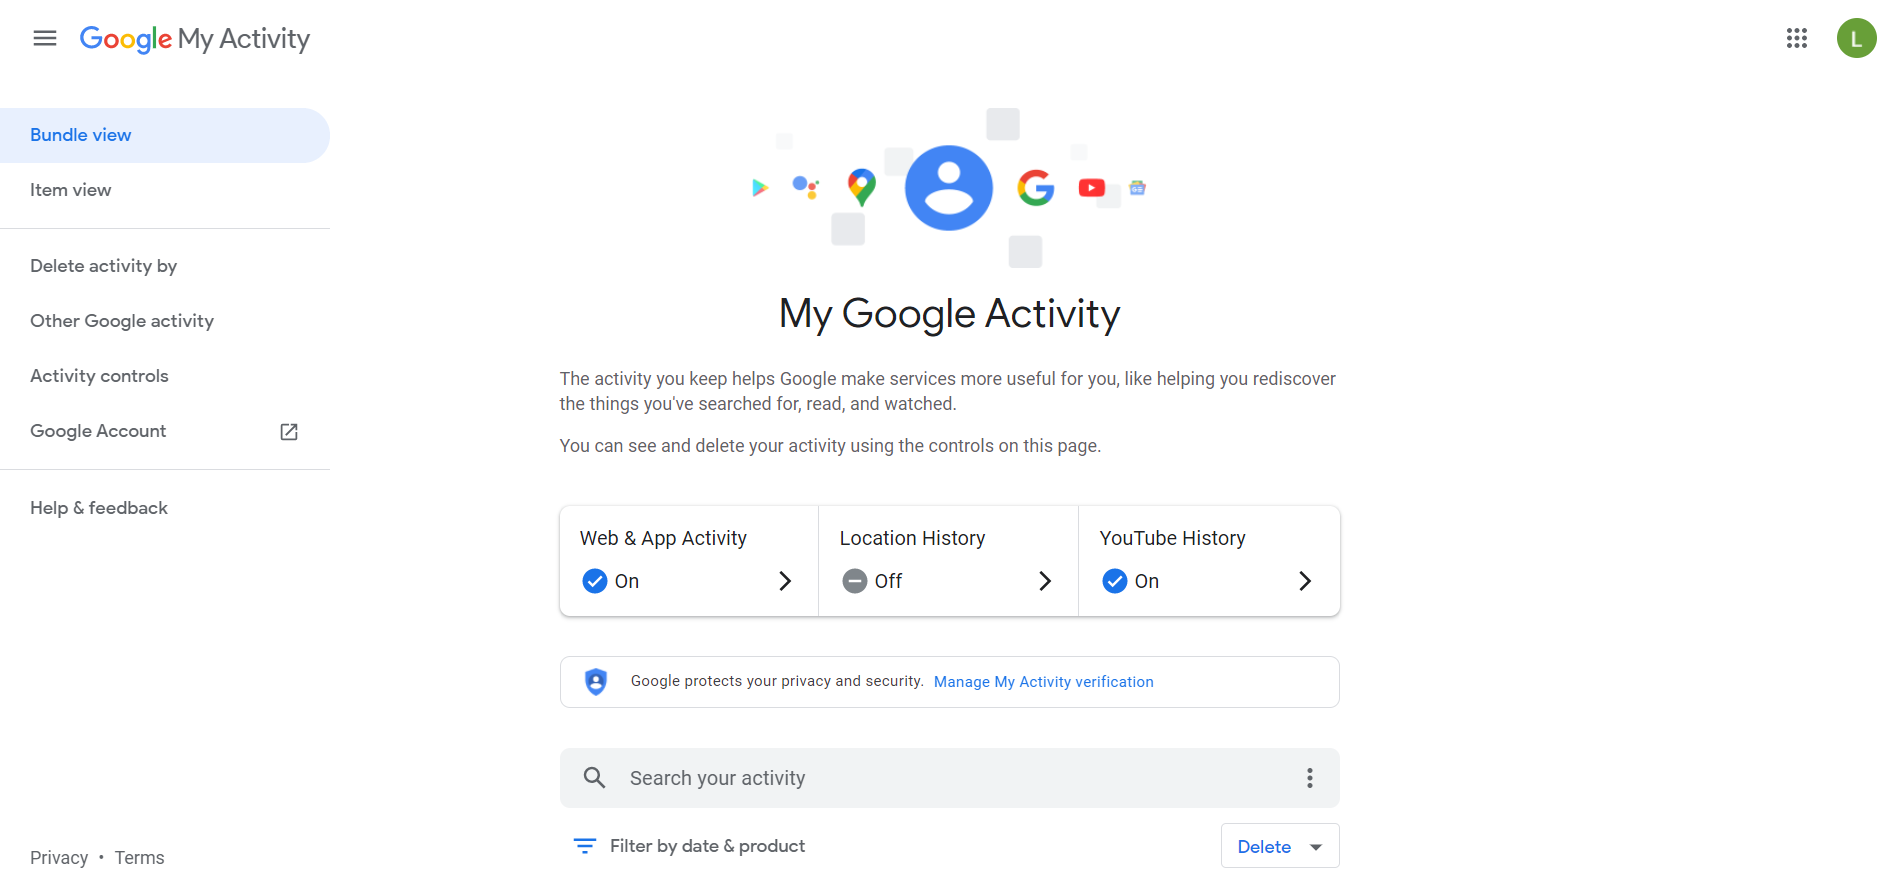
- Scroll down to see all of your activity across devices listed out. It includes Google searches as well as general activity on Android too.
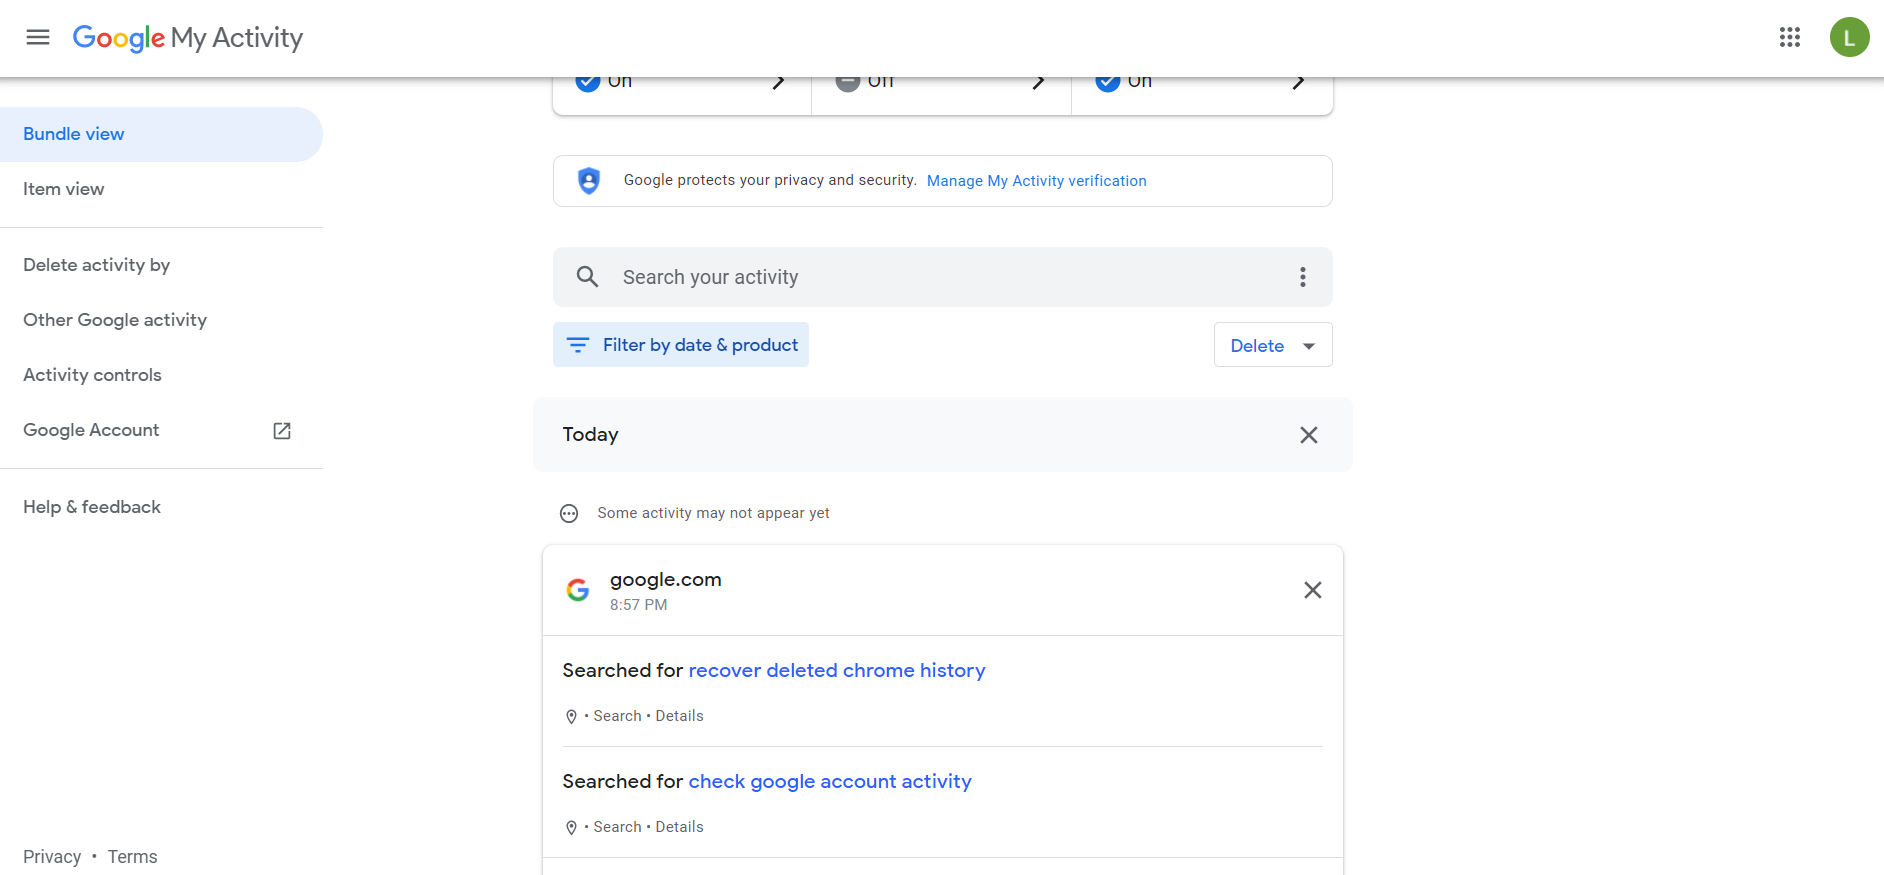
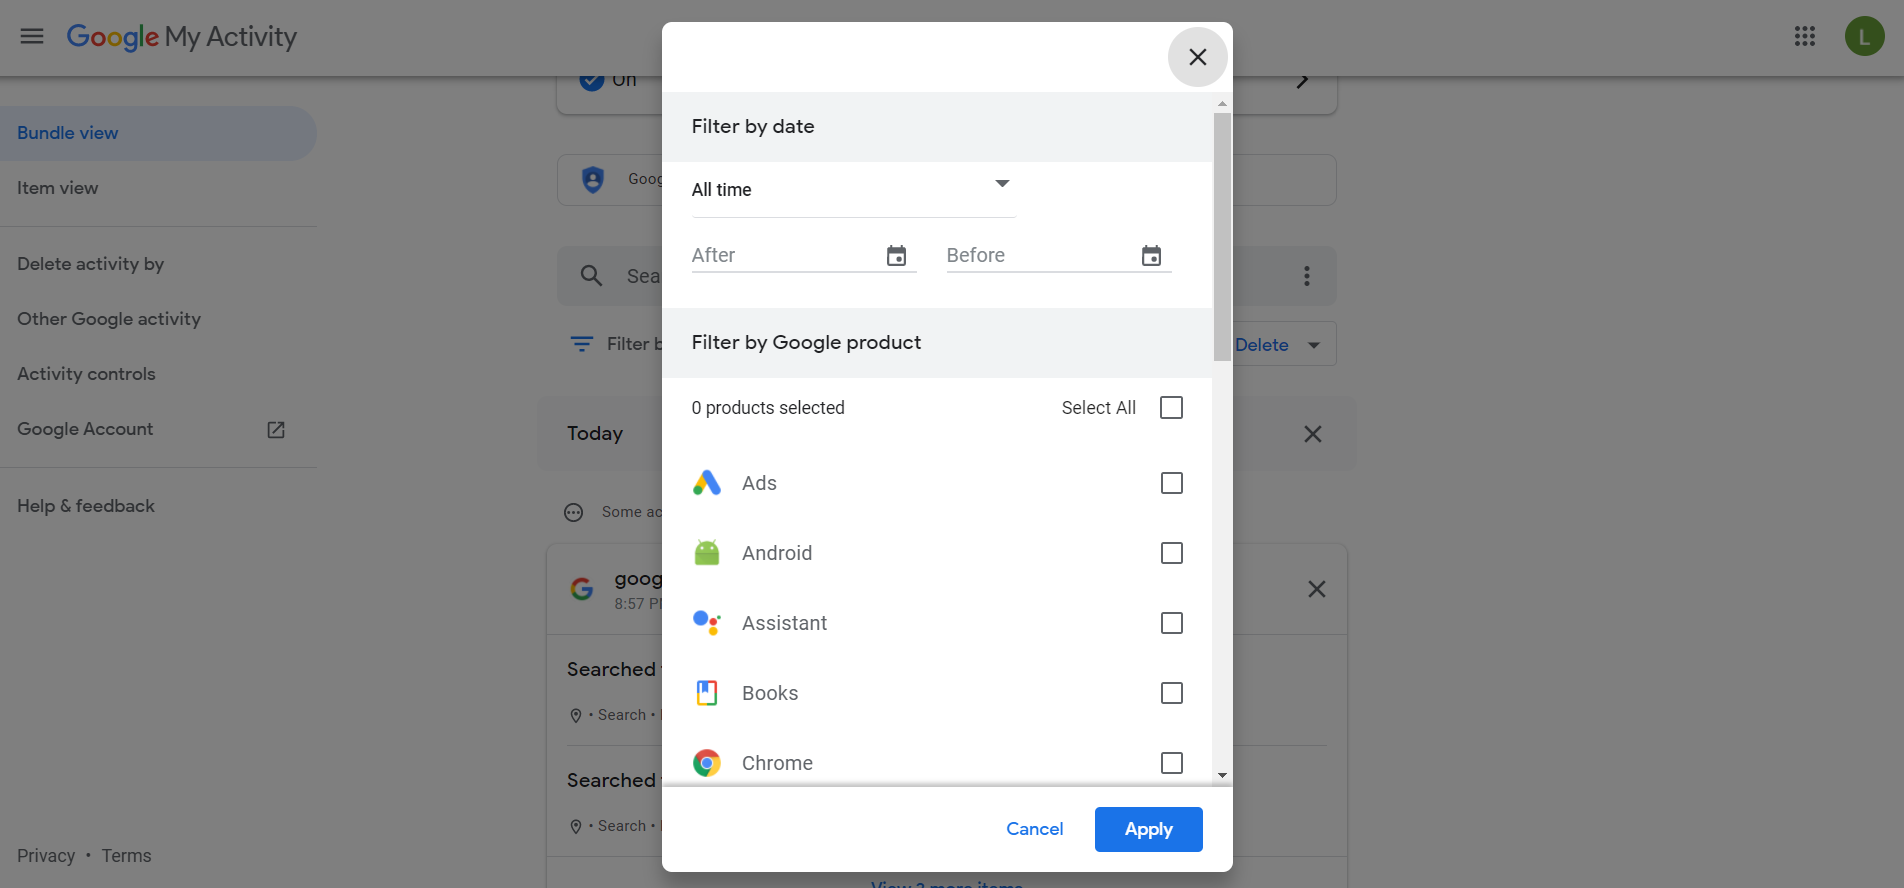
- You can search for specific terms or even filter the results based on the date or the type of activity. This can help you narrow down the list to just your Chrome history.
Method 2: Use Data Recovery Software
When the History file storing Chrome’s browser history is deleted, the best way to get it back is by using data recovery software. Software like that scans through the whole disk for deleted files, giving you the opportunity to restore your Google History to the way it was.
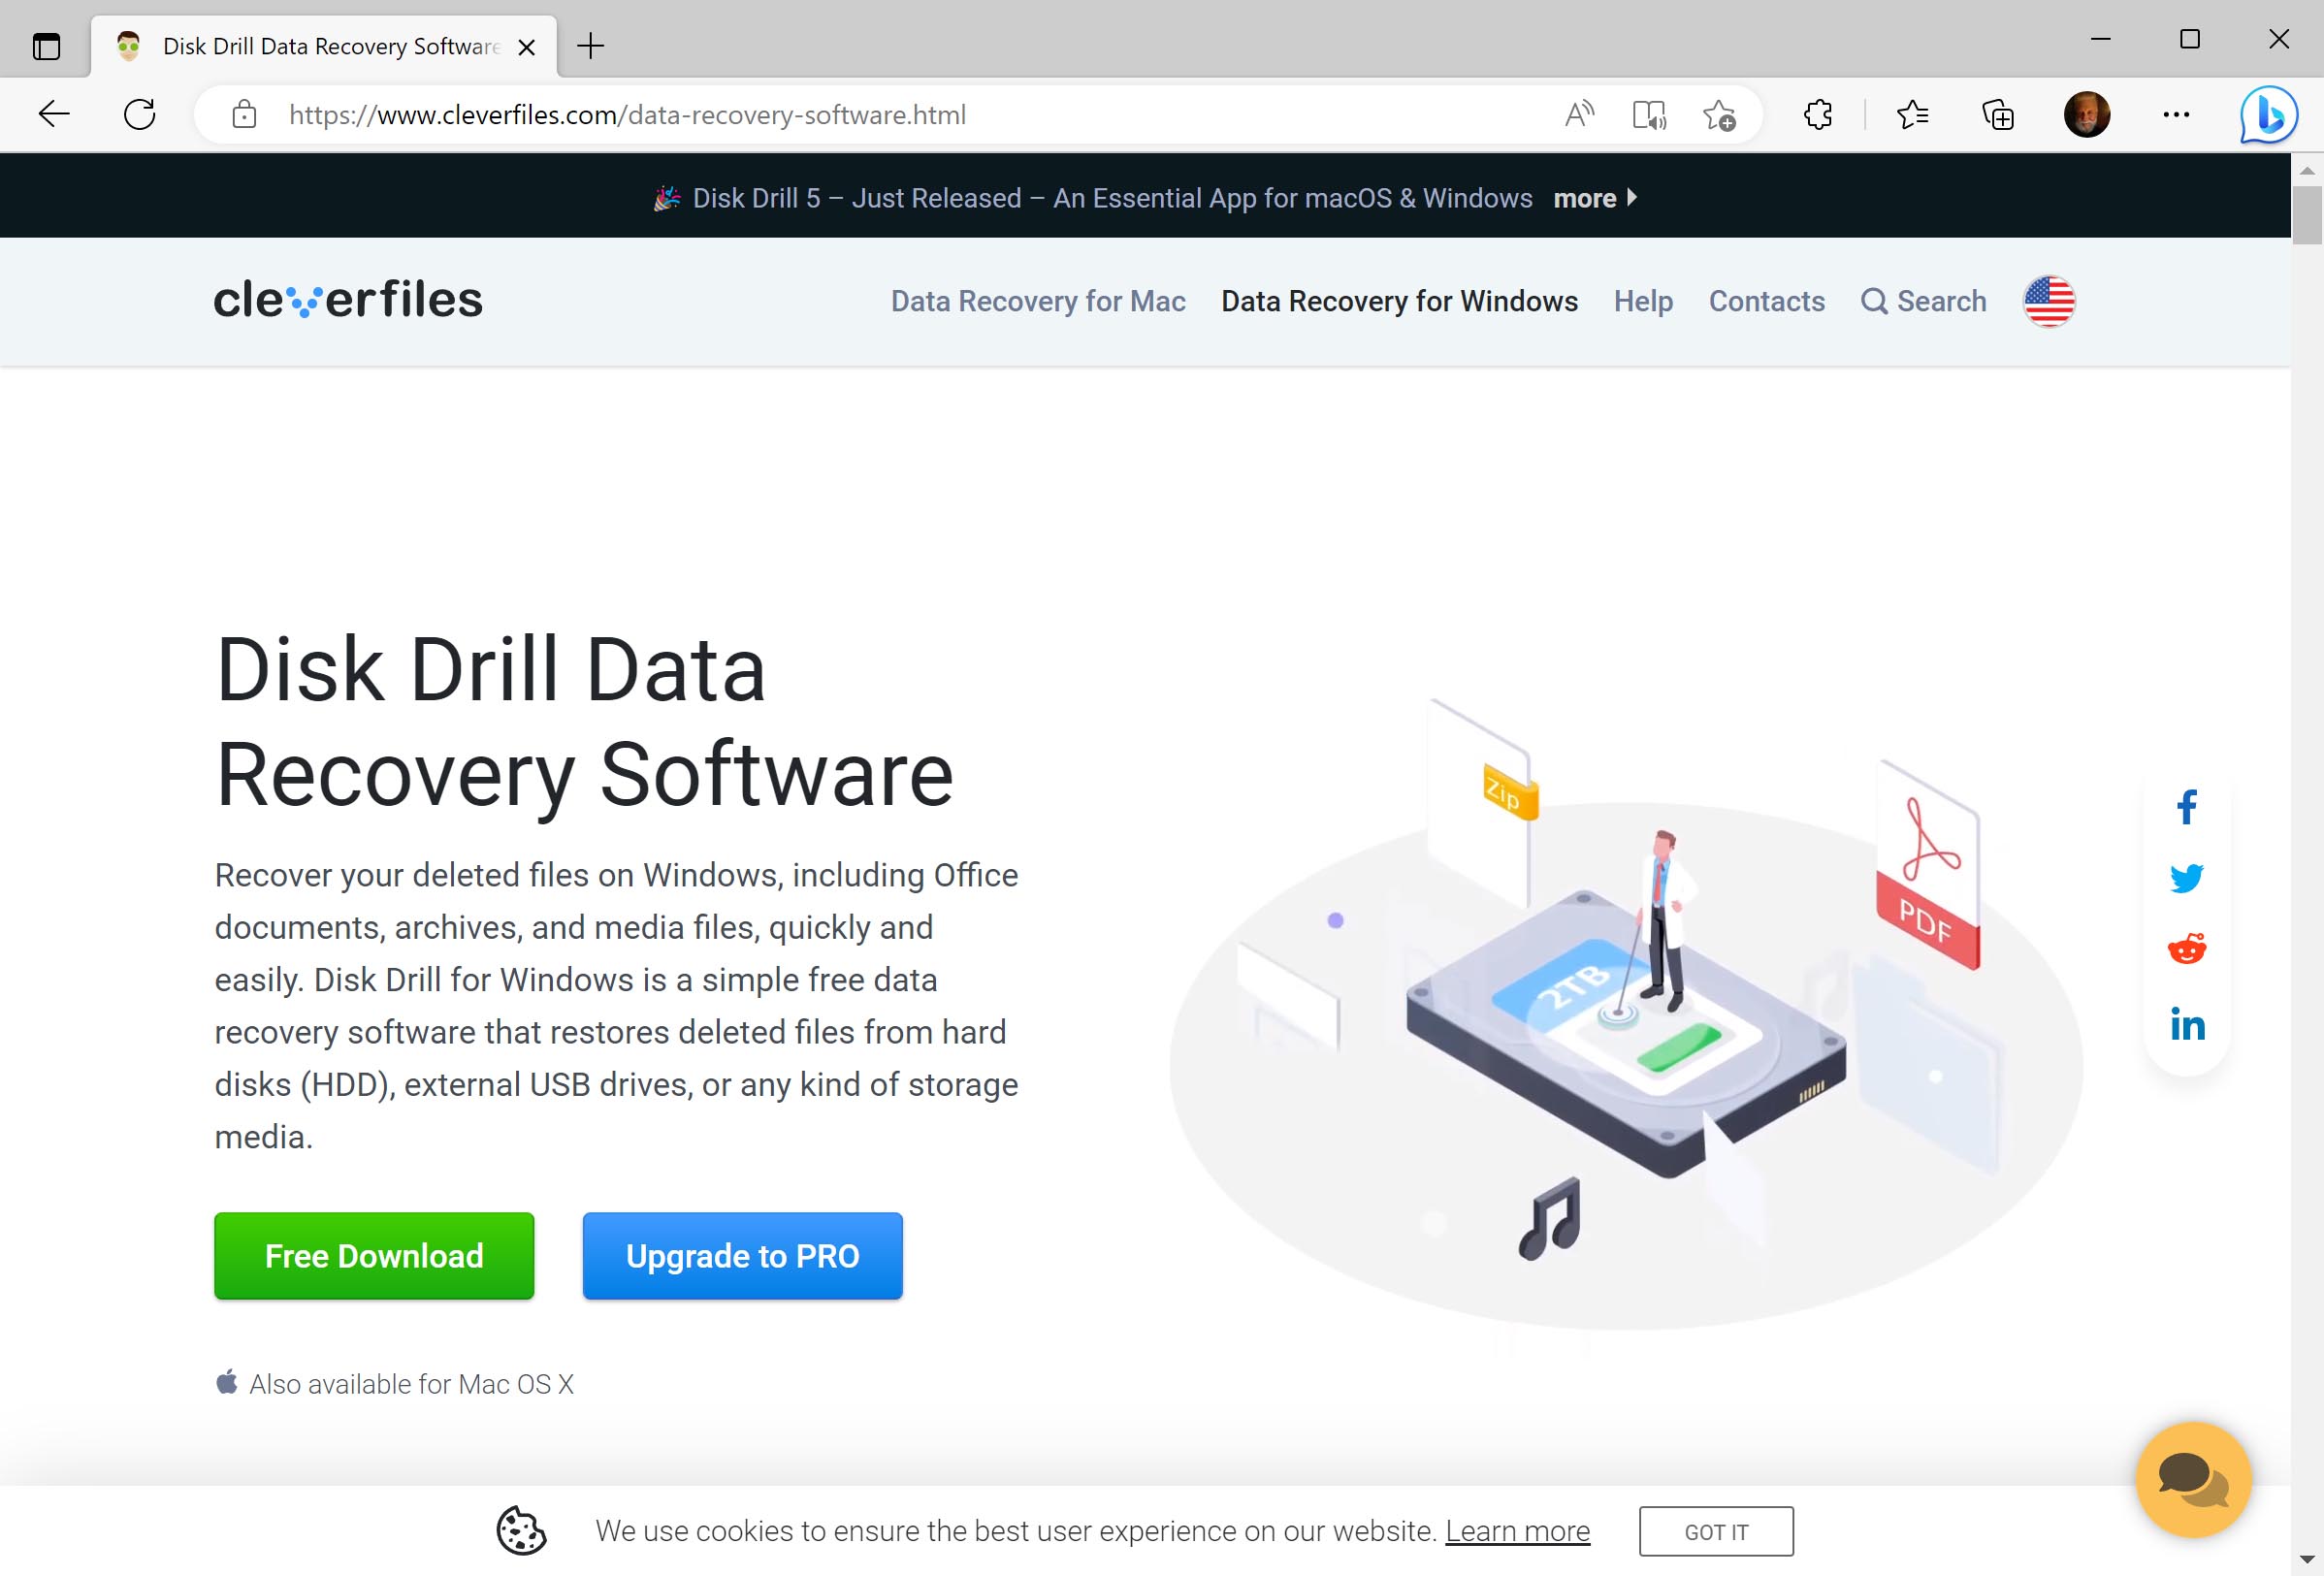
While you can use any data recovery tool for this, we are going to go with Disk Drill Data Recovery. It is a fully-featured data recovery application for both Windows and Mac that can recover files lost due to any reason. The best thing is that you can recover 500 MB of data for free, so restoring your deleted Chrome History wouldn’t cost you a penny.
-
Download Disk Drill:
To begin, you obviously need the application itself. Head to the official site and download Disk Drill.
-
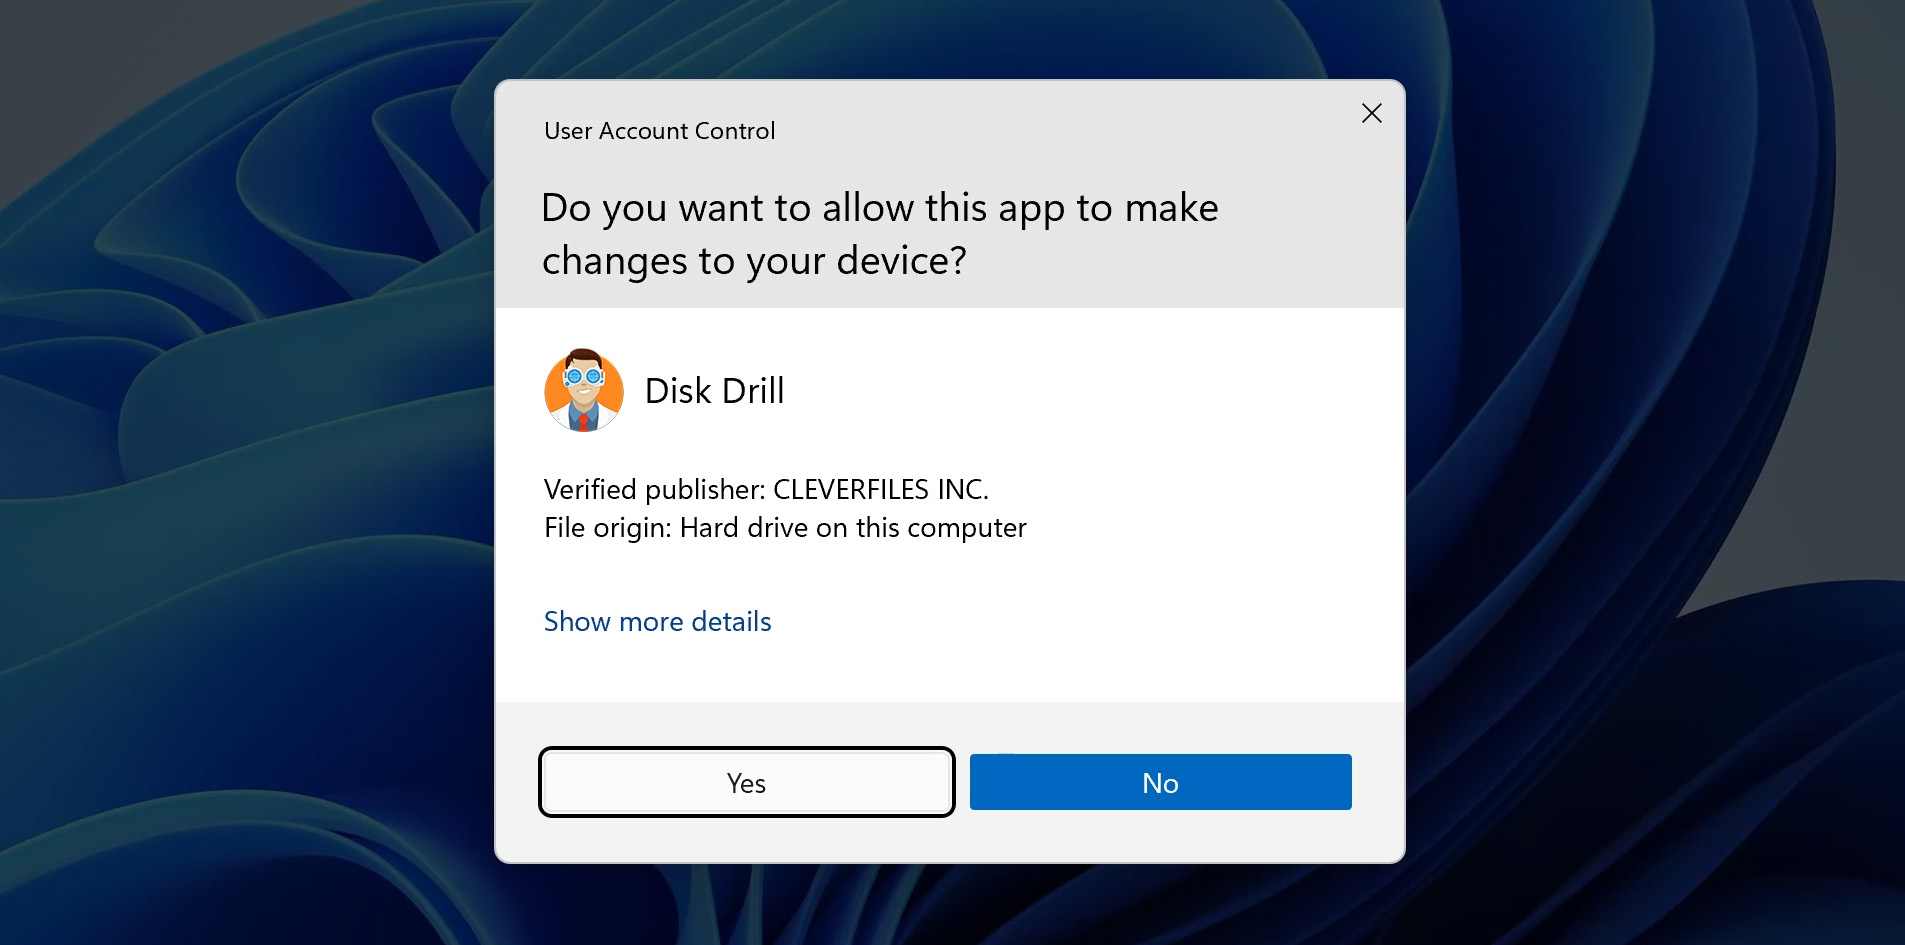
Launch the installer:
The setup file is small and should download in minutes. Use it to install Disk Drill on your computer.

-
Install Disk Drill:
Now, run Disk Drill. You will be presented with a license agreement. Agree and continue.
-
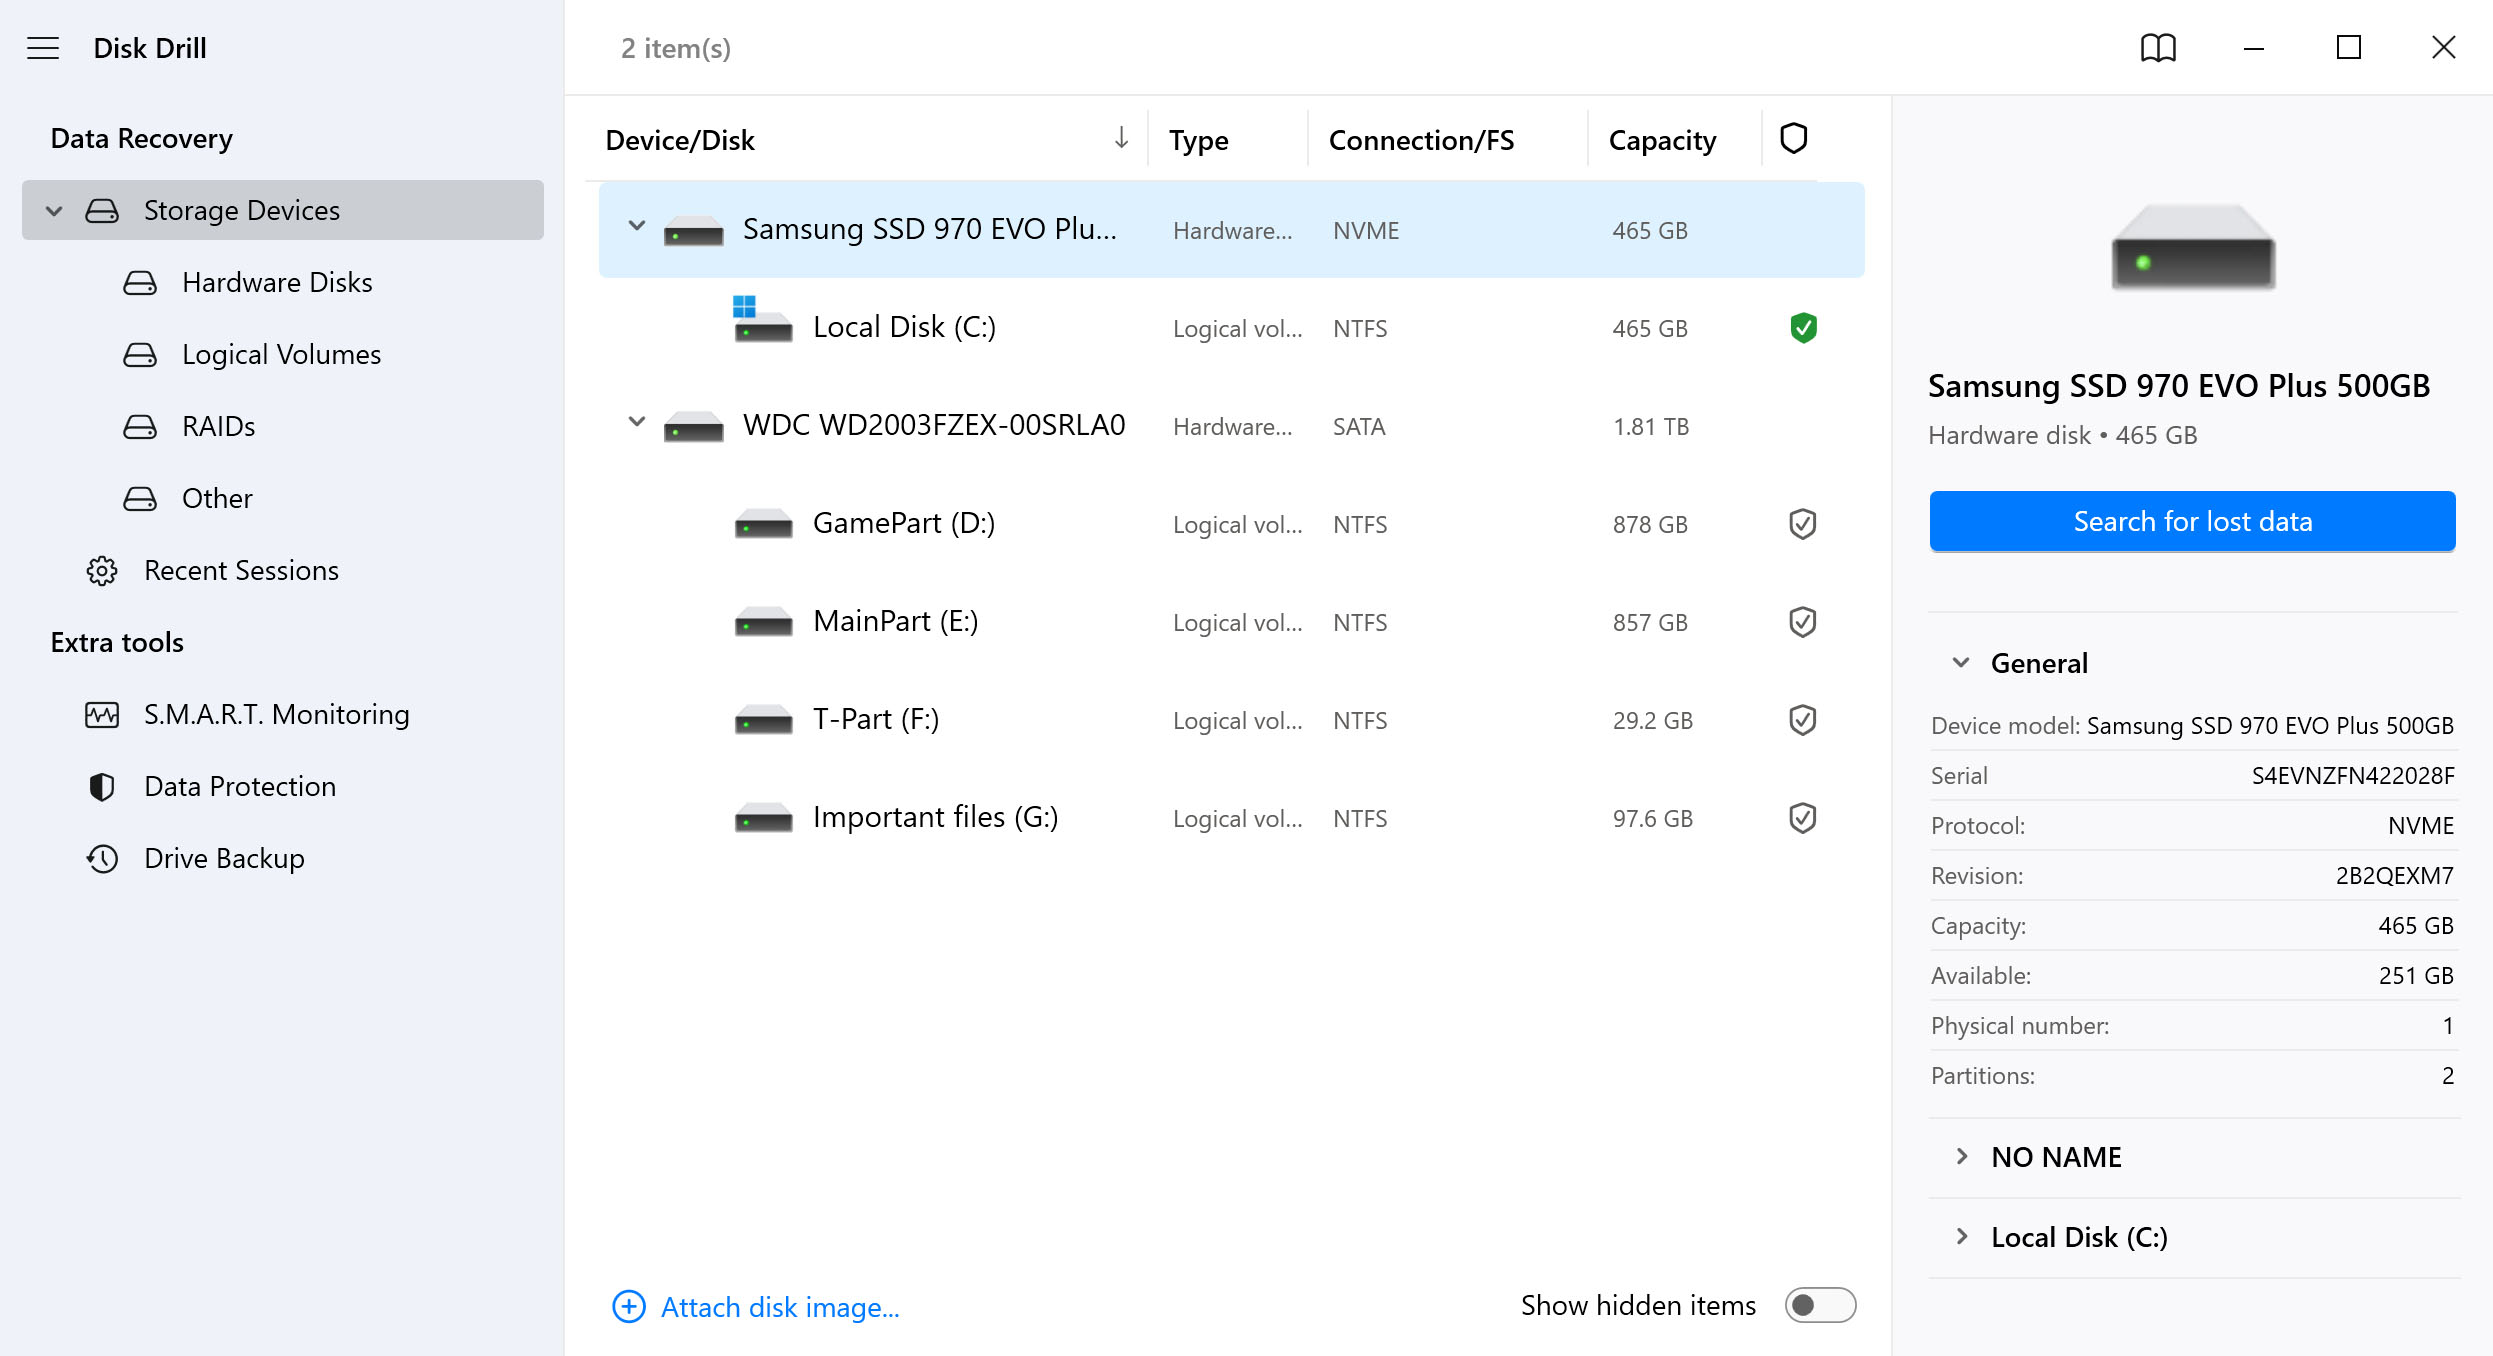
Scan your drive:
After a couple of welcome screens, you will get to the main window. Here you can see all the drives connected to your computer. Select your hard drive and hit the Search for lost data button.
-
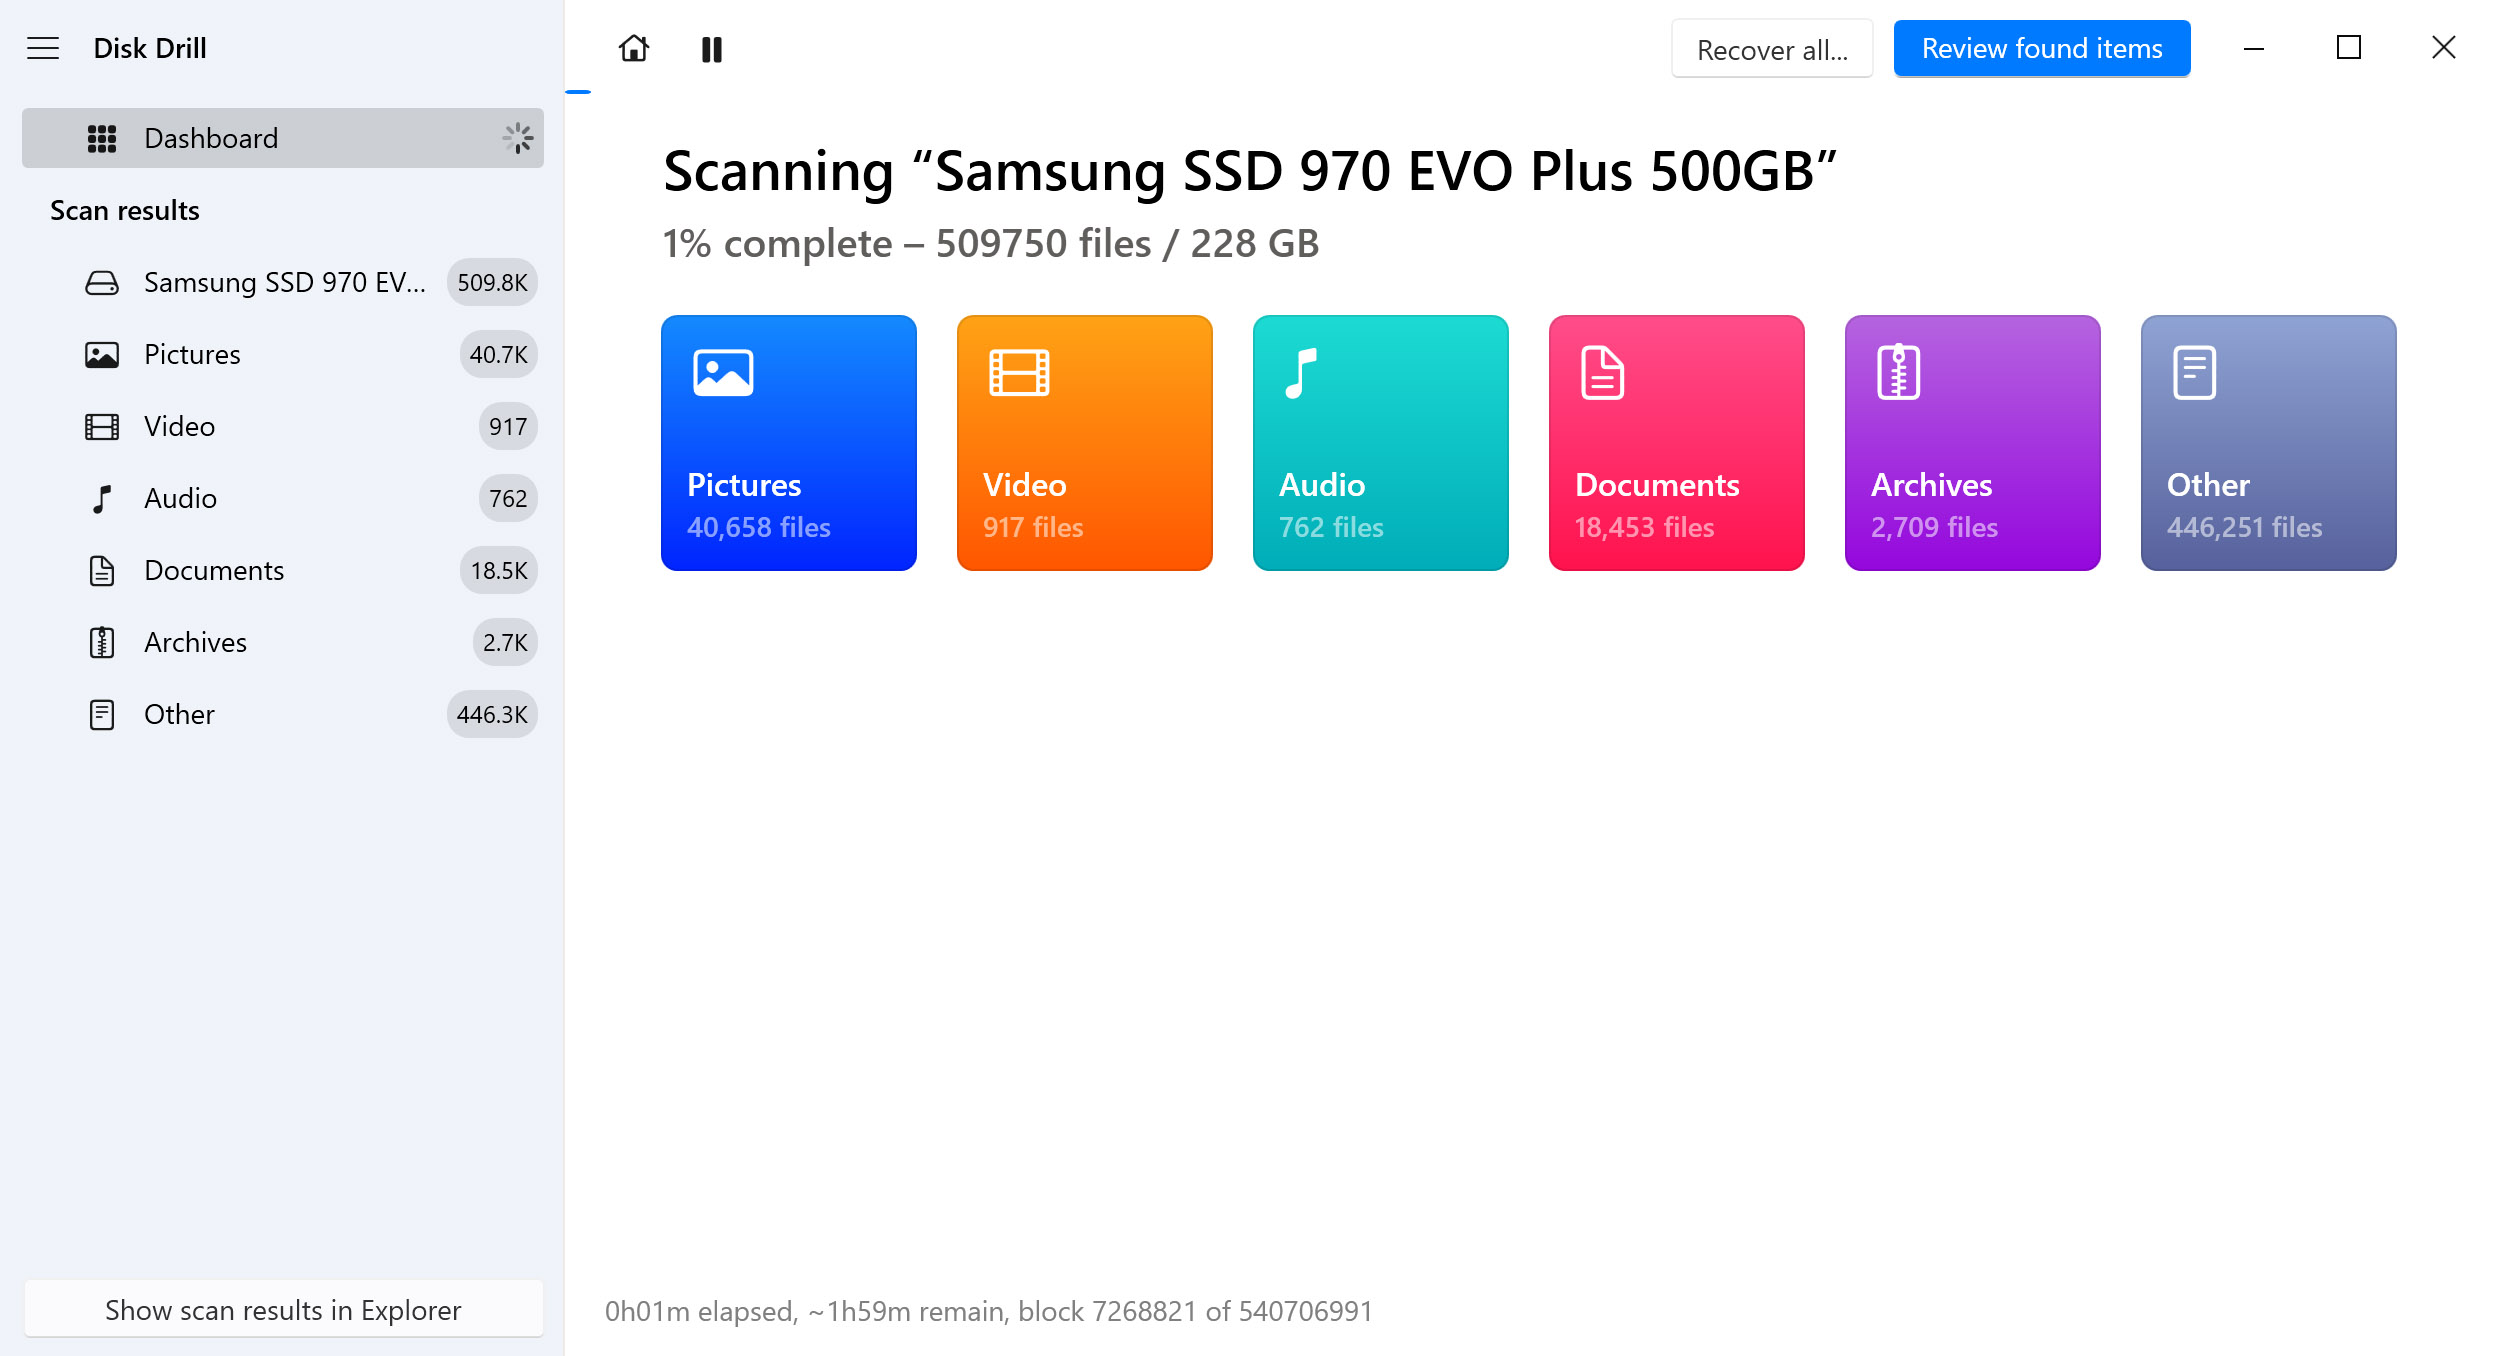
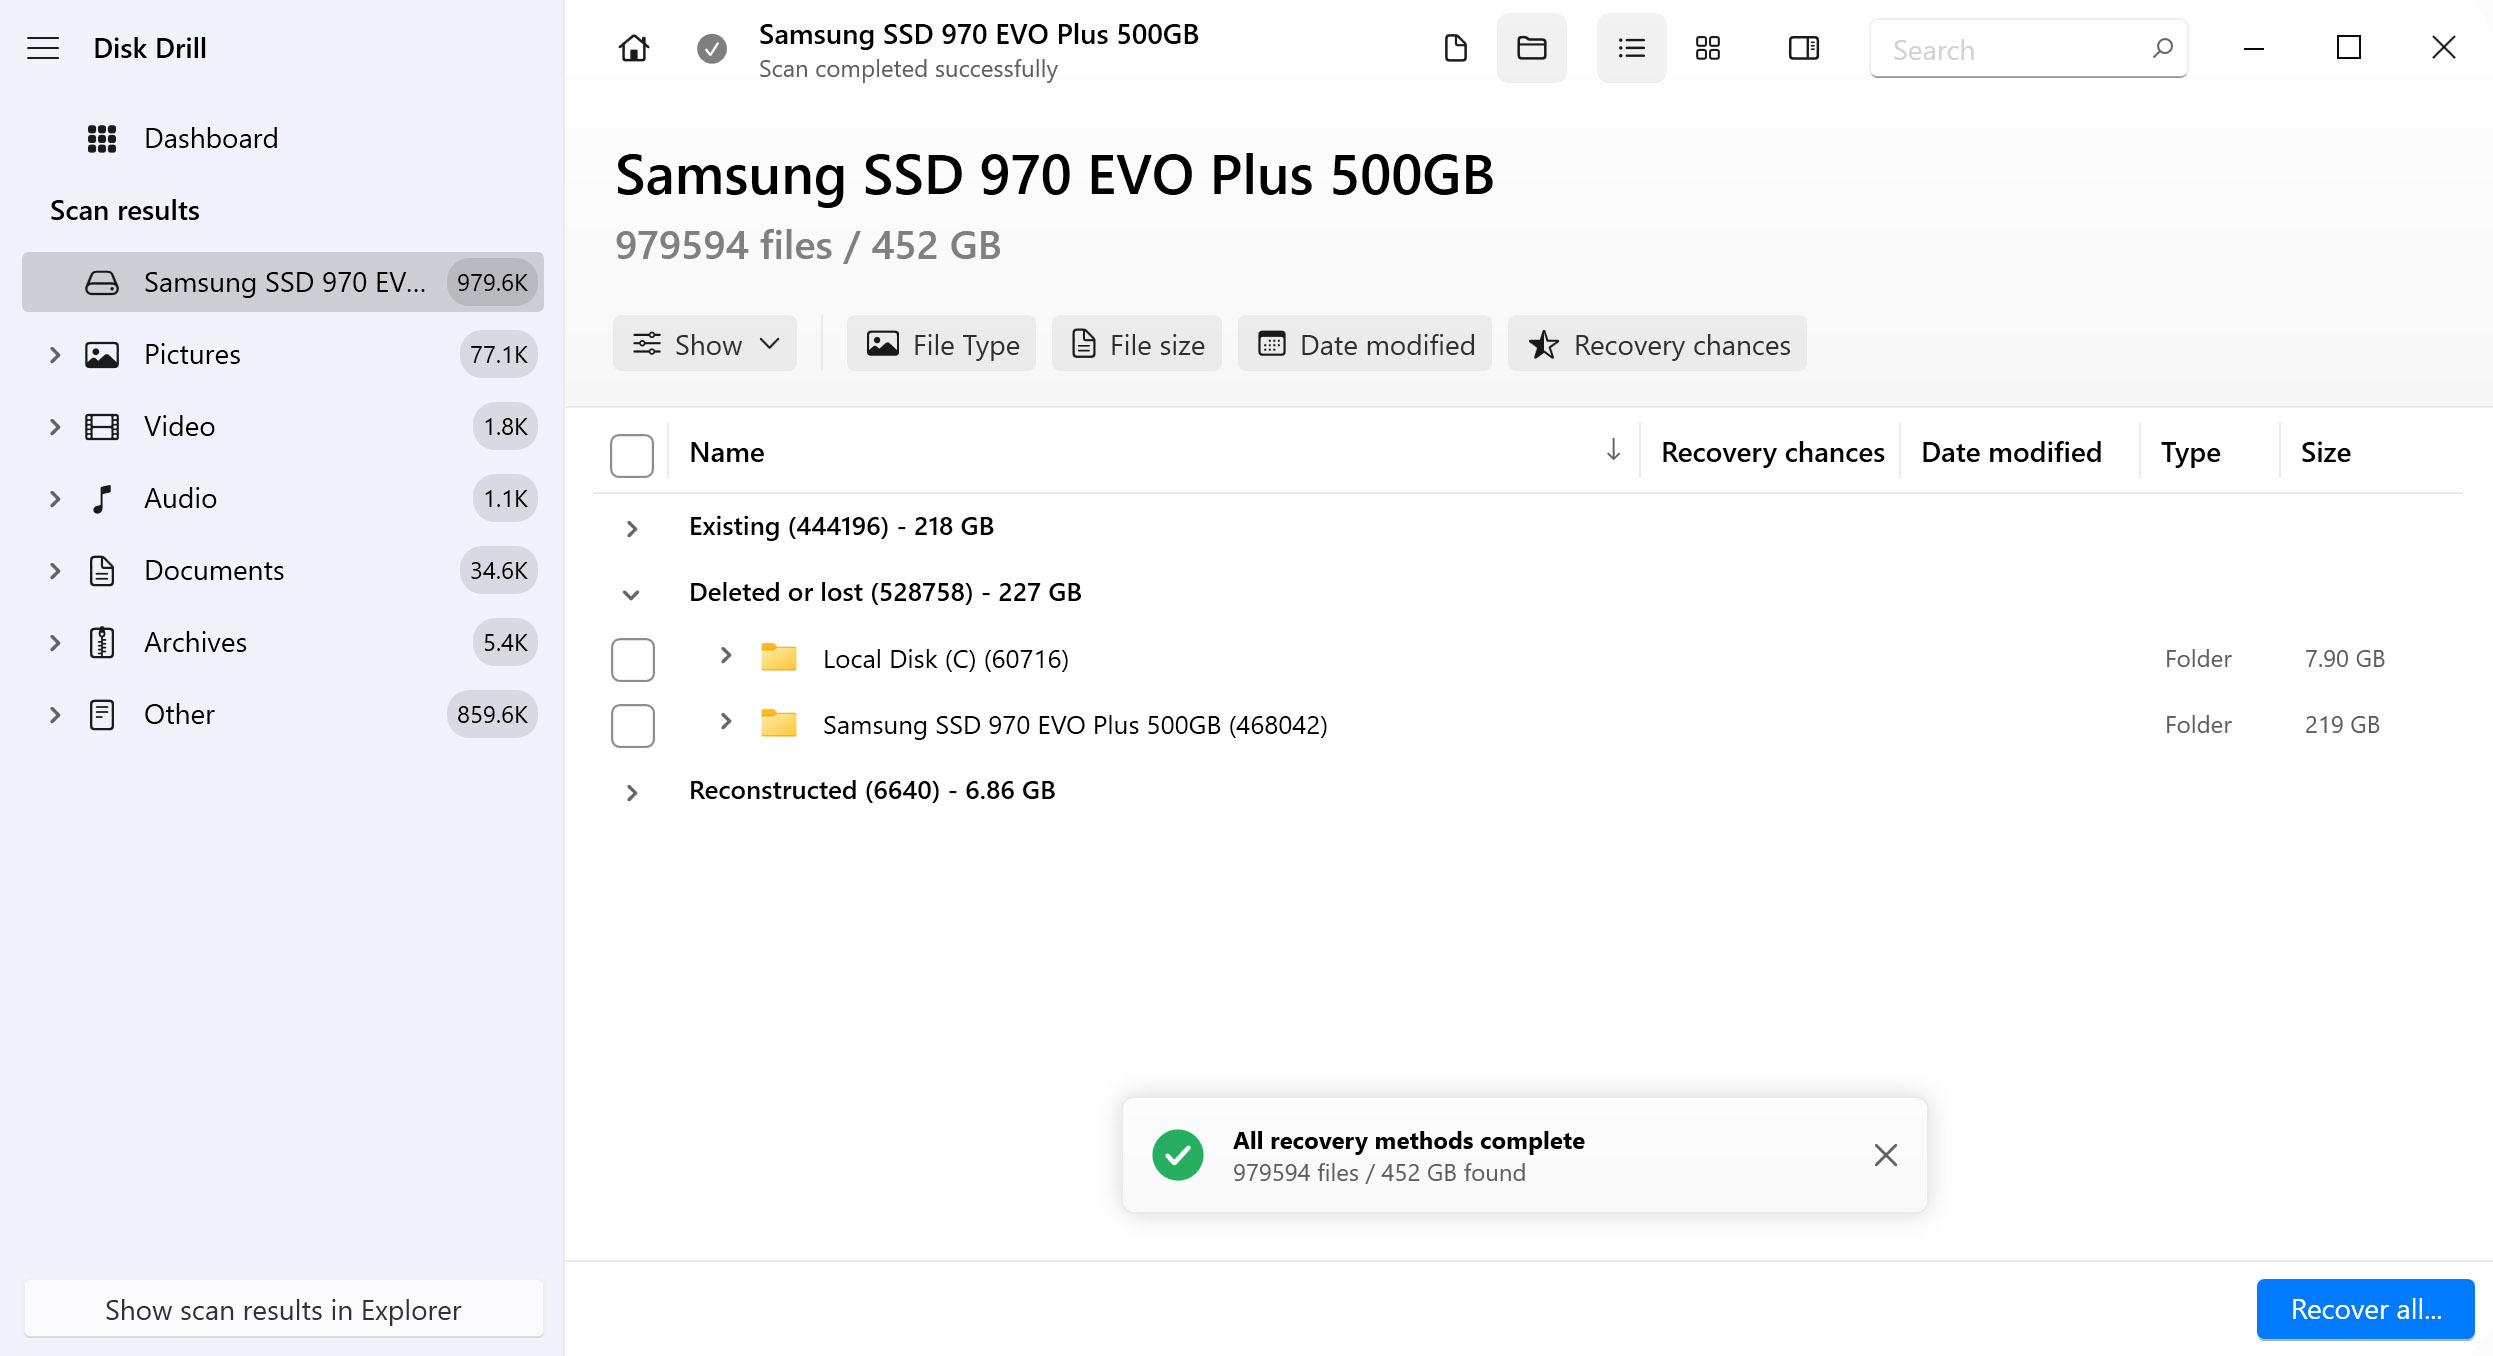
View scan results in real-time:
Disk Drill will now start scanning. You will be able to see how many files of each type are found by glancing at the sorted icons on the screen. Normally, we would wait for the whole scan to finish, but since we are looking for one specific file, we will click on Review found items.
-
Look for the history file:
The scanning will continue even as the current results are displayed on a new screen. You can change the file category from the left and search for a file (or folder) from the right. Type ‘History’ in the search box and hit enter.
-
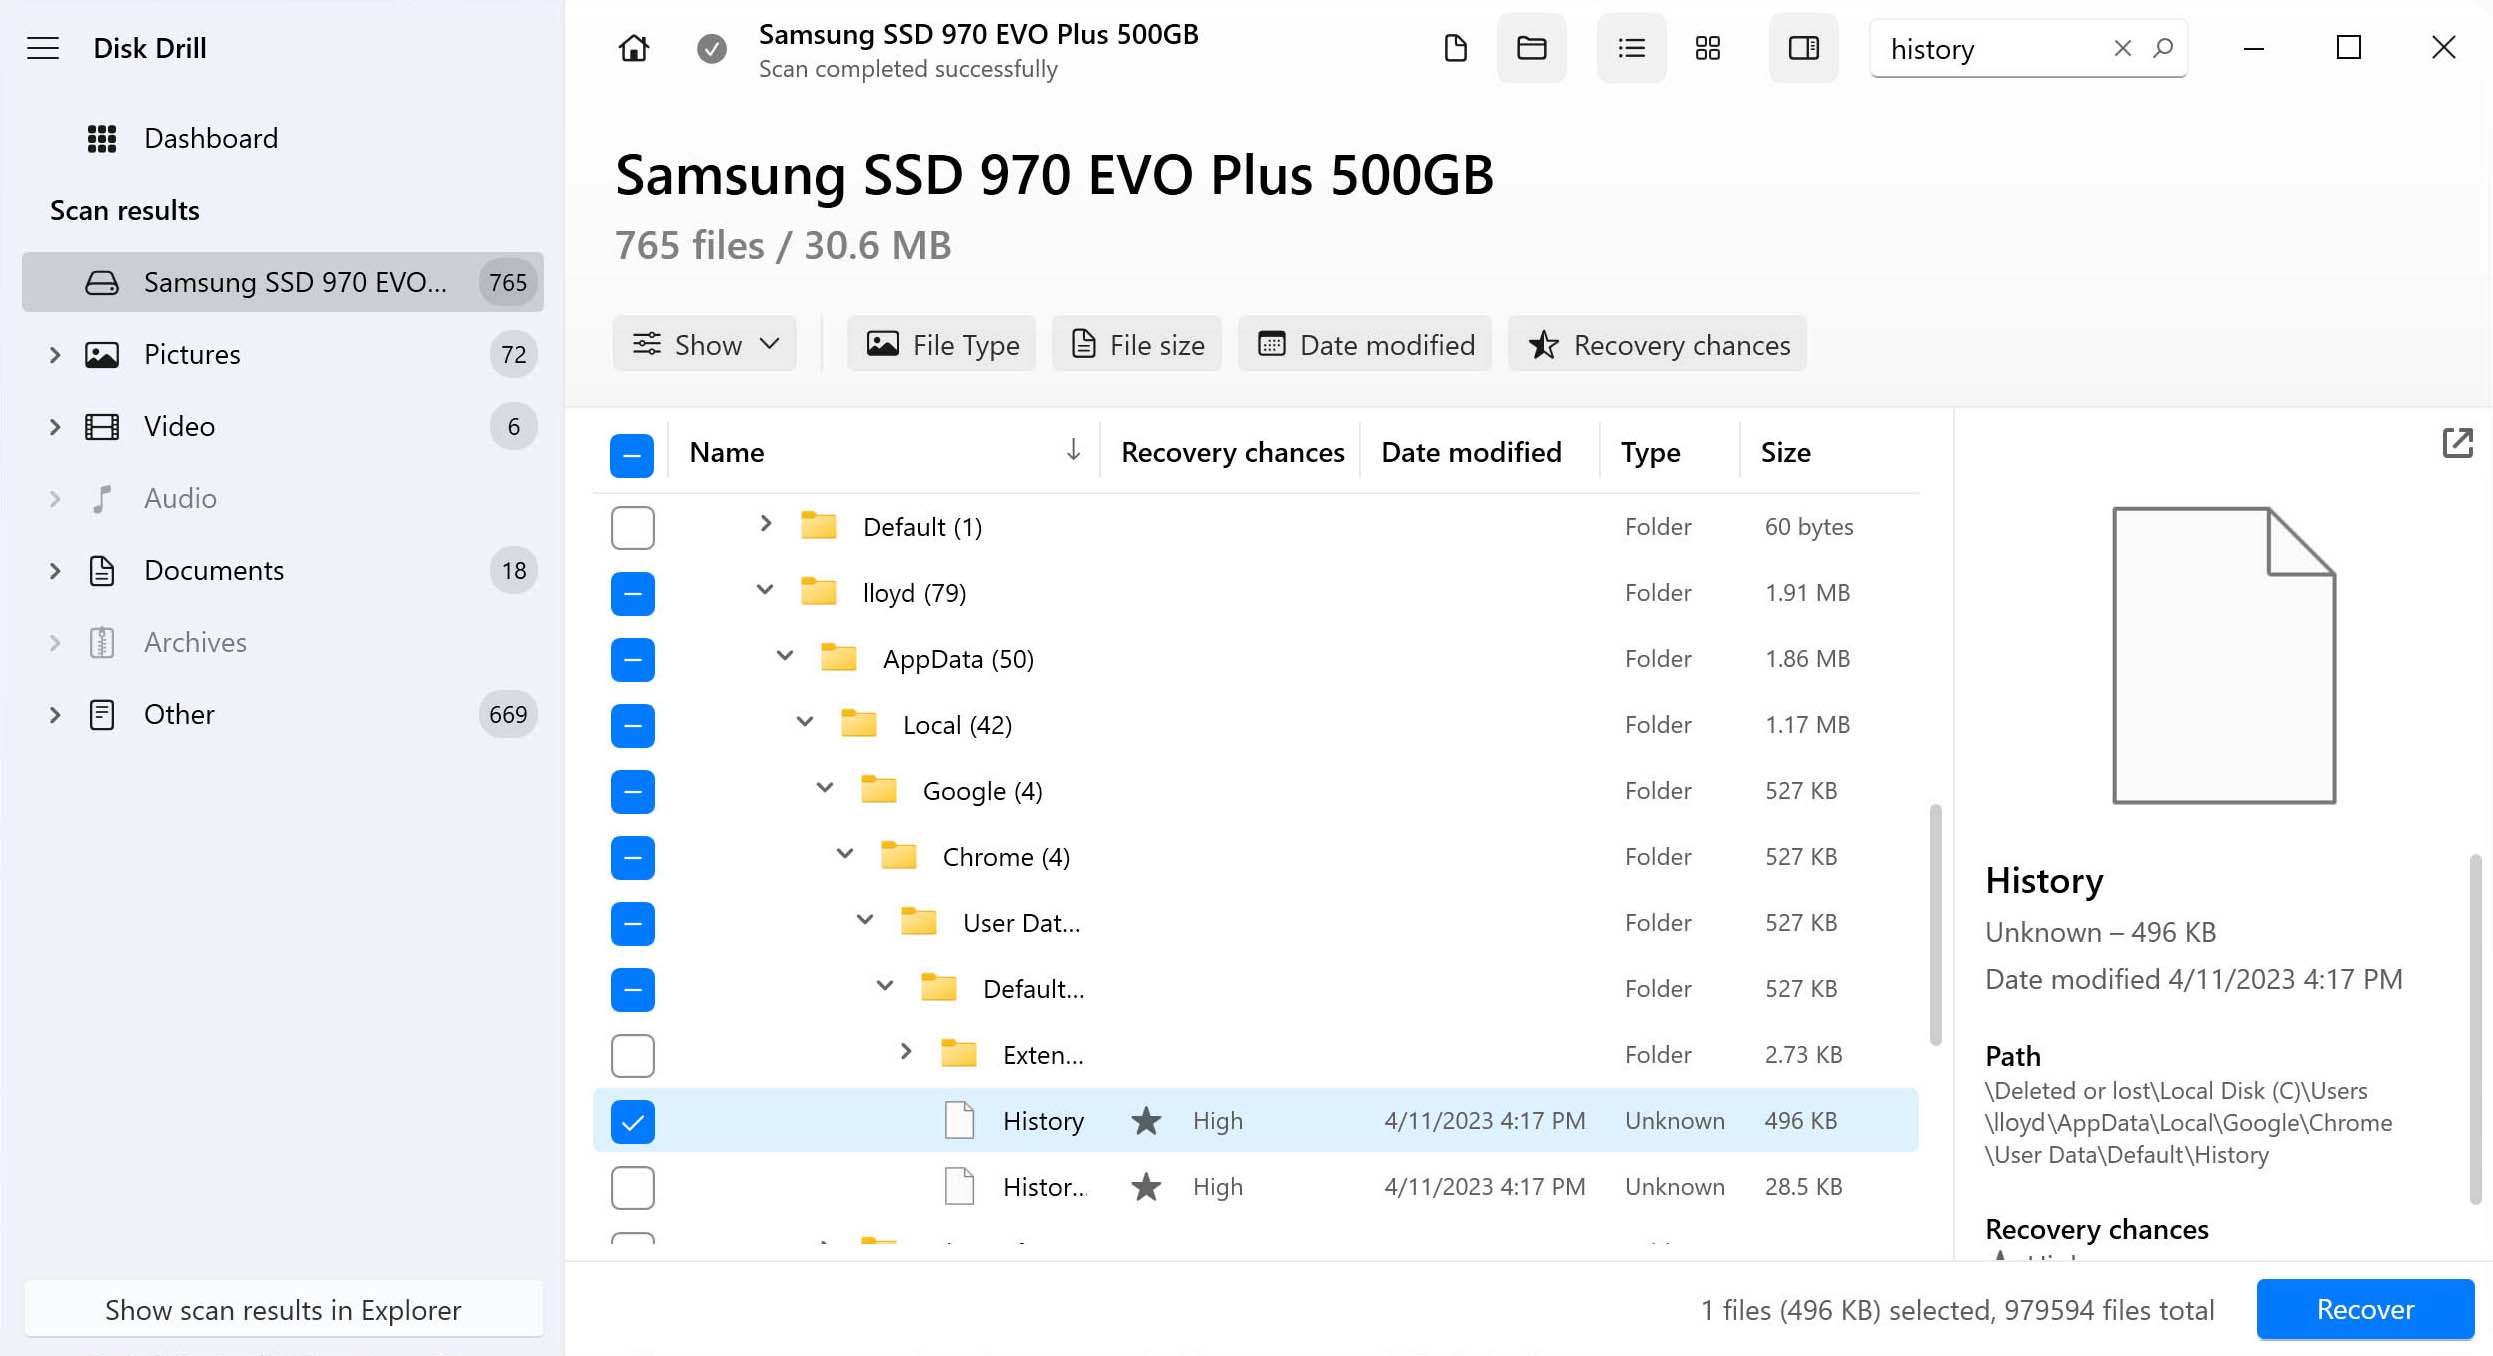
Select the history file:
The results will be filtered based on your search results. Since the files are shown with their folder structure, it is easy to check if the correct file has been found. Chrome’s history file is stored in C:\Users\Username\AppData\Local\Google\Chrome\User Data\Default. This is what it would look like. Select the file.
-
Recover your browser history:
Click on the Recover button to restore the selected file. You can choose the destination to save the recovered file. While it is preferable to save somewhere other than the main drive, in this instance, you can ignore it. Since we only need one file, there is nothing else to overwrite.

-
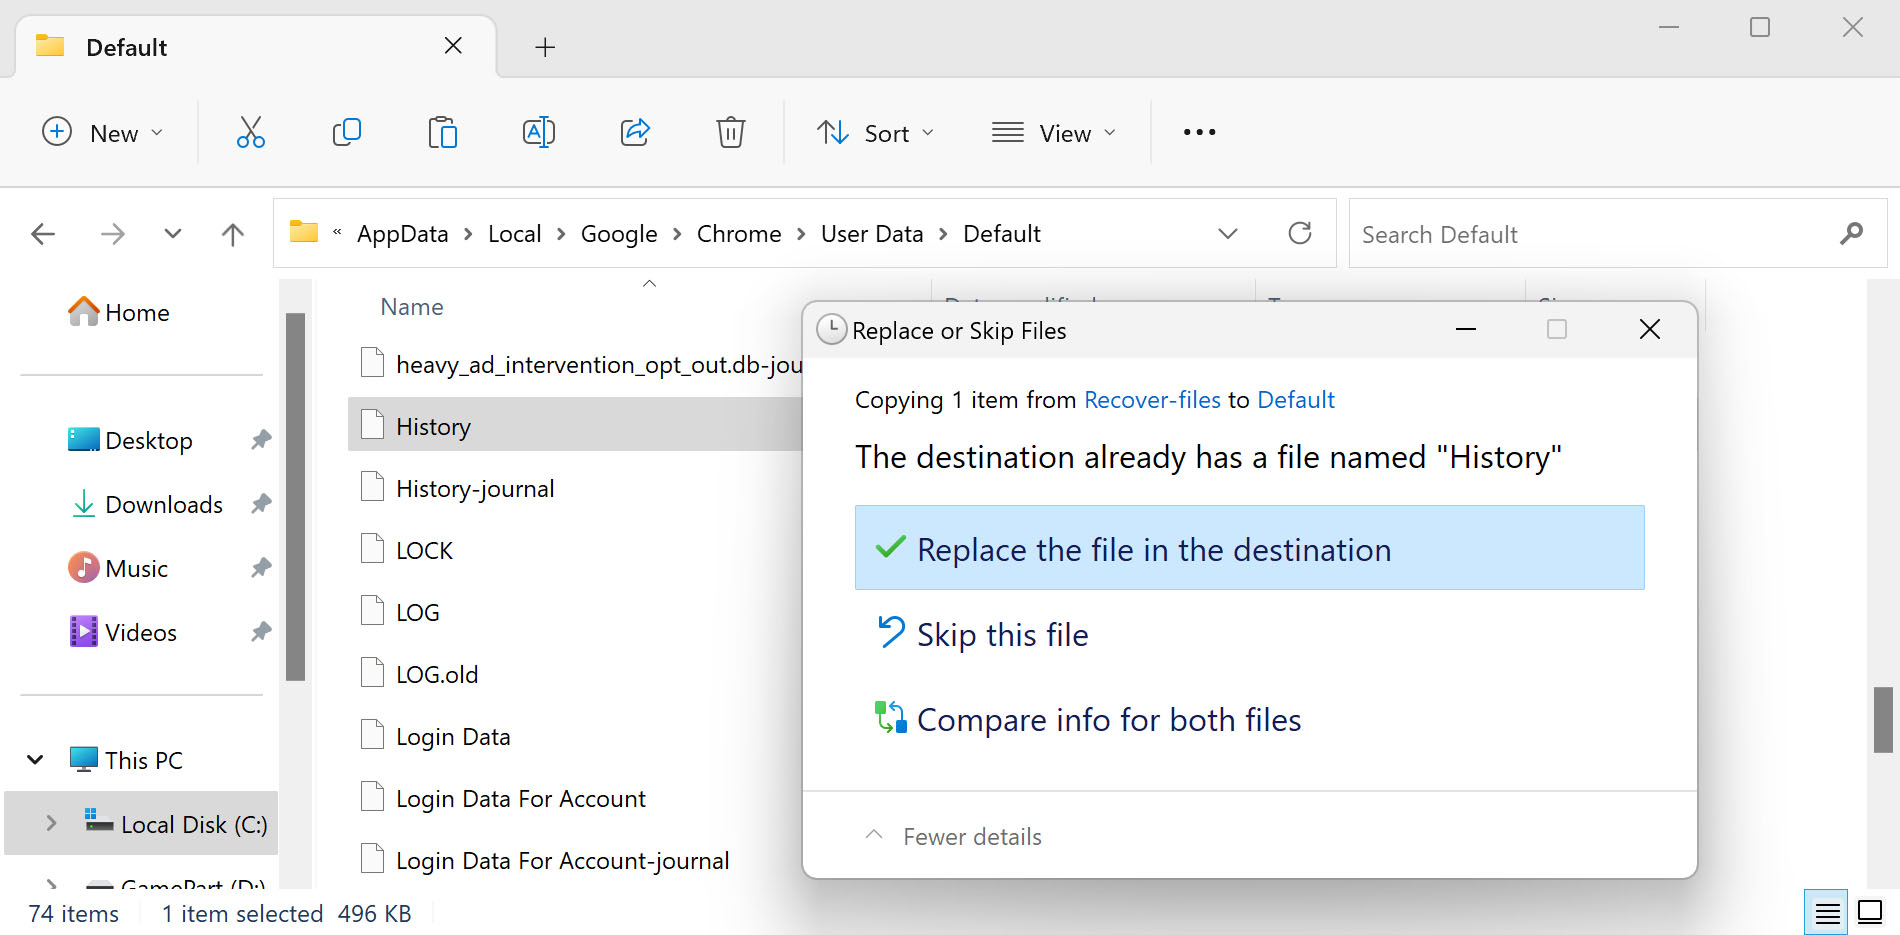
Overwrite your current history file with the restored one:
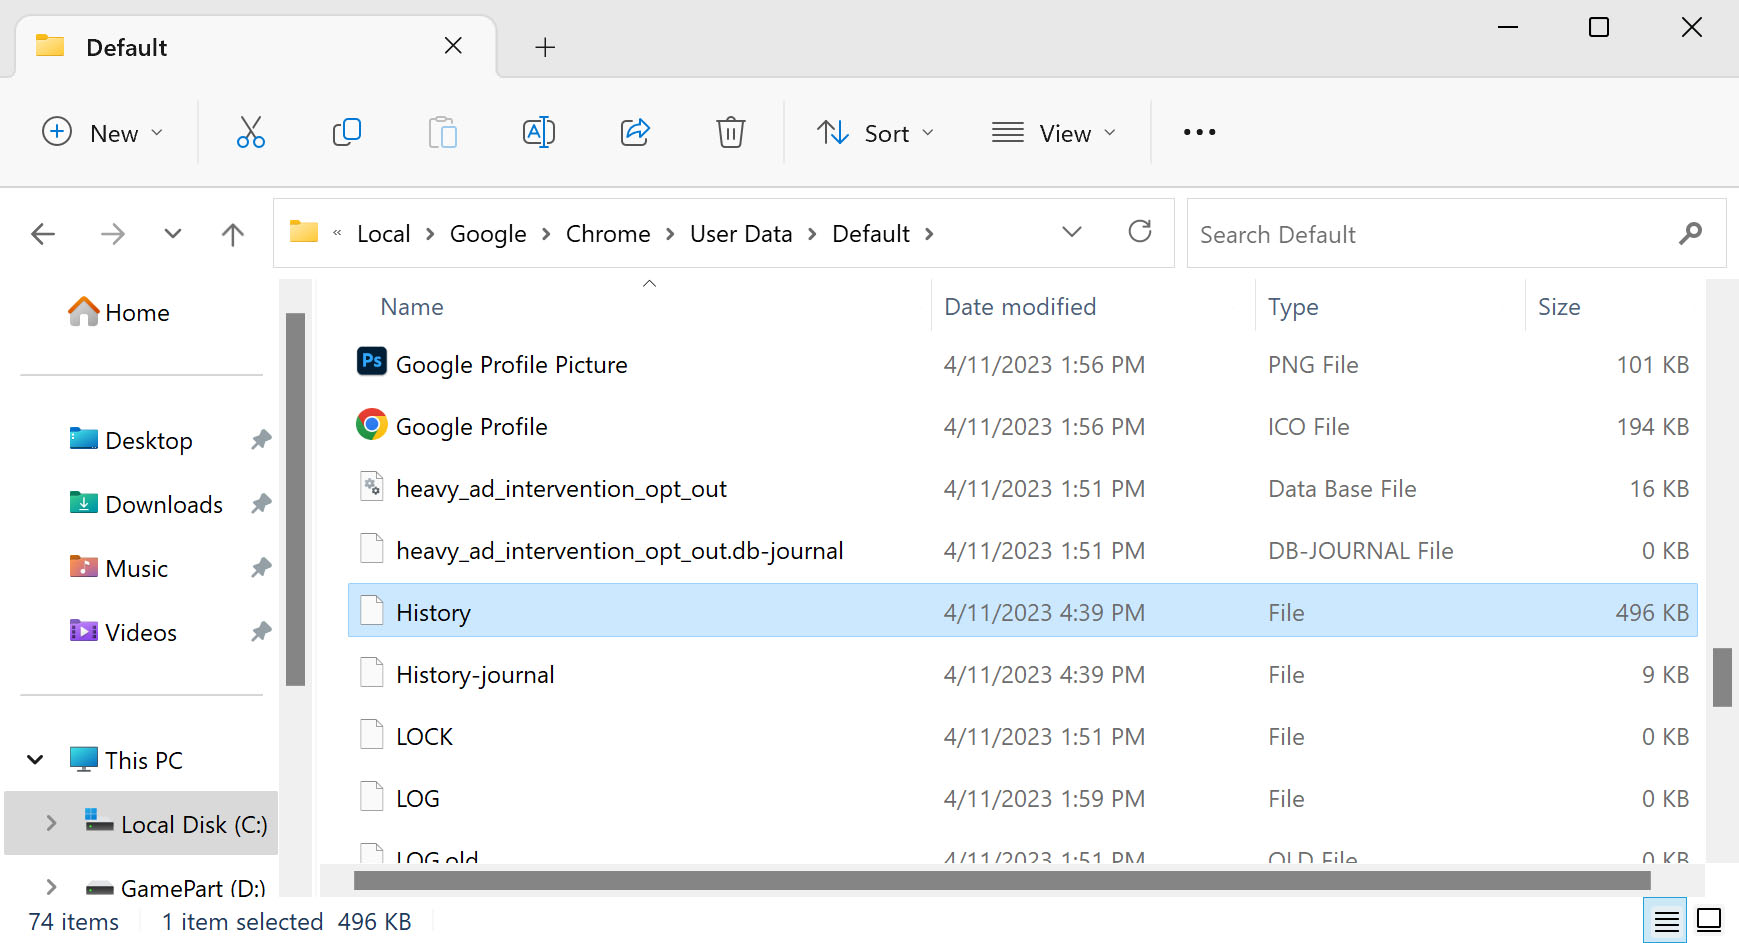
But just recovering the History file is not enough. You need to navigate to C:\Users\Username\AppData\Local\Google\Chrome\User Data\Default (replace Username with your user name) and copy-paste the recovered file into it. This allows Google Chrome to load up the browsing history stored in the file.
If you’re interested in Disk Drill, you should also be aware that we conducted a safety analysis of this popular data recovery software.
Method 3: Restore Previous Versions of Your Google Folder
If you have deleted the history from Google Chrome, recovering it can be a bit more tricky. This is because Chrome does not actually delete the History file, but empties the contents of its database. This lost data cannot be recovered by a data recovery tool.
The solution? Restoring a previous version of the History file. If you have File History set up on your Windows computer and have the Google folder backed up, it is possible to obtain an older version of the History file.
Here are the steps for doing so:
- Open File Explorer and enter the following path in the Address bar at the top: C:\Users\Username\AppData\Local\Google\Chrome\User Data\Default, where Username is the name of the user in question.
- While there are a bunch of files and folders in here, we are only interested in the History file.
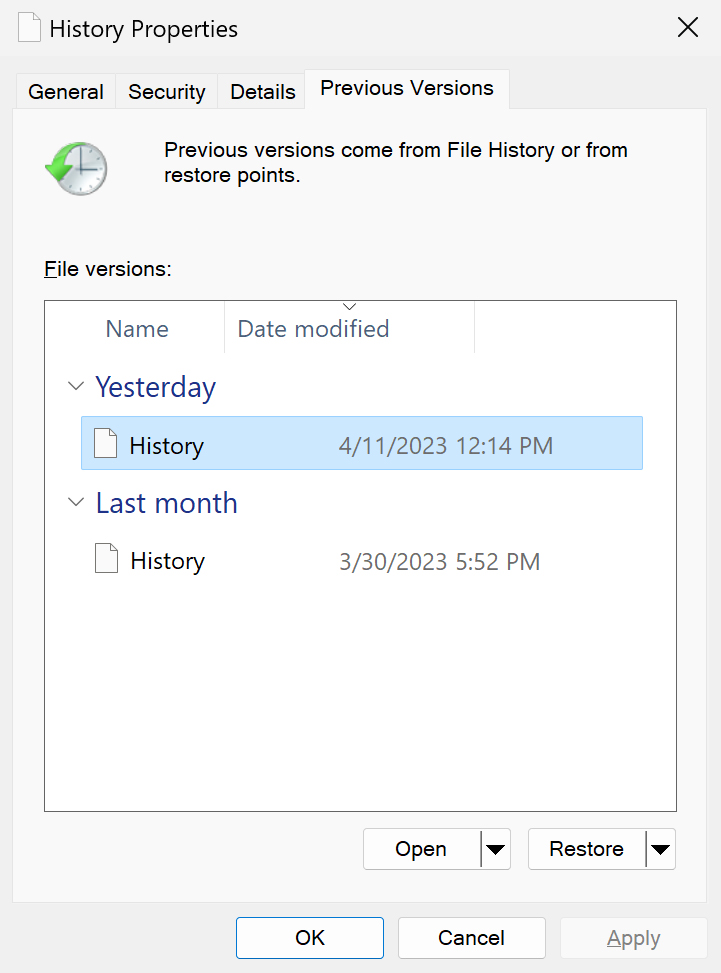
- Right-click on the History file and open Properties.
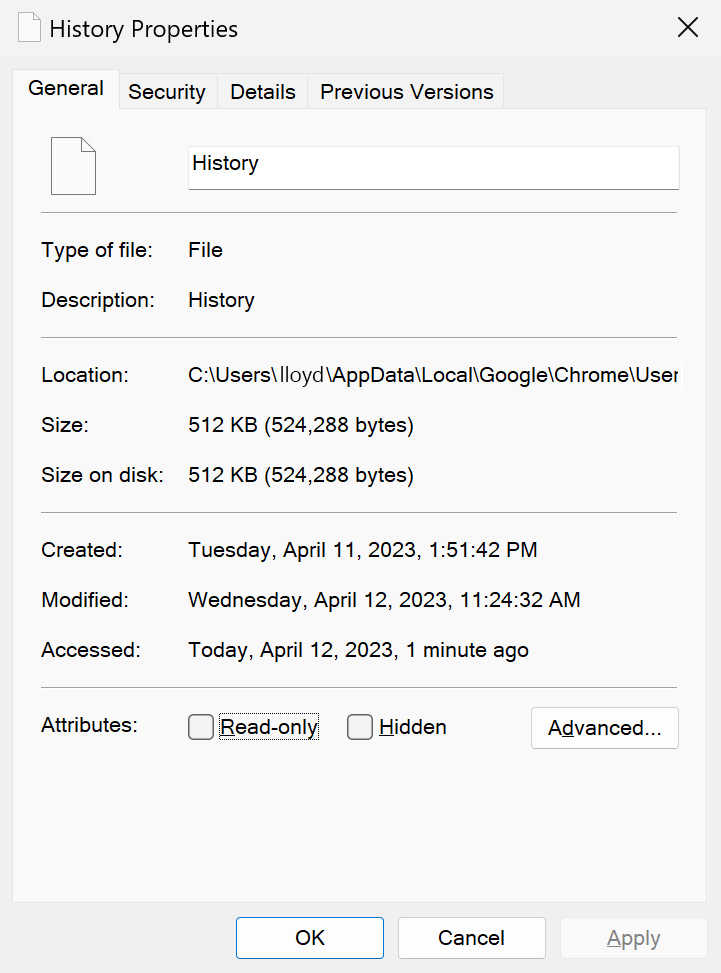
- Click on the Previous Versions tab. When File History has been set up, it shows older versions of the file. Just click on the version you want to return to and hit Restore.
Addendum: Setting up File History on Windows
We have seen how to restore the History file to a previous version if File History is set up. But how exactly do you do that? Here are the steps for both Windows 10 and Windows 11:
For Windows 10:
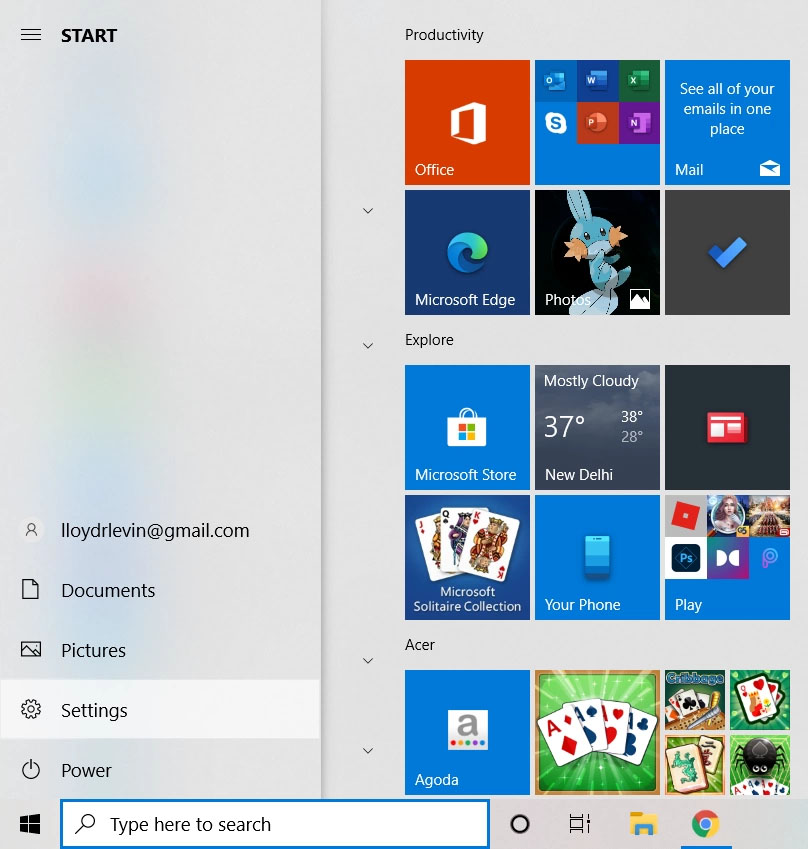
- Open the Start menu and click on Settings.
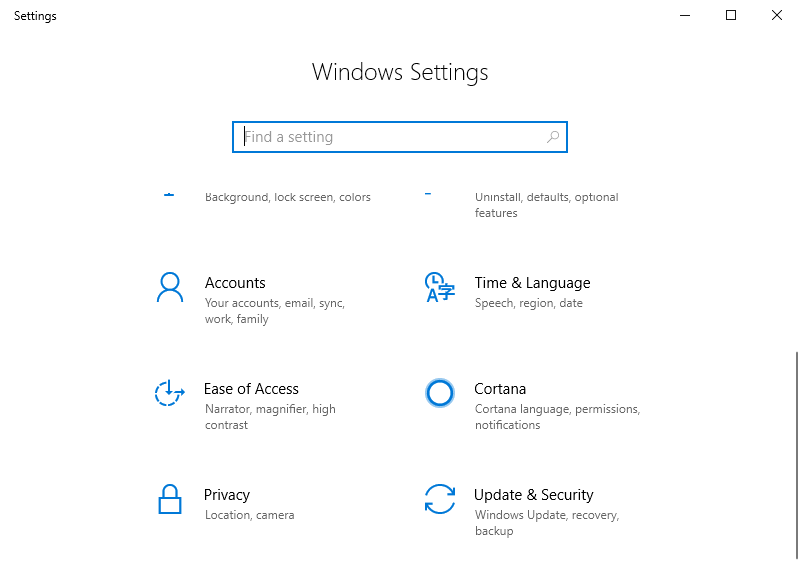
- In the Settings window, open Update & Security.
- In the Update & Security window, navigate to the Backup tab from the left.
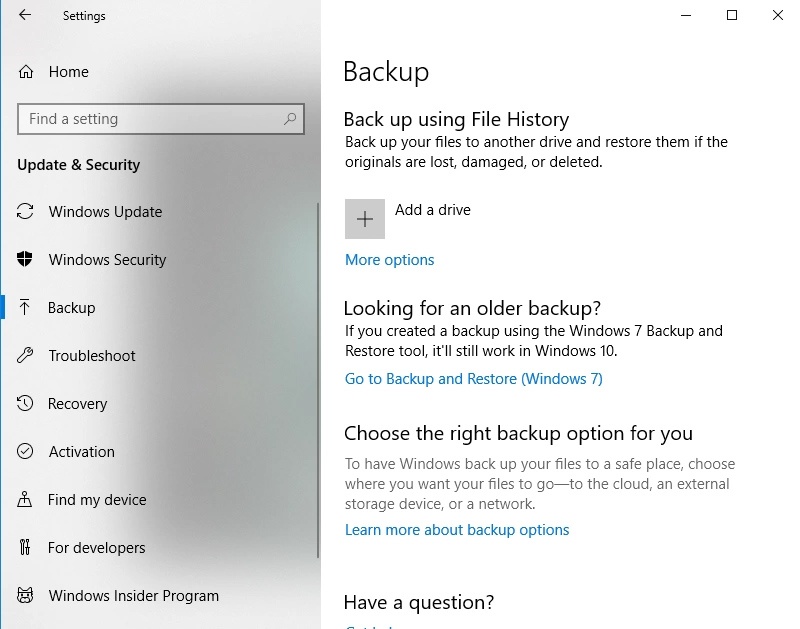
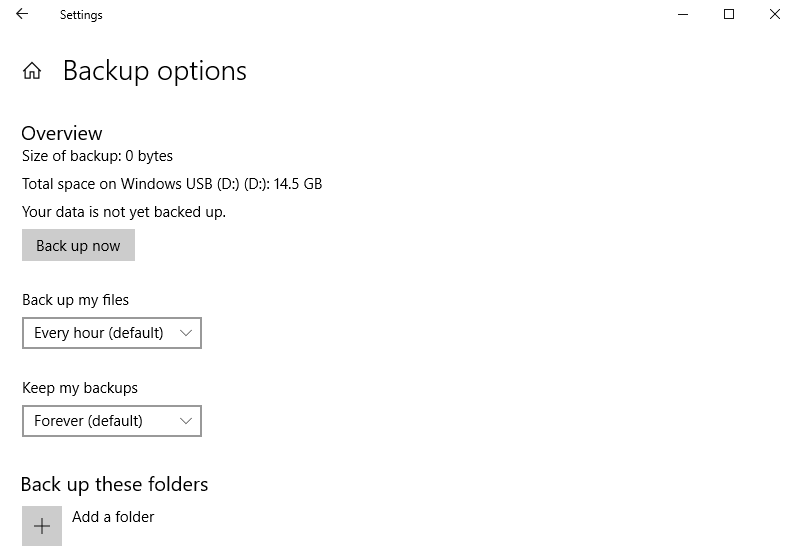
- To start backing up your data, you need an external HDD. Connect the drive and click on Add a drive to enable it.

- To customize which folders are included in the backup, click on More options. Use the Add a folder button to add the Google folder to this list.
For Windows 11:
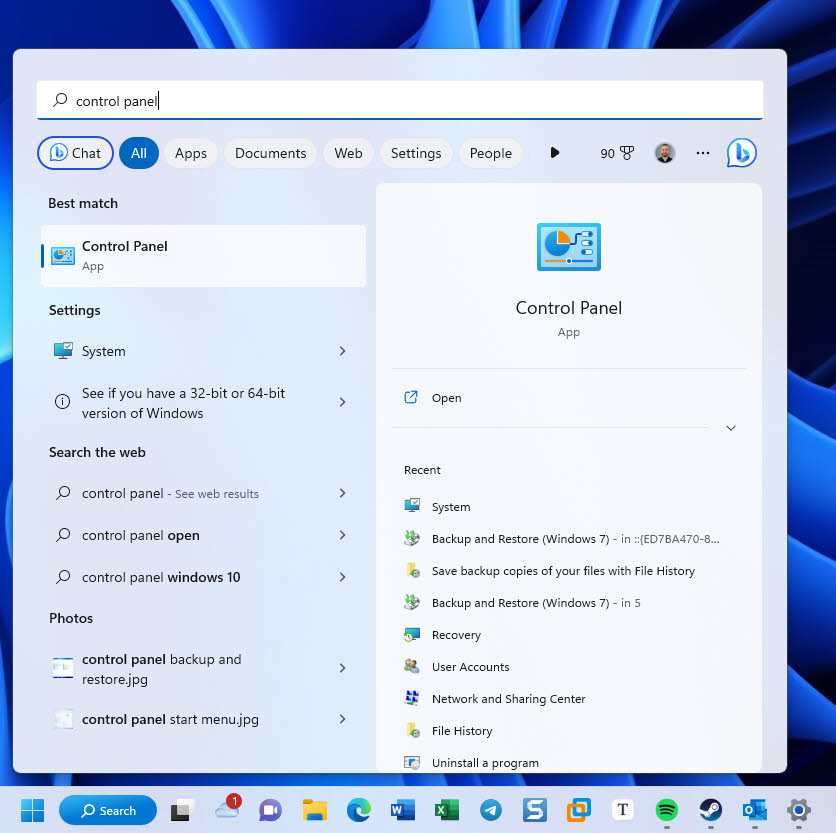
- Open the Start menu and enter “Control Panel” in the search bar.
- Select Control Panel from the list of results.
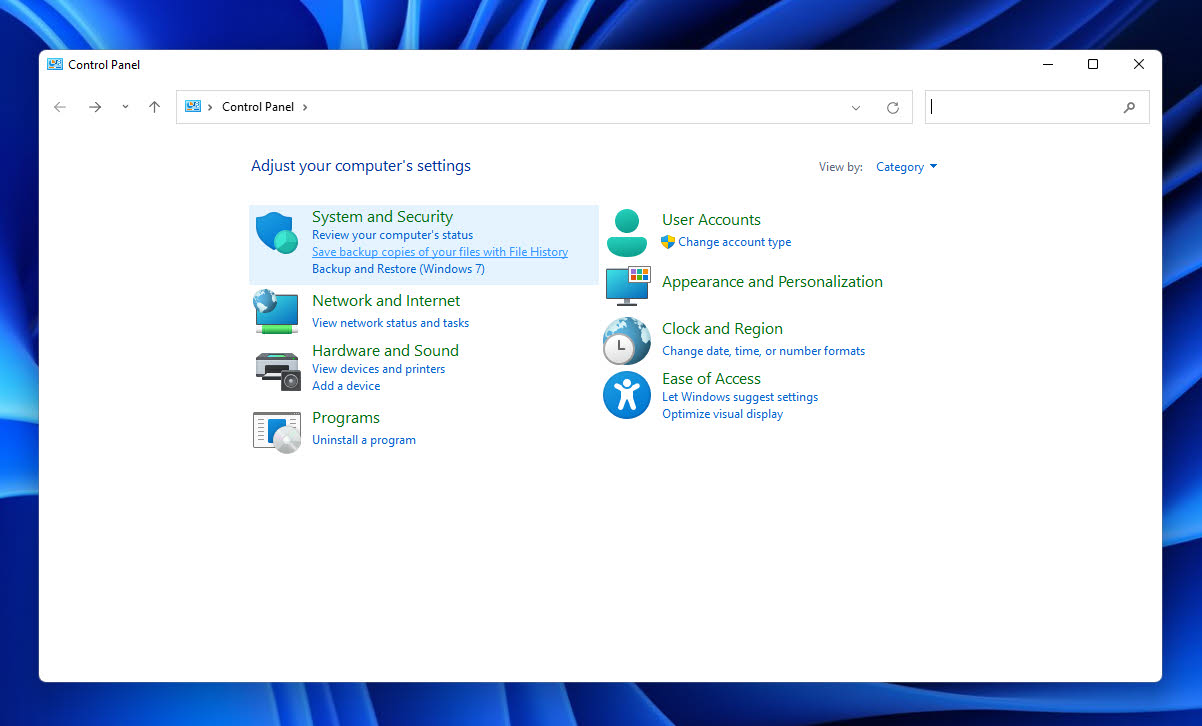
- Select the Save backup copies of your files with File History option.
- Connect your external backup drive and click the Select drive option in the left pane.
- Choose the connected backup drive and confirm.
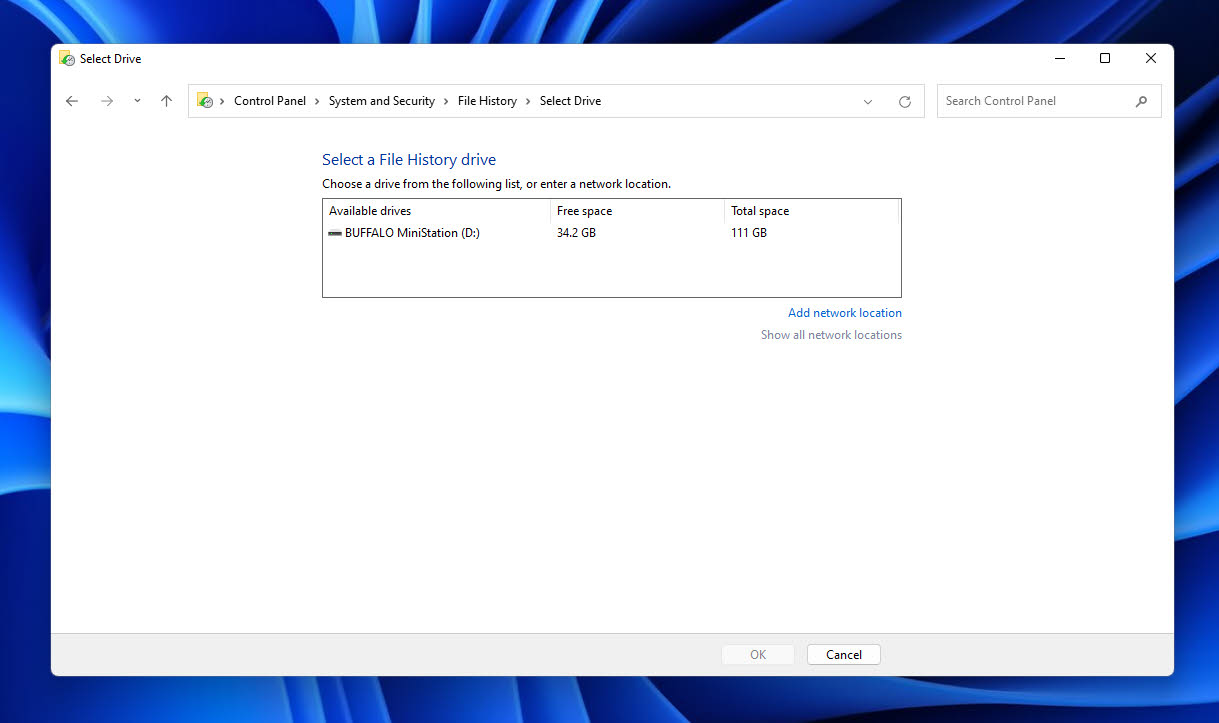
- Click Turn on to enable File History on Windows 11.
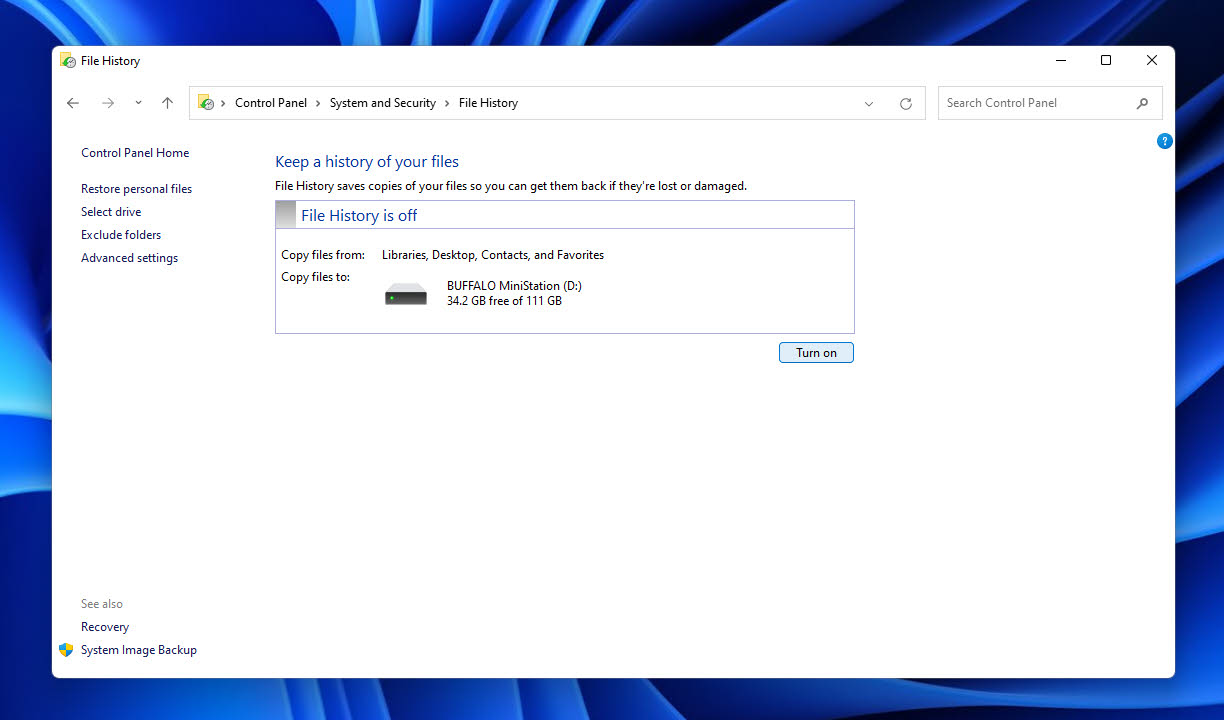
- Optionally configure File History by clicking the Advanced settings options in the left pane and changing the available settings.
Method 4: Use DNS Cache to Recover Deleted History
DNS or Domain Name System is the mechanism by which the URL you type in the address bar gets converted into actual addresses on the web. Since this conversion can take some type – especially when visiting a website for the first time – the OS maintains a cache of the DNS addresses of recently opened sites.
You can get some idea of what kind of websites you have visited by taking a look at this list. Note that this includes internet activity from all browsers on your computer, not just Chrome.
Here is how to view the DNS cache using Command Prompt:
- Open Command Prompt as an administrator. You can find it by typing cmd in the Windows search bar.
- Enter the command: ipconfig /displaydns. This brings up all the DNS records on your computer.
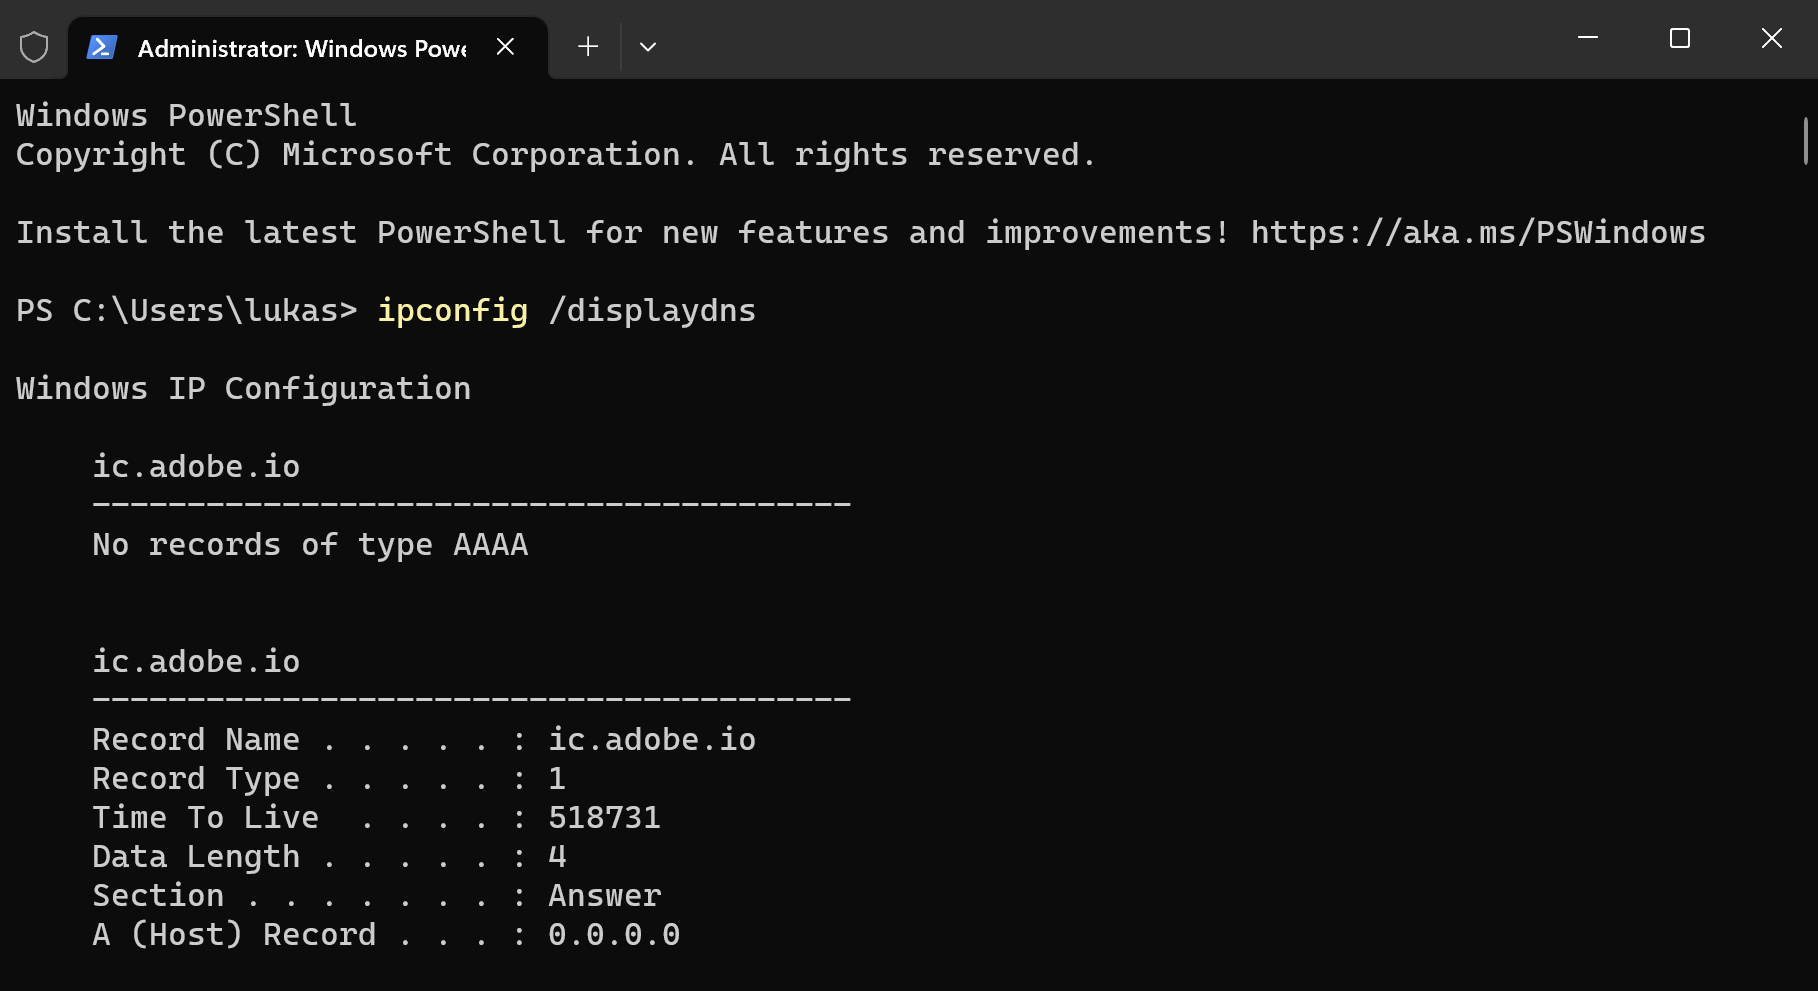
- As you can see, the records are… technical. There isn’t much relevant information, except for the Record Name field, which is actually the DNS name. You can look up these names to try to guess which websites use them.
Method 5: Reinstall Google Chrome
If sync is enabled in your Google account, then your personal data is backed up to the cloud. Bookmarks, search history, passwords – everything is stored. As soon as you sign in on a new device, Google syncs this data to it.
You can use this feature to recover deleted history on Google Chrome too. Simply reinstall Google Chrome on your computer and sign in again. Your history should be synced from your other devices.
Note that this will only work if it is the History file that is missing – clearing your history from Google chrome removes it for all devices.
Method 6: Check Cookies to Recover Deleted Browser History
Cookies are another method through which the browser (or rather, the websites) store data on your computer. The problem is that cookies are website-specific, and only store information related to that website. Your search history is not found in a cookie.
Instead, cookies give you an overview of what websites you have interacted with in the past. Even when your browser history is beyond recovery, taking a look at all the cookies on your computer can give you similar information. Do note though that merely opening a website might not lead to a cookie being created. Usually, you will be prompted to accept the cookies.
Here is how to view all the cookies on your browser:
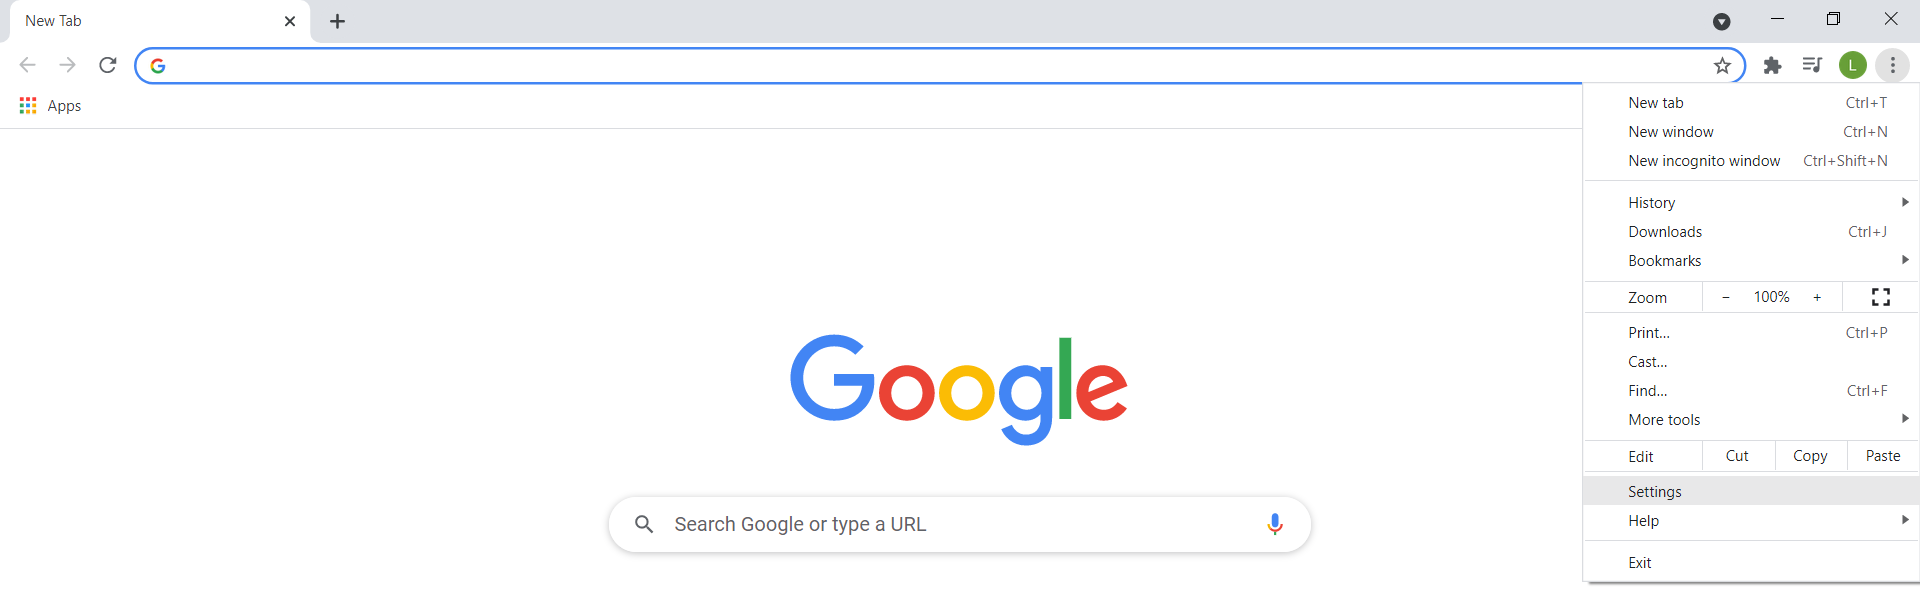
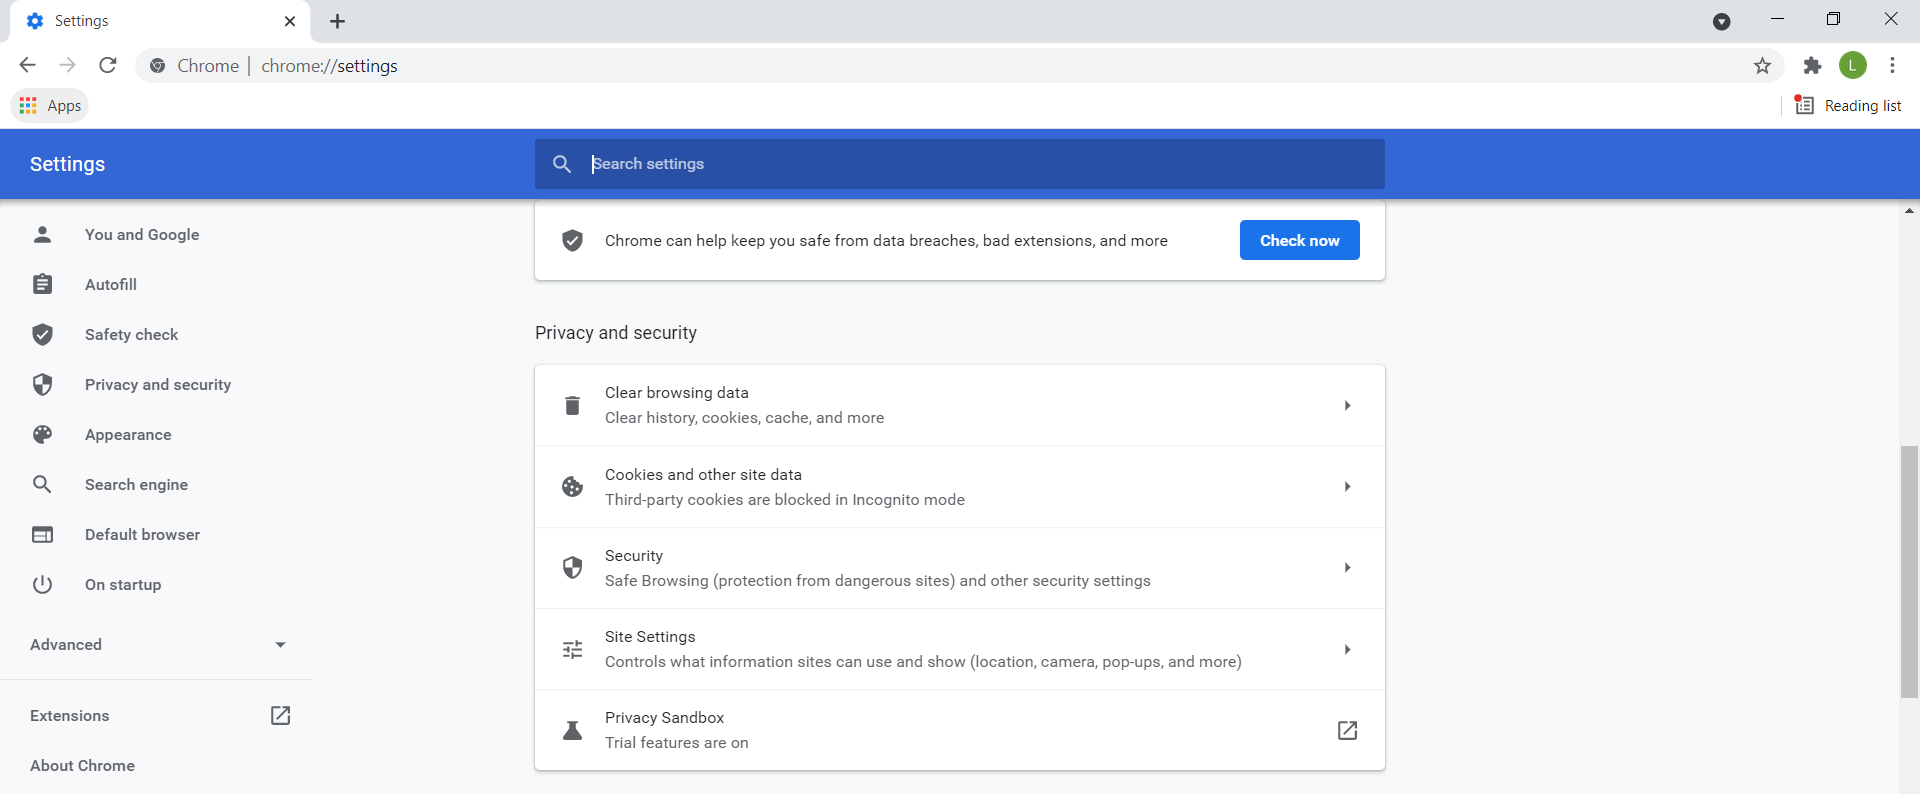
- Open Chrome and bring down the three-dot menu from the top right. Click on Settings.
- Scroll down to the Privacy and security section and click on Cookies and other site data.
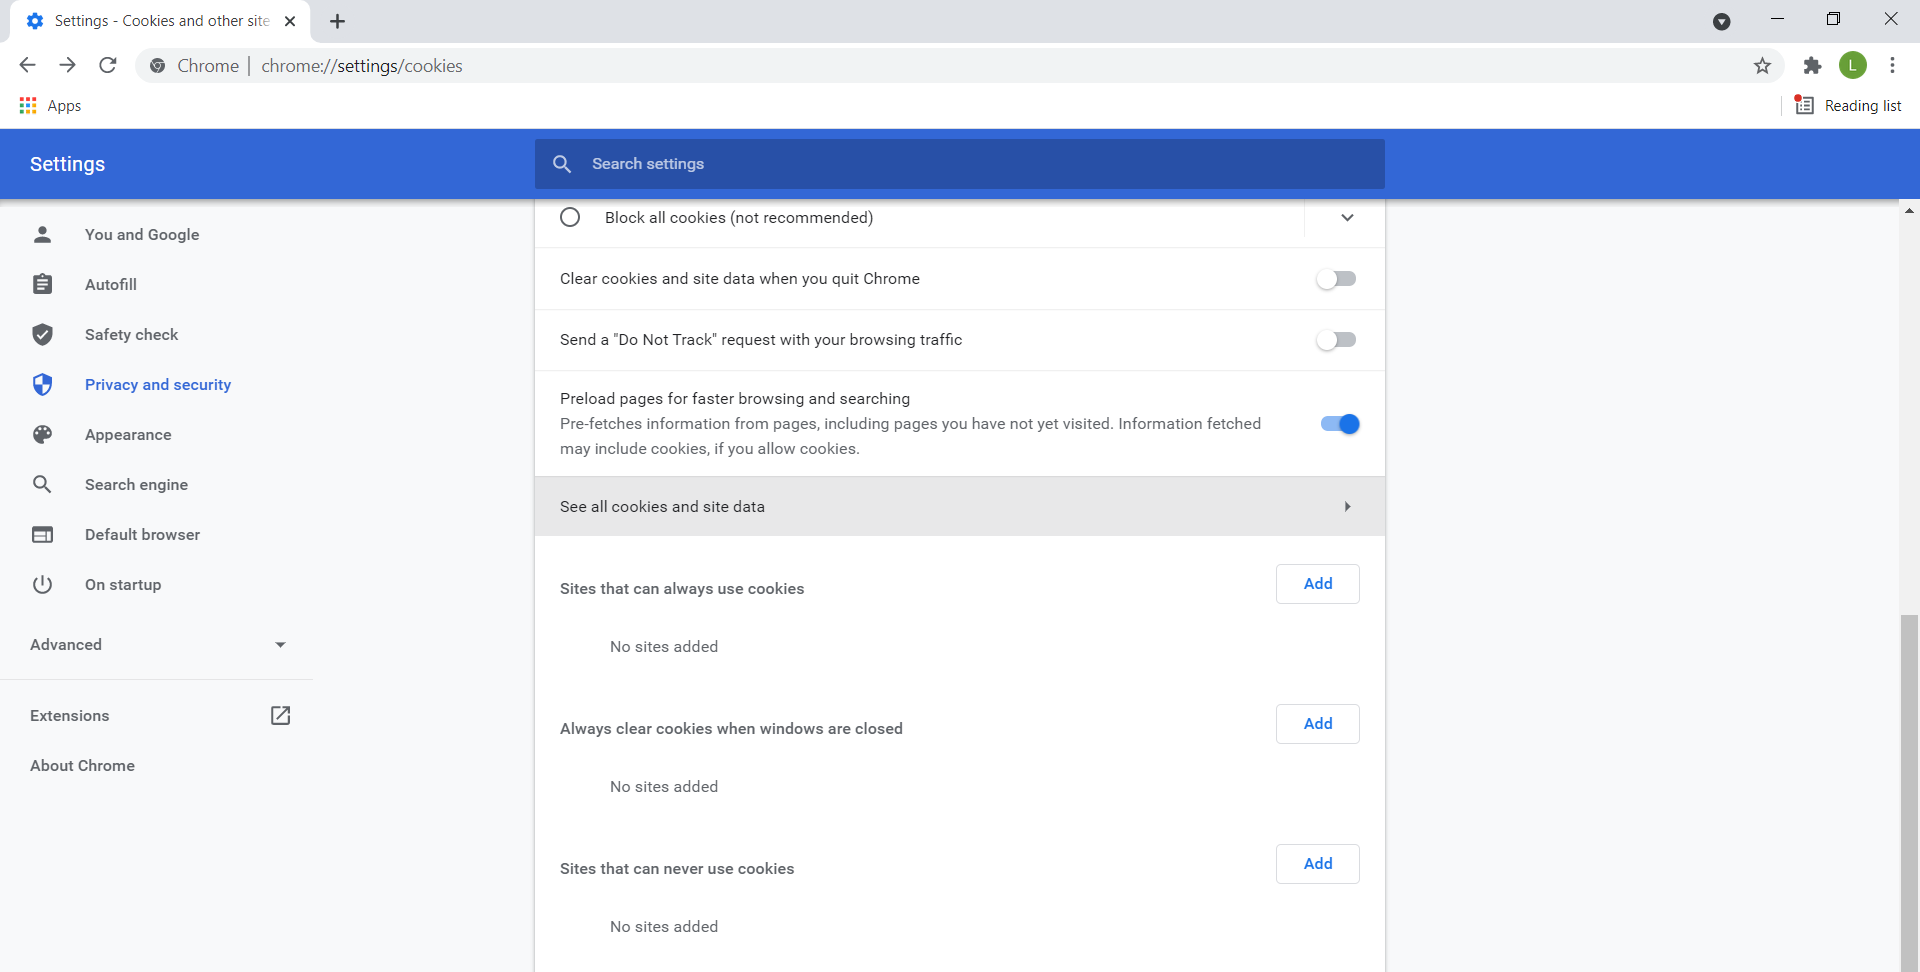
- All options related to cookies show up here. You need to click on the See all cookies and site data option.
- All the cookies on your computer will show up in an alphabetical list of websites. You use this information to determine which websites you have interacted with in the past.

How to Recover Deleted Chrome History on Mobile Devices
So far we have explored various methods for regaining your lost Chrome history on a PC. But what about a smartphone? Is there any way for doing so on Android or iPhone?
Certainly. While things like data recovery software or checking the DNS cache are harder on mobile, many of the other methods work just the same. Here are two of them:
With Sync
If your mobile has sync enabled, your Chrome data is backed up across all of your devices. This means that signing in on your phone again should restore your search history. Here are the steps for doing so:
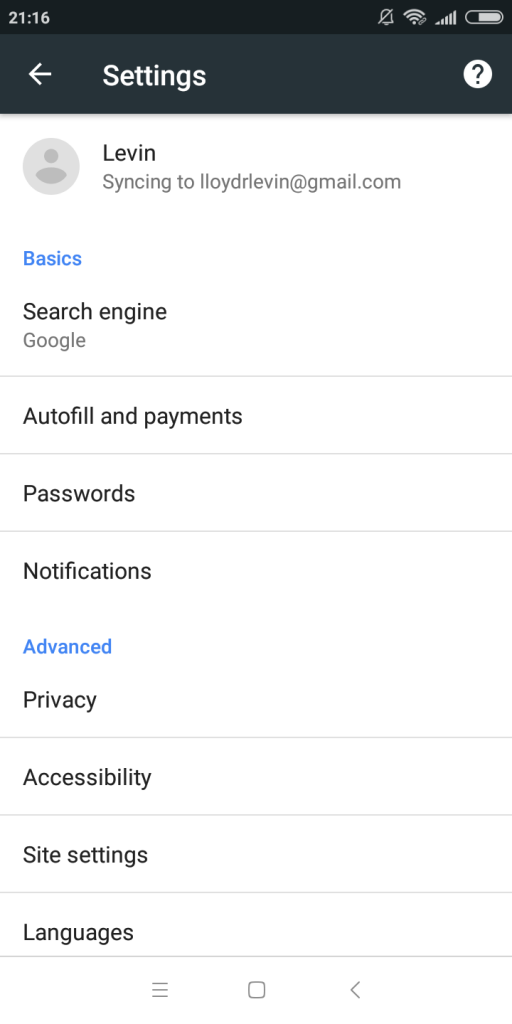
- First, verify that sync is indeed enabled on your device. To do that, open Chrome and head to its settings. You will see the Google Account being synced at the top.
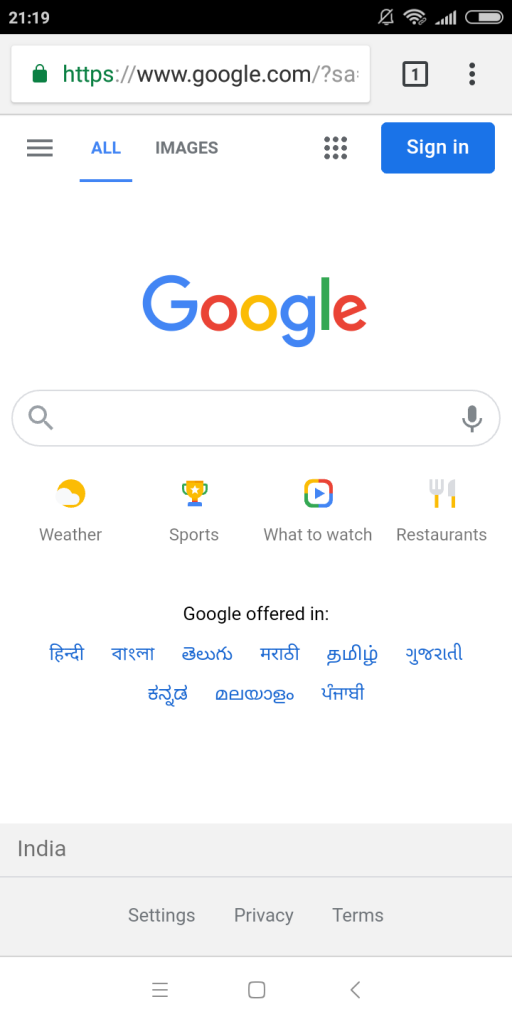
- Now you need to uninstall Chrome. If that’s not possible on your device, simply sign out of your account. Open Chrome again to be greeted with a tab like this.
- Tap the Sign in button and enter your login details.
That’s it. Upon signing in again, your data will be synced with your Google account, restoring any lost history using the backups from your other devices.
Using Google Account Activity
When your data isn’t synced (or the method doesn’t work), you can always check out your Google account activity. The My Activity dashboard holds a record of every action on Chrome, including searches. To access this information, follow these steps:
- On your Android mobile, head to Settings and tap on Google.
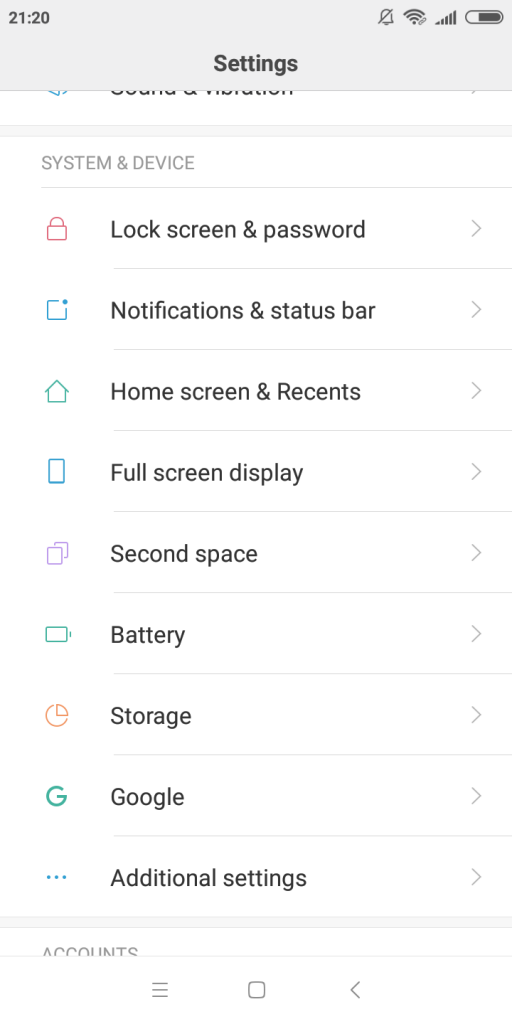
- Now hit the Manage your Google Account option.

- All of your Google Account related settings can be accessed from here. For now, switch to the Data & Personalization tab.
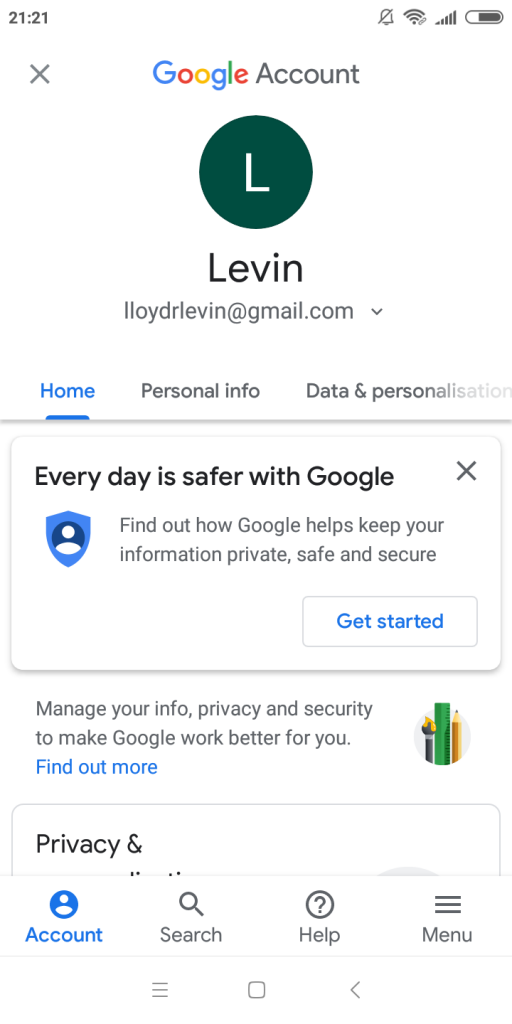
- From here, scroll down to Activity and timeline and tap on My Activity.

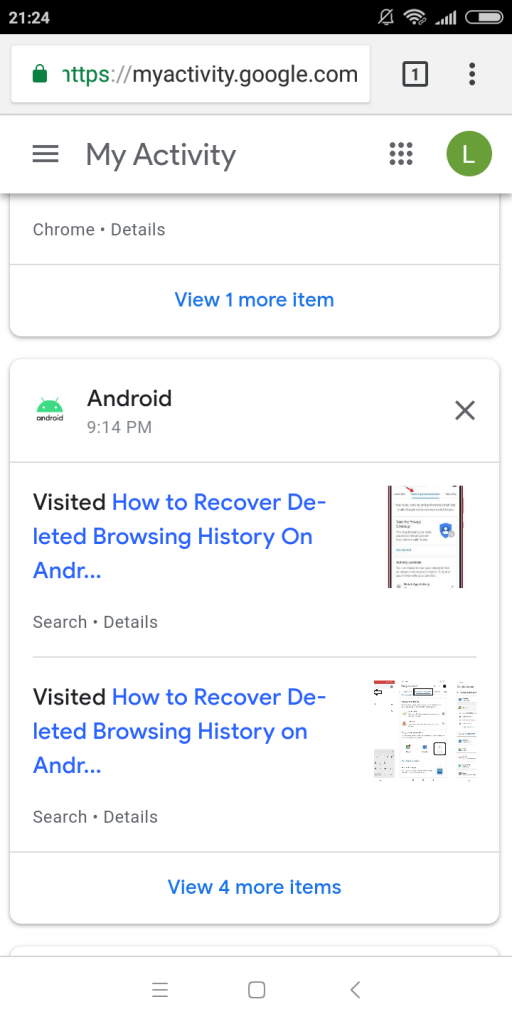
- Alternatively, on both Android and iPhone you can open Chrome and navigate to My Activity directly. This opens up the My Activity dashboard, containing a log of your online activities.
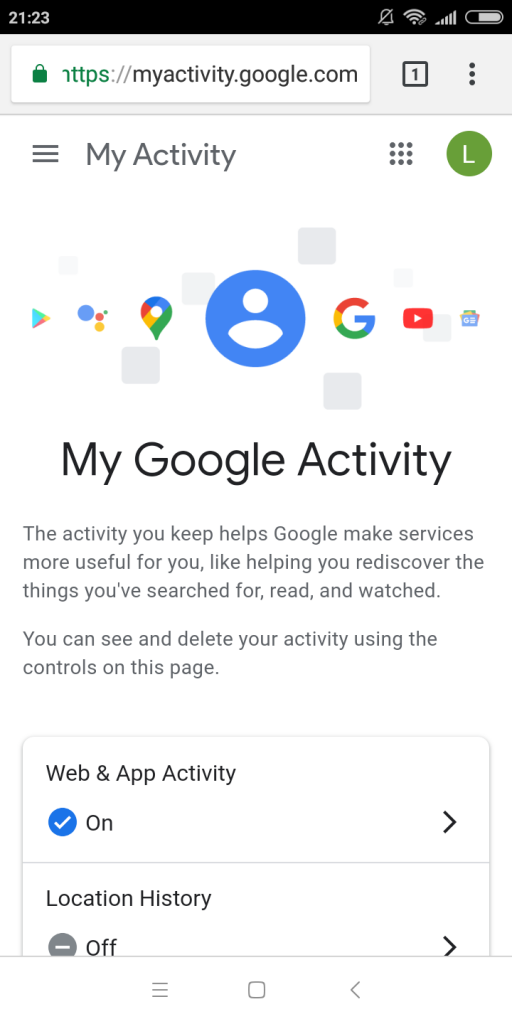
- Scroll downwards to view a list of your search history ordered by date and time. Tap on any of the items to view more details.
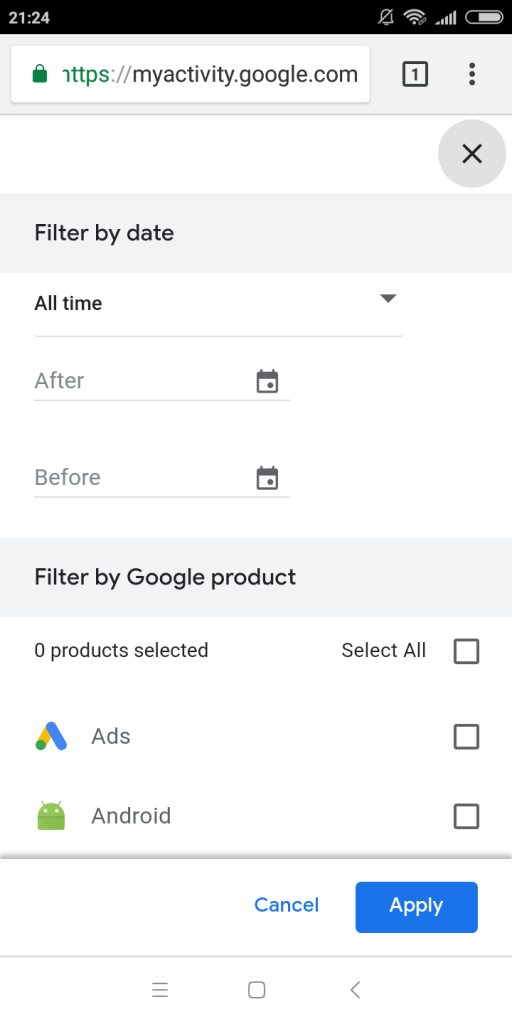
- If your activity is clogged up by actions performed on other Google apps, you can always use the Filter option to narrow things down. You can filter by the date and the type of activity you wish to see, such as Chrome.
FAQ
Is Chrome history deleted forever?
No, Chrome history is not necessarily deleted forever. Even if the browsing history file is deleted, it may still be possible to recover it using data recovery software or by restoring a previous version of the file. Additionally, your Google account itself contains a log of your online activity, including the websites you have visited and the search terms you have used, which can also be used to access your browsing history.
However, it is important to note that there are some circumstances where the history may be permanently lost, such as if it has been overwritten by new data or if you have explicitly chosen to clear your history.
Where is deleted Chrome history stored?
Chrome stores browsing history locally on your computer using database files. Here are two possible paths on Windows:
- C:\Users\\AppData\Local\Google\Chrome\User Data\Default
- C:\Users\\AppData\Local\Google\Chrome\User Data\Default\Cache
If these files are deleted manually, they may show up in the Recycle Bin. If they are deleted from there, they can still be recovered using a data recovery tool.
However, if you clear the history from Chrome itself, the individual records are wiped clean. This means that the History file still remains, but it does not hold any of the browsing data.
How to recover deleted Google history on Android?
There are a couple of ways to recover deleted Google history on an android phone. The first is Chrome’s sync functionality. If you had enabled sync in the past, Chrome will automatically restore your browsing history and bookmarks once you sign in to your Google account.
In case sync isn’t enabled on your phone, you can take a look at your Google Activity. This lets you view all the sites you have visited and the search terms you have used in the recent past.
How to check deleted Google history on iPhone?
The best way to check deleted Google history on an iPhone is through the Google Account activity. Just head to My Activity and sign in with your Google account to get a list of all your browsing data. If Web & App Activity is turned on, you can even see the history of other actions on your iPhone.
Can you find your incognito browsing history?
The browser itself (and by extension, Google) doesn’t track incognito browsing. Once you close an incognito browsing session, there is no way to bring up that history from Chrome. You can always find your downloads of course, even if they are deleted.
That being said, there is another method for getting a glimpse of what websites were accessed from your computer. The DNS cache keeps a record of all the domain names accessed by the computer. Here are the steps to check it.
How to permanently delete Google history?
The best way to permanently delete Google history is to use the Clear History option from Chrome itself. This does not delete the History file (which can be restored with data recovery tools) but rather wipes the data from it. Which is much harder to reverse.
Even with sync, Google will take care to delete the history for all your devices registered to the same Google account. The only thing to watch out for then is the DNS cache. Clean that up and your browsing history is permanently removed.
Conclusion
Losing personal data like bookmarks and search history on Google Chrome can be frustrating. Fortunately, there are many methods for getting this data back.
Your search history is backed up in multiple sources, from a local database file on your computer to a log of activity on Google’s servers. You can use data recovery tools or File History to restore the local file, and sign in to your Google account to access your online information. On Windows 10, there are many other methods of file recovery as well.
And if these methods fail, you can always use indirect tricks like cookies or the DNS cache to obtain a rough idea of your search history. Remember that this advice cuts both ways; another person with access to your computer can use these methods to see your search history too.
This article was written by Levin Roy, a Contributing Writer at Handy Recovery Advisor. It was also verified for technical accuracy by Andrey Vasilyev, our editorial advisor.
Curious about our content creation process? Take a look at our Editor Guidelines.