Missing files from your SD card? Aside from human error (accidental deletion), there are a lot of reasons that may have caused the data loss. And if you’re using a Linux machine, there may be fewer options for recovery compared to Microsoft and Apple because it’s less commonly used.
However, it is 100% possible to recover files from an SD card on Linux – and we’ll show you how to do that in this article. We’ll also go through the possible reasons for data loss and what to do about it. Read on!
Is Data Recovery Possible from an SD Card on Linux?
The first step of SD card data recovery on Linux is figuring out what caused the data loss in the first place. This makes it much easier to retrieve your files down the line.
To help you quickly diagnose your SD card and jump to the right solution, we prepared a simple navigation menu:
Reasons for data loss |
Solutions |
😨 Accidental file deletion |
Your files disappear from the operating system, but they still exist in the SD card’s file system and are marked to be overwritten by new data. In this scenario, your data is still easily recoverable. Solution: Recovery Method 2 |
🧹 Accidental formatting |
If you accidentally formatted your SD card, it’s a similar situation as file deletion – your files may have disappeared, but they are still in the file system. Solution: Recovery Method 2 |
📛 SD card corruption |
SD card corruption is usually caused by file system errors. File system errors are commonly triggered by viruses, improper ejection, power outages, and more. Solution: Recovery Guide. Once you’re done with that, follow the Repair Guide. |
💿 SD card isn’t mounted |
Most Linux distributions auto-mount SD cards by default, but some don’t. The feature may also be simply turned off for some reason. In this case, you can’t access the data on your SD card. Solution: Mounting Guide |
🔥 Mechanical or physical damage |
On one hand, certain components may simply be struggling to establish a connection. On the other hand, your SD card may be damaged – they are prone to breakage and weak to extreme temperatures and water. Solutions: try other cables, adapters, and ports. If that doesn’t work or if your SD card is physically damaged, send it to a professional data recovery service. They have the right tools, facilities, and specialists to restore your data safely. |
How to Recover Deleted Data from an SD Card on Linux
Linux SD card recovery can be trickier than doing it on Windows or macOS because it involves working with the Terminal. Don’t worry – we’ll guide you step-by-step through each stage of the process.
Step 1: Mount Your SD Card
Mounting your SD card is an important process that allows your computer to “see” the SD card and access and modify its contents.
Both mechanical and logical issues may prevent your computer from mounting your SD card automatically. It’s also possible that your Linux distribution has the auto-mount setting turned off by default.
If your SD card’s data loss is caused by mounting issues, this step may be enough to make your data reappear.
To mount your SD card manually on your Linux computer:
- Open the Linux Terminal from your application launcher or by hitting the CTRL + ALT + T keys.
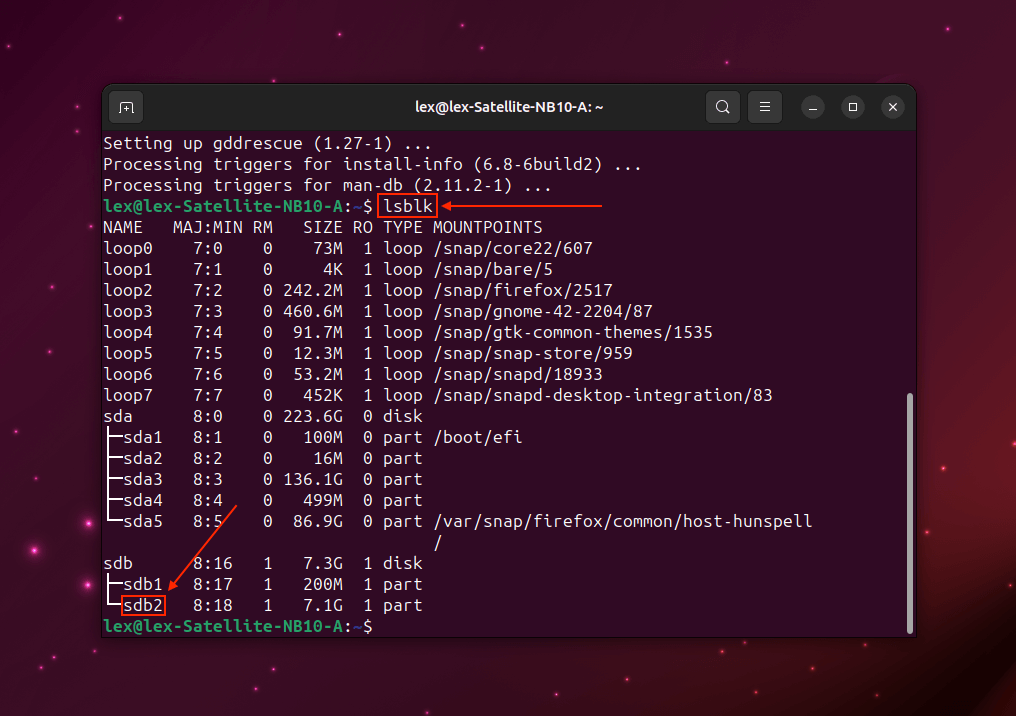
- Type the following command and hit Enter (take note of your SD card’s NAME entry/device ID):
lsblk
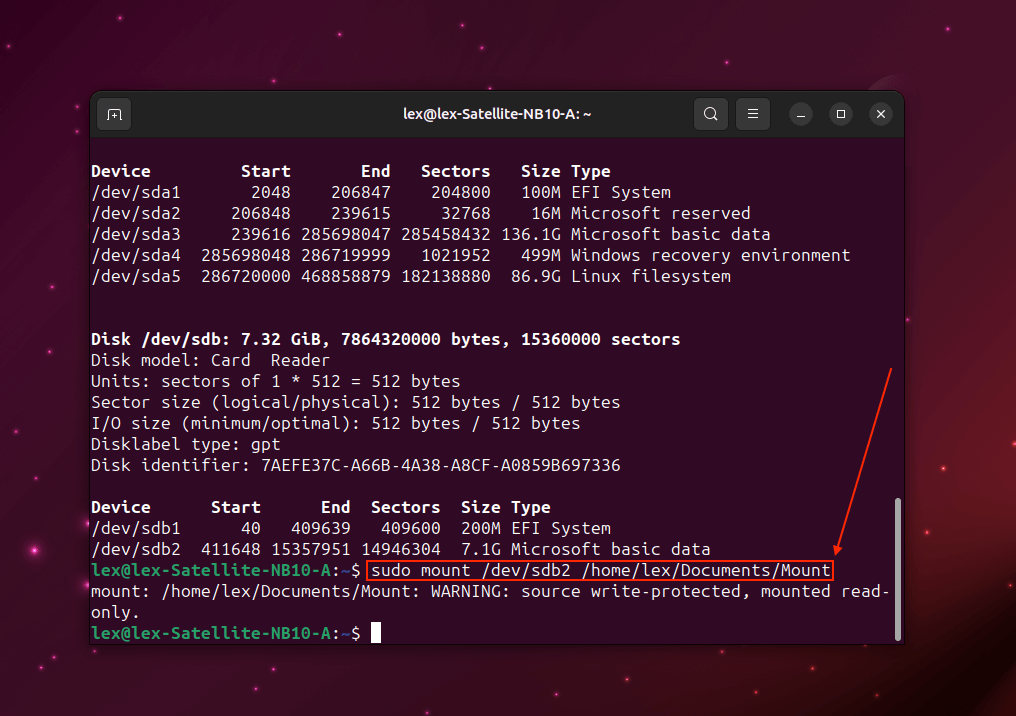
- Type the following command and hit Enter:
sudo mount /dev/(your card’s device ID) /(mount location)
Check the Files window to confirm that your SD card is mounted. From here, you can try accessing your data. If you can’t, proceed to Step 2.
Step 2: Back up Your Data from the SD Card
Once your memory card is mounted, the next step is to back up your data using ddrescue. It’s a free and open-source tool that can create a bit-by-bit copy of your SD card.
We’ll actually be using gddrescue, which is built on top of ddrescue and was created by the same developer. It’s basically ddrescue with additional features.
Creating a backup is important for 2 reasons: (1) in case anything goes wrong, you have a copy of your data. (2) We can use the backup file created by ddrescue as the source of data recovery in Step 3. That way, we can prevent further wear and possible damage to the SD card.
This section is for users with corrupted SD cards. If your data loss scenario involves accidental deletion or formatting, skip to Step 3.
To create a backup of your SD card using ddrescue on Linux:
- Open the Linux Terminal from your application launcher or by hitting the CTRL + ALT + T keys.
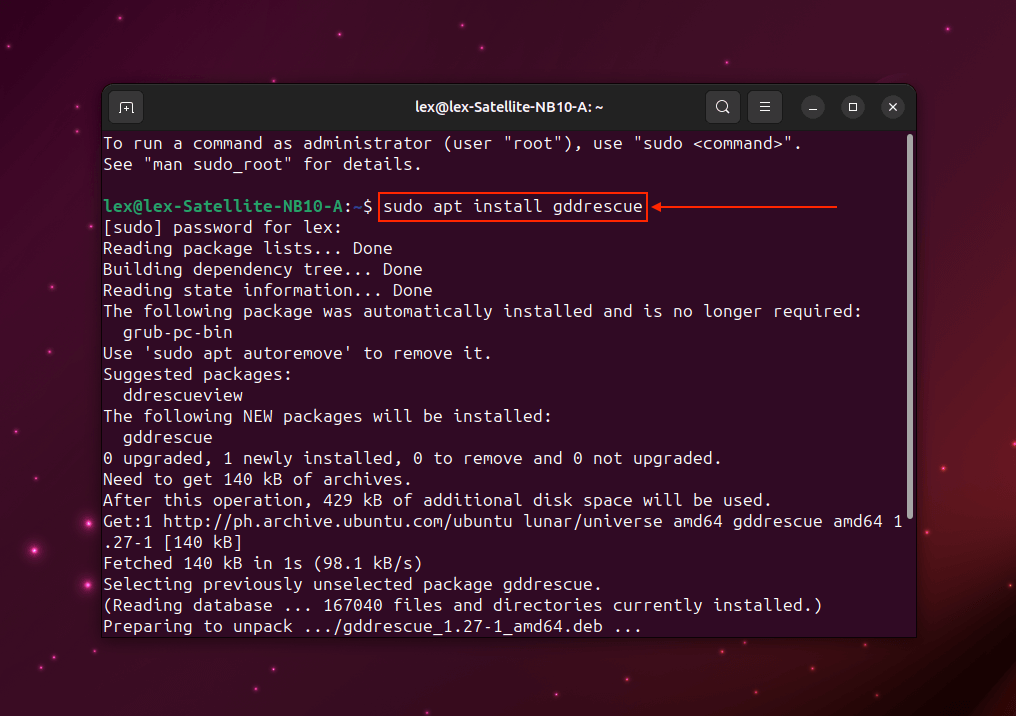
- Type the following command and hit Enter:
sudo apt install gddrescue
- Type the following command and hit Enter (take note of your SD card’s NAME entry).
lsblk
- Type the following command and hit Enter:
sudo ddrescue -d /dev/(your SD card’s NAME) /(path of image file)/(image filename).img

- Wait for the backup process to complete and close the Terminal window.
Take note of your image file’s location path! You’ll need it for Step 3.
Step 3: Recover Files from the SD Card
Once your data is safely backed up to a secure location, we can proceed with the recovery. Below are 2 different methods that deal with the 2 main data loss scenarios: deletion/formatting and corruption.
- If you want to recover a corrupted SD card on Linux, use Method 1.
- If you accidentally formatted your SD card or you want to recover deleted files from your SD card on Linux, use Method 2.
Method 1: Using TestDisk
If you encountered data loss due to SD card corruption, the recovery process is a little bit different than restoring deleted data. That’s because this case of data loss may likely be caused by issues with the file system. By repairing the file system, we can regain access to the data.
For this task, we’ll use a free and open-source tool called TestDisk. TestDisk is a well-known software created by CGSecurity and it was designed to restore data by recovering lost or damaged partitions. It’s a great Ubuntu SD card recovery tool, but it also works with other popular Linux distributions like Arch Linux, Kali Linux, Linux Mint, etc.
To repair your SD card’s corrupted partition using TestDisk:
- Make sure your SD card is securely connected and mounted (here’s the mounting guide).
- Open the Linux Terminal from your application launcher or by hitting the CTRL + ALT + T keys.
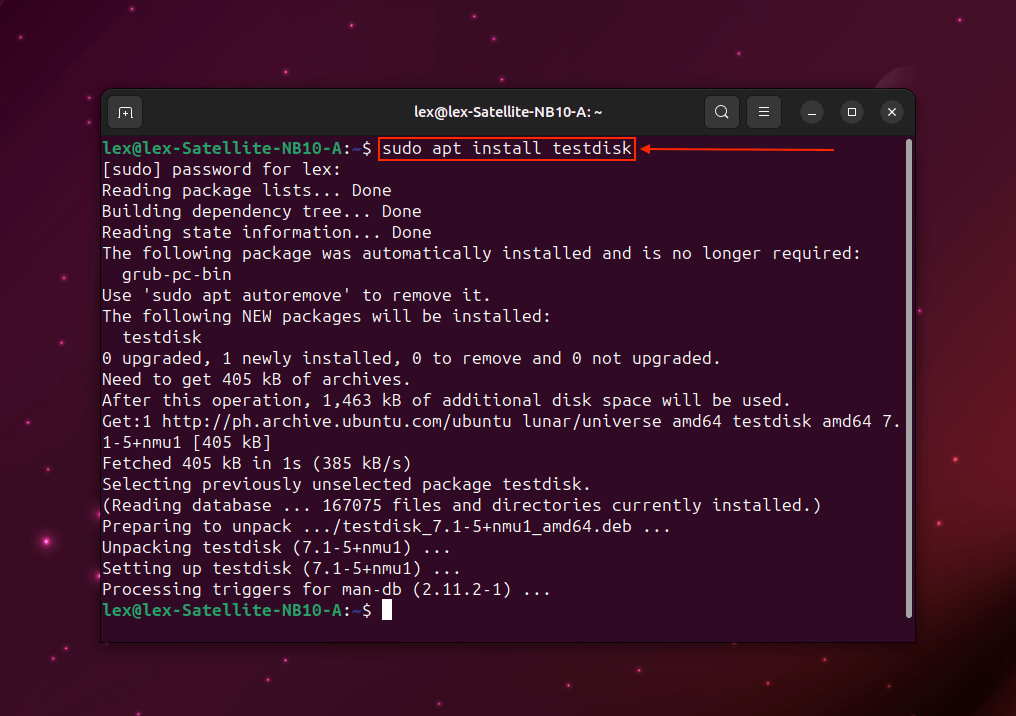
- Type the following command and hit Enter:
sudo apt install testdisk
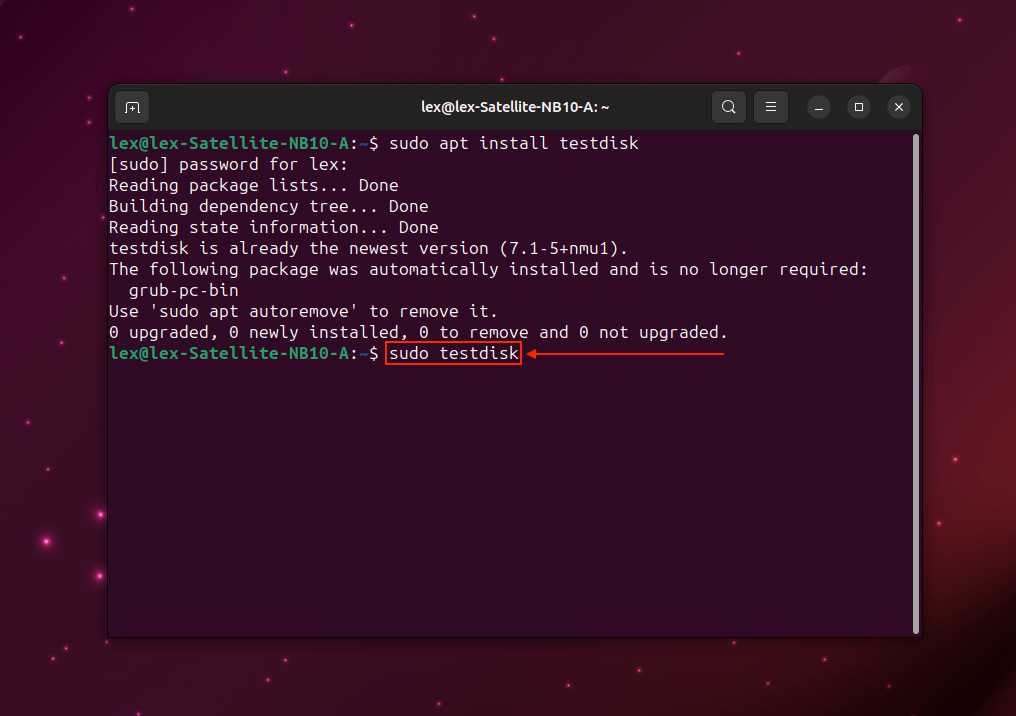
- Once the installation process is complete, type the following command and hit Enter:
testdisk
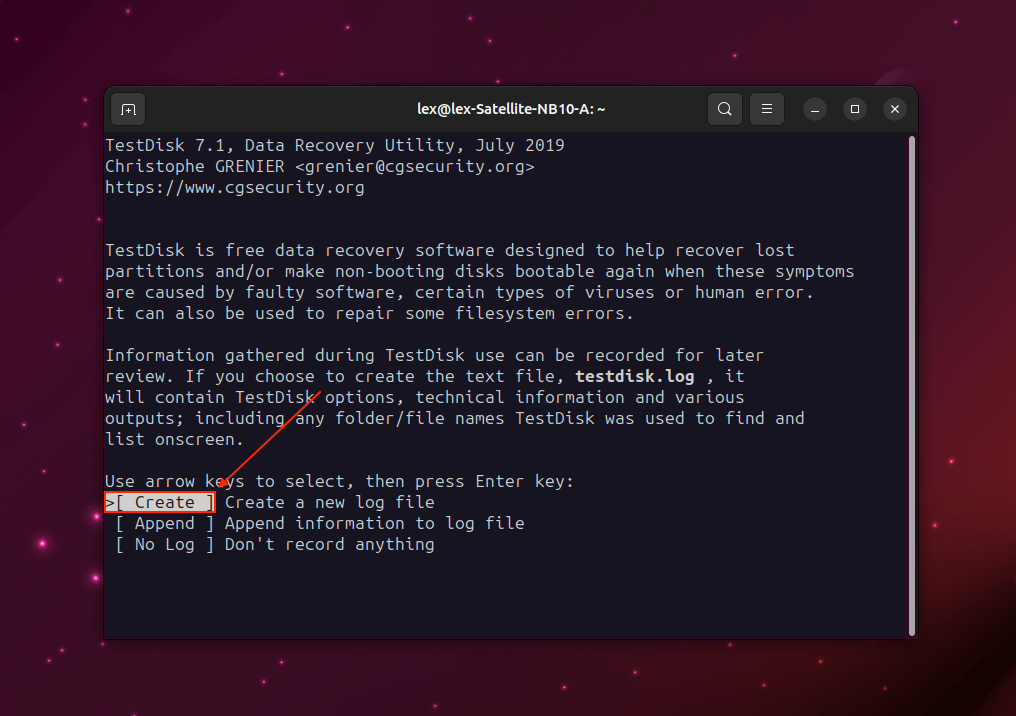
- Use the up and down arrow keys to highlight Create and hit Enter.
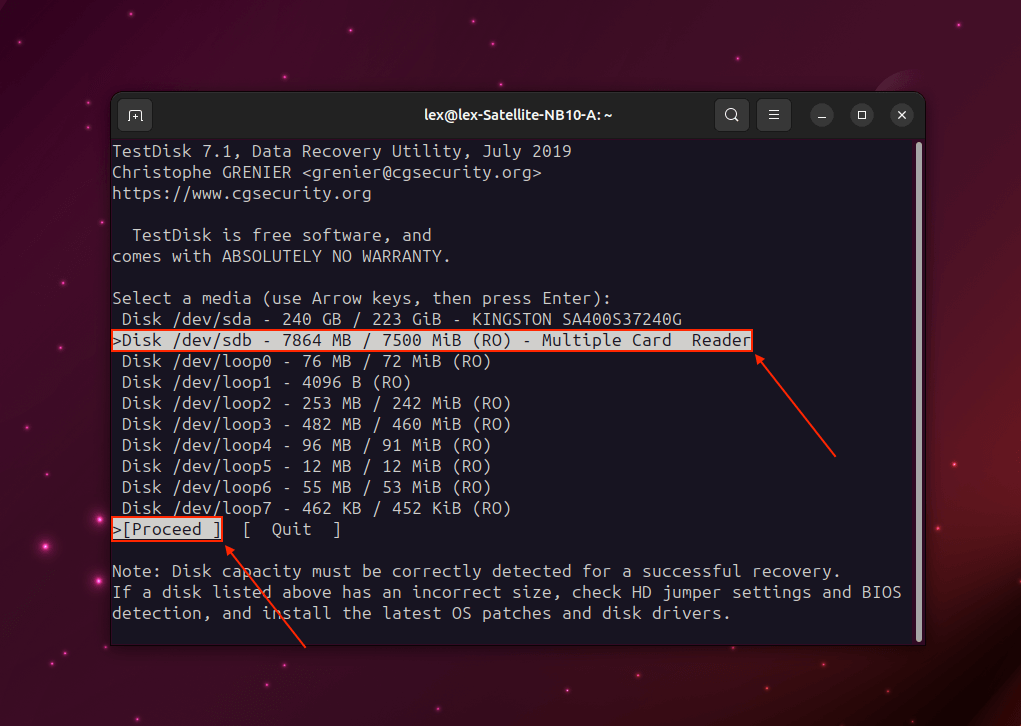
- Use the up and down arrow keys to select your SD card’s image backup. Use the left and right arrow keys to select Proceed and hit Enter.
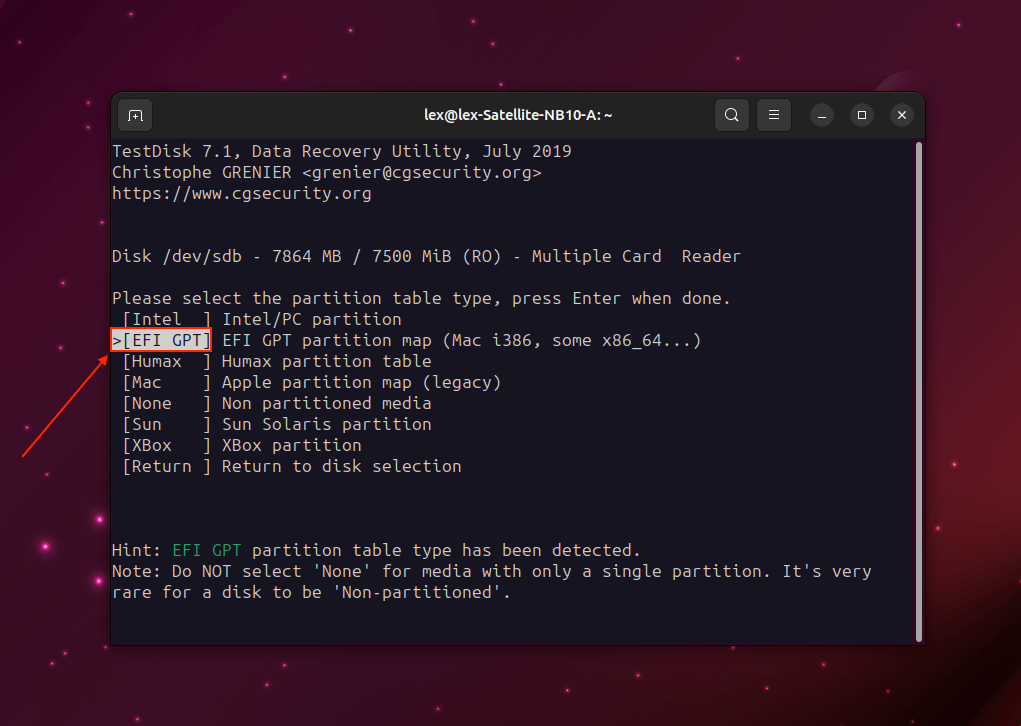
- Hit Enter to select the partition TestDisk automatically detected and hit Enter again to select the Analyse option when prompted.
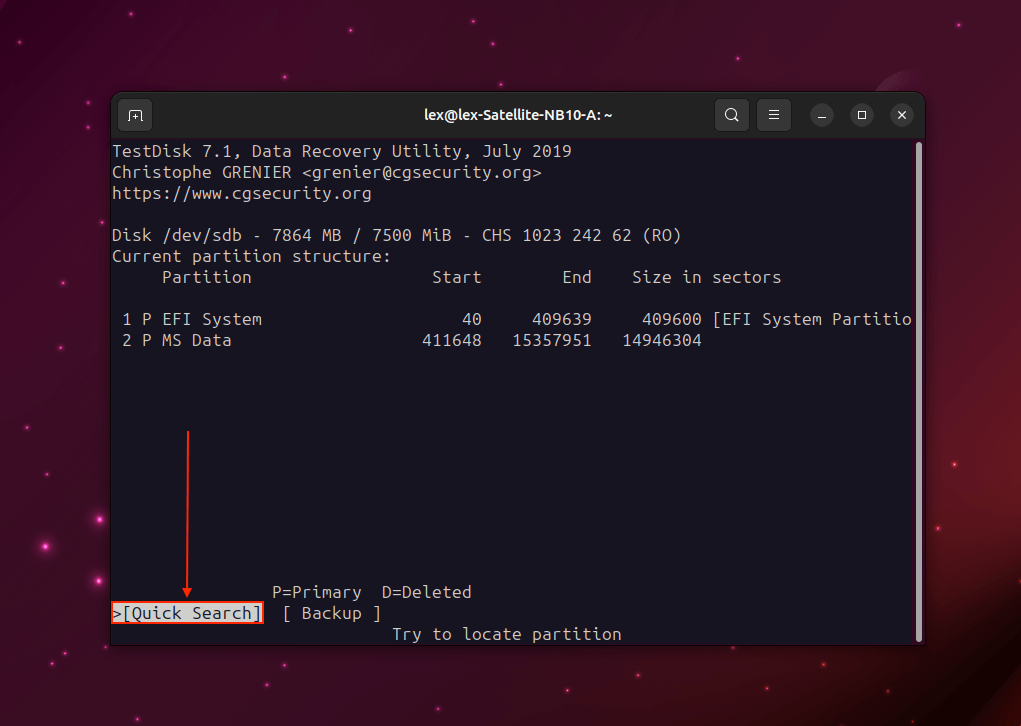
- Hit Enter again while selecting the Quick Search option.
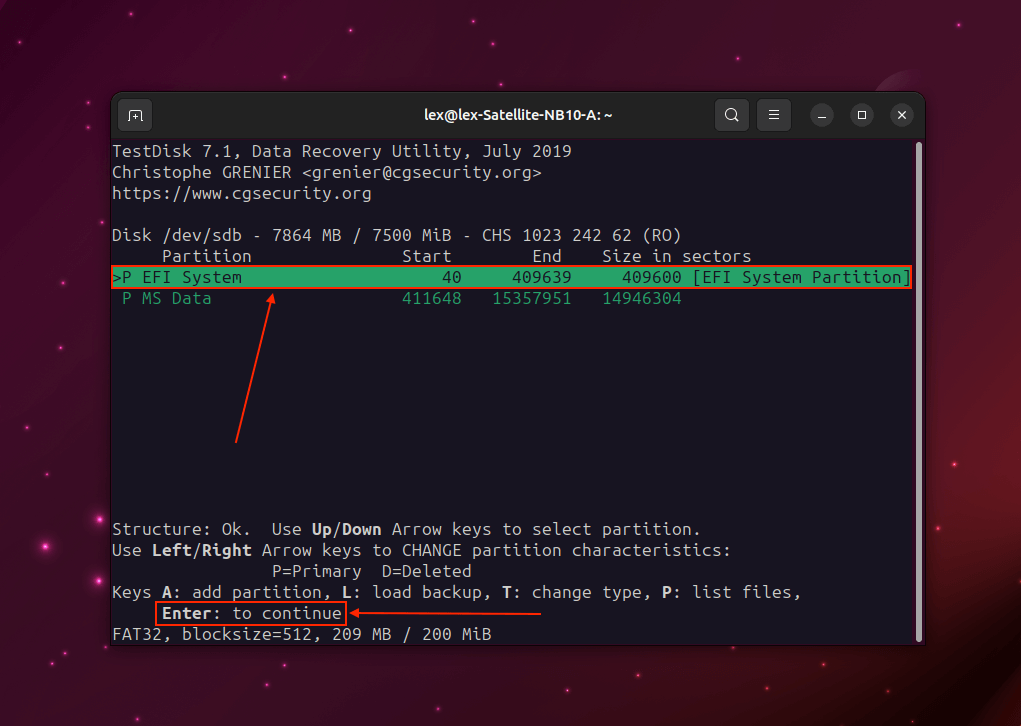
- At this point, TestDisk may find missing partitions. Use the up and down arrow keys to select the partition you want to recover, and hit Enter.
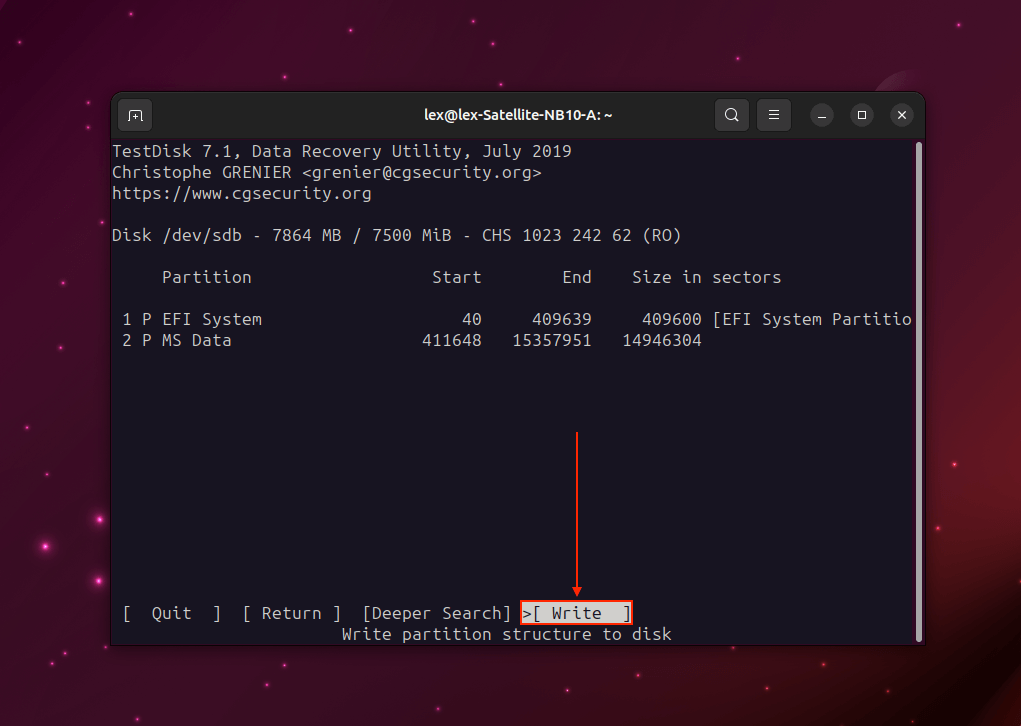
- Use the left and right arrow keys to highlight Write and hit Enter to restore the partition. If TestDisk failed to locate missing partitions using Quick Search, select Deeper Search and hit Enter.
Method 2: Using PhotoRec
If you accidentally deleted or formatted your data, it’s still present in your drive’s file system. However, it’s marked to be overwritten by new files – so you have to recover your data before that happens.
For this task, we’ll be using a tool called PhotoRec. PhotoRec is the sister software of TestDisk, the tool we used to restore our corrupted SD card. While TestDisk restores your data by fixing your SD card’s file system, PhotoRec is designed to restore the files themselves.
Like TestDisk, PhotoRec works with all major Windows, Mac, and Linux-based file systems. These include exFAT, FAT32, NTFS, HFS+, ext2, ext3, and ext4. It’s a great option for Kali Linux SD card recovery, but it also works for Ubuntu, Linux Mint, and other popular Linux distributions.
While PhotoRec performs really well for the majority of known file types, it may not provide the same coverage as newer data recovery software. It also can’t recover original file names and folder structure.
To recover deleted files from your SD card using PhotoRec:
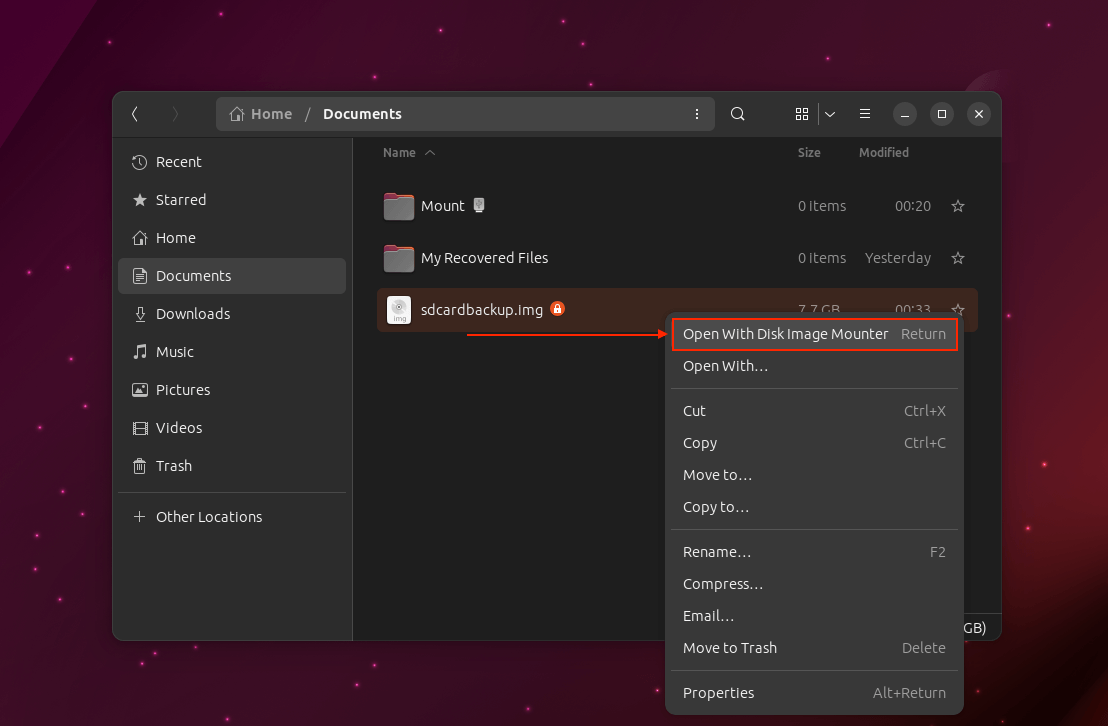
- Right-click the image backup we created in Step 2 and click Open With Disk Image Mounter.
- Open the Linux Terminal from your application launcher or hit the CTRL + ALT + T keys.
- Type the following command and hit Enter:
sudo apt install testdisk
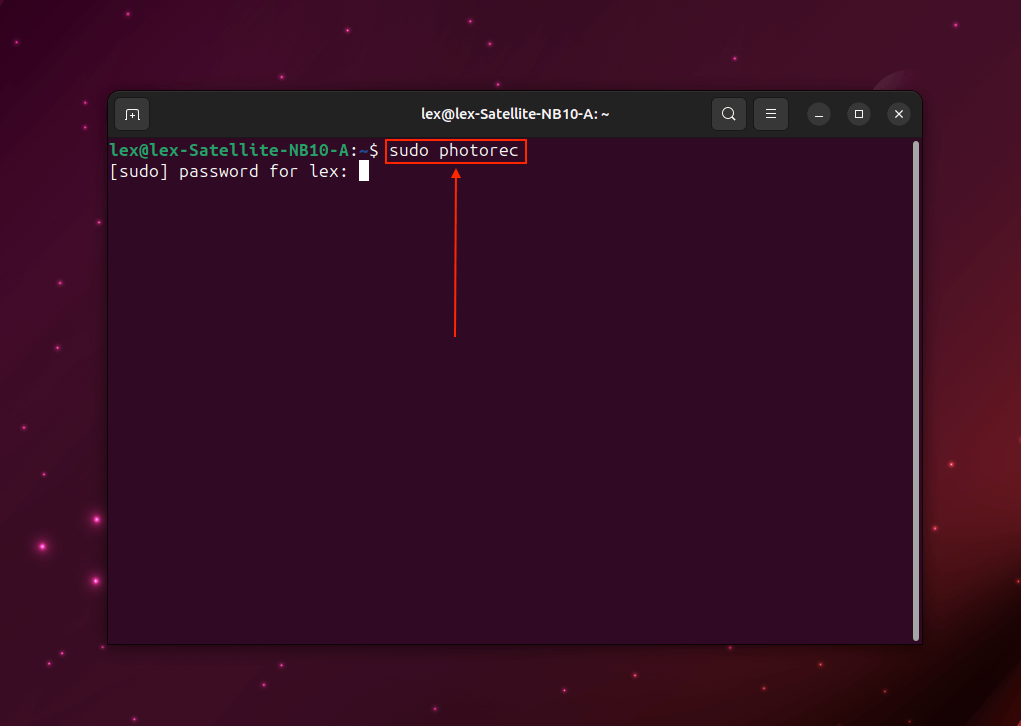
- Type the following command and hit Enter:
sudo photorec
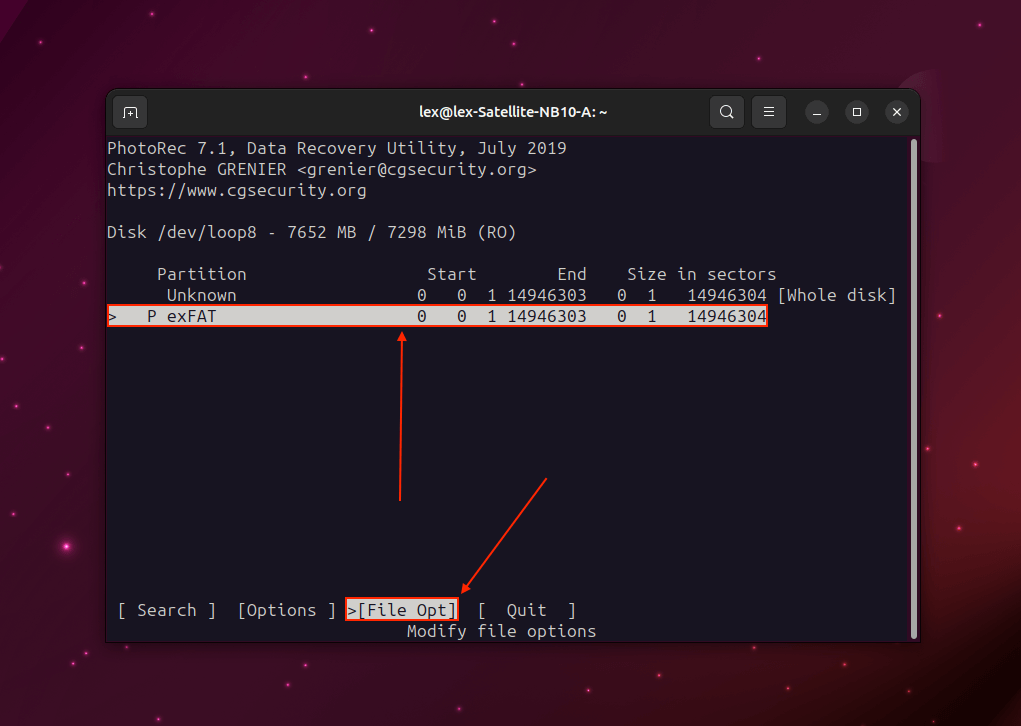
- Use your up and down arrow keys to select your image backup (you’ll know by its size) and use your arrow keys to select Proceed. Then, use your arrow keys to select File Opt and hit Enter.
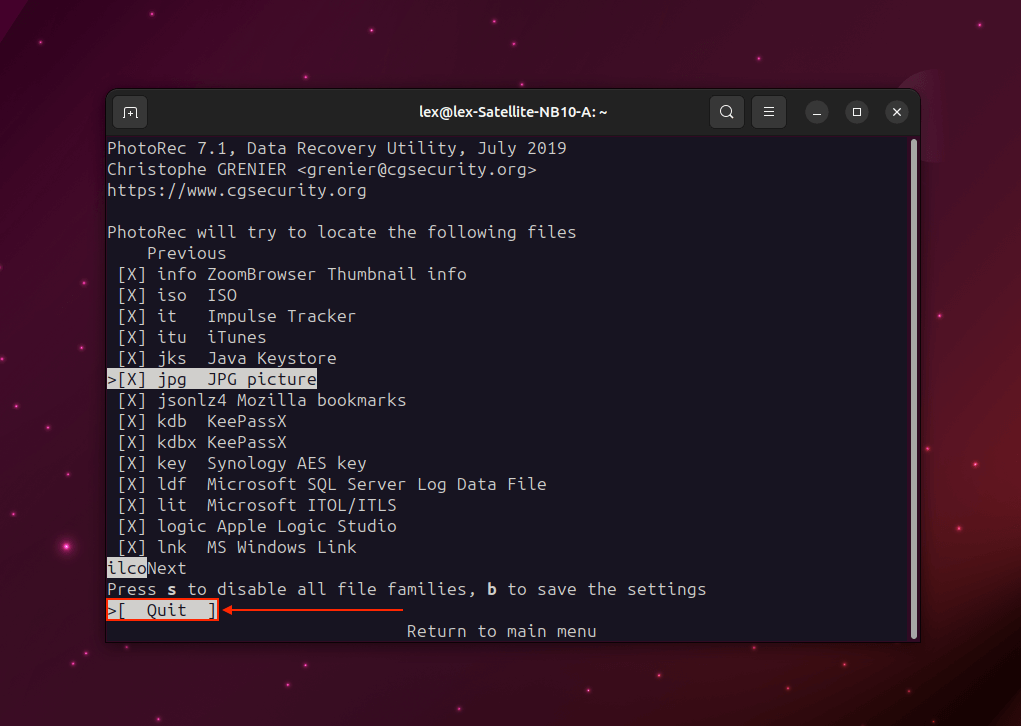
- Make sure the files you want to recover are selected. Then hit Enter again on Quit to return to the previous menu.
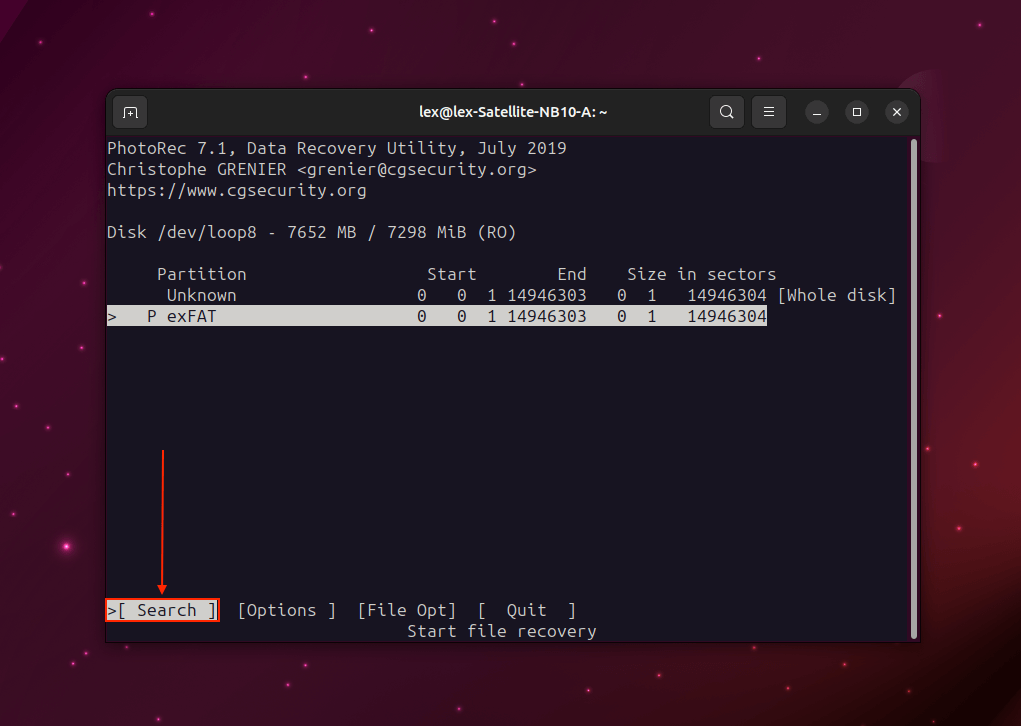
- Use your arrow keys to select Search and hit Enter.
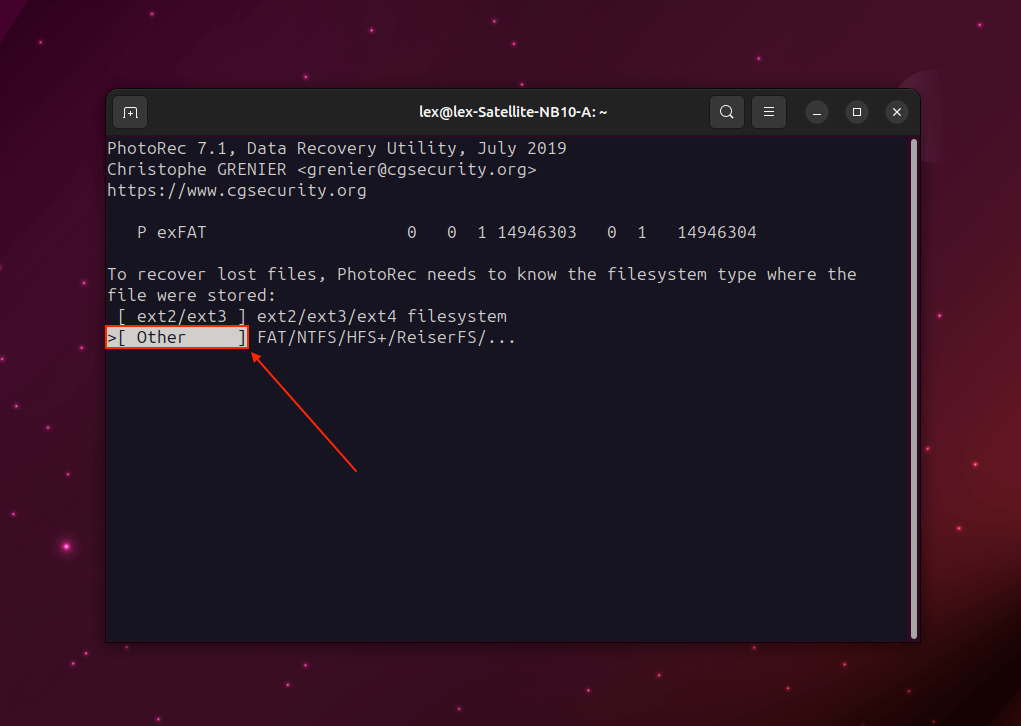
- Use your arrow keys to select Other and hit Enter.
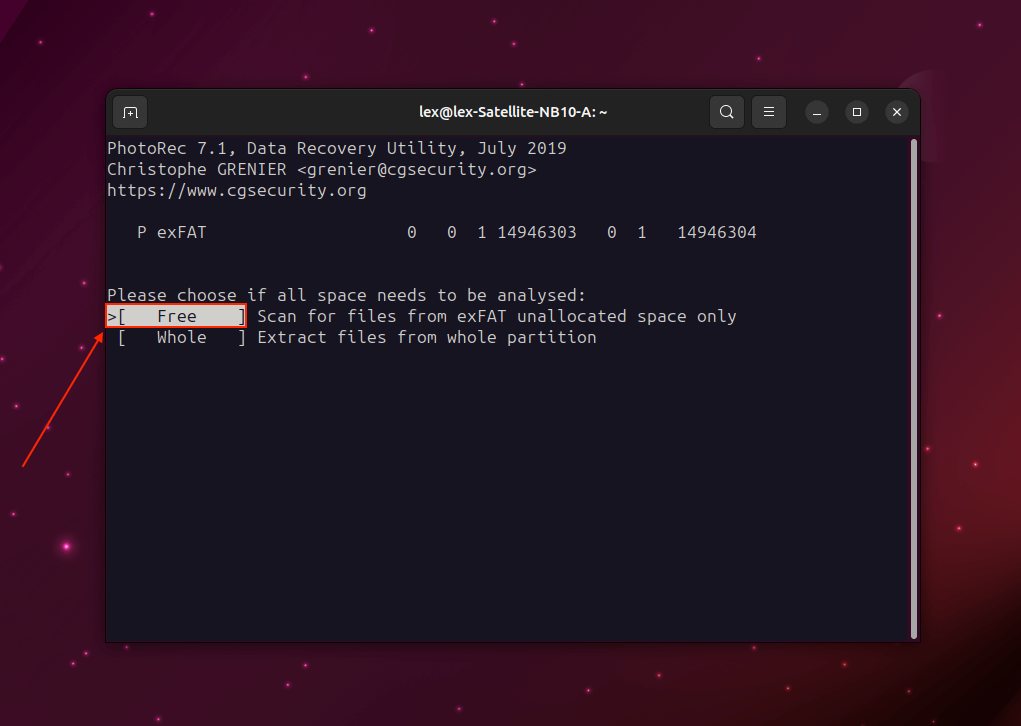
- Use your arrow keys to select Free and hit Enter.
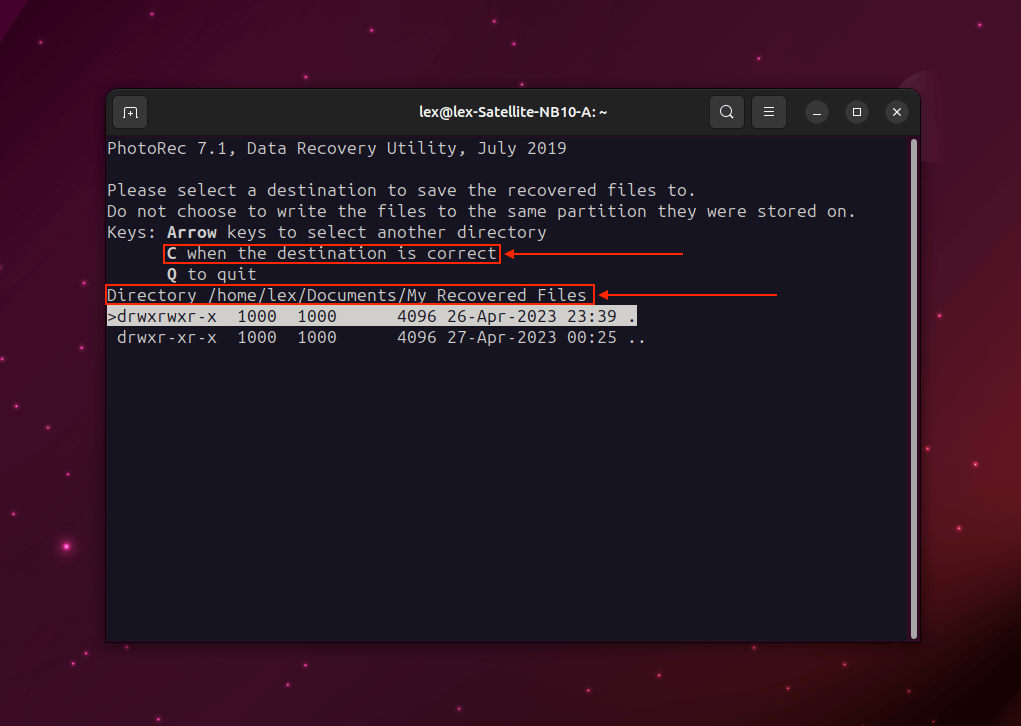
- Use your up and down arrow keys to select folders and use the left and right arrow keys to open selected folders. Once you’re satisfied with the destination, hit C to recover your SD card.
- Once the recovery process is complete, hit Enter to quit PhotoRec.
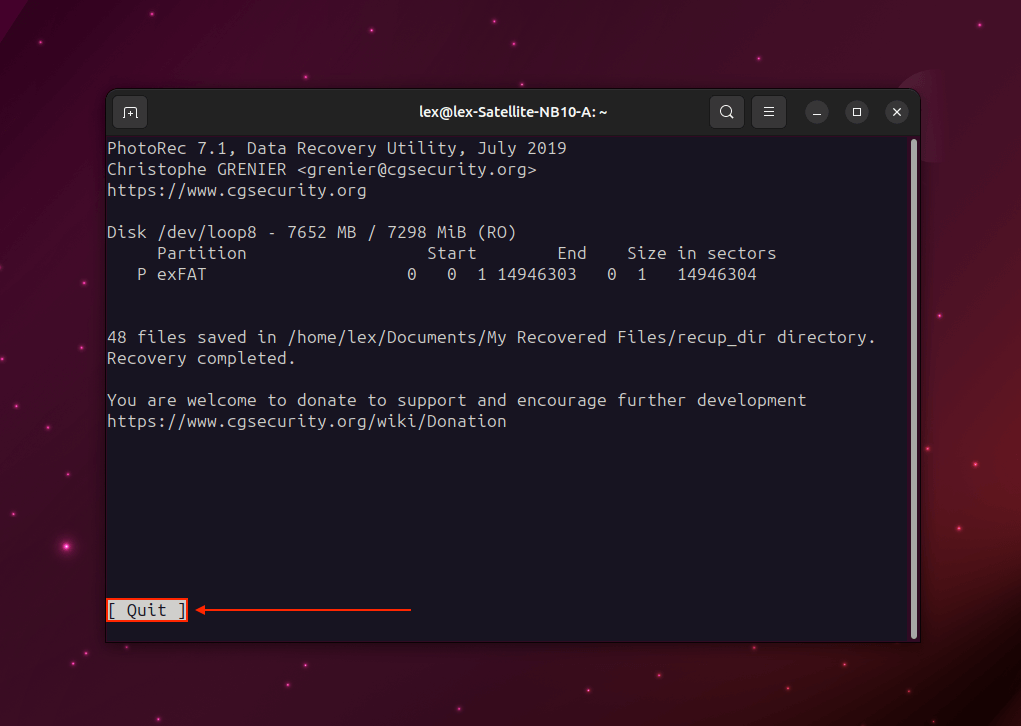
You’ll find your recovered files in a folder called recup_dir or similar in the destination you set in step 11.
How to Fix a Corrupted SD Card on Linux
Once you’ve restored your data and secured it in a safe location, we can safely attempt to repair the SD card. Note that both methods we’ll teach you below will indirectly and/or directly cause data loss. So make sure you’ve followed our Recovery Guide before proceeding!
Method 1: Repair the SD Card Partition Using GNOME Disk Utility
As we briefly mentioned earlier in the article, file system errors are the most common cause of SD card corruption because so many factors can trigger it.
Fortunately, Linux comes shipped with a tool called GNOME Disk Utility. GNOME Disk Utility provides a few useful disk management tools – we’ll be using a feature called Check Filesystem. Check Filesystem will automatically check for errors on your SD card’s file system and try to fix them.
To repair your SD card partition using GNOME Disk Utility:
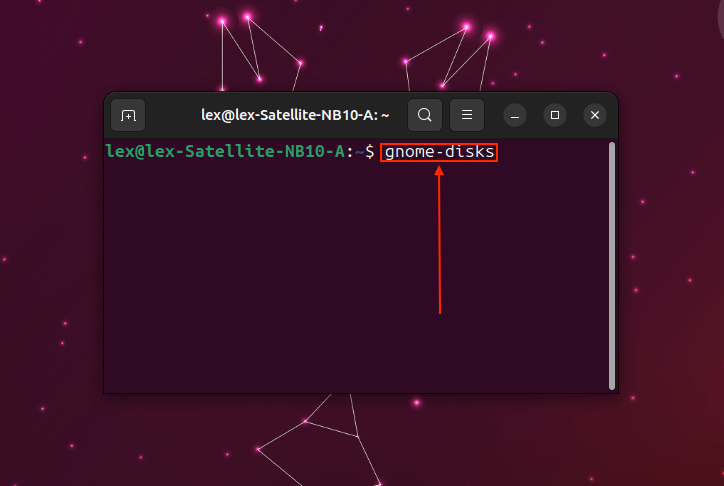
- Open the Disks app from your application launcher or by executing the following command in Terminal:
gnome-disks
- Select your SD card from the left sidebar. Then, click the gear icon and click Check Filesystem…
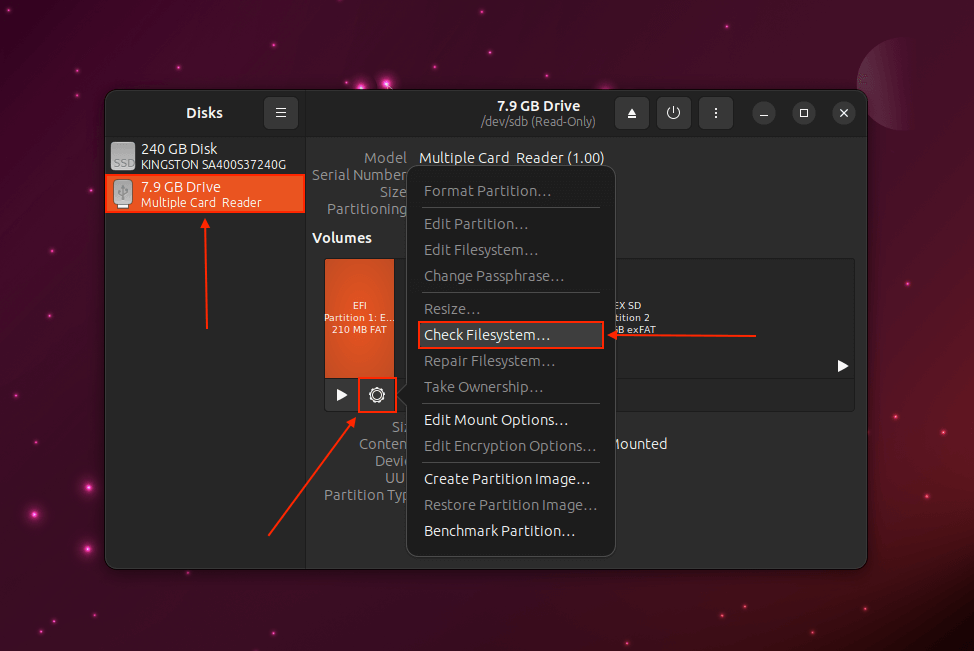
- Click OK to confirm the action.

Method 2: Format the SD Card
The second and (in our opinion) superior way to repair your SD card is by formatting it. Formatting your SD erases everything and creates a brand-new file system. Formatting your SD card will also mark bad sectors and avoid using them to store data, lowering the chances of data loss significantly.
For this task, we’ll be using the GNOME Disk Utility again. To format your SD card on Linux using GNOME Disk Utility:
- Open the Disks app from your application launcher or by executing the following command in Terminal:
gnome-disks
- Select your SD card on the left sidebar. On the right pane, click the gear icon > Format Partition…
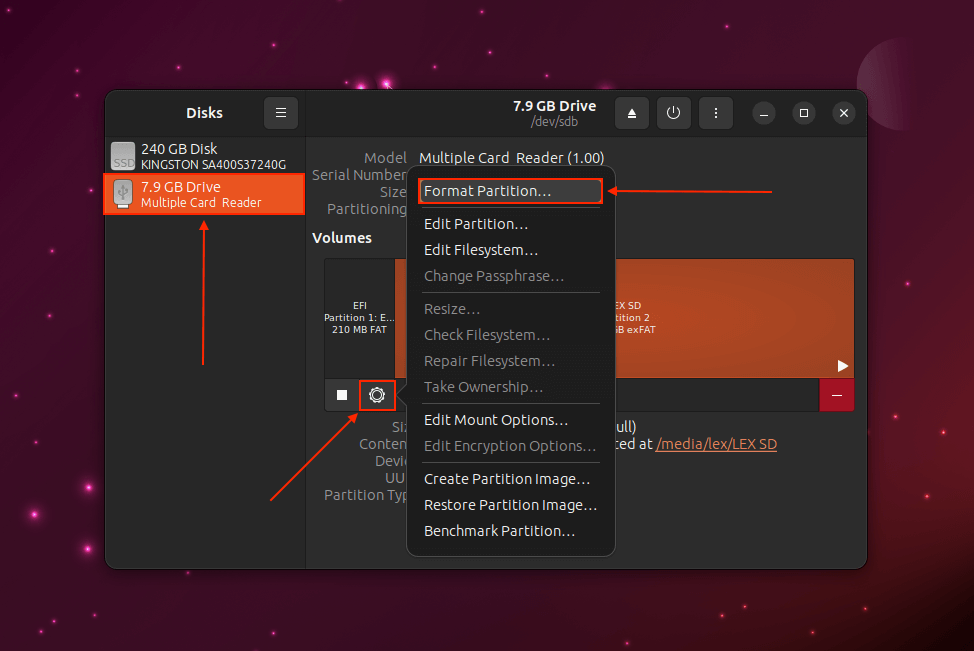
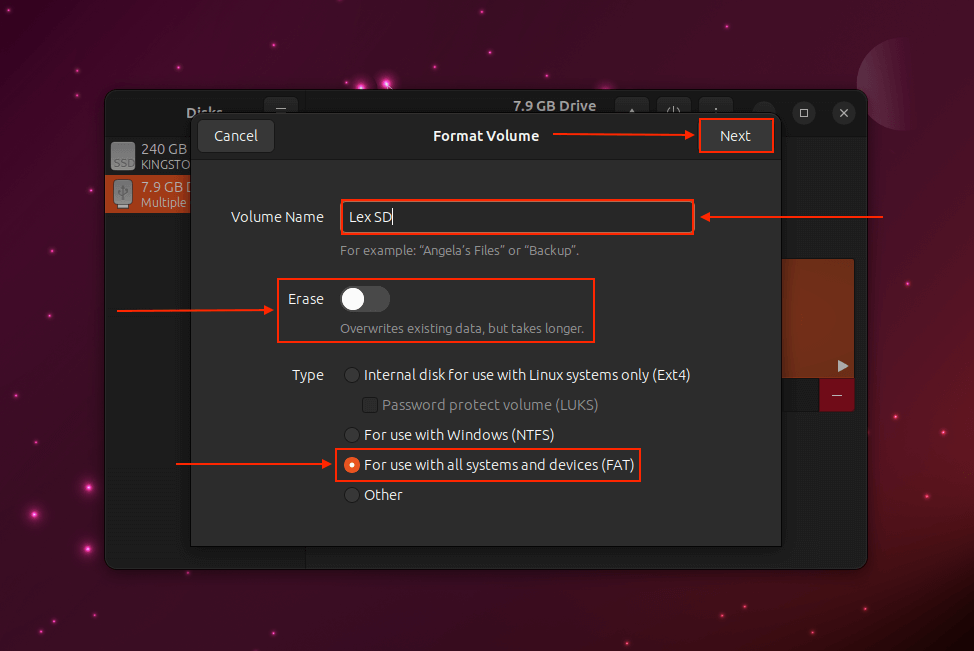
- Name your SD card and select For use with all systems and devices (FAT). You can turn Erase on if your SD card is corrupted. Then, click Next.
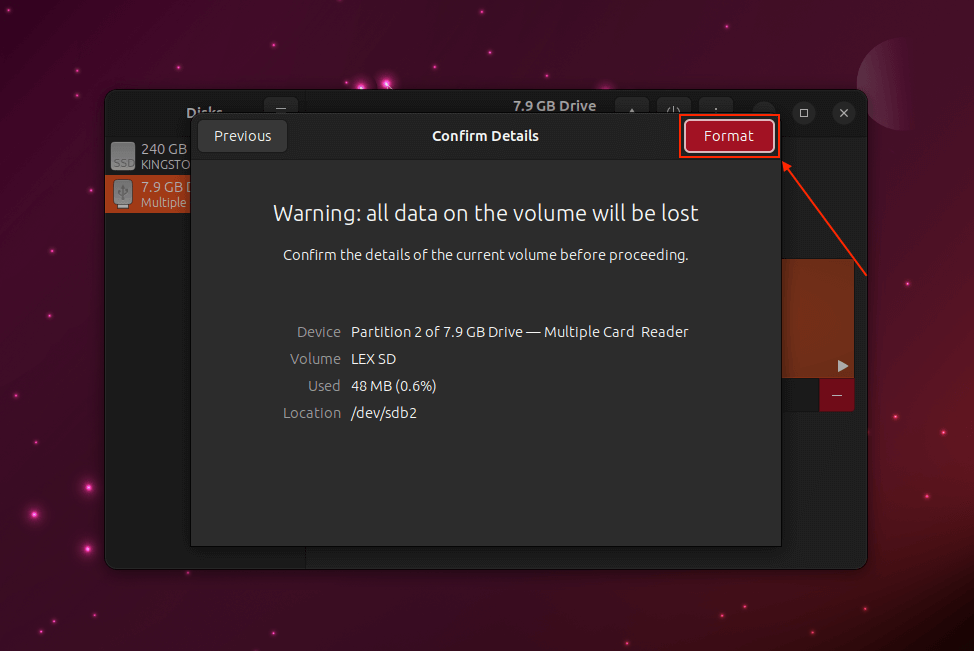
- Click Format to confirm the action.
FAQ
How to recover data from an SD card in Ubuntu?
To recover data from an SD card in Ubuntu:
- Mount your SD card.
- Back up your data from the SD card. We suggest using ddrescue to create an image backup.
- If your SD card is corrupted, use TestDisk to repair the corrupted partition and regain access to your data. If you accidentally deleted your data or formatted your SD card, use PhotoRec. Both tools are free and open-source.
How to recover deleted photos from an SD card on Linux?
To recover deleted photos from an SD card on Linux, use the free and open-source tool PhotoRec. You can install it by executing sudo apt install testdisk in the Terminal. Follow the instructions in the program.
Why is Linux not detecting my SD card?
Here are possible reasons why Linux is not detecting your SD card (and what to do about it):
- There is a mechanical issue with your cable, adapter, or ports. Try replacing your equipment or connecting your SD card to another computer.
- Your SD card isn’t mounted. Mount it in Terminal using the following command: sudo mount /dev/(your card’s device ID) /(mount location)
- Your SD card is corrupted. (1) Create an image backup of your SD card. (2) Recover data from the image backup using data recovery software. (3) Use GNOME Disk Utility to repair your SD card’s file system or simply format your SD card. Note that your data will be erased upon formatting.
- Your SD card is physically damaged. Send your SD card to a reliable data recovery service. DIY recovery attempts will likely worsen the SD card’s condition.
Conclusion
Thanks to software like TestDisk and PhotoRec, recovering data from your SD card on Linux is made easier. However, remember that corrupted SD cards require a bit more preparation. Fortunately, all the tools you need to recover and even fix your SD card are free, open-source, and/or come already installed in Linux!
This article was written by Alejandro Santos, a Staff Writer at Handy Recovery Advisor. It was also verified for technical accuracy by Andrey Vasilyev, our editorial advisor.
Curious about our content creation process? Take a look at our Editor Guidelines.