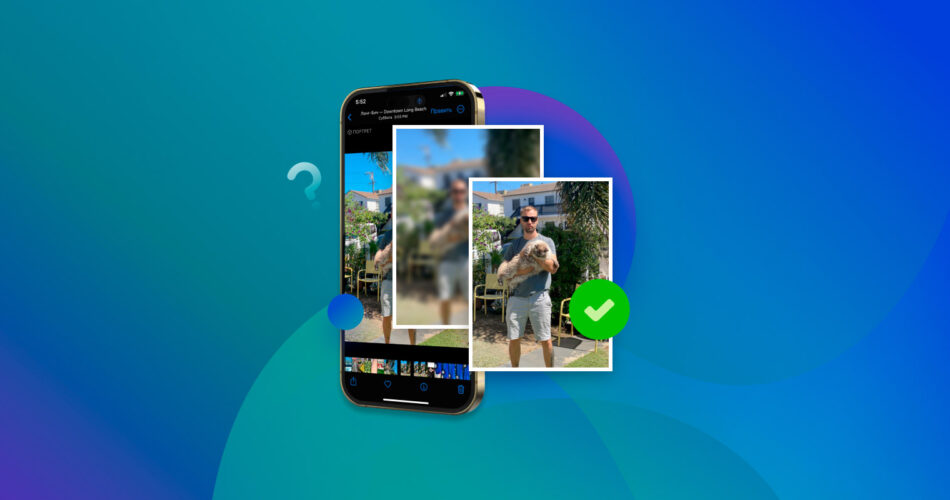
Were you expecting to see great shots in your library and found that they’re all blurry? Meh. Whether it’s due to bad lighting, sudden camera movements, or wrong focus, the fact is that these images would be hard to work on if not edited correctly.
In this article, I’ll discuss how to fix blurry pictures on iPhone by adjusting their sharpness, using AI-powered tools, and trying third-party apps. I’ve also packed some tips for you to avoid taking blurry images in the future.
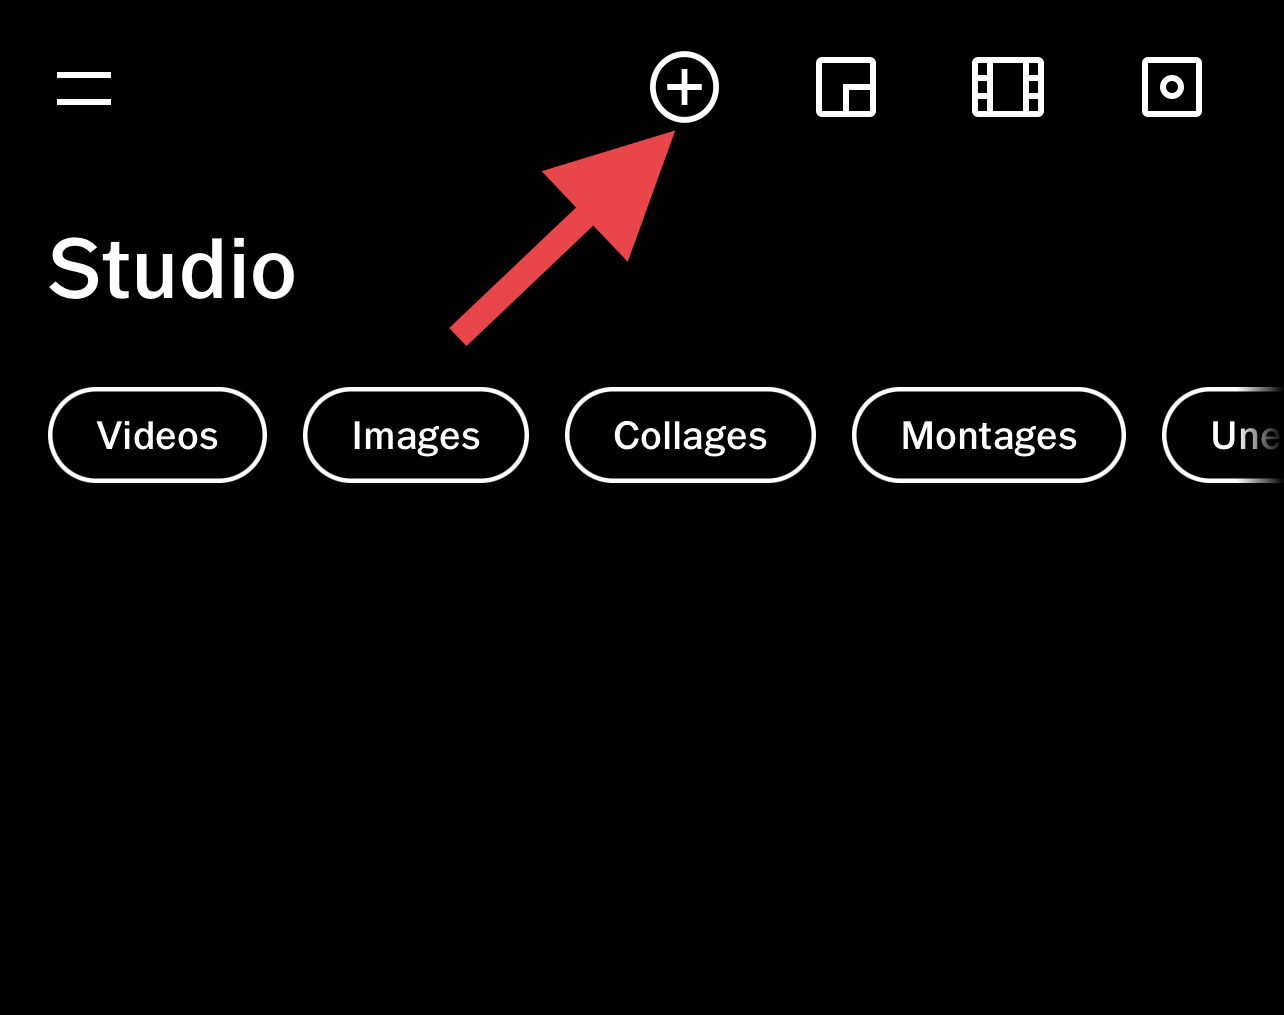
Is It Possible to Make a Blurry Picture Clear on iPhone?
You can still restore blurry images that you take on your iPhone, but it depends on how much the image is blurred. Nothing else can be done if it’s too blurry. There are multiple approaches to this, including the following:
- Using the native Photos app on the iPhone
- Using online photo editors (classic tools and AI)
- Using third-party apps from the App Store
How to Unblur Photos on iPhone
Our methods below will help make a picture clearer on iPhone only if it’s fixable. Examples include grainy pictures and those with soft blur, motion blur, and lens blur. Note that you cannot unblur images that have been intentionally blurred (or pixelated) using photo editors.
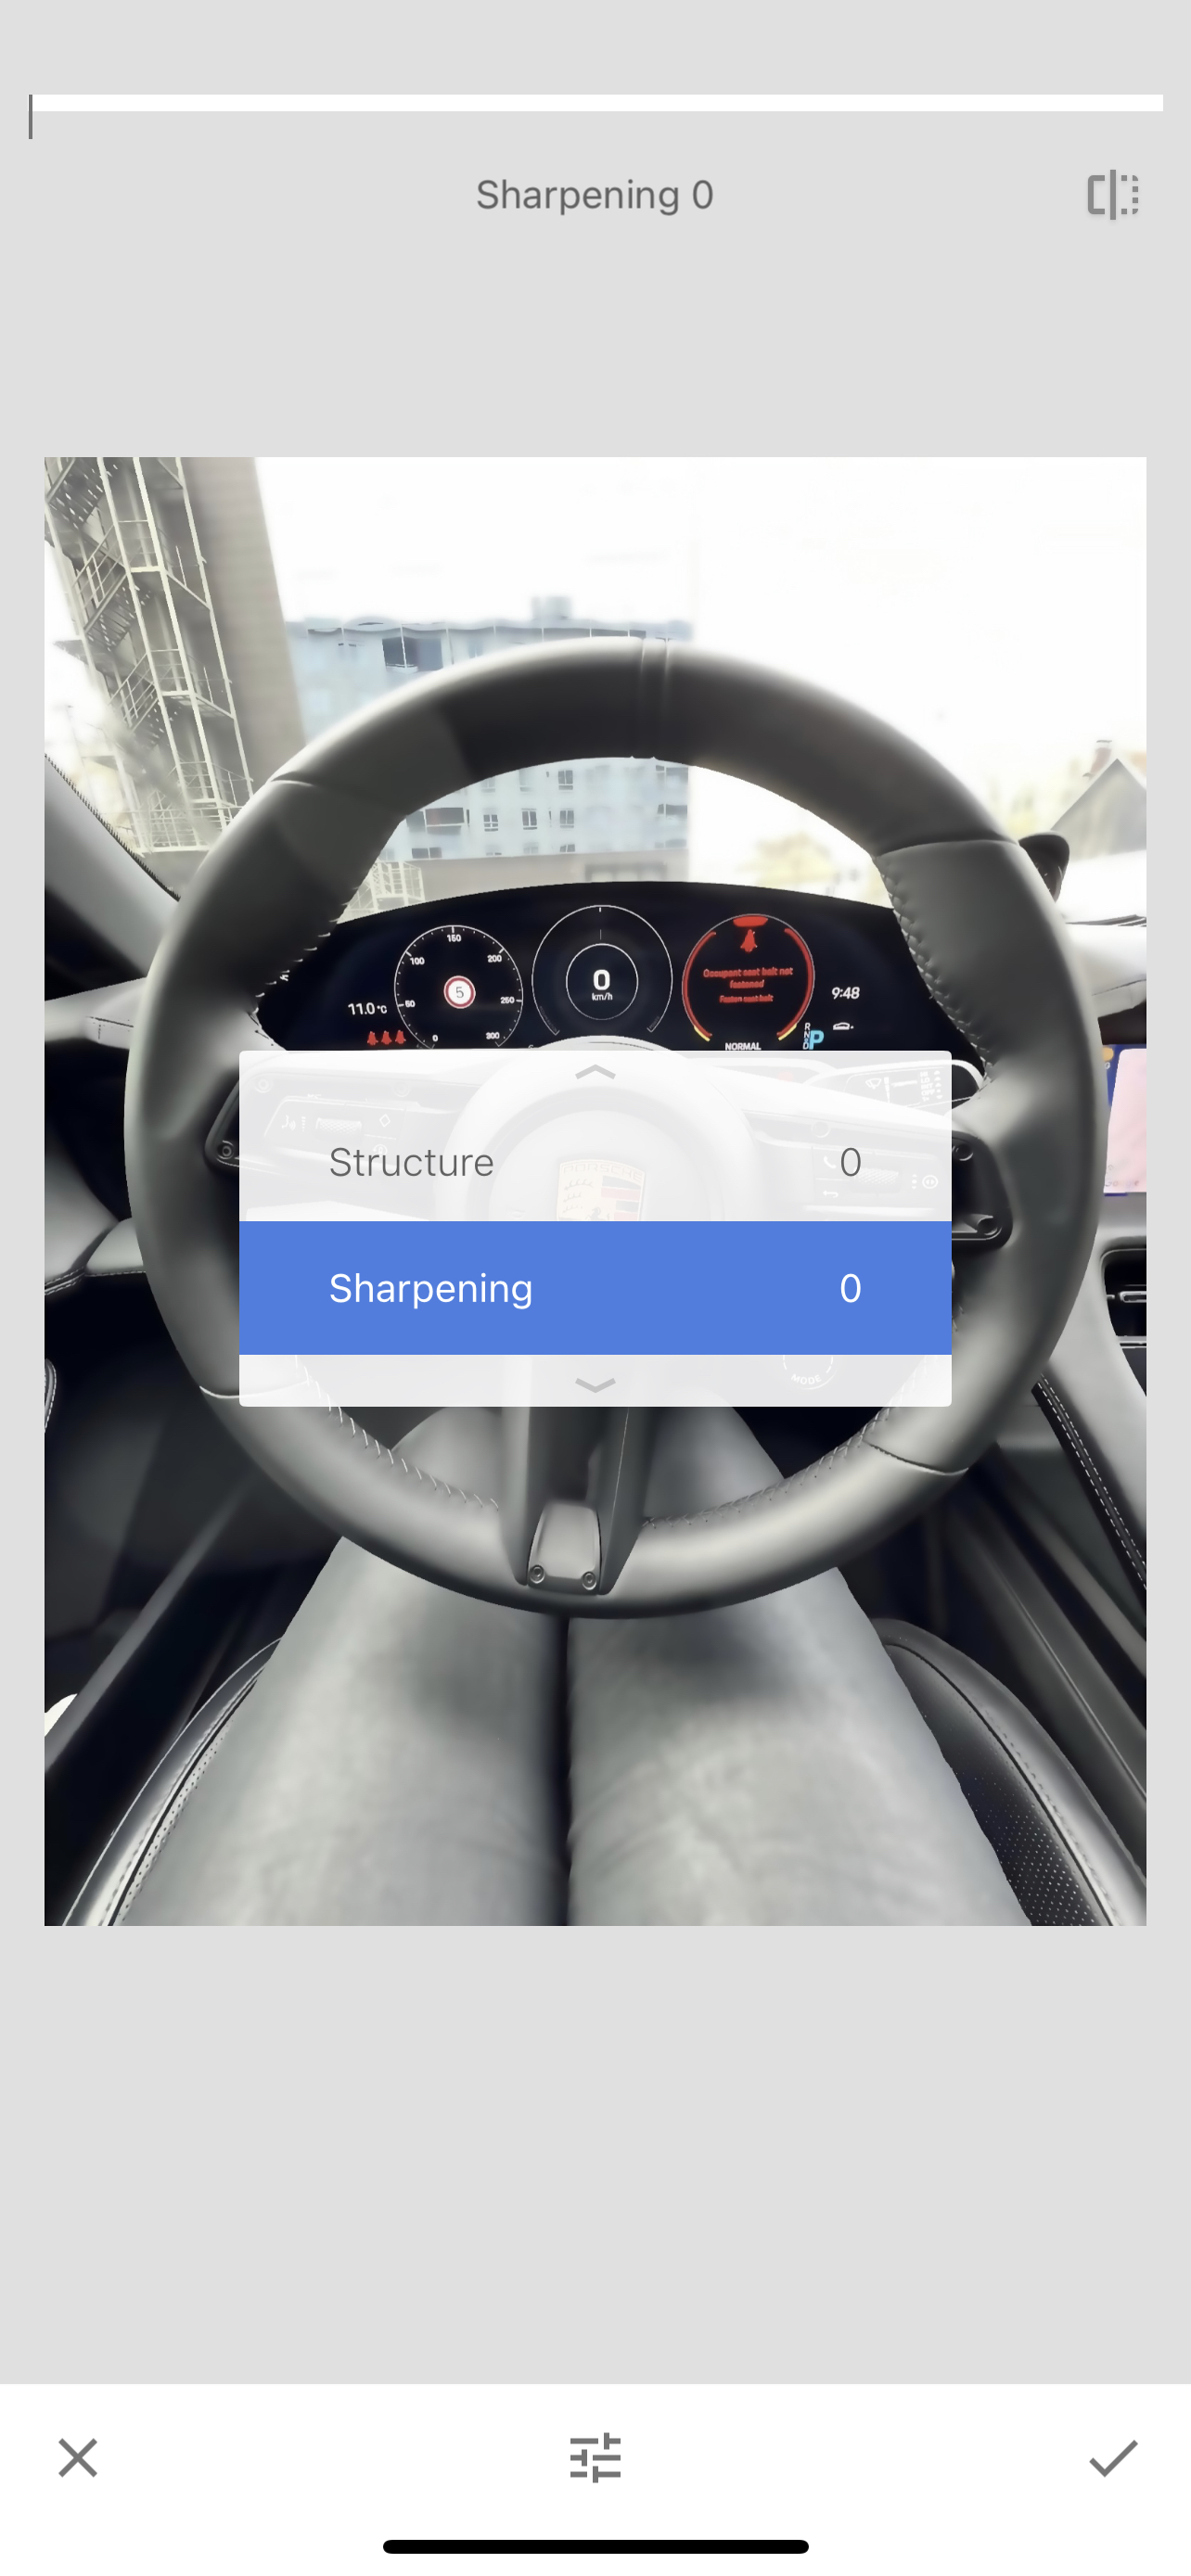
Method 1: Using Photos App
You can manually adjust their photo quality to fix blurred images. Particularly, you want to increase the sharpness attribute to make a picture less blurry on iPhone. The Photos app allows you to do this using the in-built Adjust tool.
To get started, follow these steps:
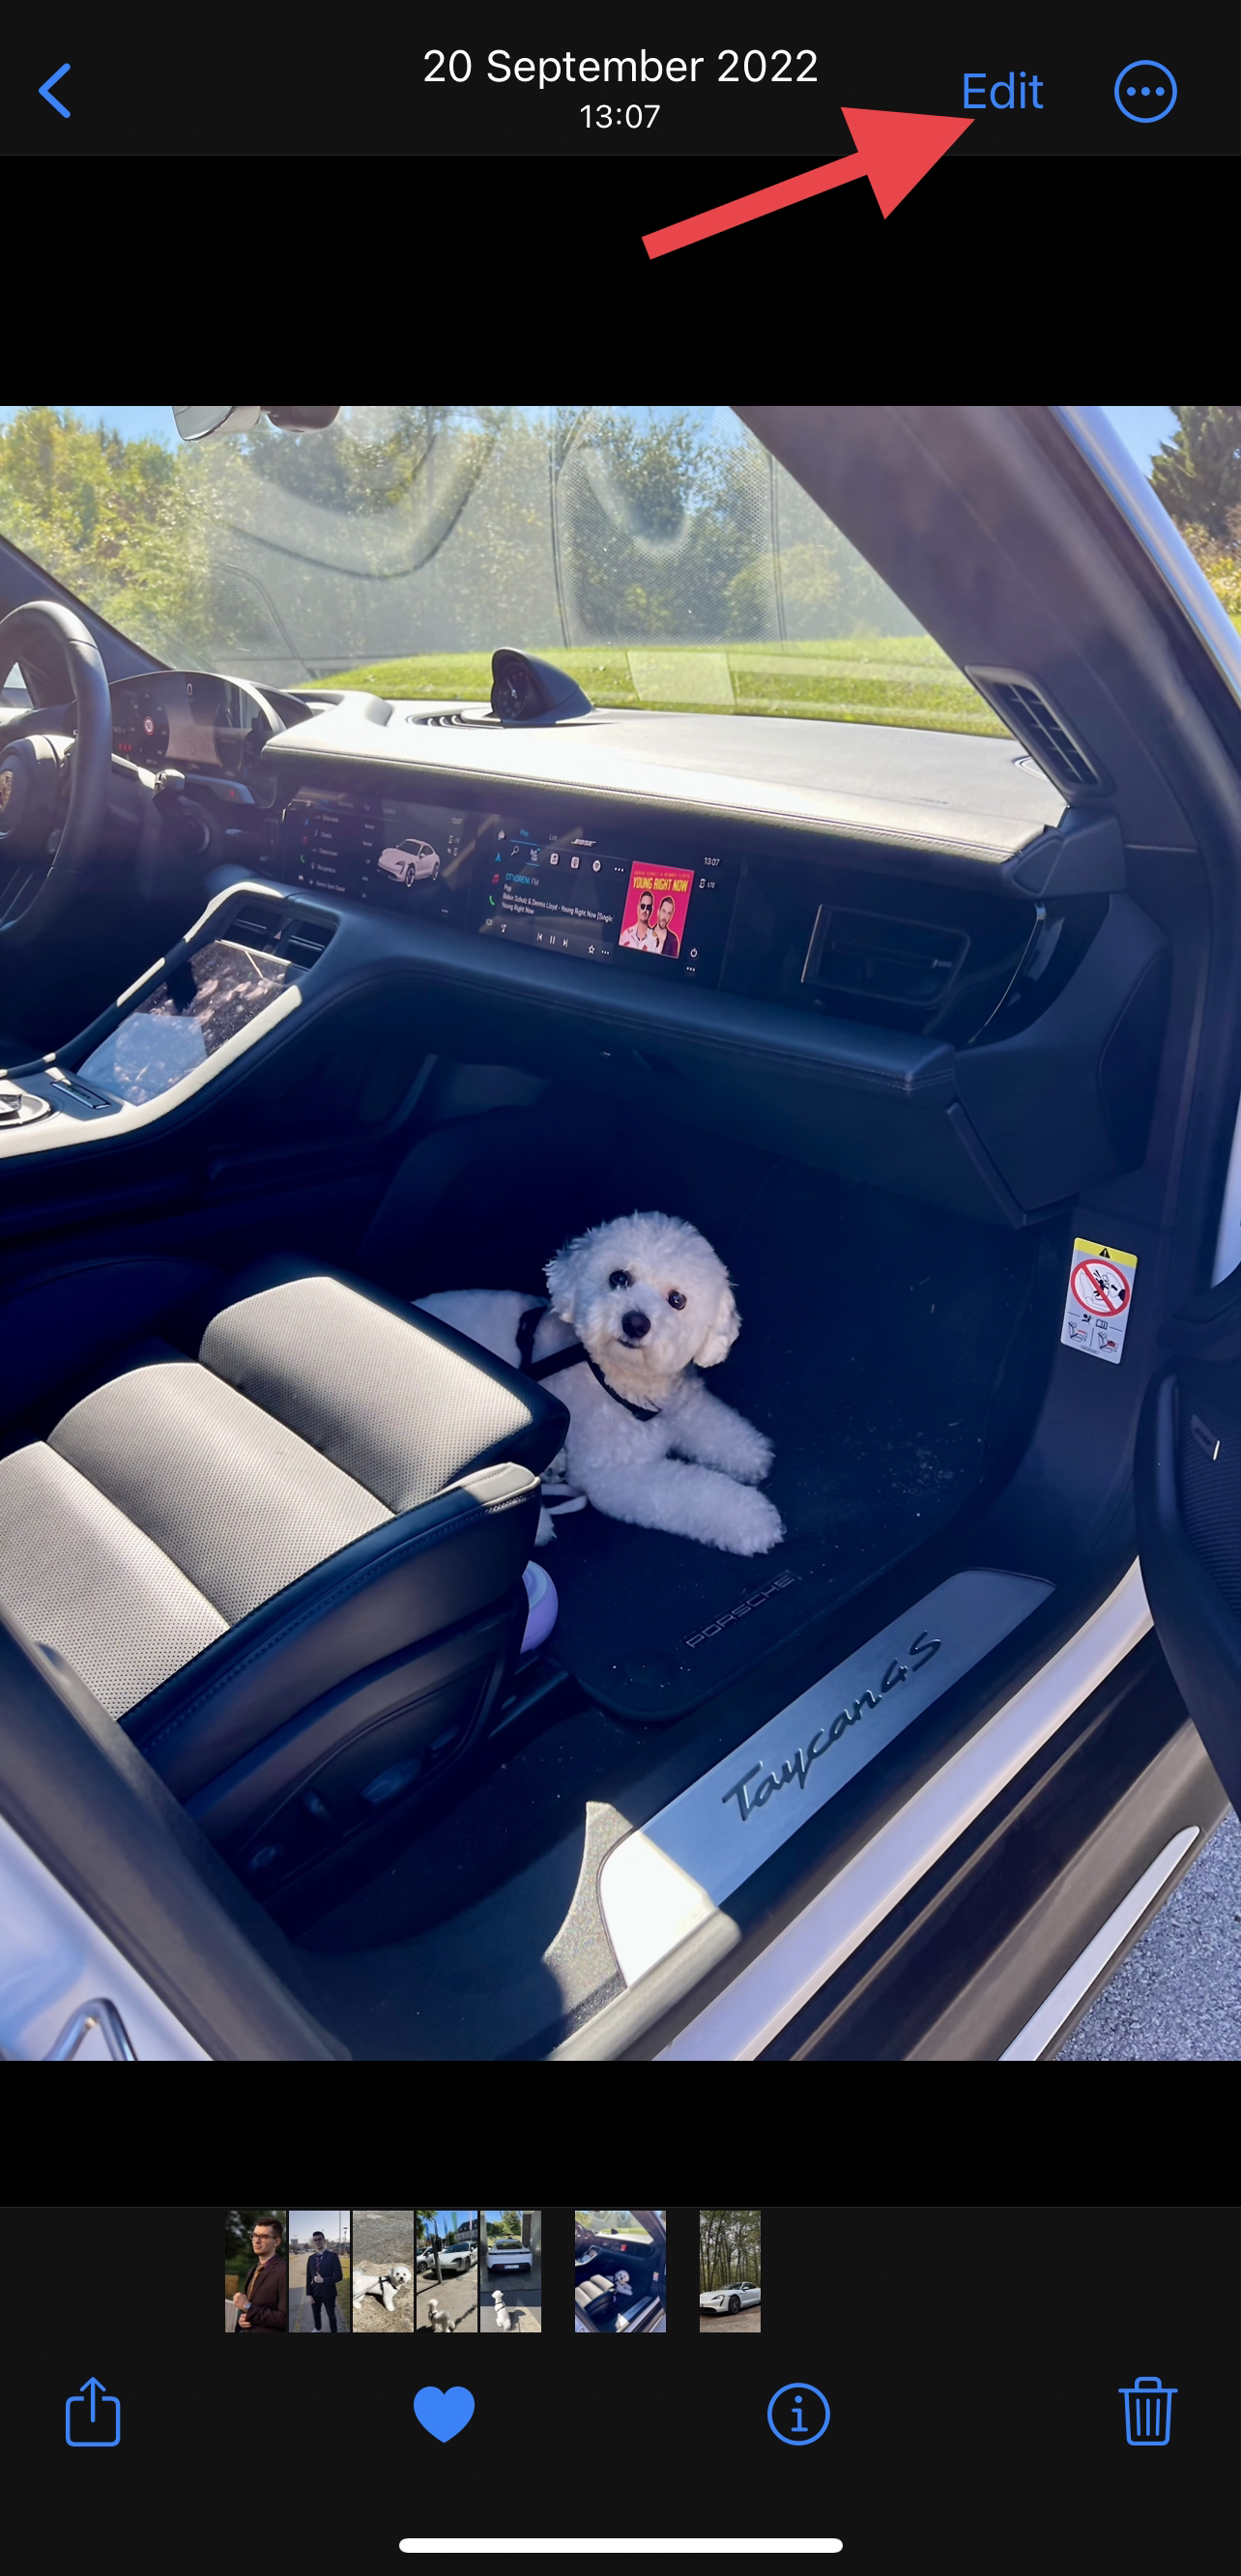
- Launch the Photos app on your iPhone and open your blurry photo.
- Next, tap “Edit” at the top-right corner of your screen.
- Make sure you are in the “Adjust” tool by tapping the circular icon at the bottom.
- After that, swipe the toolbar to the left and navigate to “Sharpness” among the editing tools.
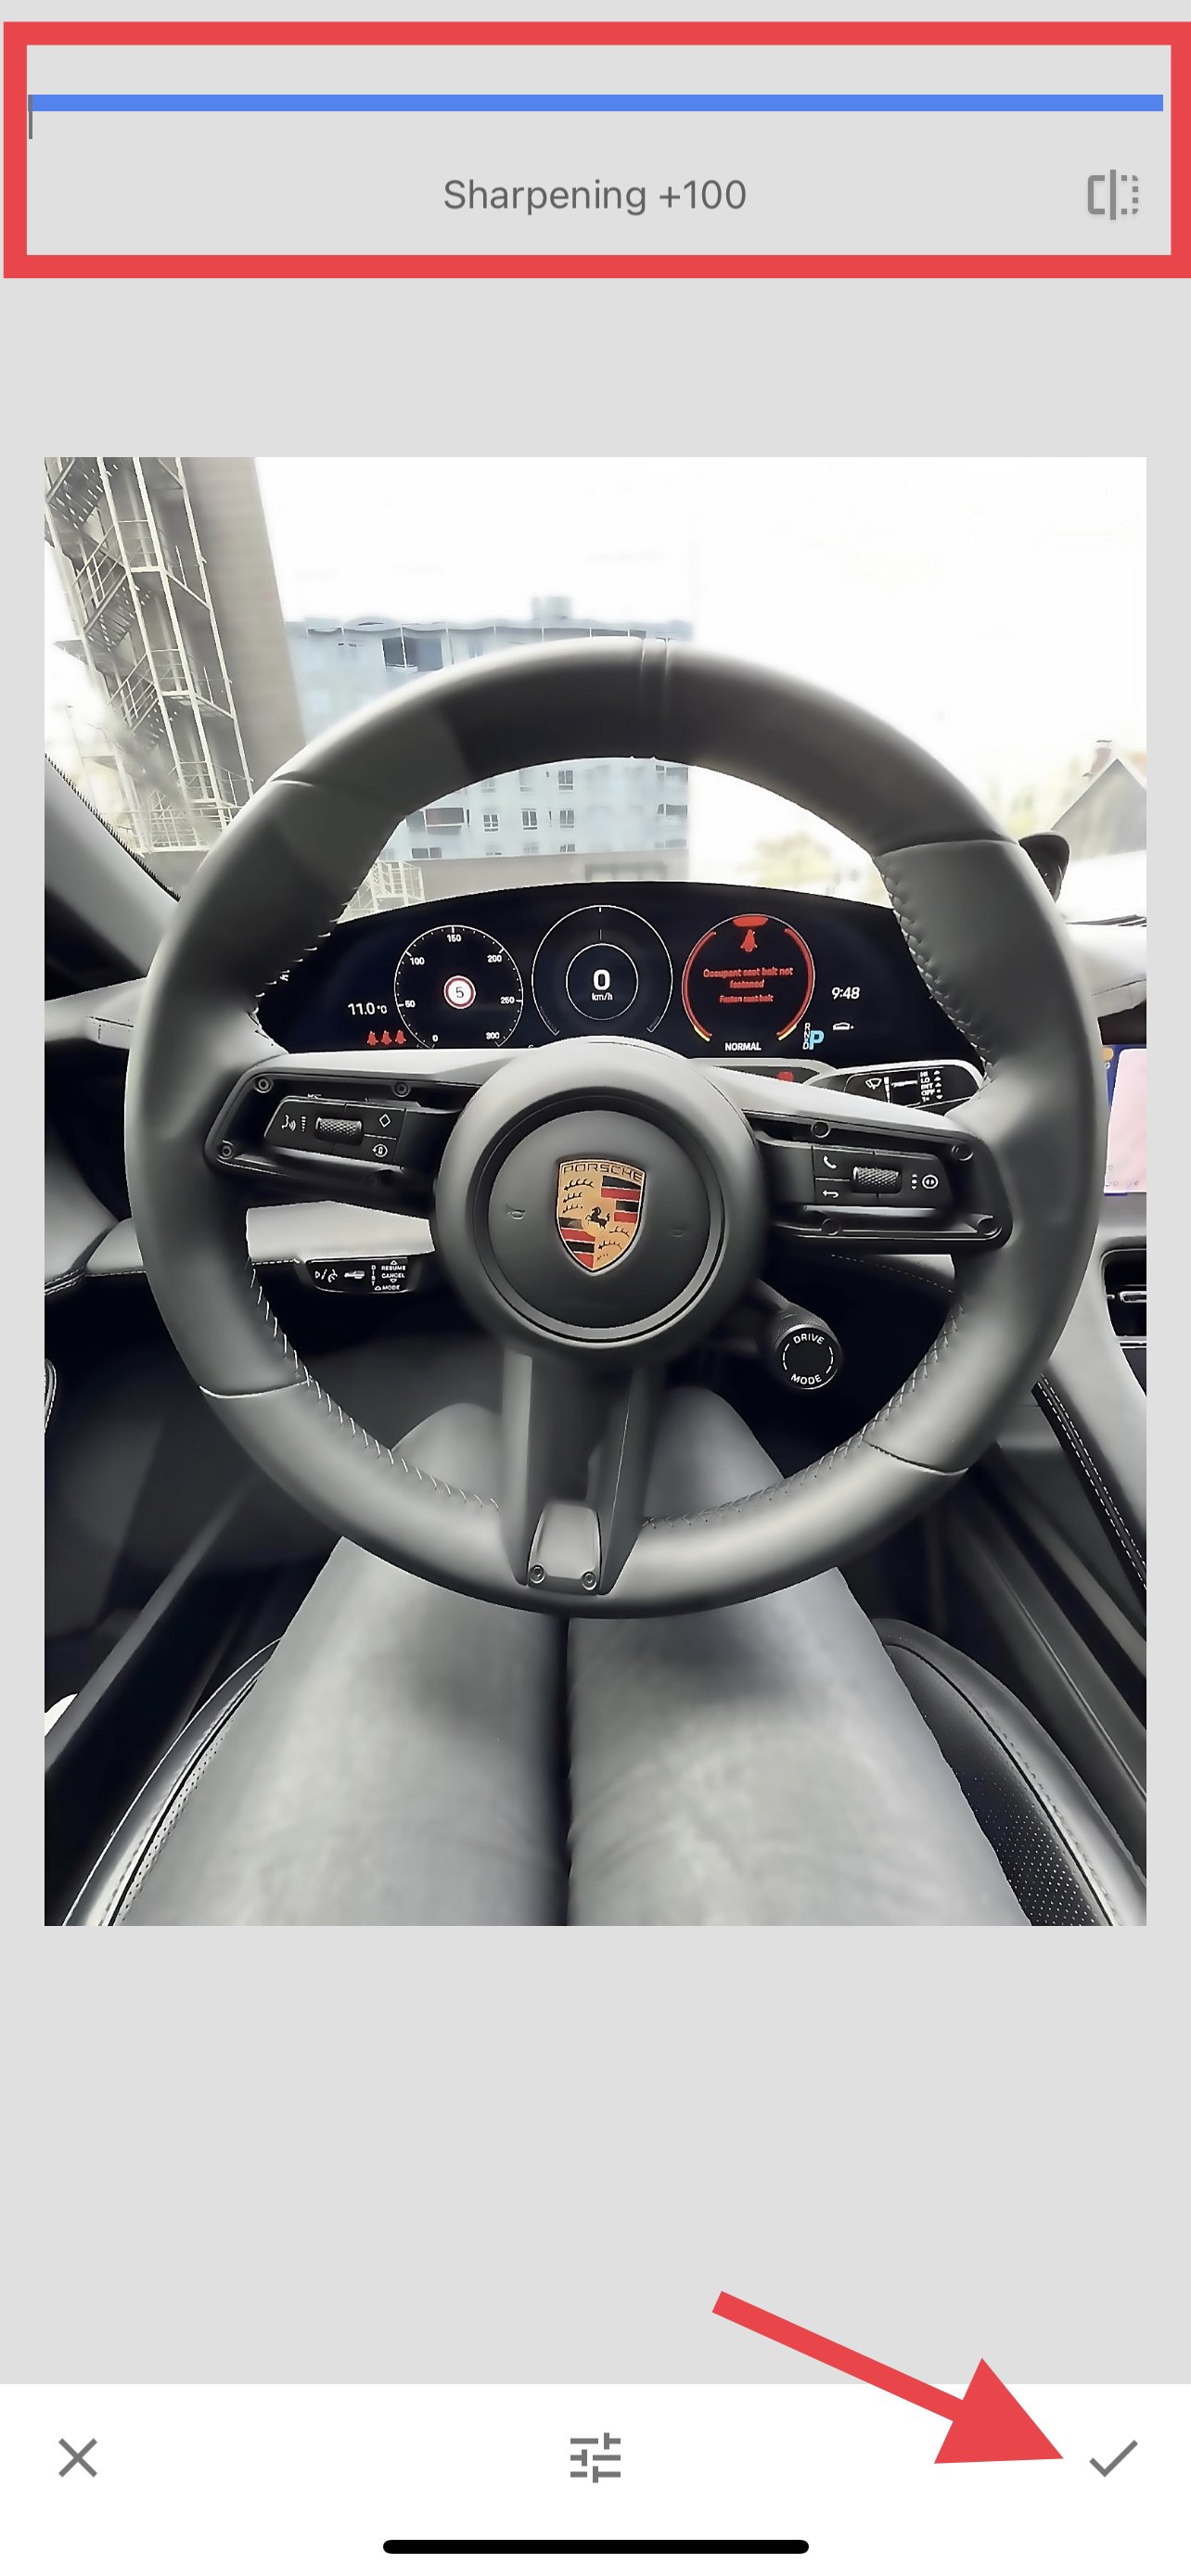
- Tap and hold the slider provided, and adjust the sharpness accordingly.
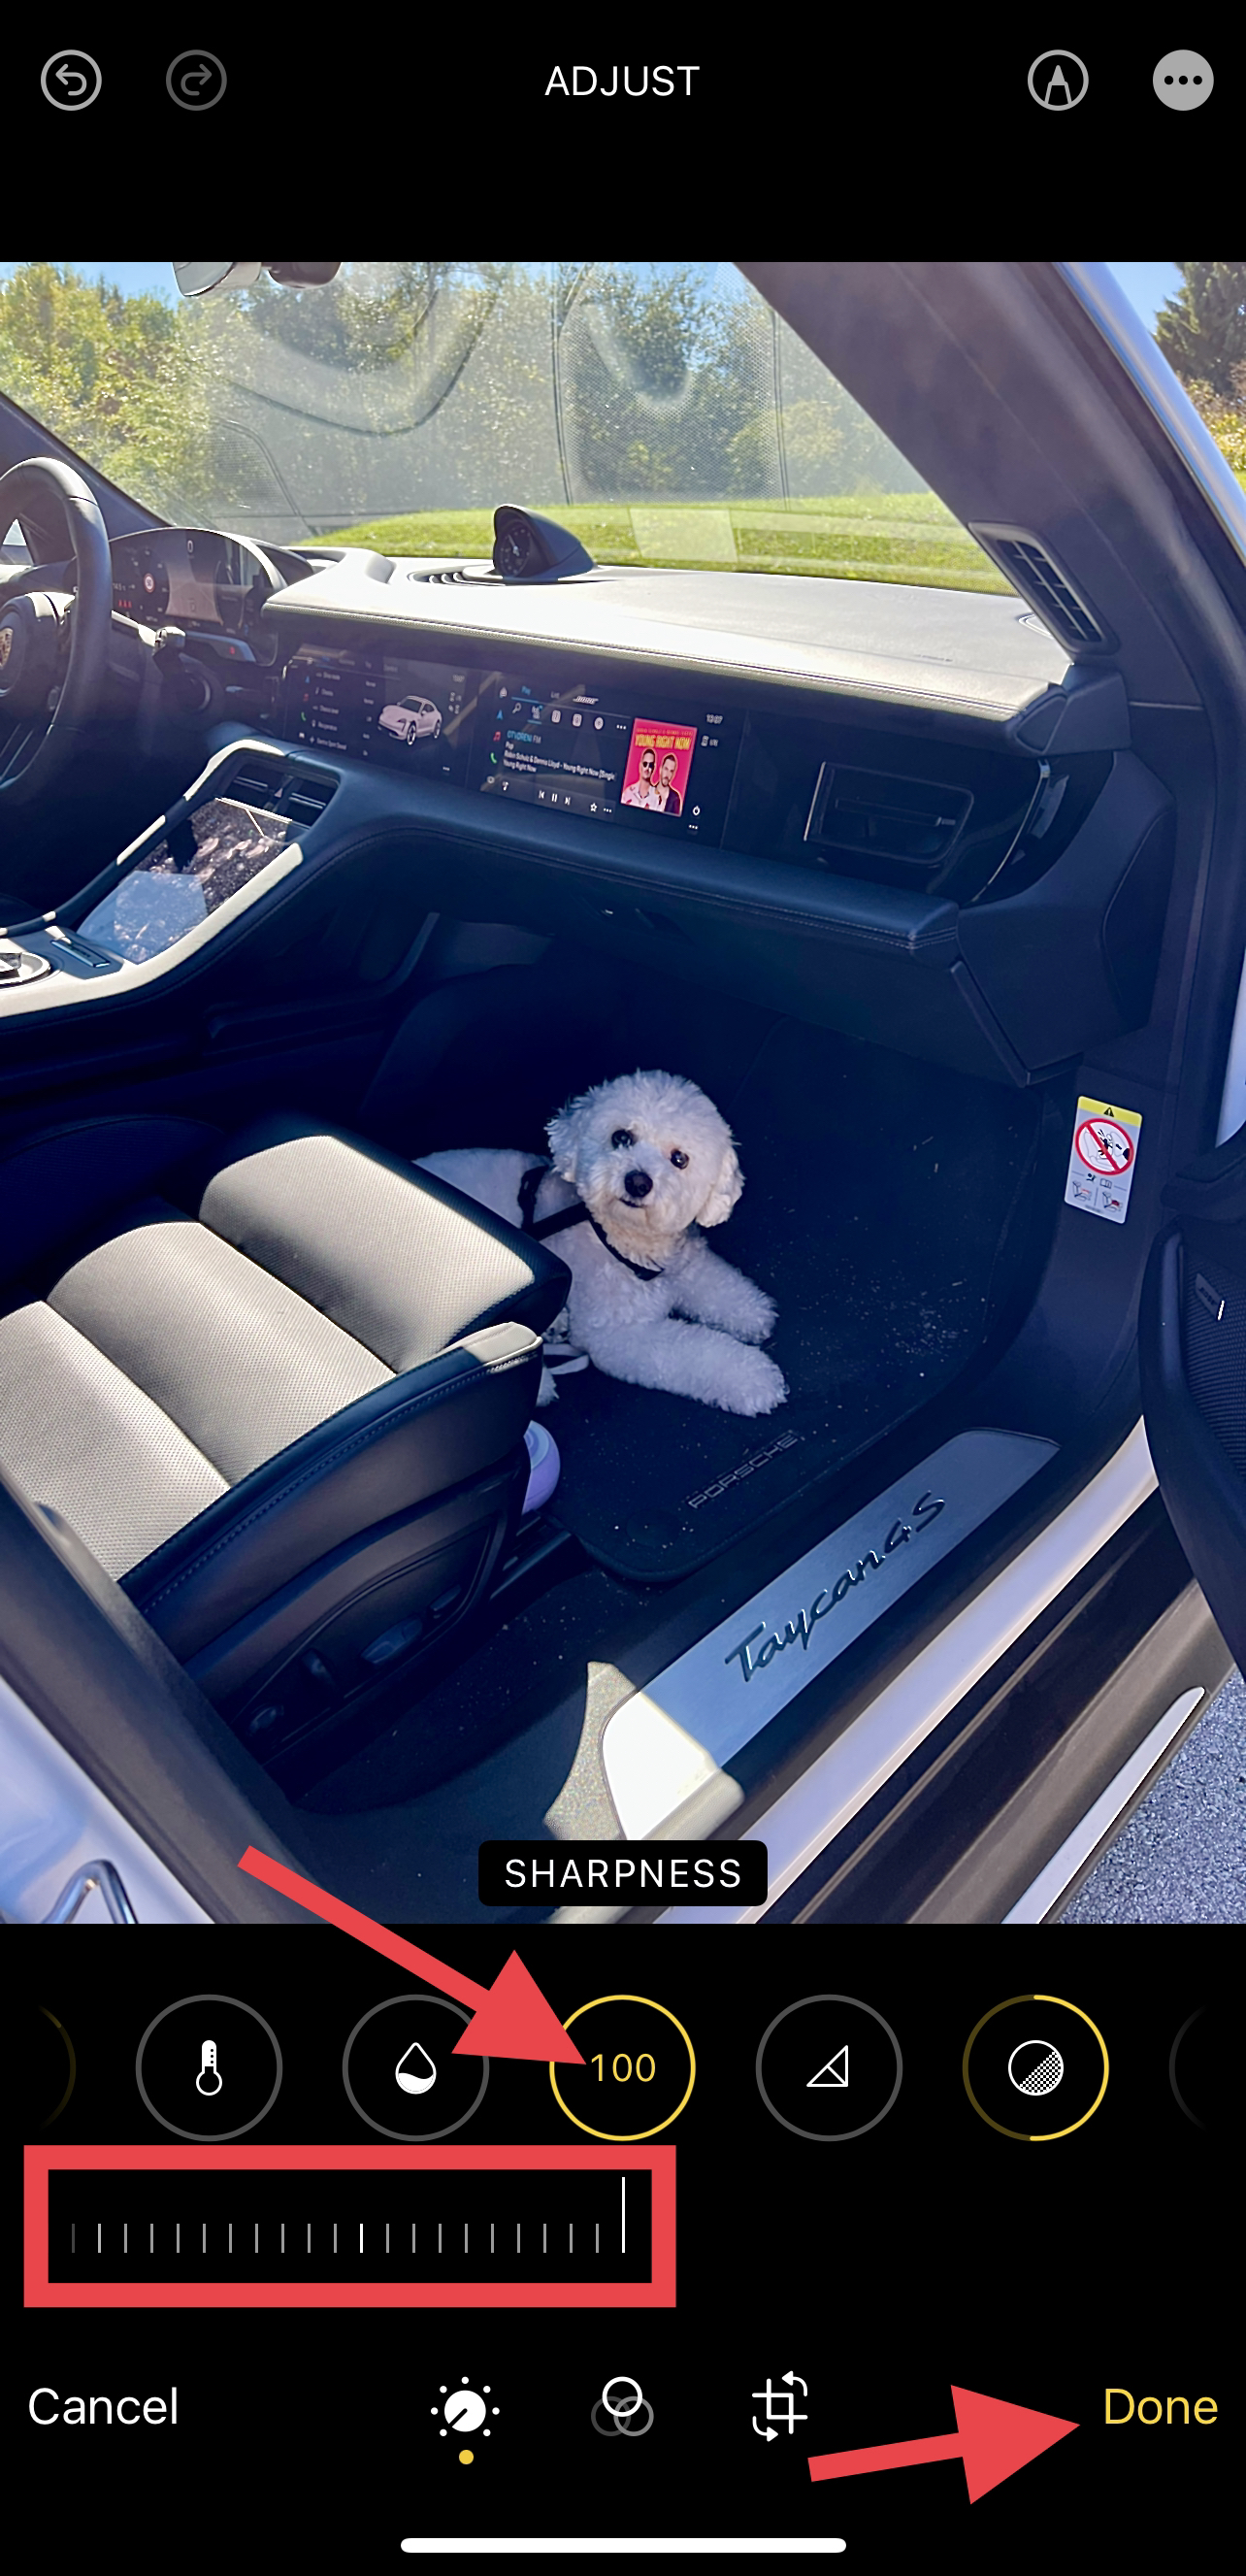
- To save your edited photo, tap “Done.”
Consider adjusting the brightness, exposure, and contrast of your image to further enhance its quality. This allows you to highlight the features of your subject better and make it stand out from the background.
Method 2: Using Online Photo Editors
If you don’t have the time to manually adjust each fuzzy image in your gallery, consider using an online photo editor instead. Some tools automate the editing process (adjusting the sharpness, contrast, exposure, saturation, etc.) for you.
Other AI-powered editors retrieve the nearest clear pixel and use it to replace blurred pixels. All it takes to discover these tools is a Google search — just be sure to pick a reputable photo editor to protect your privacy and safety.
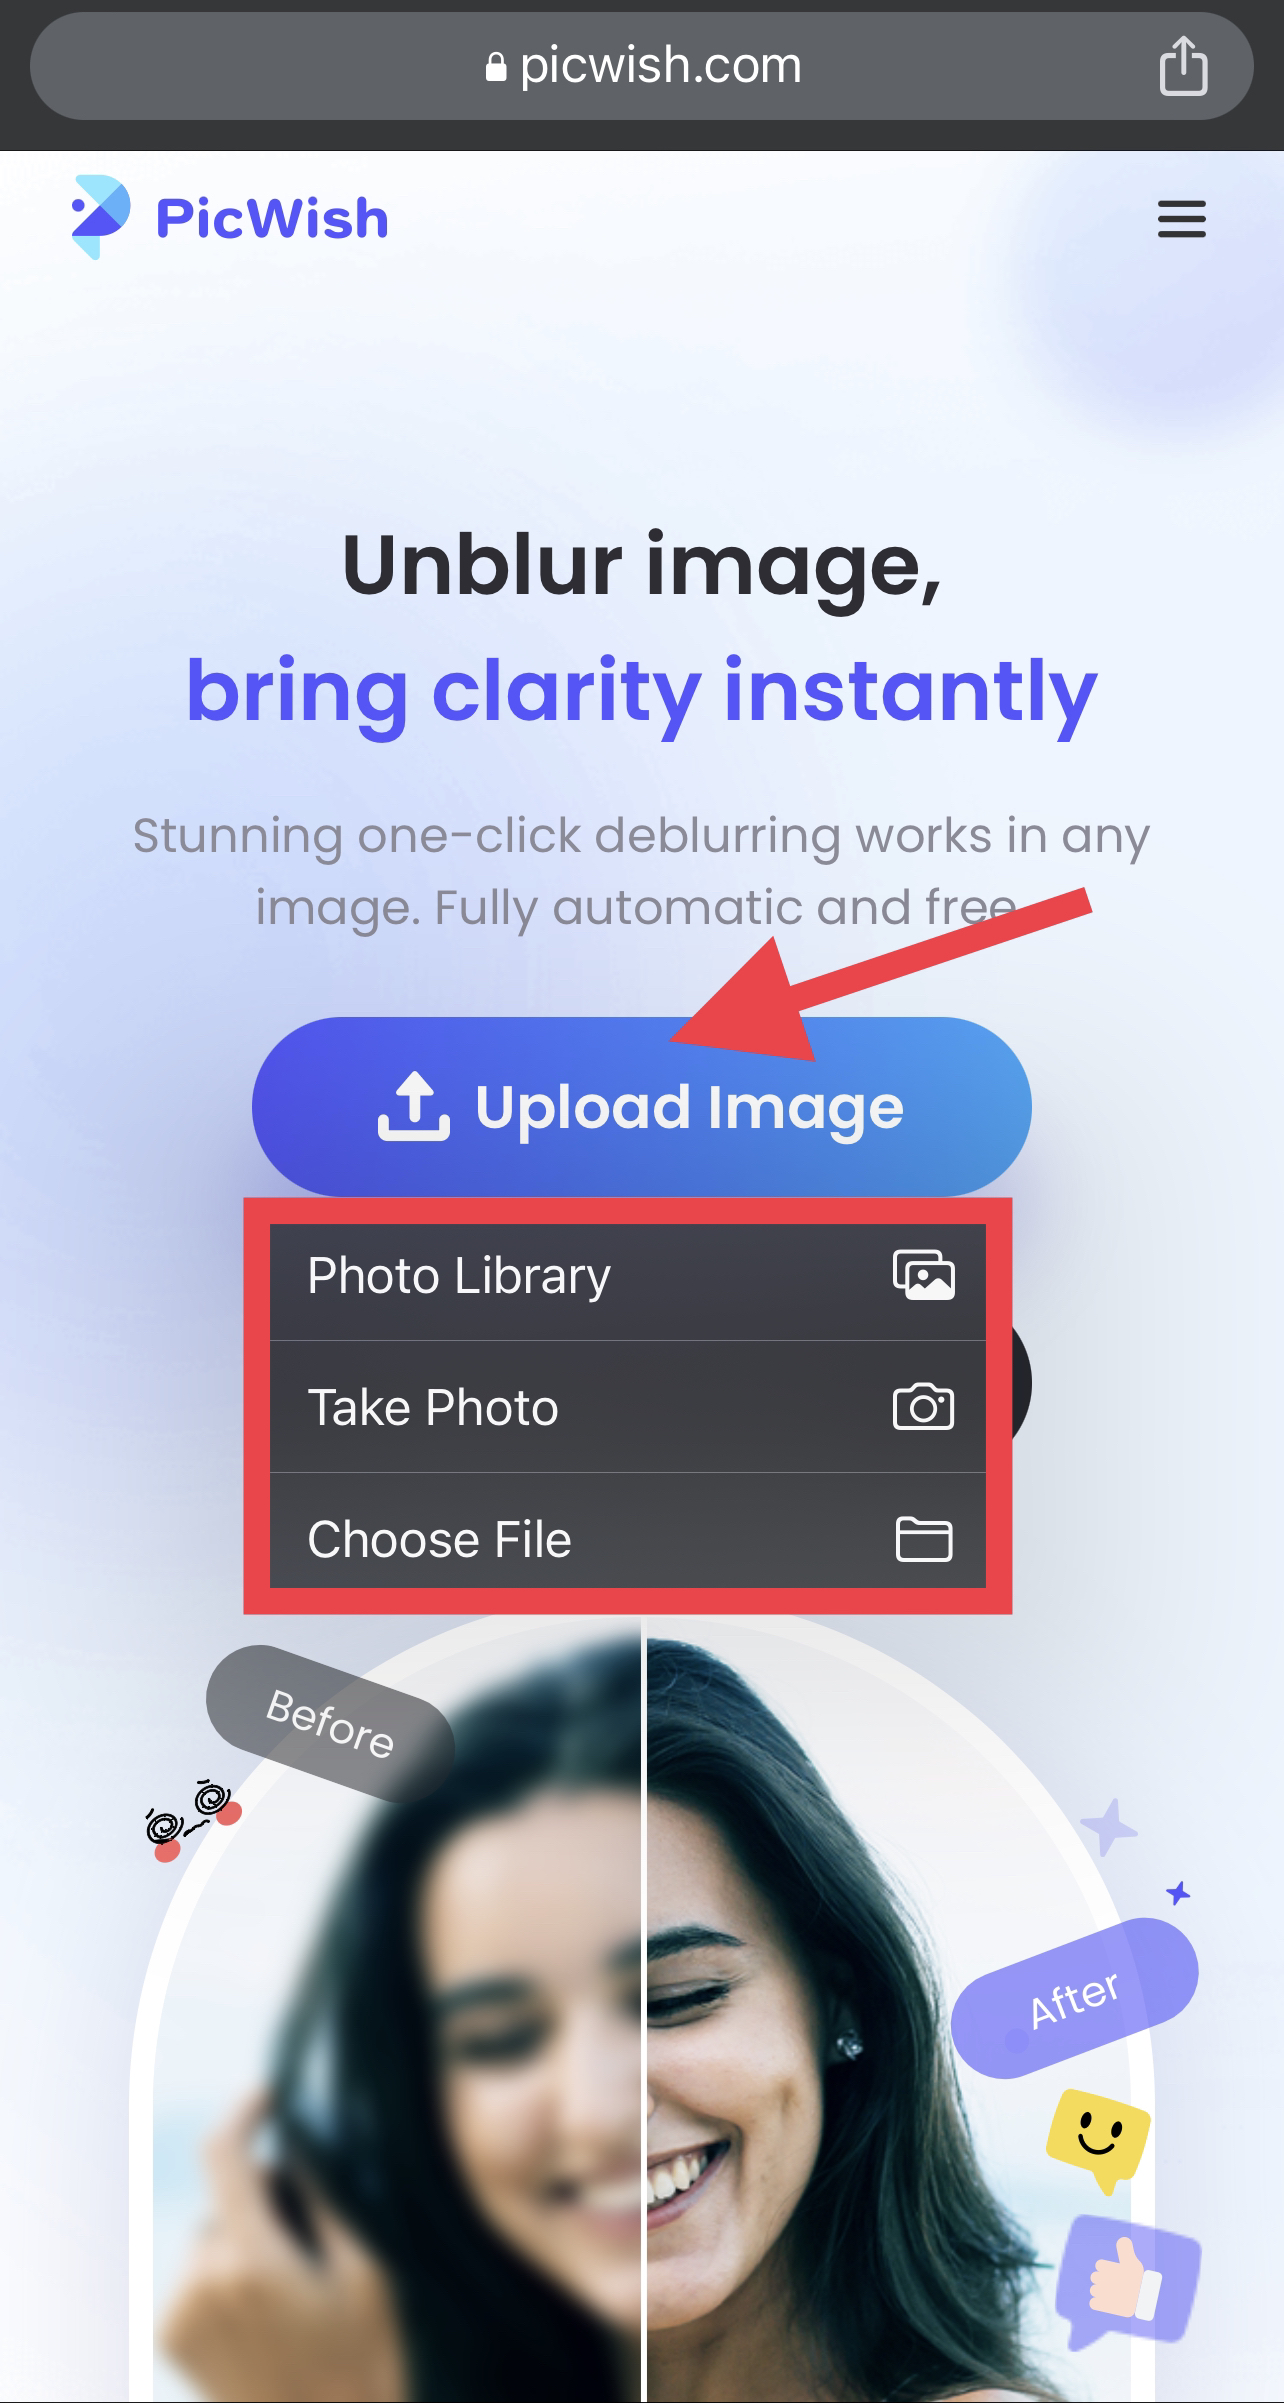
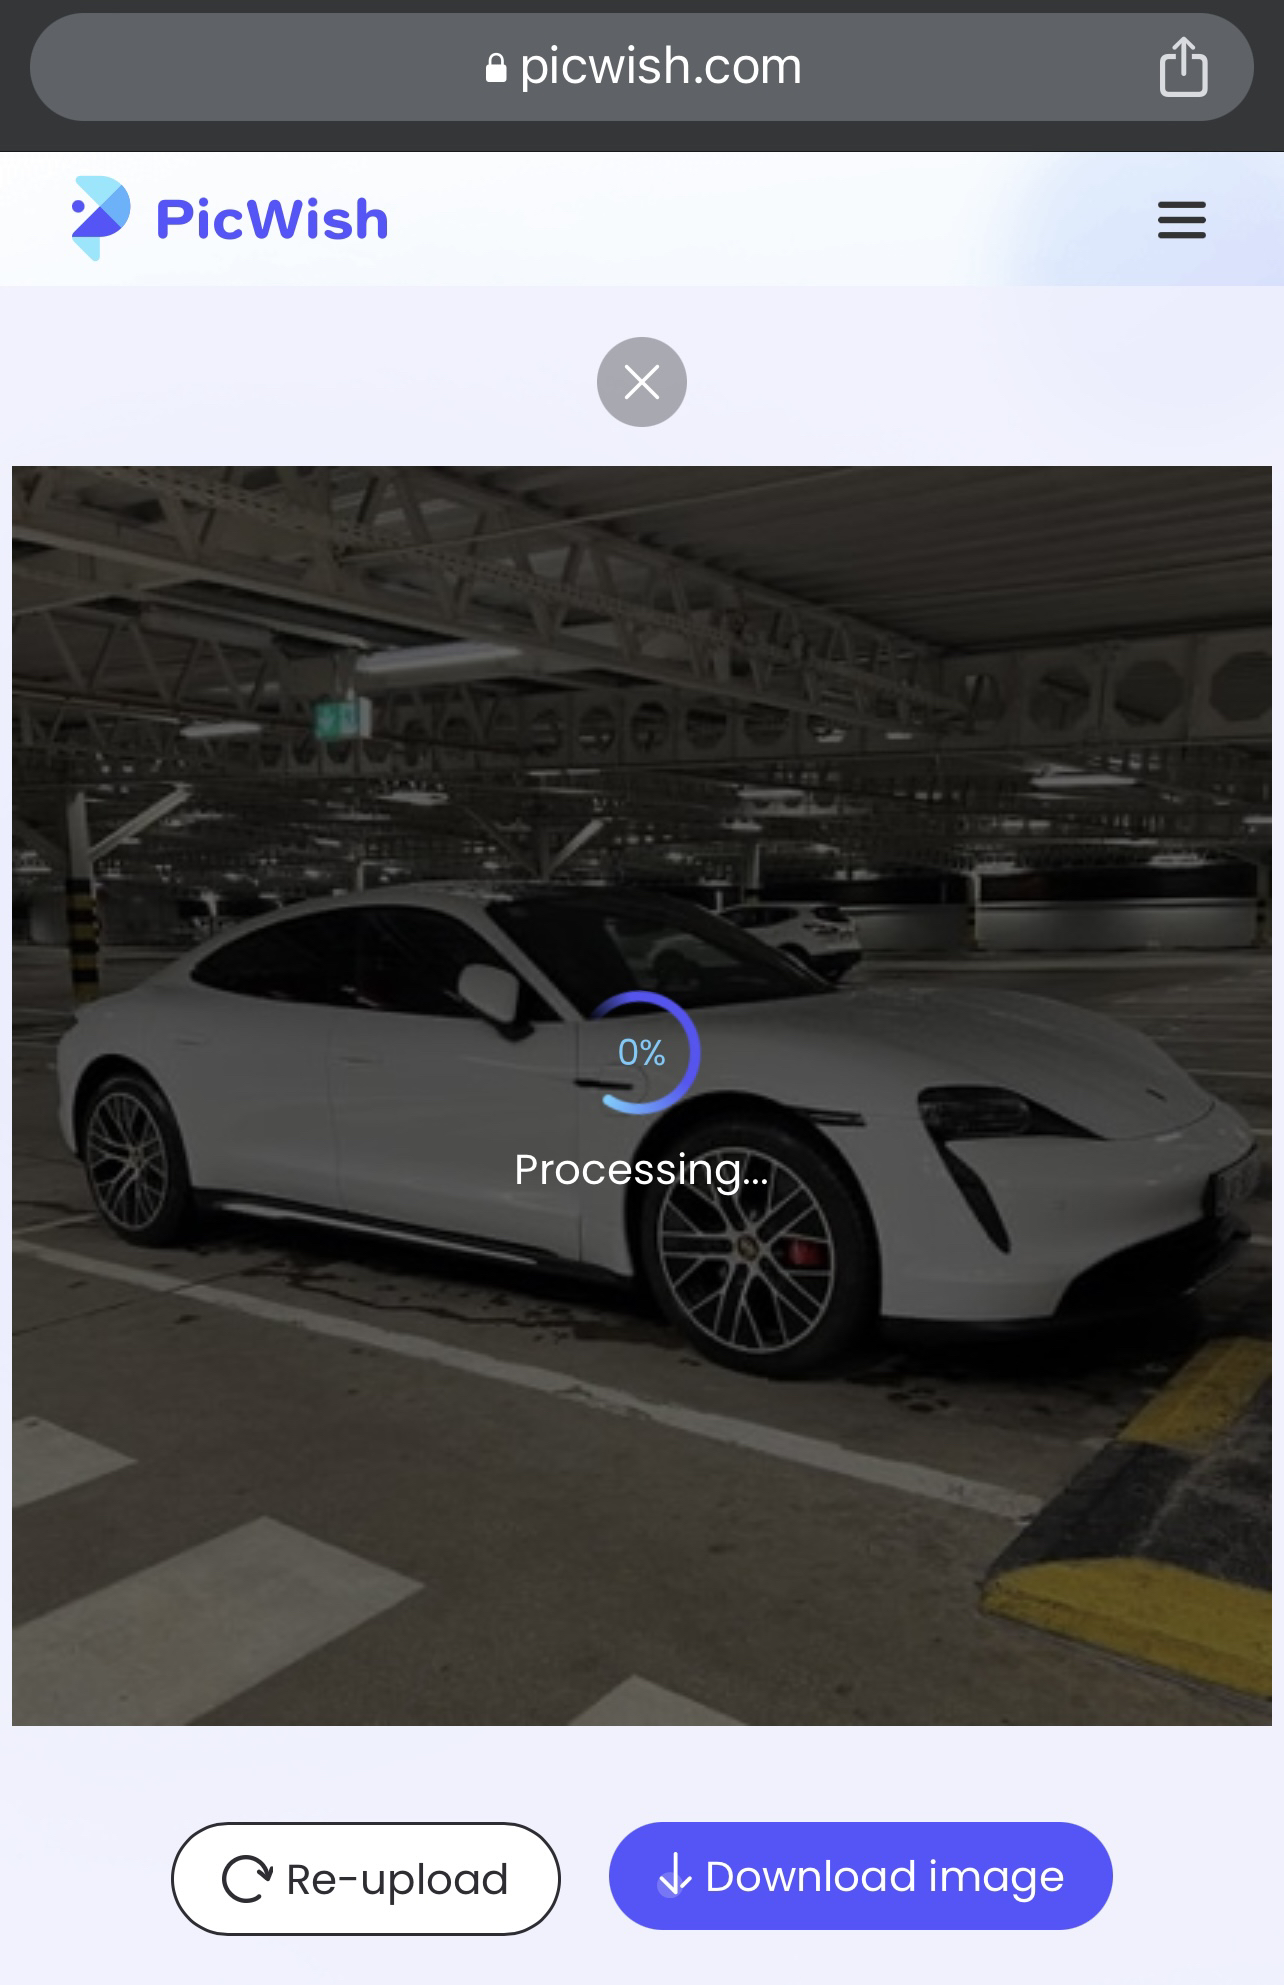
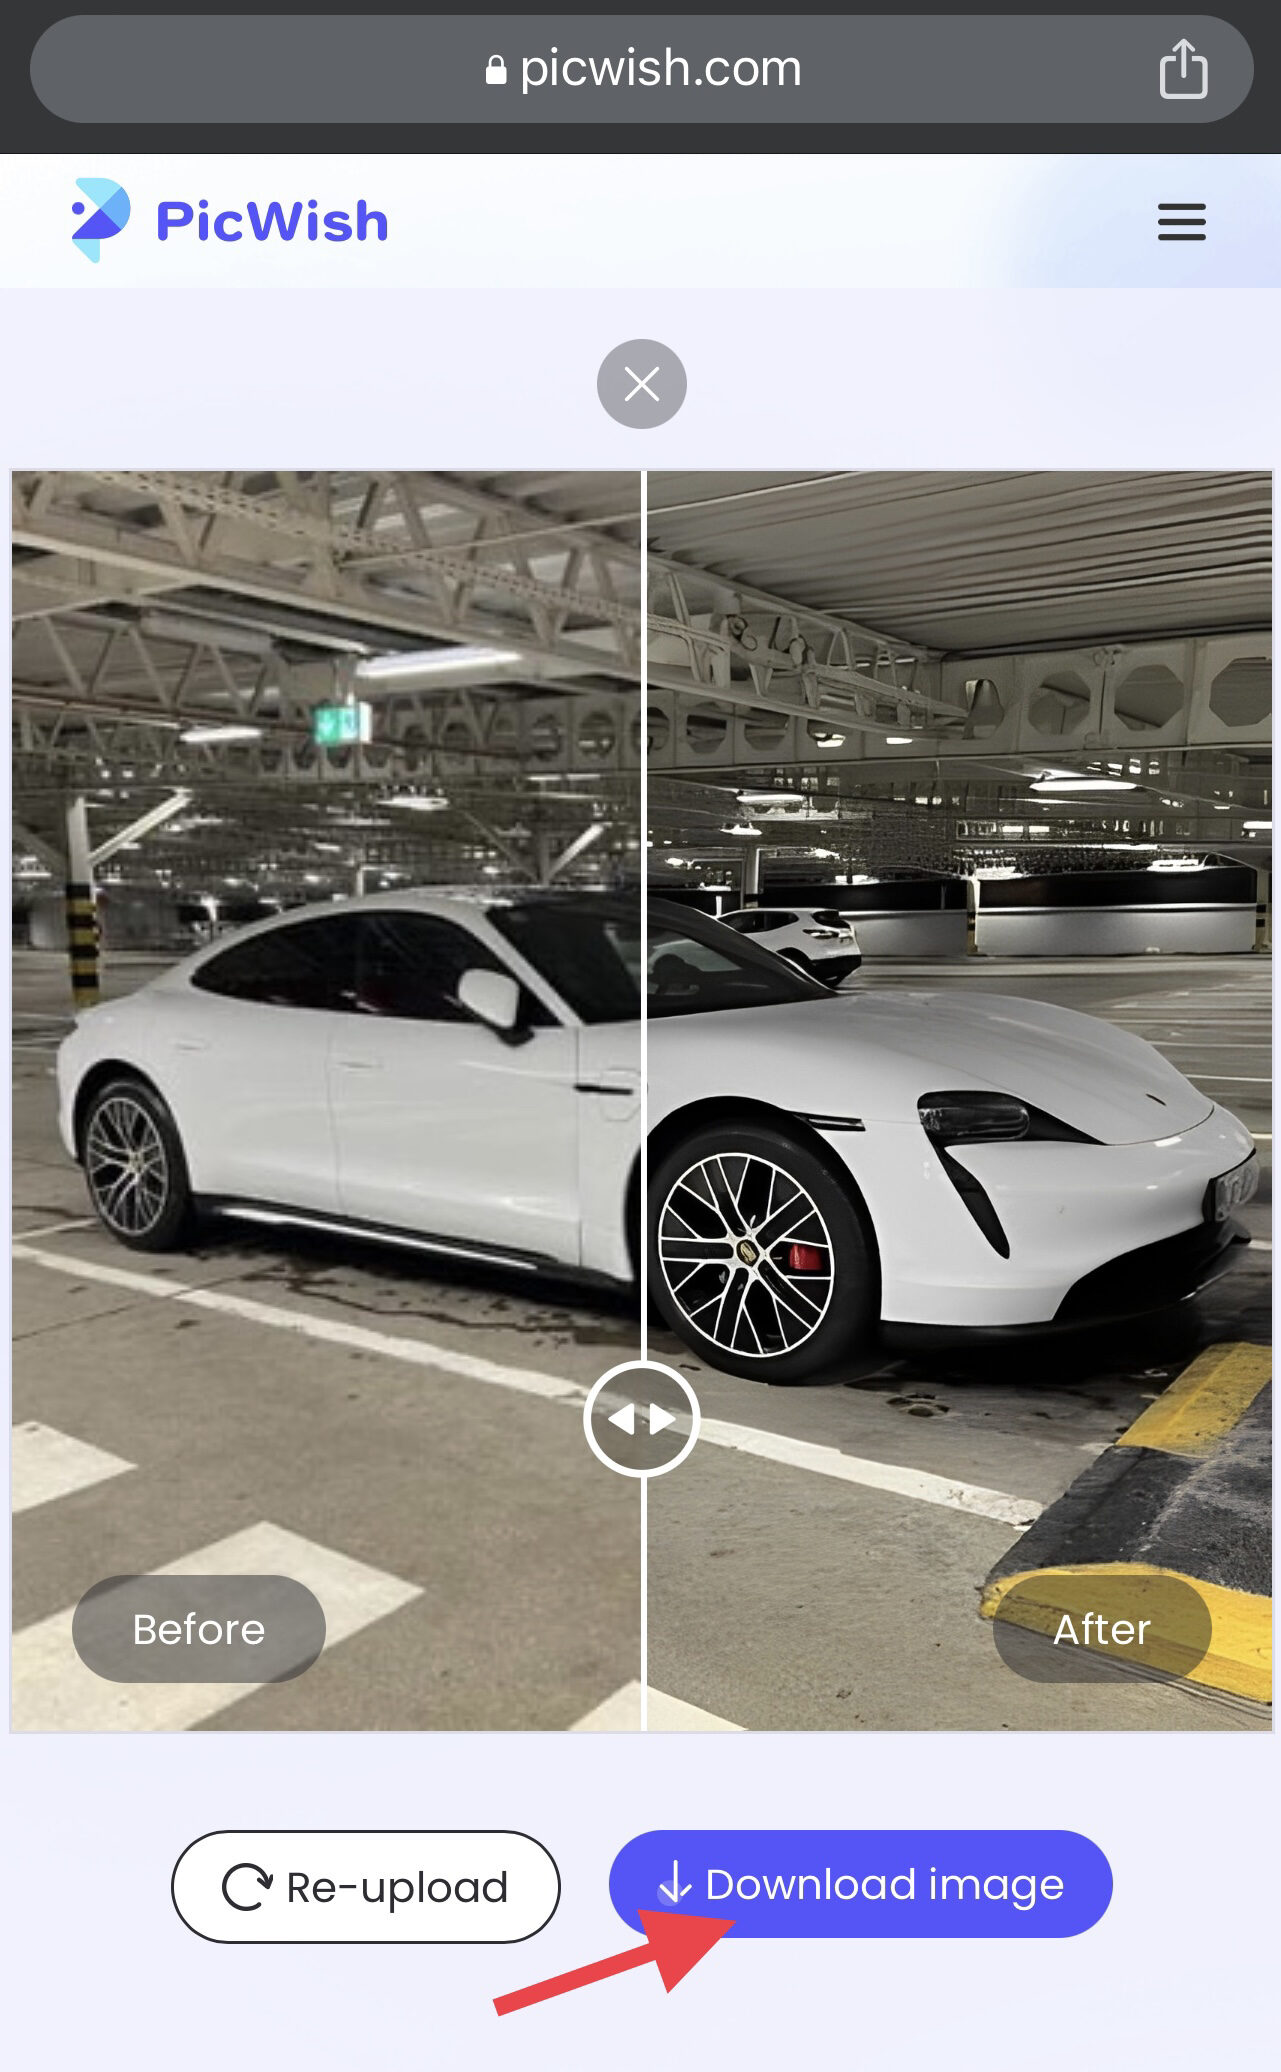
See how I used PicWish to unblur an image on iPhone below:
- To get started, open Safari and go to PicWish.
- Next, tap “Upload Image” and choose your photo using the on-screen instructions.
- Wait for the tool to finish processing your image.
- Once done, tap “Download image” to save your picture.
Method 3: Using Third-party Apps
If you’re not inclined to use tools on the web due to privacy concerns, using apps that you can safely download from the App Store might be better.
The most popular options here include Snapseed, Adobe Lightroom, and VSCO. You can use them to manually edit and fix your fuzzy photos.
Here’s a quick step-by-step guide on how you use each of the apps I mentioned:
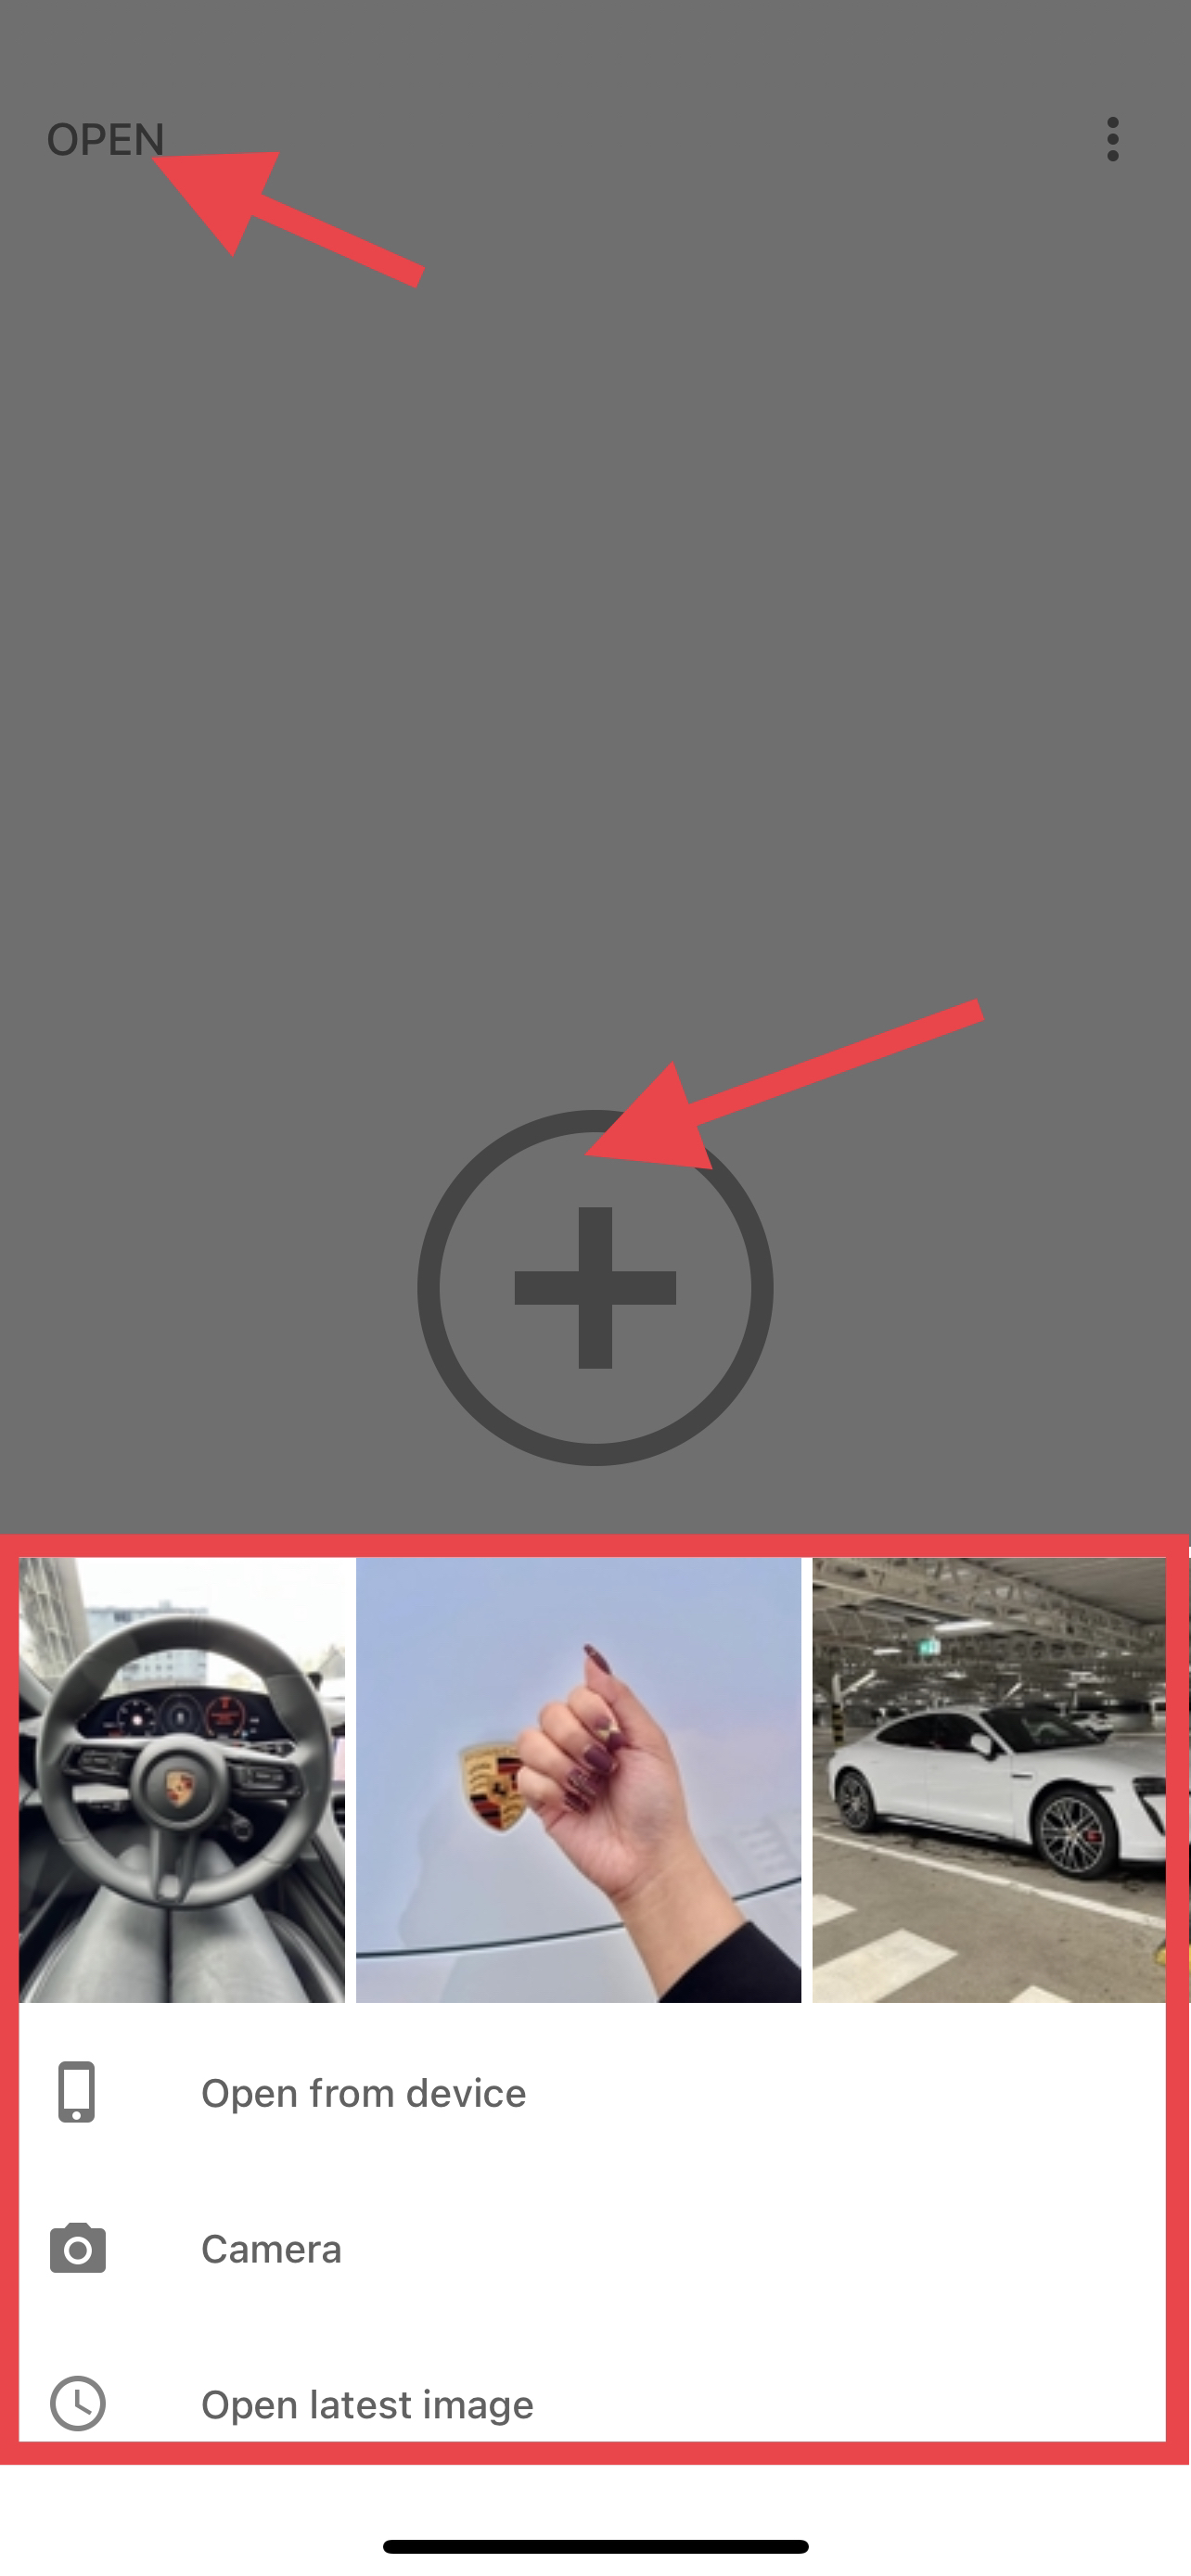
Using Snapseed
- Open Snapseed.
- Tap anywhere on your screen and select your photo.
- Alternatively, you can tap “OPEN” on the upper-left corner of the app to see your images.
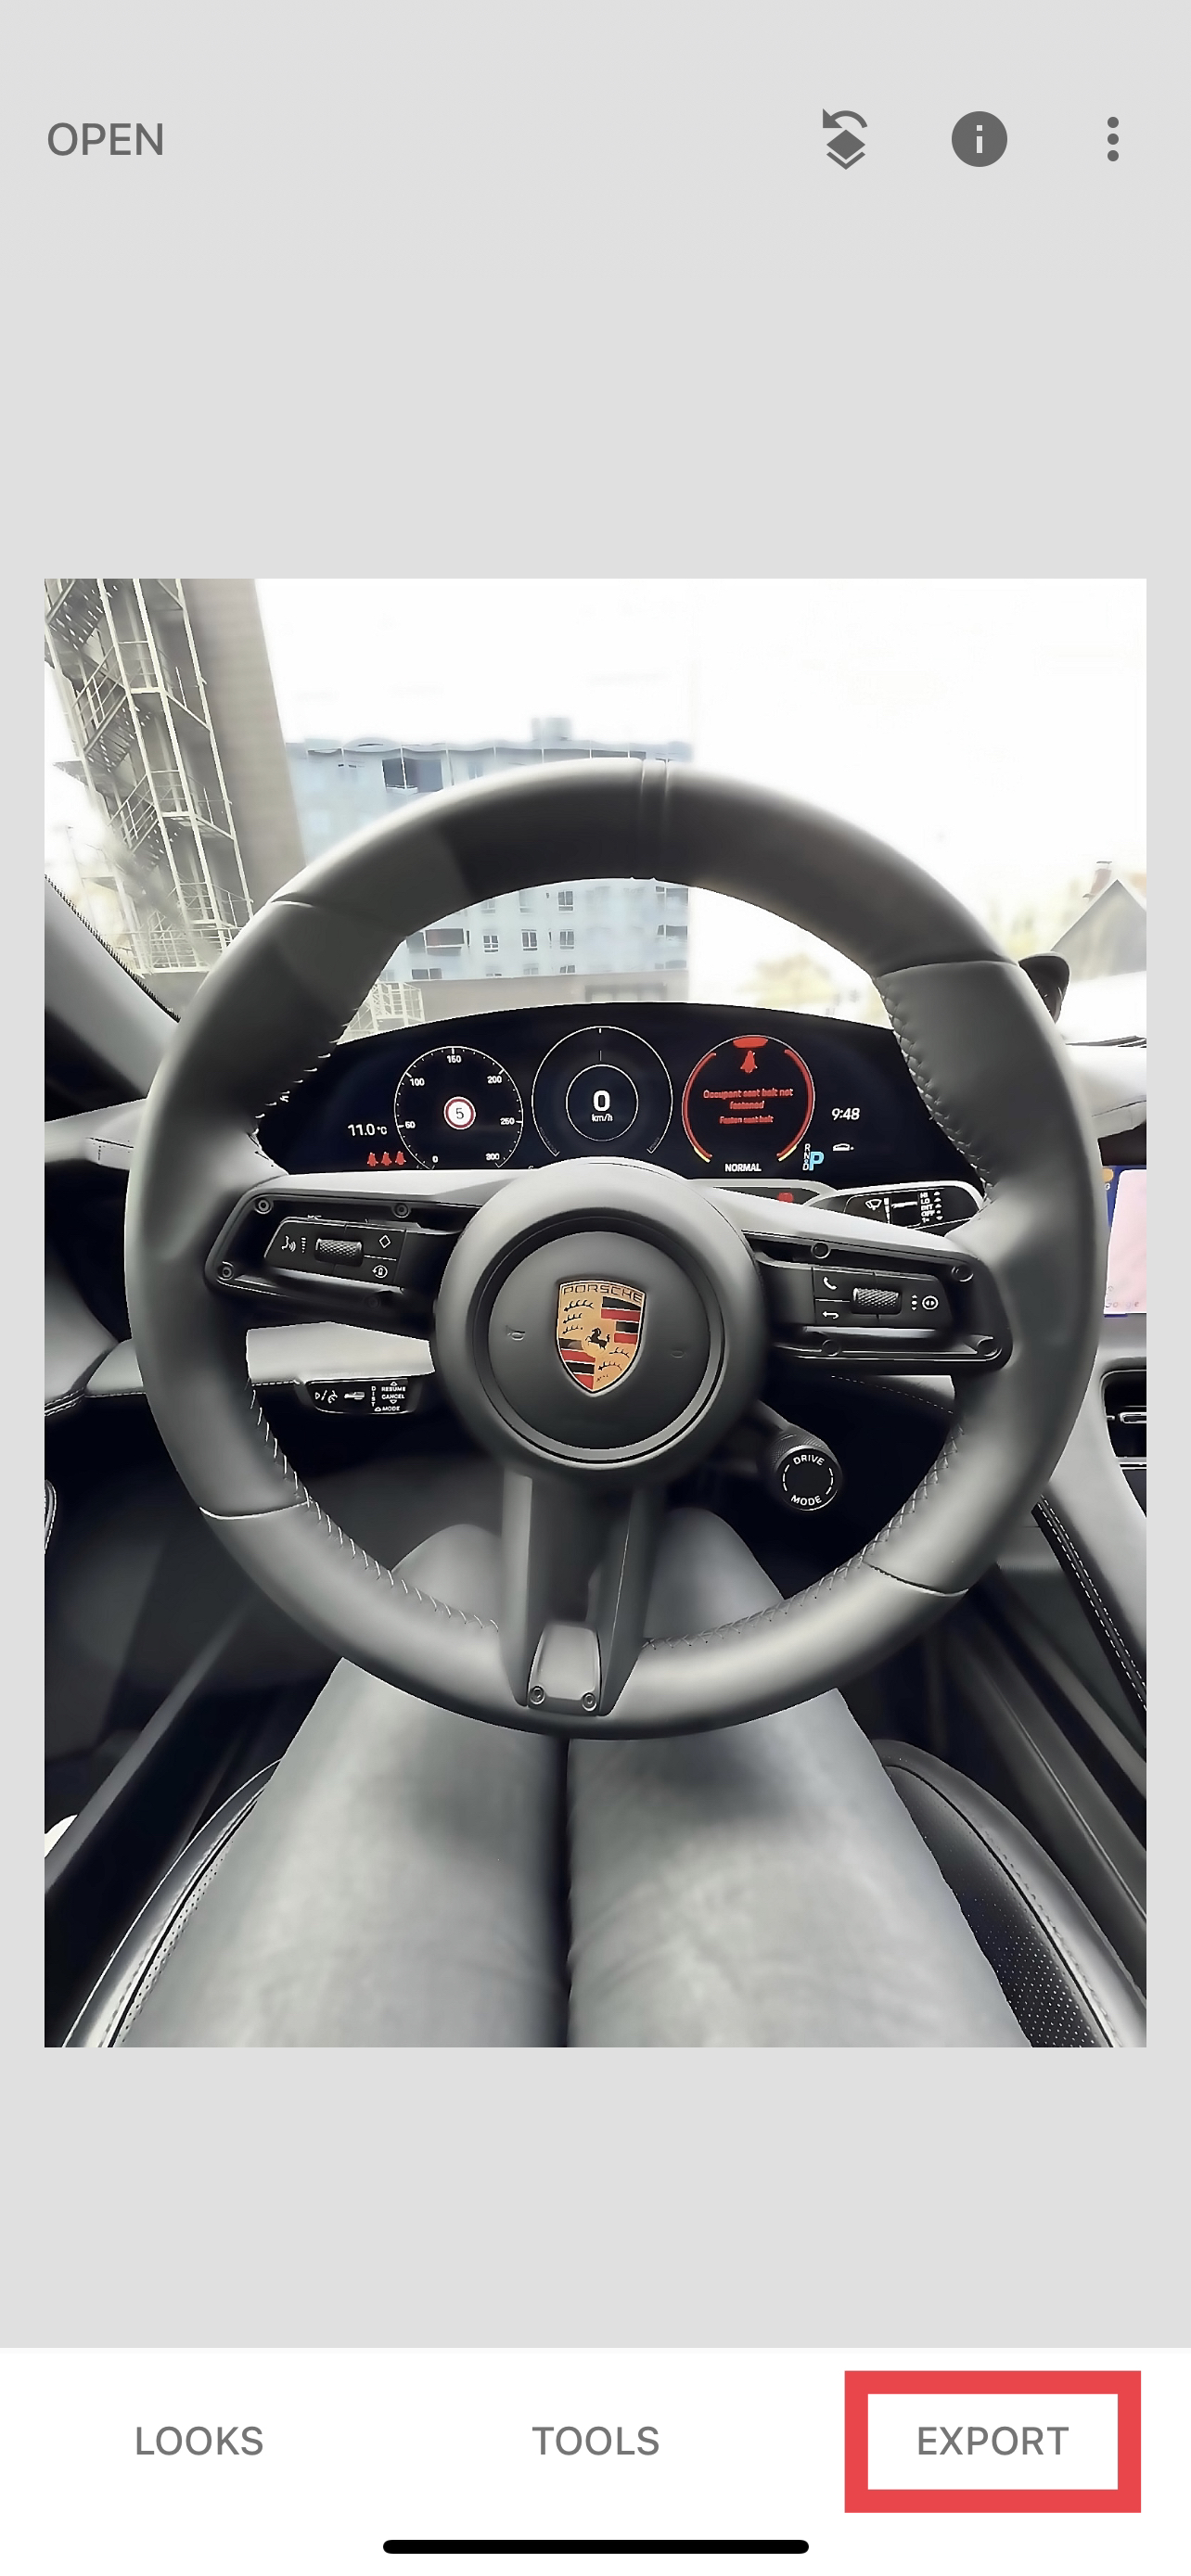
- After that, tap “TOOLS” at the bottom and select “Details” in the displayed menu.
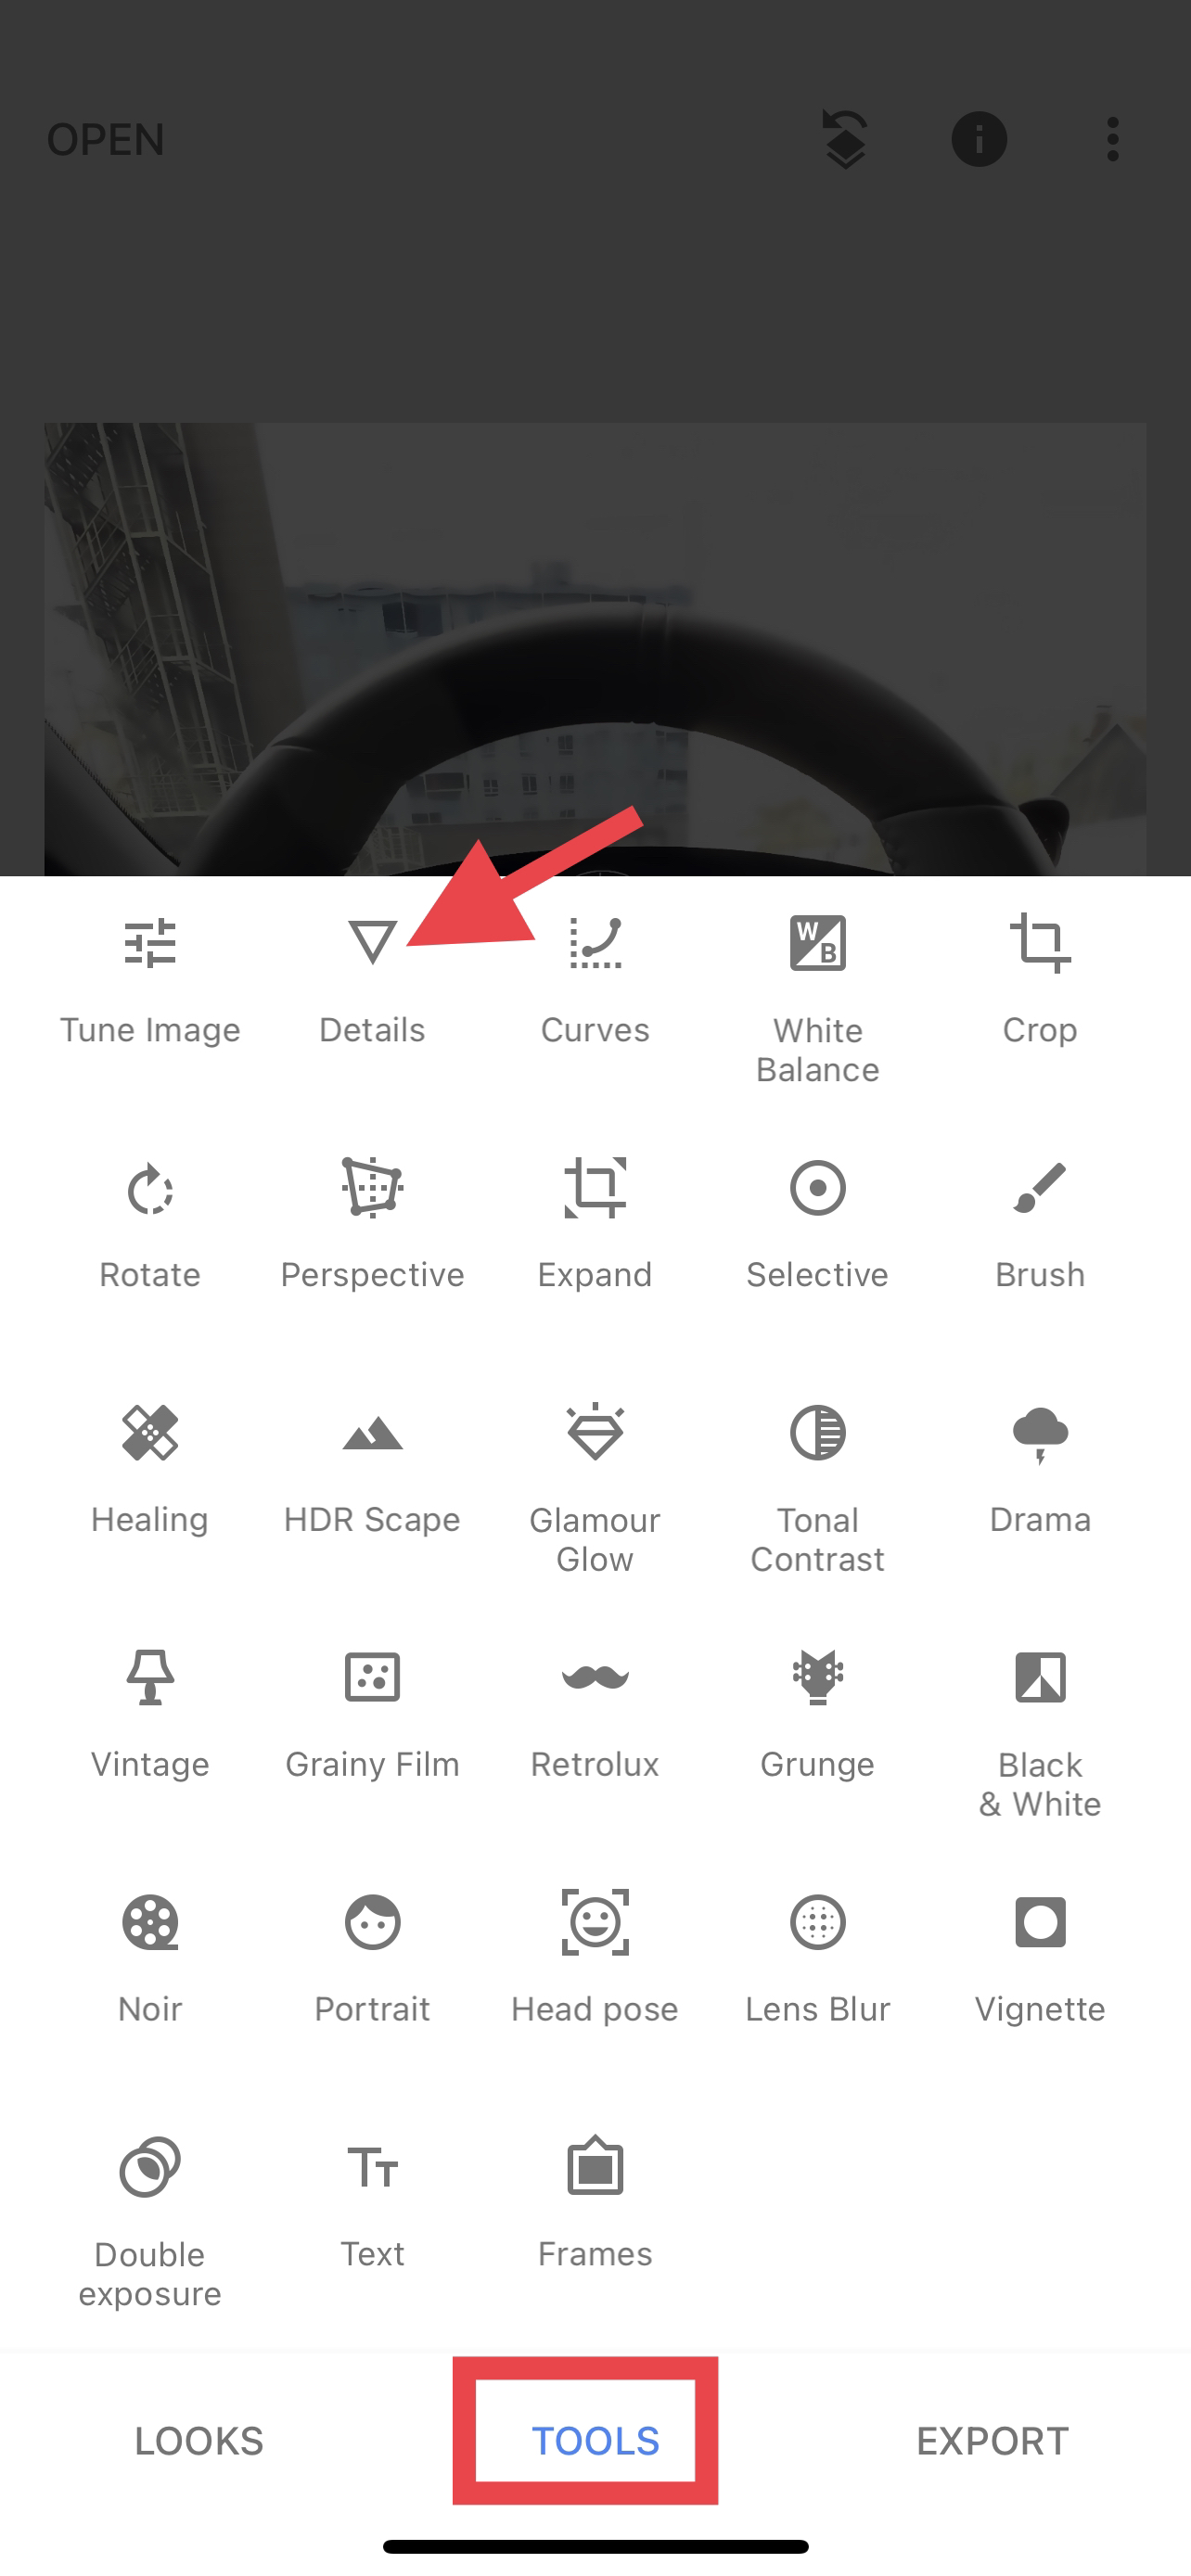
- Swipe your finger upwards and make sure the selector indicates “Sharpening.”
- Next, swipe your finger to the right to increase the sharpness of your image.
- If you’re satisfied with your photo, tap the checkmark at the bottom right.
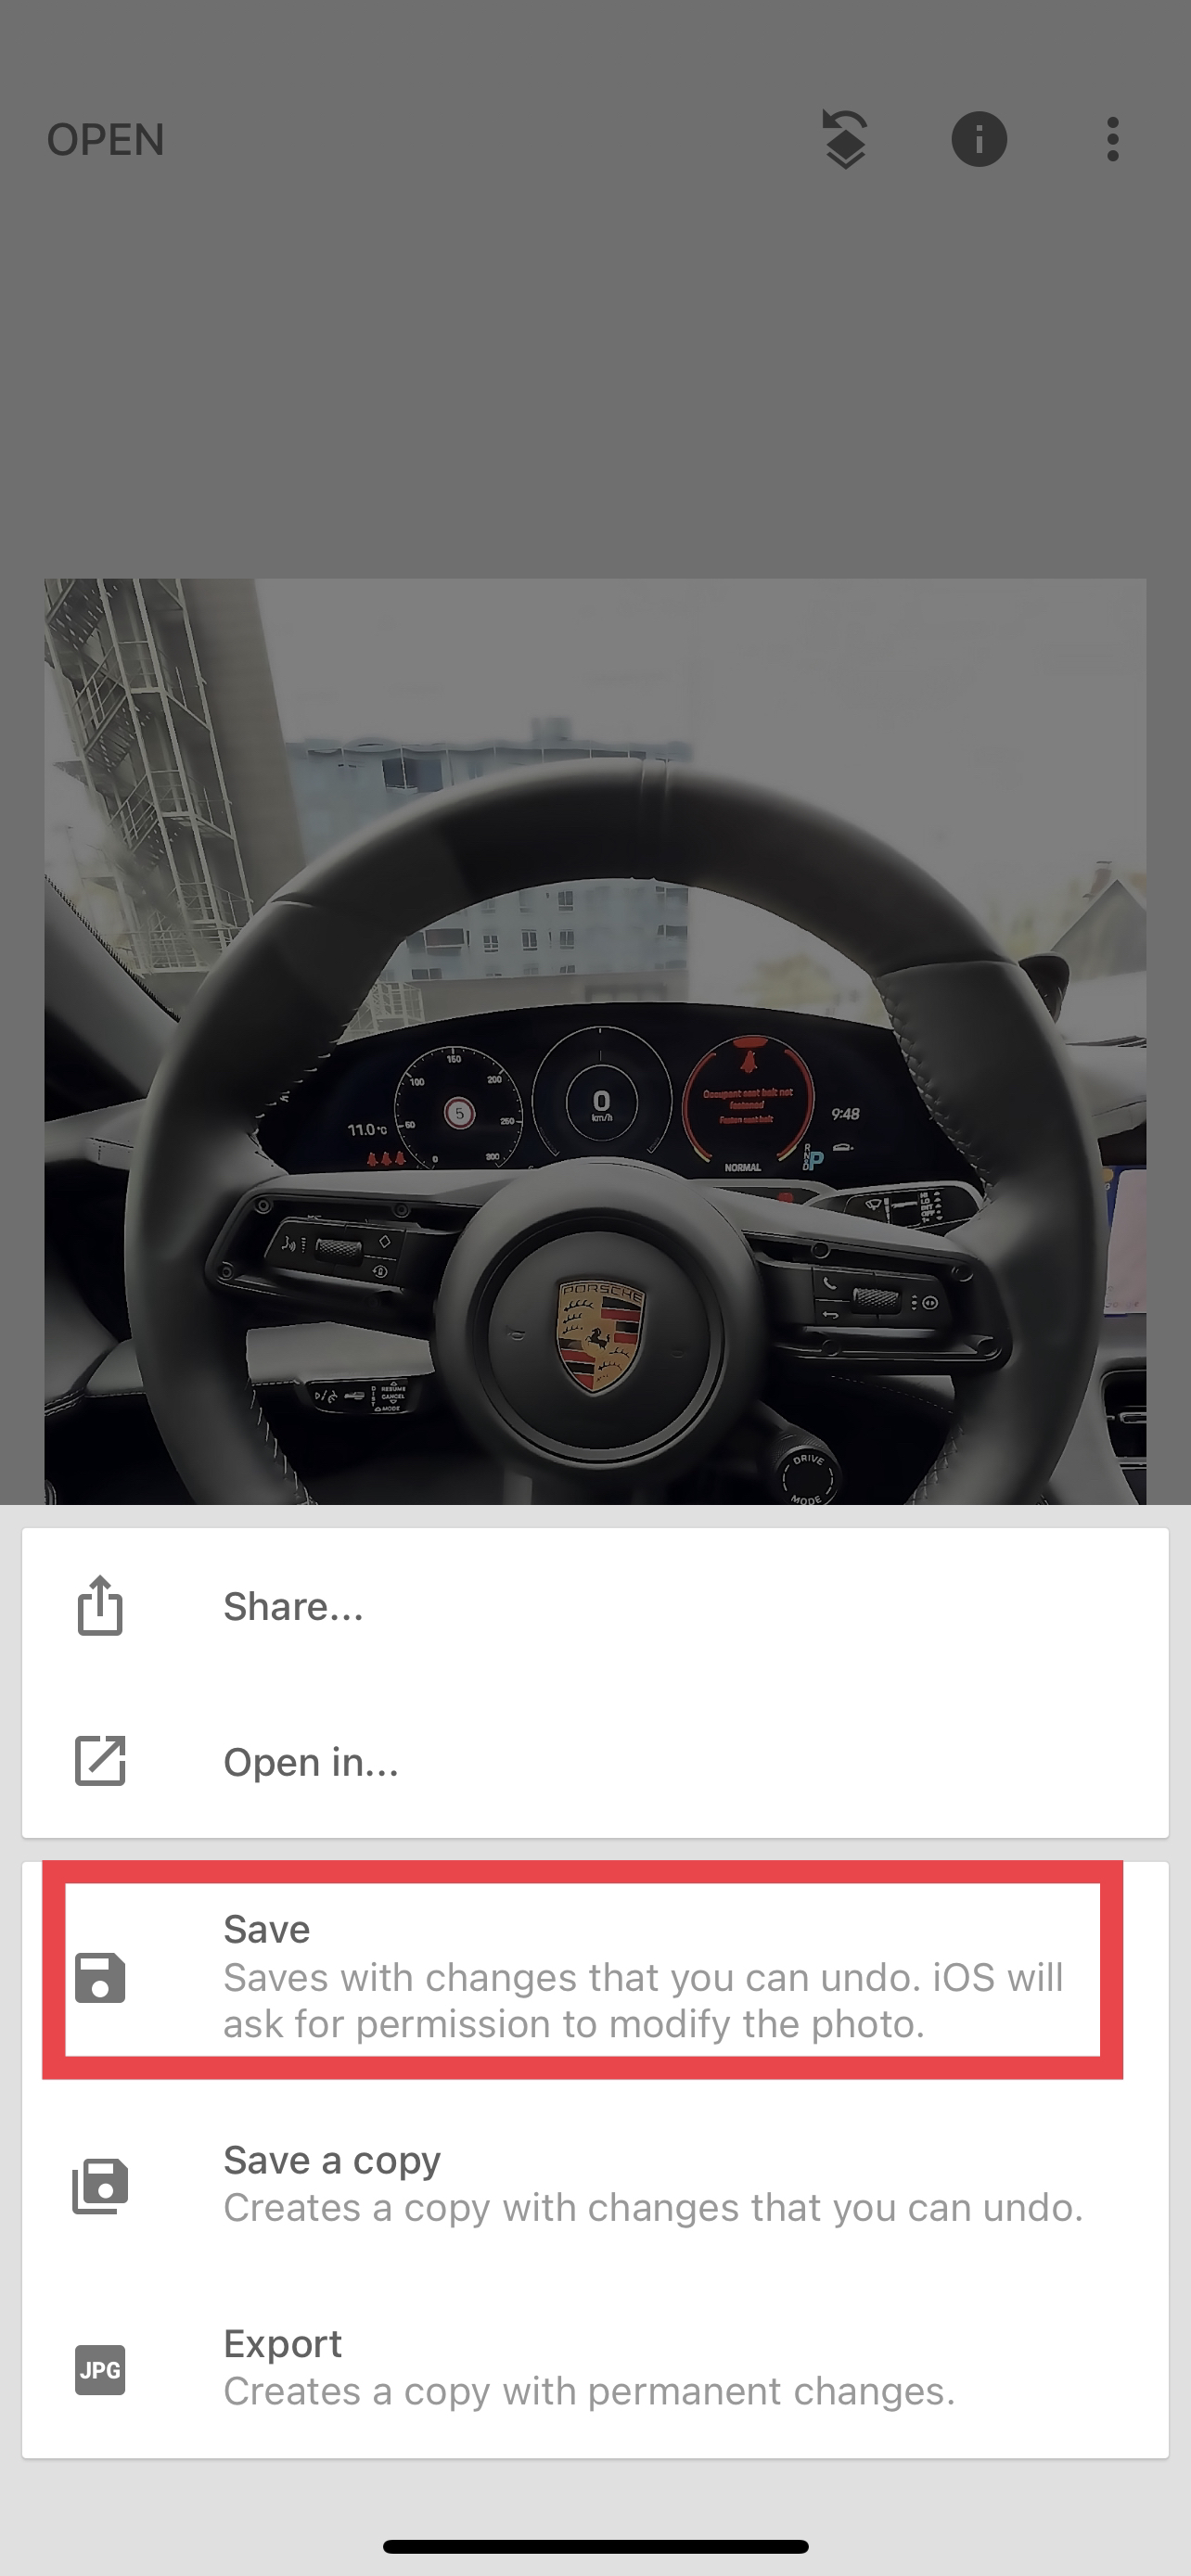
- Next, tap “EXPORT” at the bottom of the screen.
- Finally, select “Save.” Note that iOS will ask you for permission to modify the photo.
Using Adobe Lightroom
- Open Lightroom and sign in (or sign up) to your account.
- Next, tap the photo you want to edit from the gallery.
- Swipe to the left and tap “Detail” on the bottom toolbar.
- Then, adjust the slider for “Sharpening,” “Radius,” “Detail,” and “Masking.”
- Once done, tap the “Share to” button at the top and choose where to save your photo.
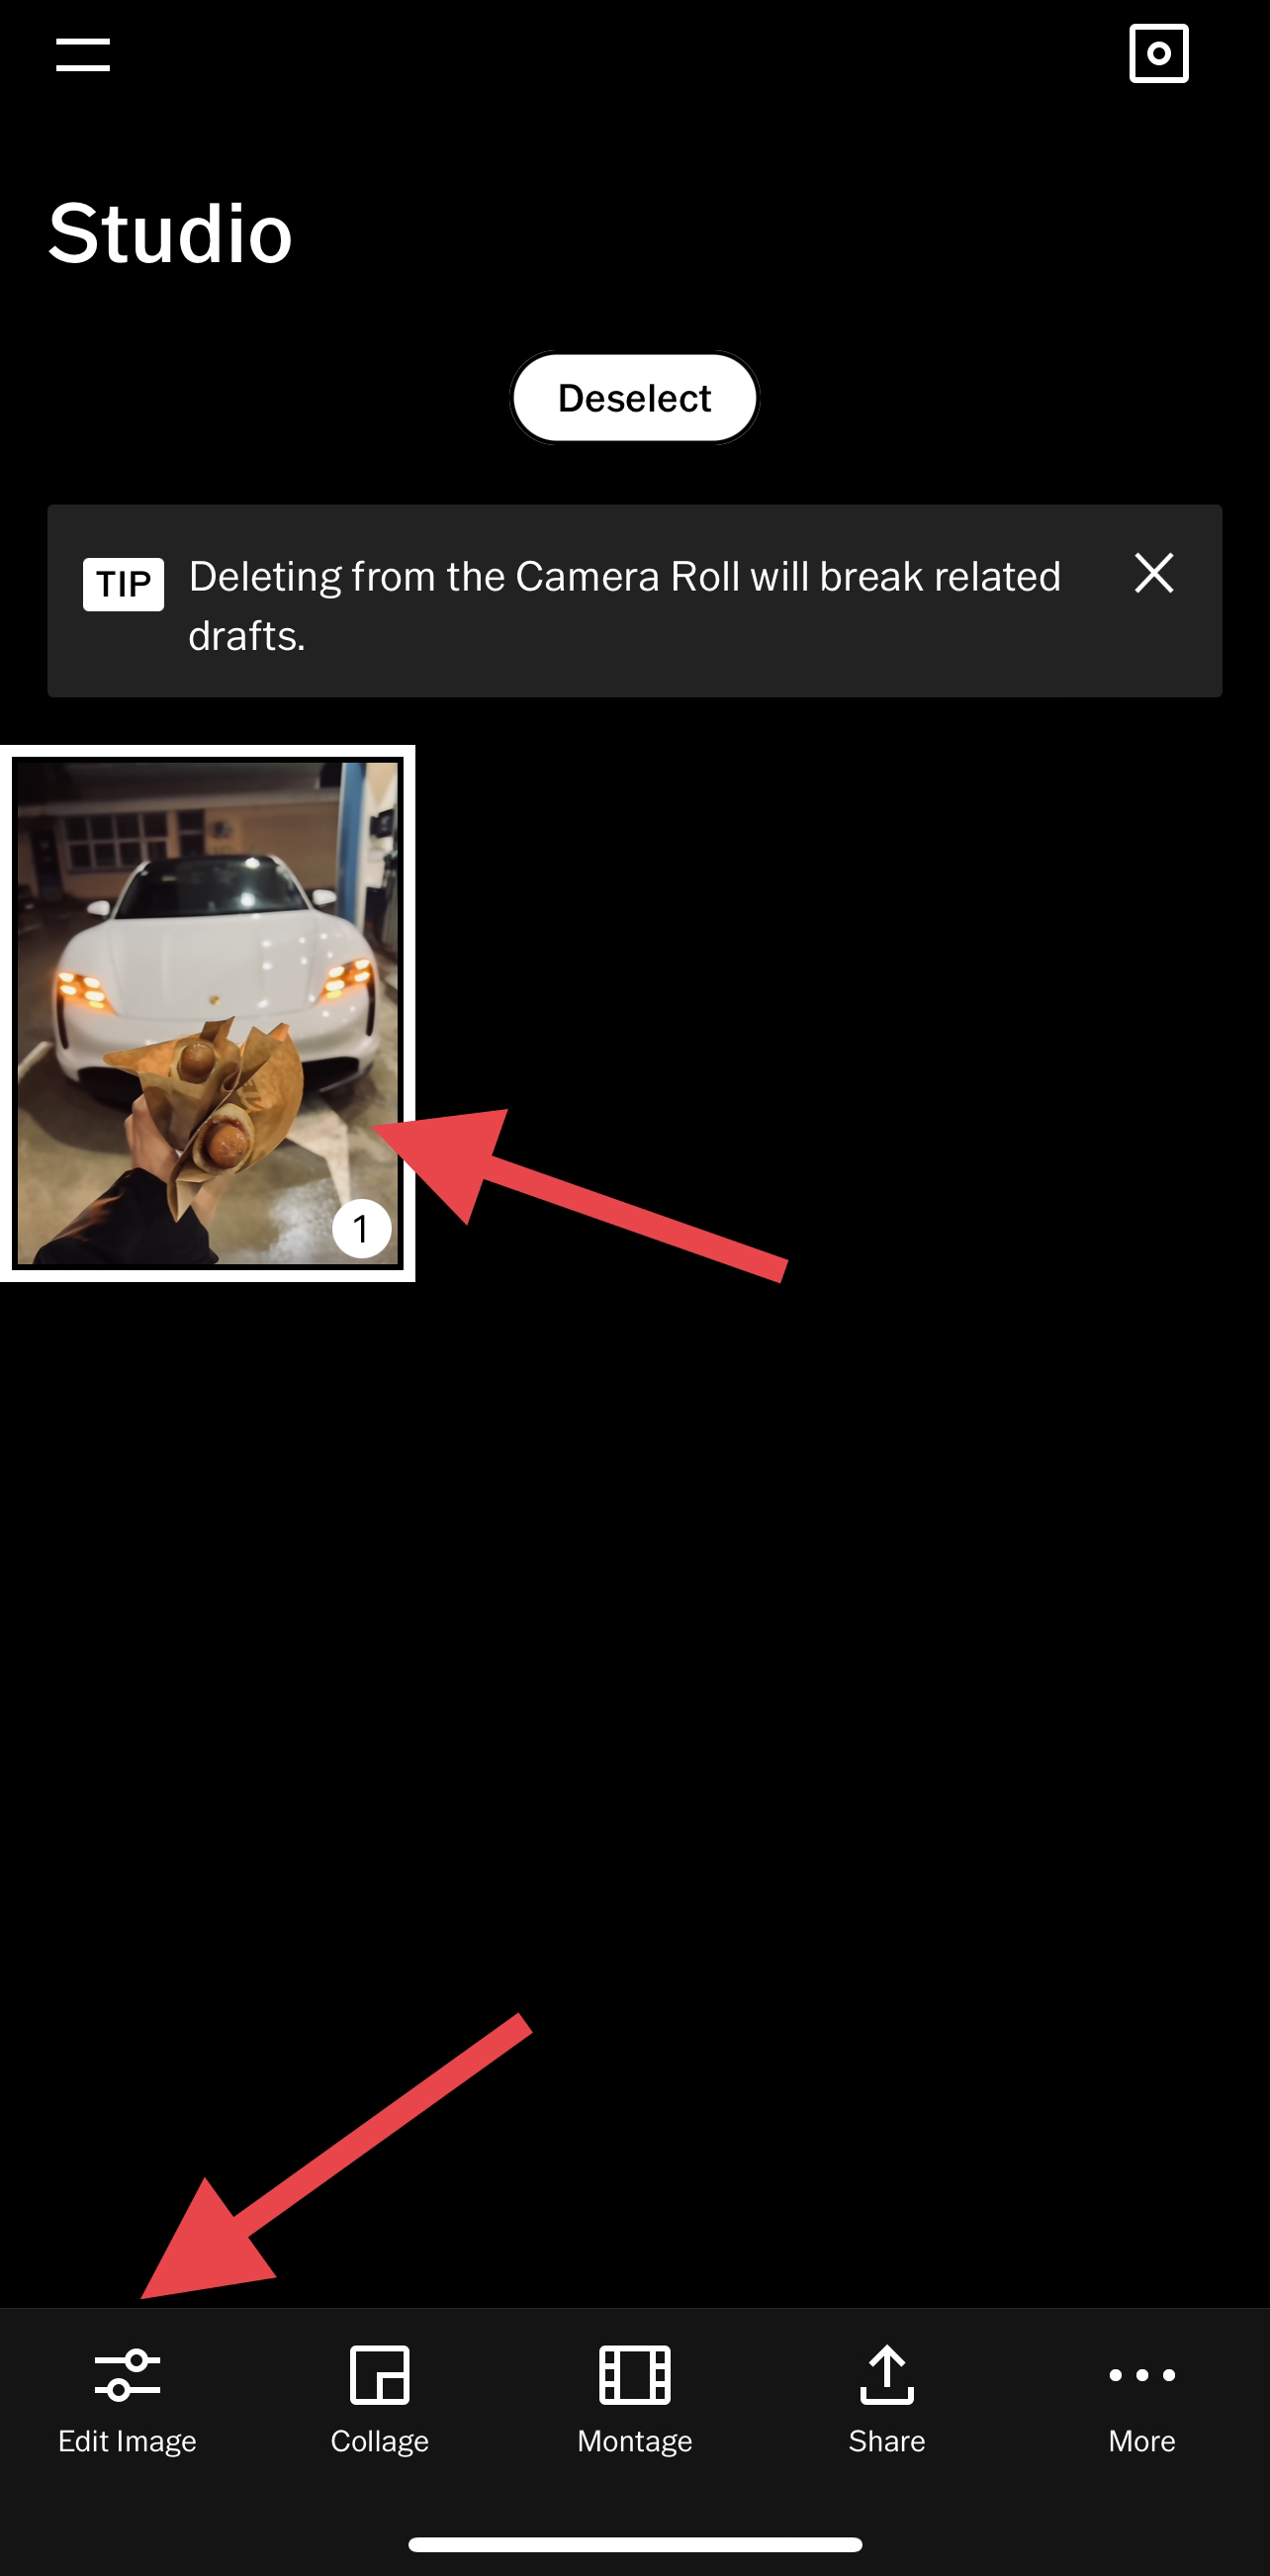
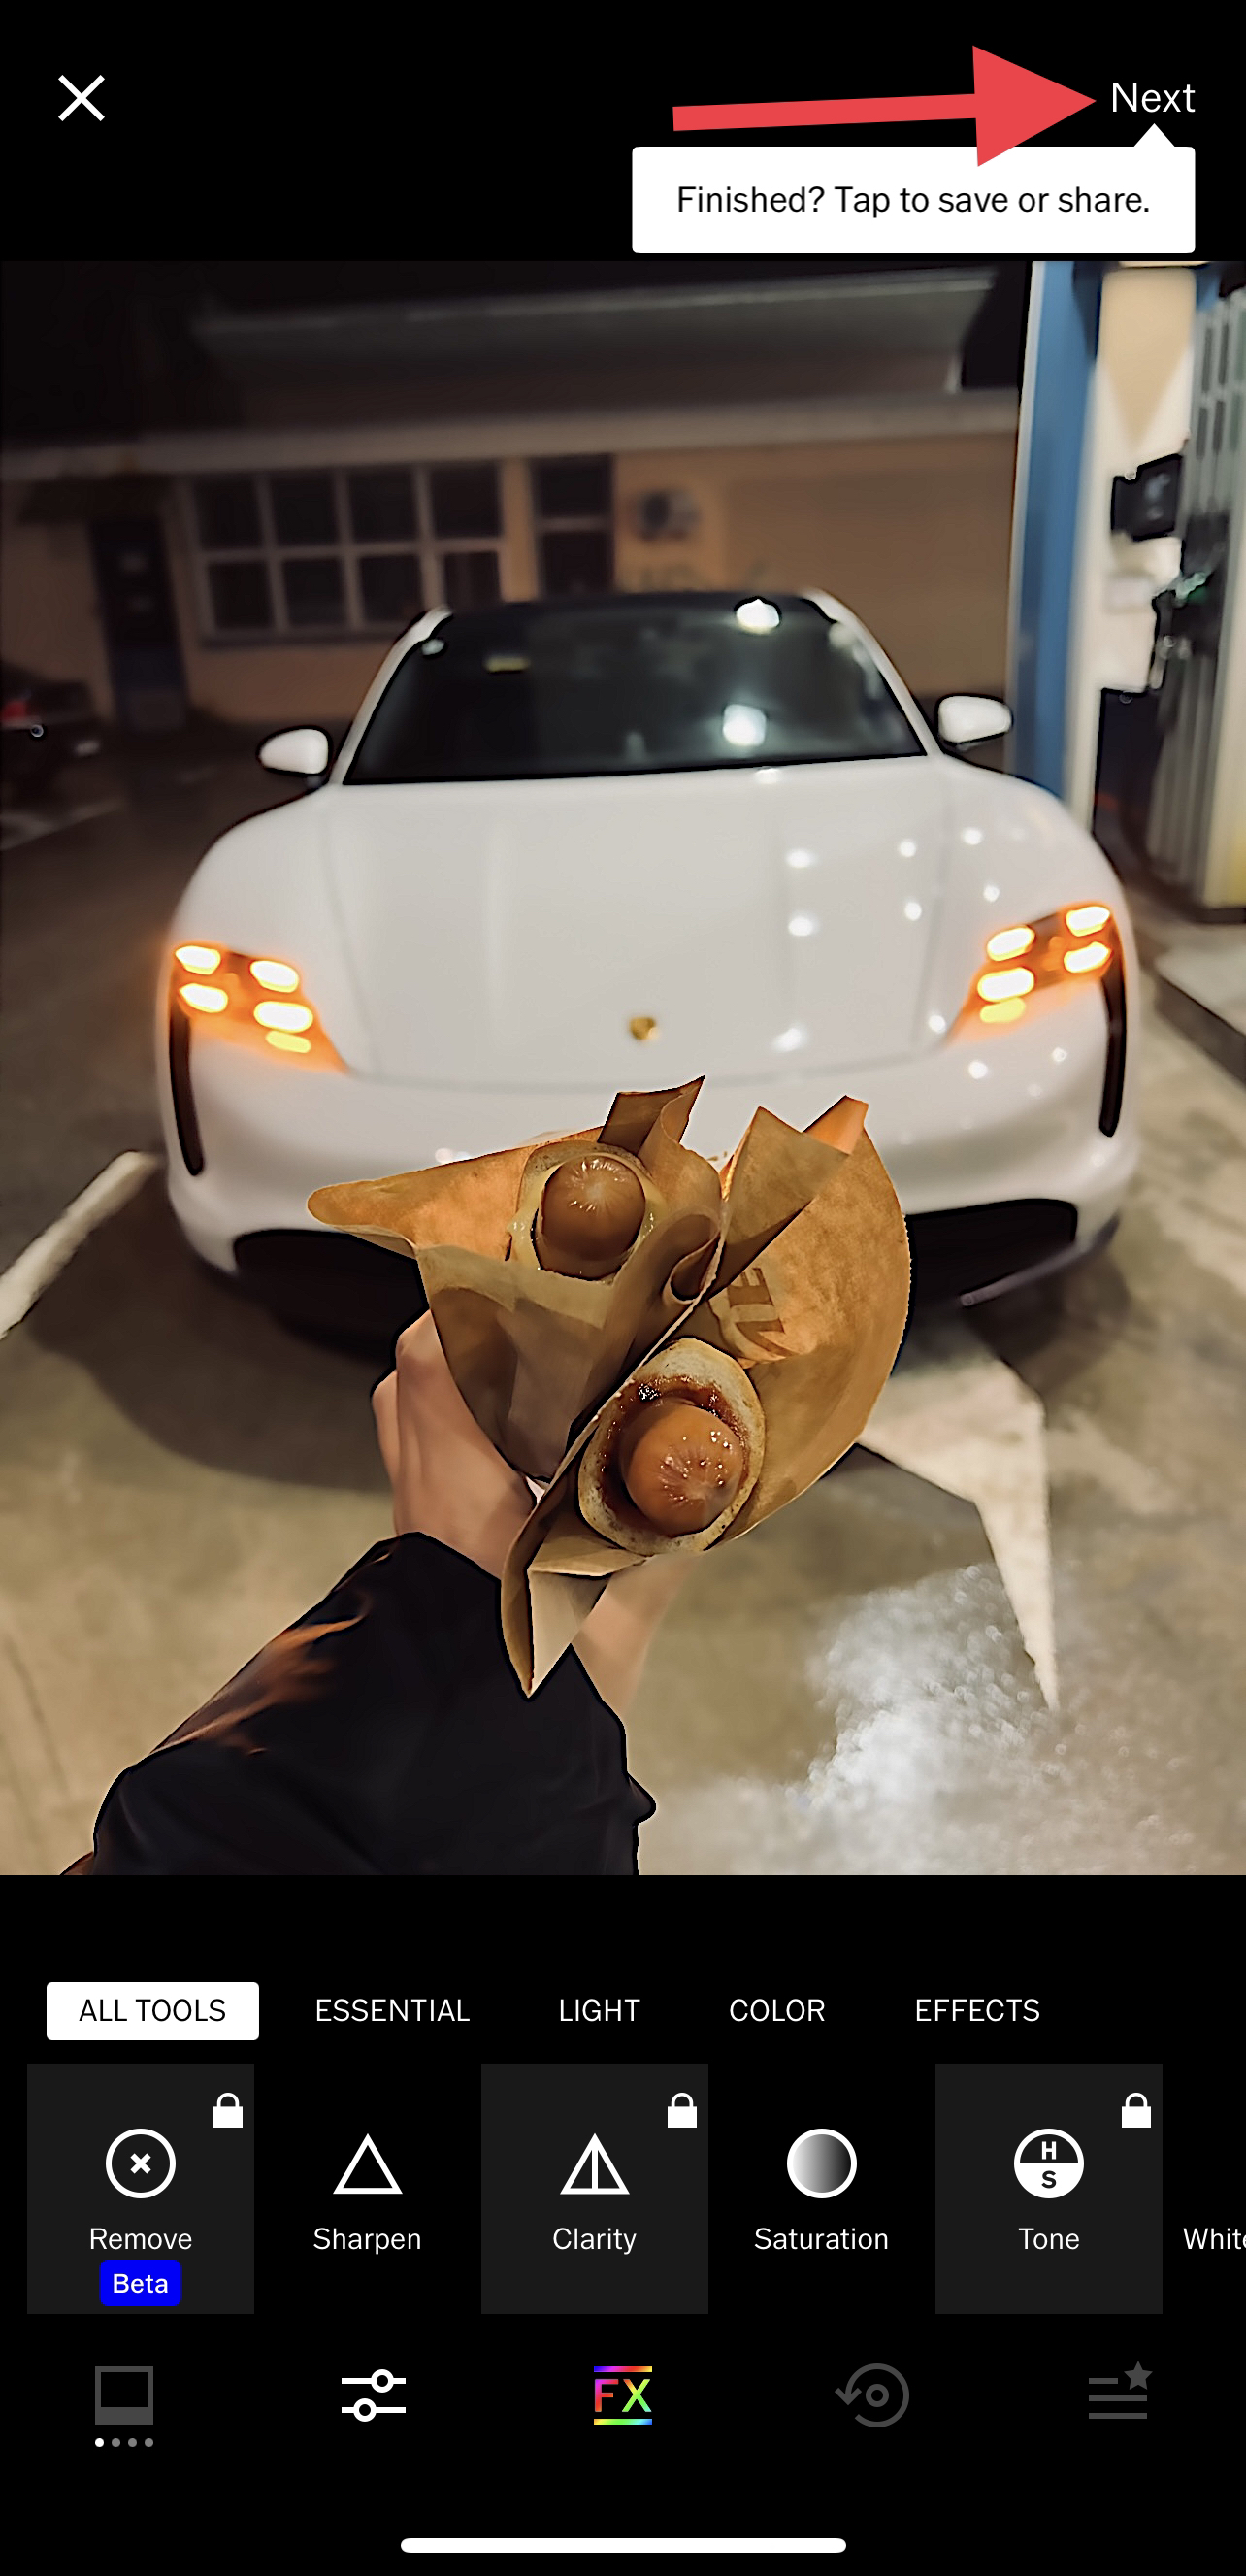
Using VSCO
- To get started, open VSCO and log in to your account (sign up if you’re a new user).
- Go to “Studio” and tap the “Import” (plus) button.
- Next, select your image from the “Photo Gallery” and tap “Continue” at the bottom.
- After that, select your newly imported picture and tap the “Edit” button.
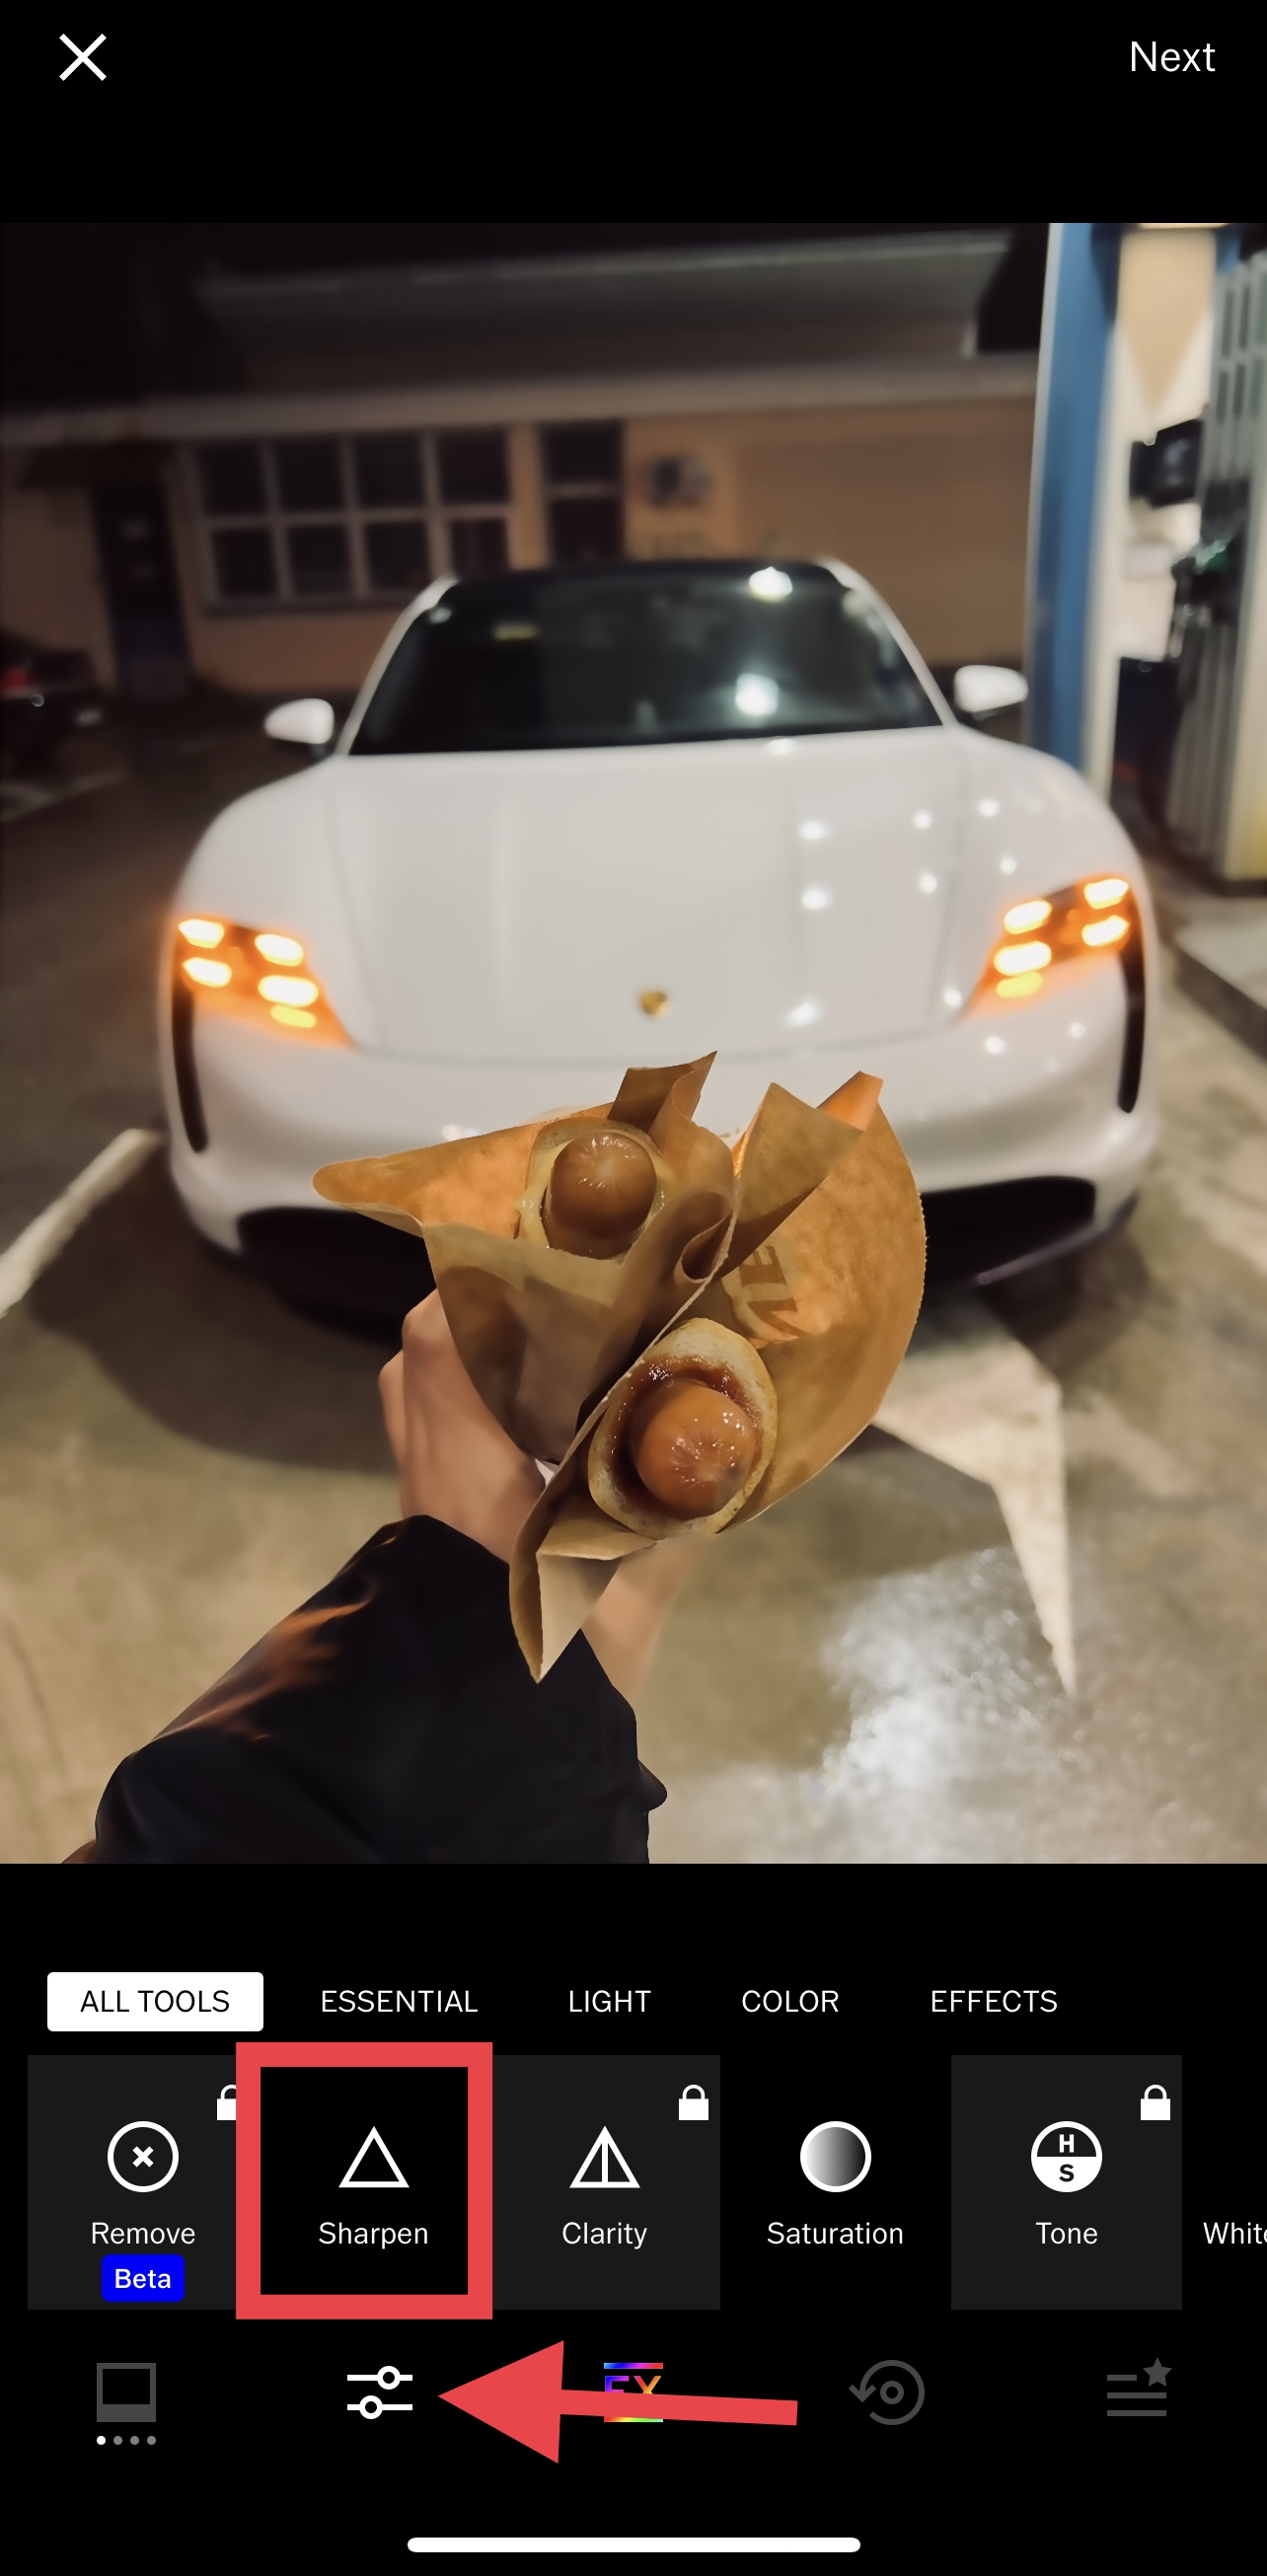
- Tap the “Tools” icon and select “Sharpen.”
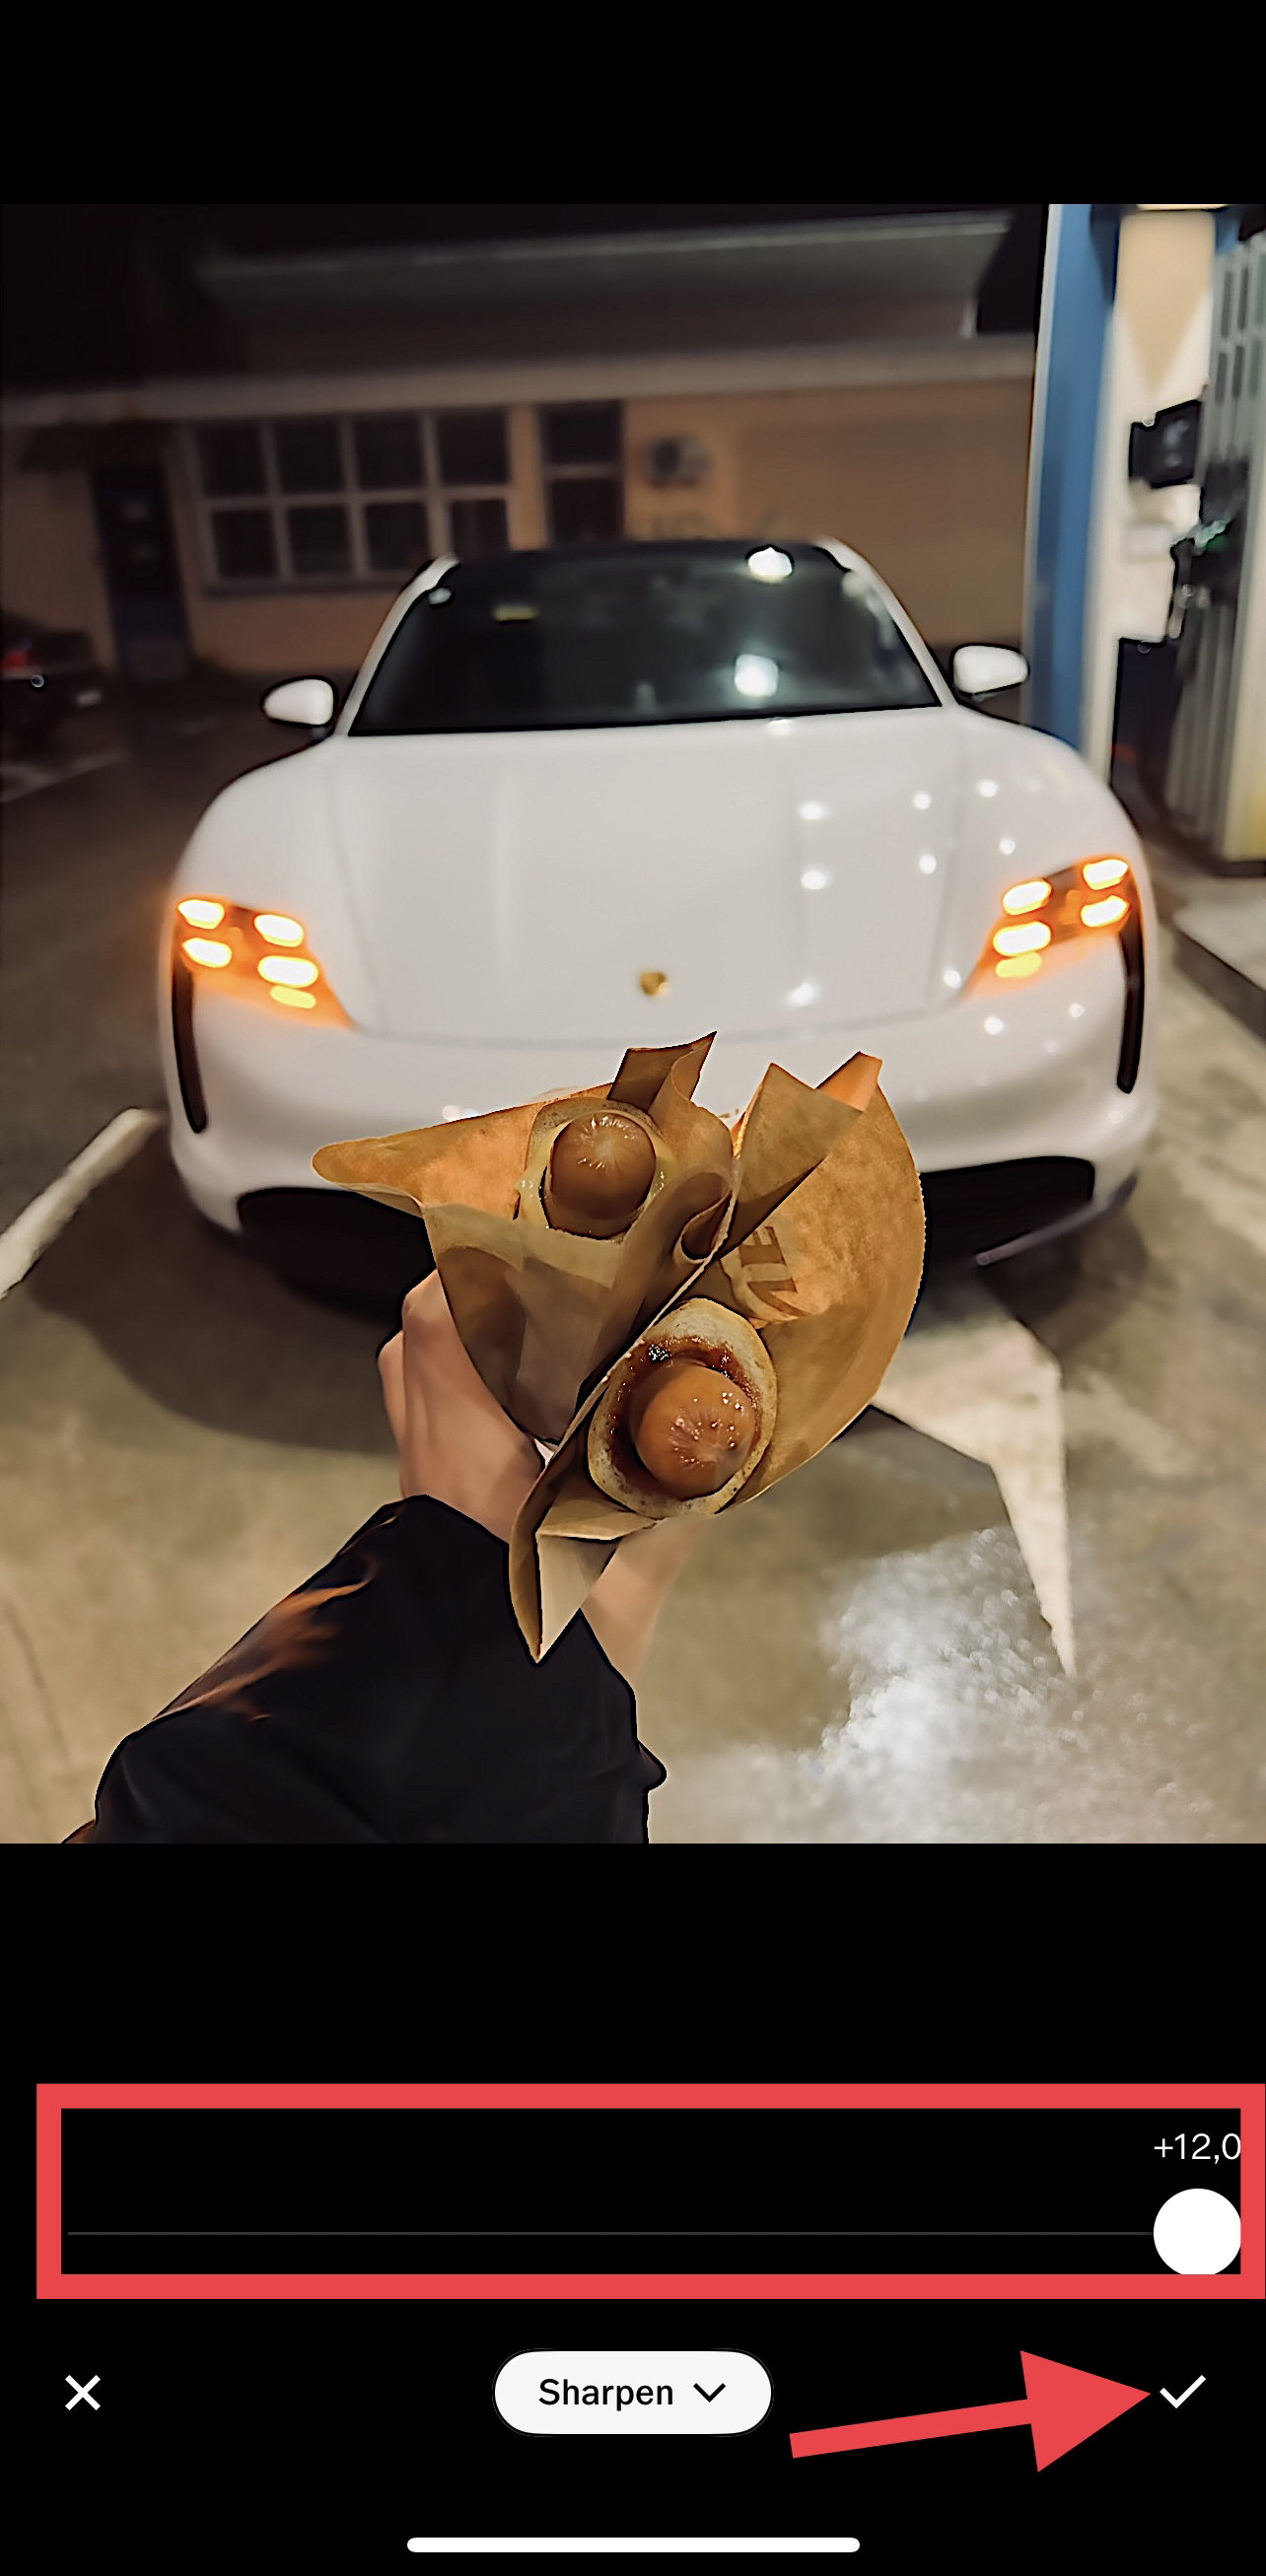
- Next, adjust the slider to your desired position and tap the checkmark once you’re satisfied.
- Tap “Next” at the top right of the screen.
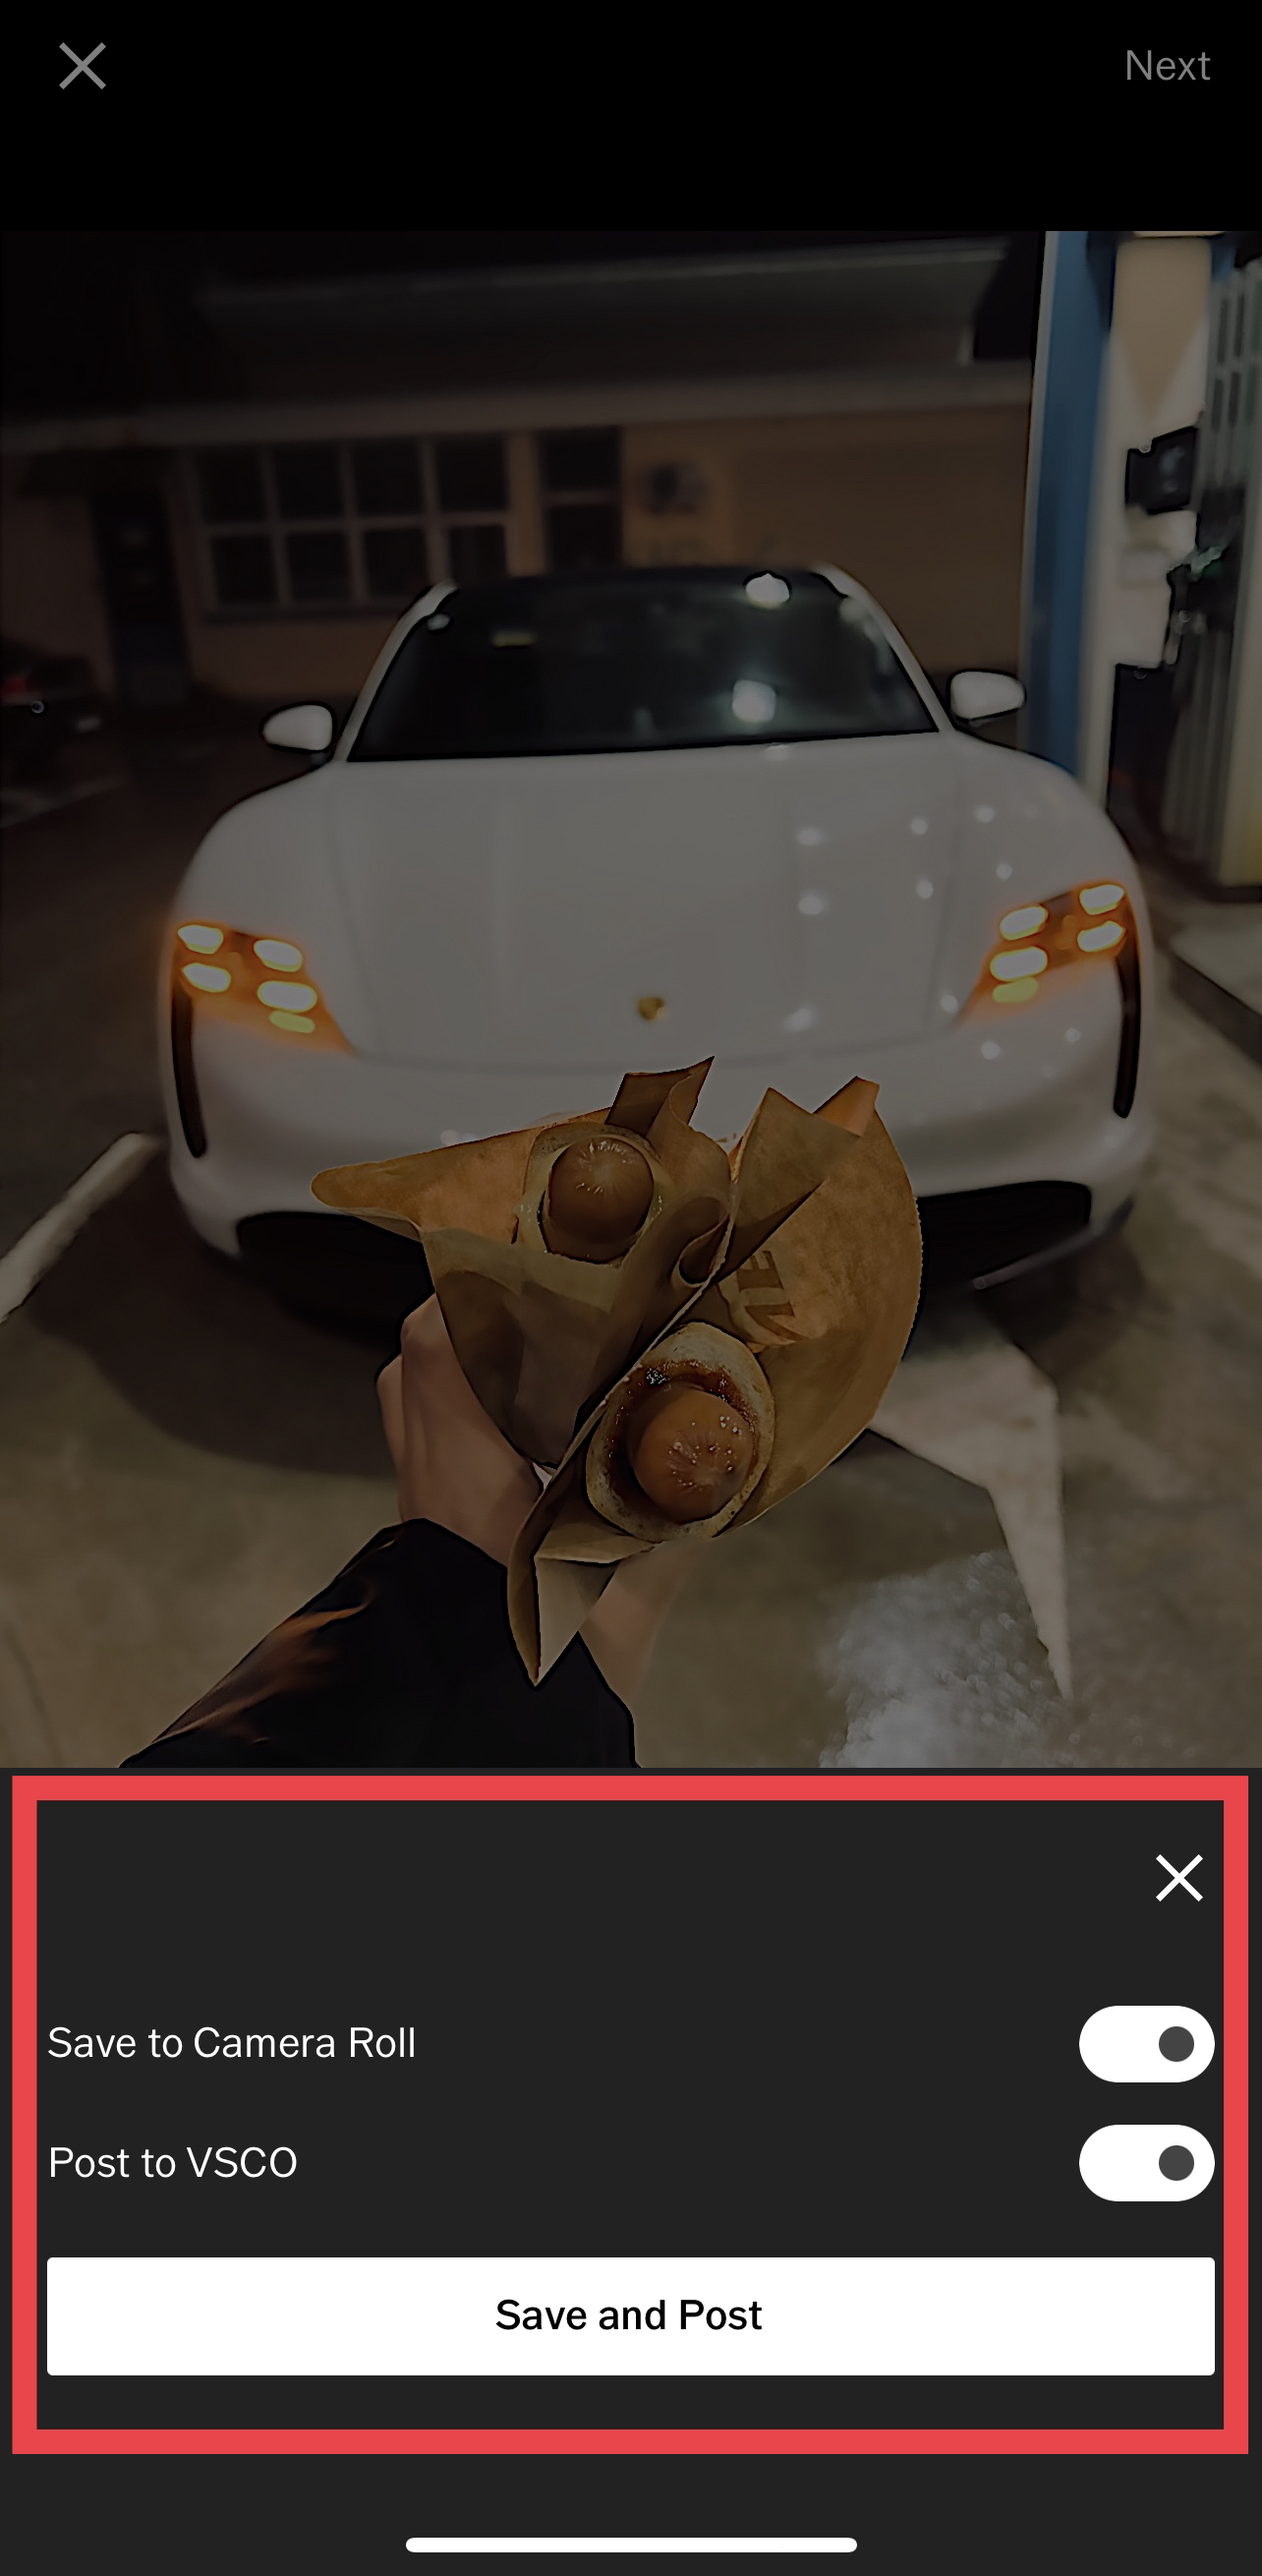
- If preferred, toggle off the button for “Post to VSCO.”
- Finally, tap “Save” (or “Save and Post” if you skipped the previous step).
How to Swiftly Remove Multiple Blurry Photos
After restoring the quality of your blurry images, you might also want to check if they have duplicates in your photo library. Removing these duplicates would do your storage good and make your albums less cluttered.
You can use the Duplicates feature on your iPhone to do this:
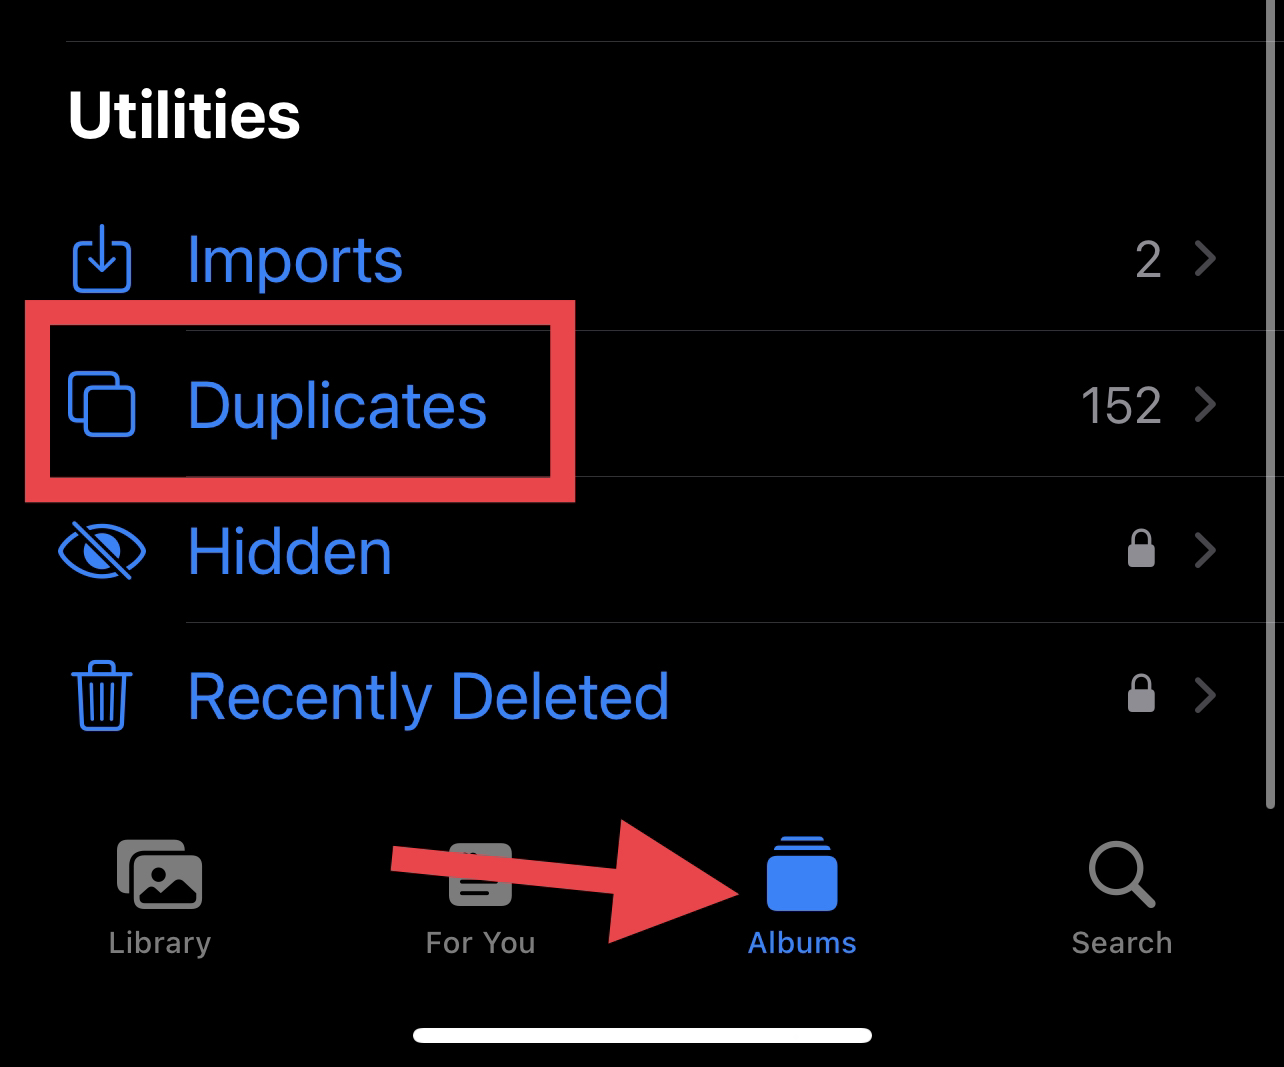
- First, open the Photos app on your iPhone.
- Tap “Albums” and select “Duplicates.”
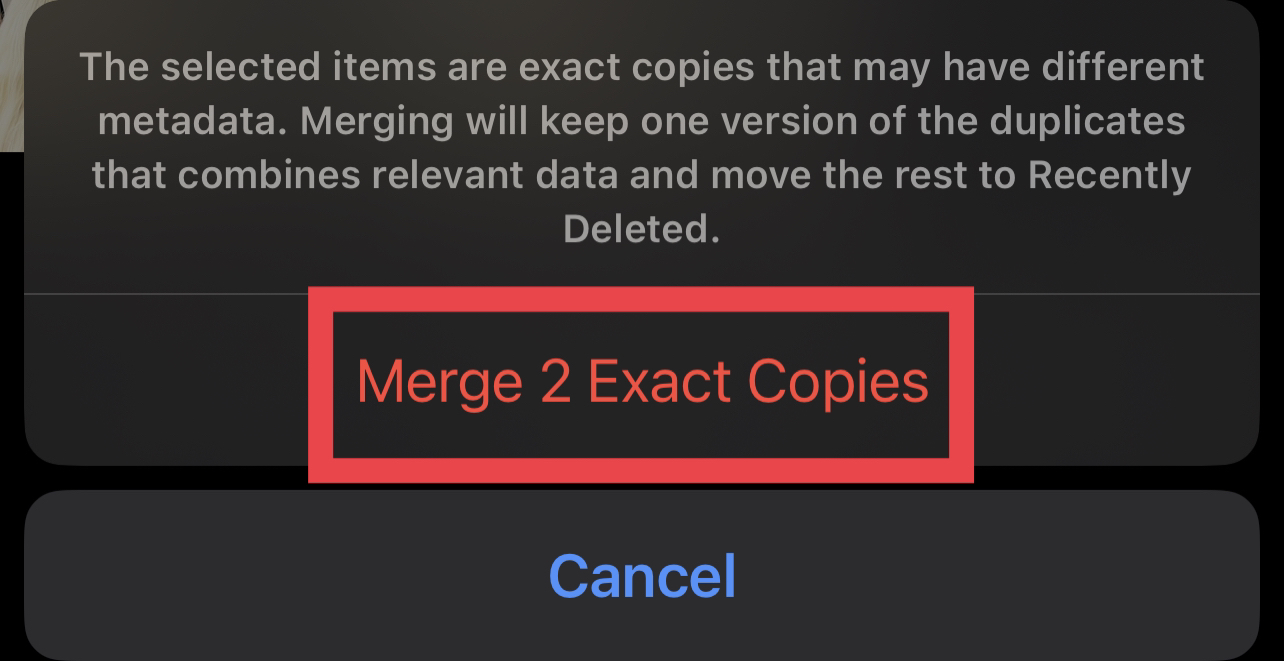
- Next, tap “Merge.”
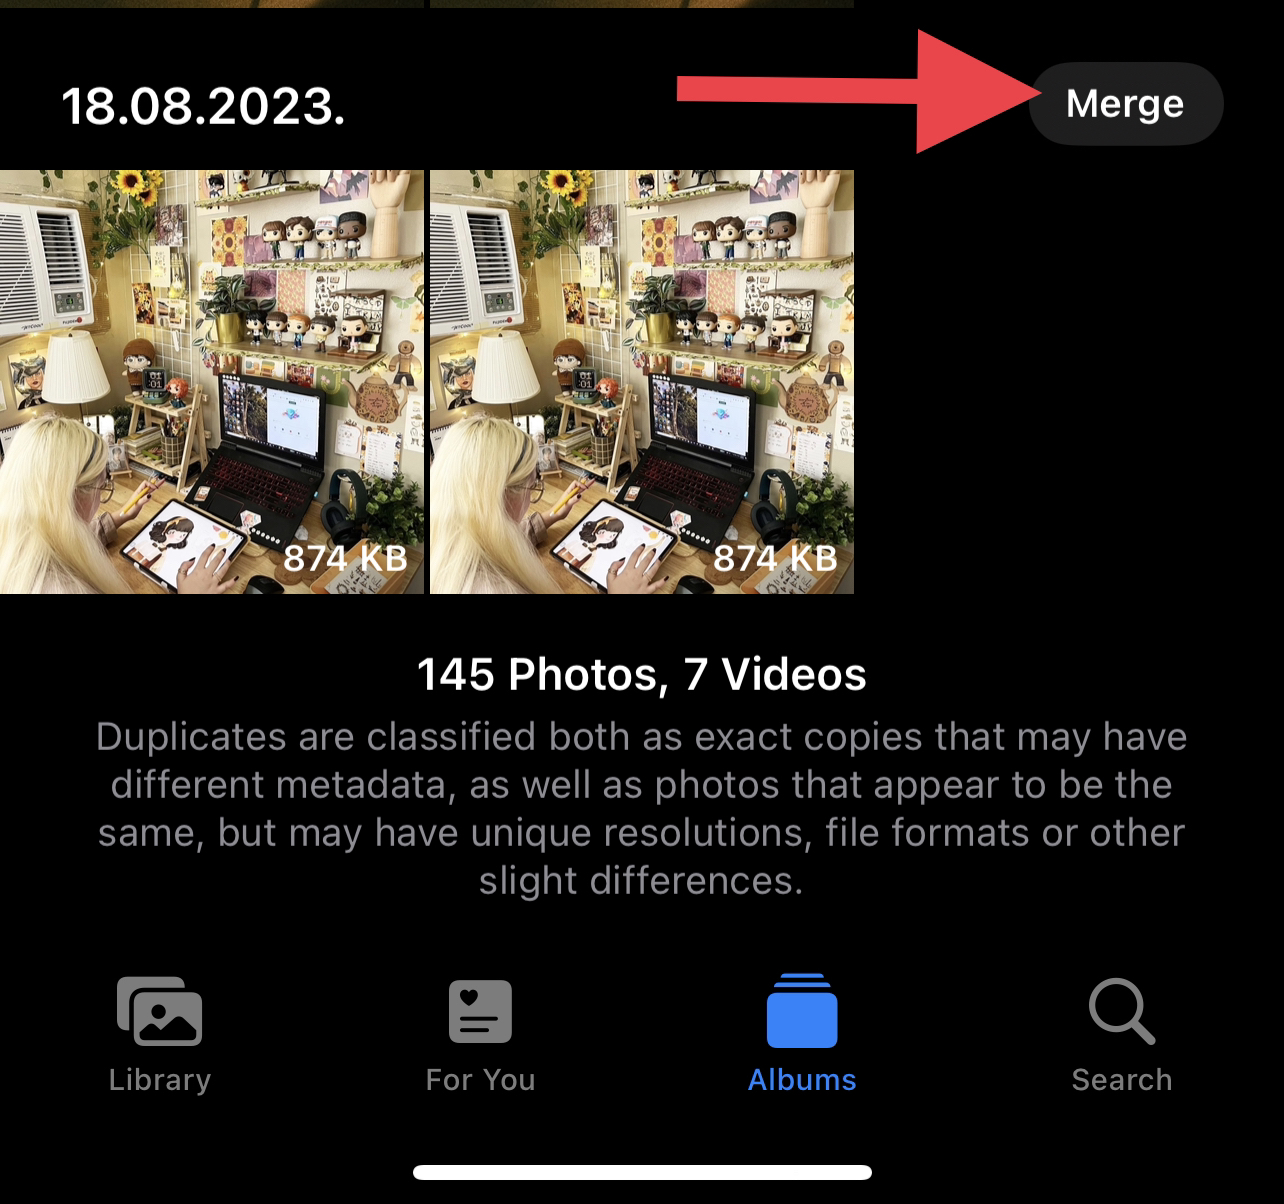
- Tap “Merge [number] items” in the confirmation dialog interface.
Note that this feature is only available on iPhones with iOS 16 or newer. Your phone may also take up to a few days to completely detect these duplicates.
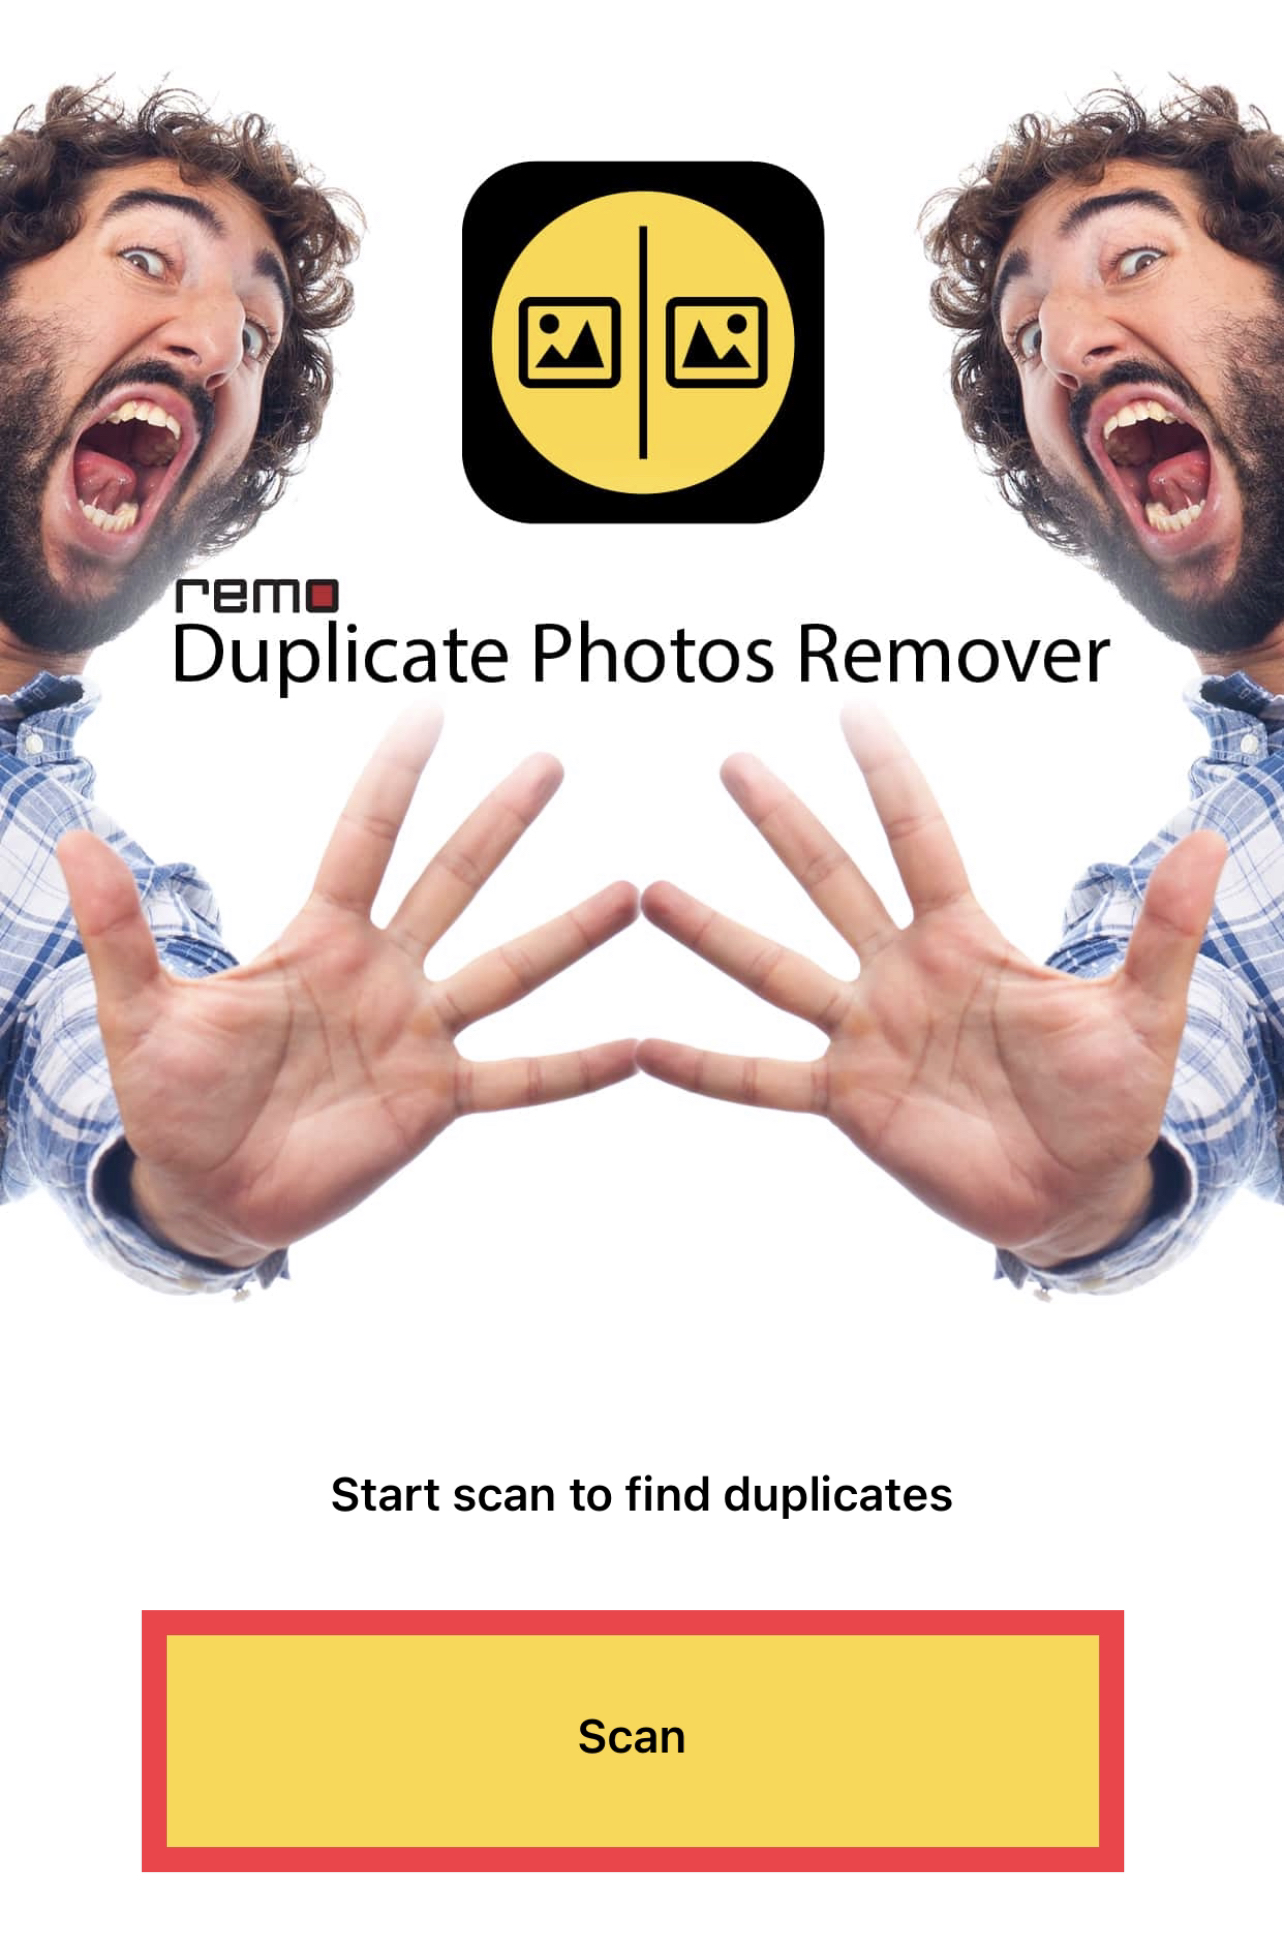
For iOS 14/15/16, using cleaner apps like the Remo Duplicate Photos Remover would be great. This app scans your device for duplicate photos quickly and automatically keeps the best duplicate.
Here’s how you can use it:
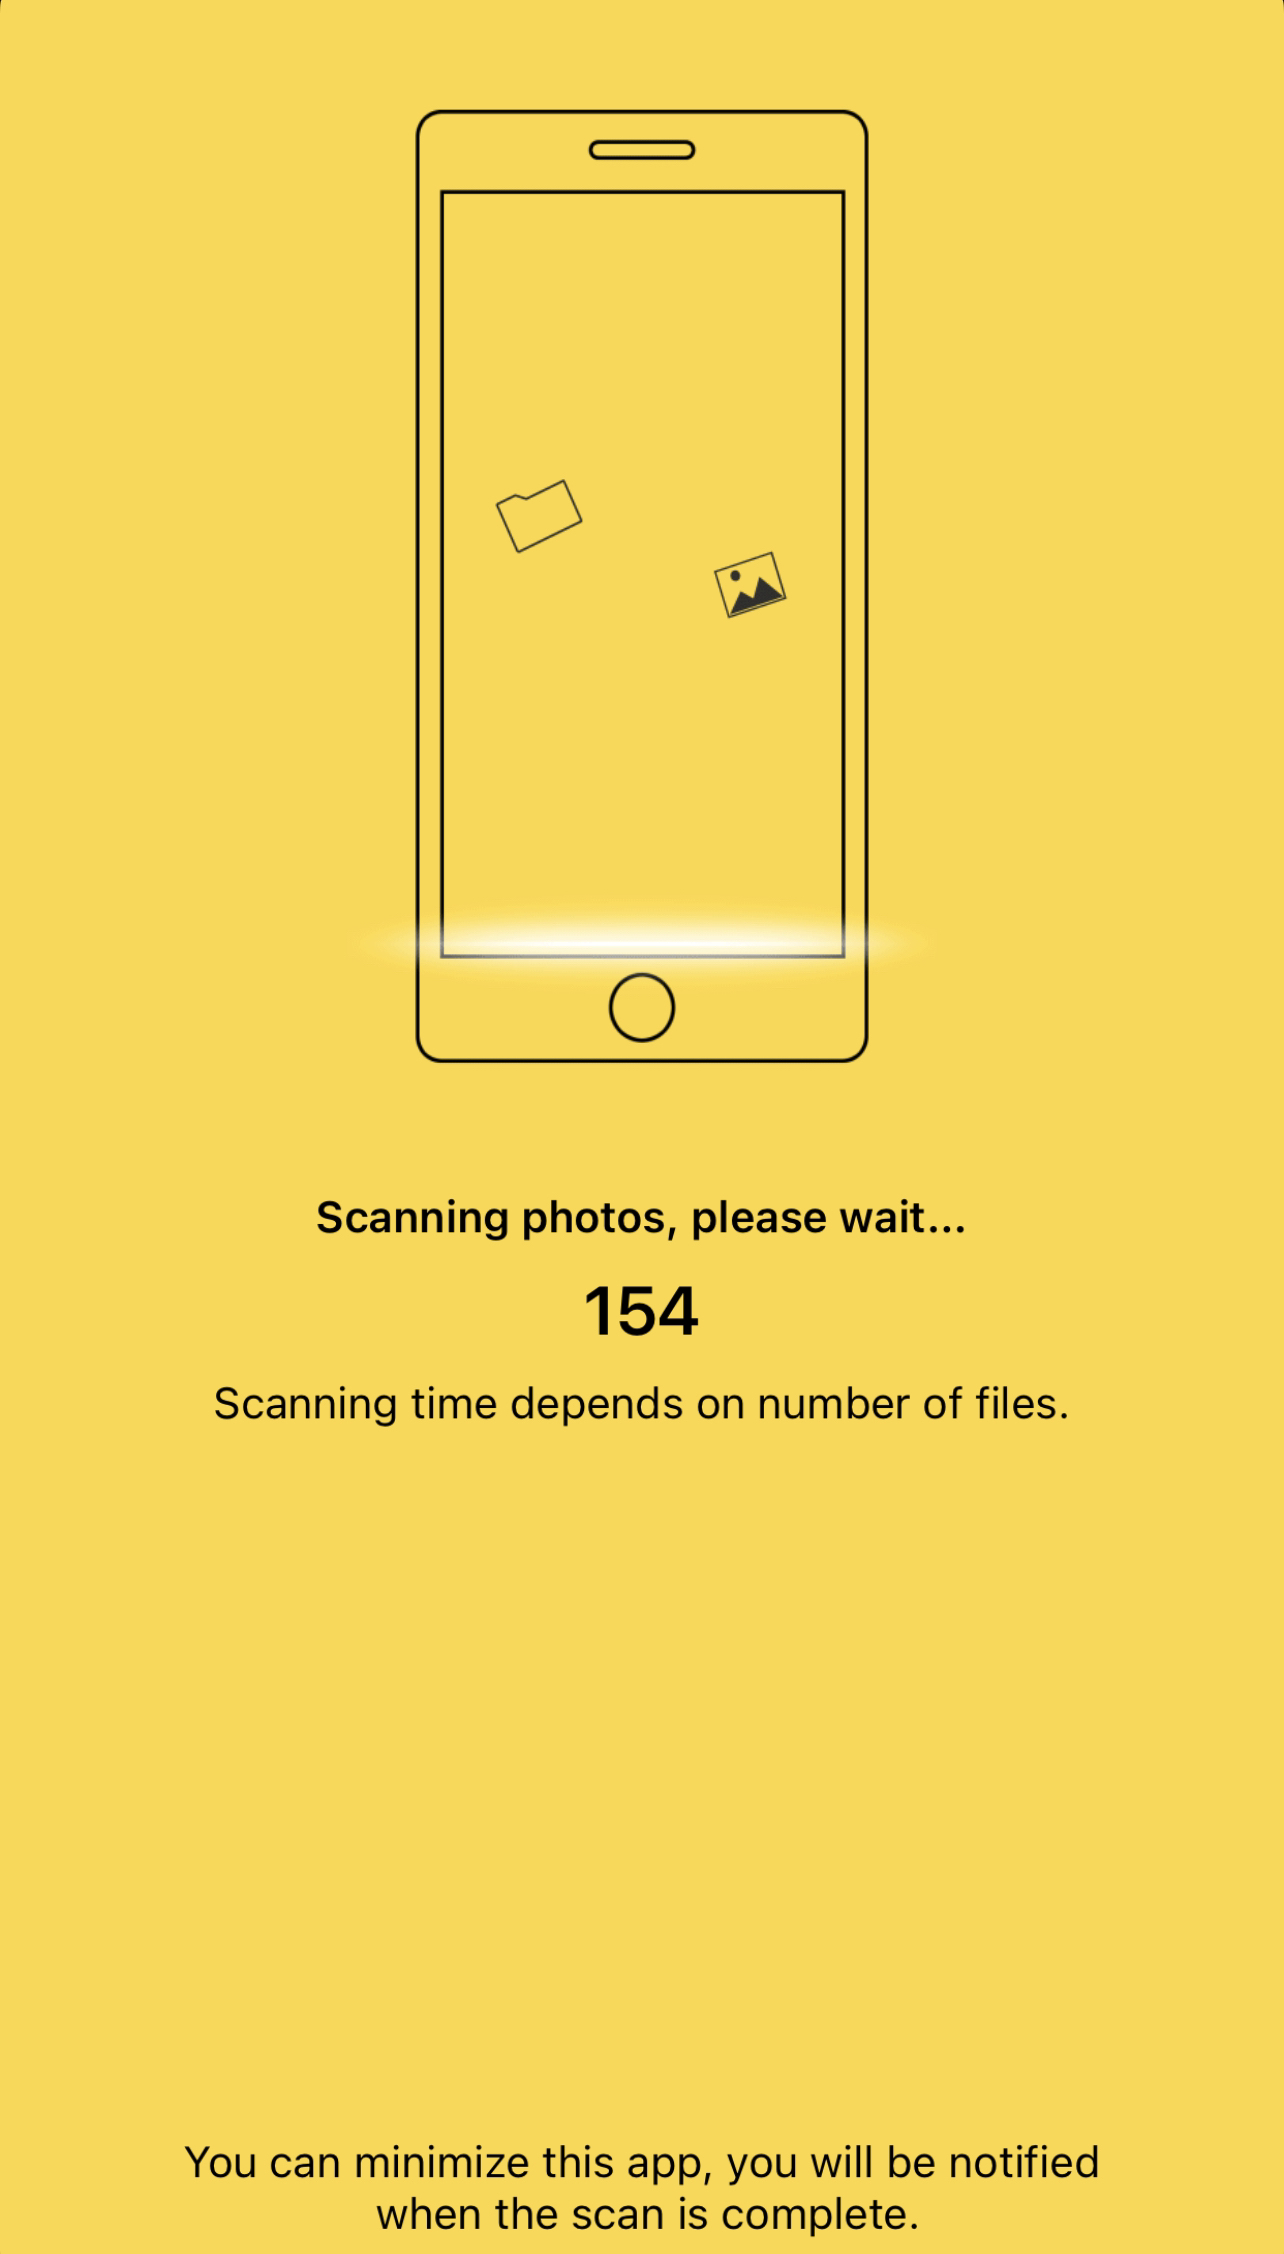
- Launch the app on your iPhone and tap “Scan.”
- Let the app scan your library for duplicates.
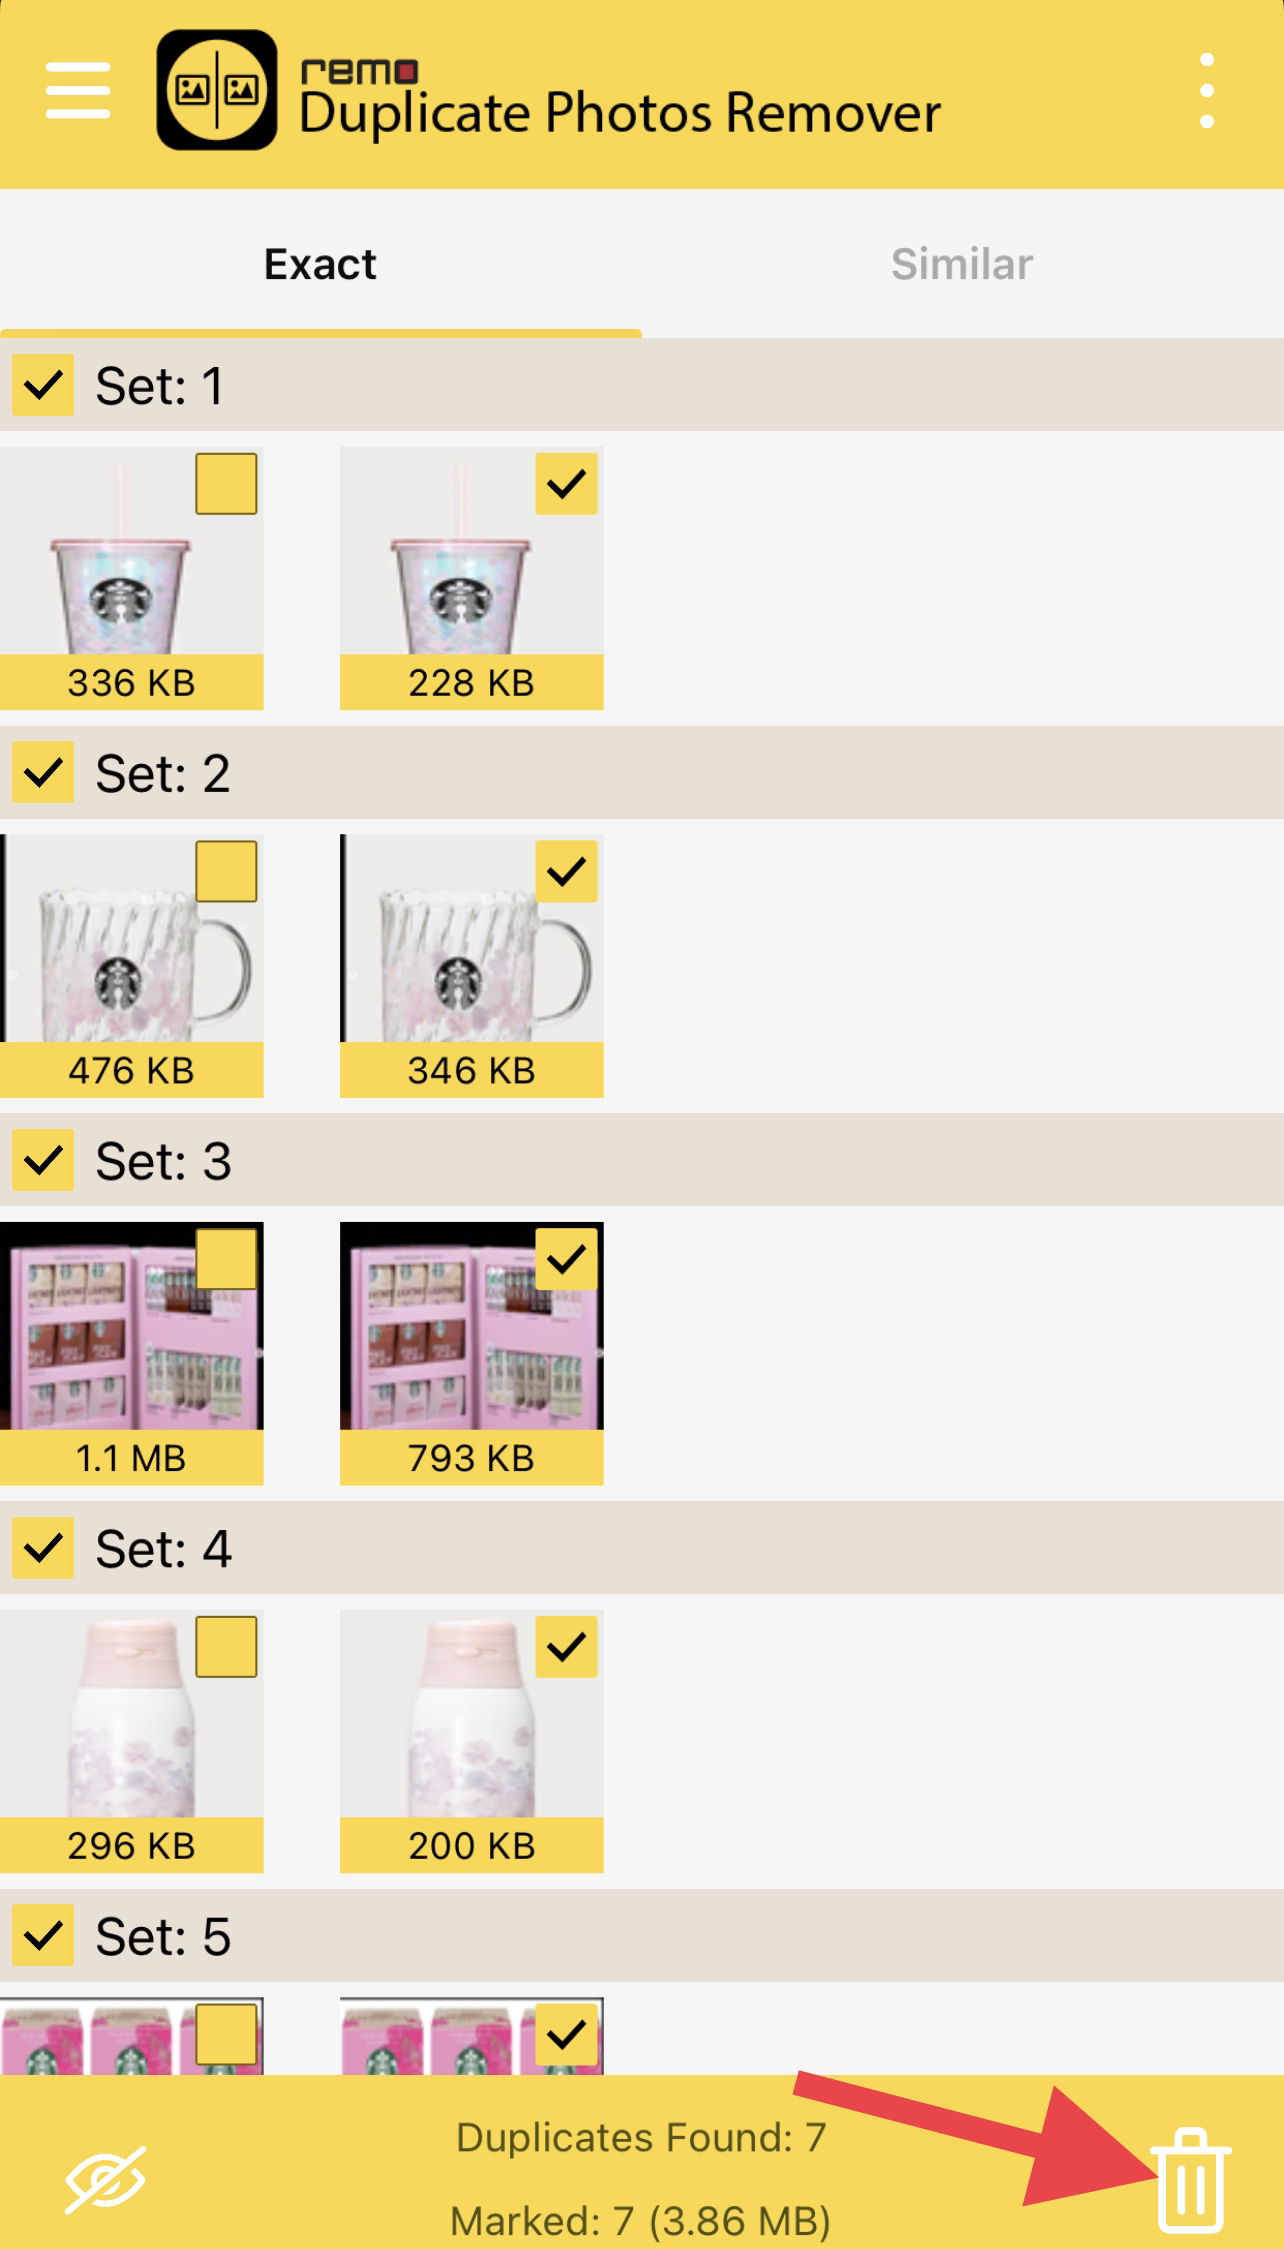
- Check the detected photos and tap the trash icon once done.
Tips for Avoiding Blurry Photos on iPhone
If you find the unblurring process time-consuming, learning these tips on how to avoid blurry photos on your iPhone is definitely a must.
1. Restart the iPhone to Exclude Software Glitches
While the Apple iPhone’s system is one of the most acclaimed out there, it’s not without its fair share of issues. It may also experience software glitches from time to time, which can affect its camera. To erase these glitches, restart your iPhone.
2. Check Your Camera Lens
Dirt and other things can affect your camera lens, resulting in blurry images. Before taking your photos, wipe the lens with a dry and clean cloth (best if you use one made with microfiber). Avoid wetting the camera lens when cleaning to prevent worse issues.
3. Use Manual Tap to Focus Option
When you take photos, your iPhone automatically adjusts the focus settings of your camera. Since it’s automated, your lenses might go out of focus all of a sudden. You can prevent this from happening by simply doing the following steps below:
- In the Camera app, tap anywhere on your screen to show your auto-focus and exposure options.
- Tap where you want the camera to focus.
- Drag the slider for exposure and adjust it accordingly.
- To preserve these exposure settings for the next camera shot, hold the focus area until “AE/AF Lock” appears.
4. Avoid Excessive Zooming
iPhones use two types of zoom technology: digital and optical. Optical zoom works by adjusting the lenses, while digital zoom uses an algorithm to simply crop your photo and make it seem “larger.”
You can use optical zoom on the Pro models of the iPhone 11/12/13/14 by virtue of their telephoto lenses. Optical zoom works only at preset values, i.e., 0.5x, 1x, 2x, 2.5x, and 3x to produce non-blurry photos.
If you zoom in beyond these values, the iPhone switches to digital zoom. Here, the more you zoom in, the more pixelated and blurry your photos get. Hence, it’s best to go closer to your subject and avoid excessive zooming.
5. Stabilize Future Shots
One of the best culprits for blurry photos is a sudden camera shake. This results in either motion blur or making your subject out of focus. To prevent this, try to hold your iPhone as stable as possible. Better yet, try using a tripod when taking your pictures.
FAQ
How do you unblur photos on iPhone for free?
To unblur a picture on iPhone, start by launching the Photos app. Tap “Edit” and navigate to the “Sharpness” tool in the editor. Adjust the photo’s sharpness attribute as needed. Tap “Done” to finish.
How do you unblur a screenshot on an iPhone?
To unblur a screenshot on an iPhone, open PicWish on Safari. Upload your screenshot and wait for the tool to finish. Tap the download button to save the unblurred screenshot to your local storage.
How do you fix blurry photos in the camera roll?
If you’re using iCloud Photos, you might have the “Optimize Storage” option turned on. This saves your photos on iCloud and only keeps lower-resolution versions on your iPhone. To solve this, open Settings and go to “[Your name]” > “iCloud” > “Photos.” Tap “Download and Keep Originals.”
If you haven’t optimized your photo storage before, you can fix blurry images using the editing tool in the Photos app. Tap “Edit” and sharpen the photo using the “Adjust” tool.
Conclusion
You take photos to capture important moments of your life, and it’s really a bummer to find that they are all blurred when you browse them. Fortunately, you can fix these blurry photos on your iPhone as long as they’re not completely blurred or pixelated. Try our methods above and see which works best for you.
This article was written by Princess Lescan, a Staff Writer at Handy Recovery Advisor.
Curious about our content creation process? Take a look at our Editor Guidelines.