
Since you’re reading this, we can safely guess the nature of the problem you’re dealing with. Your MP4, MKV, or AVI files have disappeared. Now, you’re wondering it it’s possible to recover deleted videos from your PC.
We’ve been there, seeking video files that seemingly vanished into thin air. But here’s the thing: we managed to find or recover them. Let’s go over why files can often go missing, and the methods we used to find ours that will probably help you, too.
Quick Navigation
| Problem | Solution |
|---|---|
I pressed Delete with a file selected on my Windows 10 PC without realizing it. How do I get it back? |
Look if they’re in the Recycle Bin. |
My lost videos aren’t in the Recycle Bin! What now? |
|
Is there any other way to get back my videos? I cannot find them anywhere. |
If you kept backups, you can get them back from one of them – for example, from File History’s vaults, or a cloud clone at Google Drive. |
I cannot find my videos anywhere but I also haven’t kept any backups. |
You can try to “undelete your videos” by recovering them with a data recovery solution like Disk Drill. |
Maybe Your Videos Are Not Actually Deleted?
Quite often, disappeared files aren’t deleted, but misplaced. All you need to find such “deleted” videos is File Explorer, which comes with your Windows installation. Let’s see how.
Perform a Global Search in File Explorer
Windows File Explorer allows you to fine-tune the results after searching for a text string. Did you know that you can also find all files of specific types, sizes, or matching other filters, even if you don’t remember their file names?
To find all videos on a storage device using File Explorer:
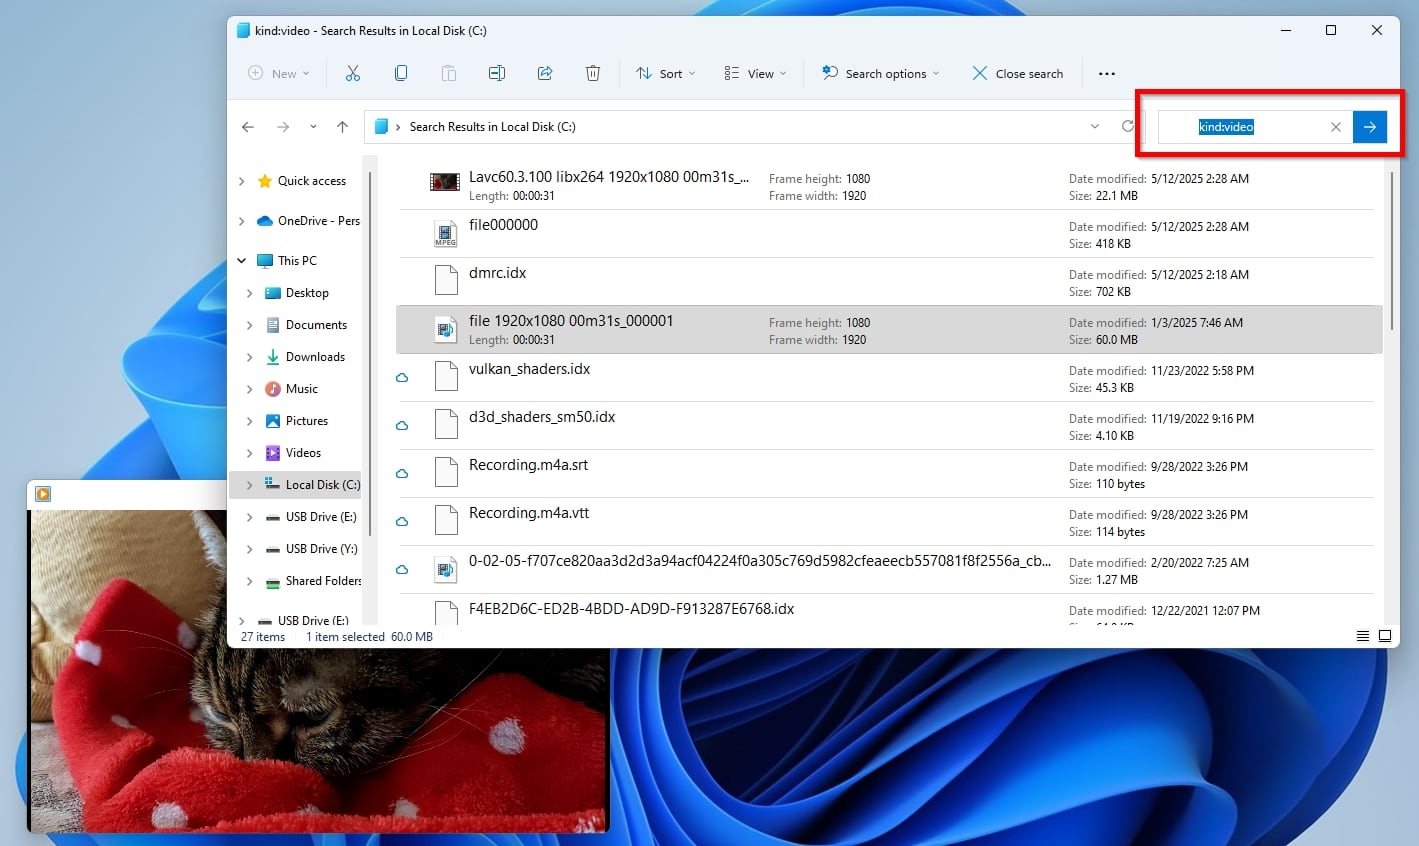
- Open Windows File Explorer (you can use its default hotkey, Windows key + E).
- In the left sidebar, click “This PC” to expand it, and select the storage device where you want to search for your files.
- Click in File Explorer’s Search field at the top right of its window. Type “kind:video” to find all video files on the selected storage device.
- Use the newly revealed Search Options drop-down menu to refine your search or seek a different kind of files (photos, games, etc.).
Windows Search sometimes proves to be somewhat limited, slow, clunky, and unable to locate all files. If you can’t find your video files with it, it’s worth trying a more powerful solution, like Everything by voidtools. Everything offers much more thorough and quicker indexing and searching, consumes minimal resources, and is free to use.
Check Common Storage Locations
If you don’t remember your video files’ names, and thus can’t search for them as we saw, how can you locate them if they’re misplaced? Try the same approach that could help when seeking physical “things”, like your car keys: seek them wherever it’s most probable you’ve left them the last time you used them. In the case of video files, that translates to the following locations.
Run Windows File Explorer or your favorite file manager, and inspect the following locations:
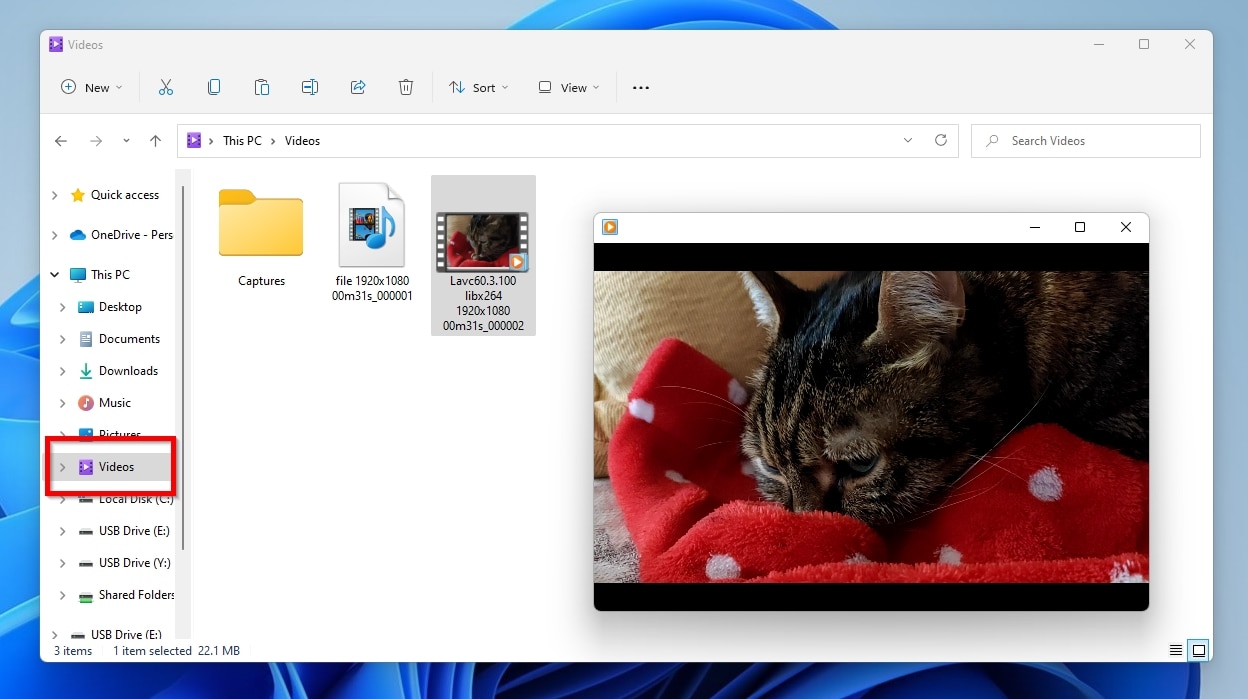
- Videos (or
Libraries > Videos, or%UserProfile%\Videos): The default video directory for Windows and apps that respect OS storage settings. - Downloads (or
%UserProfile%\Downloads): The folder where Windows, the Edge browser, and many other apps store downloaded files by default. - Documents (or
Libraries > Documents, or%UserProfile%\Documents): The standard destination for files owned by the active user account.
In most cases, to “recover” your lost videos, you’ll only have to move them back from where they were misplaced (and not actually deleted) to the desired folder.
Use the “Recent Files” Feature
Had you recently opened the videos you’ve lost? Then, you’ll probably find them on Windows’ Recent Items list. You can see some of those files directly on the Windows Start menu, but not where it matters the most: within File Explorer. Thankfully, that’s an easy issue to fix.
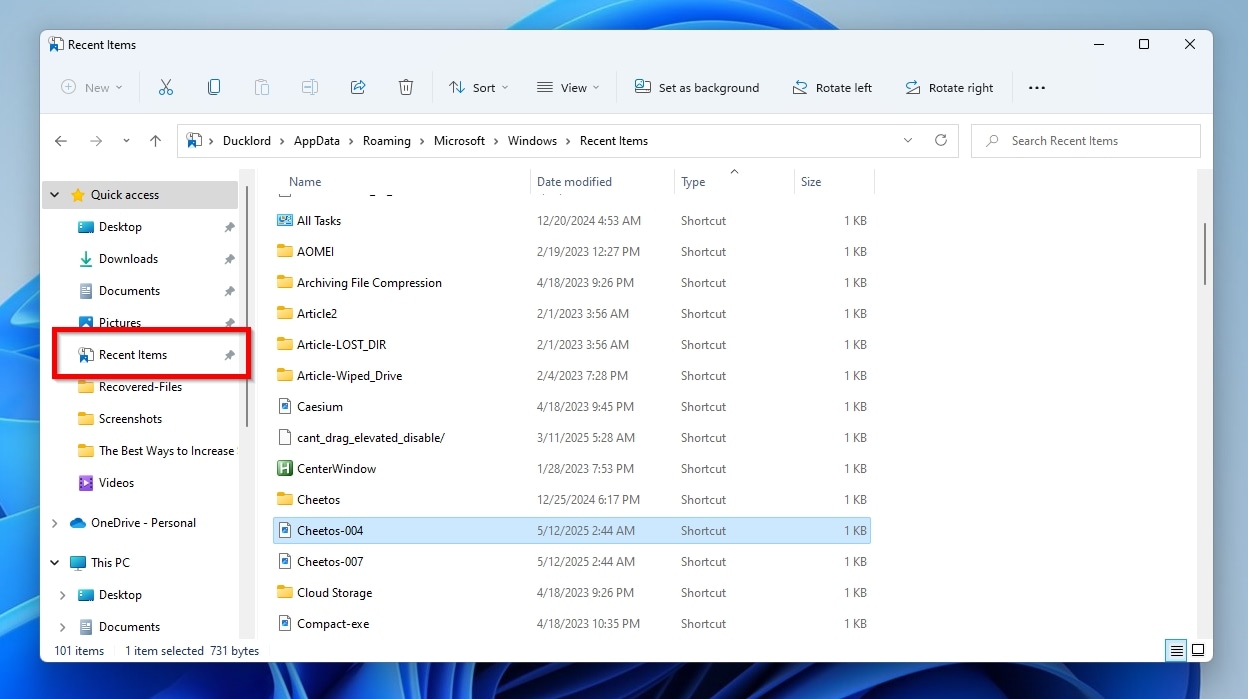
To pin the Recent Items folder to Quick Access and find your files within it:
- Run Windows File Explorer (Windows key + E), and visit the following address:
%UserProfile%\AppData\Roaming\Microsoft\Windows. - Right-click on Recent Items and select Pin to Quick Access.
- You will see that the Recent Items folder has been added to the Quick Access area on the left side of Windows File Explorer. Click on it to see all the files and folders that Windows has logged that you accessed recently.
Although you’ve probably already checked there, since some users are unfamiliar with how the particular folder works, we should remind that it’s worth looking for lost video files within the Recycle Bin. On most modern desktops, the Recycle Bin (or “Trashcan”, or simply “Trash”), is where the operating system temporarily stores any deleted files.
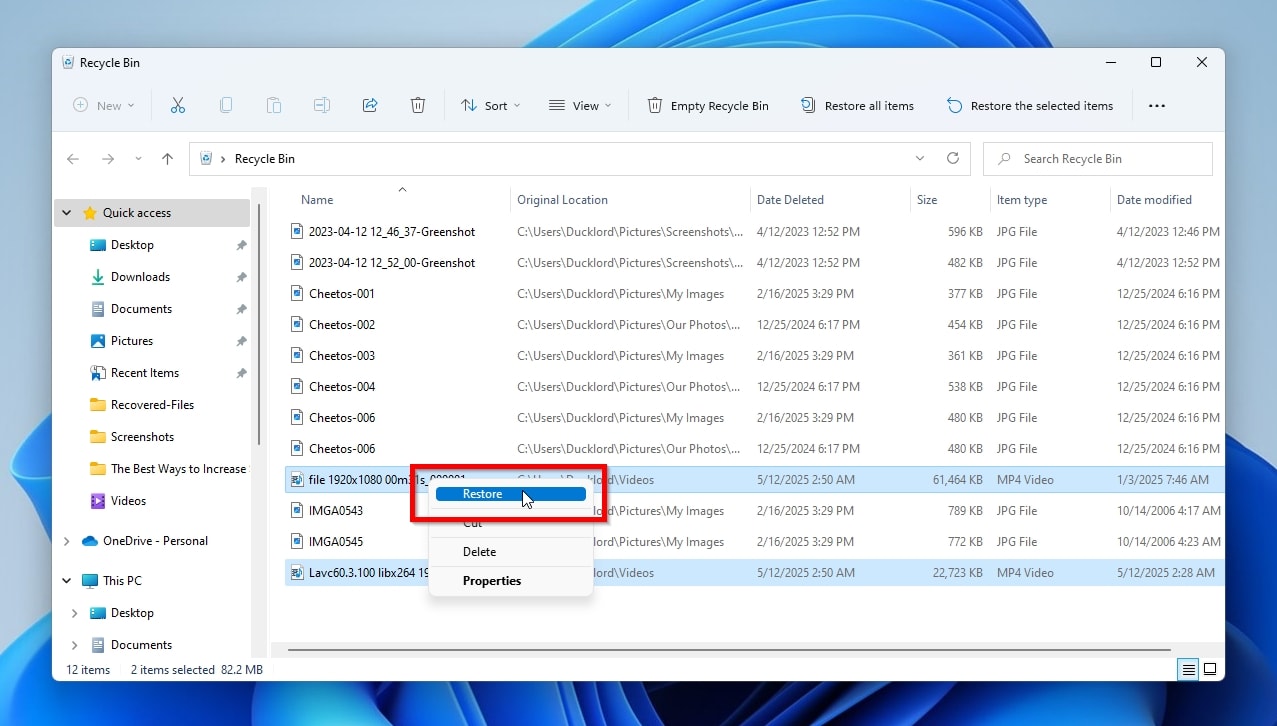
To get your videos back out of the Recycle Bin:
- Double-click on the Recycle Bin icon on your desktop.

- Find and select the files you want to recover within it.
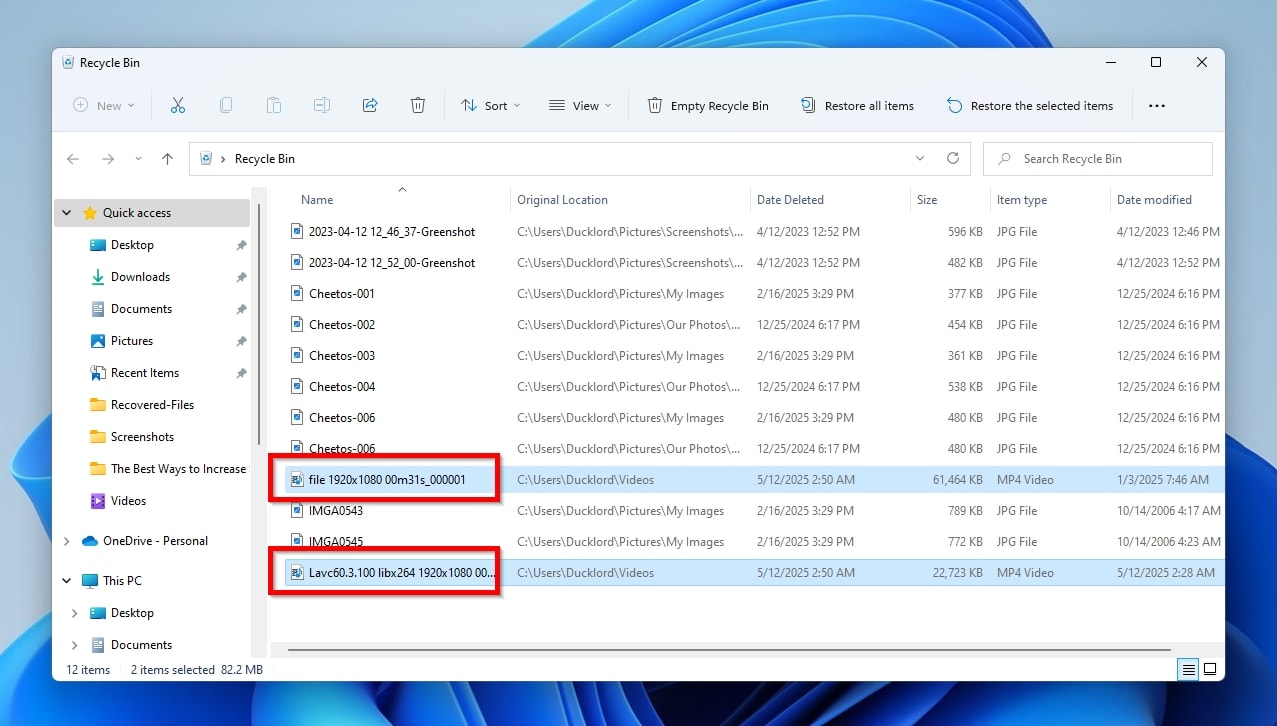
- Right-click on them and select Restore.
For more info, check our guide on how to recover deleted files from the Recycle Bin.
How to Recover Permanently Deleted Videos from PC With Software
Did you look everywhere, including within the Recycle Bin, but couldn’t find your videos? Then, it is highly probable they were truly deleted. This leads to two possible paths: retrieving them from a backup or using specialized video recovery software.
Our internal statistics indicate that most people do not keep backups before it’s too late. Thus, we will focus on the second option, using video recovery software to bring back deleted videos.
We will use the popular Disk Drill app for that task, as our thorough data recovery software tests have shown that it excels with video files. That’s because, unlike many of its peers…
- Disk Drill can recover various video file formats, including popular ones like MP4, MOV, AVI, MKV, and even less common formats, like ARI or BRAW.
- The app allows you to preview recoverable videos before attempting to restore them. However, a compatible media player must be installed on your Windows system for this feature to function correctly.
- Disk Drill provides an extensive collection of categories and filters that can help you locate specific video files efficiently, based on factors like their file type, size, last modification date, and more.
- It is compatible with a wide variety of storage devices, including internal drives, external drives, USB drives, and SD cards, where most users store their videos.
- Disk Drill can recover videos from corrupted, formatted, or inaccessible drives.
- In its latest version, Disk Drill comes with an Advanced Camera Recovery module, that specializes in dealing with more problematic videos. Its advanced “logic” enables it to find and reconstruct all the pieces of fragmented video clips, to produce playable original videos when other apps would fail.
- The app offers a free trial, which you can take for a test drive to make sure it meets your needs without first diving into your wallet.
When an attempt at data recovery ends up fruitless, many people blame the app involved without realizing that other significant factors are at play.
- ⏱️ In the world of data recovery, time is critical. The more time passed since some files were deleted, the fewer the chances of their successful recovery. Files aren’t removed from a device as soon as they are deleted, but that doesn’t mean they remain salvageable for all eternity. Their data on a storage device stays available only until the space it occupies is required by other files.
- 💾 Every new write operation to the drive where the files were deleted decreases the odds of their successful recovery. After newer files replace their data, their recovery is impossible. Did you keep using a drive after files were deleted on it? Writing new files or modifying existing ones can overwrite deleted data. For example, downloading a 10 MB app’s installer may overwrite that amount of data from a deleted MP4 video. In short, the less you use a drive, the better your chances of successfully recovering deleted files from it.
- 🔧 The type of a storage device and even how it connects to a PC can significantly affect recoverability. HDDs (Hard Disk Drives) offer increased chances of a successful recovery compared to SSDs (Solid State Drives), since deleted data lingers on them longer. On SSDs, a feature called TRIM runs automatically to preserve their performance and prolong their lifespan by rearranging stored data. However, TRIM also removes all data marked as deleted, rendering it unrecoverable. Connectivity matters, too, especially for SSDs, since those connected through a USB Type-A or Type-C interface might not receive a TRIM command, rendering the deleted data on them recoverable. In contrast, TRIM almost always runs automatically on internal SSDs and M.2 drives. This makes recovering deleted files impossible, even after a “mere” handful of days, or even a single restart. For more on that, check our article on how to recover data from SSDs.
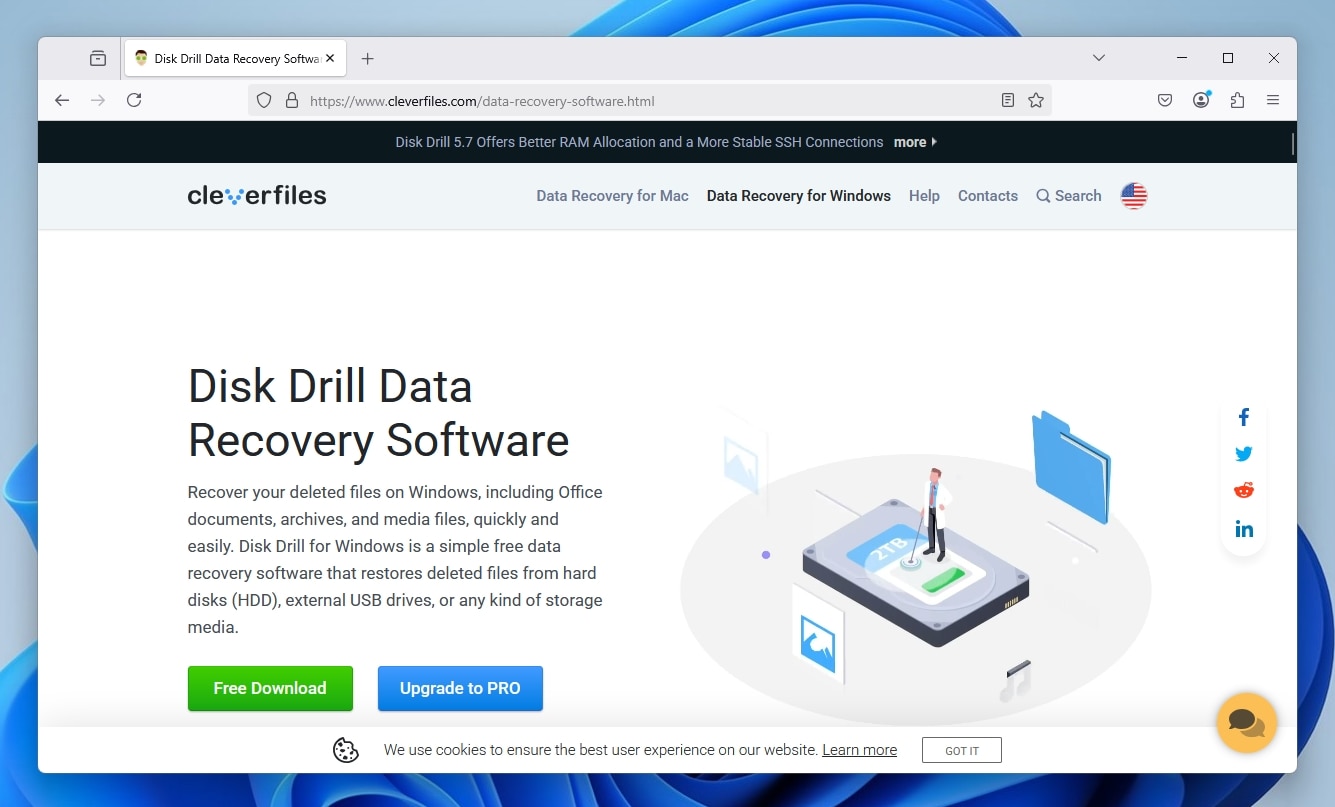
Step 1: Download and Install Disk Drill
Download Disk Drill from its official site and install it. Then run the app.
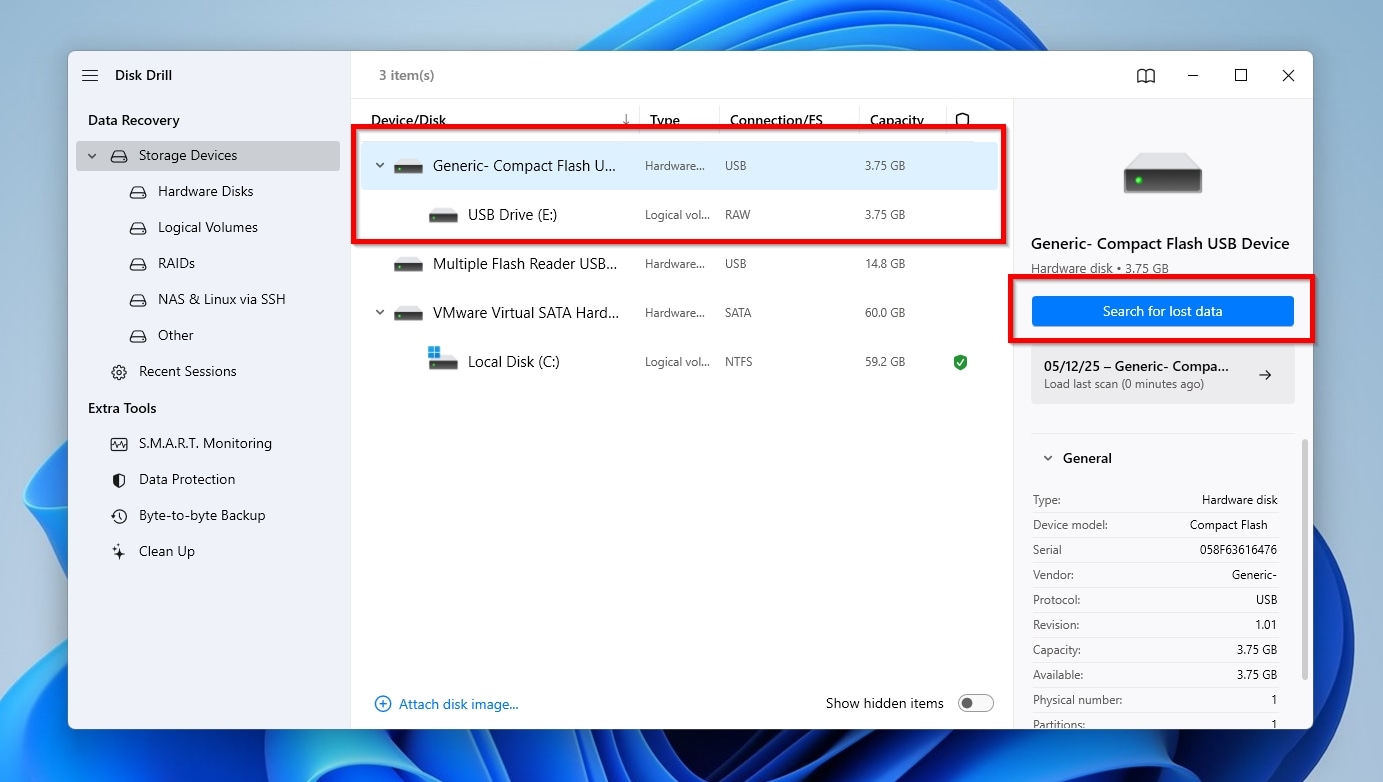
Step 2: Select the Drive And Start the Scanning Process
Select the drive you want to scan for lost files and click on Search for lost data.
Step 3: Start the Scanning Process
Wait for the scanning process to complete. Then, click Review found items.

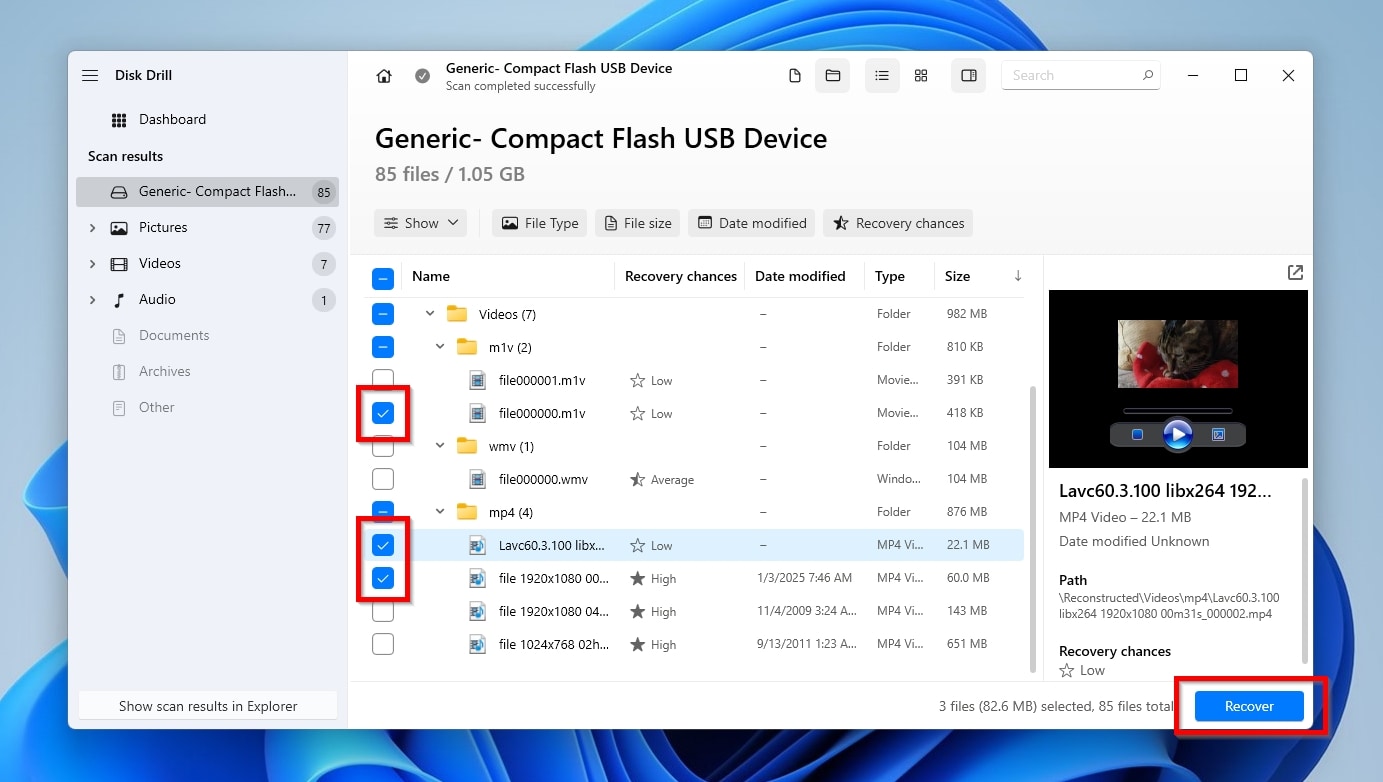
Step 4: Preview and Select the Videos for Recovery
Take advantage of Disk Drill’s Categories (on the left) and Filters (above the results list) to find your videos effortlessly and quickly. The quick and easy way to locate your videos is to expand that category (Videos) on the sidebar on the left of Disk Drill’s interface, from where you can then select a particular file type. To make sure you’ve found the correct ones, If there is a compatible media player installed, you can preview found files using the preview pane on the right of the app. If it’s not visible, right-click on them and select Preview. Place a checkmark on the left of the ones you want to get back and click on Recover.
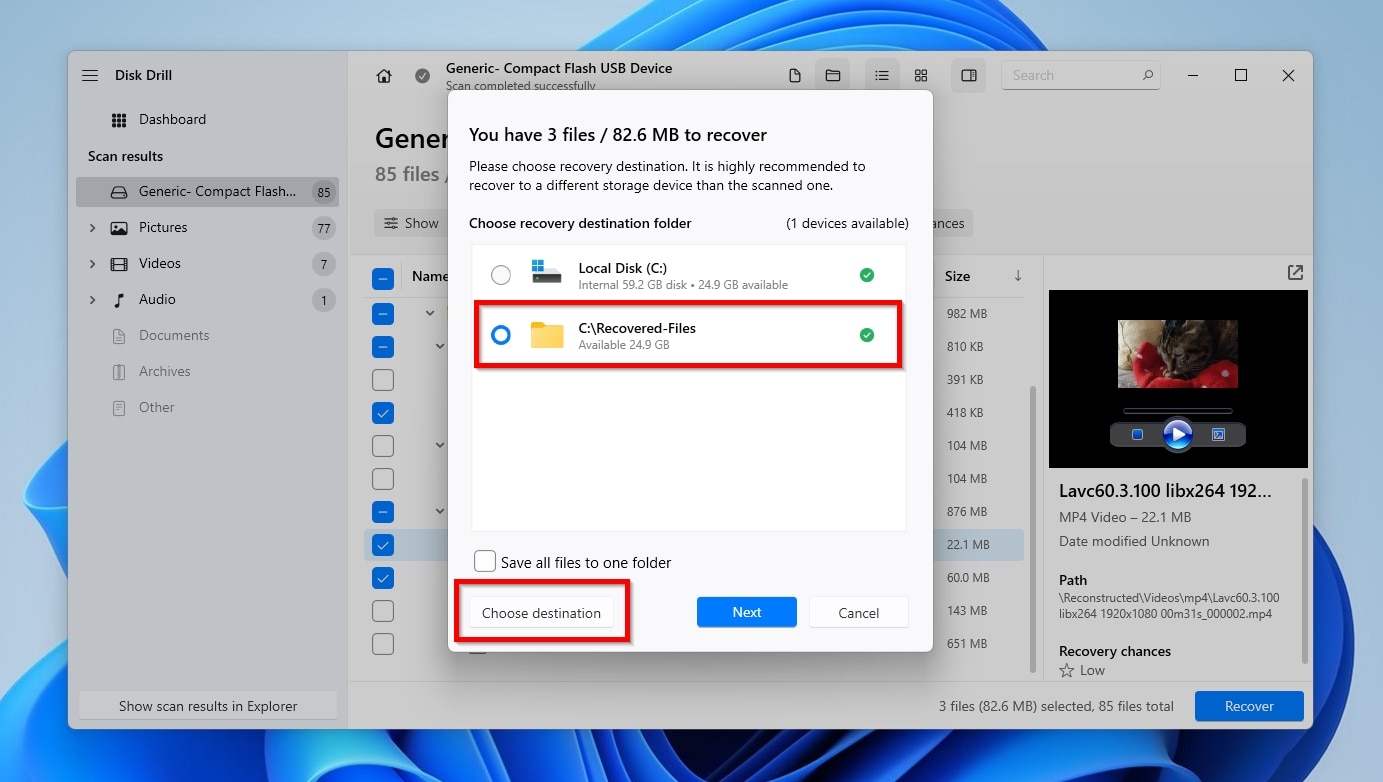
Step 5: Recover the Selected Files
Disk Drill will show you a list of folders it suggests or remembers from past operations. Select one of them to store the recovered files there, or any other folder with a click on Choose destination. Then, click Next to have Disk Drill recover your files to your selected destination folder.
If using Disk Drill to recover deleted videos from your PC for free seems too good to be true, we assure you it’s the real deal. As evident in the steps above and as we saw when we reviewed Disk Drill, it’s both feature-rich and effortless to use, as well as safe in all regards.
Pros:
- Extremely user-friendly.
- Well-thought-out and aesthetically pleasing interface.
- Compatible with almost all storage devices (as long as the PC detects them).
- Can recover most types of video files, from the popular MP4, MKV, and AVI formats, to FLV and R3D.
- Robust but swift scanning and recovery engines.
Cons:
- Requires a working OS (no “boot” version available).
- No native Linux version.
How to Use Backups for Deleted Video Recovery on PC
The most proactive users keep frequent backups that can turn any data loss scenario into a minor inconvenience. If you find yourself among them and have a relatively recent backup within which your deleted files were included, you can extract them back to your PC from there.
Local Backups: File History
Windows comes with some backup solutions baked in. The primary one is File History, which by default, backs up all the user’s folders that fall under the “Libraries” umbrella; Folders like Desktop, Documents, Downloads, Pictures, Videos, and more. However, it skips most other folders unless you manually add them to its backups.
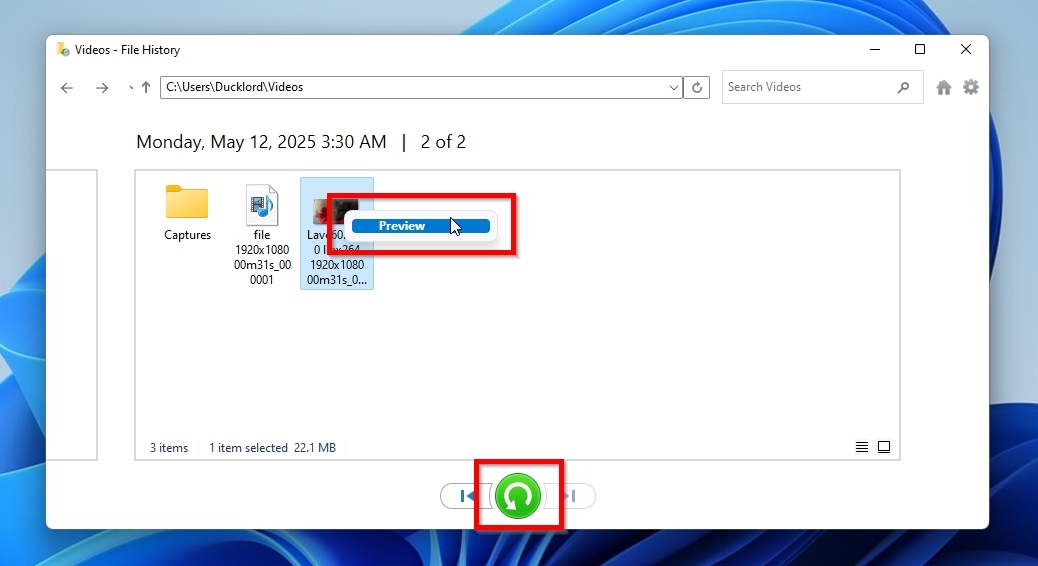
To recover deleted videos from a computer where file history was active:
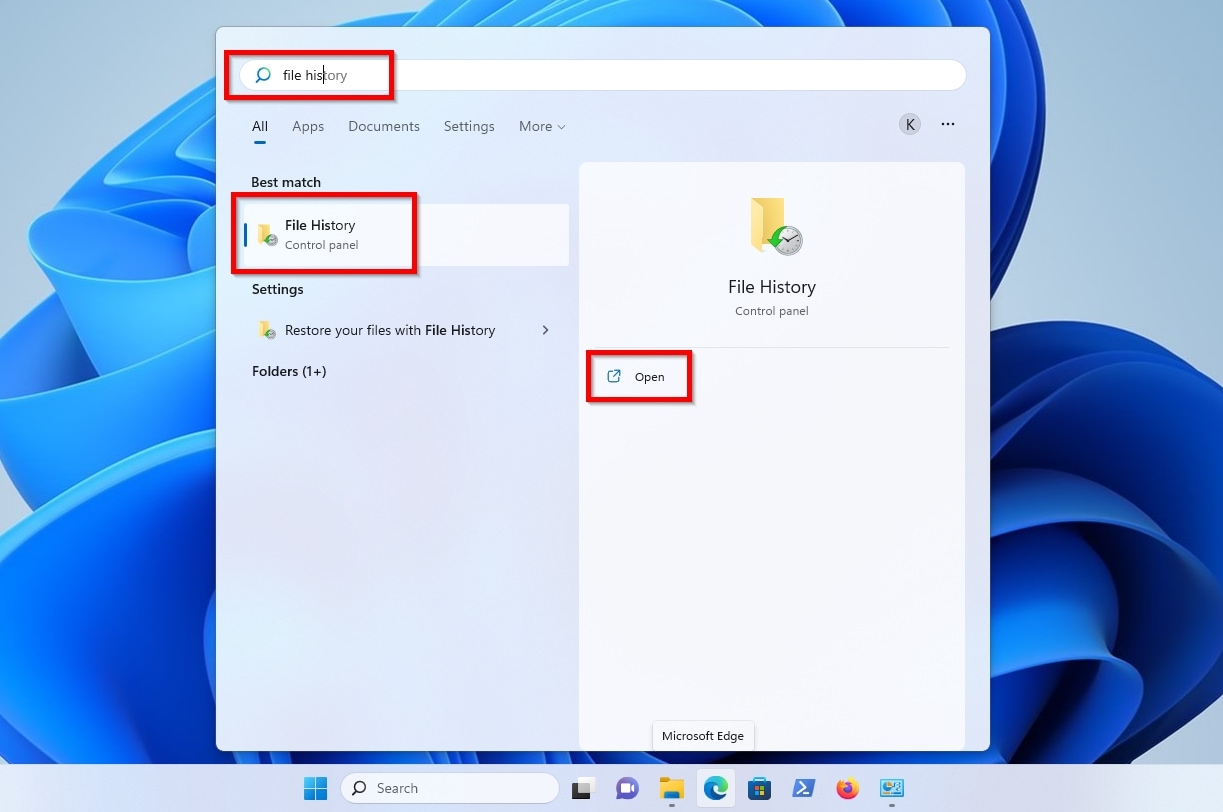
- Seek “File History” using the Start menu and select it to visit its page.
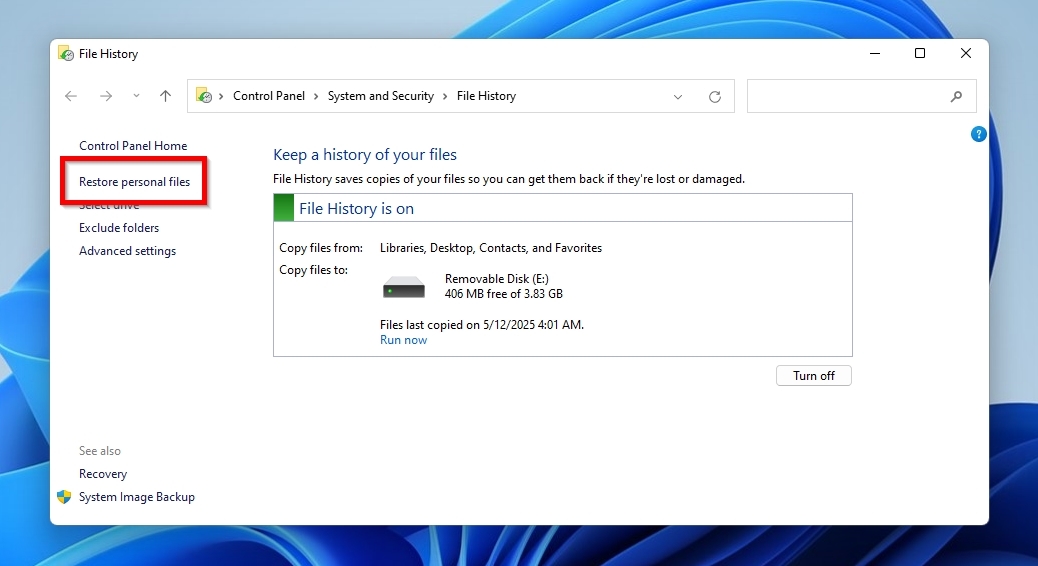
- Click Restore personal files on the left of File History’s window.
- If there is more than one backup available, you can navigate among them using the buttons with the left and right arrows. If you don’t want to restore everything from a backup, you can enter any of its folders and choose the individual files or subfolders you want to recover.
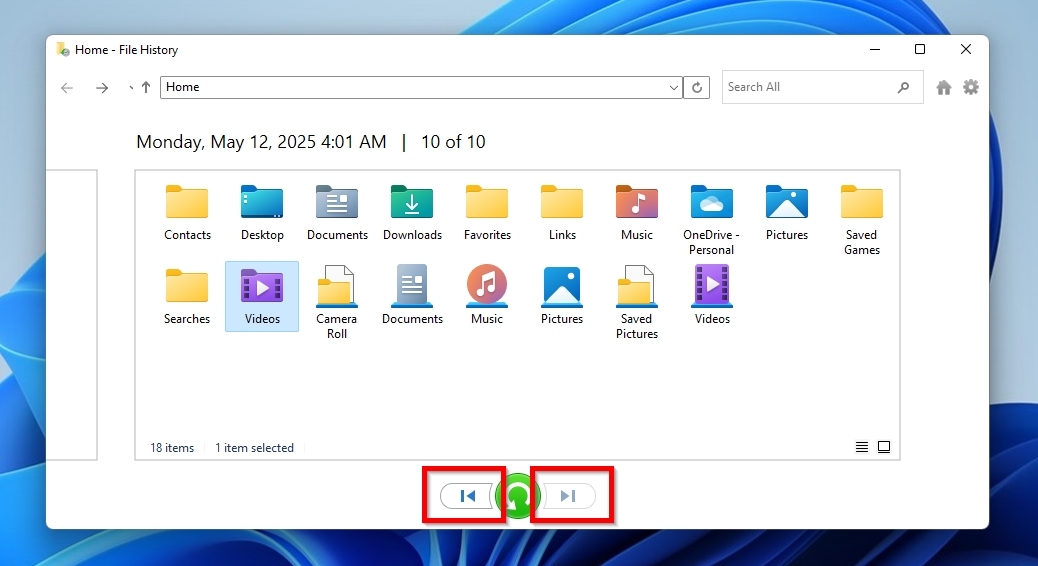
- If there’s an app installed that can open the files you will find within File History’s backups, you can right-click on them to preview them. To recover one or more files and folders, click on them (use CTRL or Shift for multi-selection), and then click the Restore button at the bottom of File History’s window.
Pros:
- Built-in Windows solution with no extra cost.
- Automated, set-it-and-forget-it approach to backups.
Cons:
- Requires a permanently connected USB flash drive (or other external storage solution) to operate.
- Only backs up a restricted collection of predefined user folders by default.
- Severely limited feature set.
A prerequisite for taking advantage of File History and getting your deleted videos out of one of its backups is to have enabled it, configured it, and taken such backups beforehand. If File History is off on your Windows installation, find out how to enable it (and more) with a quick visit to our guide on the major Windows Backup and Restore features.
Cloud Backups: Google Drive
Today, almost everyone uses a cloud storage solution. They are convenient since they allow you to synchronize your files online and access them from any device with Internet access. More importantly, they act as an additional security layer by keeping copies of your most important files online.
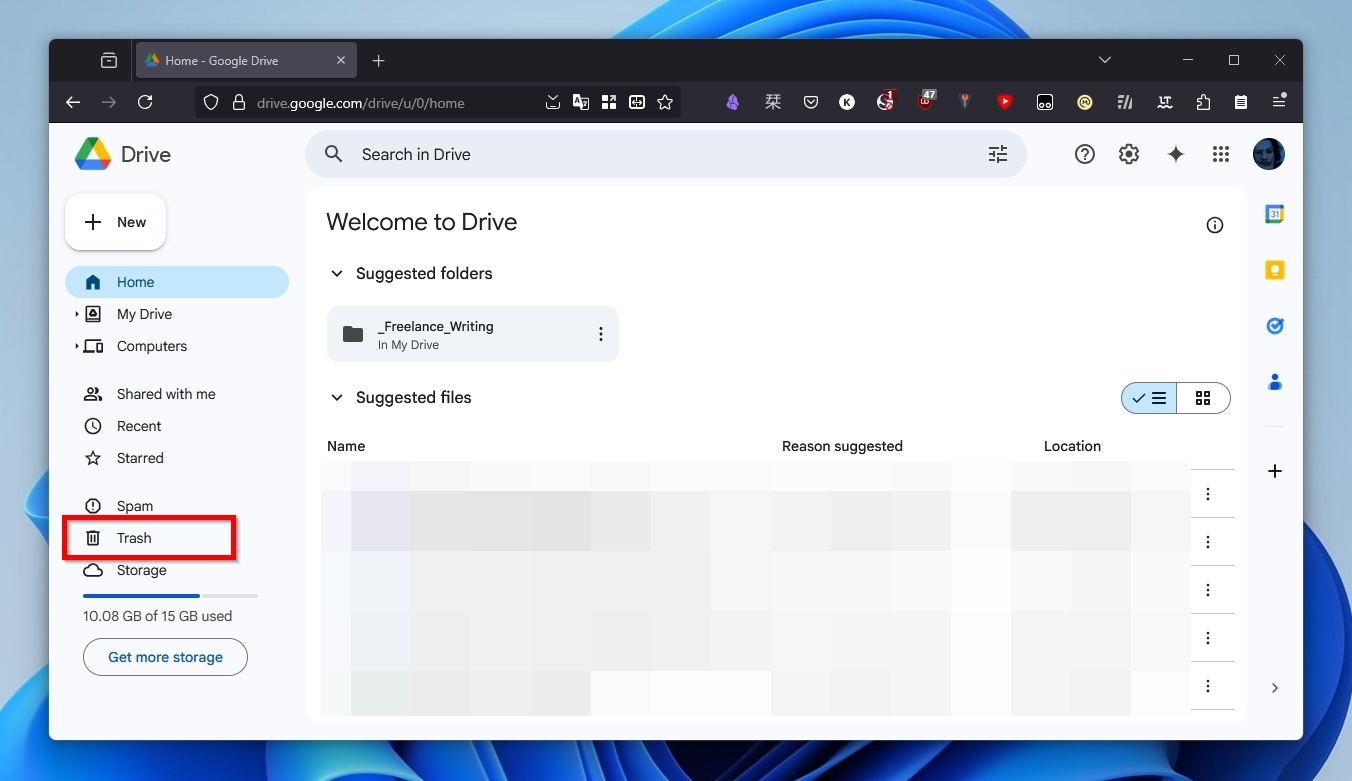
Although cloud services like Dropbox and OneDrive are equally popular, we’ll use Google Drive for this article. That’s because various solutions like OneDrive also synchronize the desktop’s Recycle Bin with its Trash, so everything deleted from one is also gone from the other. Google Drive operates differently: Deleting a synchronized video file from your computer’s (local) Recycle Bin desynchronizes it, and Google Drive retains a copy within its online trash folder. As a result, the file is not immediately lost and can still be recovered directly from the (online) Trash folder using Google Drive’s web interface or application.
To recover deleted videos on your PC using Google Drive’s web interface:
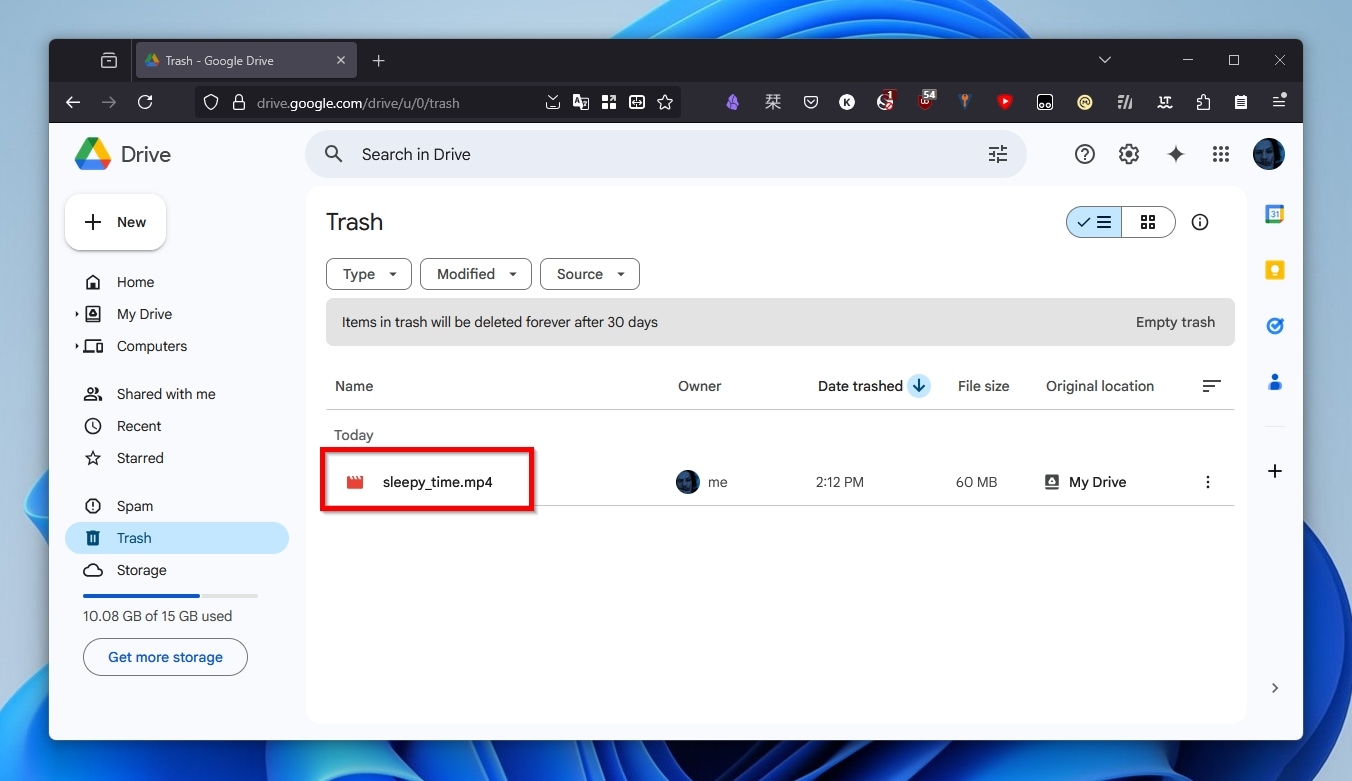
- Visit Google Drive’s site. Make sure you are logged in with the same account you use on your desktop, where your videos were deleted. Click on the Trash folder on the left.
- Locate the deleted videos you want to recover in the trash folder.
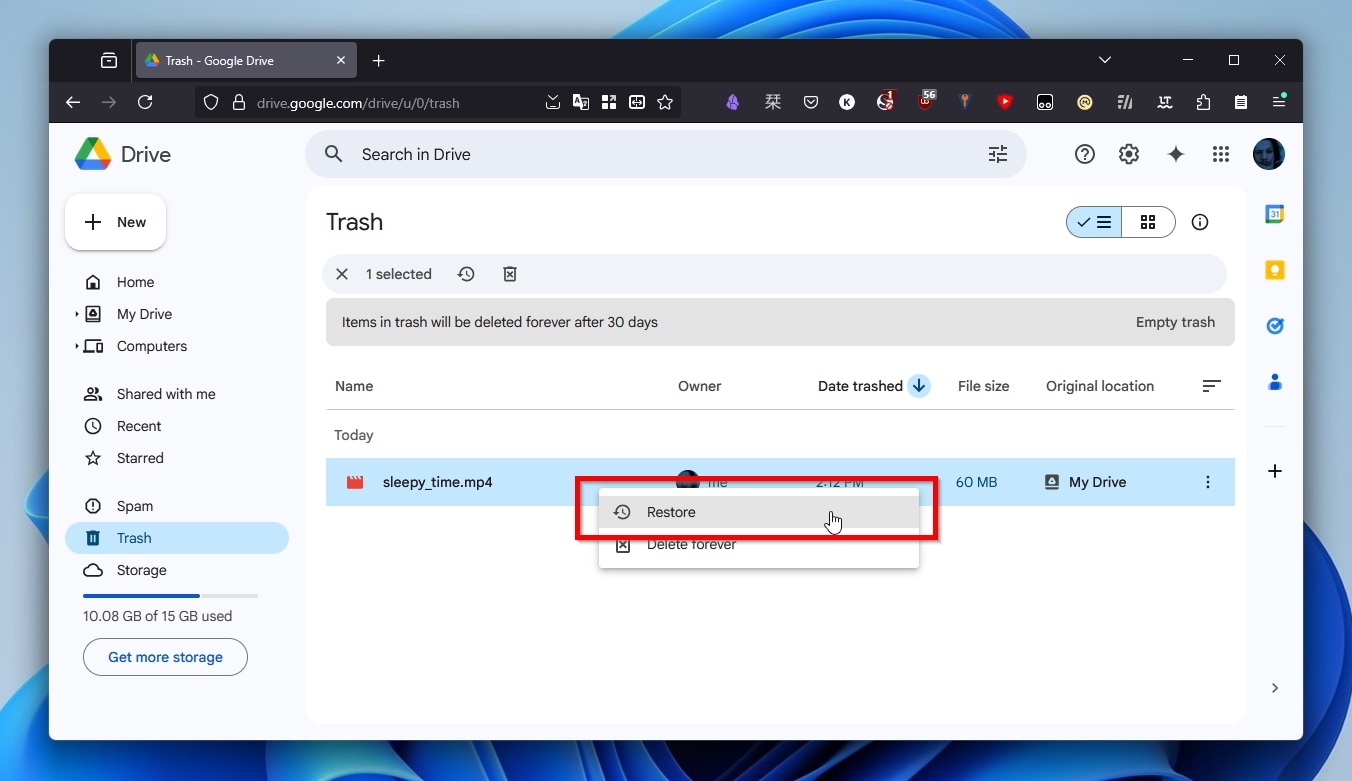
- Right-click on them and select Restore.
Pros:
- Easy and quick solution.
- Doesn’t require scanning storage devices or searching within backups.
Cons:
- It doesn’t work without internet access
- It requires you to redownload your files, which can take a while or come with extra costs (on slow and metered connections).
- Only works for files synchronized with Google Drive.
Video Won’t Play After Recovery? Need Help?
Sometimes, even after a successful recovery, your favorite media player may refuse to play your restored videos. That’s because “a successful recovery” translates to restoring deleted videos on your PC, but it doesn’t guarantee that they’ll be in their original condition (or even usable at all).
That applies especially to videos that you didn’t preview or check their recovery chances (if the data recovery solution you used supports such features), and there are various possible reasons for such an outcome. The problematic video might have been fragmented or incomplete, with some parts overwritten by newer data, leading to an incomplete recovery.
If you find yourself in that position, check our list of apps that can deal with such problems. And if your videos were stored in either of those popular video formats, check our guide on how to fix corrupted MP4 files and how to repair MOV files.
Data recovery often feels like a far too complicated, advanced, or arcane process, that most people would sum up as “too much fuss”. It also requires familiarity with storage-related terminology and some familiarity with how technology works. Otherwise, it’s easy to make things worse and, with a single misstep, lose even more data than you were trying to recover.
Still, even those who do not want or cannot put in the time, energy, and effort themselves still have two alternative options:
- Contact a professional data recovery service (keeping in mind that such services aren’t cheap).
- Ask for help on online communities like the Data Recovery subreddit or our own community.
FAQ
Is it possible to recover deleted videos from PC for free?
You can use various solutions to recover deleted videos from your PC for free. However, the approach that will produce the best results depends on how those videos were deleted in the first place.
If the deleted videos were included in a backup or synchronized with an online cloud storage service, you can get them back from there. If they weren’t (synchronized with a cloud solution), you can use a data recovery app to locate and restore them. Still, various factors may affect the outcome of that option, like the time that passed since the files were deleted, if (and how much) the device where they were stored was in use, and more.
You can find tools for recovering files at zero cost – check this discussion in our community about more on that. Still, the best solutions are usually commercial products. Those come at a price, but they’re typically quite affordable and tend to produce much better results.
How to recover deleted videos from a computer without any software?
If the deleted videos were misplaced, still exist within the Recycle Bin, or were synchronized with a cloud storage service, you can find and restore them from there. If they were truly deleted from your local storage devices and weren’t synchronized with an online storage solution, a specialized data recovery app is probably unavoidable.
Are there any risks in using third-party recovery software on my PC?
You must always be careful when downloading and installing third-party software on your PC. The sites of some free data recovery applications are often filled with questionable ads that even present themselves as download links for the software you are seeking. Even when you decide to purchase a commercial solution, some affordable data recovery apps come with bundled extra software hidden in their installers that you would never install on your computer intentionally.
However, downloading a data recovery solution from its trusted developer’s official site is usually safe.
Can I use CMD to restore deleted videos on PC?
The Windows terminal, either the classic CMD or the newer PowerShell, is useless on its own for recovering deleted videos. However, some data recovery solutions, like PhotoRec, run in the terminal and can assist with getting back deleted videos. You can use those directly through the terminal, by typing commands or interacting with a text-based rudimentary interface.
Will the quality of recovered videos be the same as the original files?
When dealing with videos, data recovery solutions are split into three groups:
- Many that will fail to recover your videos at all.
- Most that will try to recover your video files’ data like they would for any other type of files. If they succeed in recovering your videos, the produced files will be identical clones of the originals.
- Some that also attempt to reconstruct (and re-encode) your video files to increase the chances of a successful recovery. Those have higher chances of producing usable files. However, the produced videos may be missing parts, skipping chunks of time when you try to play them, and always have lower quality than the originals.
This article was written by Odysseas Kourafalos, a Editor-in-Chief at Handy Recovery Advisor. It was also verified for technical accuracy by Andrey Vasilyev, our editorial advisor.
Curious about our content creation process? Take a look at our Editor Guidelines.