
That meme or receipt you screenshotted for one-time use? It’s still sitting in your gallery, taking up precious storage space. We ran into the same problem and tested the best ways to clear them out from our iPhone.
We’ll share what worked for us and take you through the two fastest ways to delete screenshots on your iOS 26 device.
Delete All Screenshots From the “Screenshots” Album
We’ll start with the simplest method first, which lets you delete screenshots directly from the Photos app without needing any third-party tools.
Every time you take a screenshot on your iPhone, it’s automatically saved to both your main photo feed and a dedicated Screenshots album under Media Types in the Photos app. What’s helpful is that this album lets you select all the screenshots at once and delete them with a few clicks.
Here’s how you can do it:
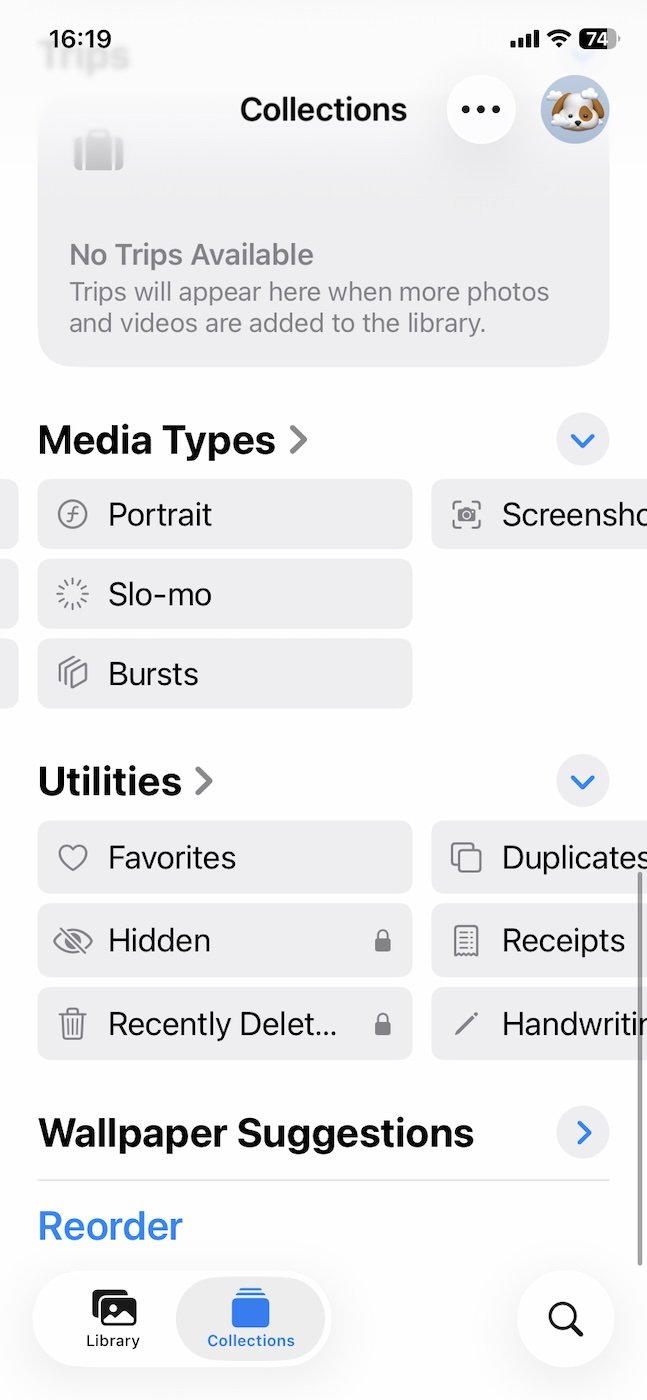
- Open the Photos app.
- Tap the Collections tab at the bottom.
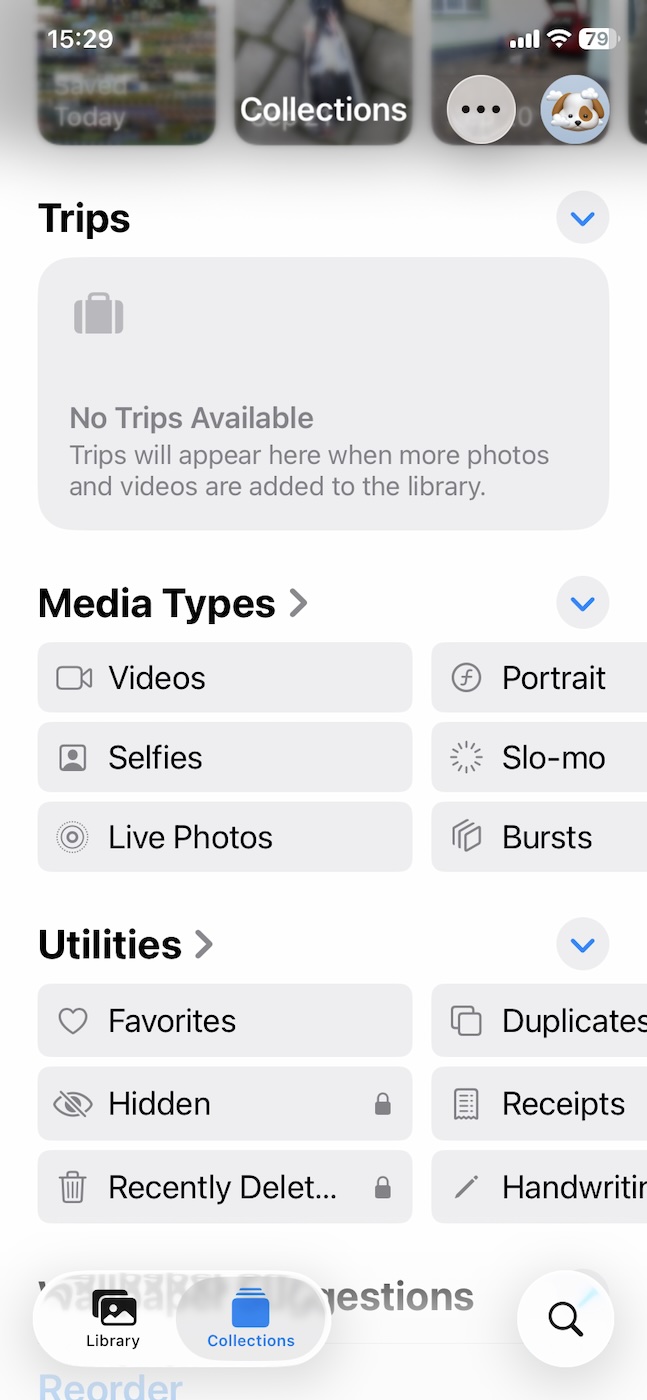
- Scroll down to Media Types and select Screenshots. This will show you all the screenshots you’ve taken.

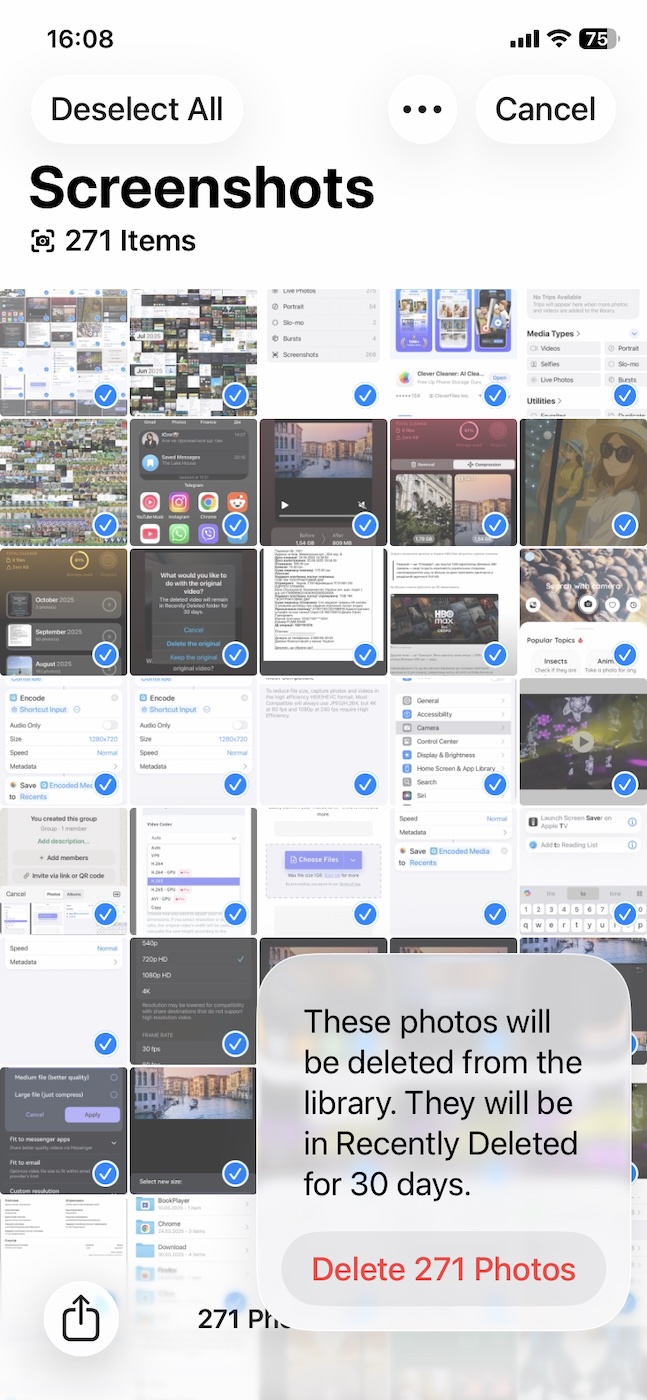
- Tap on Select in the top right corner. You can then click Select All to mark all of them at once or manually pick the ones you want to delete.
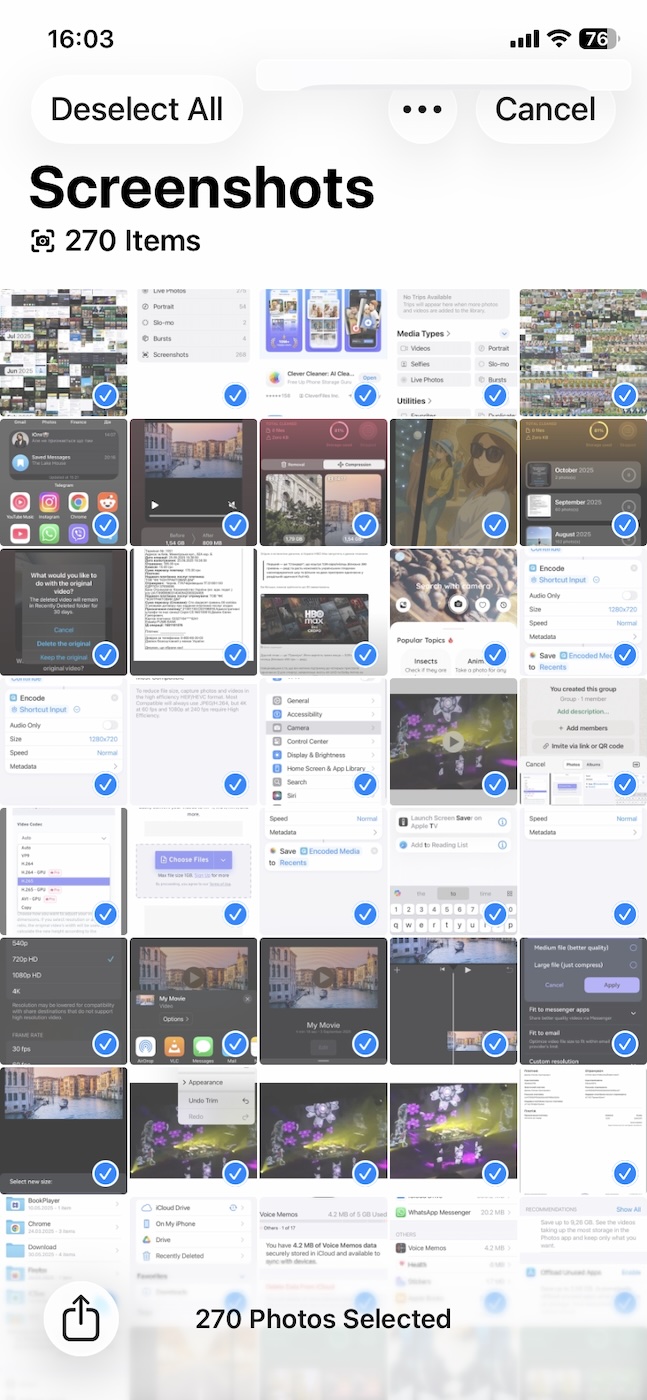
- Tap the Trash icon and then confirm your deletion.
 And that’s it!
Note: Keep in mind that while this removes the screenshots from your main gallery, they’ll still be in the Recently Deleted folder for 30 days after deletion. If you want your space back immediately, you’ll have to permanently delete them. Hang around and read on because we’ll cover how to do this below, but first, let’s look at another method.
Use a Cleaning App to Delete Screenshots on iPhone
The above method is pretty straightforward, but it has a few caveats. While the Photos app works for bulk deletion, what if you want more control? Maybe you don’t want to delete all the screenshots at once or need to see more information about each photo you’re deleting, such as its file size. There are many iPhone cleaner apps that let you do so and simplify the cleaning process to just a few taps.
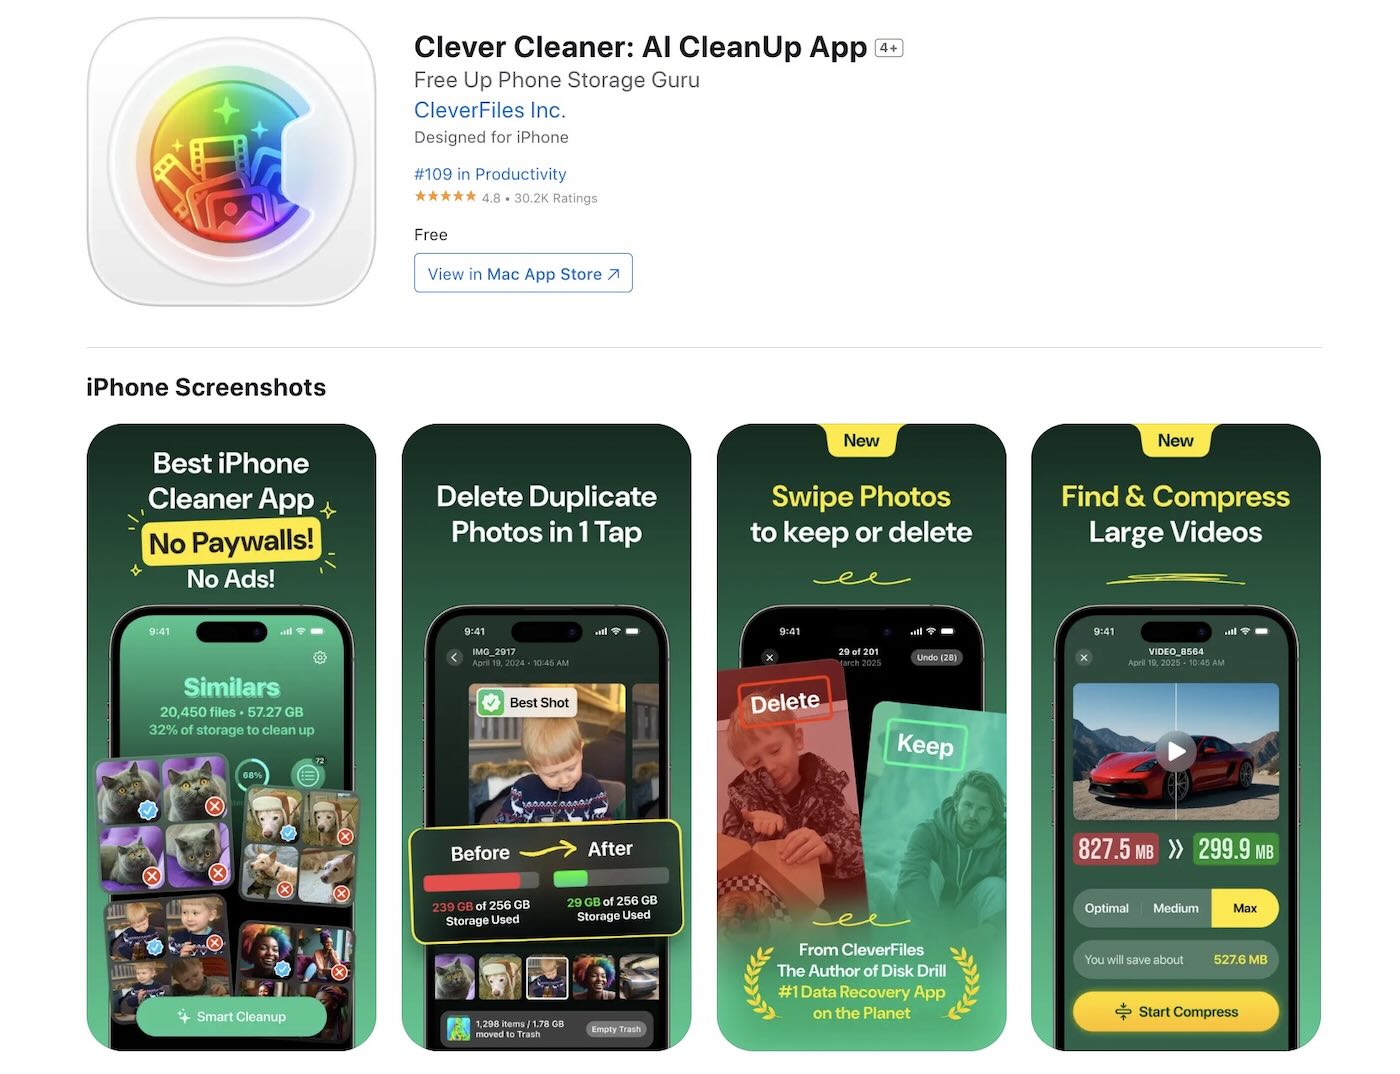
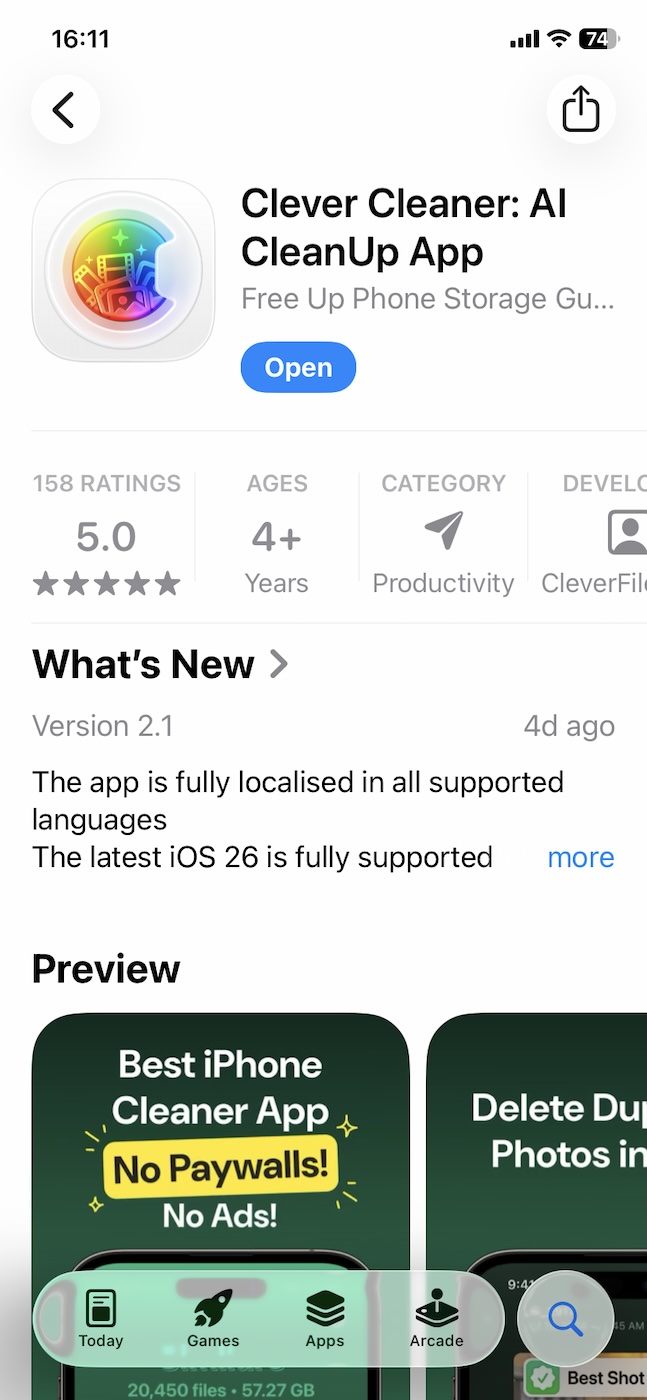
We’ve already tested out some of these apps, and you can find our rating of the best iPhone storage cleaner apps here. For this demo, we’ll show you how to use the AI-powered Clever Cleaner app, which we found to be the easiest to use and the best overall app amongst its competitors. It’s 100% free to use, so you might assume that it’s filled with distracting ads, but surprisingly, it’s also ad-free!
Currently, there aren’t any restrictions or paywalled features, so you can try it for yourself with no limitations and see if it works for you.
Let’s look at how we used Clever Cleaner to remove screenshots from our iPhone:
- Open the App Store and type “Clever Cleaner” into the search bar, or you can use this link to go to the app’s page.
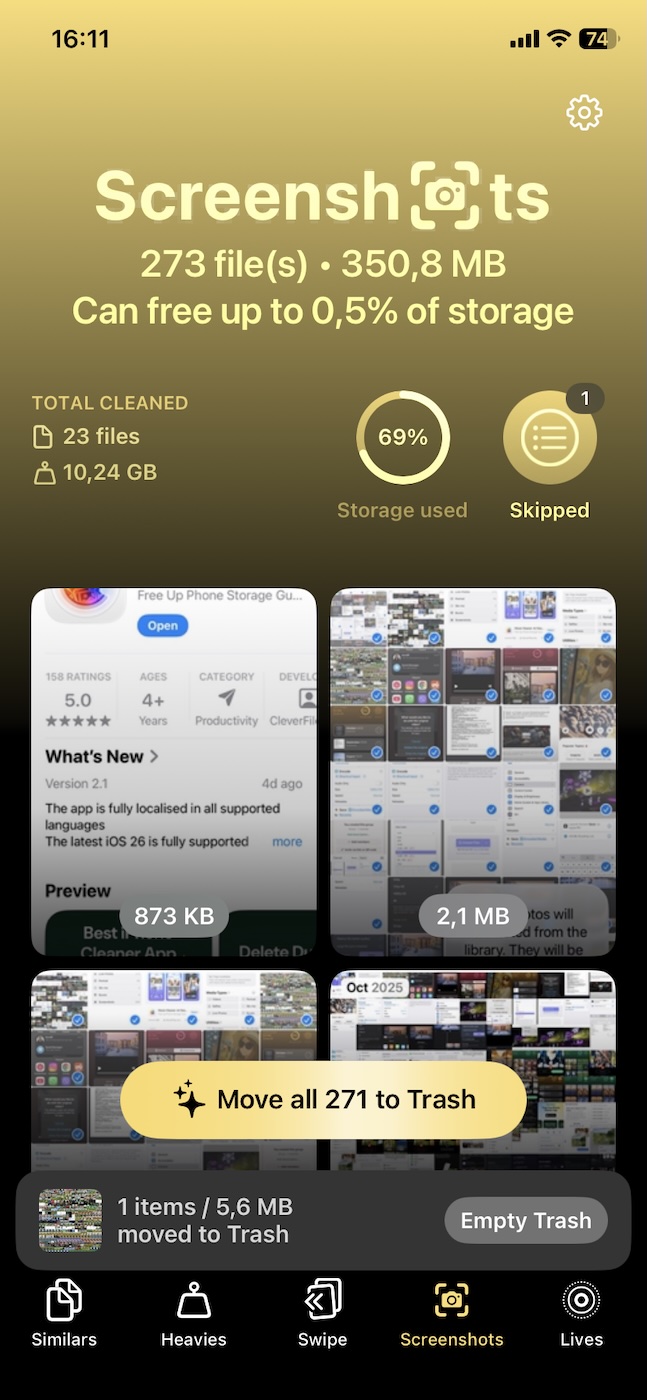
- Install the app and open it. Now tap on the Screenshots tab.
- The first time we used the app, it performed a scan that took a few minutes. After this, all your screenshots will be neatly arranged in a grid, along with their file sizes.
- You can now tap on the “Move all X to Trash” button to immediately delete them all or click on any one of them to open the sorting menu.
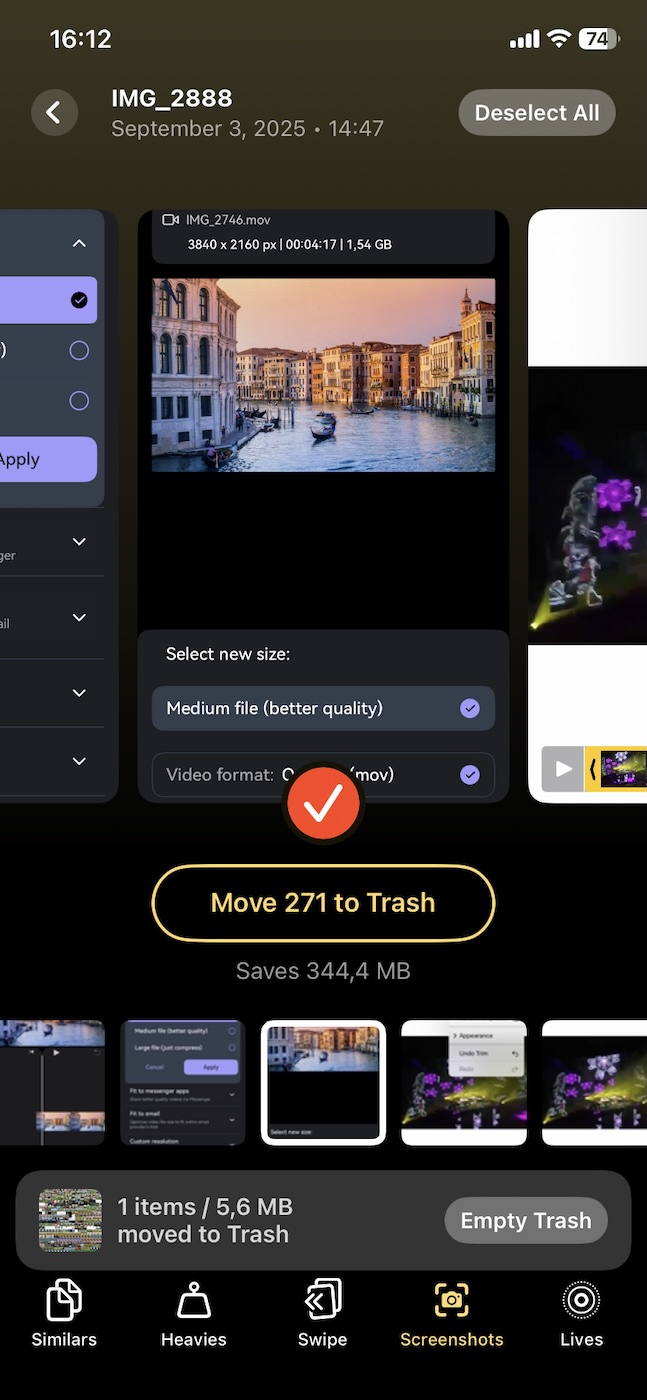
- This sorting menu has a pretty unique selection process – you tap on a screenshot to select it or swipe up to skip it. You can now pick and choose and then move them to trash.
- Next, click on the Empty Trash button. It’ll ask you to slide for confirmation, so go ahead and do this.
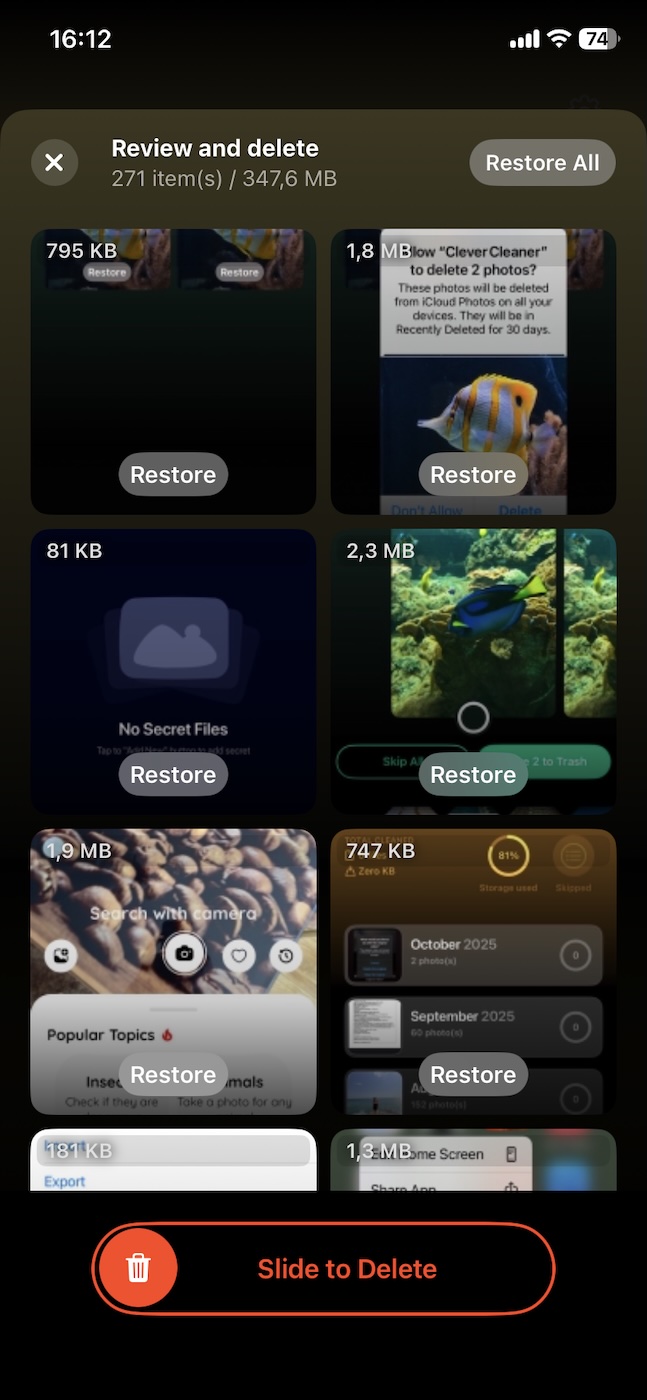
- And you’re done! The app gives you a summary of how much space you freed up and instructs you how to go about permanently deleting them from your Recently Deleted folder (we’ll show you how in a bit).

From our testing, it looks like there’s no catch here, and as their page states, it is a truly free iPhone cleaner app with no ads or paywalls.
Note: The official Clever Cleaner page says that users who download the app today will get to use ALL its features for free, forever. So if you get the app today, you’ll never have to pay for future upgrades or pro-features – a pretty generous offer considering how capable this app is.
As you can see, the above method not only lets you delete everything at once but also provides additional information about file sizes, which helps you free up the most space with the fewest number of deletions. In our opinion, the main benefit is that, beyond just screenshot deletion, Clever Cleaner opens up additional opportunities for cleaning your iPhone.
Let’s break down what else you can do with this app:
- 🔍 Duplicates and visually similar images. It uses AI to detect identical and similar photos in your gallery to let you quickly remove those unwanted extra selfies and select just the best one. To use this, go to the “Similars” section of the app. 👀
Note: Our tests have shown that Clever Cleaner is one of the best and most convenient apps for cleaning duplicate photos on iPhone.
- 📸 Live Photos. Its next tool lets you save space by converting Live Photos into standard images without the extra video clip. Don’t worry– there’s no change in quality; it just removes the animation that takes up extra space. This can be accessed in the “Lives” section of the app.
- 🎥 Large files. It also sorts your gallery from largest to smallest by file size, and since videos are almost always bigger than photos, it shows them first. You can free up lots of space quickly by deleting the largest videos it finds first. This is something that seems obvious, yet the Photos app doesn’t do. You can find this in the “Heavies” section of the app. Also, this section includes a “Compression” feature. Instead of deleting your videos, you can shrink the video file size significantly without losing much quality.
- 👆 Cleanup with Swipe mode. If you prefer a more hands-on approach, Clever Cleaner offers a “Swipe” mode that makes it easy to go through your screenshots (or photos) one at a time. Your media is neatly organized by month, so you can clean up in batches. Just swipe right to keep a photo and swipe left to delete.
Pro tip: If you’re looking for more ways to clean up your iPhone beyond just screenshots, check out our full guide on how to clean up iPhone photos.
Now, let’s move on and see how to permanently delete screenshots from the Recently Deleted album.
Need to Permanently Delete All Screenshots or Get Them Back if You Change Your Mind?
All your deleted screenshots get sent to the Recently Deleted folder, where they’ll remain for a month before getting purged for good. This 30-day buffer can actually be a lifesaver if you delete something accidentally and want to recover it. However, if you need to free up space immediately, you’ll have to clear out this album manually. It takes just a few taps, so let’s see how we can do both.
To permanently delete screenshots:
- Open the Photos app and tap the Collections tab.
- Scroll down to the Utilities tab.
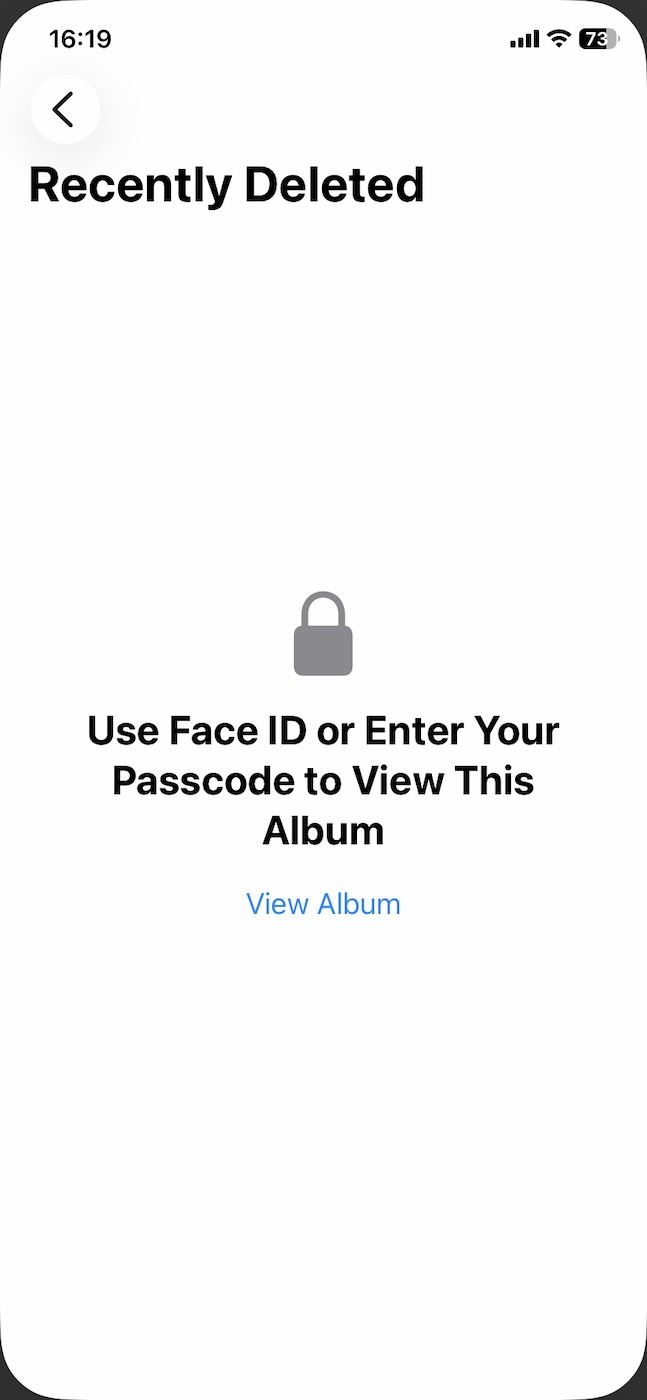
- Tap on Recently Deleted (you’ll need to use Face ID or your passcode to unlock this album).
- Tap Select in the upper right corner, and choose the screenshots that you want to get rid of for good. You can also tap on the “…” and then press Delete All to remove them all.
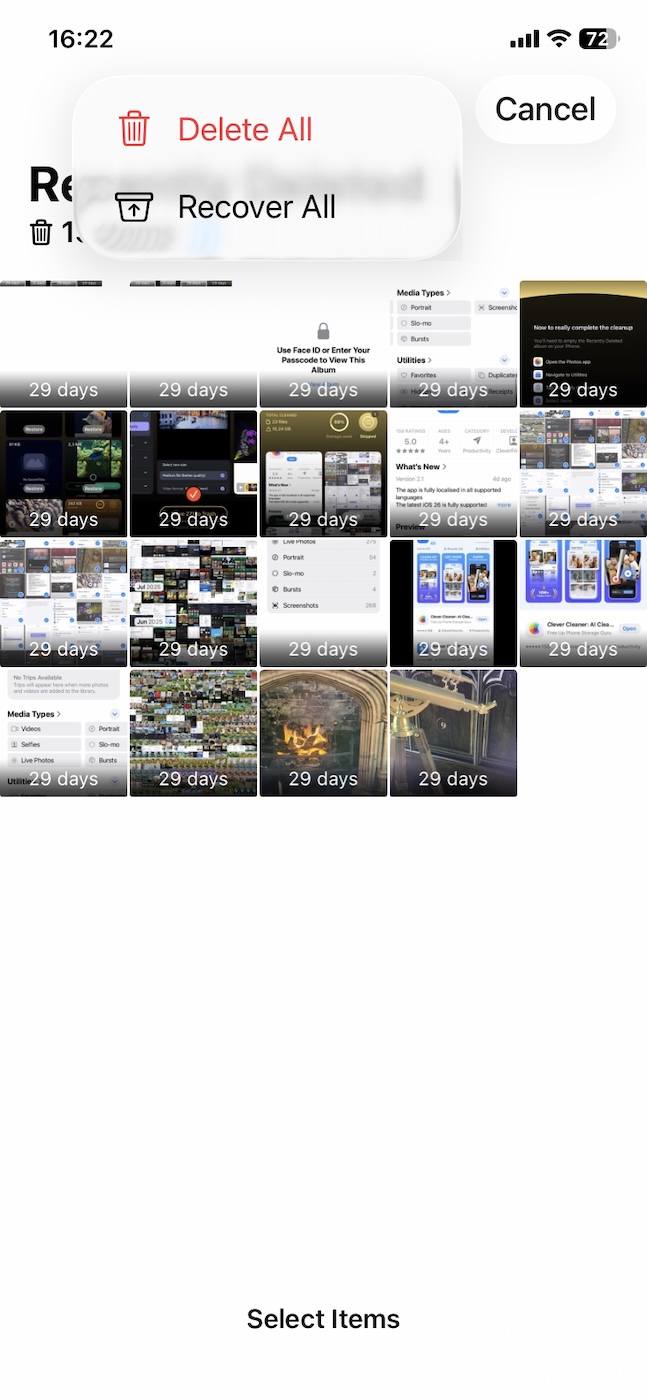
- Now tap on Delete From This iPhone to confirm.⚠️
Beware – this action will permanently remove those screenshots from your device.

With that, your screenshots are now truly deleted, and your iPhone’s storage will reflect the same. If you deleted something from the Screenshots album by mistake, though, you can recover it, as shown below.
To recover deleted screenshots:
- Same as above, open the Photos app and find the Recently Deleted.
- Press Select and tap on the “…”.
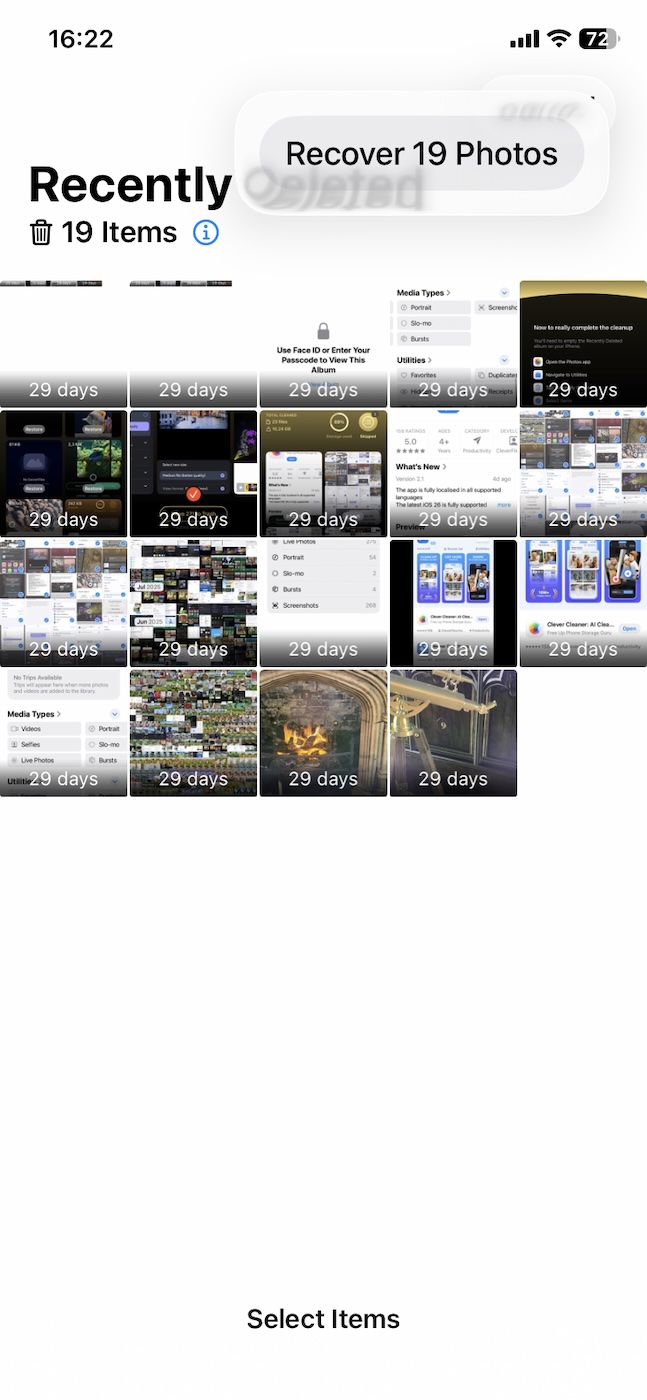
- Choose all the screenshots you want to recover, and then tap on Recover to restore them to their original location.
Is There a Way to Identify and Delete Someone Else’s Screenshots in Your Gallery?
Once you’ve deleted all the screenshots suggested by iOS or a third-party app, you might still see some left in your gallery. Why? Most likely, these are screenshots that were sent to you rather than the ones you captured yourself. We wondered if it was possible to automatically identify such screenshots and concluded that it isn’t all that simple. But let’s go through it step by step.
At first, we assumed that the easiest way would be to manually review them in the Screenshots album. However, it turns out that iOS does not classify downloaded screenshots as screenshots. Basically, if the source of the external screenshot is iMessage/WhatsApp or even email, they’ll be in the Recents folder. (NOT in the Screenshots album).
If someone uploaded a screenshot to an iCloud Shared Album, you can remove it directly by opening the album, selecting the image, and tapping Delete from Shared Album.
You can also dig deeper using Metadata apps like Metapho, which lets you view an image’s EXIF metadata. How will this help? Well, your iPhone stores native screenshots as PNG files, so if they came from someone else, they’ll most probably be saved as HEIC/JPEG. Take a look at these two:

Metapho also reveals other metadata like date/time, source device, and location information. Compare these with your device’s screenshots, and you’ll know if you took them or not.
However, with iOS 26, this method might not be as dependable anymore. Apple now allows users to enable HDR screenshots, which are saved in HEIC format instead of PNG. So if you’ve turned this setting on, your own screenshots will be saved as HEIC, just like many received images.
Note: While third-party apps like Metapho give you a wealth of information about the metadata, they also let you edit them and share files without metadata information. If you simply want to see the metadata to differentiate between internal and external screenshots, you can do it through the Photos app itself by clicking the “i” button below it, as seen in the two screengrabs above.
So, the final verdict? There’s no automatic way to filter out someone else’s screenshots from your gallery because iOS treats them like any other image. Your best options to remove them are:
- 📂 Manually review your Recents album for screenshots you didn’t take.
- ☁️ Check iCloud shared albums and delete unwanted screenshots.
- 🧐 Use apps like Metapho to view image metadata and identify and delete external screenshots.
This article was written by Vihaan Jain, a Staff Writer at Handy Recovery Advisor. It was recently updated by Roman Demian.
Curious about our content creation process? Take a look at our Editor Guidelines.