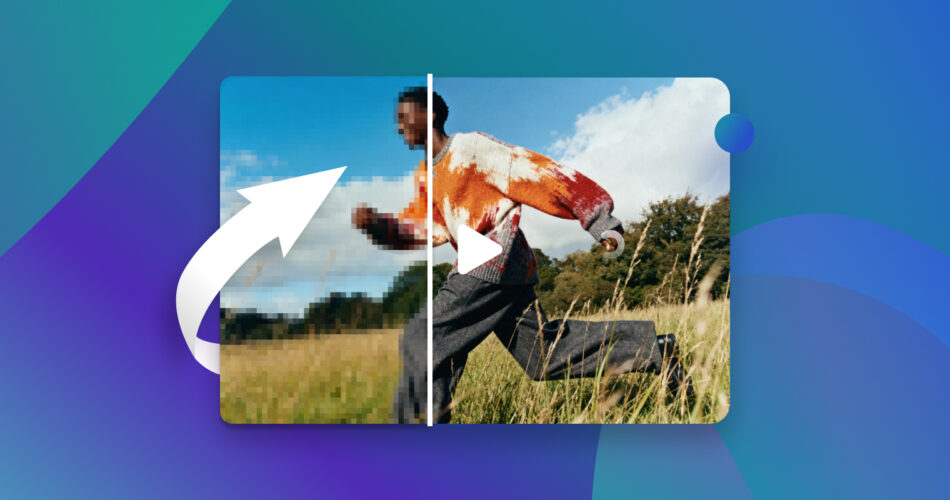
Got a blurry old video you wish looked sharper? With the progress AI tools have made lately, it’s now easier than ever to give your footage a serious quality boost. Our team tested the most promising AI video enhancers out there and put together this guide to show you exactly how to use them for better results – step by step.
Let’s walk through what works, what to expect, and how to get the most out of each tool. Here’s how to enhance video quality with AI.
How AI Can Enhance Video Quality
Before we get to the how-tos, let’s quickly cover what AI can actually do for video quality. AI tools don’t work the way old-school video editors do. They don’t just sharpen edges or apply a filter – they’re trained to recognize patterns and improve footage based on what’s missing or distorted.
Here’s what they typically handle:
- Upscaling is one of the most common tasks. AI looks at low-resolution video frame by frame, detects missing detail, and generates new pixels based on what it’s learned from high-res training data.
- Denoising works in a similar way. Instead of applying a blanket blur, AI models learn to separate noise from actual content. That means they can clean up grainy clips without softening the image too much (edges can stay sharp, and textures don’t get wiped out).
- When it comes to sharpening or deblurring, these tools identify actual objects in the frame (edges, outlines) and then add structure back in. This is useful for handheld footage or anything with motion blur.
- Color enhancement is more subtle, but just as useful. Most AI tools auto-correct things like white balance, exposure, contrast, saturation. Some even adapt color grading to match different styles, though results depend on the input footage.
- AI-based stabilization is another area that’s come a long way. It doesn’t crop the frame or rely on simple anchor points. Instead, it analyzes motion paths, predicts shake, and realigns frames accordingly. That’s especially helpful for action shots.
- And if you’ve ever wanted smoother motion, frame interpolation (or motion interpolation) is where AI fills in gaps. It generates new frames between existing ones to raise the frame rate – useful if you ned to turn 30 fps into 60 fps, or slow down fast movement without stuttering.
These are the core capabilities you’ll see across most modern AI video enhancers. Some tools specialize in one or two of them. Others bundle several together. You’ll see how it all works next.
5 Best Methods to Enhance Video Quality with AI
For this guide, we hand-picked five of the best AI tools to enhance video quality – the ones we actually liked after running them through real footage. Not every app here is a full all-in-one machine, but each one does something well enough to earn a spot.
We’ll walk you through how to use each, where it performs best, and what to watch out for. We’ll also point out quirks we ran into and give quick pros and cons so you don’t waste time figuring that stuff out on your own.
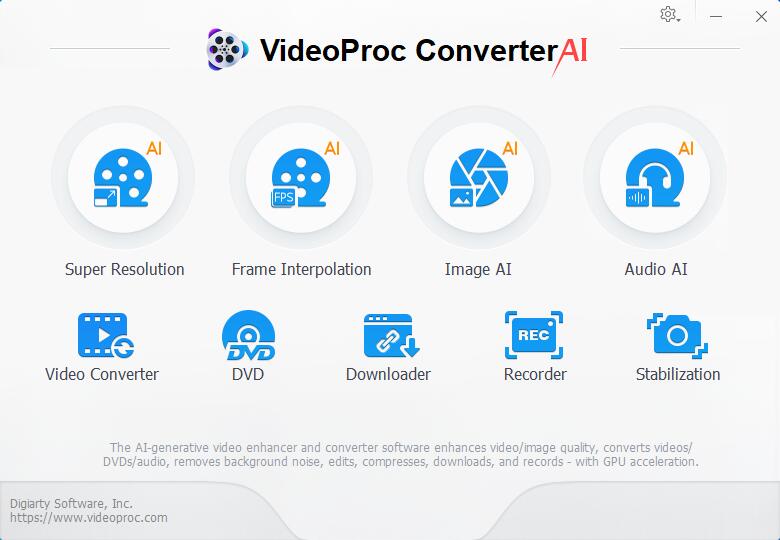
1. VideoProc Converter AI
Pros:
- Offers multiple AI tools in one program, video enhancer, image upscaler, audio noise remover, etc.
- Combines AI enhancement with many other utilities like converter, compressor, quick editor, downloader, recorder, etc.
- More efficient, less hardware-intensive, decent video quality.
- Quick and beginner-friendly, batch process supported.
- Cost-effective option with a highly competitive price.
Cons:
- Desktop software requires installation.
- Lack of support for Linux.
We’ll start with VideoProc Converter AI. This one’s the most powerful option on our list. When it comes to enhancing video quality with AI, it checks a lot of boxes. It’s a versatile, all-in-one media suite.
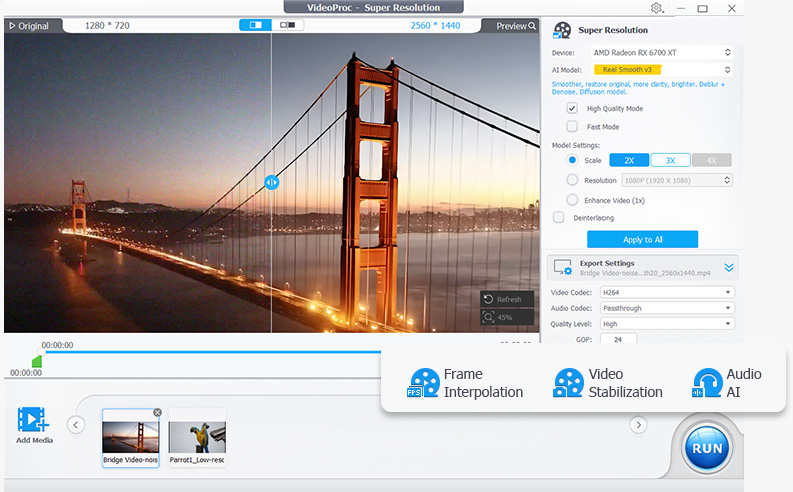
VideoProc Converter AI features three AI modules for video quality enhancements: Super Resolution, Frame Interpolation, and Stabilization. AI Super Resolution automatically reduces noise, deblurs, and increases resolution to up to 4K, while restoring details and reducing artifacts. The Frame Interpolation module synthesizes extra frames to convert low‑FPS clips into smoother sequences or create slow motions in one click. The AI stabilization module detects shakes and stabilizes footage, producing cinematic results.
We ran it through a few low-quality test videos – stuff you’d find in old backups ripped from the internet in 360p. One of them was an old video shot on a phone from over a decade ago. Colors were dull, and faces turned into a blur every time someone moved too fast. We tried to upscale it to 1080p and 4K, and surprisingly, it held up. The results obviously weren’t like it was recorded in 1080p from the start, but they were good enough that you’d think twice – there was way more detail than we expected. The whole clip felt usable again.
VideoProc doesn’t take forever to process either, which we appreciated. With GPU acceleration, it chewed through those test clips without lag. We’ve seen heavier tools do less, slower.
As for the actual steps, it’s pretty straightforward.
Here’s how to use VideoProc Converter AI for video quality enhancement:
- Download and install VideoProc Converter AI, then launch the program.
- Choose your desired function module from the main interface, such as Super Resolution.
- Add your videos by dragging them onto the workspace.
- Then select an AI model. In our tests, Gen Detail gave us the cleanest sharpness on general footage. Real Smooth is better for noisy or heavily compressed clips. Anime works well for, you guessed it, animated content. If your clip has interlacing lines (older TV footage or low-res downloads), make sure to enable Deinterlacing too.
- Choose upscale factor (2x‑4x or resolution presets) and codec.
- Click RUN to start processing.
The software will upscale, interpolate, or stabilize the clips, then save them to your specified folder. All you need is a bit of time and a machine that can handle the processing.
Last thing, don’t expect the preview panel to match the final output quality. What you see in that little window is lower-res and doesn’t reflect the enhanced version. You’ll want to check the exported file for the actual improvements.
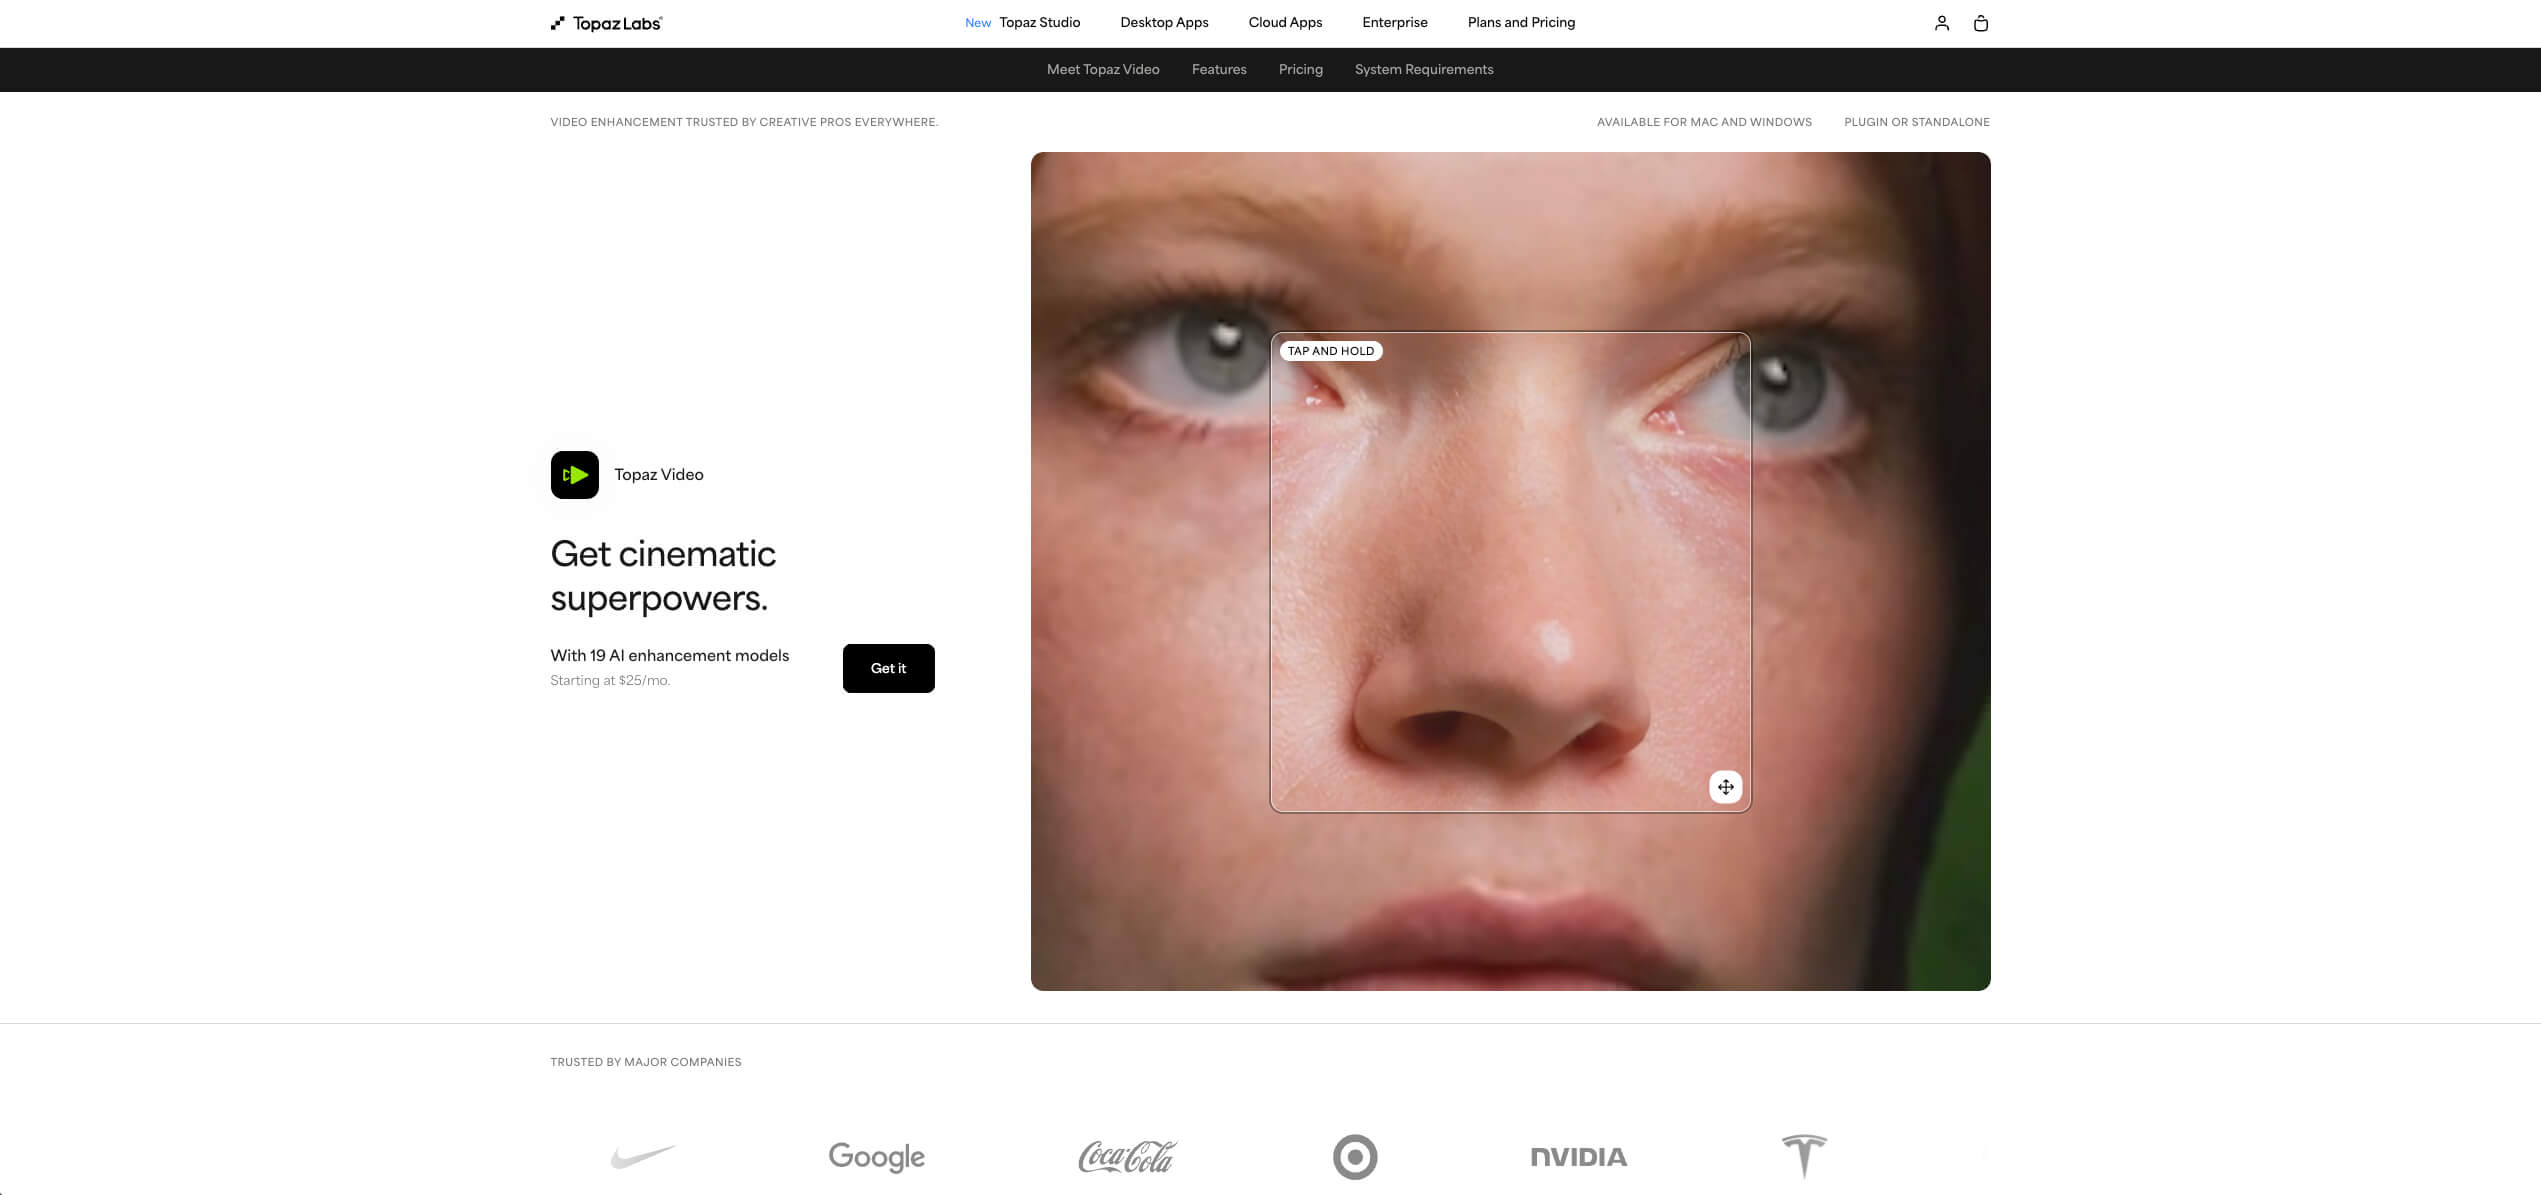
2. Topaz Video
Pros:
- Professional-grade AI video enhancement and upscaling.
- Offers specialized AI models for different scenarios.
- Available as a plugin for popular NLEs.
- Not too complicated interface.
Cons:
- Requires significantly more computational resources.
- The program is expensive relative to simpler apps.
- Processing can be slow for long clips or low‑end hardware.
- Too many model options can be confusing for beginner users.
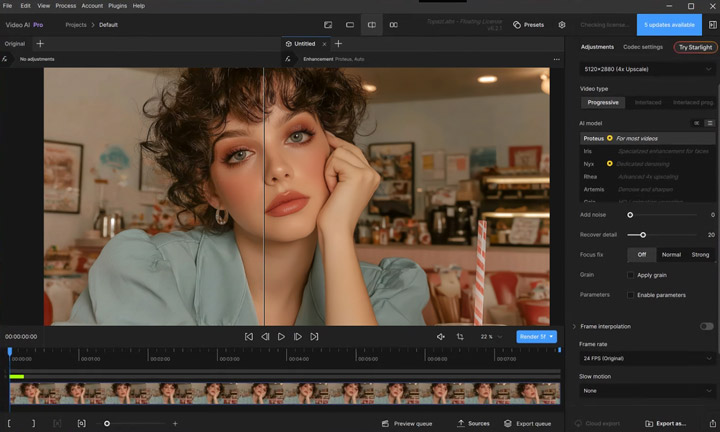
Next up is Topaz Video AI. This is the heavyweight. If you’re looking for the sharpest upscale + cleanest deblur that actually holds up on big screens, this one’s worth a serious look.
It excels at AI upscaling to 8K resolution and noise reduction using deep neural networks. The software also includes frame interpolation for smooth slow motion and dedicated deblurring models that reconstruct detail in soft or shaky footage.
In our tests, we were glad to see that some signs or small text became readable again, and background textures like brick walls and foliage had more definition. It didn’t turn our footage into something shot in native 4K, but the upgrade felt like a proper remaster.
One thing we didn’t love is the speed. It’s slow. That’s something we saw mentioned a lot in forums, and we’d agree. Compared to some of the other tools in this list, this one takes its time. Topaz Video demands a powerful computer with a high-end dedicated GPU, a modern CPU, and ample RAM. The software is also significantly more expensive than competitor products.
Follow the steps below to use Topaz Video:
- First, install and launch the app. It works on both Windows and macOS, but make sure your system meets the requirements.
- Open the application.
- Import your video by dragging it to the window.
- Choose an AI model and make adjustments based on your goal. We recommend starting with the default and adjusting only if needed. Proteus is a good all-around choice – it lets you control sharpening/noise/compression cleanup on a sliding scale. If your video is already clean and you’re just upscaling, Gaia or Theia might be faster.
- Adjust codec settings, such as type, codec, profile, etc.
- Click Export to process the video; the AI will upscale, denoise, deblur or interpolate and save the output.
3. CapCut
Pros:
- One‑click video enhancement for resolution and noise removal.
- Saves time and produces good results without manual settings.
- Great for beginners and integrates with editing features.
Cons:
- Many AI tools require a CapCut Pro subscription.
- Limited customization; only basic enhancement levels are available.
- Lacks advanced AI models compared with specialist tools.
- Leads to an artificial or overly smooth, plastic-like effect sometimes.
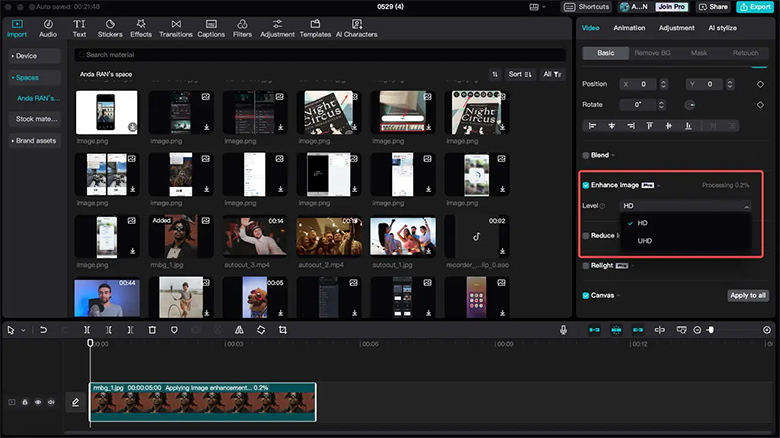
Another useful tool that can enhance your video with the help of AI is CapCut. You’ve probably heard of it – it’s mostly known as a mobile video editor for TikTok-style content, but the desktop and web versions actually include a few quality upgrades. With a CapCut Pro subscription, you’ll have access to some AI enhancement features. For example, the Enhance image option automatically increases the video’s resolution using machine‑learning algorithms. AI movement smooths out shaky footage. AI Relight can automatically adjust lighting in poorly lit scenes.
Most of these adjustments are simple, with no model selection, just intensity options like HD or UHD. It’s not nearly as flexible as the previous two tools, but for a lot of people, that’s a plus, not a limitation. You don’t have to think much. You upload, click a few things, and export.
In our tests, the results looked cleaner and noticeably sharper. It didn’t fully fix motion blur or bring our old handheld footage up to pro level, but static areas like signs, buildings, and backgrounds came out looking surprisingly good. CapCut handled the noise reasonably well too.
Even though its main focus is short-form video creators, anyone looking for a quick AI-enhanced video cleanup will find it useful.
Here’s how to use CapCut’s AI tools for quality enhancement:
- Download CapCut desktop and start a new project.
- Import your video into the timeline.
- Select the clip and toggle “Enhance image” in the Video panel; set the level to HD or UHD according to your needs.
- Preview the result and optionally add transitions or captions.
- Click Export to save the enhanced video.
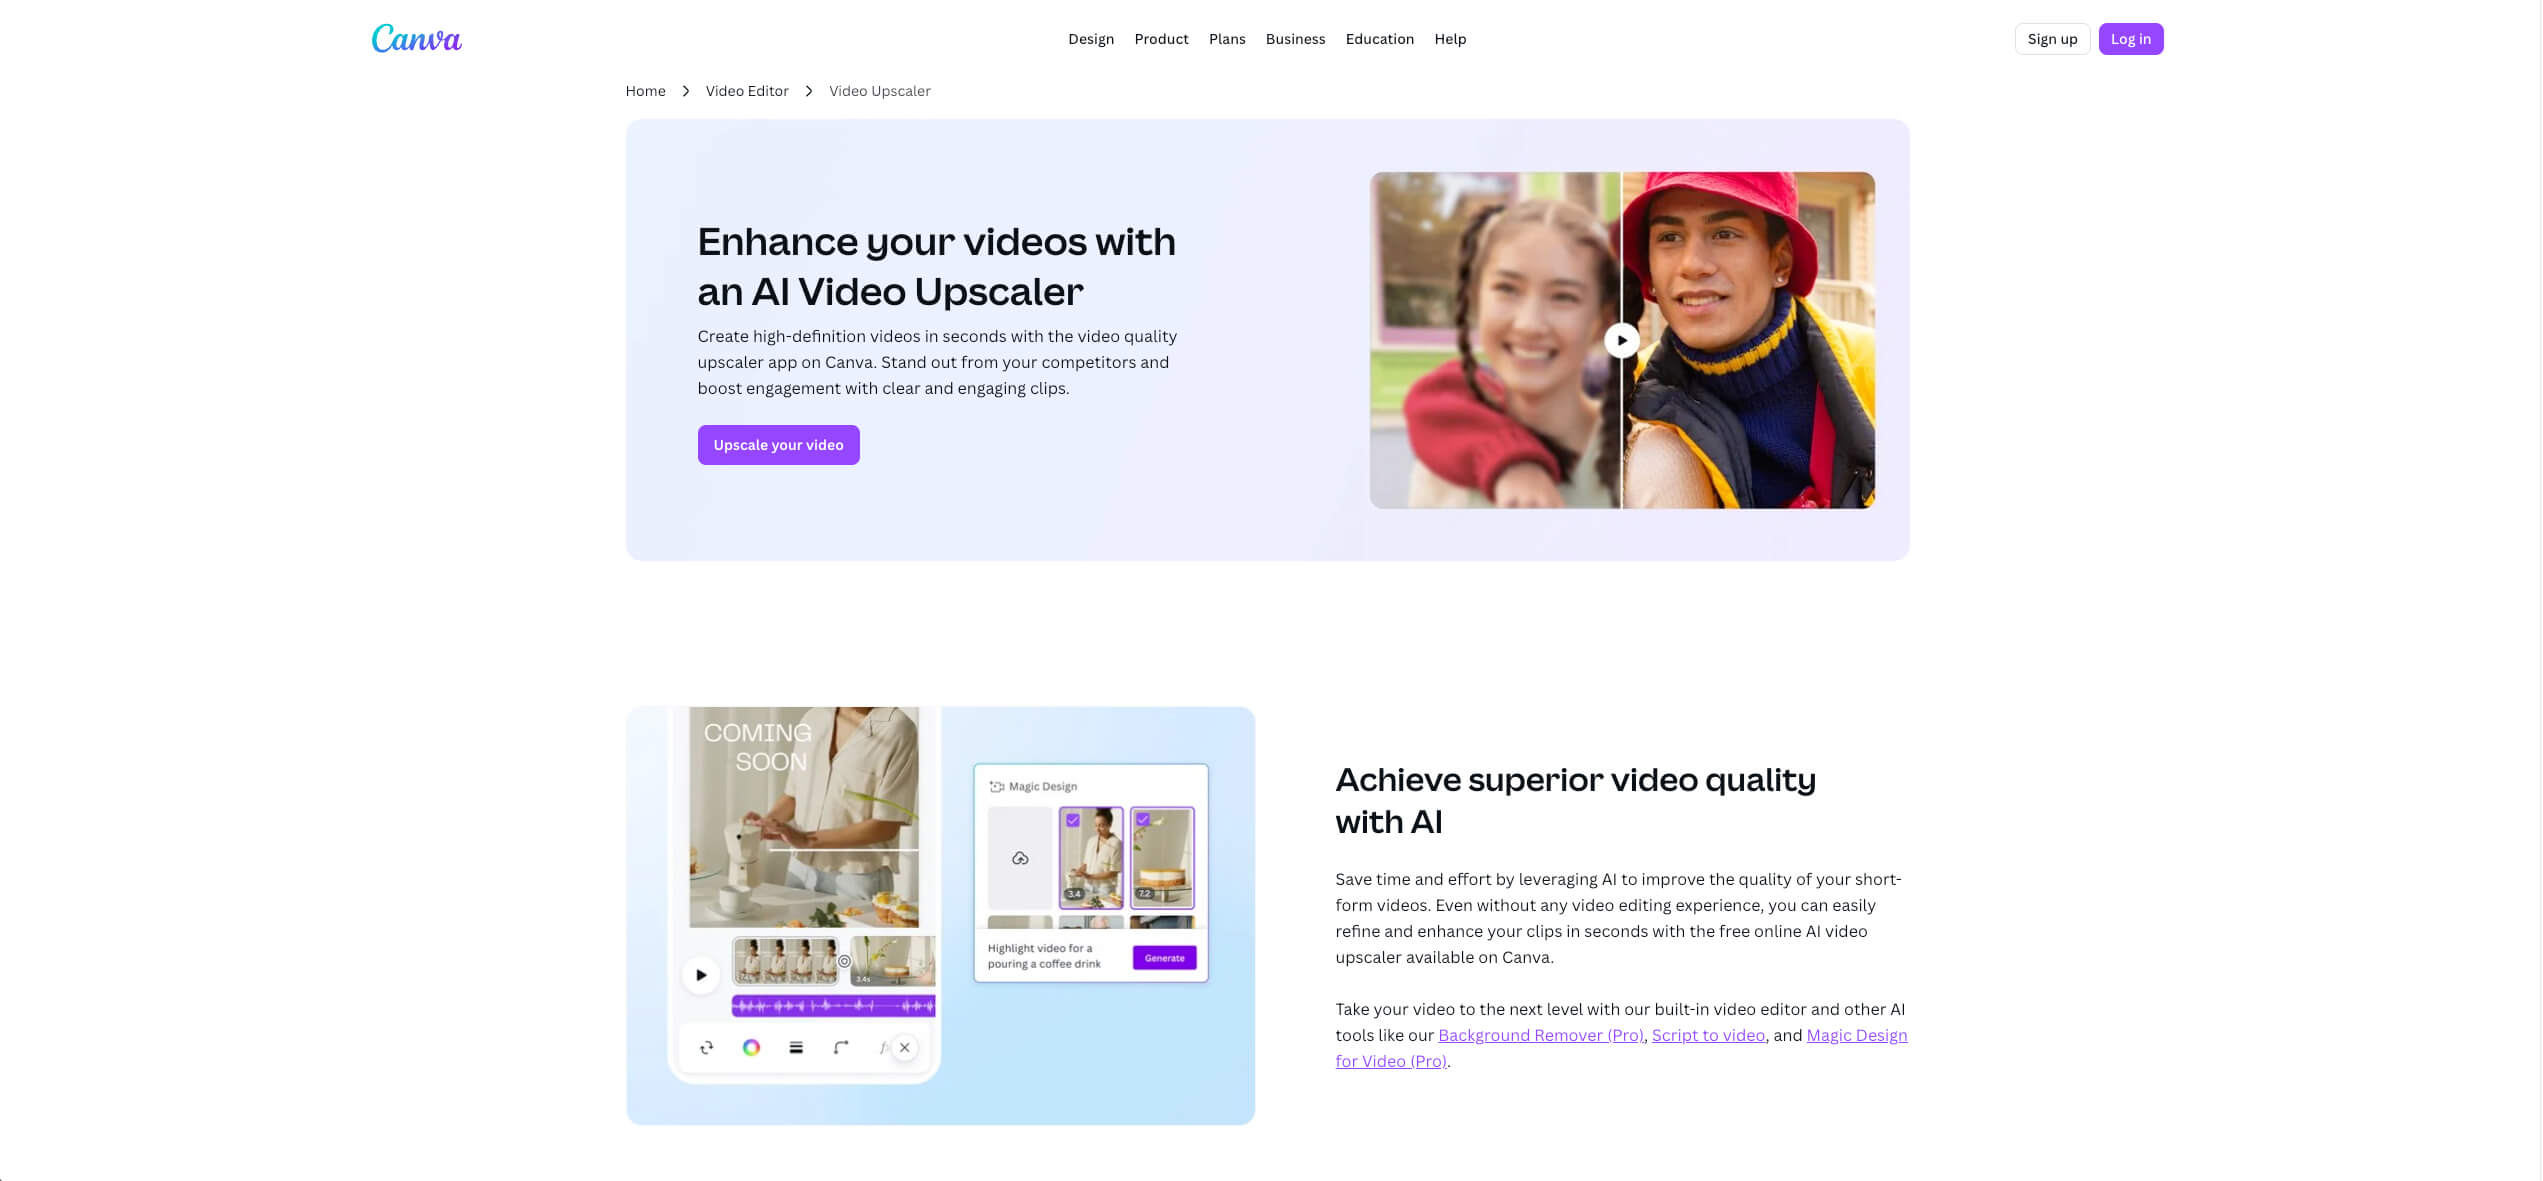
4. Canva
Pros:
- Easy to use and intuitive sliders with real‑time preview.
- Cloud‑based; works directly in a browser without installing software.
- Offers quick content creation and basic AI color correction.
Cons:
- Many AI capabilities are limited or exclusively for Pro users.
- Quality improvements are modest compared with dedicated upscalers.
- Lacks advanced AI controls for deblurring or denoising.
- Free plans may limit exports.
If you are looking for a web-based tool for simple improvements, Canva is a good choice. It’s mostly known for making social graphics and presentations easy, but not that long ago, they added an AI video upscaler into their editor. It uses machine learning to increase resolution and improve clarity. The built-in Auto-adjust feature provides an immediate fix for video brightness, contrast, and saturation.
While simple, Canva’s AI upscaler does give your video a more polished look. Its capabilities are closer to what you get with CapCut – in fact, many people actually recommend CapCut as a more capable alternative when it comes to AI-based enhancements. But again, like with CapCut, we don’t see that as a major drawback.
If you need something quick, this might be it.
What we liked most: there’s no hardware load since it runs online, and you don’t have to mess with technical settings or wait for model previews to render. It’s the kind of tool you can use on any laptop without worrying about specs.
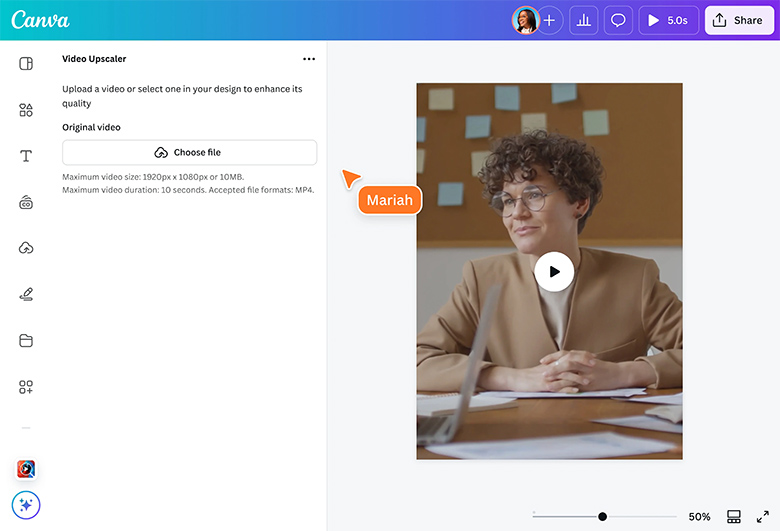
Here’s how to enhance video quality online using Canva:
- Open Canva and create a video project.
- Drag your video onto the timeline.
- To upscale, open the Apps panel, search for “Video Enhancer”, upload your video and let the AI upscaler run.
- Click Edit and adjust brightness, contrast, saturation and hue using the sliders until the colors look balanced.
- Once processed, replace the clip in your project with the upscaled version and export.
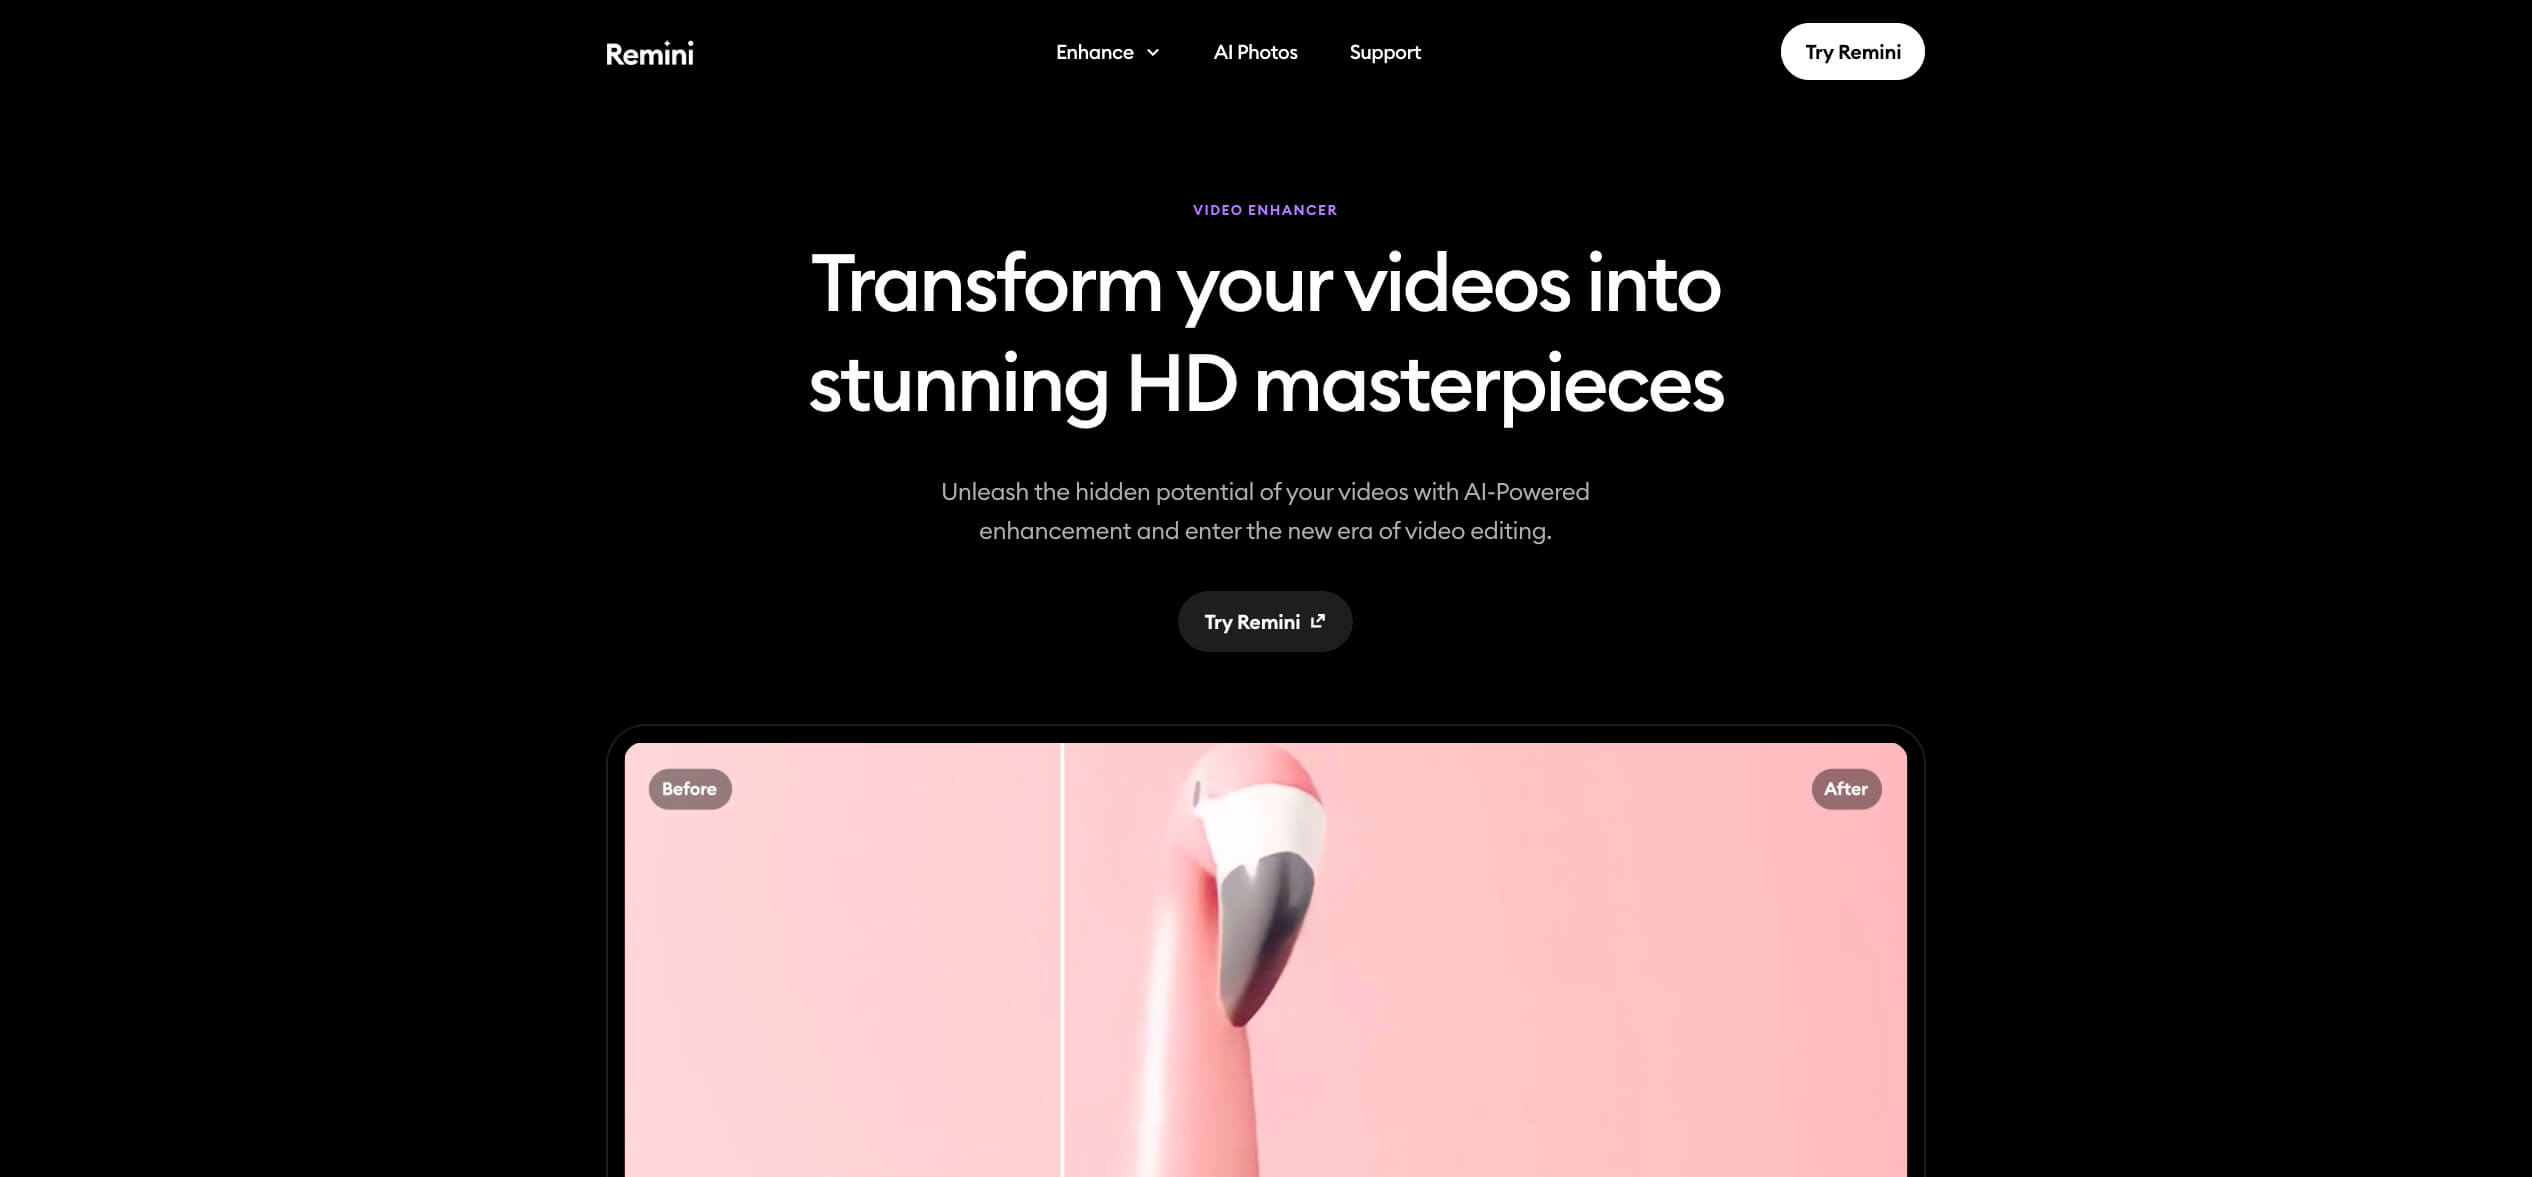
5. Remini
Pros:
- Provides a single-click enhancement and quick video quality fixes.
- Upscales the resolution up to 2x and restores details.
- Enhances faces and removes blur, grain and pixelation.
- Offers a mobile app and web service with batch processing options.
Cons:
- Subscription cost is high; free version limits exports.
- Limited customization with little control over the enhancement.
- Can sometimes over‑smooth the video.
Last but not least on our list of tools is Remini, a quick mobile-first option to enhance video quality with AI on your phone. It’s maybe not as capable as the desktop tools we’ve covered, but if you’re looking for something mobile-friendly or browser-based (there’s a web version too), this might be right up your alley.
The process is a single-click enhancement and requires minimal user input. New users can enjoy a 7-day free trial, but full access to the video enhancement features requires a paid subscription.
We found it to be most useful on close-up footage of people – clips where faces were soft, low-res, or poorly lit. Eyes and skin tones came out noticeably sharper, and in a few cases, it recovered facial features that were poorly visible in the original. It doesn’t do much for wide shots or busy scenes, but for portraits or selfie-style videos, it works surprisingly well.
Just be warned: Remini uploads your video to its servers for processing. If that’s not something you’re comfortable with, a full-featured desktop AI tool would be a better option. Everything here runs in the cloud, so you’re trading privacy for convenience.
Here’s how to enhance video using the Remini app:
- Download the Remini app and sign in.
- Tap Enhance Video and upload your clip.
- Choose Video Enhance and let the AI process the footage.
- Preview the improved video; tap Save to download it.

What You Can and Cannot Expect with AI Video Enhancement
To wrap up this guide, we want to talk about what you can and can’t expect with AI video enhancement. We’ve seen way too many people go in expecting a miracle and end up disappointed.
So let’s be clear. AI video enhancement has come a long way, and yes, the results can be impressive. But it’s not magic. If you’ve got a clip that’s too far gone, no AI is going to bring it back to life like it was shot on a new mirrorless camera. That said, there’s a lot these tools can do.
What You Shouldn’t Expect
If your video is completely out of focus, shot in the dark, or heavily compressed to the point where there’s no real data left to work with – AI won’t fix that. At best, it’ll smooth things out and guess at what should be there.
And that’s the key word: guess.
AI doesn’t “restore” missing detail – it predicts it. Every enhanced frame is a smart approximation based on patterns from other videos it was trained on. That’s why upscalers sometimes introduce weird textures or halo effects. They’re building a new version based on what they think it should look like.
In our tests, we saw this a few times – a faint glow around moving objects, or textures that looked slightly off, especially in low-light or fast-motion scenes. Many people have pointed out the same thing: bizarre results in pitch-black areas, or unnatural sharpness on faces that were originally just a blur.
So if your footage is blurry, noisy, filmed in poor lighting, don’t expect miracles. You might get a usable upgrade, but there’s always a risk of the AI hallucinating things that weren’t there in the first place.
What You Can Expect
You’ll definitely see sharper visuals when working with decent source material. Think older YouTube clips, smartphone videos, or social footage that’s a little soft or low-res. AI can upscale that kind of content to 1080p or 4K, clean up some of the compression, and make it feel more watchable.
In tools like VideoProc or Topaz, we saw improvements in details – skin texture, edge sharpness, even text that was unreadable in the original version. Frame interpolation can smooth out choppy footage, and AI stabilization helps a lot with handheld shake if you’re not expecting perfection.
Facial enhancements, especially in tools like Remini, were pretty good. Blurry eyes and soft features often became much clearer, which is useful for portraits or any video where faces matter most.
And across the board, we found that most tools work best on shorter clips, well-lit scenes, and subjects that aren’t moving too fast.
If you’ve tried enhancing your own videos with AI and have tips, results, or opinions to share, we’d love to hear them. Start a thread in our community and let others know what worked (or didn’t) for you.
Or if you’re stuck on a particular video and not sure which tool to try, start a discussion. We’re sure someone in the community would be glad to help out.
FAQ
How to enhance a poor quality video?
You can use AI-powered tools or manual editing software to enhance a poor-quality video.
For general improvements, like sharpening, upscaling, or reducing noise, we recommend using tools like VideoProc Converter AI, Topaz Video AI, or Remini. These apps use AI to clean up footage and boost resolution. CapCut and Canva also offer fast, beginner-friendly upscalers if you’re doing quick edits.
If you’re not sure where to begin, try one of the simpler tools first (like CapCut or Canva) and see what kind of results you get. For more control and better quality, move up to something like VideoProc or Topaz.
How do I increase the resolution of a video?
To upscale a video, you’ll need software that supports AI-based resolution enhancement. Tools like VideoProc Converter AI, Topaz Video AI, Canva, or Remini can do this with minimal input; you usually just upload your video, pick a target resolution (like 1080p or 4K), and let the app handle the rest.
Keep in mind: always work from the highest quality source you have, if possible, as it retains the most data.
Can video enhancers improve old footage?
Modern AI video enhancers can significantly improve the quality of old footage from sources such as VHS tapes, DVDs, 8mm film, or early digital cameras. We’ve had some great results with that. If the original video isn’t completely unusable, AI enhancers can sharpen details, clean up noise, and boost the resolution enough to make old clips feel fresh again.
What tool should I choose if I want to enhance video with AI on a low‑end computer?
If your computer isn’t a powerhouse, you’ll want a tool that doesn’t demand heavy hardware or long render times. You can go with one of the web-based tools we covered, like Canva or Remini, since they run in the cloud and don’t rely much on your local specs.
If you’re set on using a desktop tool, VideoProc Converter AI is your best bet. It’s lightweight compared to Topaz and supports hardware acceleration, which helps a lot even on mid-tier systems.
What if I run a video through AI enhancement more than once, will it keep improving?
No, running the resulting video through AI enhancement multiple times doesn’t stack improvements the way you might hope. In fact, doing it too many times will actually hurt the quality.
AI upscalers and enhancers are built to work on original footage. Once a video has already been enhanced, the next run might pick up details it already “invented”, and start exaggerating them. That can lead to unnatural extra artifacts, or faces that start to look weirdly plastic or overprocessed.
If you’re not happy with the result, it’s better to go back to the original and try different settings or a different tool, rather than processing the same output over and over.
Keep your original file untouched and export enhanced versions separately for testing. You’ll quickly see when a second pass adds nothing, or starts to break the image.
This article was written by Roman Demian, a Content Editor and QA Specialist at Handy Recovery Advisor.
Curious about our content creation process? Take a look at our Editor Guidelines.