
In today’s short guide, we’ll demonstrate step by step how to recover deleted files from a USB flash drive. Whether you accidentally wiped a thumb drive, deleted a couple of important files, or lost them after a weird glitch, we’ve got clear instructions, tested tools and tips to help you get those files back. You’ll see how often this process is surprisingly easy.
Factors That Can Make or Break USB Drive Data Recovery
Before we go into the steps, we want to warn you right from the start: put that USB drive aside and don’t do anything on it. Don’t save new files to it, don’t reformat it, don’t even open anything if you can avoid it. This is your best shot at getting your data back in one piece.
Every time something new gets written to the drive, there’s a chance it’ll overwrite the files you’re trying to recover. For example, saving a 20 MB file could easily wipe out a 20 MB portion of your deleted file. The less you’ve used the drive since the deletion, the better your chances of getting the original data back intact.
We’re not saying that if you’ve already used the drive it’s a dead end. No. There’s no one-size-fits-all outcome here. Even if you’ve saved something new or tried a few things before landing on this guide, there’s still a solid chance you can recover part of your data, or sometimes even the whole thing. It depends on what sectors were touched, how the files were stored, and how smart your recovery tool is.
How to Recover Permanently Deleted Files from a USB Drive Using Data Recovery Software
Quick note: we’re going to start with the most effective method right away. In our experience, recovery software is what helps people get their files back from a pen drive most of the time.
And if our recent survey is anything to go by, about 79% of users who tried DIY recovery tools reported success. So if you’re dealing with deleted files on a USB stick, this is where you want to begin.
For this guide, we chose to use the tool that landed at the #1 spot in our rating of the best USB recovery apps – Disk Drill. It’s one of those apps that feels built for regular people. You won’t get lost in settings, and even if this is your first time dealing with data loss, you’ll know exactly where to click.
But it’s not all about the UI. Disk Drill has one of the highest success rates we’ve seen, especially in real-world USB scenarios. It works seamlessly with all the common file systems you typically find on USB drives: FAT32, exFAT, NTFS, and even HFS+ or APFS if you’ve been using the drive on a Mac. And even if your USB stick is severely corrupted, unreadable, or throwing errors, Disk Drill can often still scan it and pull out the lost files thanks to its capable signature scan mode.
Here’s how to recover deleted files from a flash drive using recovery software:
- Disk Drill can be easily downloaded from the official website of its developers, Cleverfiles. The free version for Windows allows you to recover up to 100 MB of data for free, which is plenty for hundreds of documents or dozens of songs and images.
- Once the installer downloads, double-click the file to run it. The installation process is simple. A few clicks through the setup wizard, and you’ll be ready to launch the app.

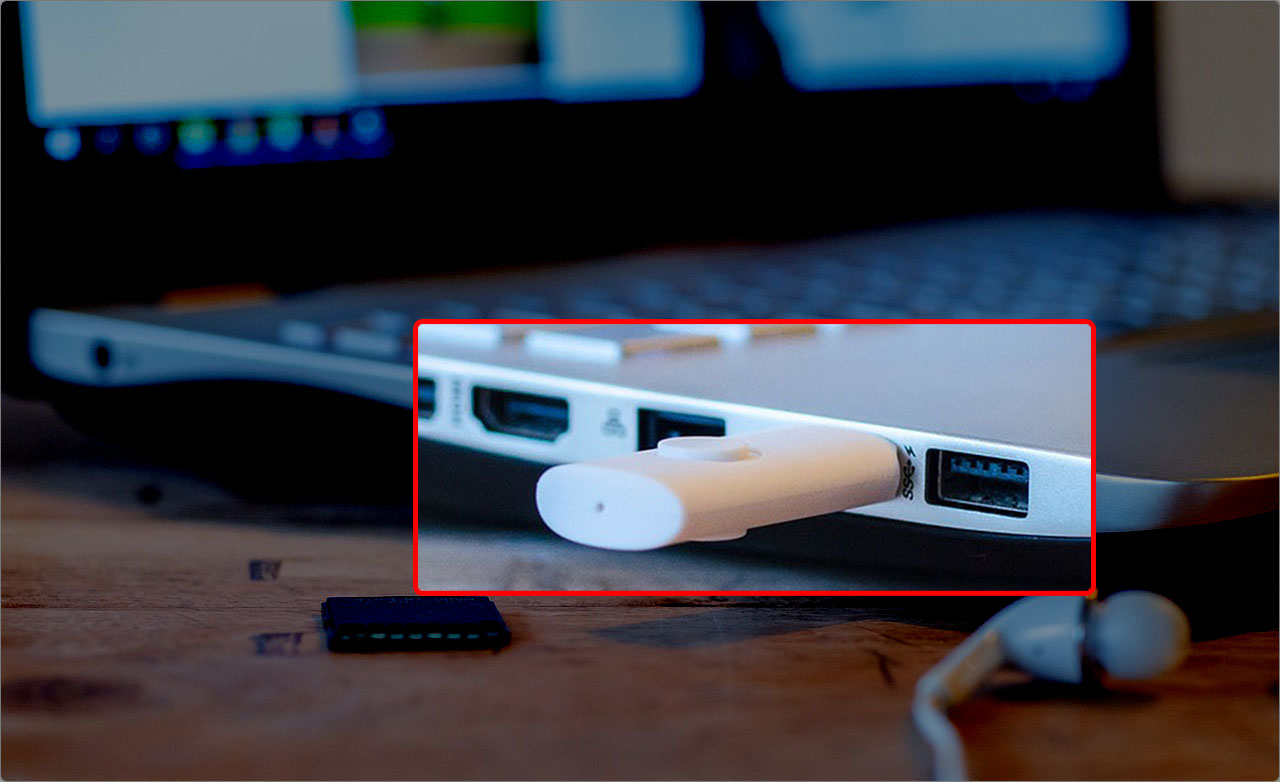
- Now plug in your USB stick.
- Once you’re in Disk Drill, look for your USB drive in the list of devices. It should show its label, size, and status. Click it once to select, then hit Search for lost data.
- Right after that, Disk Drill will ask you what scan mode you want to use. Choose Universal Scan.

- The scan may take a few minutes or longer, depending on the size and condition of your USB drive. While it’s running, you can already browse the files it finds in real time. Categories like Pictures, Documents, Video, Audio, and Archives show up automatically.

- You can click on any of those categories if you’re looking for something specific. Or if you’d rather see everything it’s uncovered so far, click Review found items.
- You’ll see a full list of recoverable files.
 You can sort them by category or use the search bar to look for something specific: like a file name, part of a name, or even by extension (.jpg, .docx). 👀
Disk Drill labels files with recovery chances like “High,” “Average,” or “Low,” which can help you focus on what’s most likely to work.
- Click on any file to preview it. If it opens without errors, it’ll recover perfectly. And if you’re dealing with a bunch of photos or documents, the thumbnail and preview features make it way easier to spot what you’re after.
- Now select the files you want to restore. You can check them one by one or just hit “Recover All” if you want to grab everything.
- When Disk Drill asks where to save them, pick a safe folder on your main hard drive or another external disk (never the same USB you’re recovering from).

- Click on Next, and that’s it.
- After it’s done, Disk Drill will offer to open the folder where your files were saved so you can confirm they’re working.
As we already mentioned, Disk Drill isn’t limited to recovering deleted files. You’ll also see a section called Existing, which lists files that are still on the drive but might be missing or hidden.

This can help when files seem “gone” due to hidden attributes or simple file system hiccups. But if the USB drive goes RAW, asks to be formatted, or the file system fails, you should expect those files to show up under Reconstructed rather than Existing.
Disk Drill can dig through all of that and recover files. Plus, it’s one of the safest tools we’ve tested, so if you were worried about making things worse, you won’t.
How to Recover Deleted Files from a USB Without Software
Although data recovery software is by far the most reliable way to recover deleted files from a USB drive, there are a few other methods worth mentioning. They’re not as universal, and they come with quite a few caveats, but we still think they’re worth pointing out.
Method 1: Unhide Files on Your USB Drive
Sometimes we see hidden files being the issue, and yes, it’s a case of mistaken identity. The files were never actually deleted. They were just hidden. This can happen after using certain USB drives on different systems, messing with backup tools, or in some cases, after a malware or third-party app resets visibility settings.
Here’s how to check:
- Open File Explorer and go to your USB drive.
- Click the View > Show and enable Hidden items.

Once those options are on, take another look at your drive. You might suddenly see folders and files that weren’t visible before. If your “deleted” files pop up here, you don’t need recovery software at all – this may be your answer to how to recover lost files from a USB drive without using any extra tools.
There’s also a Command Prompt method that can help unhide files. Here’s how to do it:
- Press Win + R, type cmd, and press Enter.
- Type the following command (replace I: with your USB drive letter):
attrib -h -r -s /s /d I:\*.*
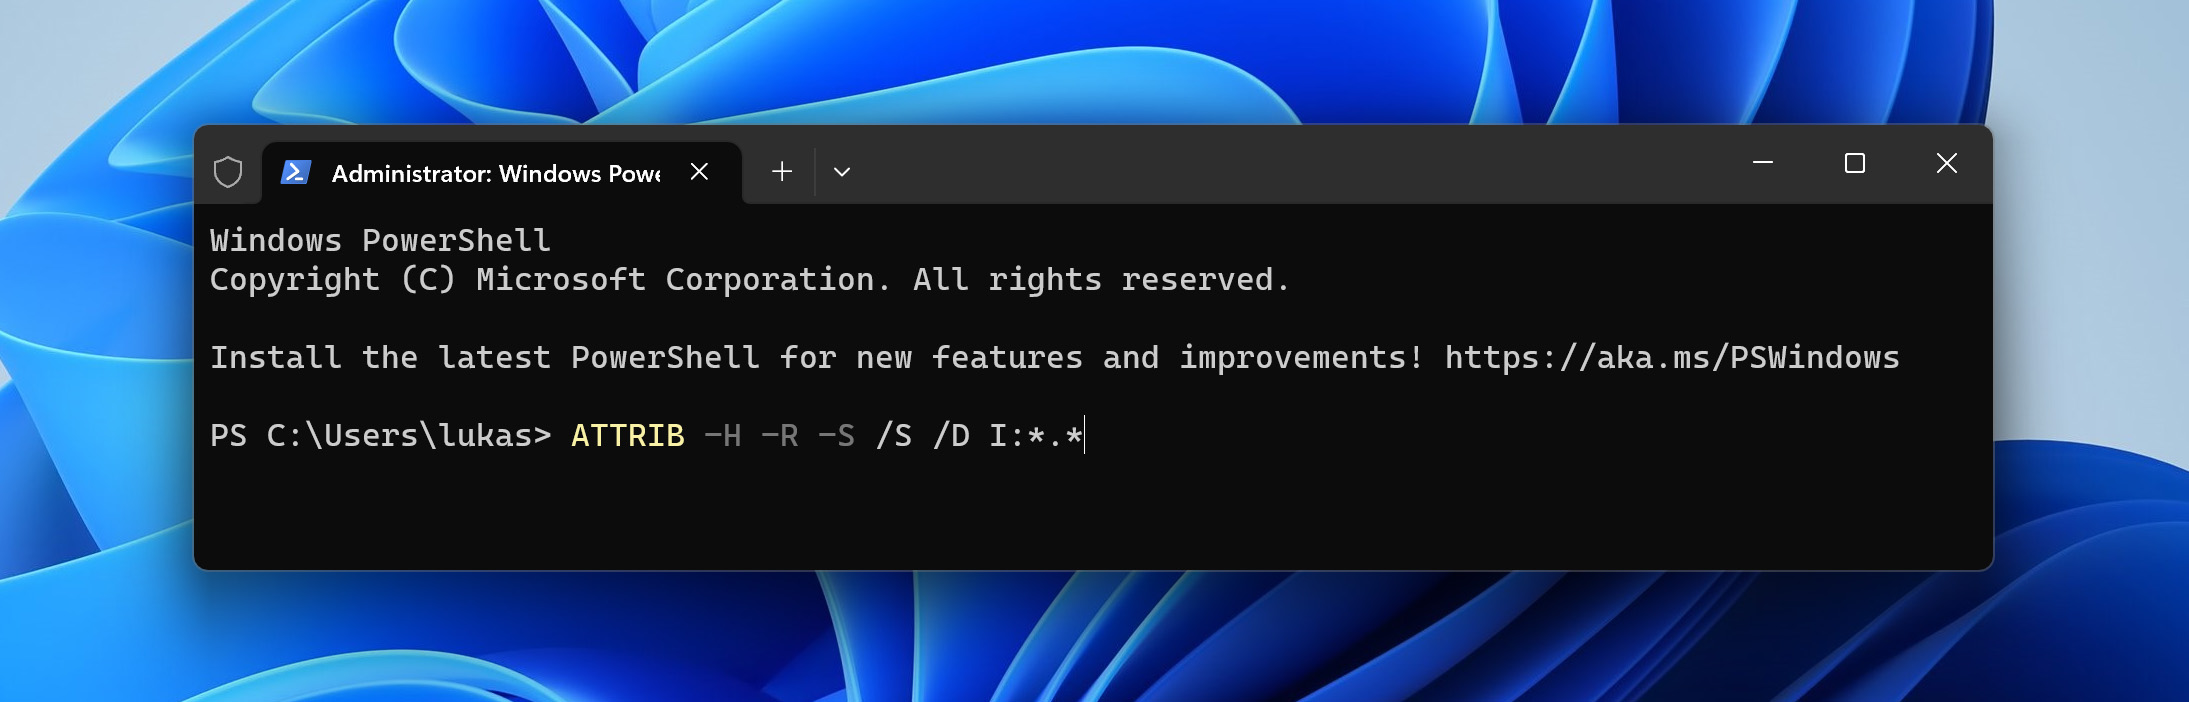
- Press Enter. This command removes the Hidden (-h), Read-only (-r), and System (-s) attributes from all files and folders on the drive. If any files were hidden due to those flags (common after a virus or weird OS interaction) they’ll show up again.
Method 2: Check File History / Previous Versions
The Windows operating system lets you go back in time and recover files that have been deleted or lost from your flash drive. The feature we’re talking about is aptly named “Restore Previous Versions,” and it includes backups created by File History and System Restore.
It’s an incredibly handy tool to recover documents, photos, or any other files that you might have accidentally deleted or that have gone missing. But bear in mind, for this time-travel trick to work, you need to have had the feature enabled before the files were lost. What’s more, external storage devices are not included by default.
Here’s what you need to do to recover files from USB drive using the Restore Previous Versions feature:
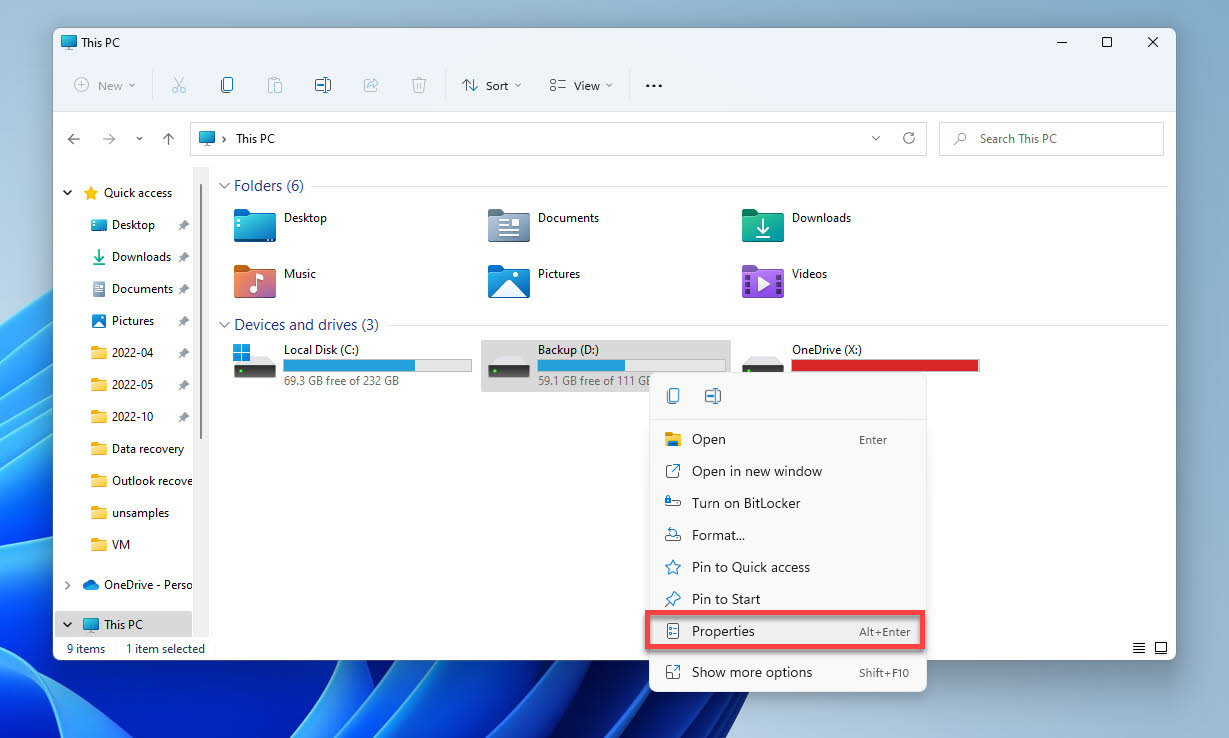
- Open File Explorer and right-click the external storage device where your lost files were stored.
- Right-click within this folder and select the “Properties” option.
- Navigate to the “Previous Versions” tab.
- Choose the version you think has the file you want and click “Open in File History” to check if it’s the right one.
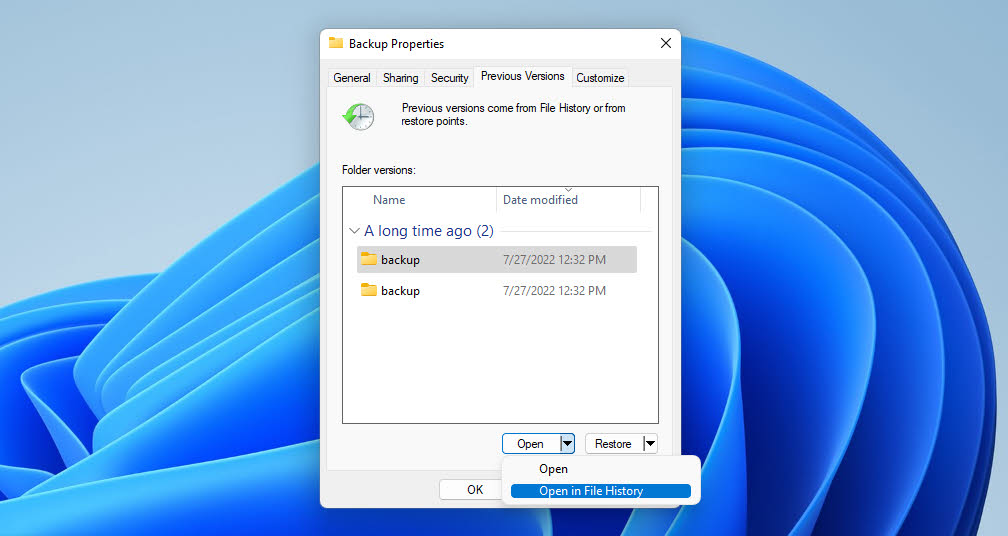
- Select the files you want to recover and click the green “Restore” button.

Method 3: Contact Data Recovery Service
If you don’t want to go the DIY route for any reason, you can always hand things off to a professional data recovery service. Maybe your USB flash drive holds something too important to risk (work documents, legal files), or the drive is physically damaged, and no software can even scan it. In those cases, it’s better not to push your luck.
Professional labs have the tools and cleanroom environments to deal with everything from dead flash memory to fried controllers. They can also handle situations where the USB device isn’t detected or shows 0 bytes in File Explorer – common signs of deeper hardware failure.
Some services let you mail in the device for a free evaluation, and many won’t charge unless they can recover your files. The cost depends on the damage, but it usually isn’t cheap, especially for physical repairs. If the data really matters, though, it can be worth it.
We’ve put together a ranking of some of the best data recovery services to help you decide where to send your drive if you want professional help. You’ll find details like turnaround speed, whether they offer “no data, no fee” guarantees, and what kind of pricing you can expect.
Is There a Recycle Bin on a Flash Drive? (How to Enable It)
We recently received a question through our contact form asking, “Why can’t you use the Recycle Bin to retrieve deleted files from a USB flash drive?” A fair question.
Here’s the deal: by default, Windows doesn’t send deleted files from USB flash drives to the Recycle Bin. Windows treats most removable drives differently than internal ones, and unless you’ve changed a few behind-the-scenes settings, that file bypasses the bin entirely. But if you’re comfortable with tweaking the registry and aim to recover deleted files from a thumb drive the next time a deletion occurs, then you can bring it back in just a few relatively simple steps:
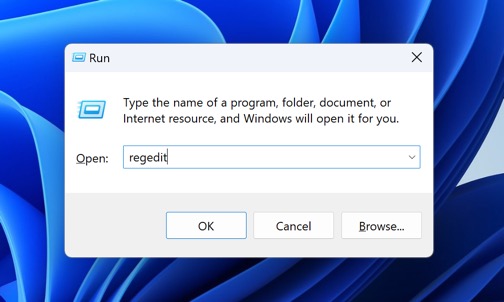
- Press the Win + R keys simultaneously to open the Run dialog box.
- Type “regedit” and hit Enter. This will open the Registry Editor application.
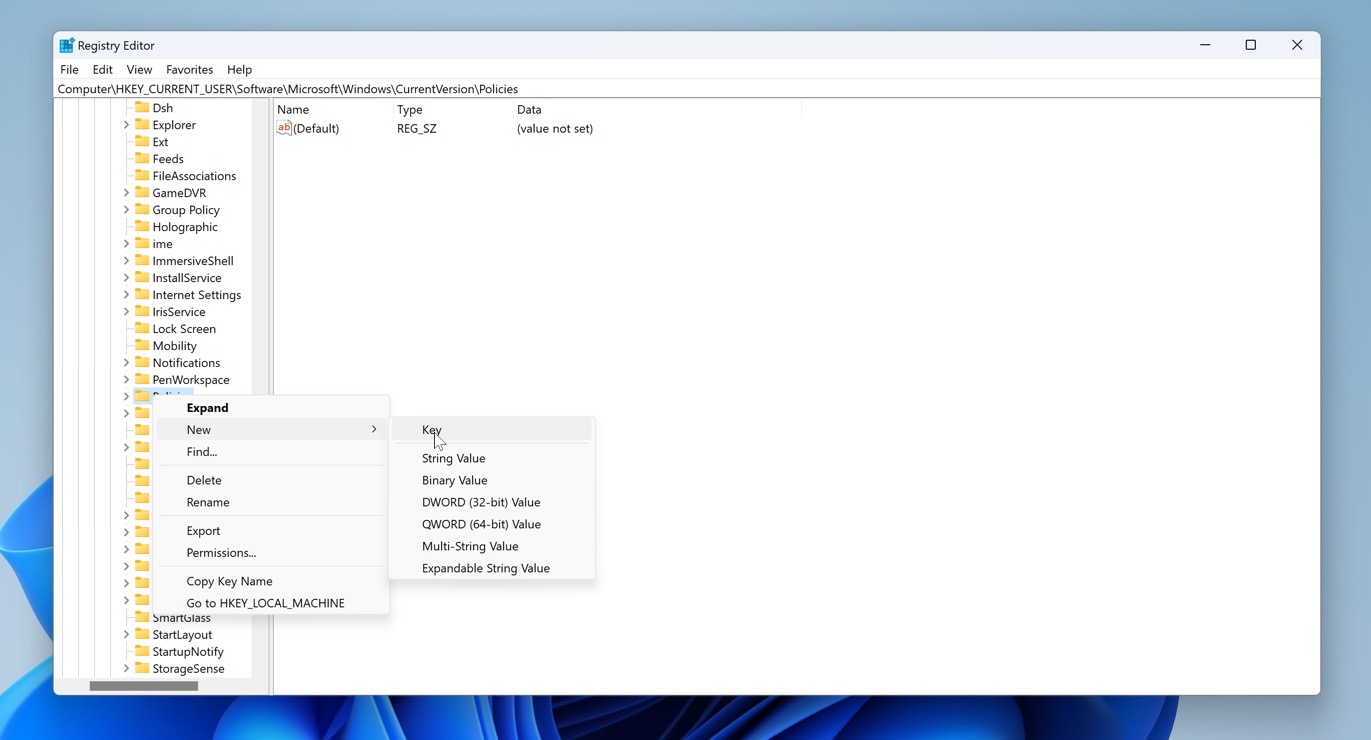
- Navigate through the editor to this key: HKEY_CURRENT_USER\SOFTWARE\Microsoft\Windows\CurrentVersion\Policies\
- Right-click “Policies” and choose New > Key. Name it “Explorer” and press Enter.
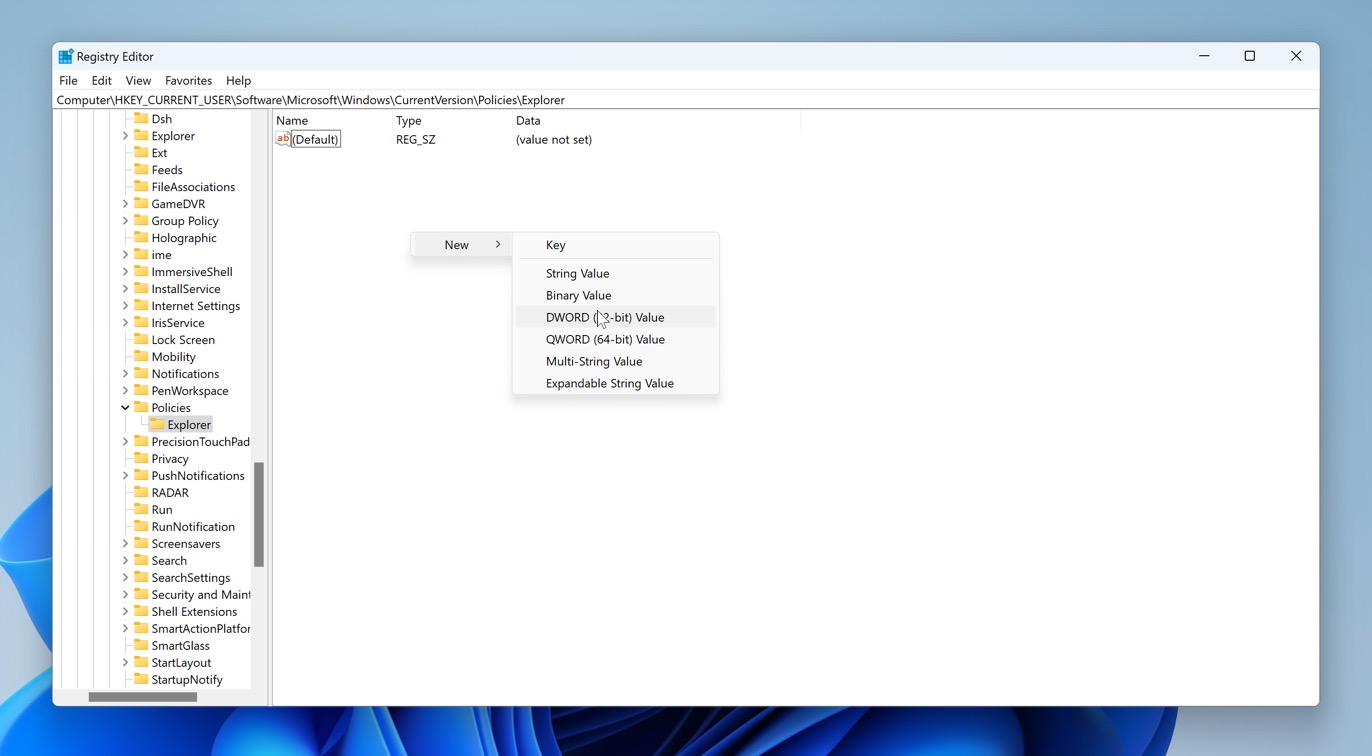
- Select the new “Explorer” key.
- Right-click an empty space in the right pane. Select New > DWORD (32-bit) Value from the context menu. You’ll see a new value appear; name it RecycleBinDrives.
- Double-click the new RecycleBinDrives value. Type in “ffffffff” (without the quotes) and make sure the base is set to Hexadecimal. Click OK to confirm.
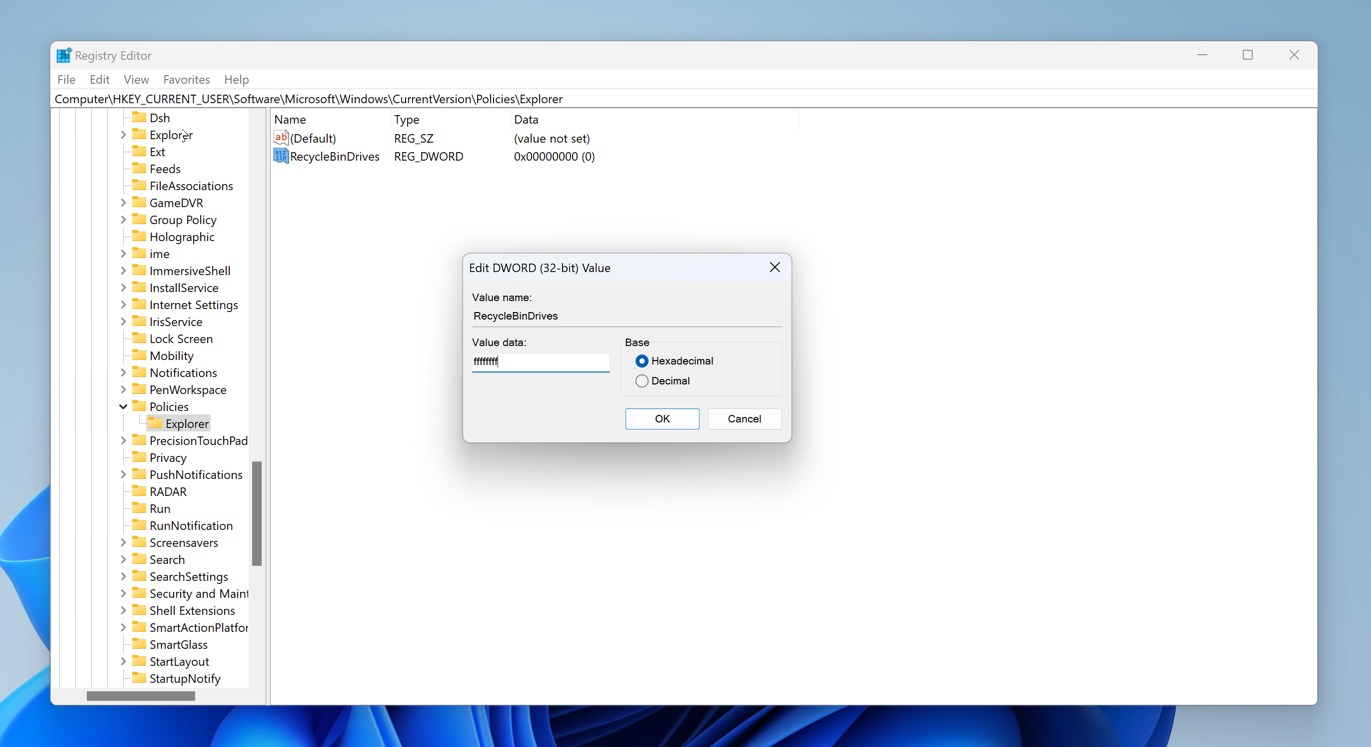
- Restart your computer for the changes to take effect.
Windows will now create a hidden $RECYCLE.BIN folder on any USB flash drive you plug into your computer. To see it, make sure File Explorer is configured to display hidden files.
FAQ
Where do deleted USB files go?
Files deleted from your USB drive do not take up temporary residence in your Recycle or Trash Bin (unless you’ve specifically configured the drive that way, as we showed earlier). They are essentially permanently deleted from a logical perspective. However, until they are overwritten, they can be recovered.
Does Windows have a built-in tool to recover deleted files from a pen drive?
To recover truly deleted files, you’ll need data recovery software – Windows doesn’t include a built-in solution for this if you don’t count Microsoft’s own tool that you can download from the Microsoft Store. That tool is called Windows File Recovery, it works, but it’s command-line only and far from beginner-friendly.
It can recover deleted files from a pen drive as long as the drive is still detected, but you’ll need to type specific commands, know file paths or extensions, and accept that results vary, especially on FAT32 or exFAT pen drives, which are far more common than NTFS.
Can I recover deleted files from a USB flash drive for free?
Yes, there are a few free tools that let you recover deleted files from a USB flash drive, though each comes with its own limits or quirks. Here are some options to explore:
- Windows File Recovery (official Microsoft tool).
- PhotoRec – open-source and powerful, supports most file types and drives, but no graphical interface unless you use QPhotoRec.
- Recuva – free version available with a simple interface, decent results for basic USB recovery.
- Disk Drill (free version) – lets you recover up to 100 MB for free on Windows; great results, easy to use with USB drives.
- File History – if you had File History enabled and your USB flash drive was included in a backup (rare, but possible), you might be able to restore deleted files for free.
How do I restore deleted files from a USB drive using CMD?
Command Prompt itself doesn’t include any native tools to restore permanently deleted files from a USB flash drive. Once a file is fully deleted (not just hidden), there’s no built-in Windows CMD command that can bring it back.
However, there are a few ways you can use CMD to help with recovery:
- If the files were hidden, you can run the attrib command to unhide them. This won’t recover deleted files but can reveal ones that were made invisible by system or malware changes.
- If you want to recover deleted files, you’ll need to use a command-line recovery tool. Two options: Windows File Recovery and PhotoRec. Both tools are separate downloads and not part of Windows by default, but they can be run entirely in command-line environments.
What is the time window to retrieve deleted files on a flash drive?
There’s no fixed time window, but the key factor is how much the drive has been used after deletion. You can often retrieve deleted files on a flash drive until that space gets overwritten by new data.
If you stop using the drive right after deletion and scan it with recovery software, your chances are high – weeks or months later. But the more you write to the drive (saving new files, formatting, etc.), the higher the risk that your deleted files get permanently overwritten.
So the “window” is less about time and more about how little the drive has been touched.
Can cloud storage help recover files from a USB drive?
Not in the “scan the USB and restore deleted data” sense. Cloud services like OneDrive, Google Drive, Dropbox can help you get your files back if the files were synced or backed up before they were deleted from the USB drive. In that case, you can usually restore them from the cloud’s version history or “Trash/Deleted files”.
But if the USB drive was never synced, cloud storage can’t help.
Also, keep in mind that most cloud services are sync tools, not traditional backups. That means if you delete a synced file from your USB, that deletion may be mirrored across devices. That said, some services handle deletions more gracefully – Google Drive, for example, often “unlinks” deleted files rather than deleting them outright and stores them in the cloud Trash for up to 30 days.
This article was written by Robert Agar, a Staff Writer at Handy Recovery Advisor. It was recently updated by David Morelo. It was also verified for technical accuracy by Andrey Vasilyev, our editorial advisor.
Curious about our content creation process? Take a look at our Editor Guidelines.